Este artículo va dirigido a quienes ya han registrado con éxito un dominio con IONOS by 1&1.
Nota: No es necesario tener un sitio web asociado a tu dominio, pero sí una dirección de correo electrónico que utilice ese dominio, ya que será la ideal para el envío. Si tu dominio es ejemplo.com, tu correo electrónico puede tener un aspecto similar a newsletter@example.com.
¿Proporciona MailerLite una dirección de correo electrónico?
Actualmente no es posible adquirir una dirección de correo electrónico ni alojar un dominio en MailerLite. Para conectar un dominio y la dirección de correo electrónico correspondiente para el envío, primero tendrán que configurarse con un proveedor de alojamiento.
Algunos proveedores de alojamiento de confianza son Godaddy, Cloudflare y Bluehost. Para una dirección de correo electrónico, te recomendamos utilizar Google Workspace, que te permite crear una dirección de correo electrónico con tu propio dominio.
Cómo autenticar tu dominio
Dirígete a la página de Configuración de la cuenta
Selecciona la pestaña Dominios.
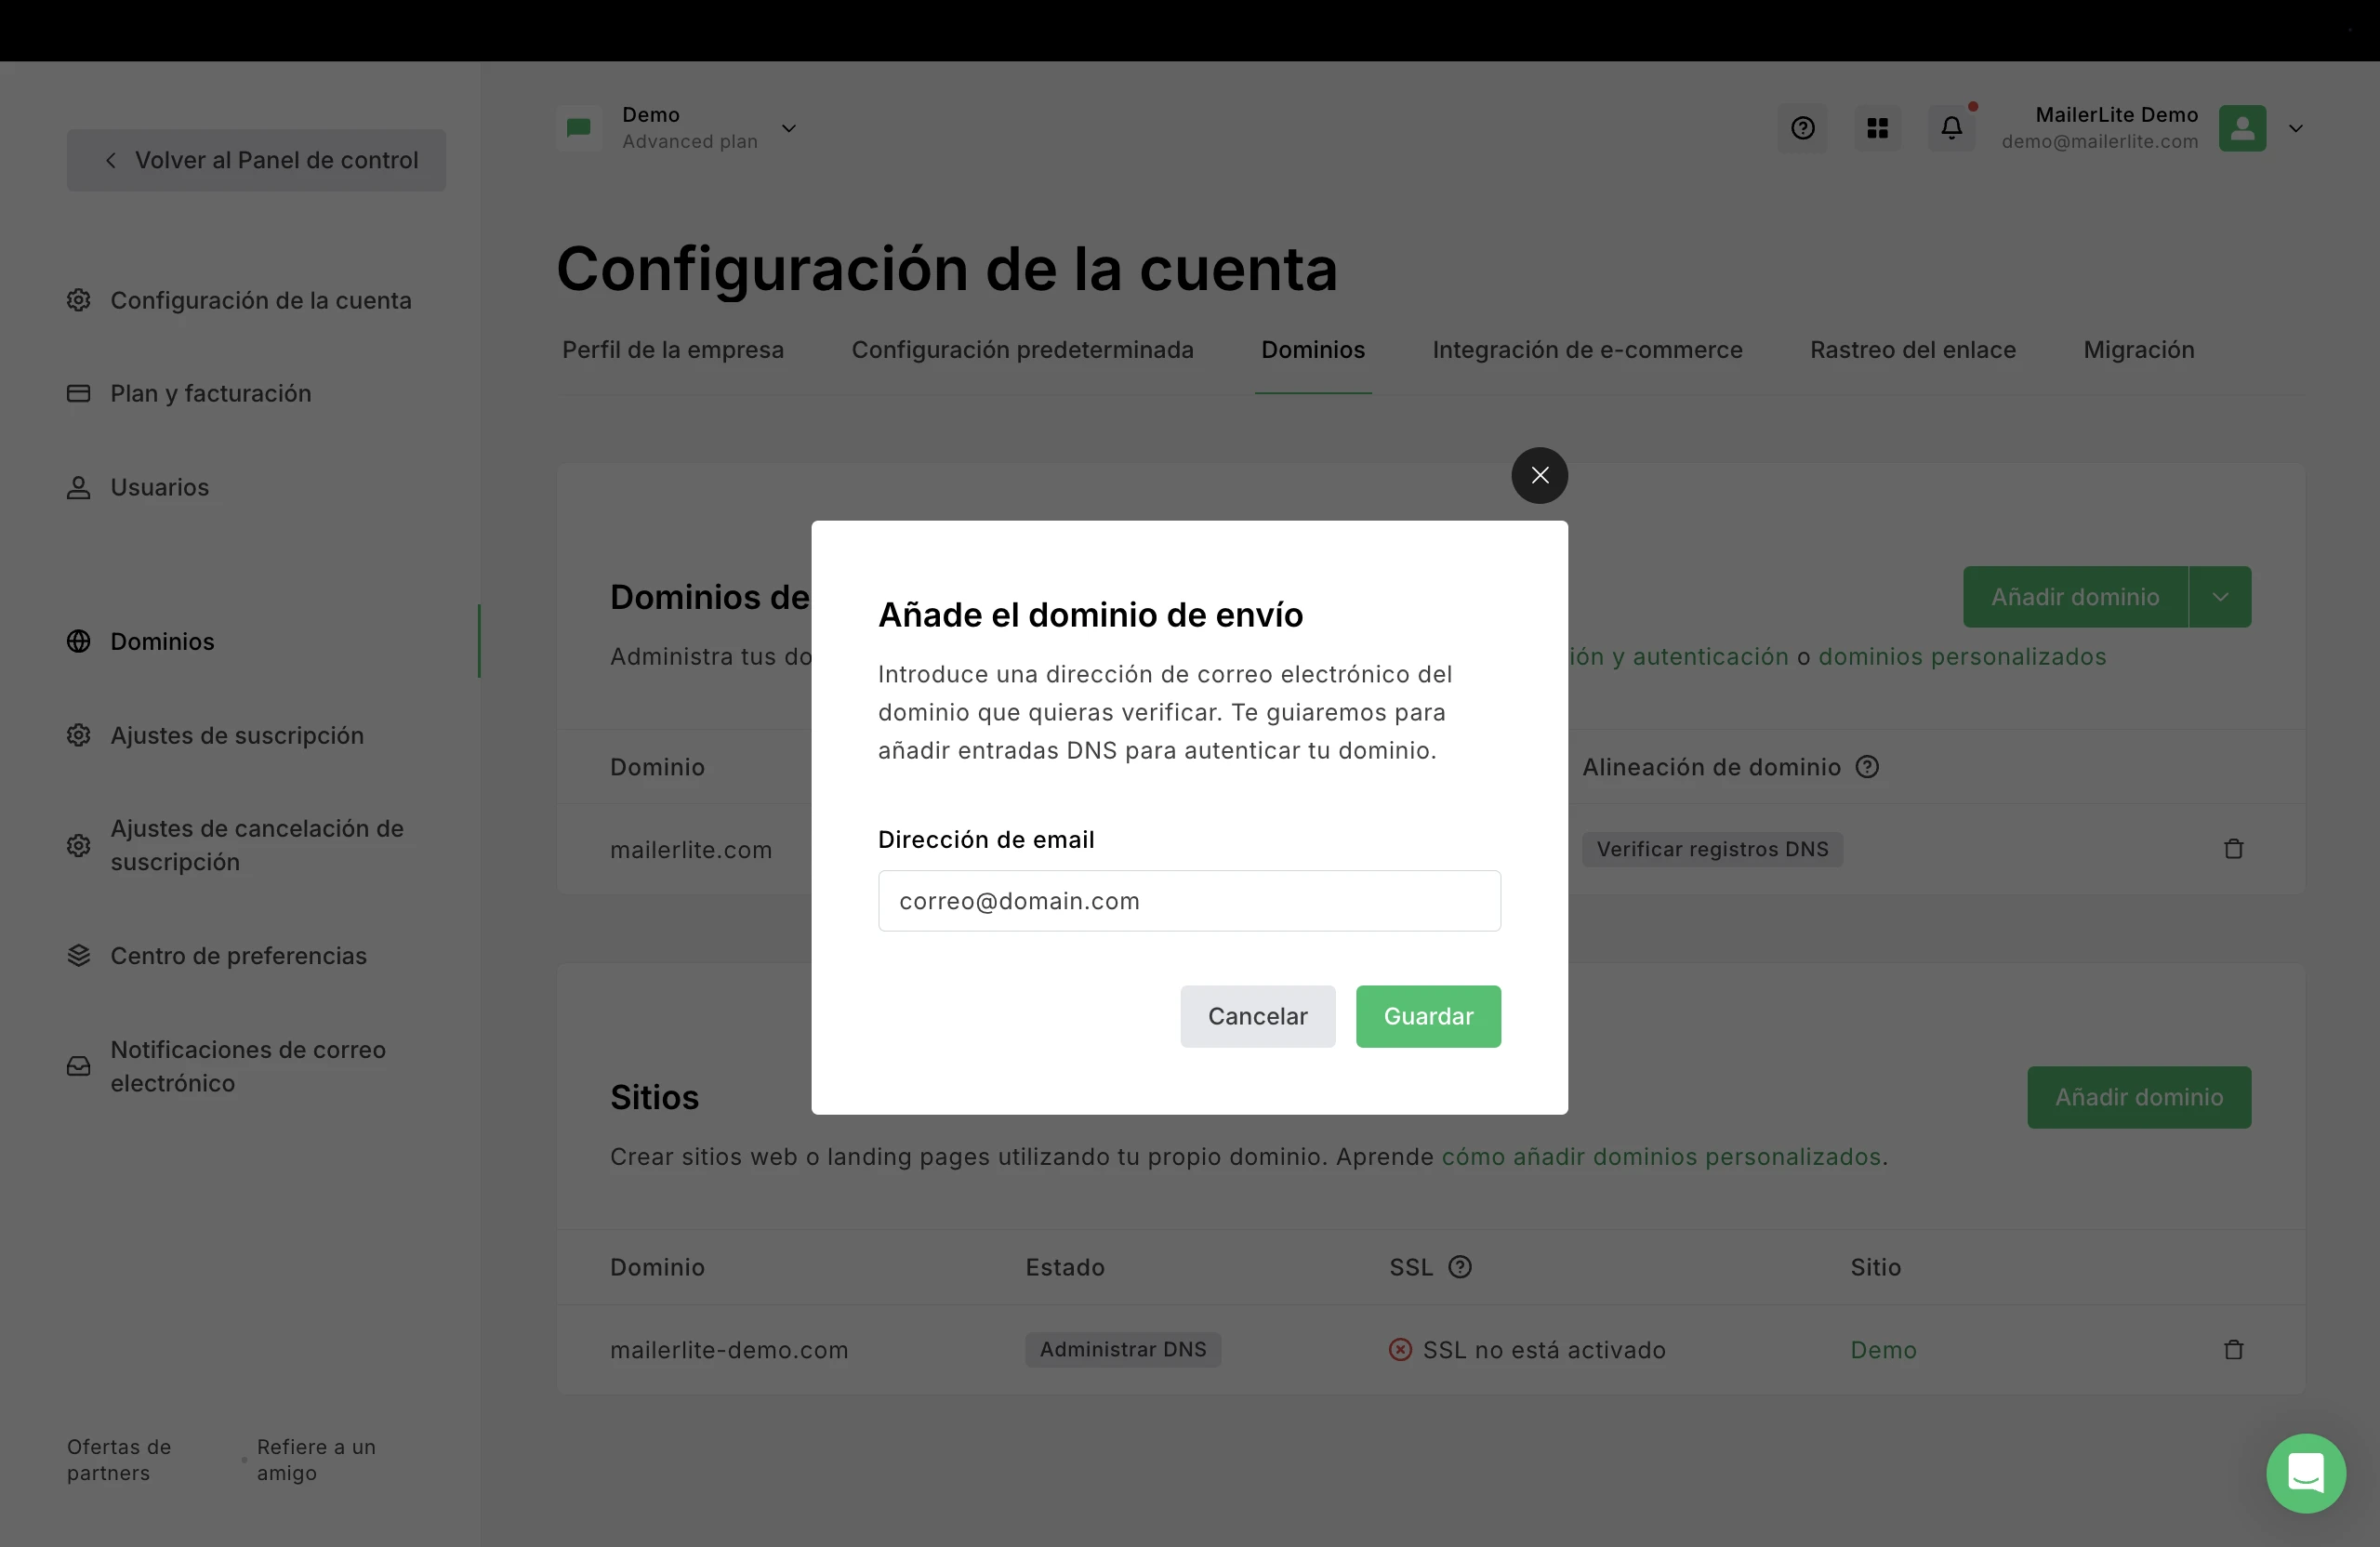
Haz clic en Añadir dominio.
Ingresa la dirección de correo electrónico que deseas usar para enviar correos electrónicos y haz clic en Guardar.
5. Haz clic en Autenticar.
Cómo utilizar la configuración automática de autenticación de dominio
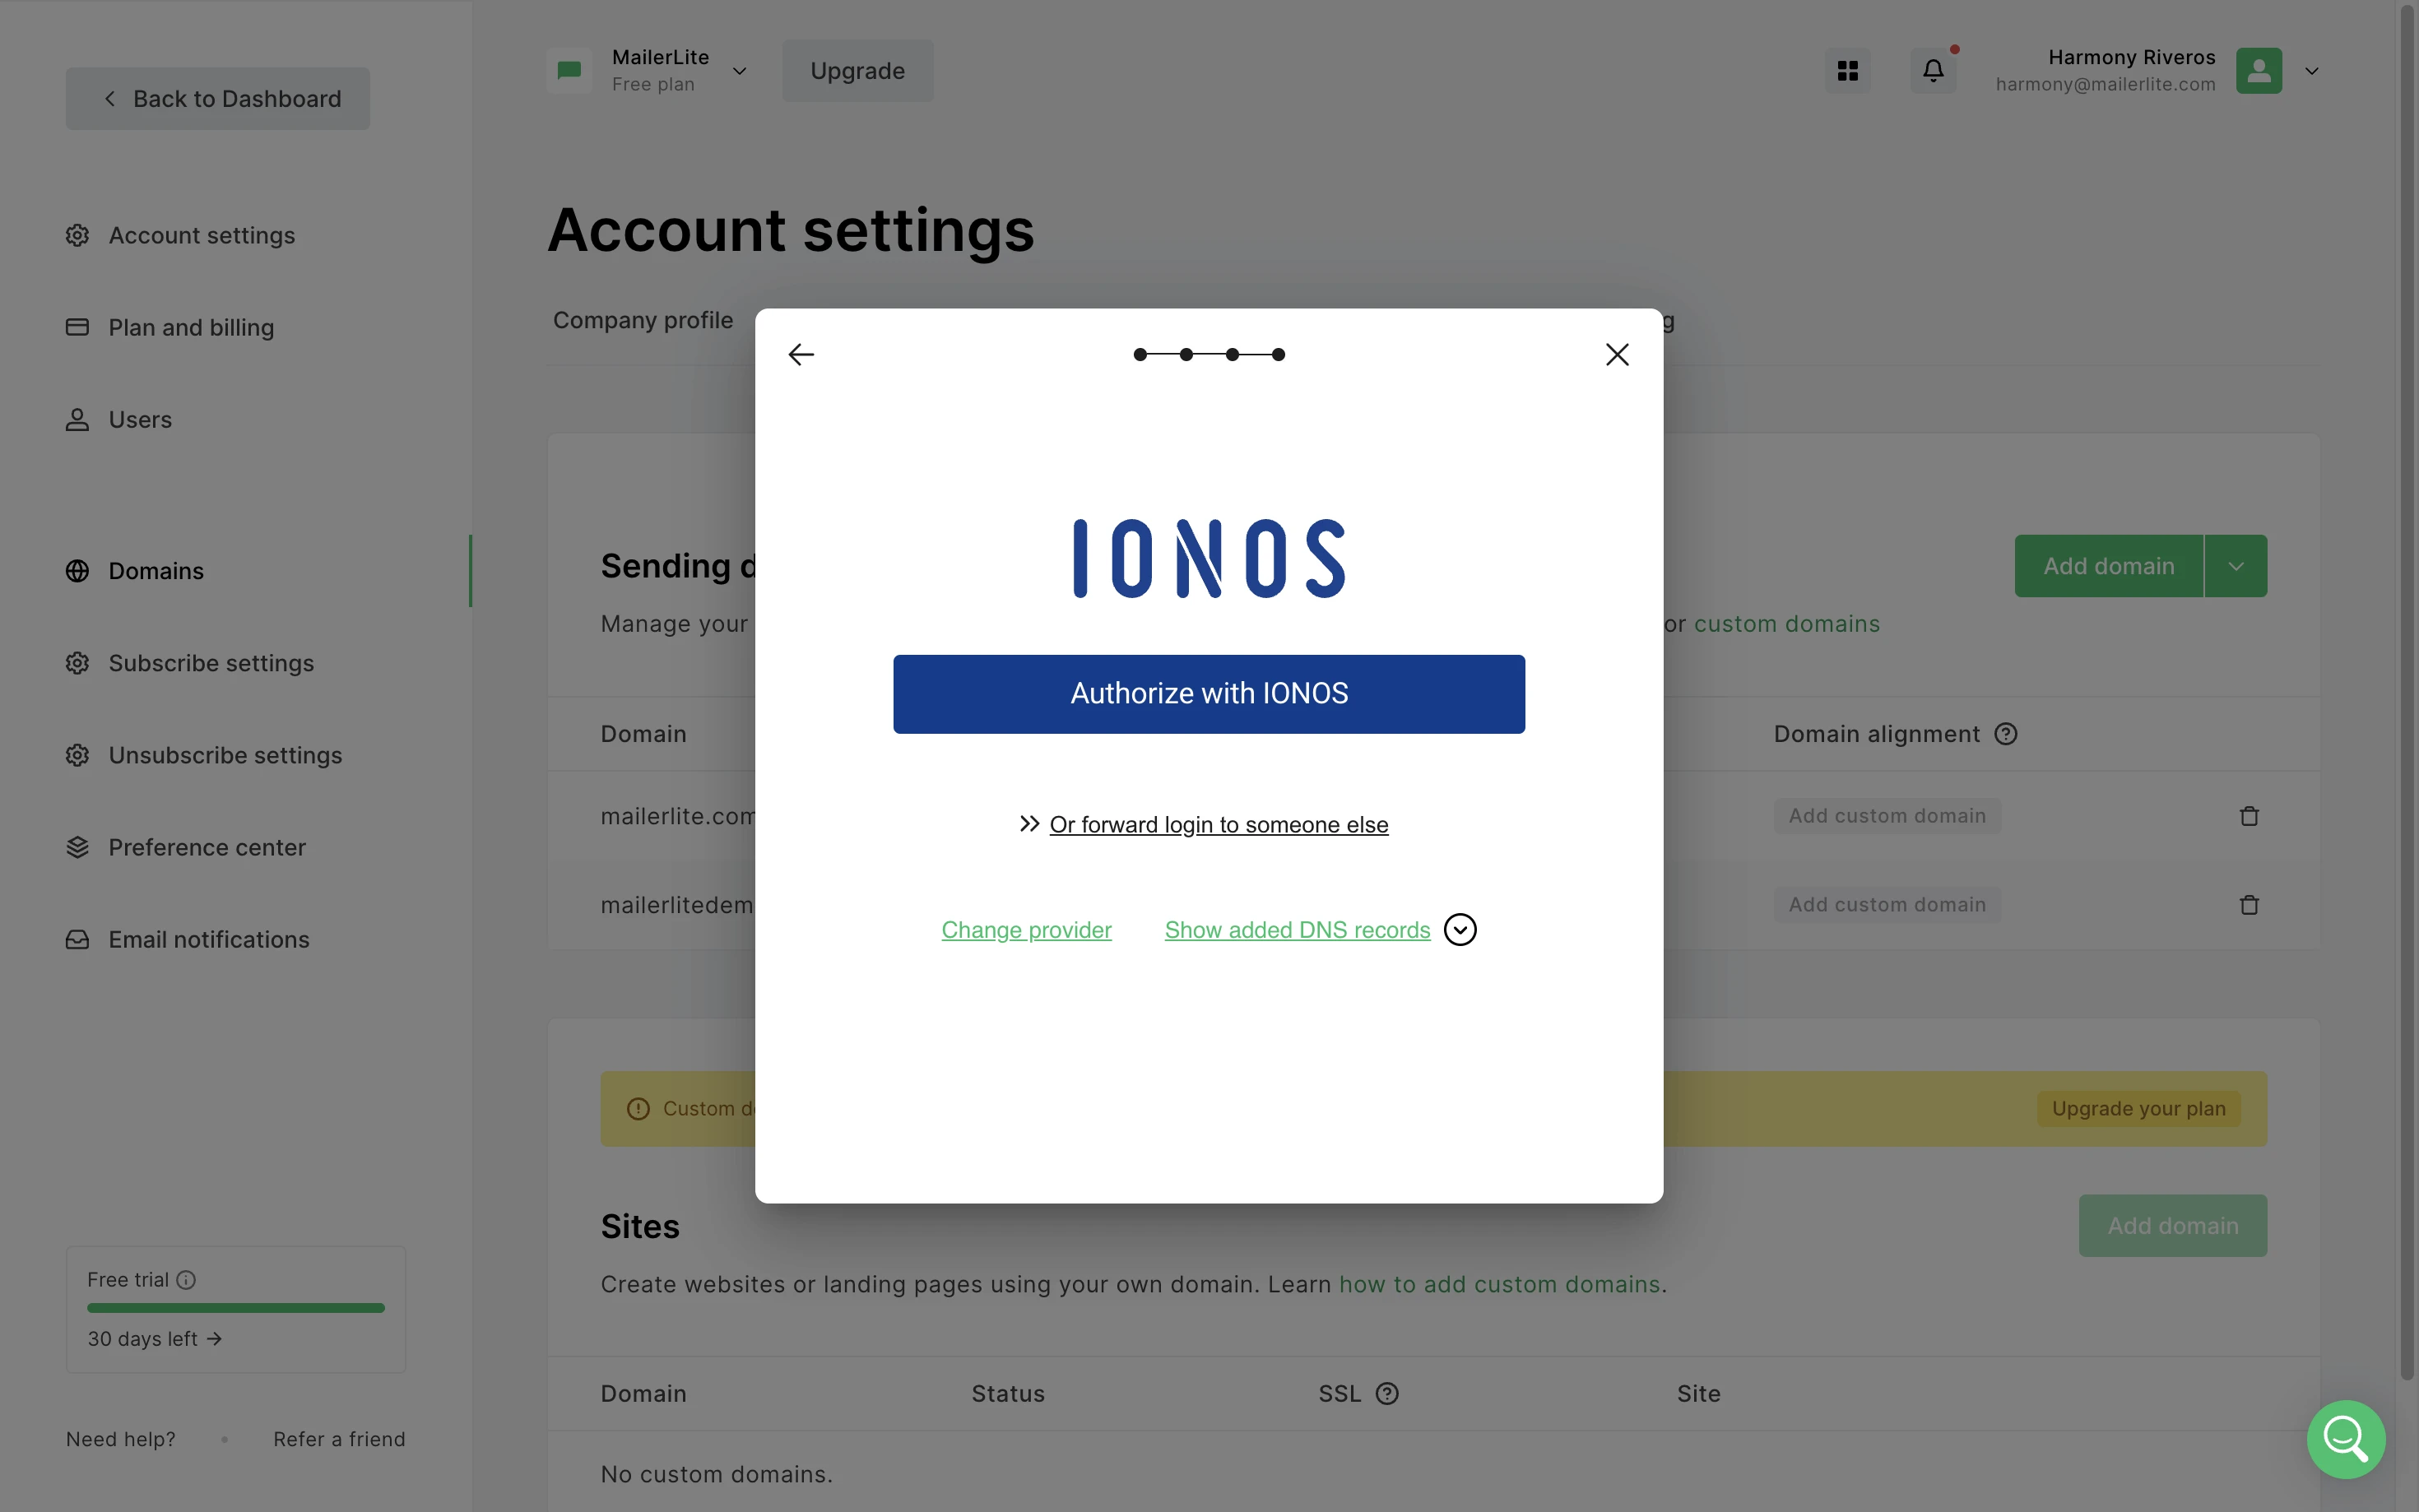
1. Aparecerá una ventana popup solicitándote que inicies el proceso de autenticación. Haz clic en Continuar. Esta herramienta escaneará tu dominio a fin de detectar cuál es tu proveedor de alojamiento.
2. Una vez el proveedor haya sido detectado, sigue las instrucciones para conectar tu cuenta. Necesitarás usar tus credenciales de acceso para ingresar a tu proveedor de alojamiento.
¿Qué ocurre si no tengo mis credenciales de acceso?
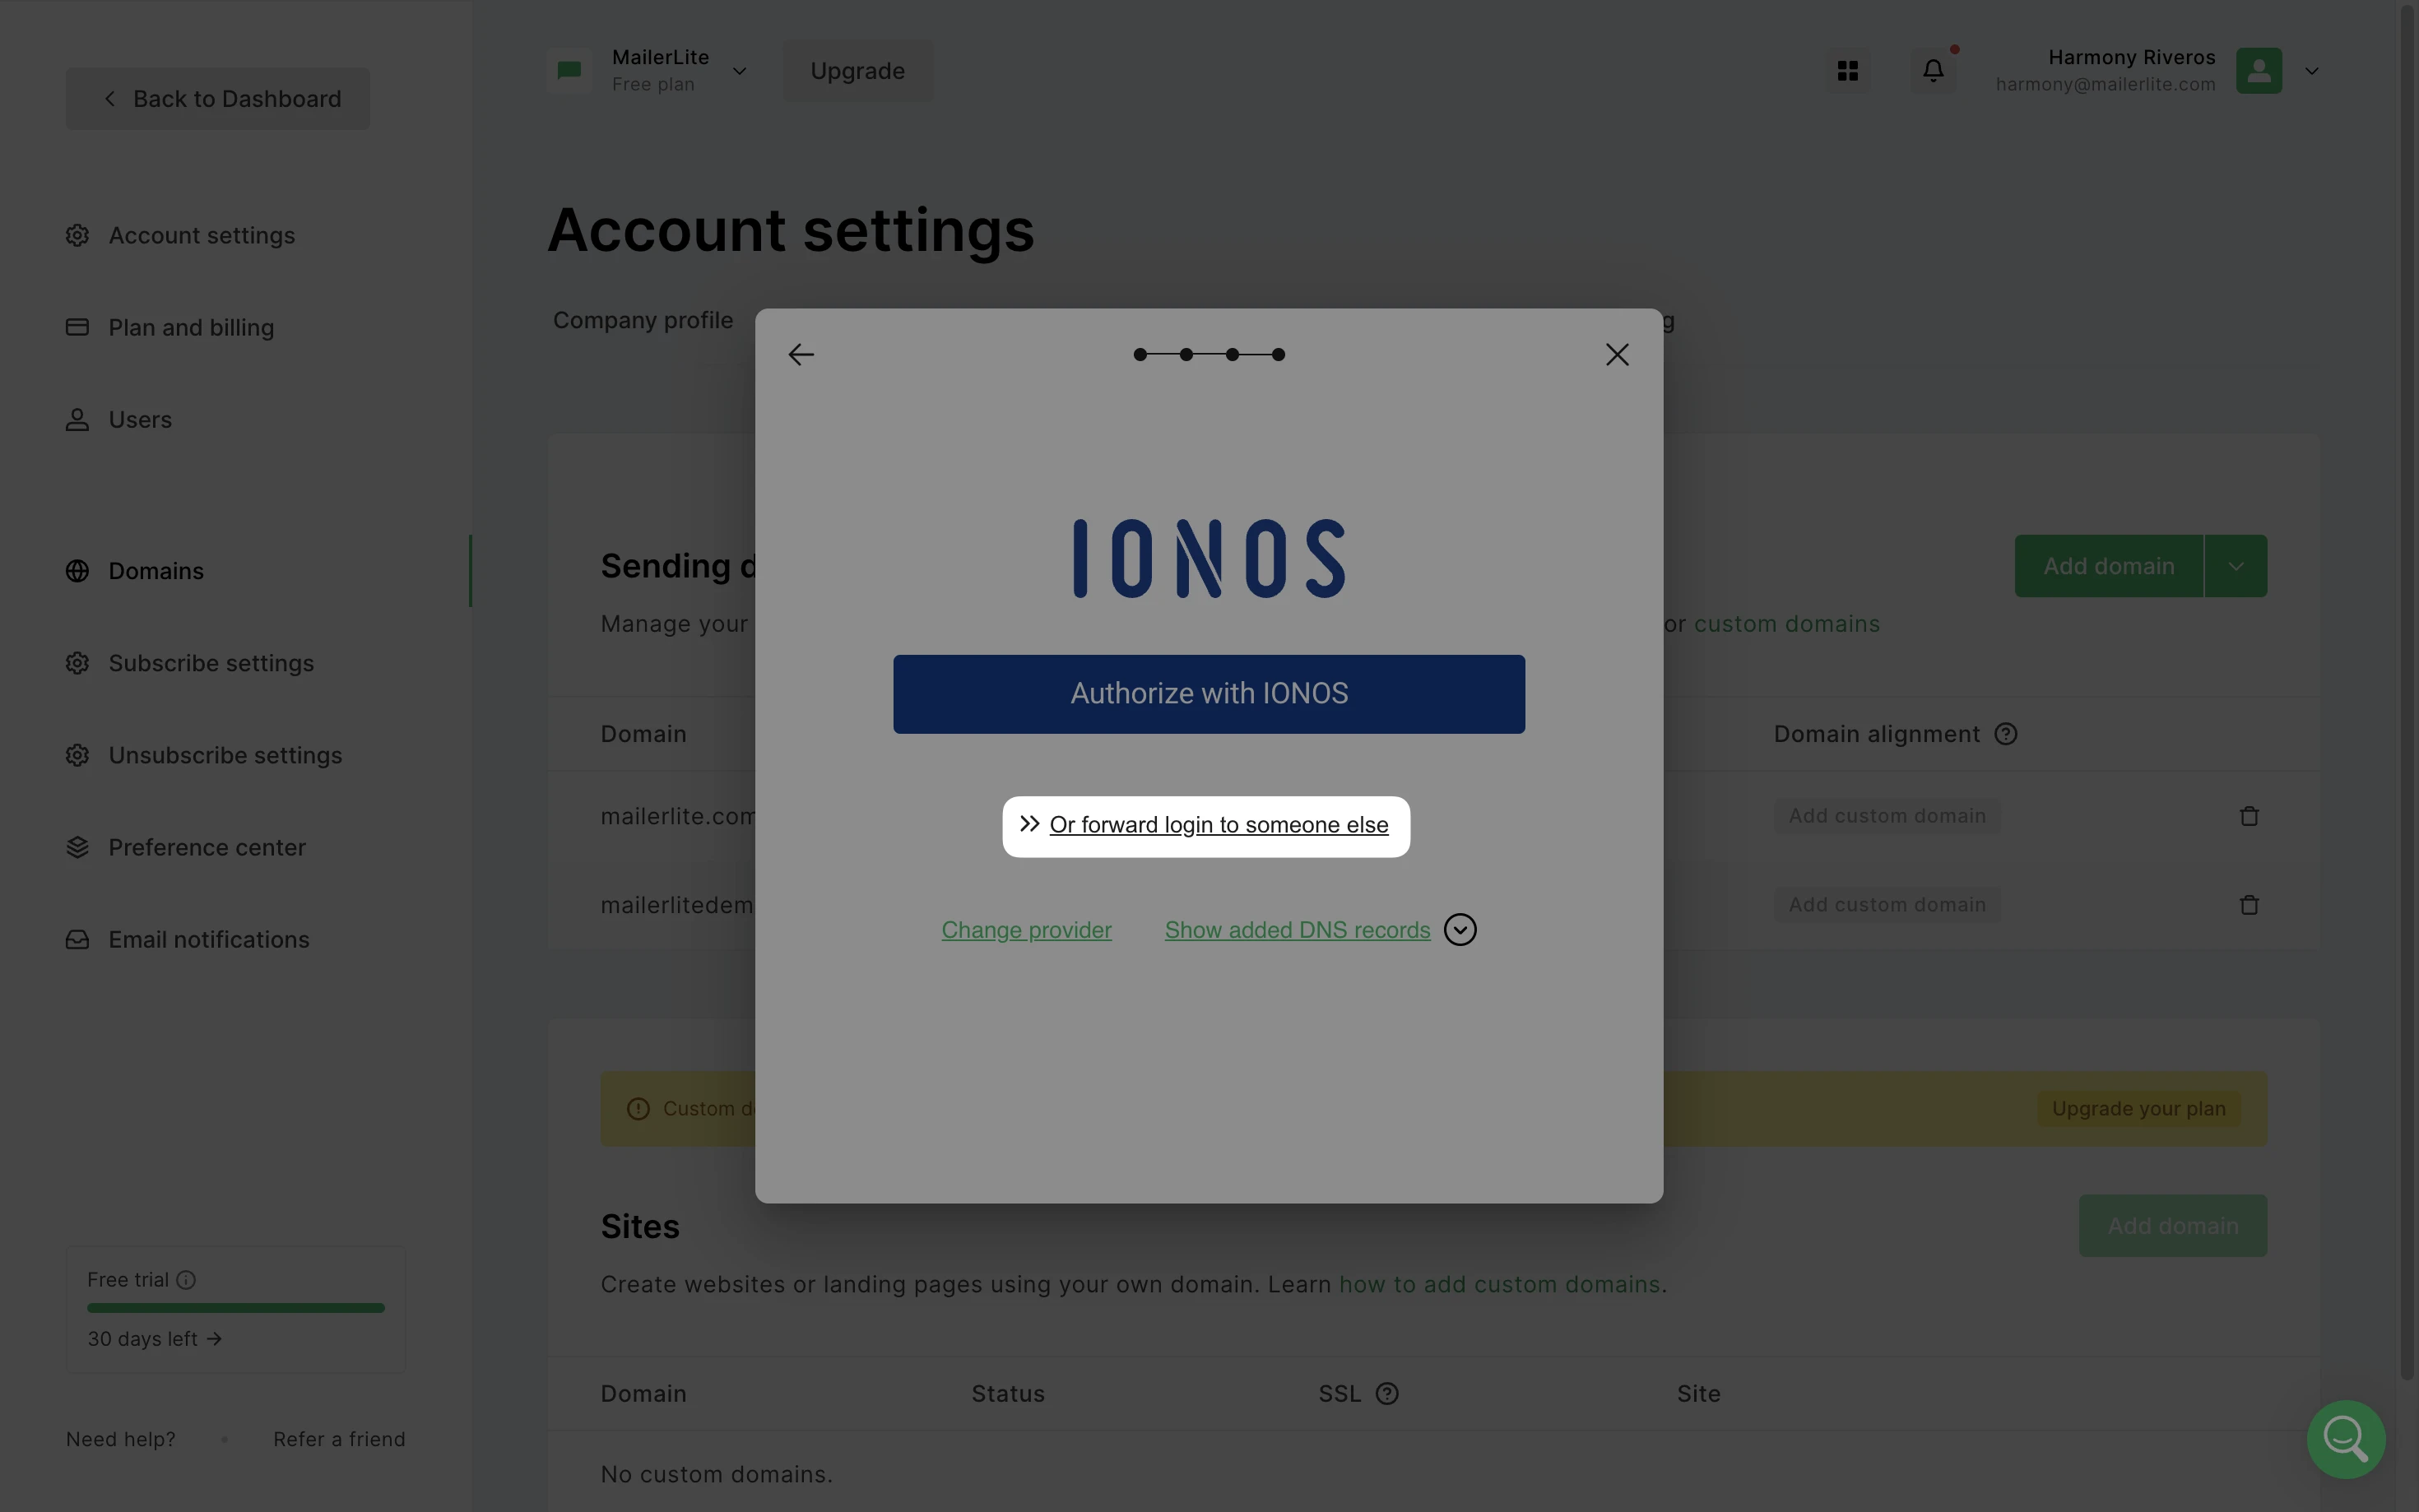
Si eliges la opción Reenviar el inicio de sesión a otra persona, podrás compartir un enlace con alguien que tenga los datos para iniciar sesión, de modo que pueda completar esta parte del proceso.
O bien, puedes elegir Mostrar registros DNS añadidos para ver y añadir manualmente los registros. Ten en cuenta que si utilizas un inicio de sesión social (como Gmail) para iniciar sesión en tu proveedor de alojamiento, tendrás que elegir la opción de autenticación manual, ya que este tipo de inicio de sesión no es compatible.
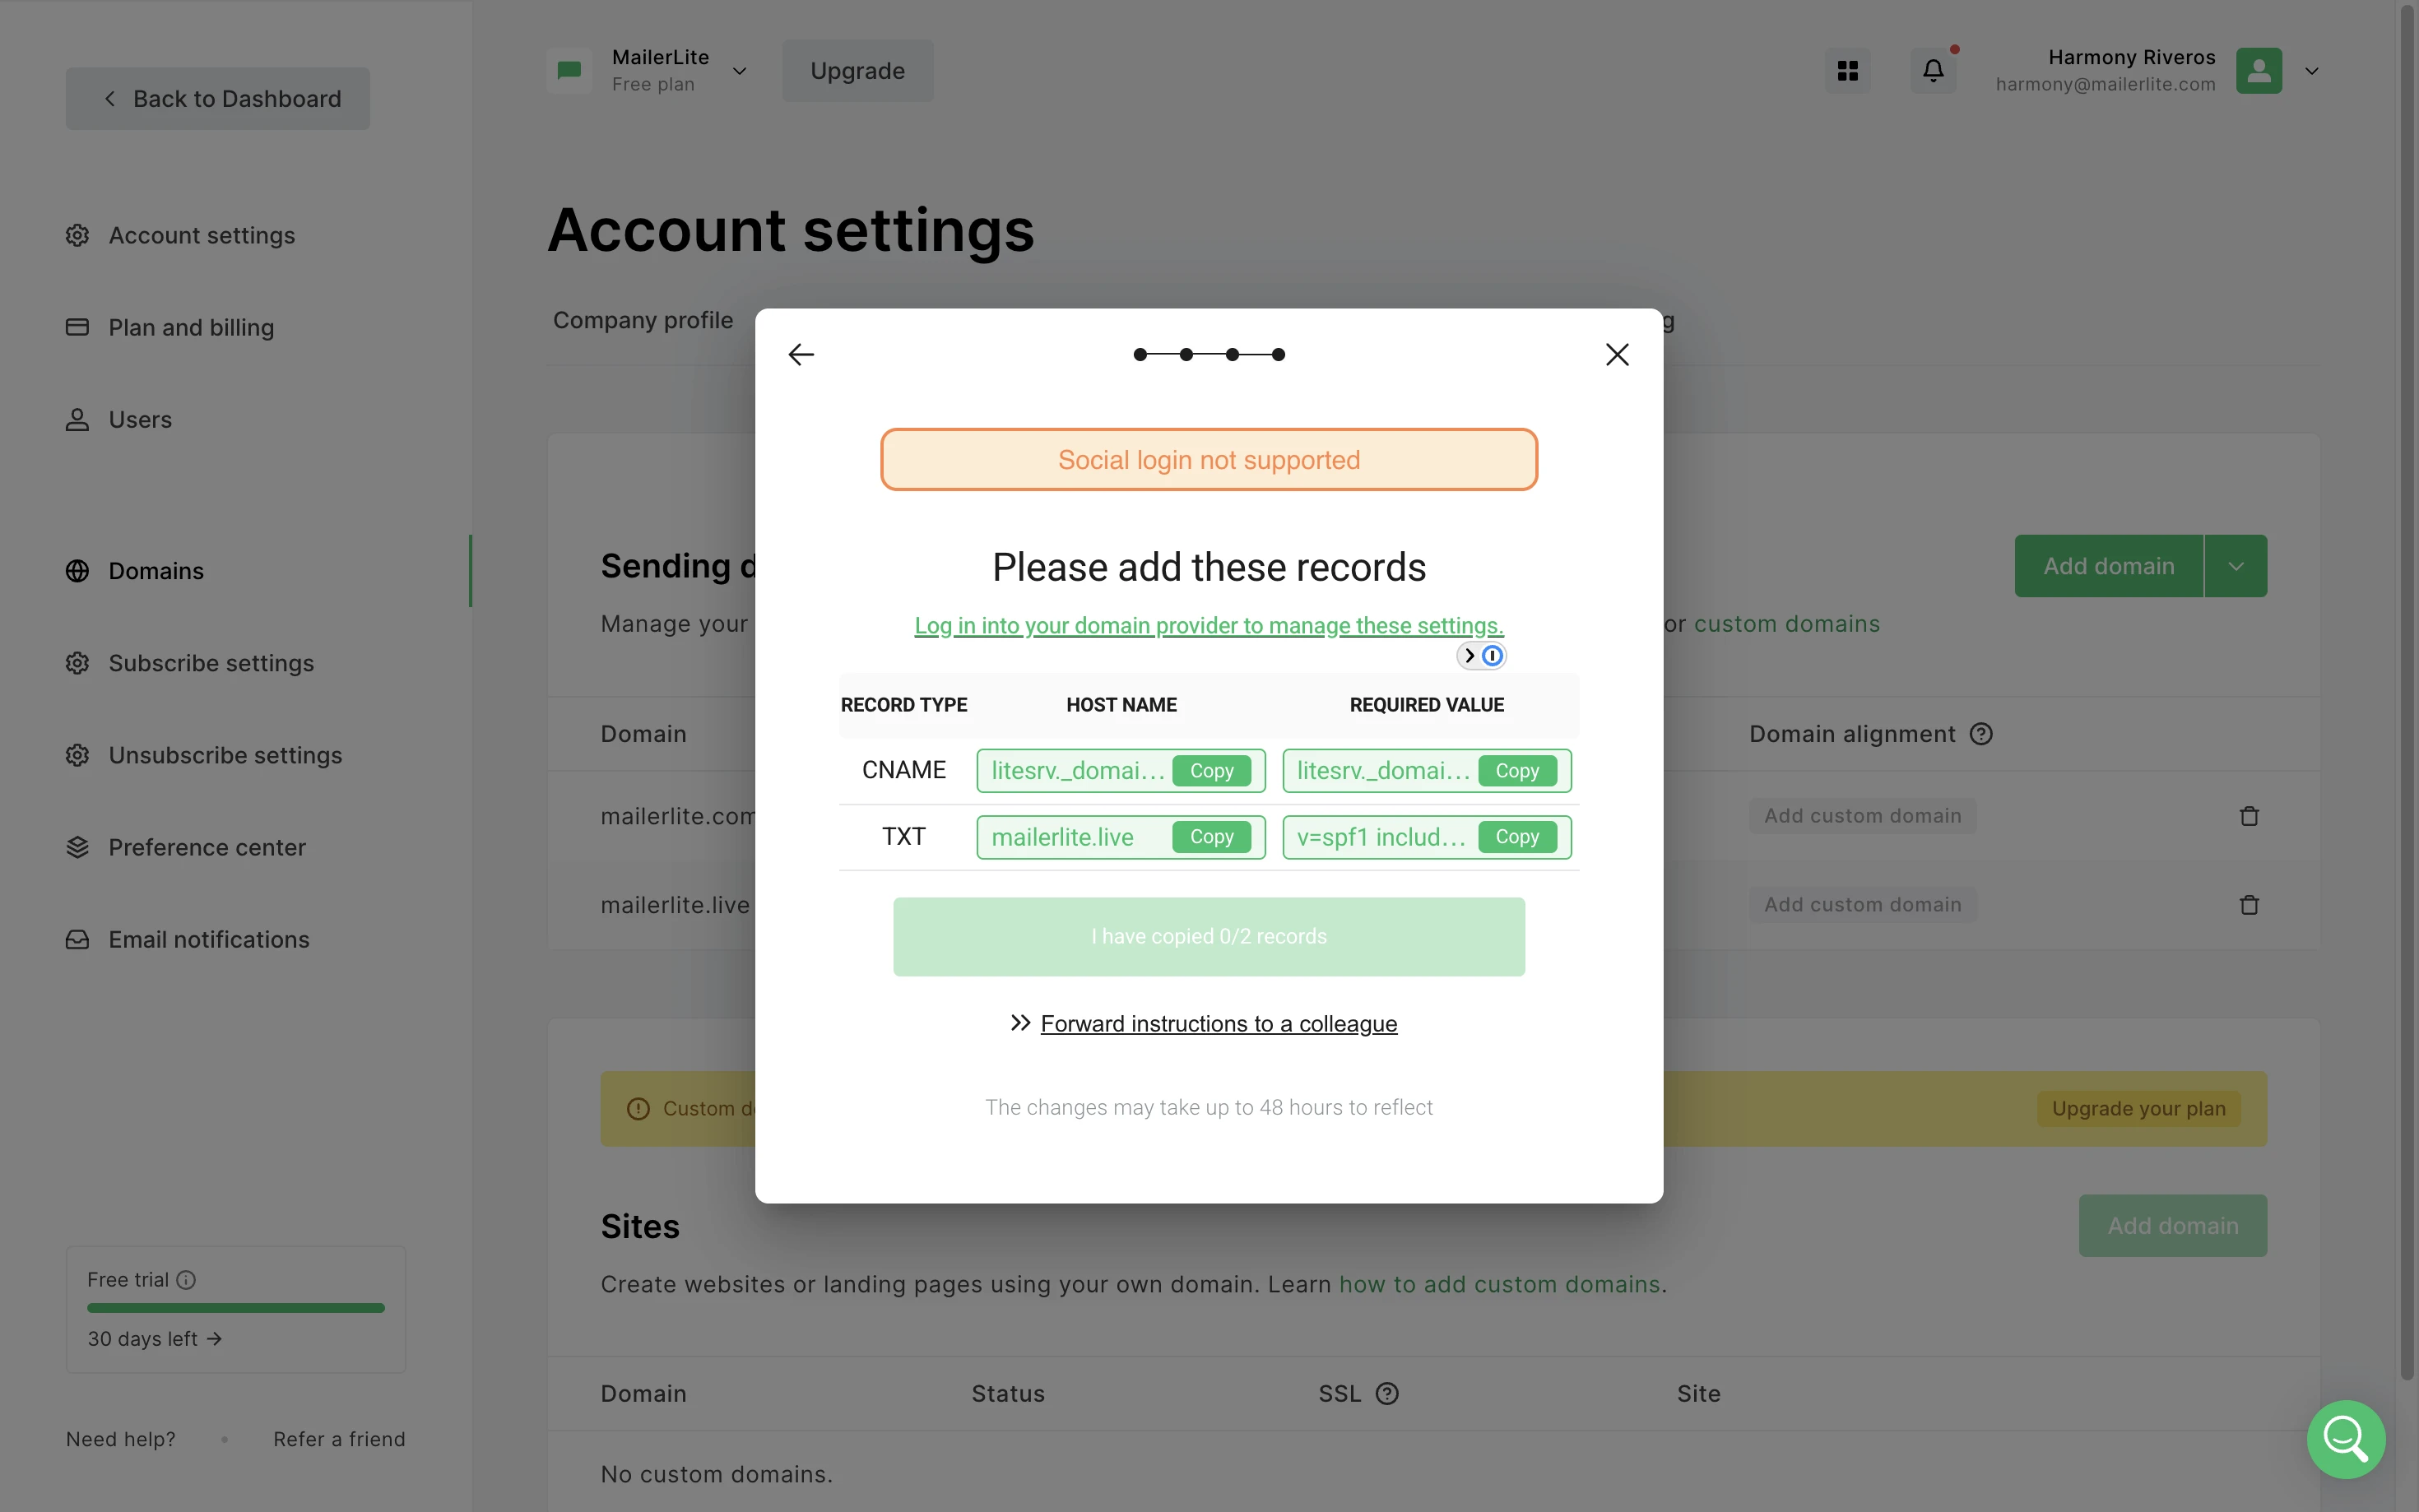
3. Luego, sigue los pasos para autorizar a MailerLite a configurar tus DNS y añadir los registros necesarios.
4. Una vez que la configuración DNS se realizó de manera exitosa, se te redigirá a MailerLite. Refresca la página para ver el estado de la actualización de tu dominio.

El dominio puede aparecer como autenticado de inmediato, o puede tardar hasta 24 horas. En este caso, verás Pendiente junto a tu dominio.
Cómo autenticar manualmente
Cambia a la pestaña Manual para acceder a los registros DNS que debes añadir a tu panel IONOS.
Cómo acceder a la página de la zona DNS en IONOS
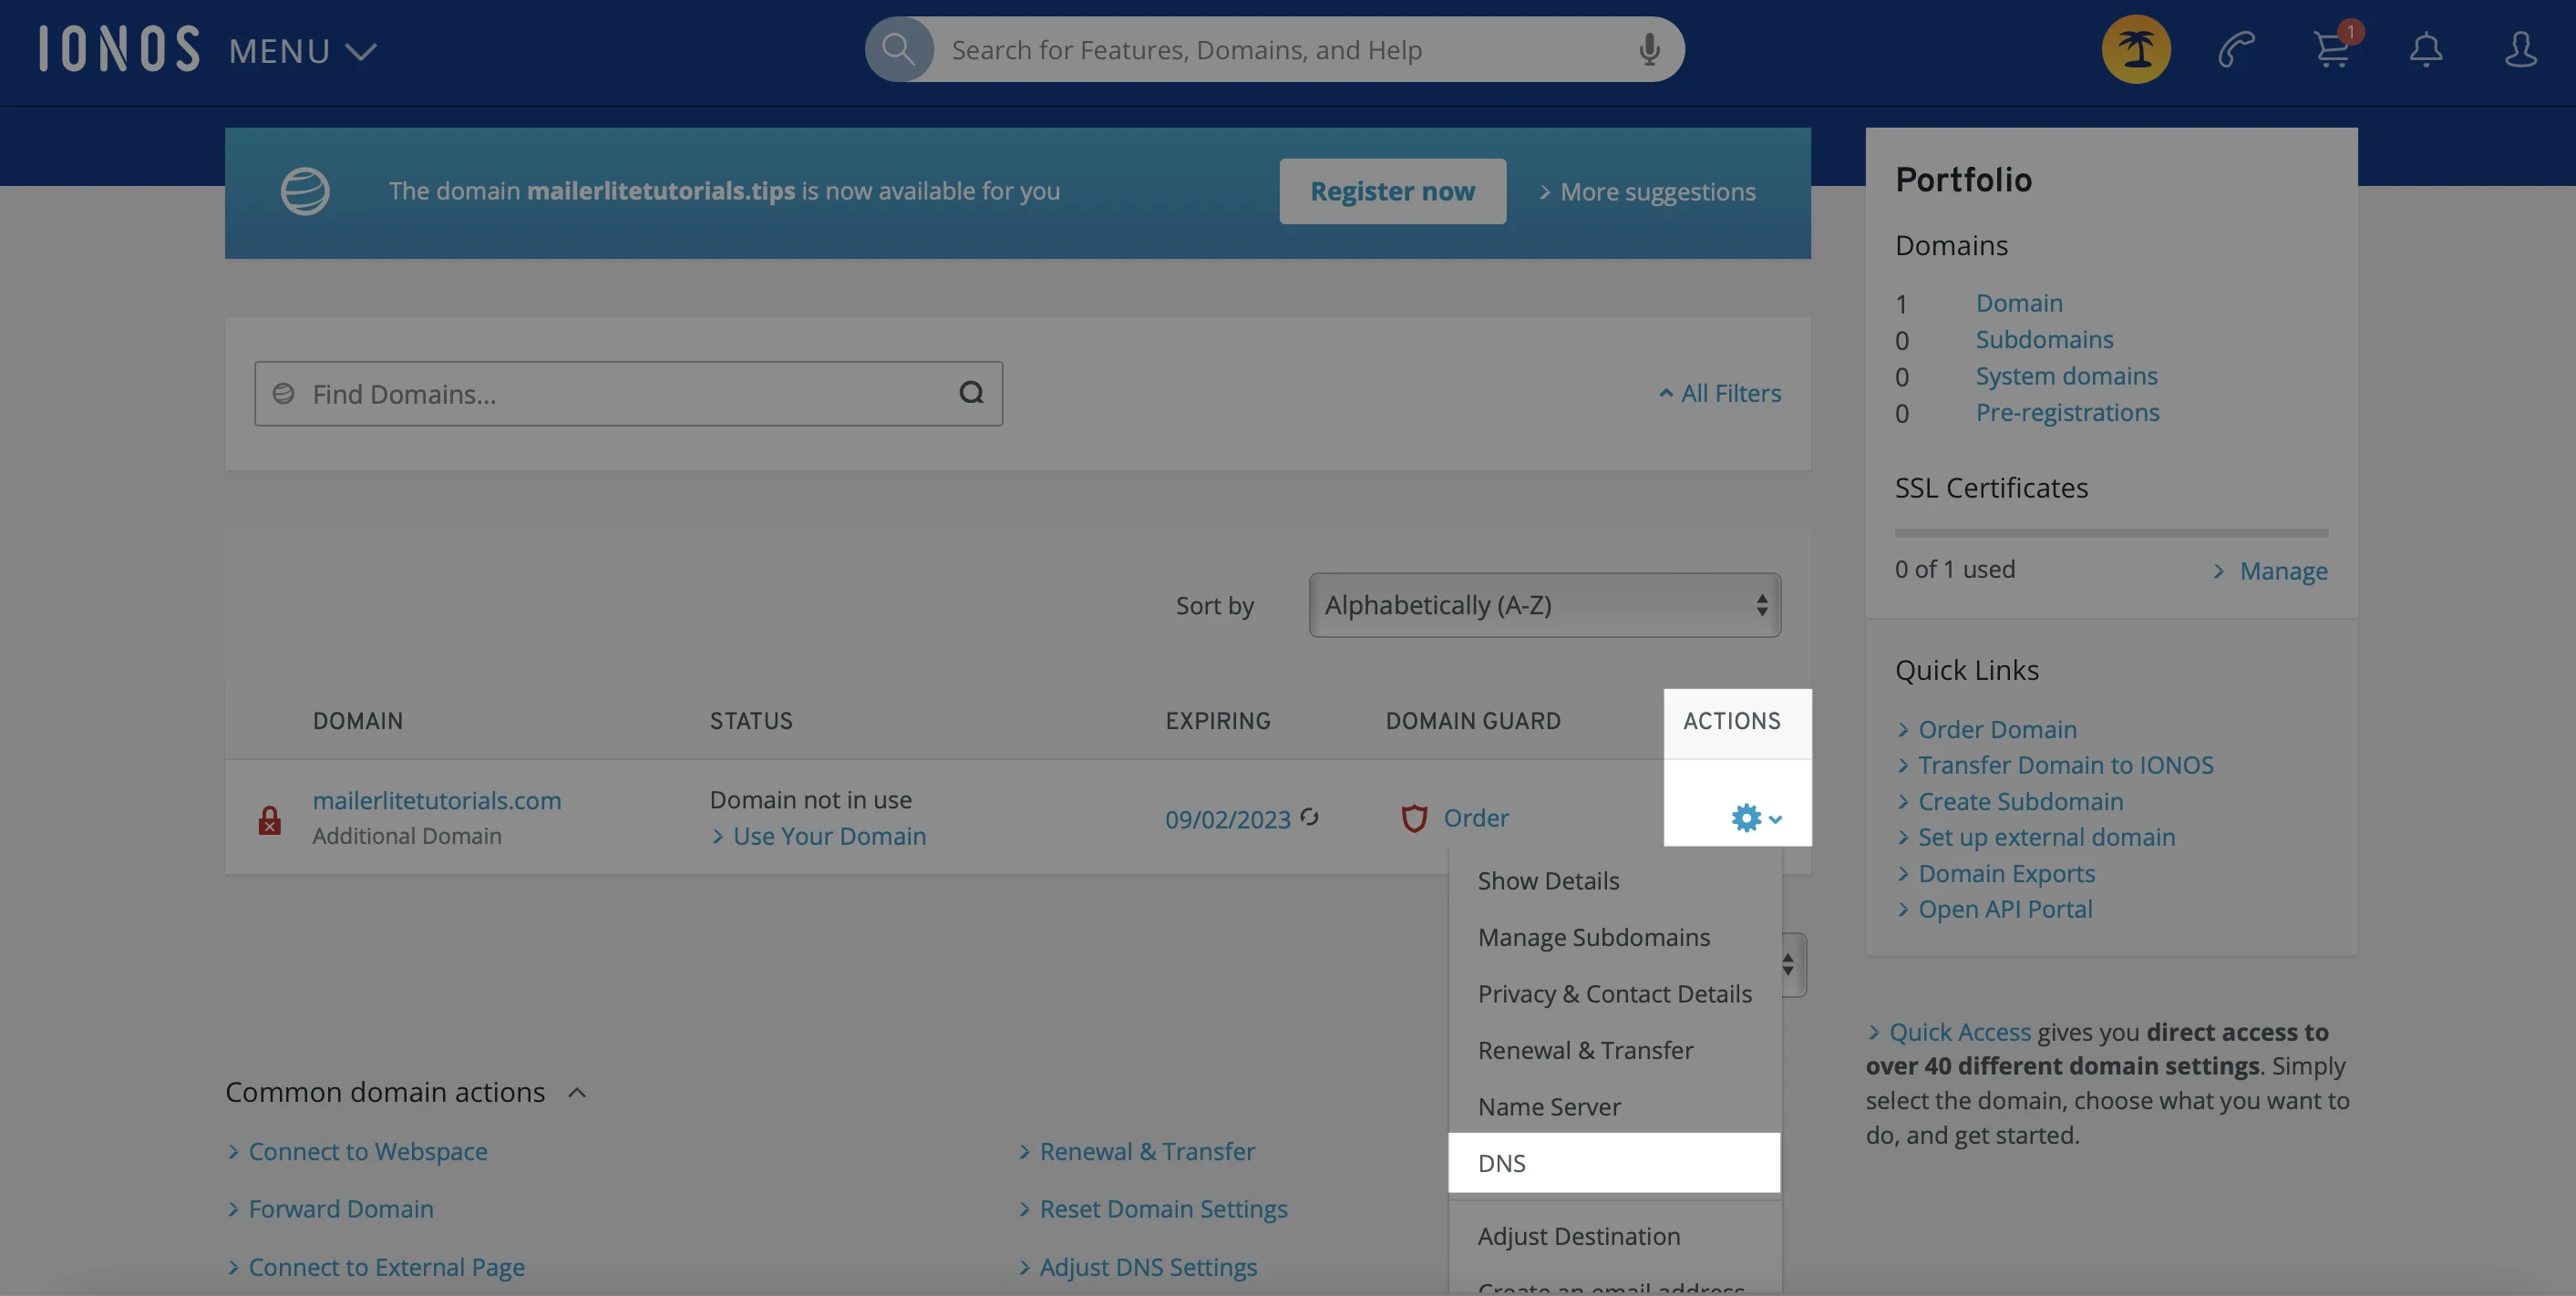
Accede a tu cuenta de IONOS y selecciona la opción Dominios y SSL.

2. Busca tu dominio y en Acciones haz clic en DNS.
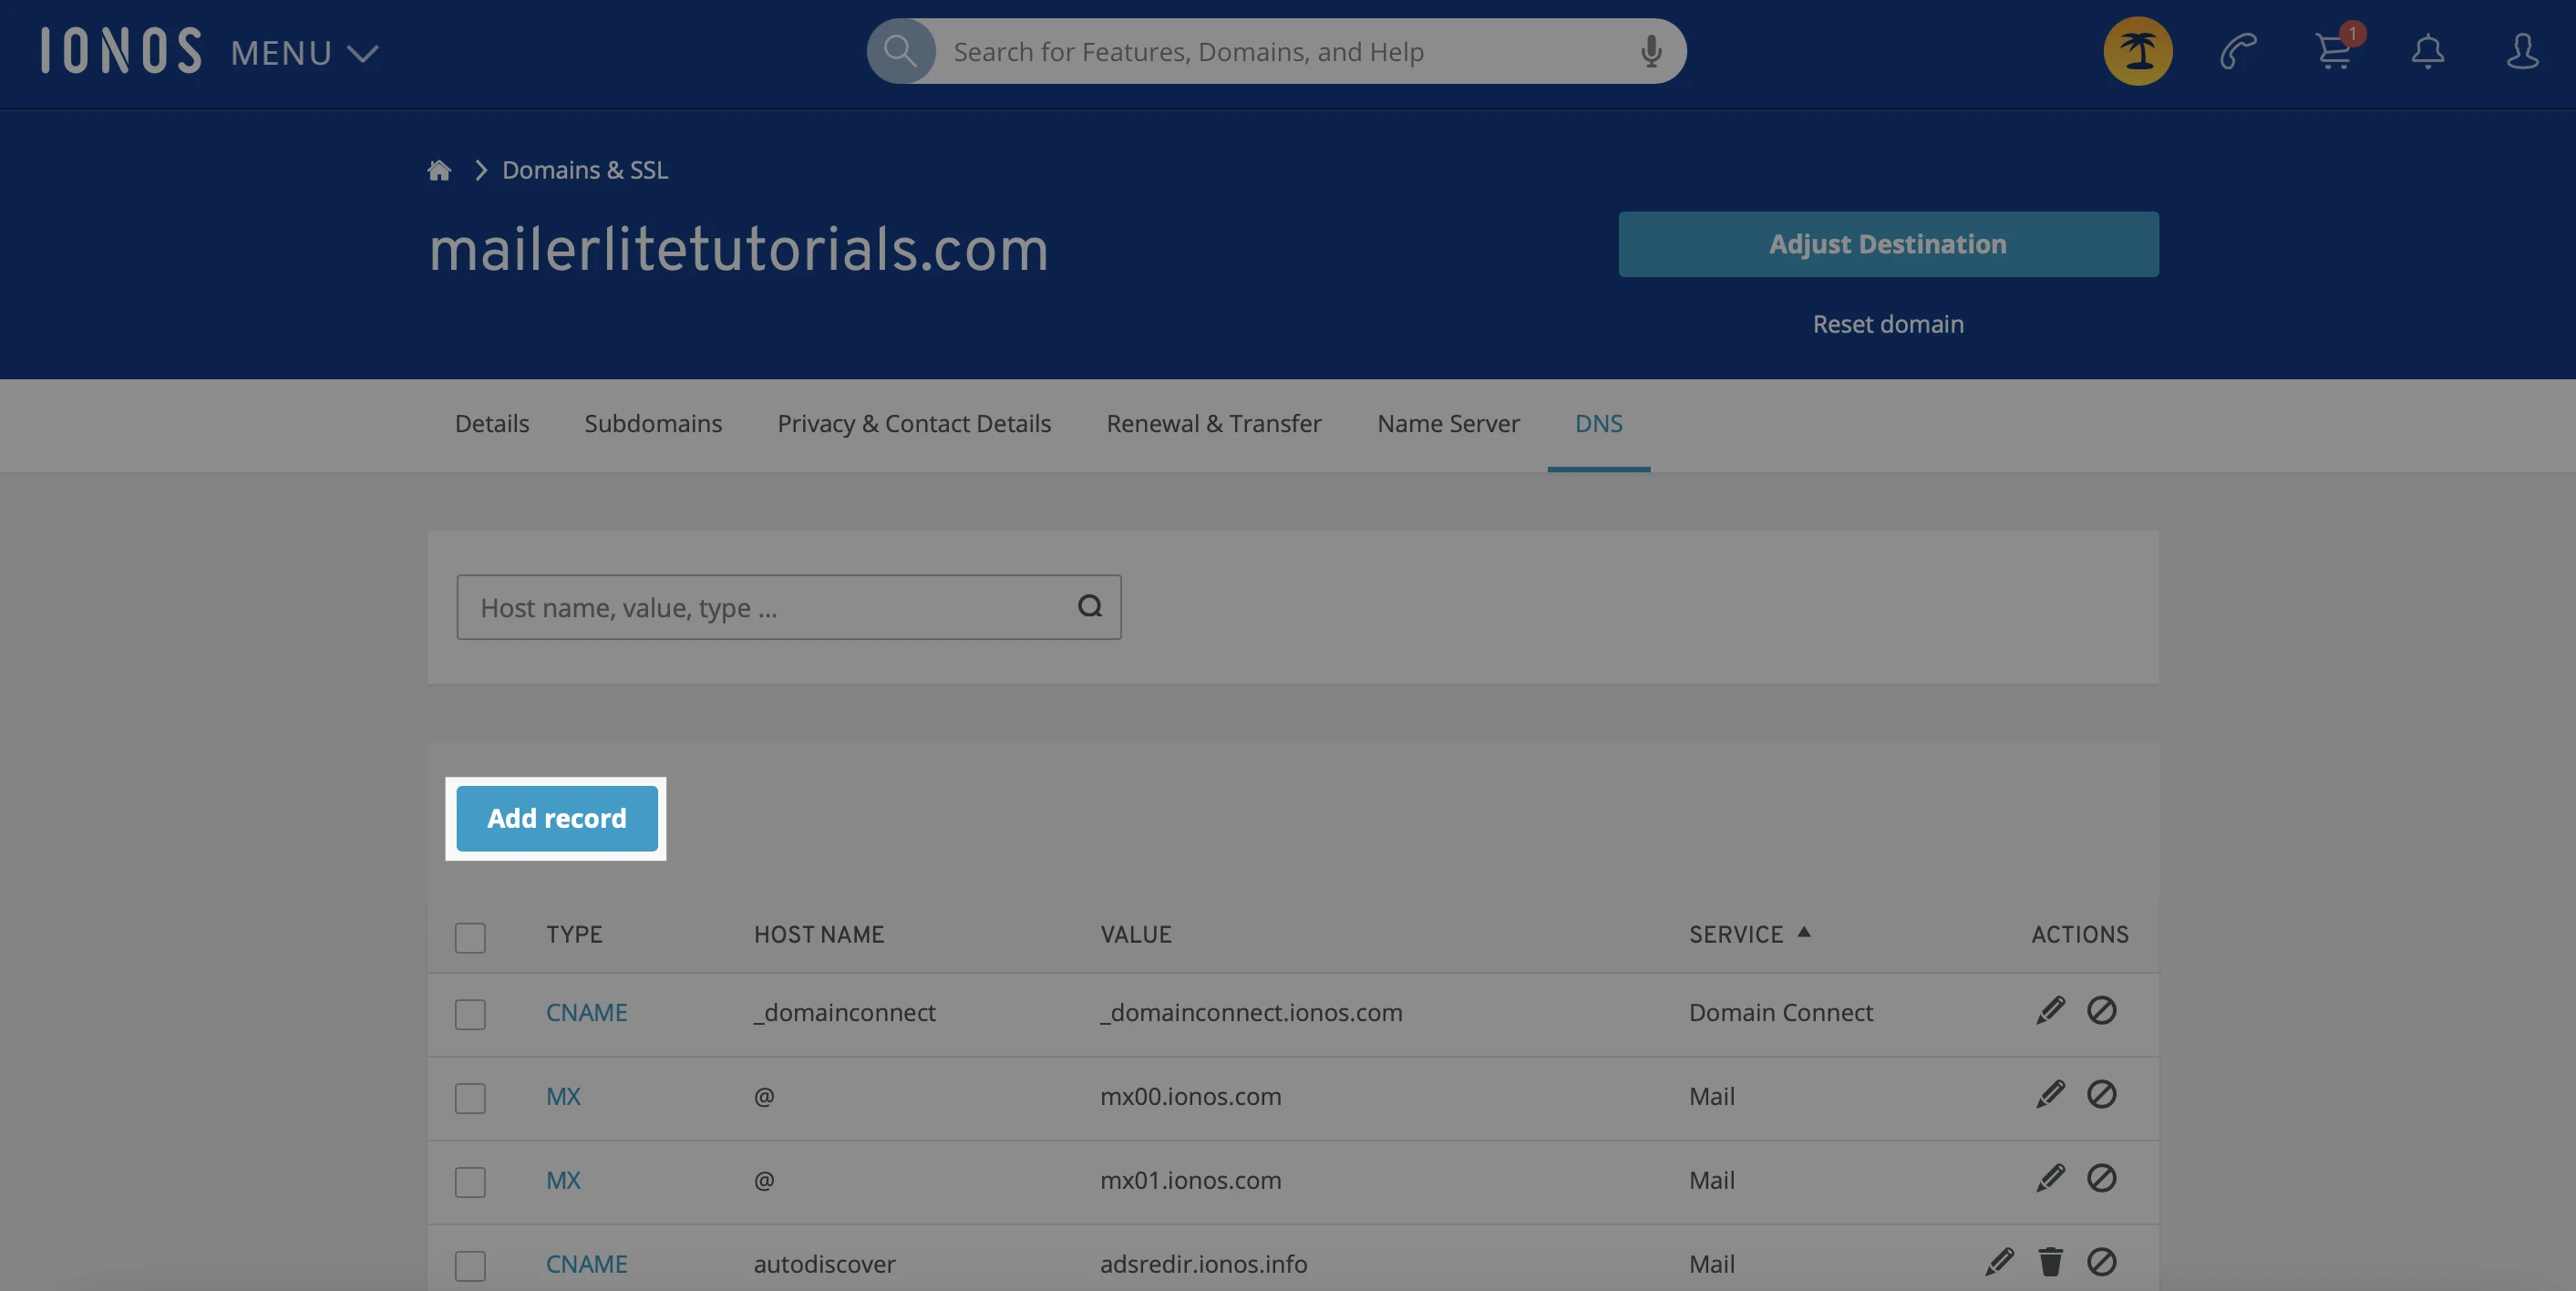
Cómo añadir el registro DKIM
Haz clic en Añadir registro.
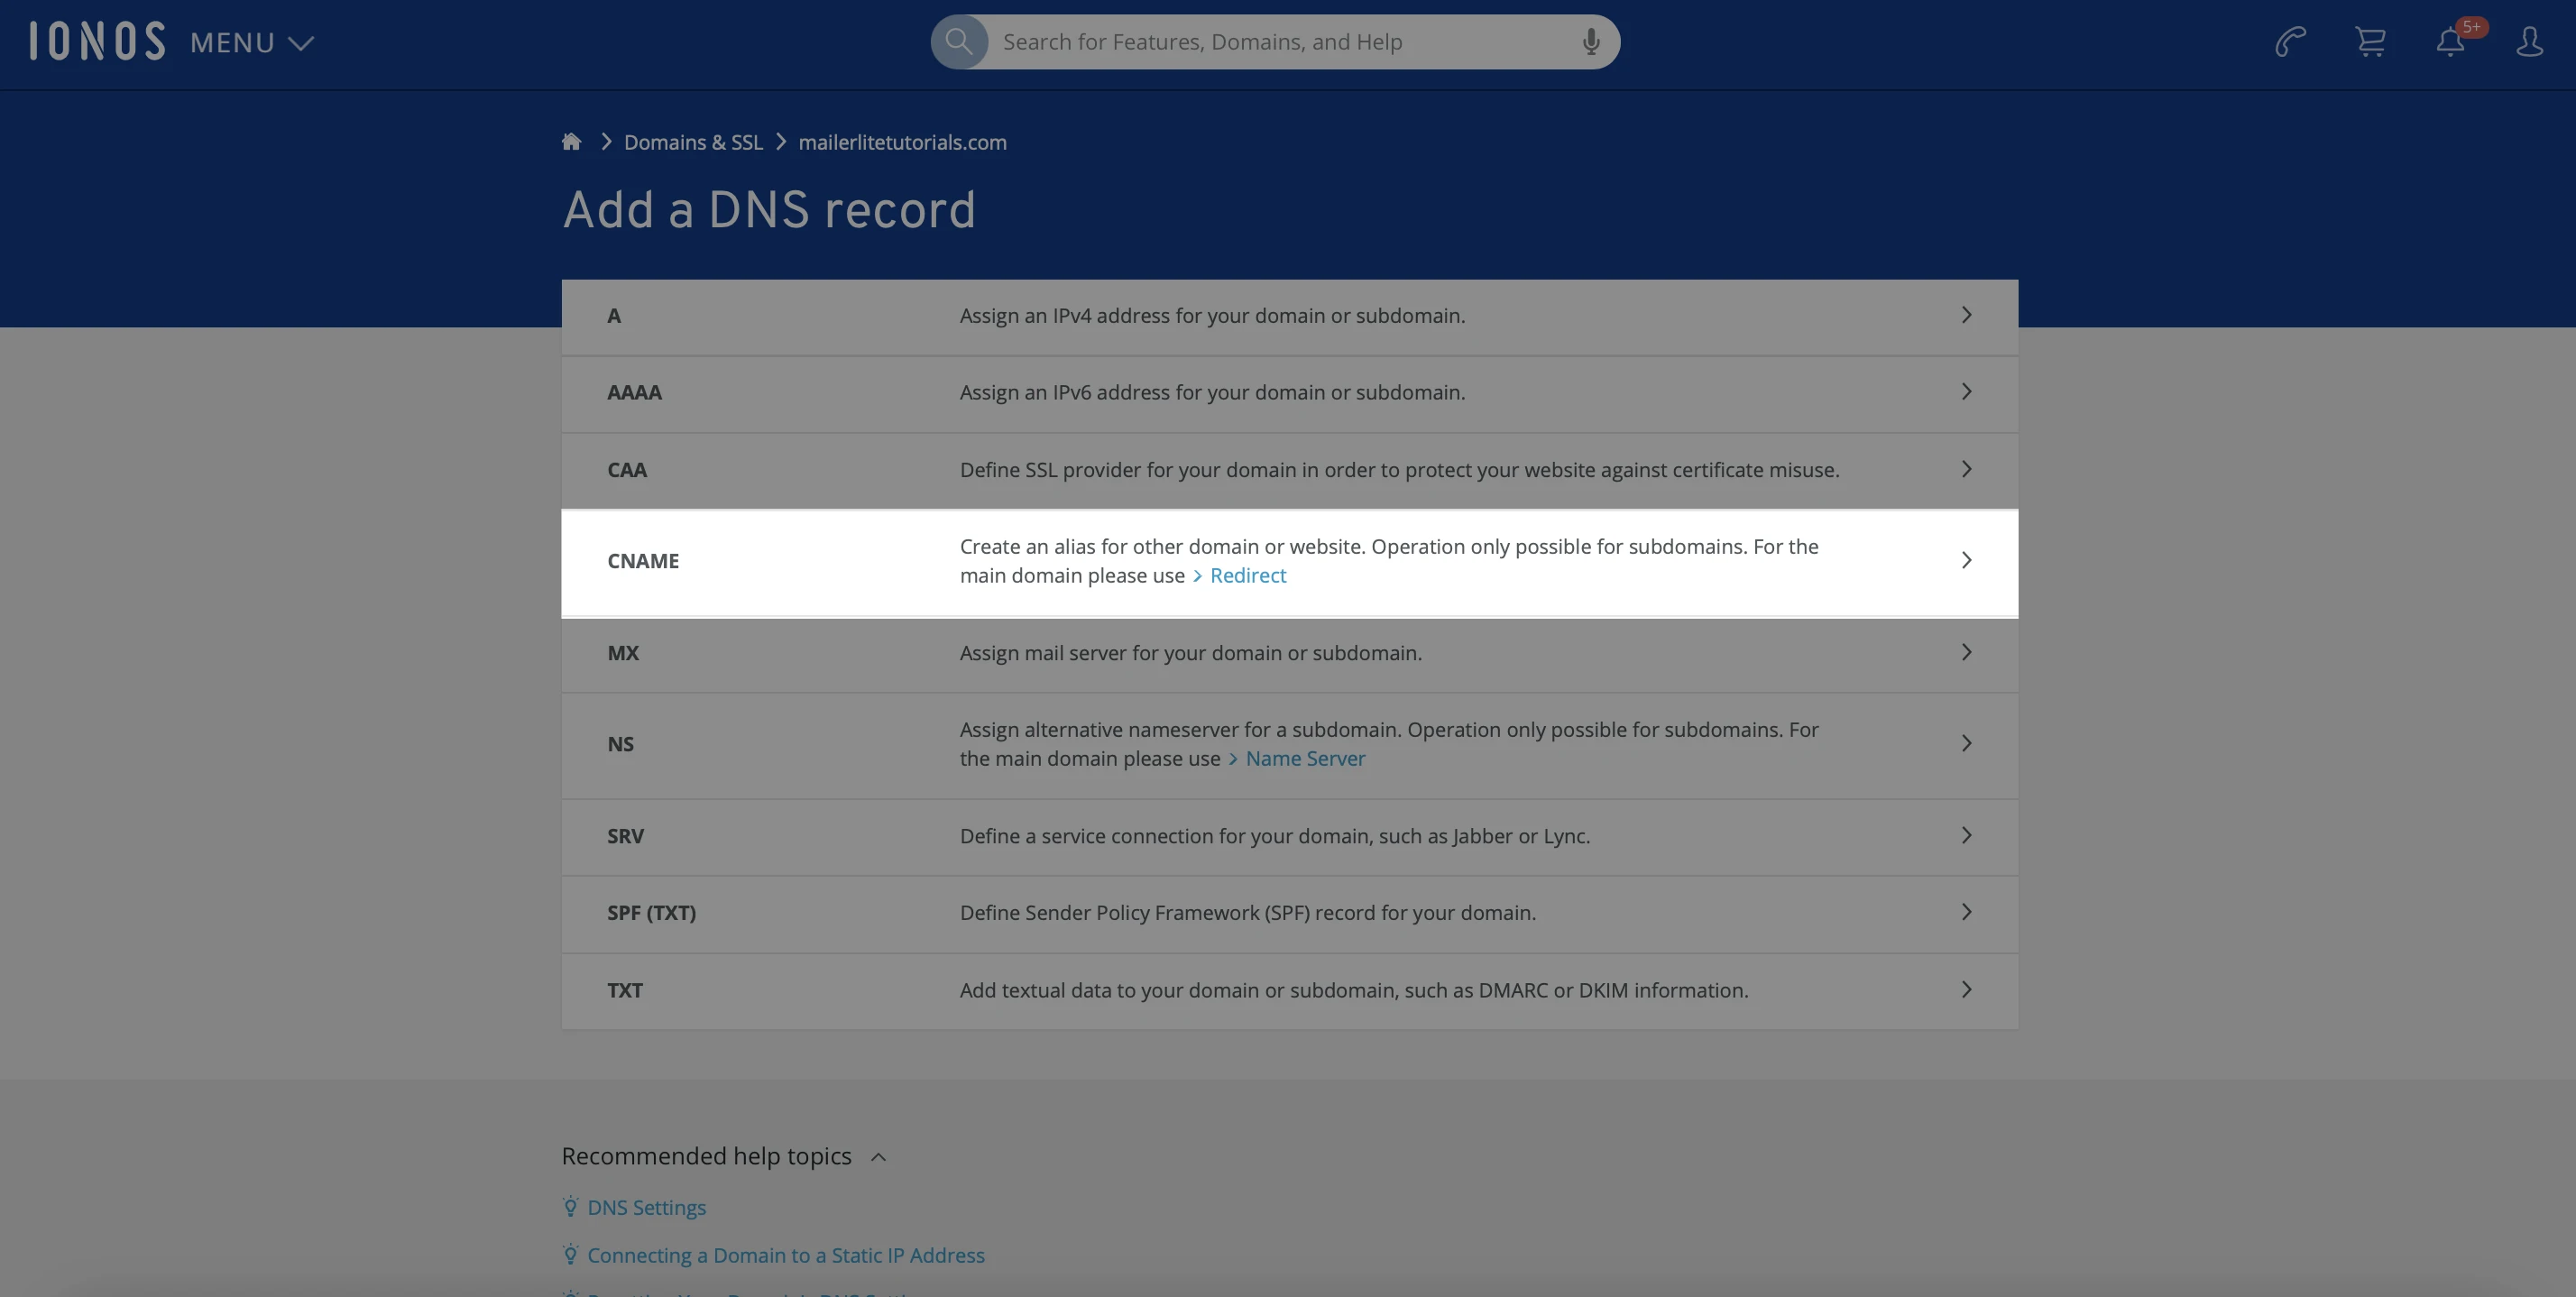
2. Selecciona la opción CNAME.
3. En la sección Nombre de host, introduce el valor que está encima del valor del registro. Se verá como litesrv._domainkey.yourdomain.com - sin embargo, el valor exacto se puede encontrar en tu cuenta MailerLite en Configuración de la cuenta > Dominios > Autenticar o simplemente haciendo clic aquí.
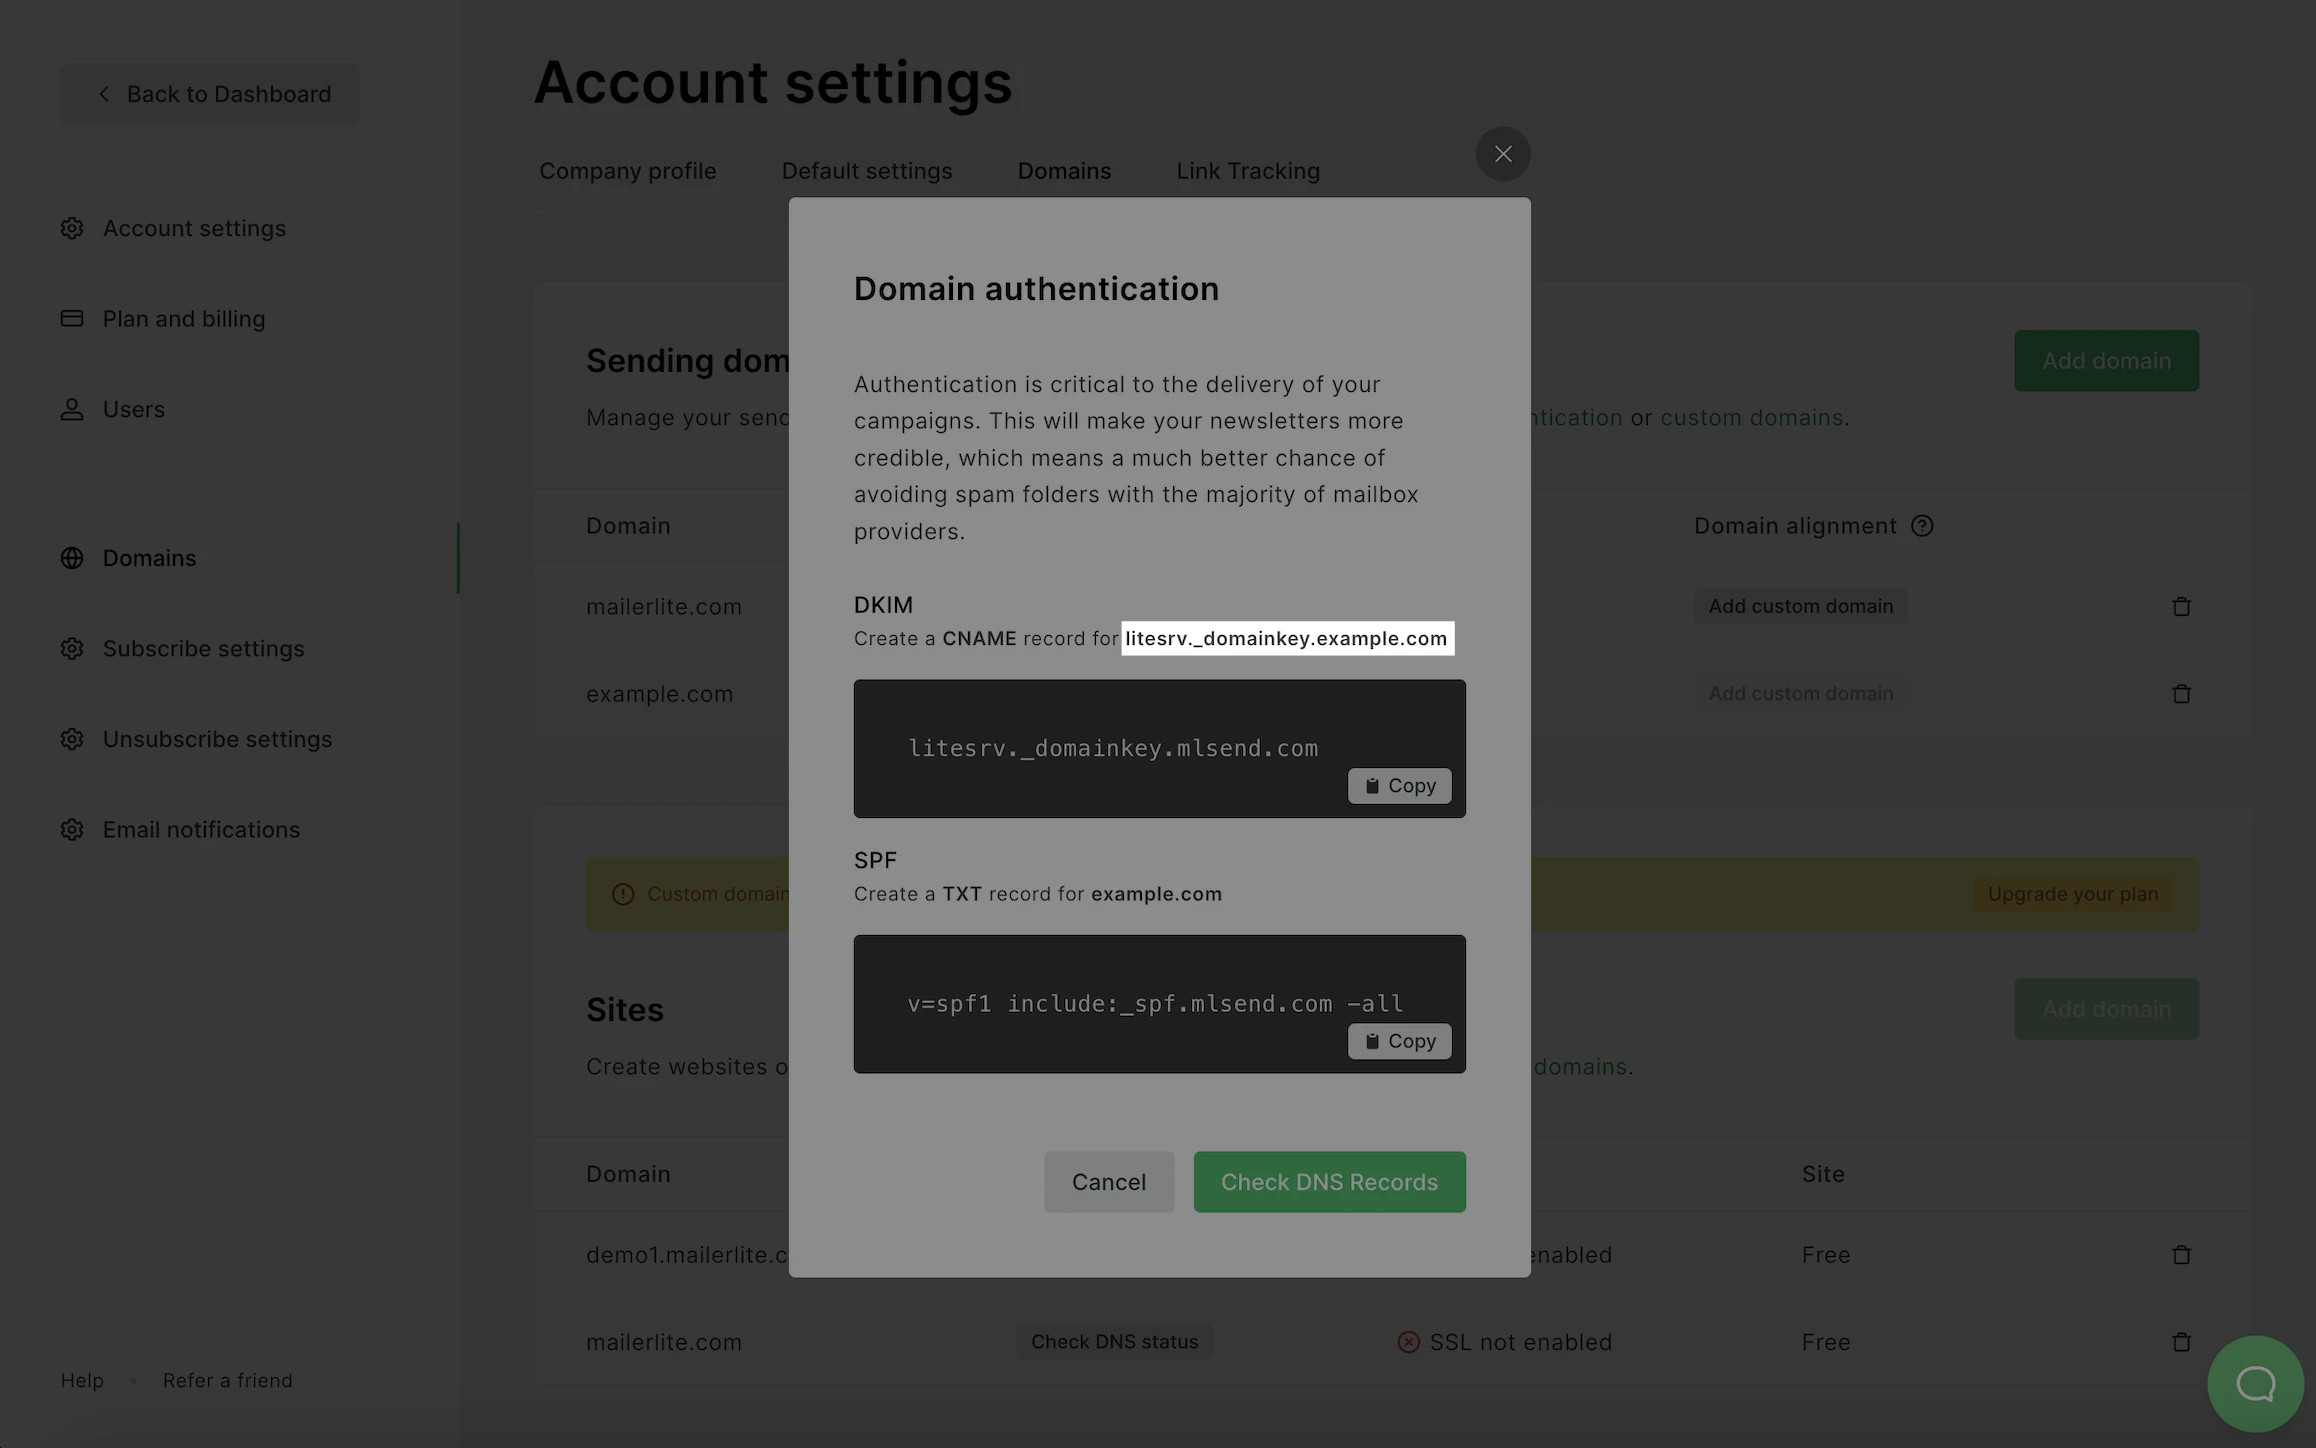
4. En la sección Puntos a, añade el valor situado en el cuadro de texto que puede copiarse directamente de MailerLite.
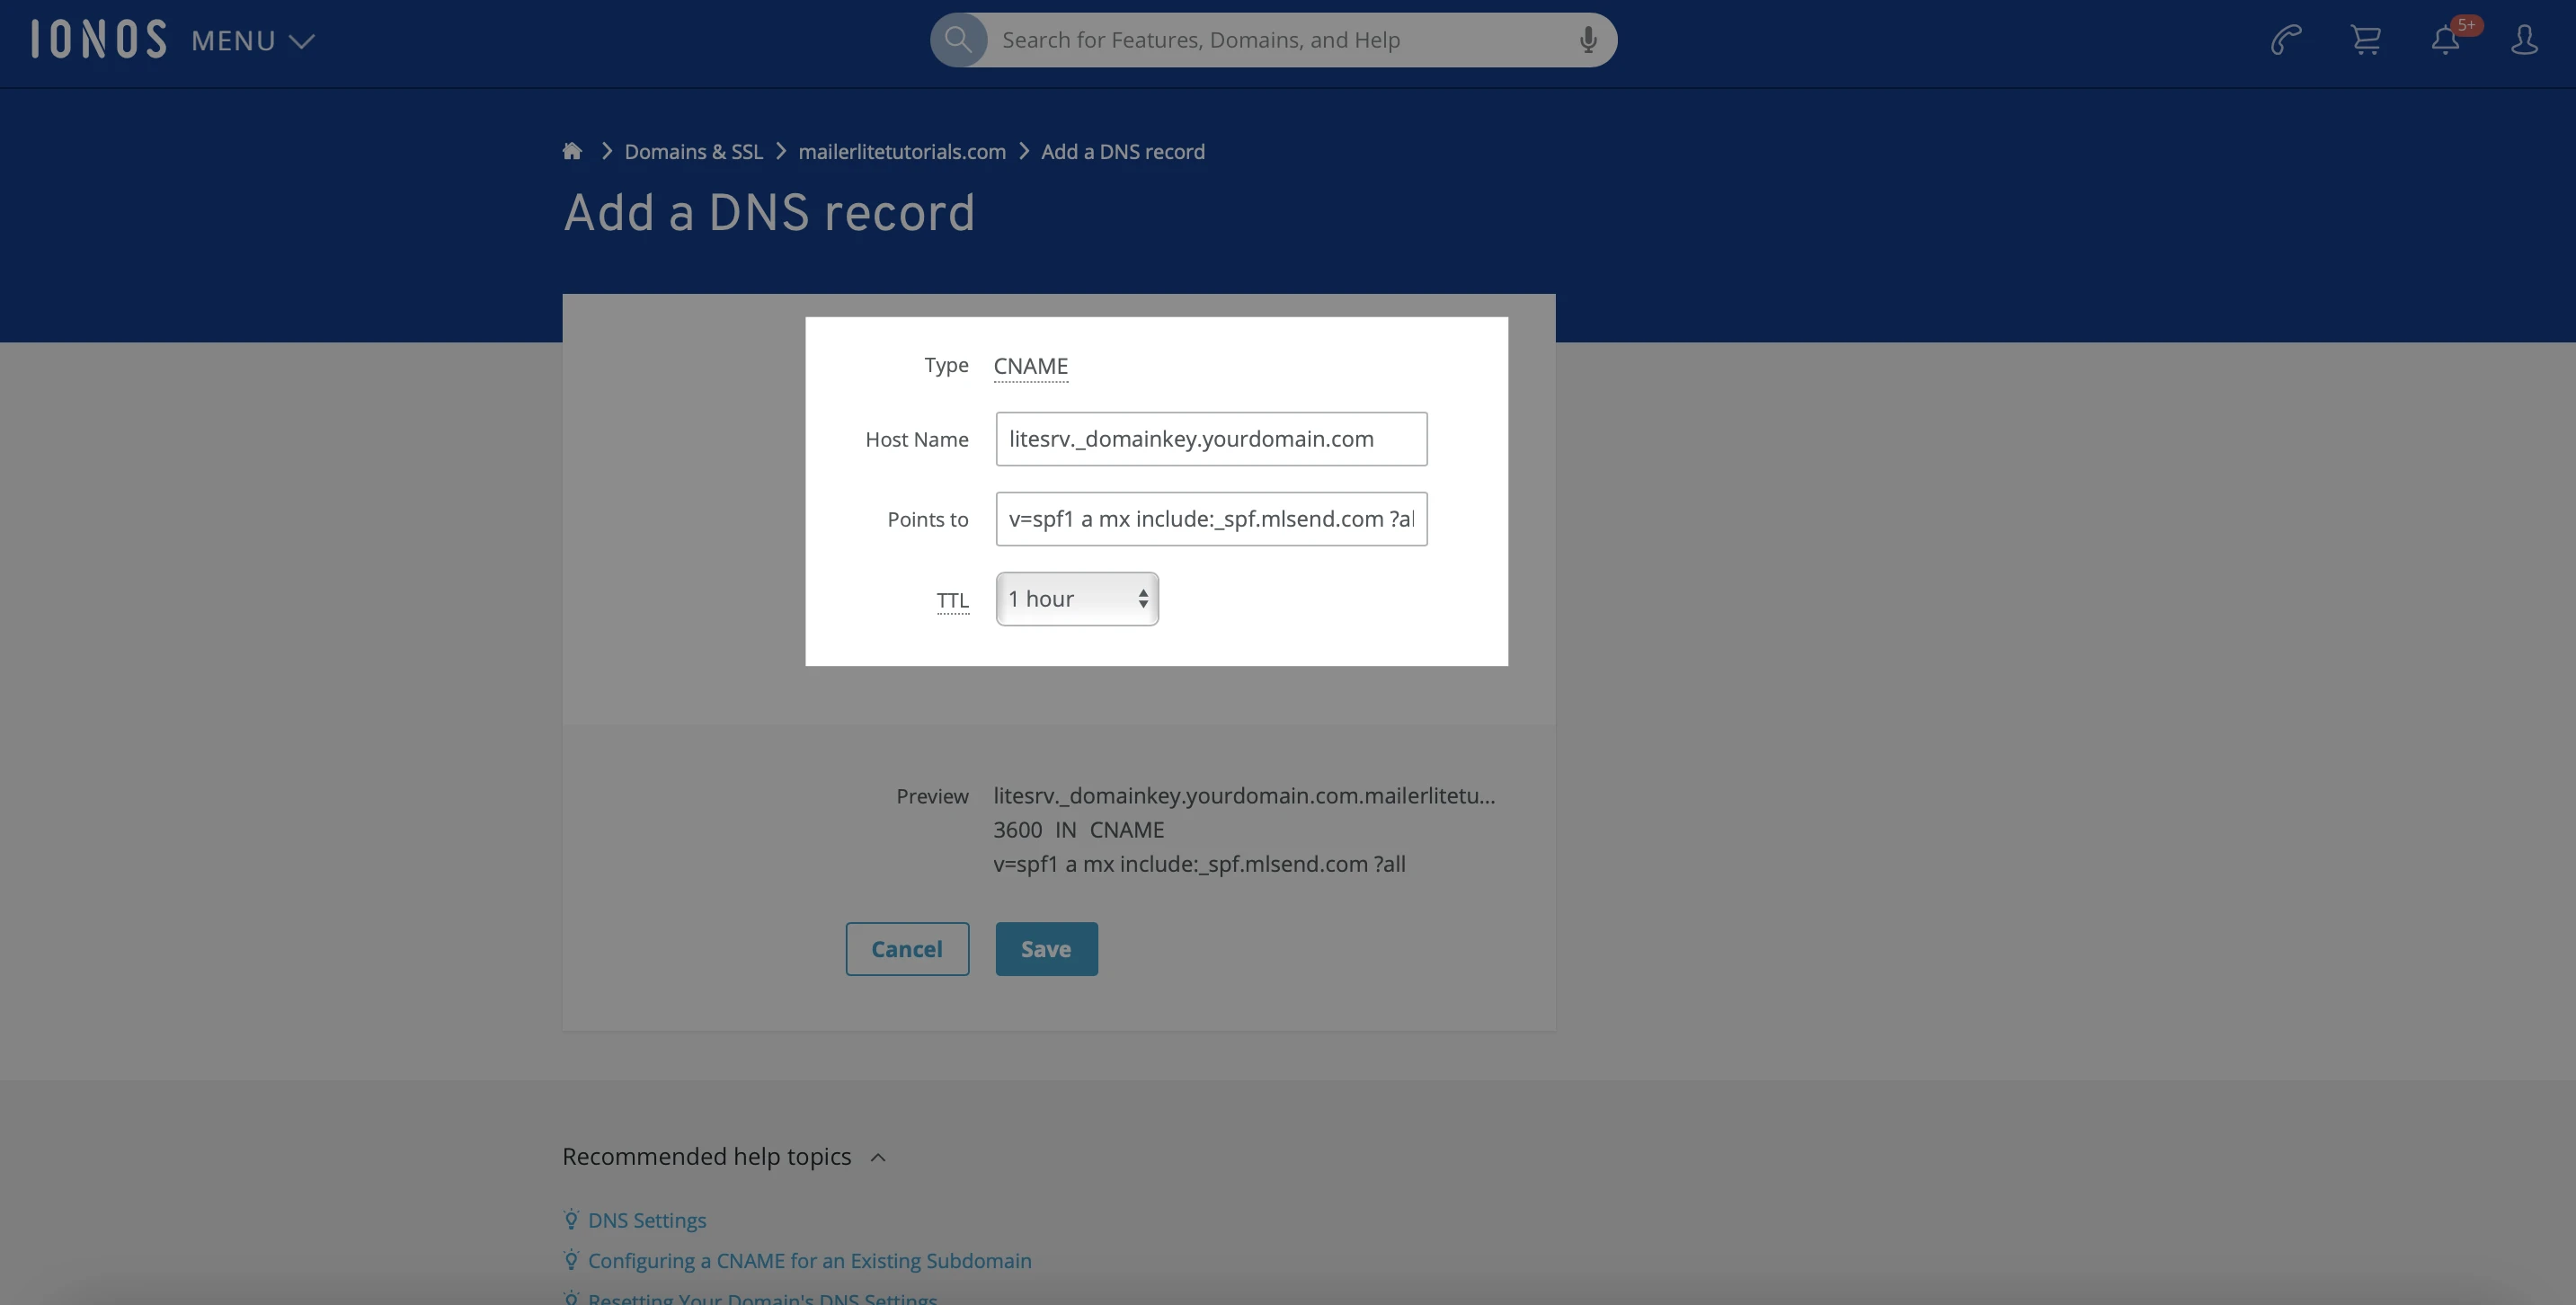
5. Haz clic en Guardar.
Cómo añadir el registro SPF
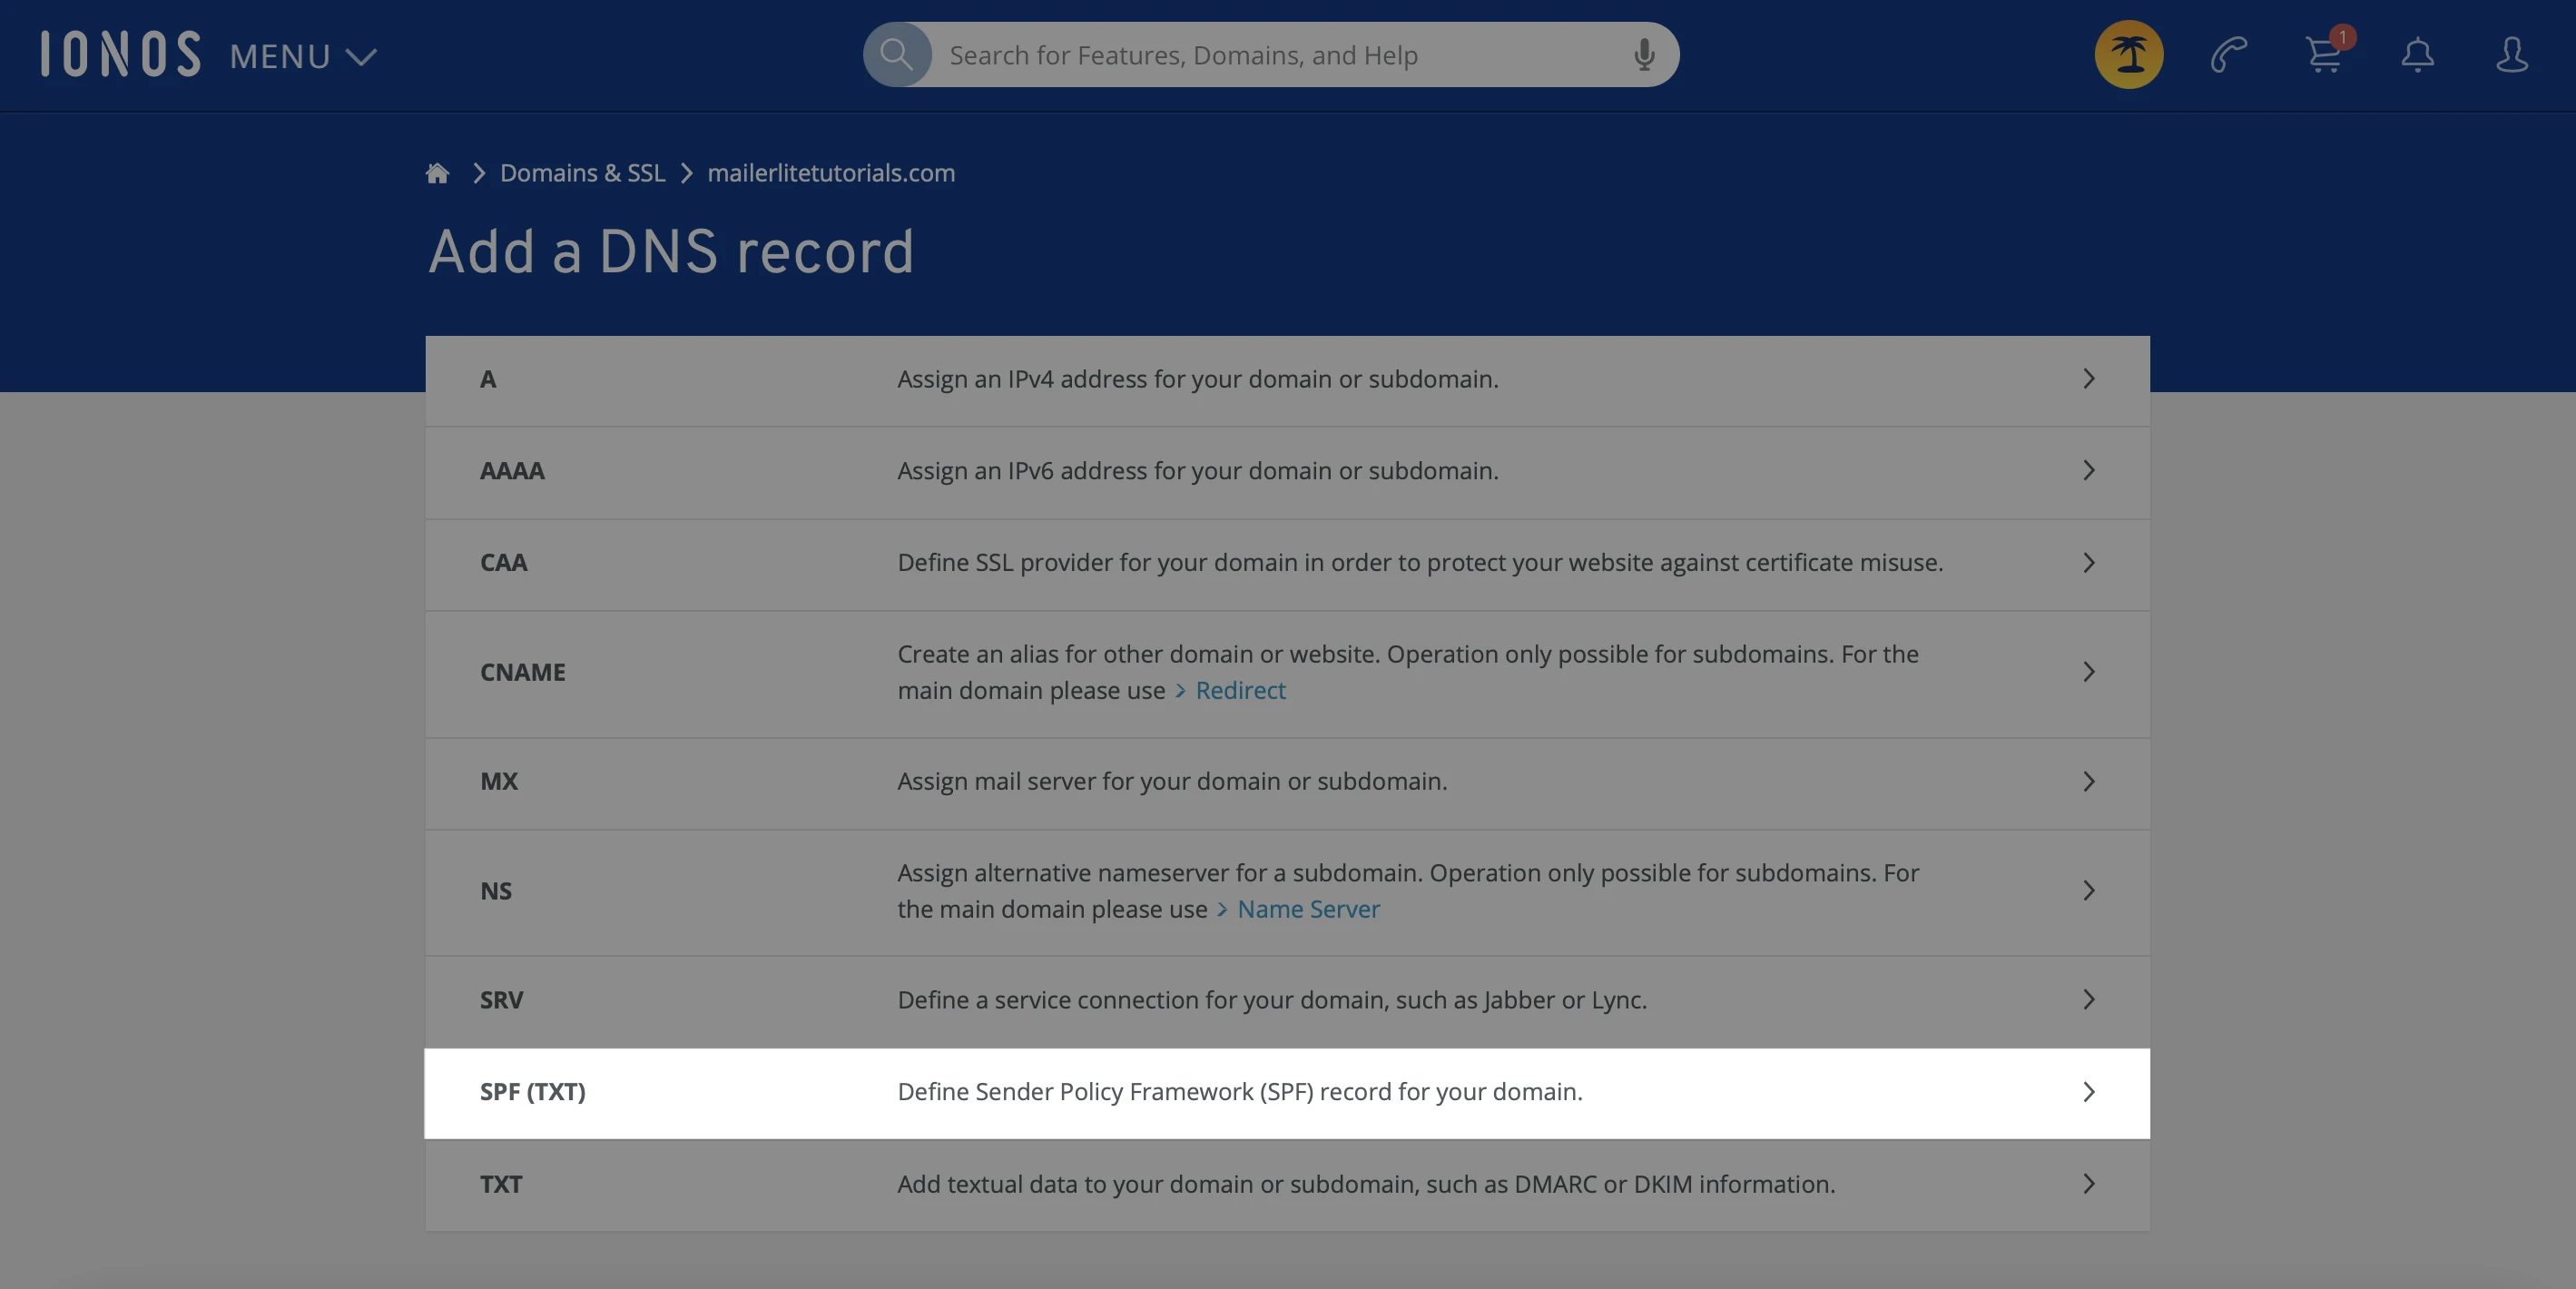
Haz clic de nuevo en Añadir registro.
Selecciona la opción SPF(TXT).
3. En el campo Nombre de host, introduce @.
4. En el campo Valor, pega el valor SPF que aparece en tu cuenta de MailerLite.
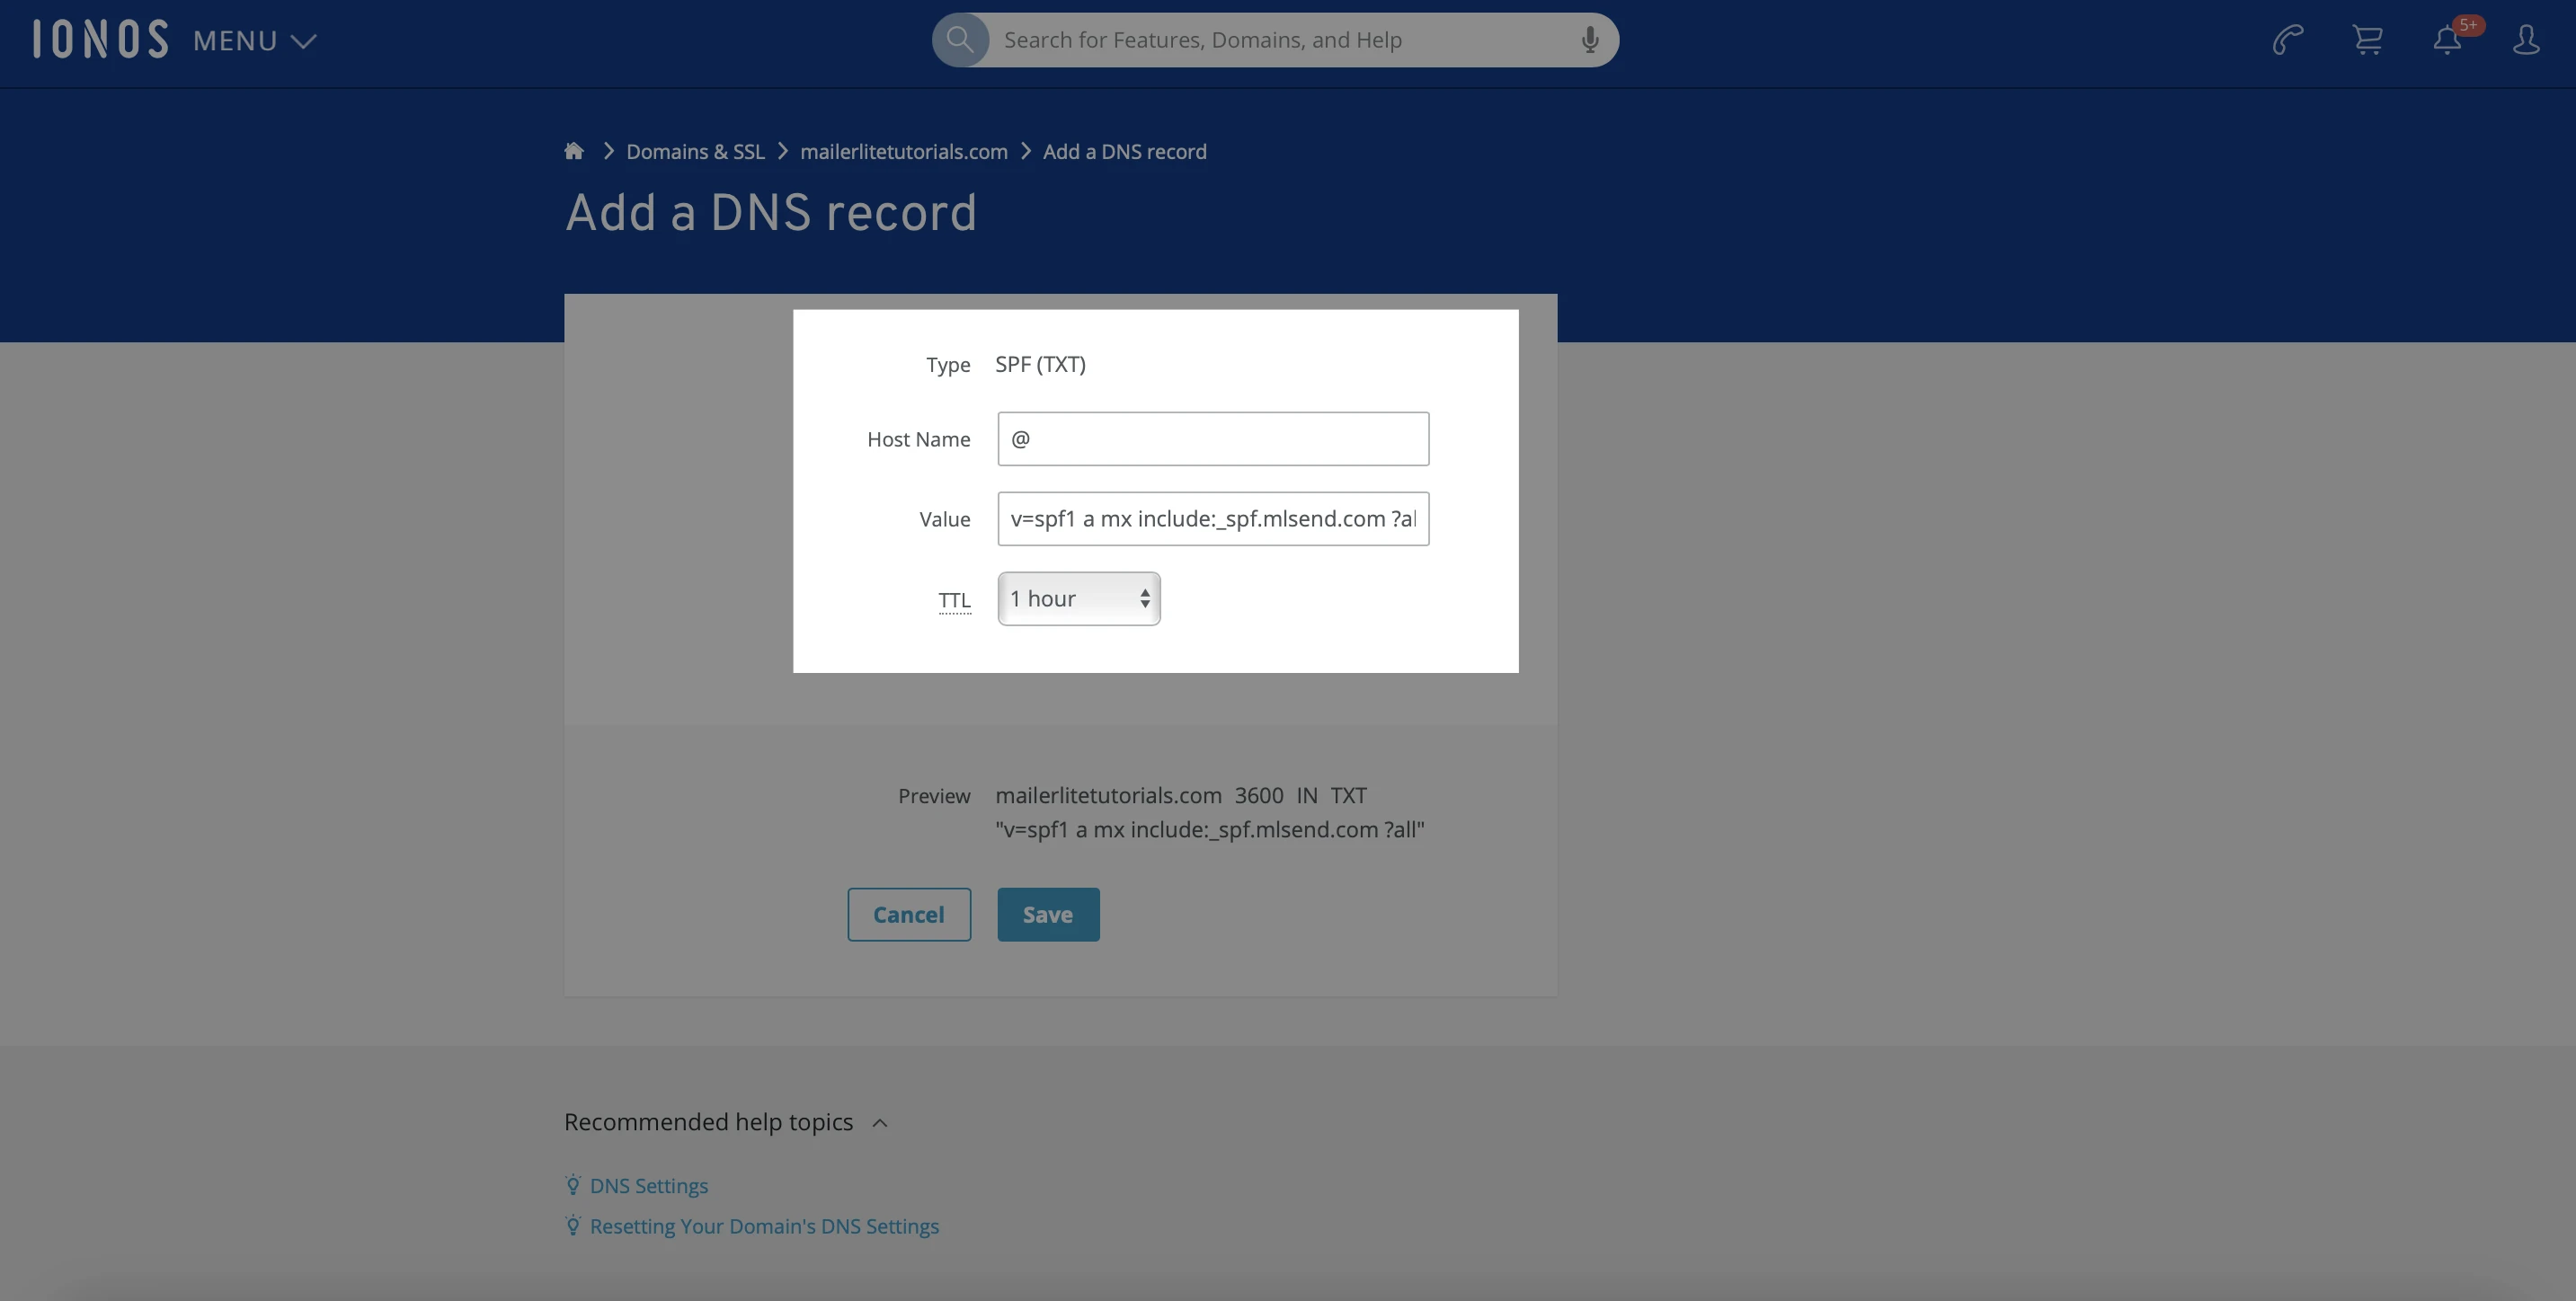
5. Haz clic en Guardar.
Si tienes alguna pregunta, ponte en contacto con nuestro amable equipo de asistencia y estaremos encantados de ayudarte.
Nota: Aunque estamos encantados de ayudar con cualquier problema que se produzca en nuestro extremo, nuestra experiencia puede ser limitada cuando se trata de aplicaciones de terceros, ya que no podemos acceder a tus cuentas con esas herramientas, incluso si están conectadas a tu cuenta de MailerLite. Esto limita la asistencia que podemos ofrecer, por lo que te recomendamos que te pongas en contacto directamente con el equipo de asistencia de esas herramientas de terceros para obtener más ayuda.
En este caso, la página de soporte de IONOS se puede encontrar aquí.