Este artículo va dirigido a aquellos que ya tienen un dominio registrado con éxito en Wix. Necesitarás este registro siempre que utilices el nombre de dominio, incluso cuando lo autentiques con MailerLite.
Cómo autenticar tu dominio
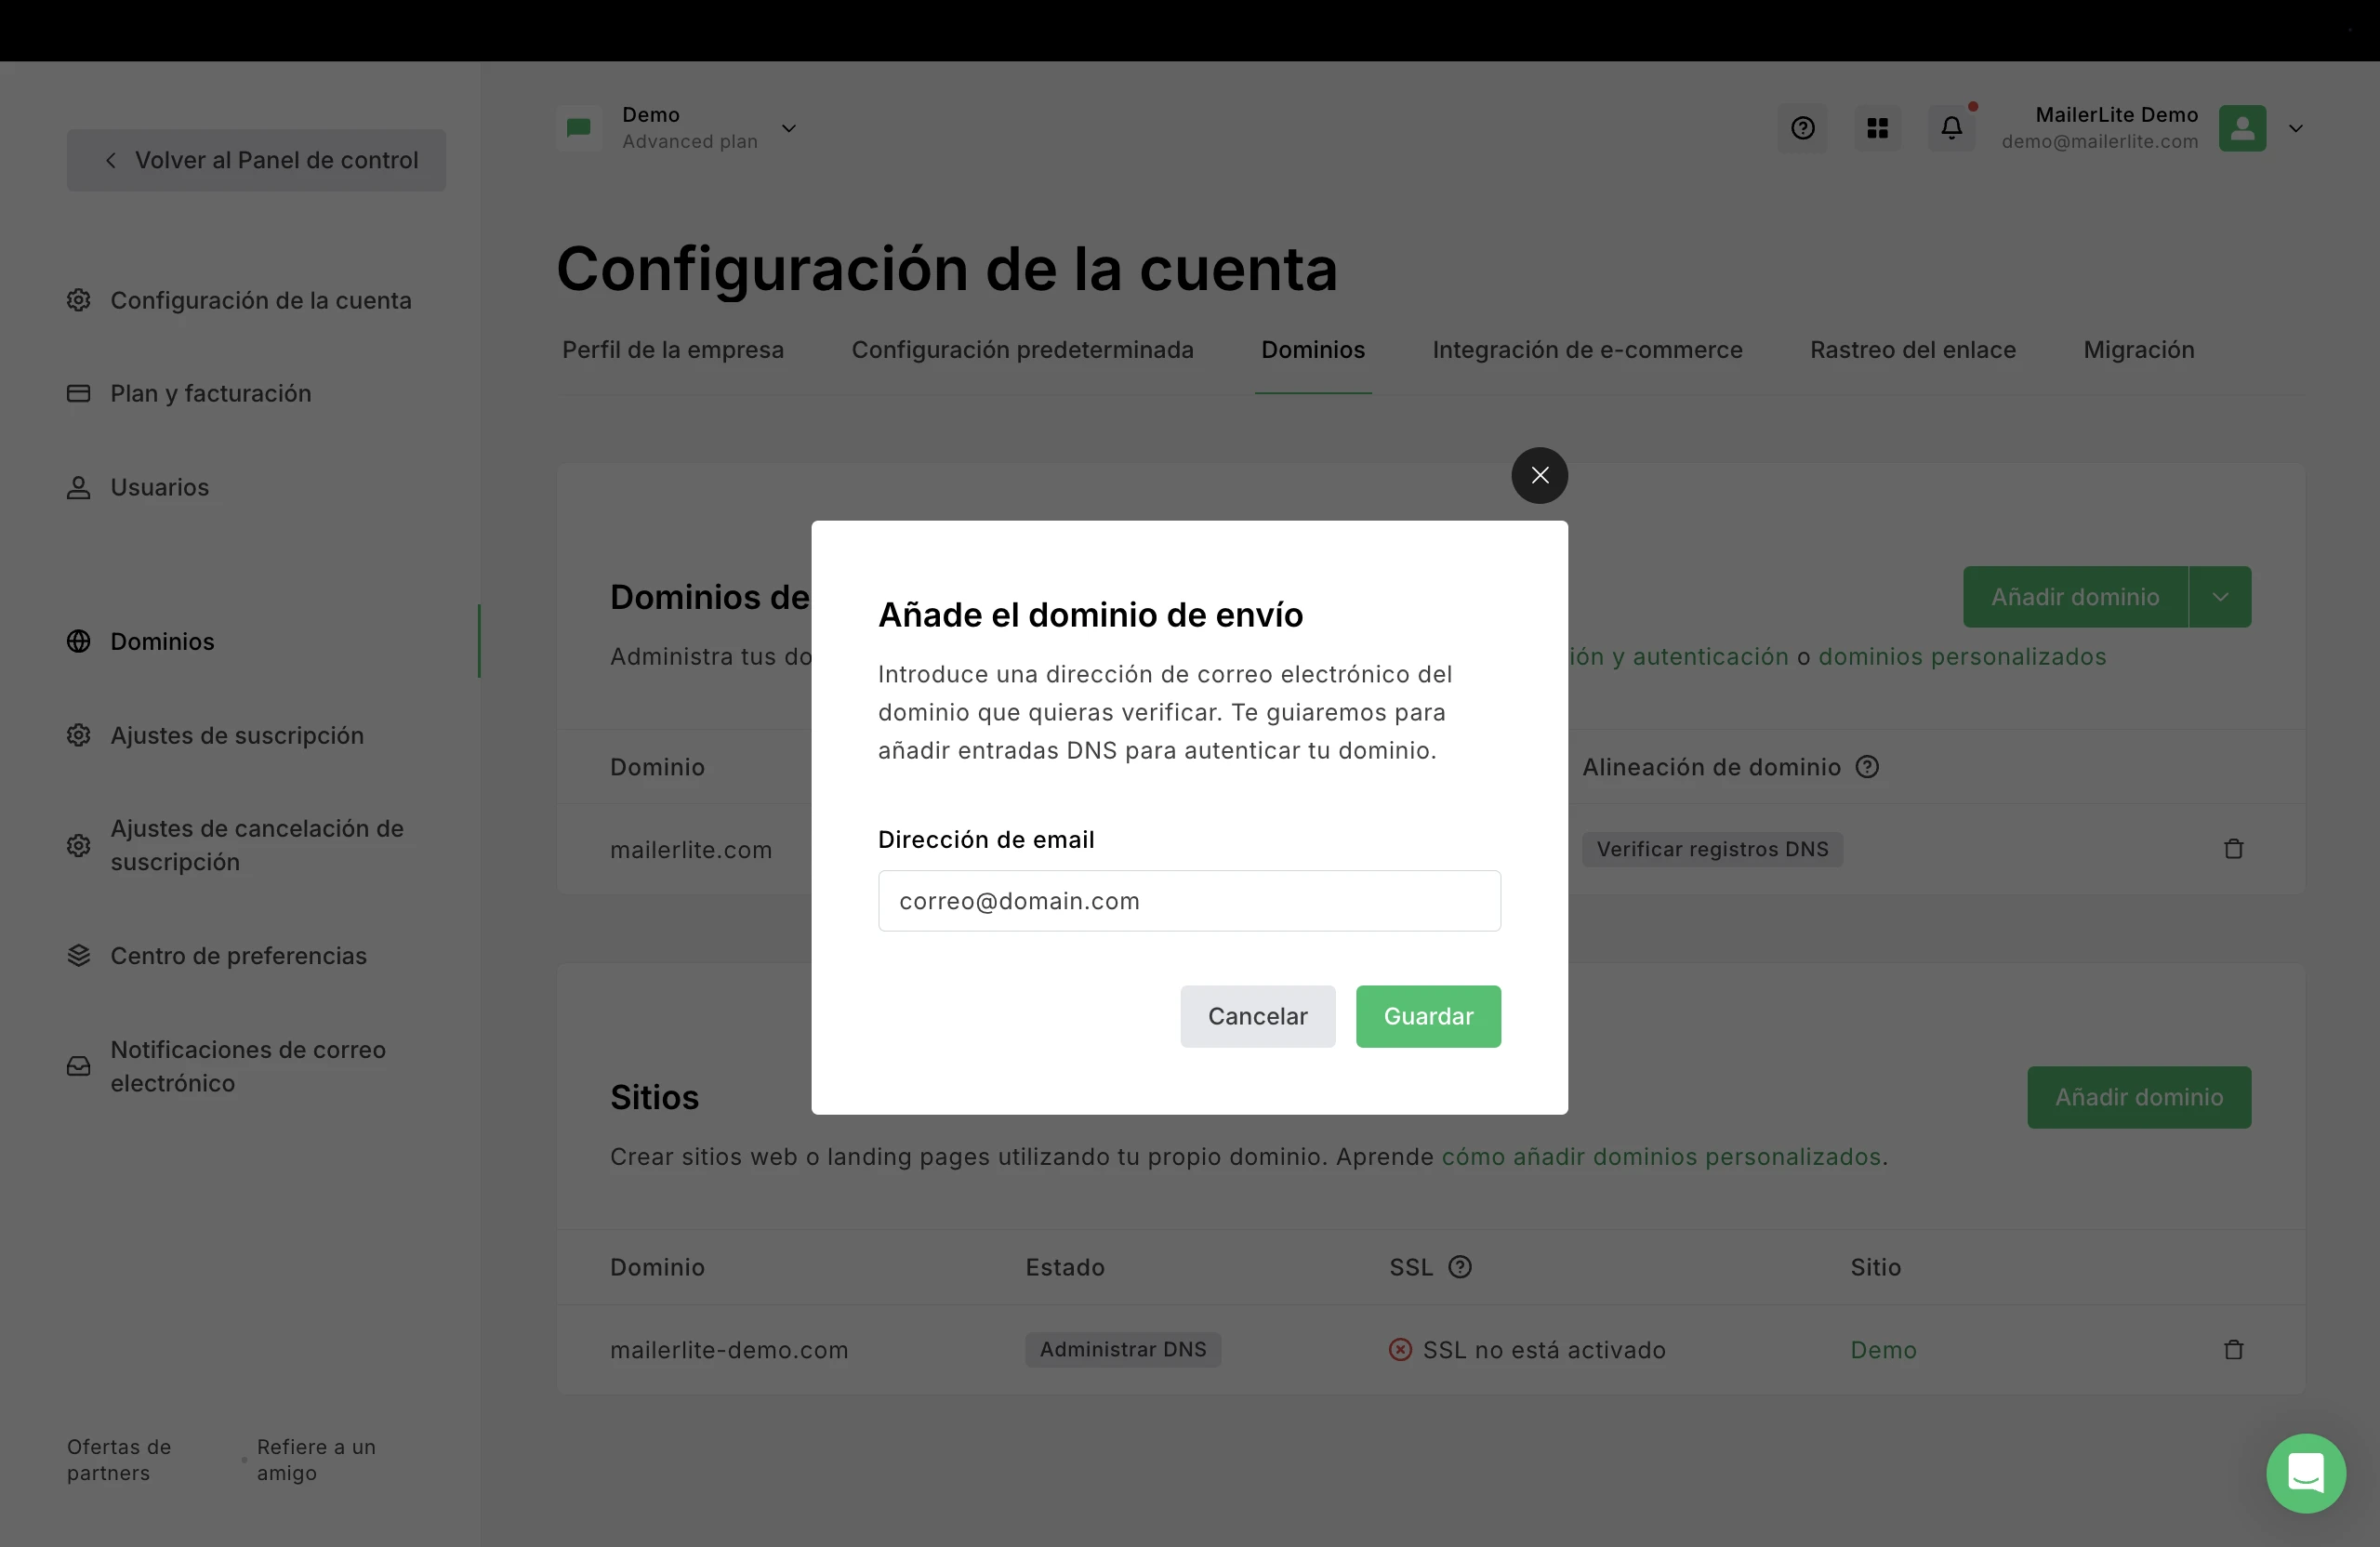
Dirígete a la página de Configuración de la cuenta
Selecciona la pestaña Dominios.
Haz clic en Añadir dominio.
Ingresa la dirección de correo electrónico que deseas usar para enviar correos electrónicos y haz clic en Guardar.
5. Haz clic en Autenticar.
Cómo acceder a la página de la zona DNS en Wix
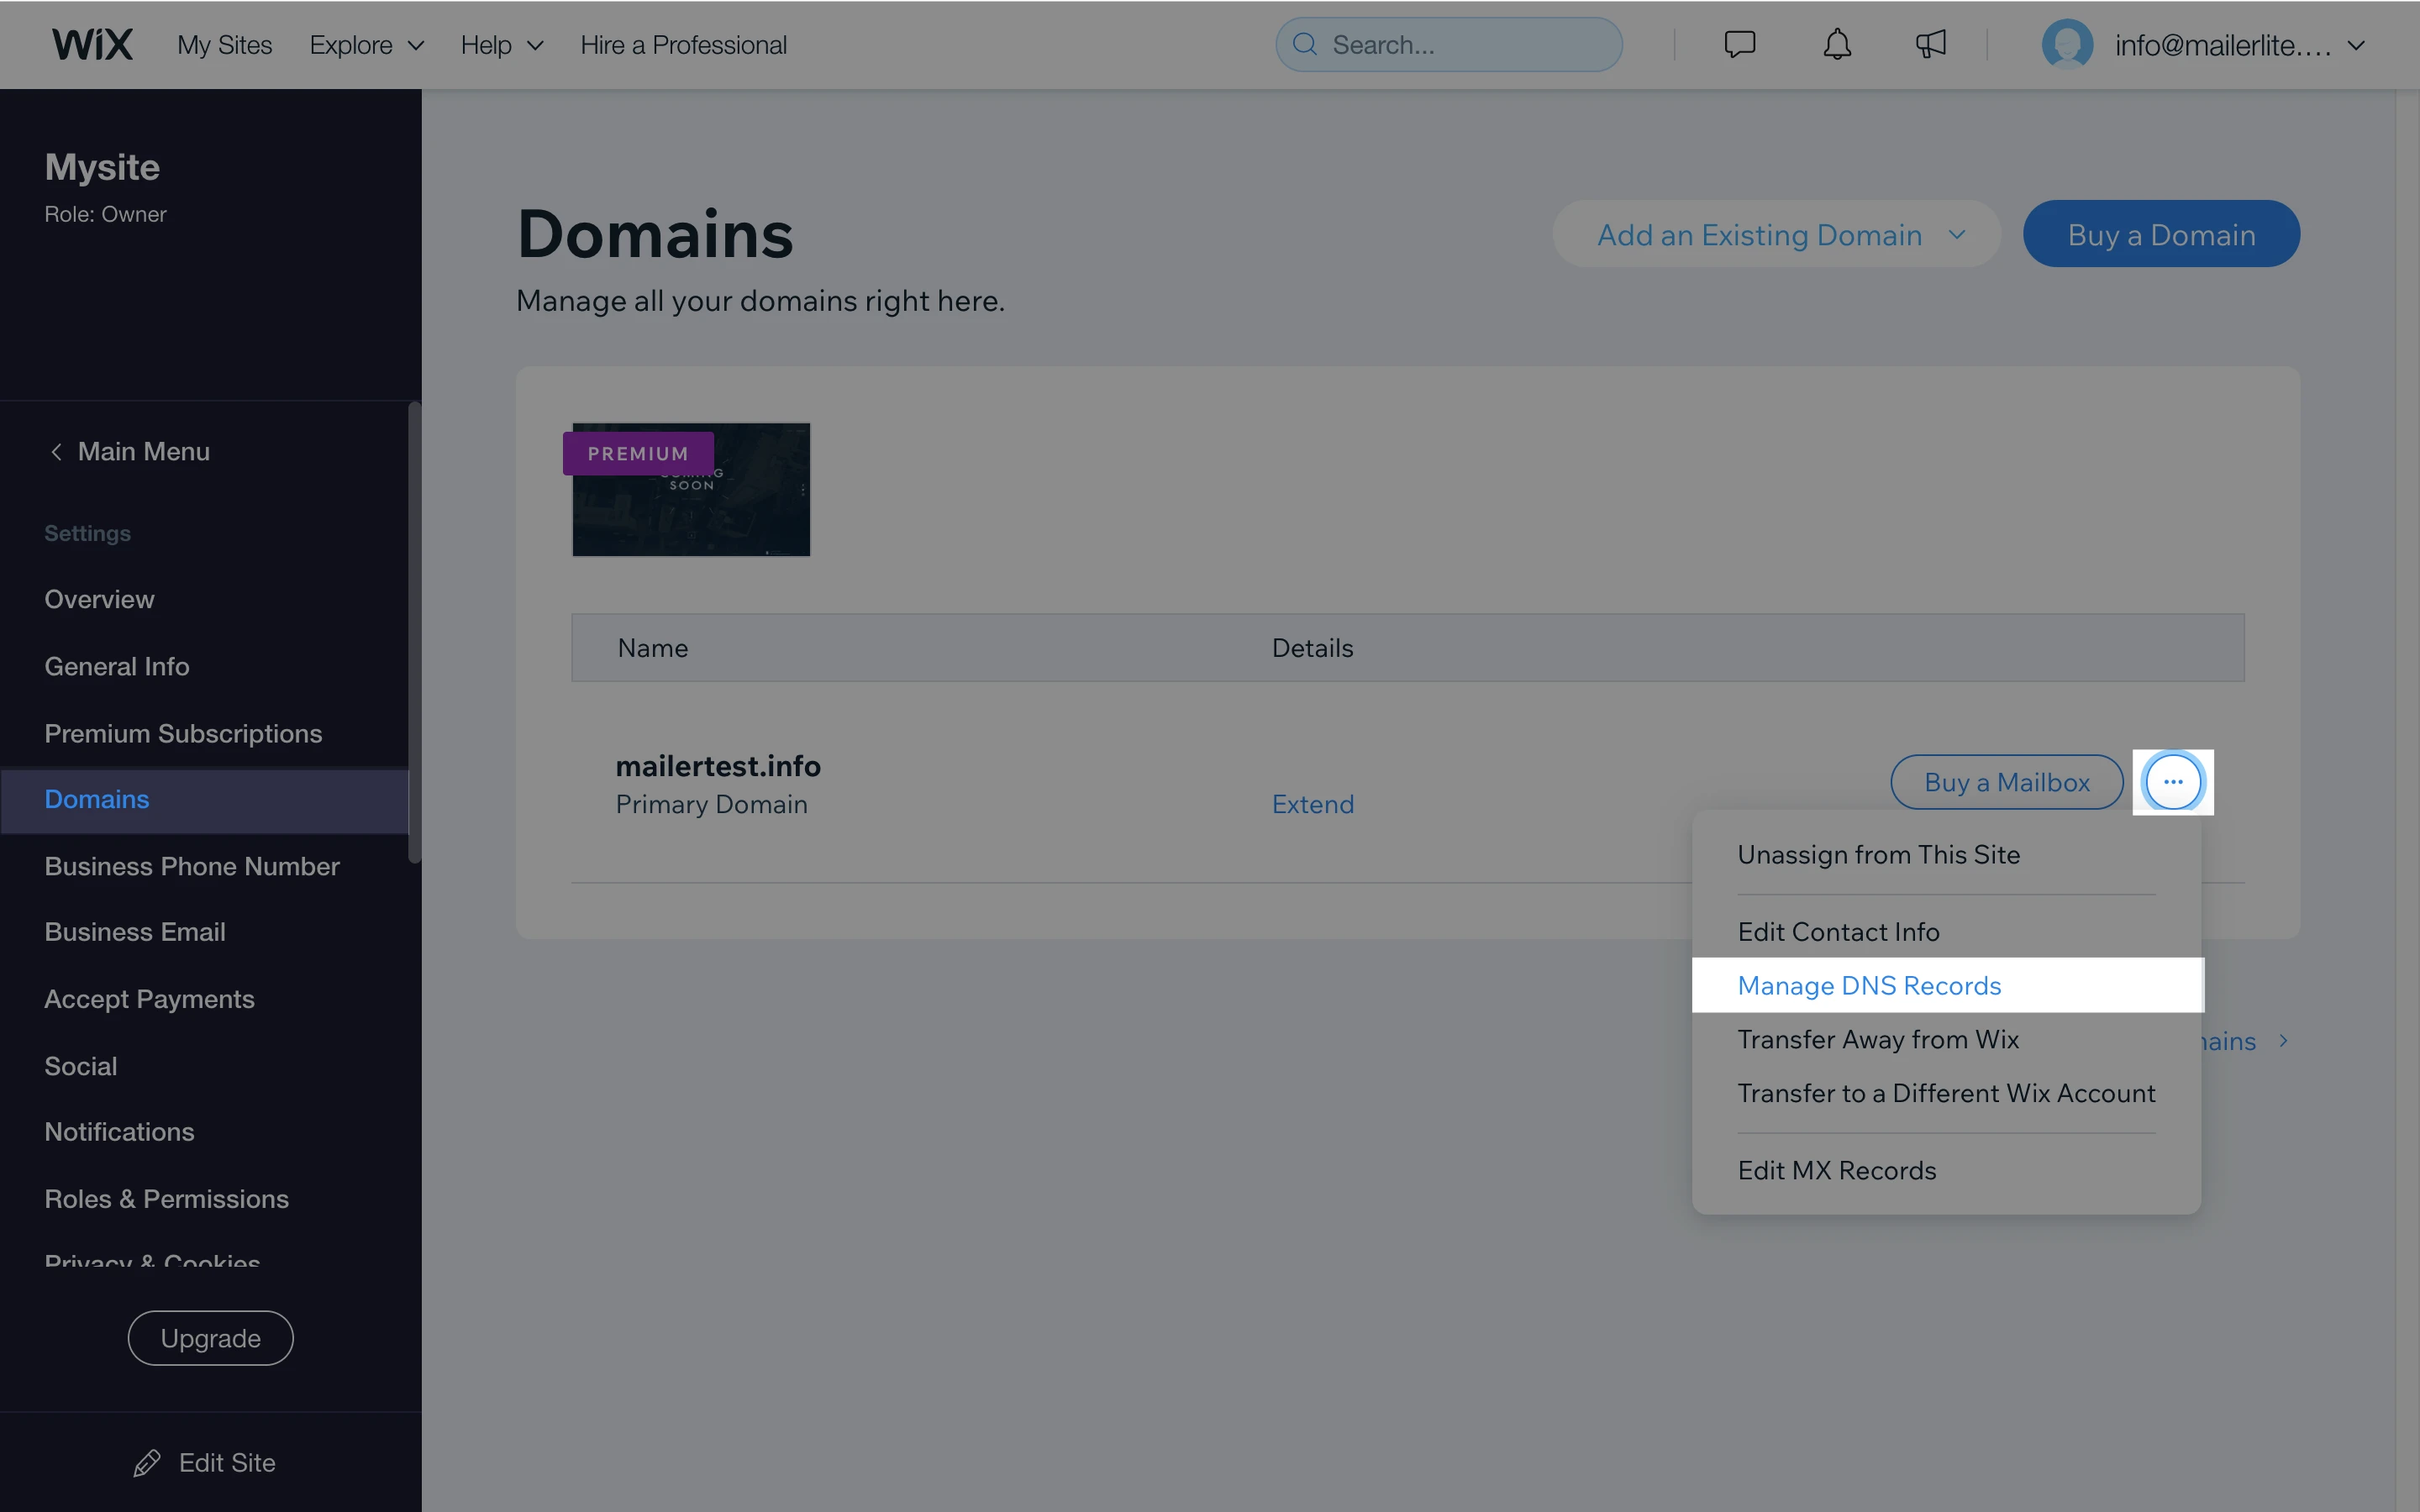
Ve a la página de Wix y navega en la página de tu panel de control. Asegúrate de seleccionar el sitio web que deseas autenticar.
En la barra lateral izquierda, haz clic en Configuración y, a continuación, selecciona Dominios.
En la sección del dominio que deseas autenticar, haz clic en los tres puntos de la derecha y selecciona Administrar registros DNS en el menú desplegable.
Cómo añadir el registro DKIM
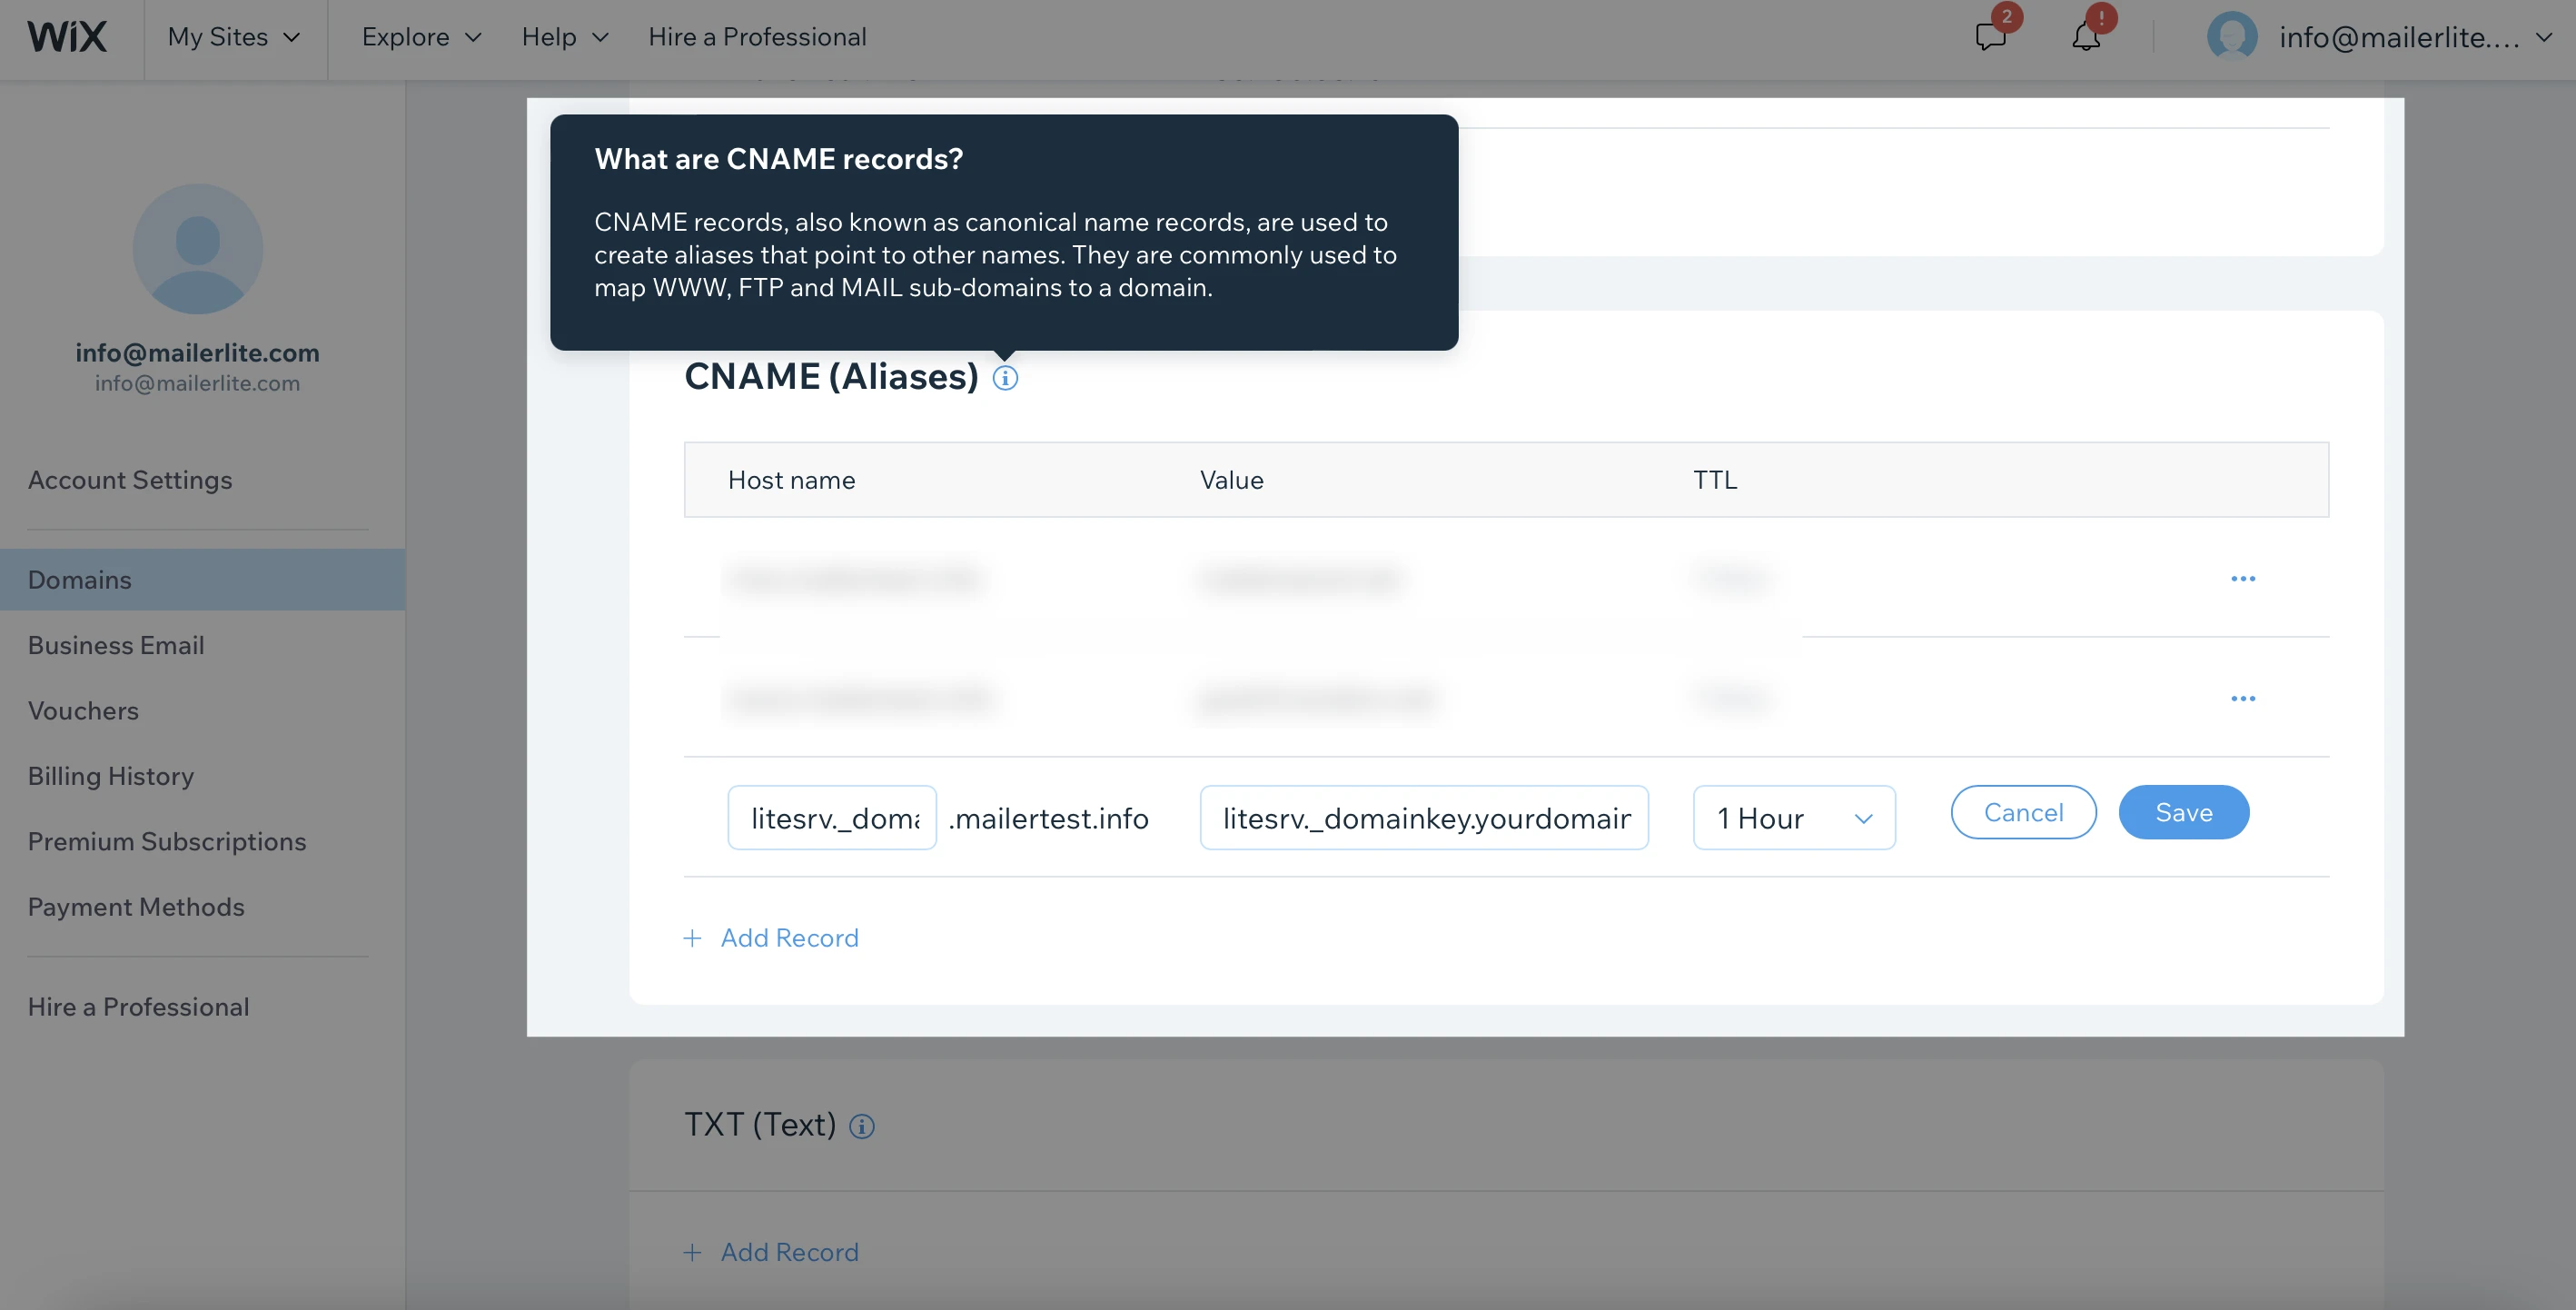
En la página Manage DNS Records (Administrar registros DNS), haz clic en + Add Record (Añadir registro) en la sección CNAME.
En el cuadro de campo Host Name (Nombre) de host, añade sólo litesrv._domainkey . No añadas el nombre de tu dominio, puesto que ya se incluye automáticamente en el registro.
En el cuadro del campo Value (Valor), pega el texto del DKIM Value que recibes en tu cuenta MailerLite.
Deja el TTL en una hora.
Haz clic en Save (Guardar).
Cómo añadir el registro SPF
En la página Manage DNS Records (Administrar registros DNS), haz clic en + Add Record (Añadir registro) en la sección TXT (Texto).
A menos que estés añadiendo un subdominio, deja vacío el campo Host Name (Nombre de host), ya que el nombre de tu dominio ya se incluye automáticamente en el registro.
En el cuadro del campo Value (Valor), pega el texto del SPF Value que recibiste en tu cuenta de MailerLite.
Deja el TTL en una hora.
Haz clic en Save (Guardar).
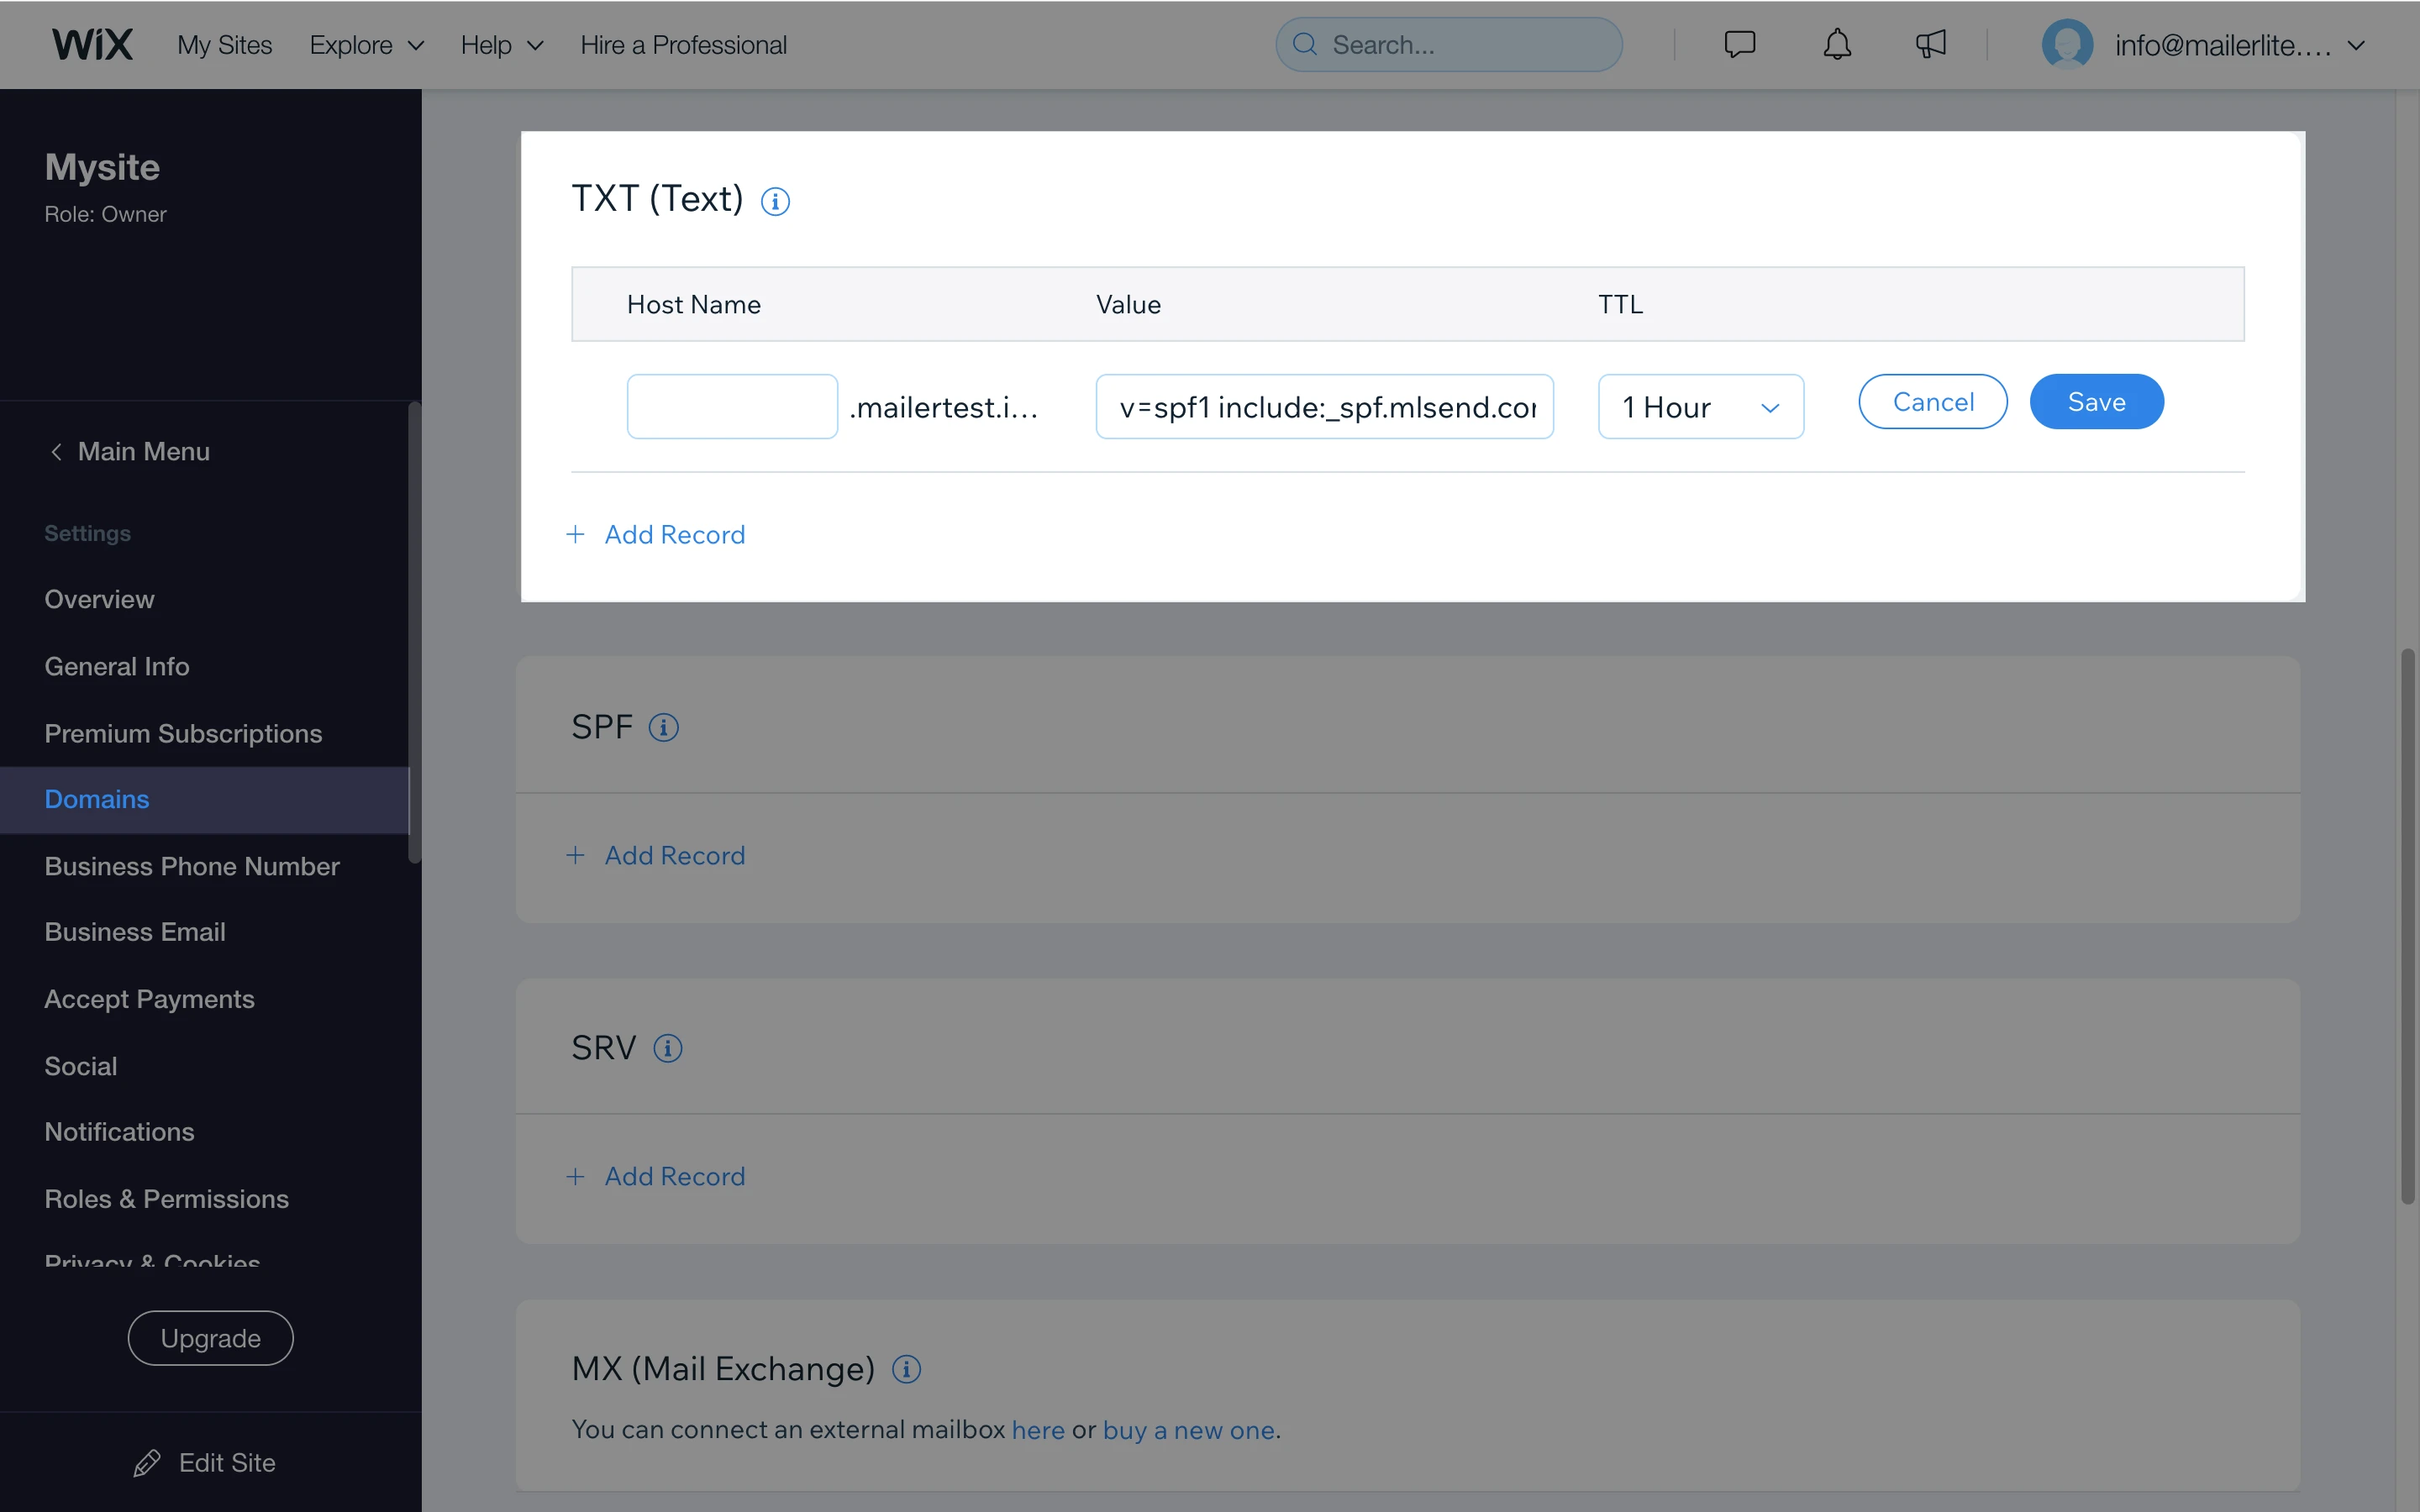
Nota: No añadas el registro SPF en la sección SPF de la página DNS en Wix, de lo contrario nuestro servidor no podrá reconocer el registro SPF.
Cómo obtener la aprobación de los registros DKIM y SPF
Vuelve a tu cuenta MailerLite y ve a Dominios y haz clic en el botón verde Comprobar registros DNS de la ventana de autenticación del dominio. Una vez aprobados ambos registros, tu nuevo dominio aparecerá como Autenticado ✅.
En algunos casos, puede parecer que uno o ambos registros no han sido aprobados aunque toda la información se haya presentado correctamente.
Esto ocurre por 2 razones:
Los servidores pueden tardar hasta 24 horas en actualizar completamente esta información. Sin embargo, la mayoría de las veces se aprueba y se actualiza en cuestión de minutos.
Hay que volver a comprobar y actualizar algunos datos.
Para soluciones a problemas comunes, consulta nuestra guía Resolución de problemas: Autenticación de dominio.
Si tienes alguna pregunta, contacta a nuestro amigable equipo de soporte y con gusto te asistiremos.
Por favor, ten en cuenta: Si bien estamos encantados de ayudar con cualquier problema que ocurra en nuestro lado, nuestra experiencia puede ser limitada cuando se trata de aplicaciones de terceros, ya que no podemos acceder a tus cuentas con esas herramientas, incluso si están conectadas a tu cuenta de MailerLite. Esto limita el soporte que podemos ofrecer, por lo que te animamos a que contactes directamente al equipo de soporte de esas herramientas de terceros para obtener una mejor asistencia.
En este caso, la página de soporte de Godaddy se puede encontrar aquí.