Note: If you're a Legacy (Classic) user, please log in to your account to access the dedicated Legacy (Classic) Help Center.
This article is meant for those who already have a domain successfully registered with Wix. You'll need this registration as long as you use the domain name, even when you authenticate it with MailerLite.
How to add a domain to your account
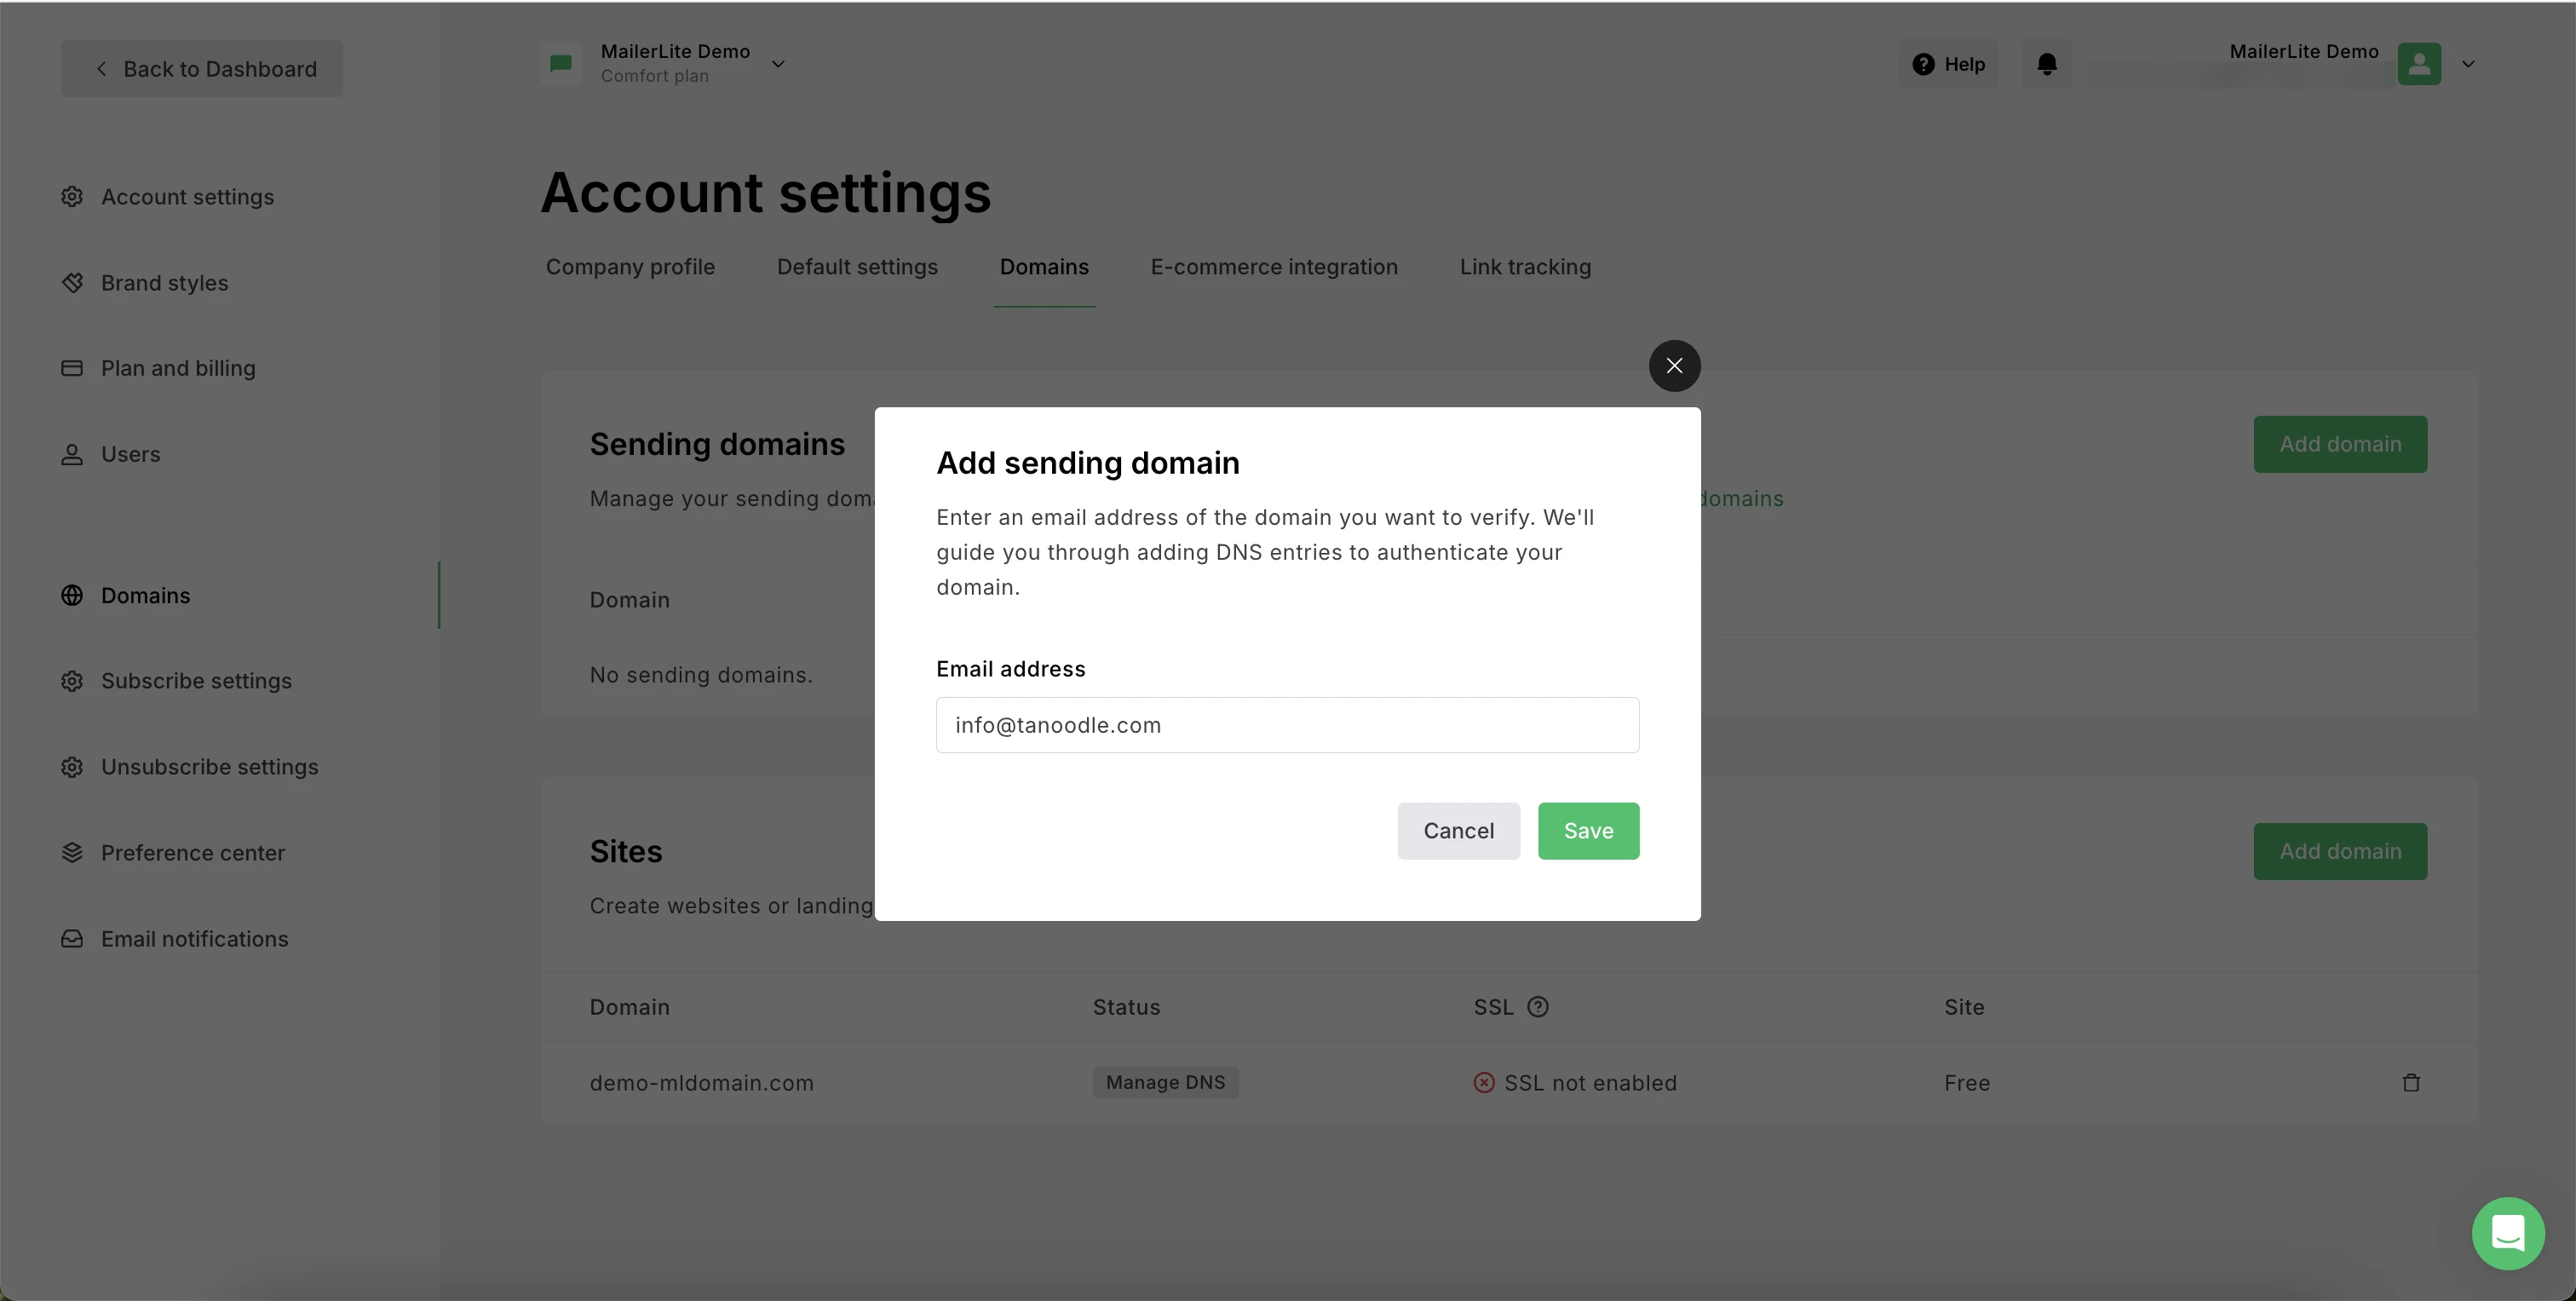
Head to the Account settings page and click the Domains tab.
Under Sending domains, click Add domain.
Enter the email address you wish to use to send emails from and click Save.
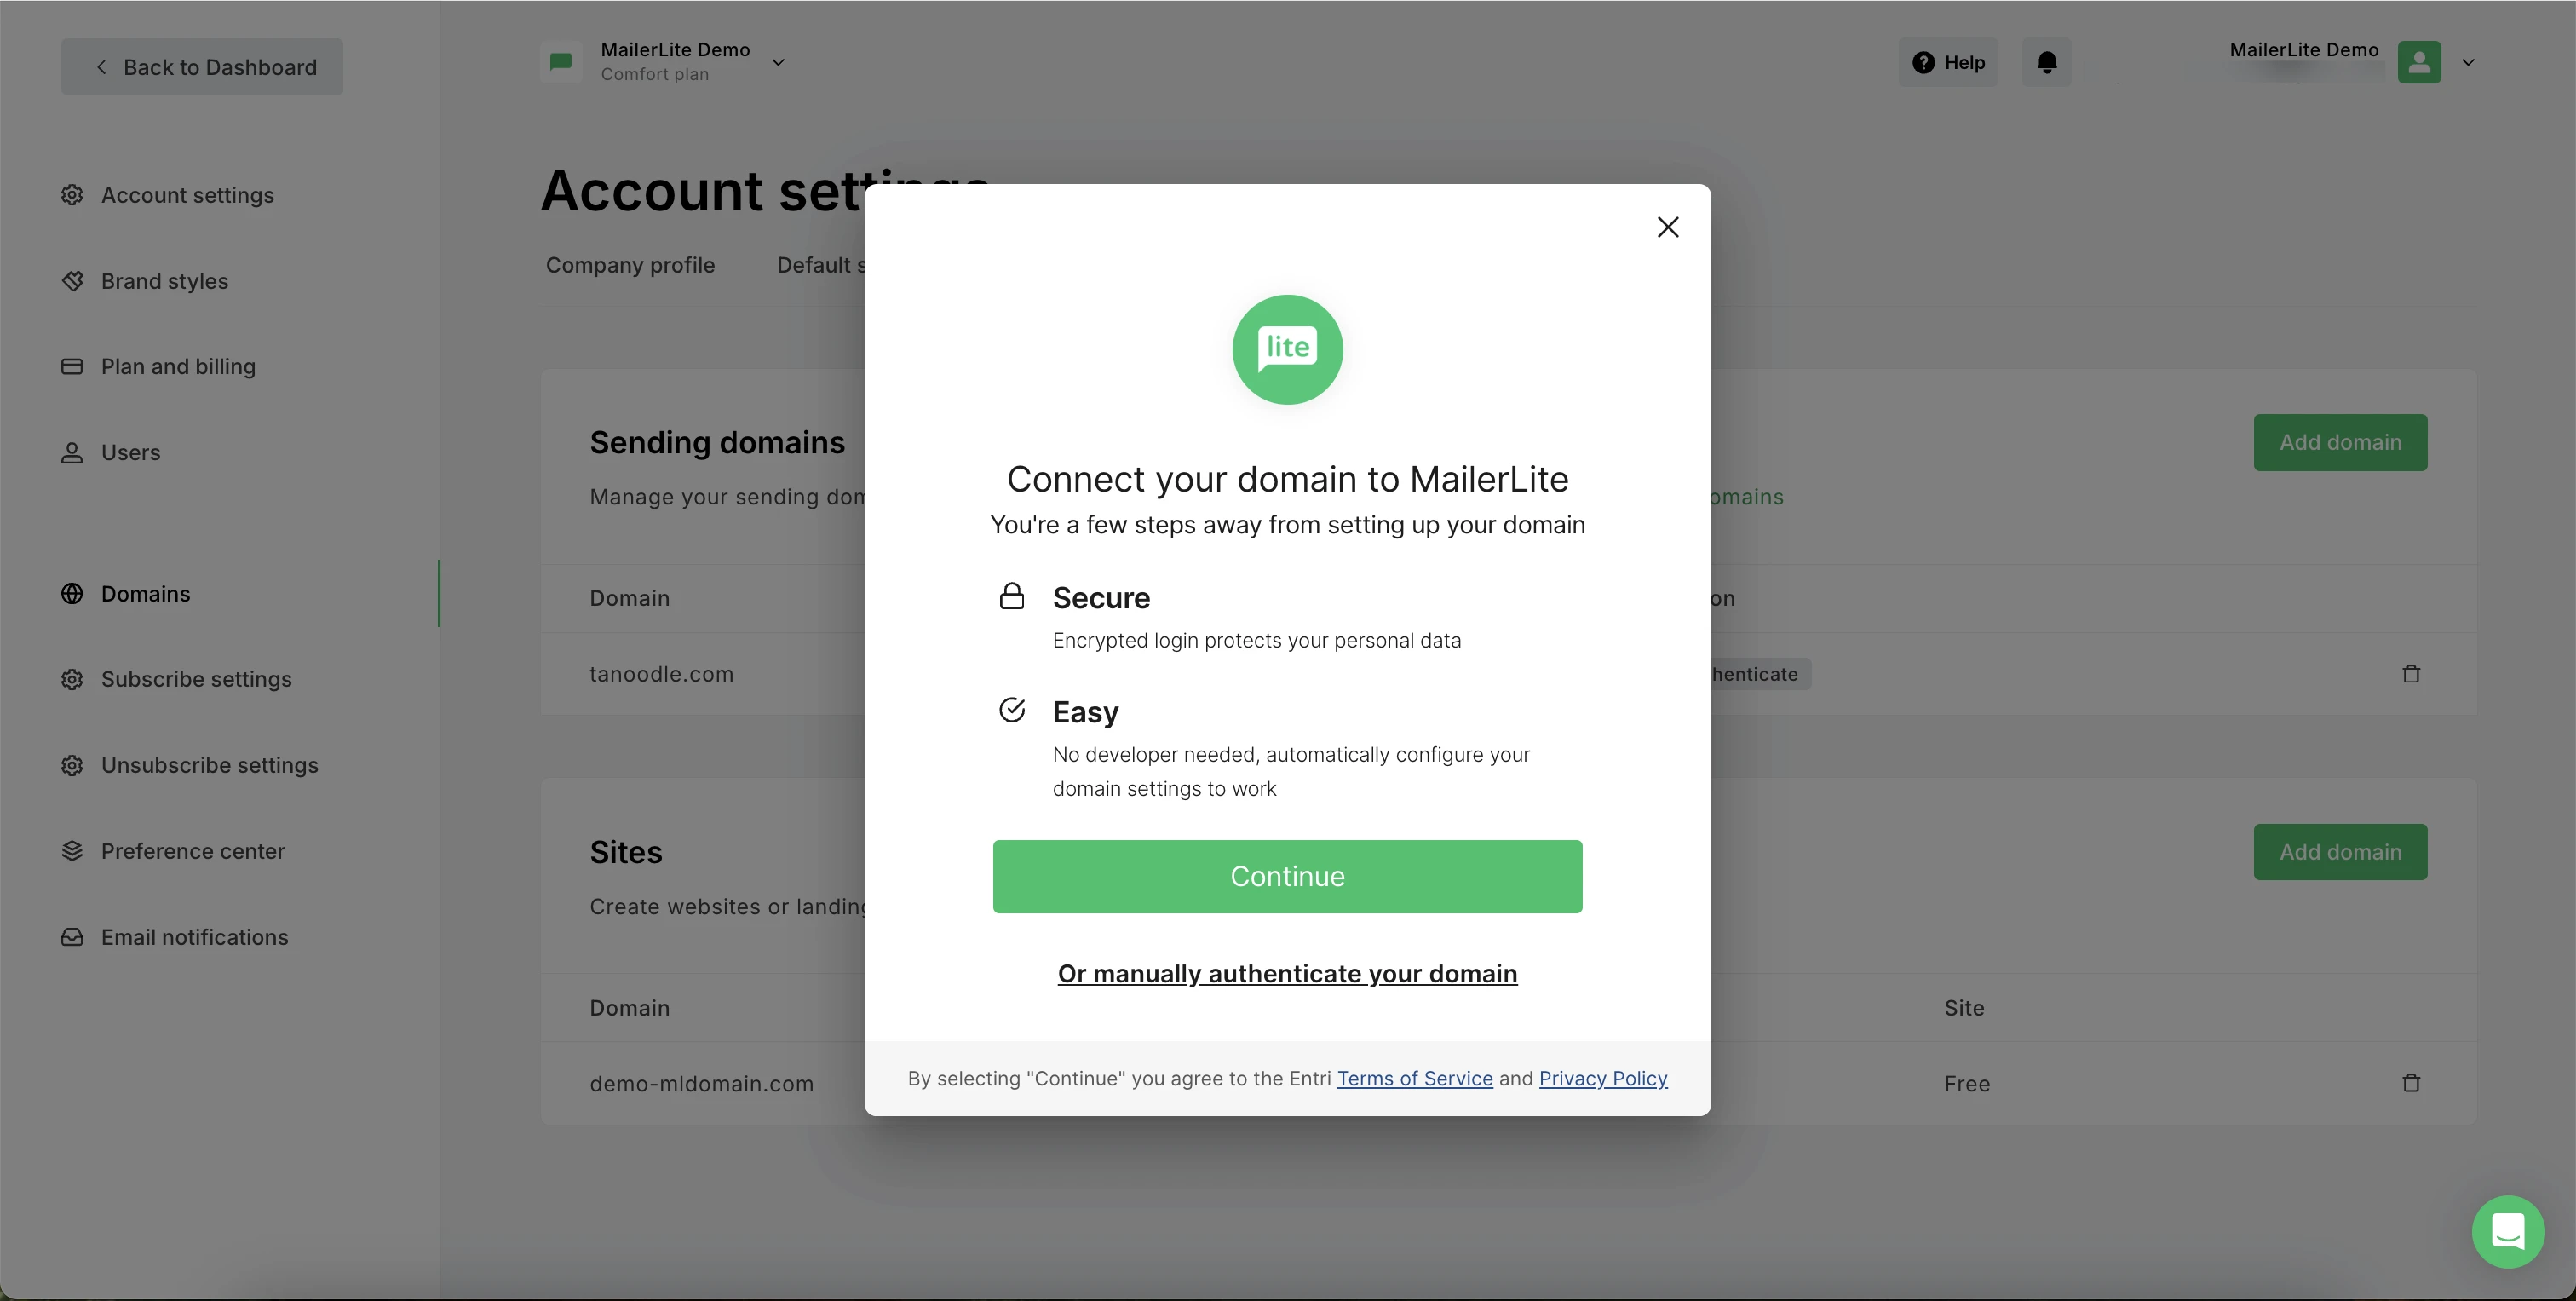
4. Once the domain has been added, click Authenticate.
How to use Wix automatic domain authentication setup
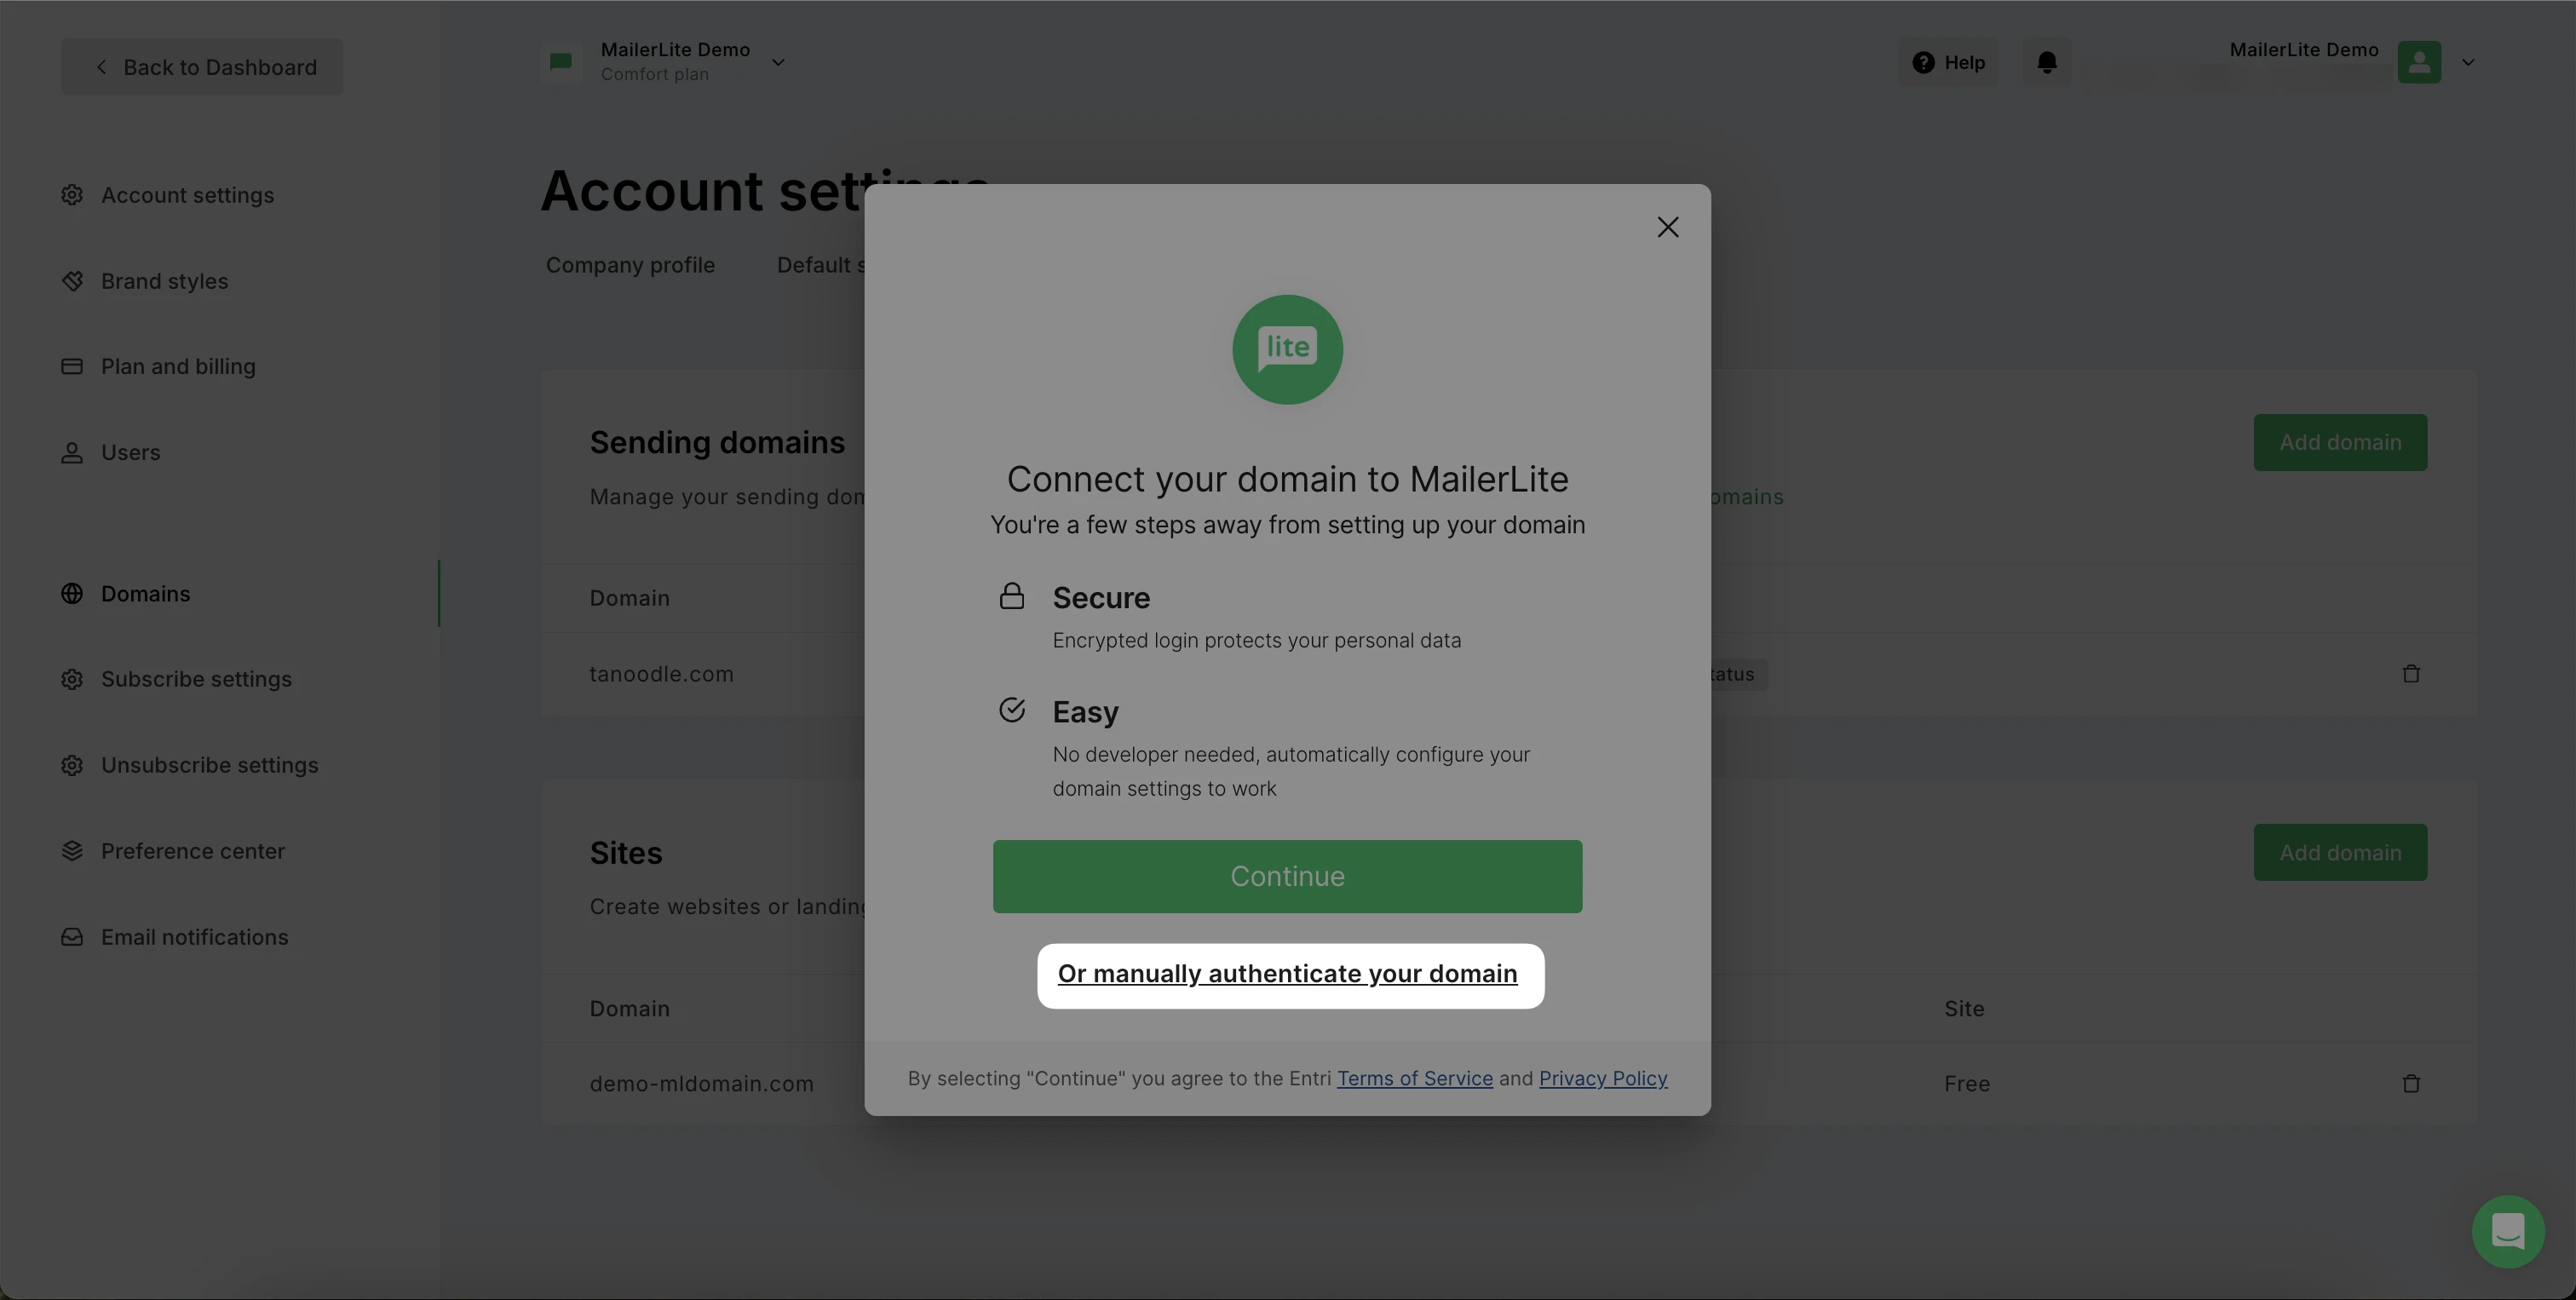
A pop-up will appear, prompting you to start the authentication process. Click Continue.
This tool will scan your domain, and detect which provider is the host.
2. Once the provider has been detected, follow the instructions to connect to your account. You will need to use your login credentials to log into your hosting provider.
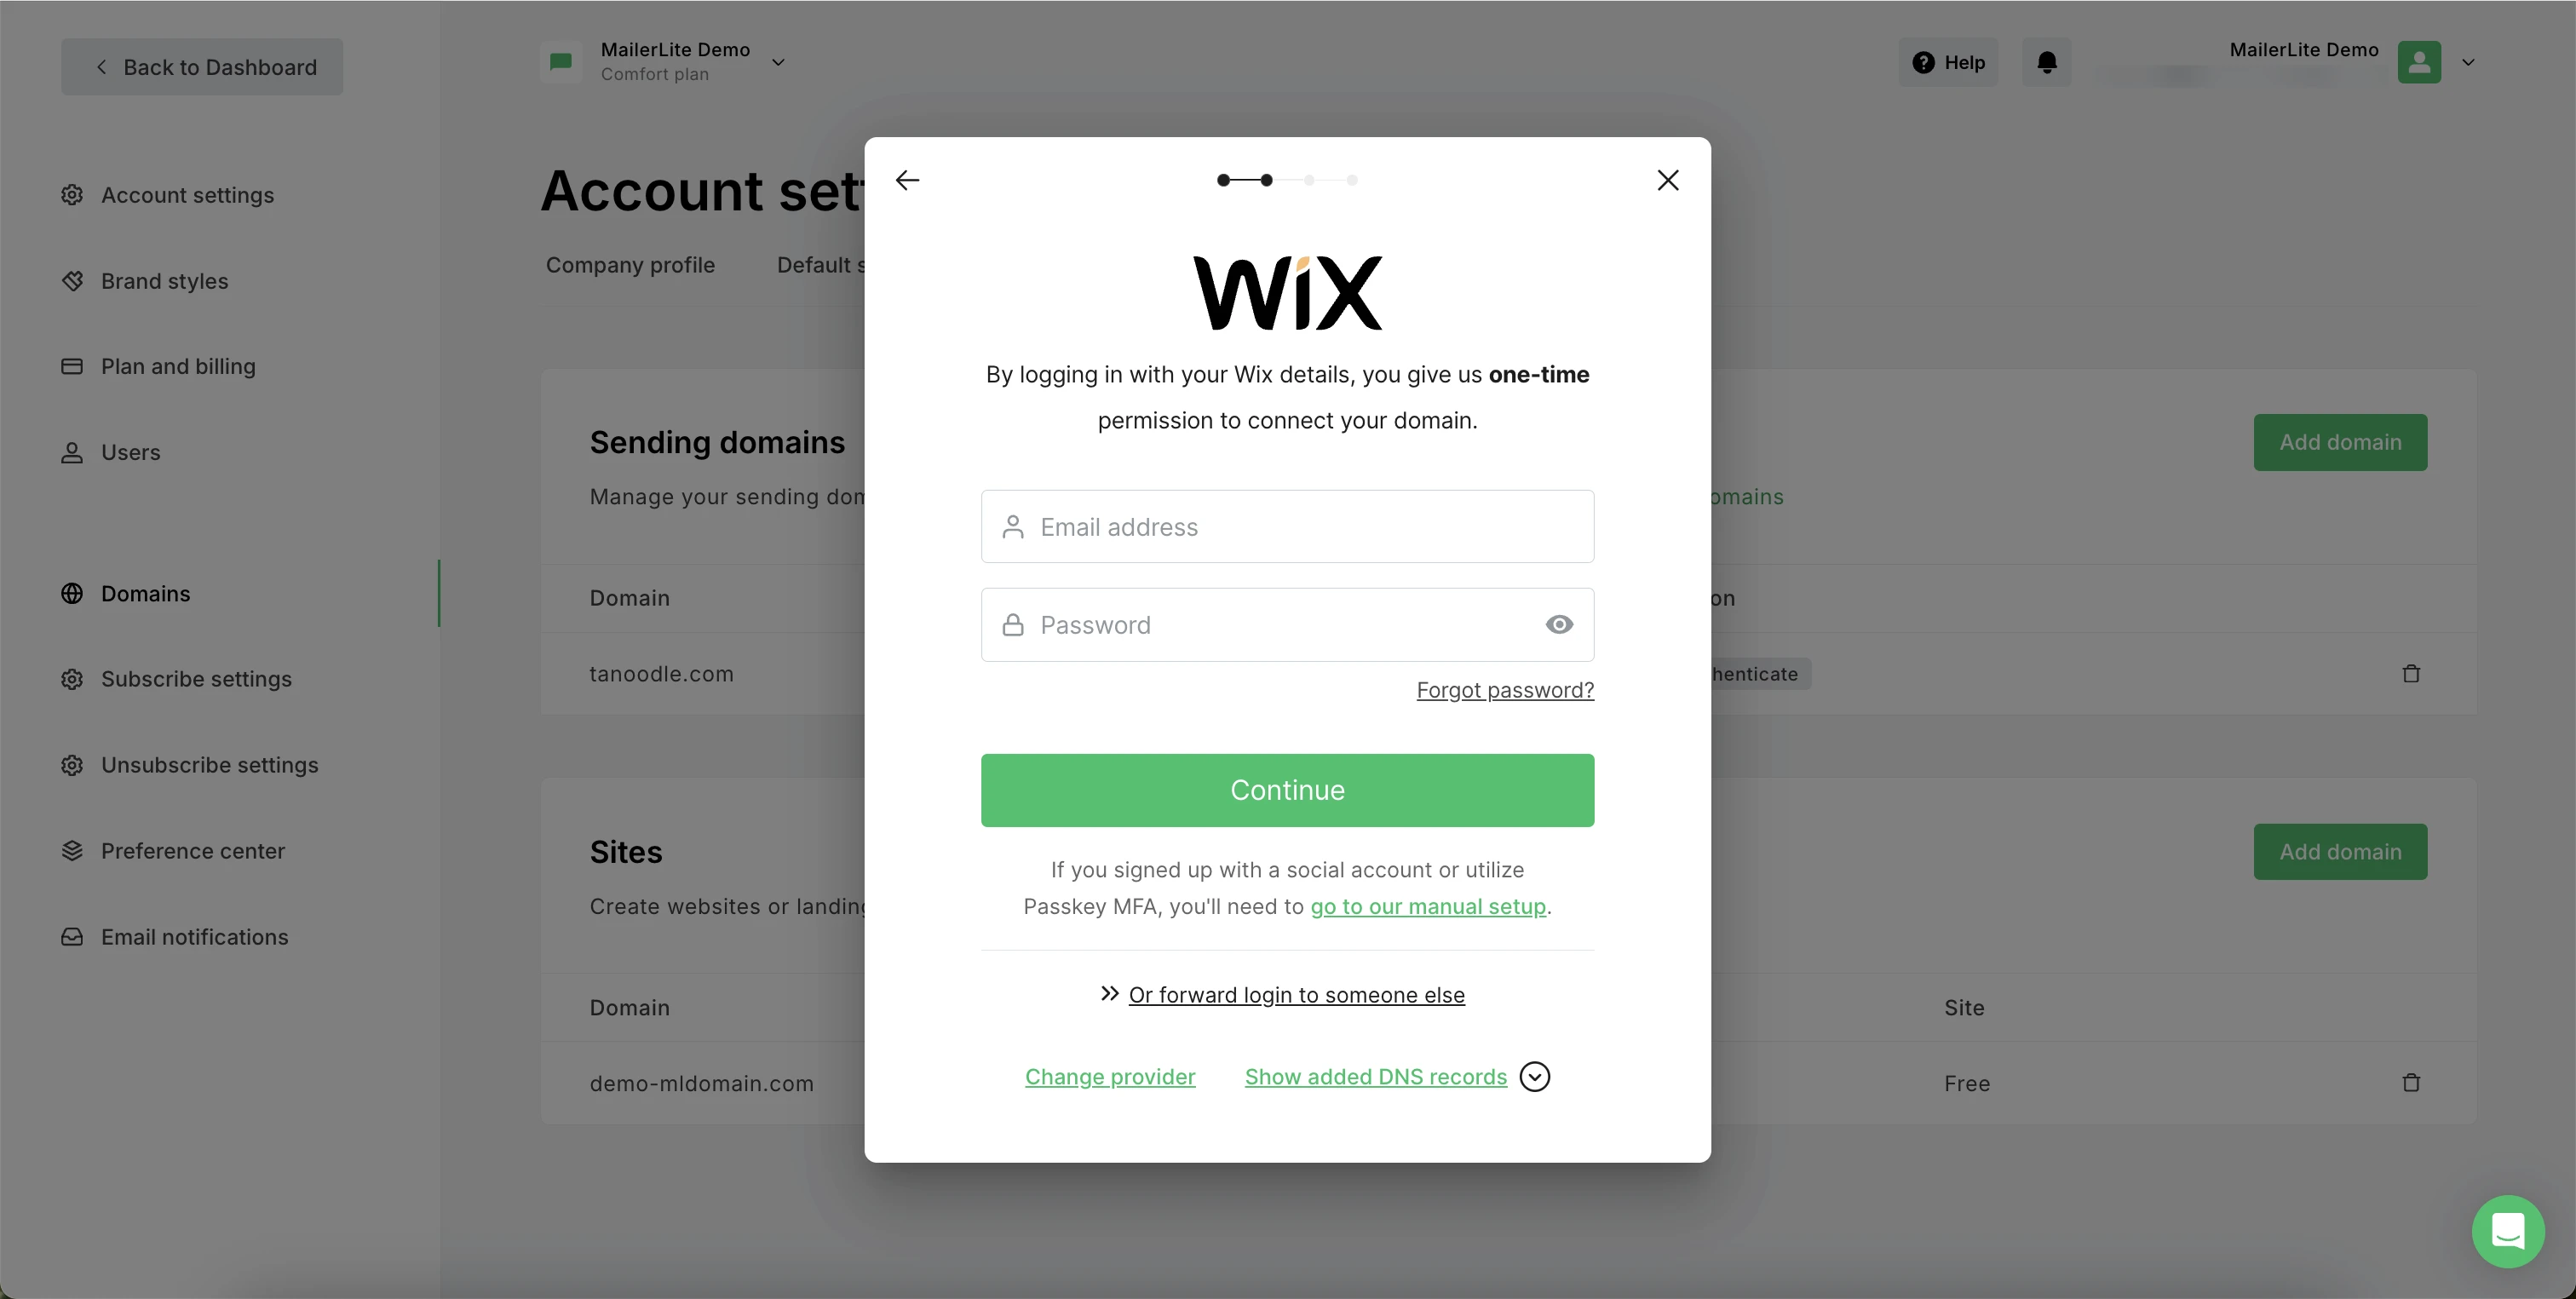
What if I do not have the login details?
By choosing the option to Forward login to someone else, you can share a link with someone who has the details to log in, so they can complete this part of the process.
Keep in mind, if you use a social login (such as Gmail) to log in to your hosting provider, you will need to choose the manual authentication option, as this type of login is not supported.
3. Next, follow the steps to authorize MailerLite to configure your DNS and add the necessary records.
4. Once the DNS configuration is done, you will be redirected back to MailerLite. Refresh the page to see the updated status of your domain.
It can take up to 24 hours for your new DNS records to propagate and for your domain to be authenticated. You will see the Wait to activate status first, which will change to Authenticated once the process is completed.
Manual authentication
If you would like to access the DNS records and authenticate manually, switch to the Manual tab.
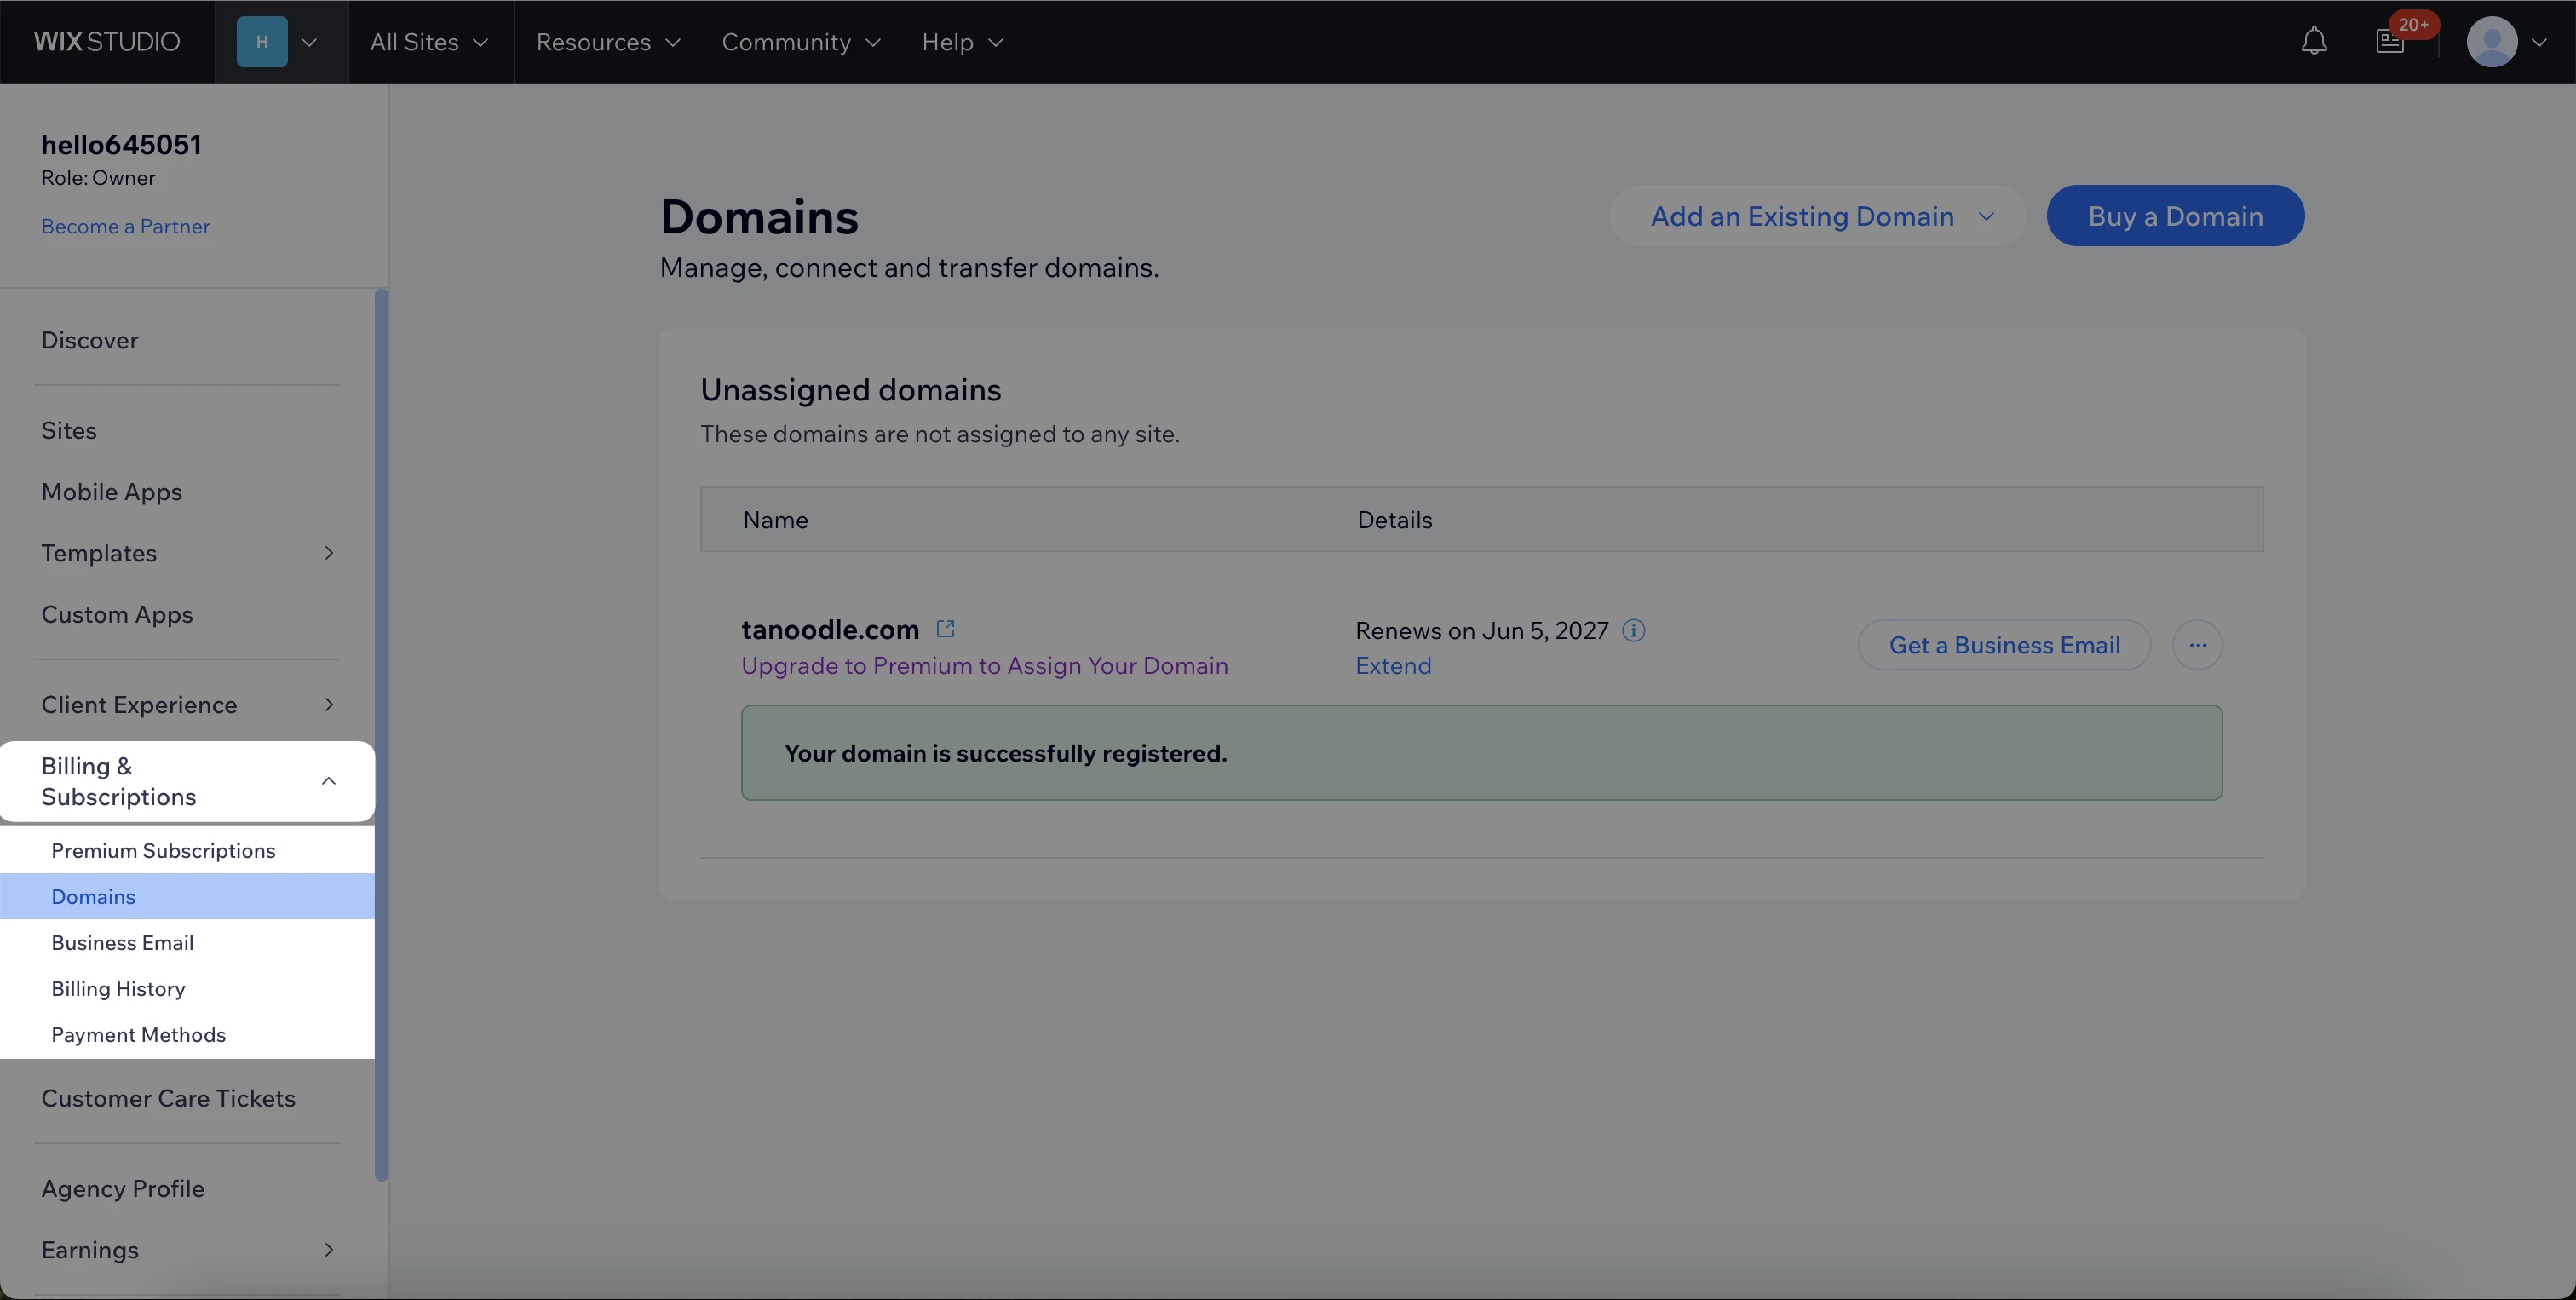
Afterwards, head to your Wix account. To access the DNS zone page:
Navigate to Billing & Subscriptions and choose Domains from the dropdown.
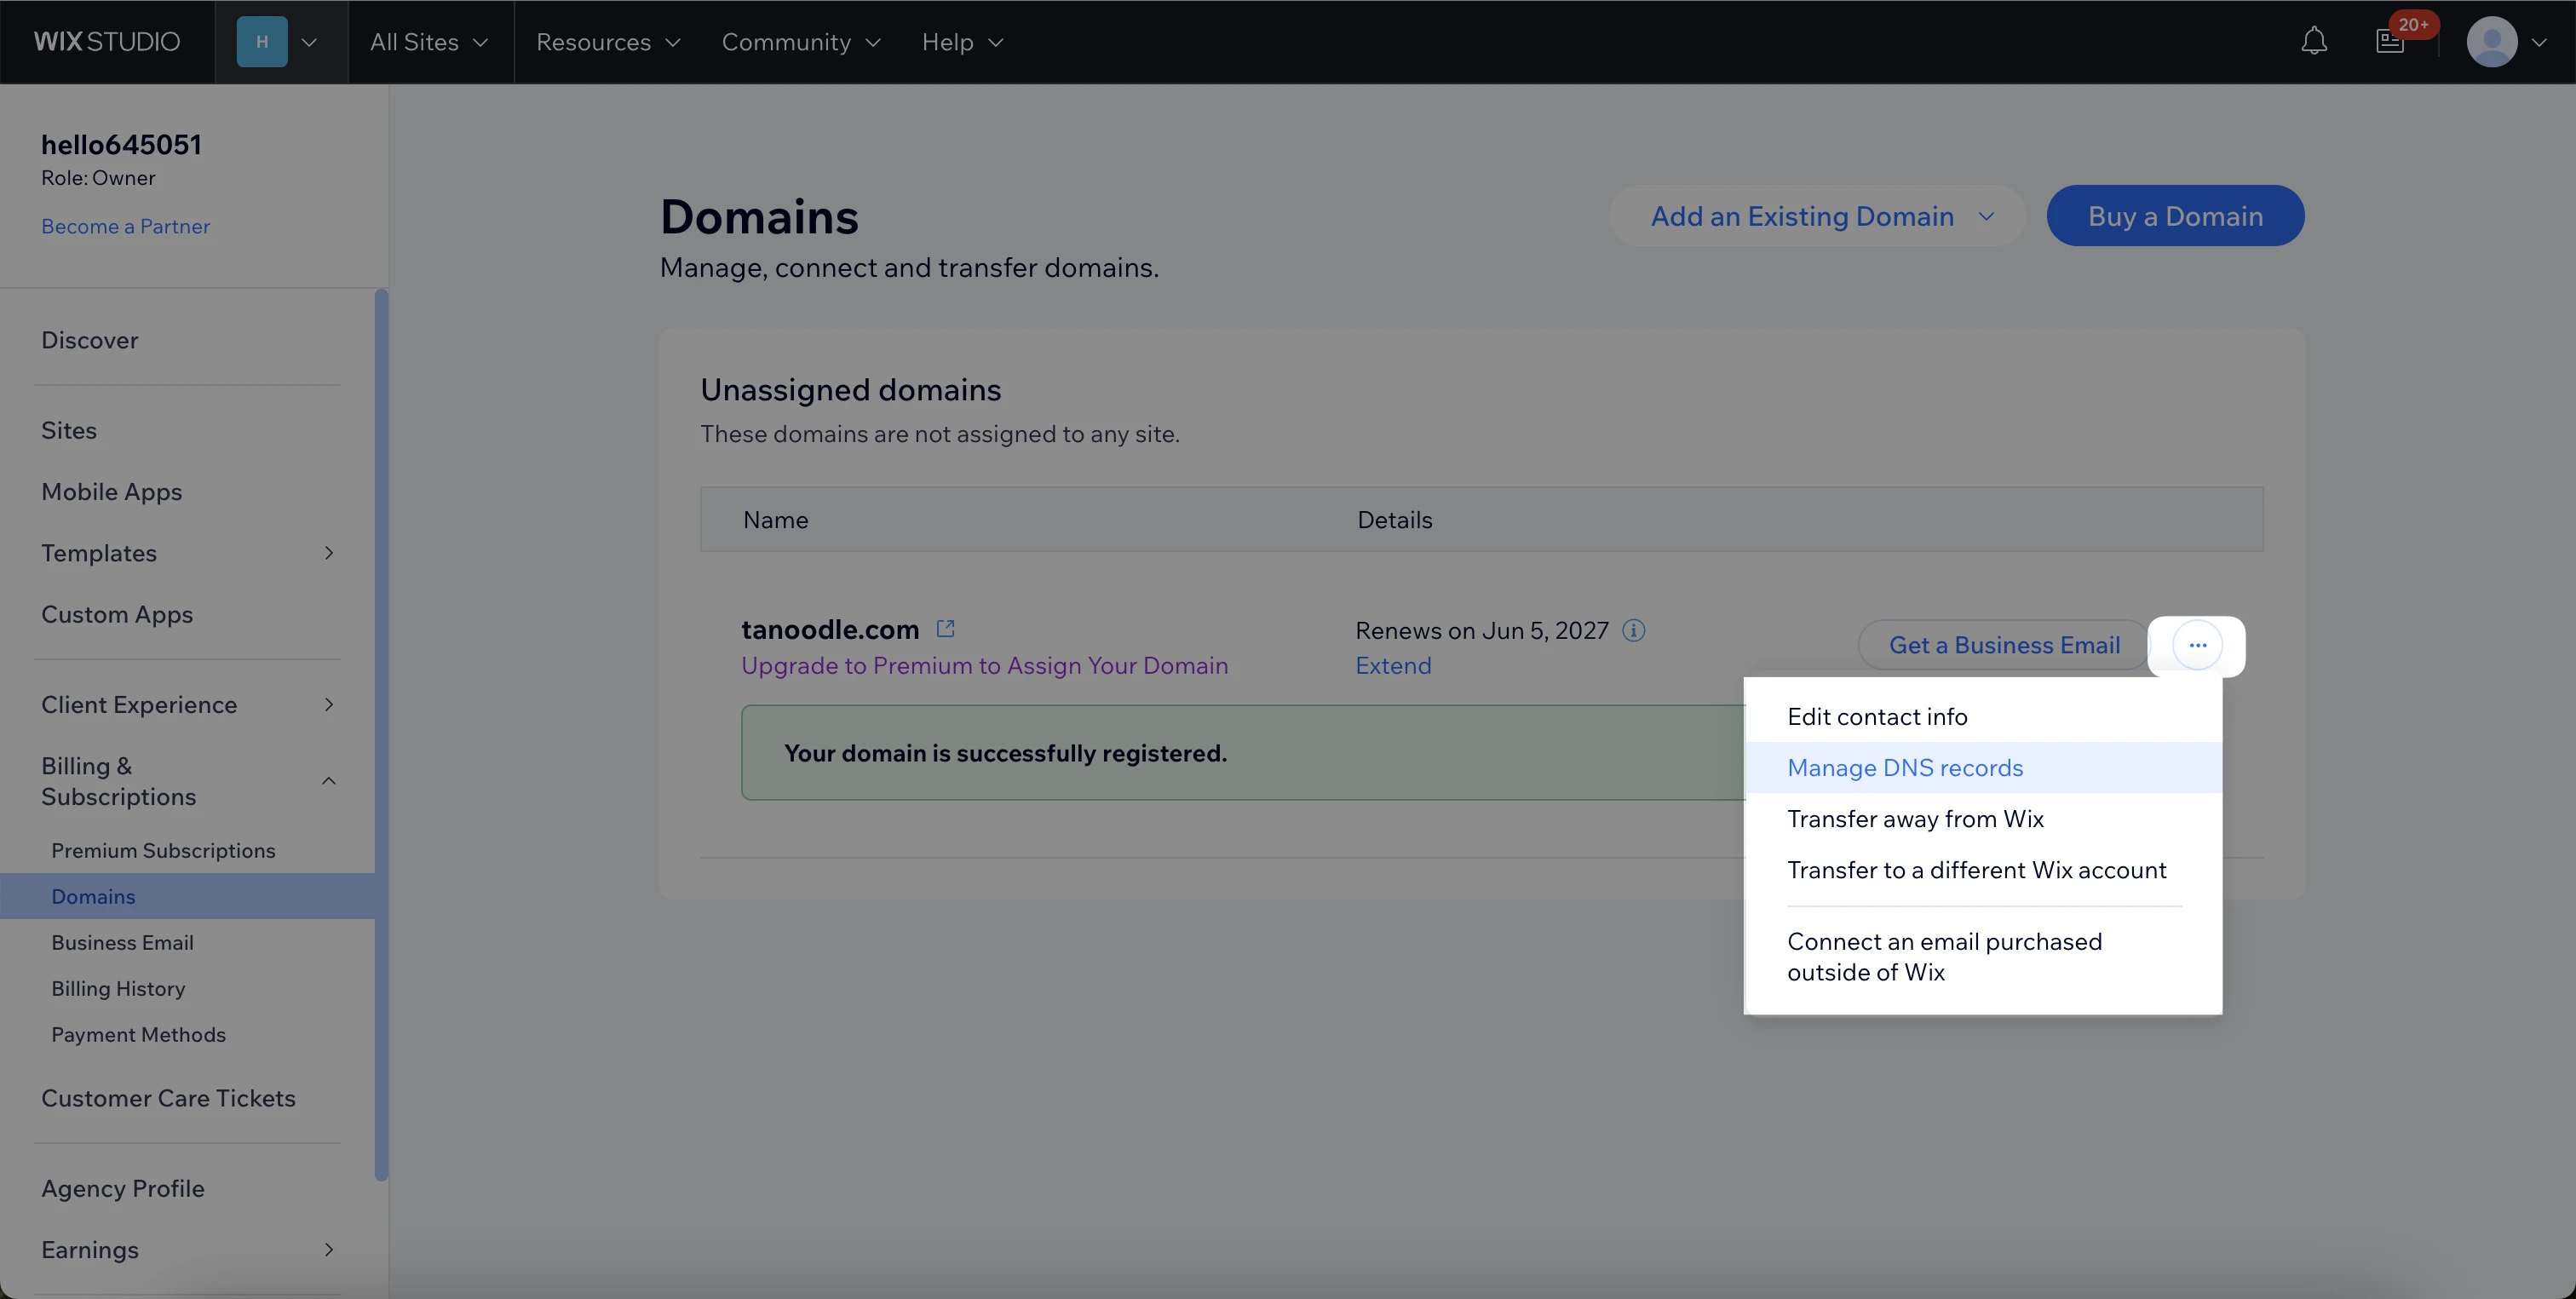
2. On the section of the domain you would like to authenticate, click on the three dots to the right, and select Manage DNS records from the dropdown menu.
How to add the DKIM record
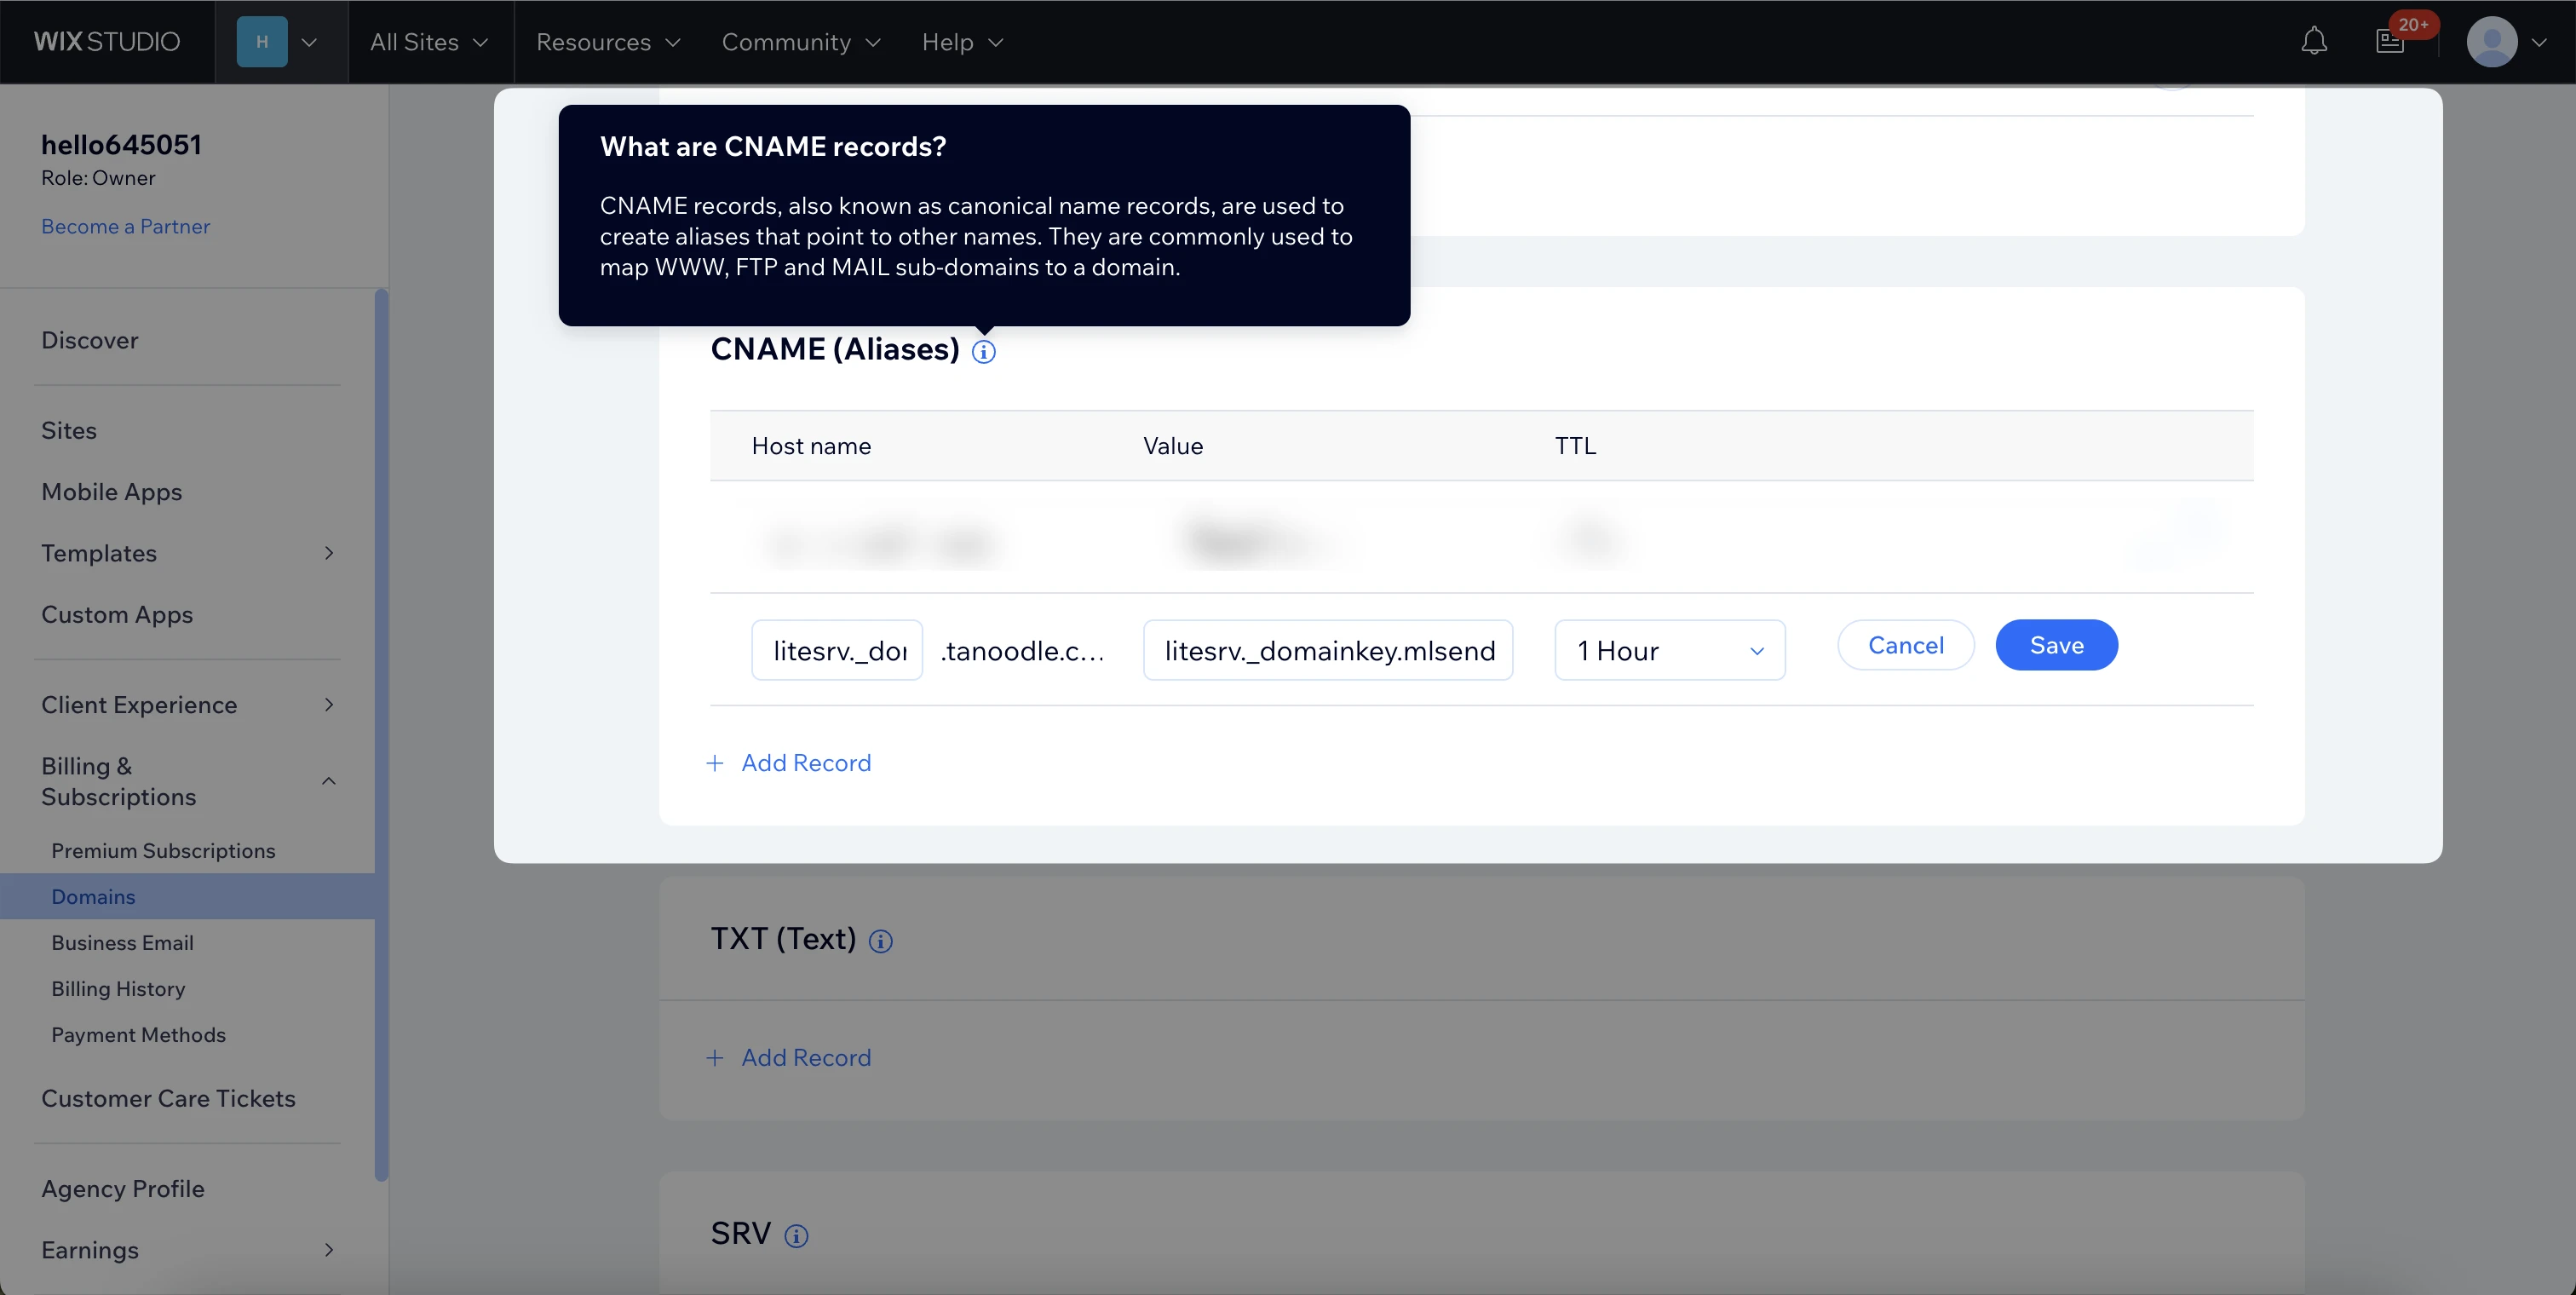
On the Manage DNS Records page, click on + Add Record under the CNAME (Aliases) section.
In the Host Name field box, add
litesrv._domainkey.In the Value field box, paste the DKIM value
litesrv._domainkey.mlsend.com.Leave the TTL at 1 Hour.
Click Save.
How to add the SPF record
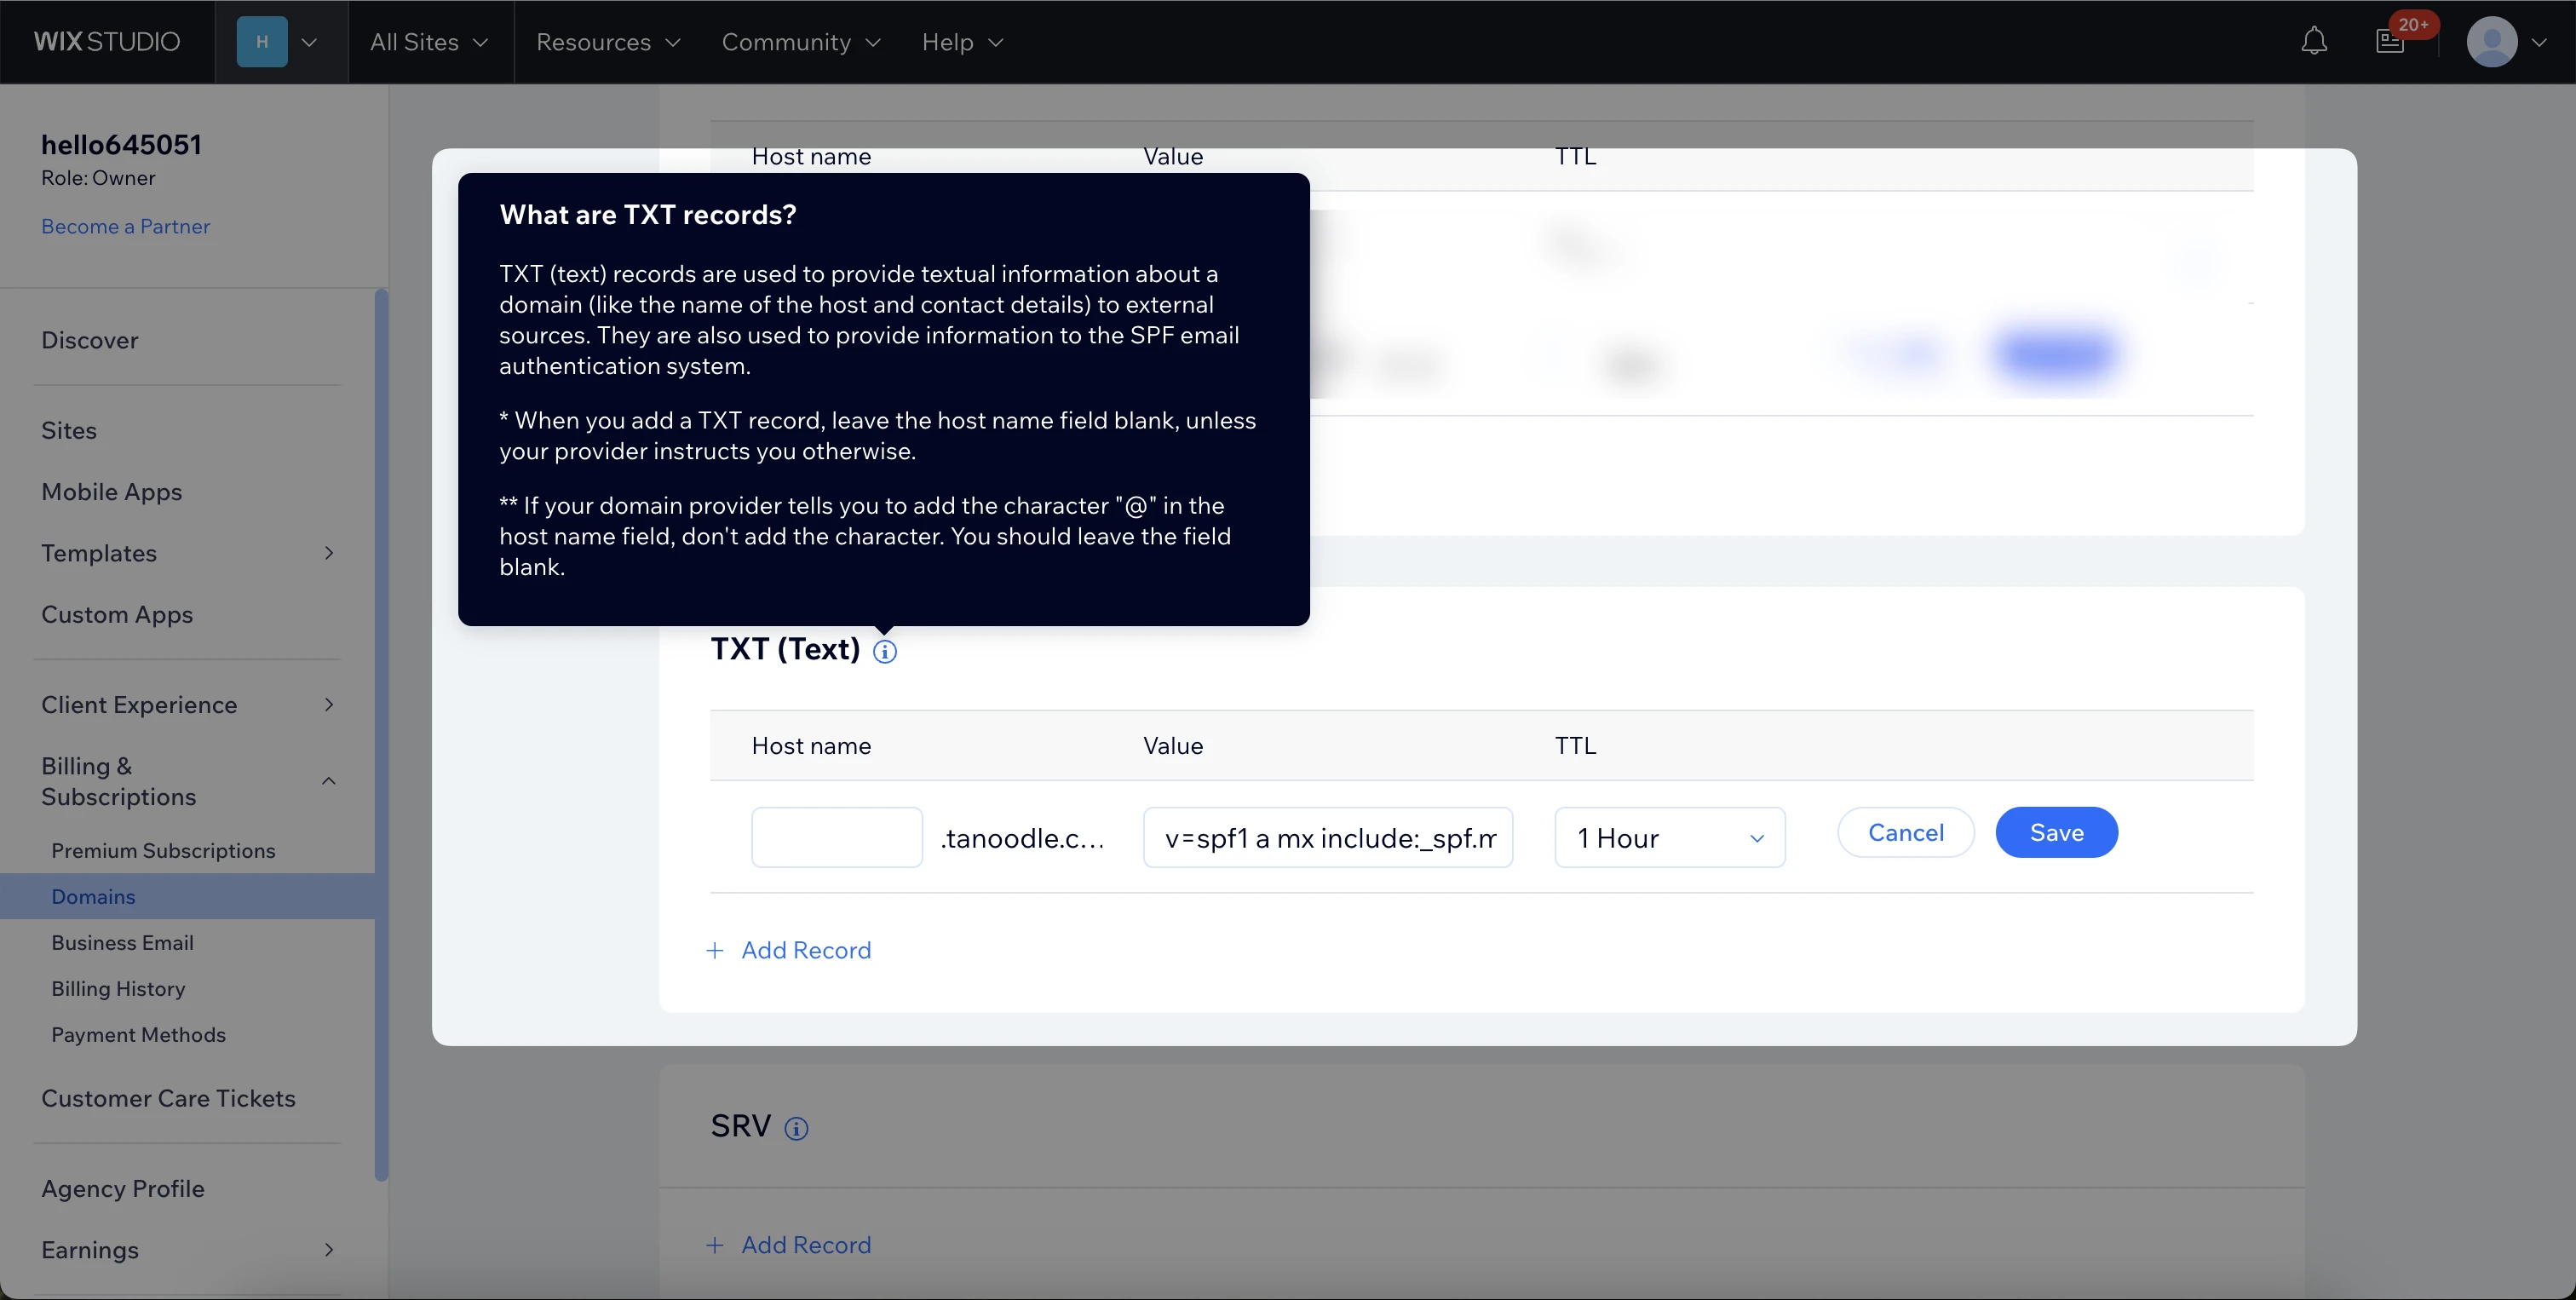
On the Manage DNS Records page, click on + Add Record under the TXT (Text) section.
Unless you're adding a subdomain, leave the Host name field box empty as the name of your domain is already automatically included in the record.
In the Value field box, paste the SPF value text that is given to you in your MailerLite account.
Leave the TTL at 1 hour.
Click Save.
Note: There should be only one SPF record added at a time. If you have another SPF record in your DNS zone (value starts with v=spf1…), make sure to delete it. The record provided by MailerLite will cover all of your services.
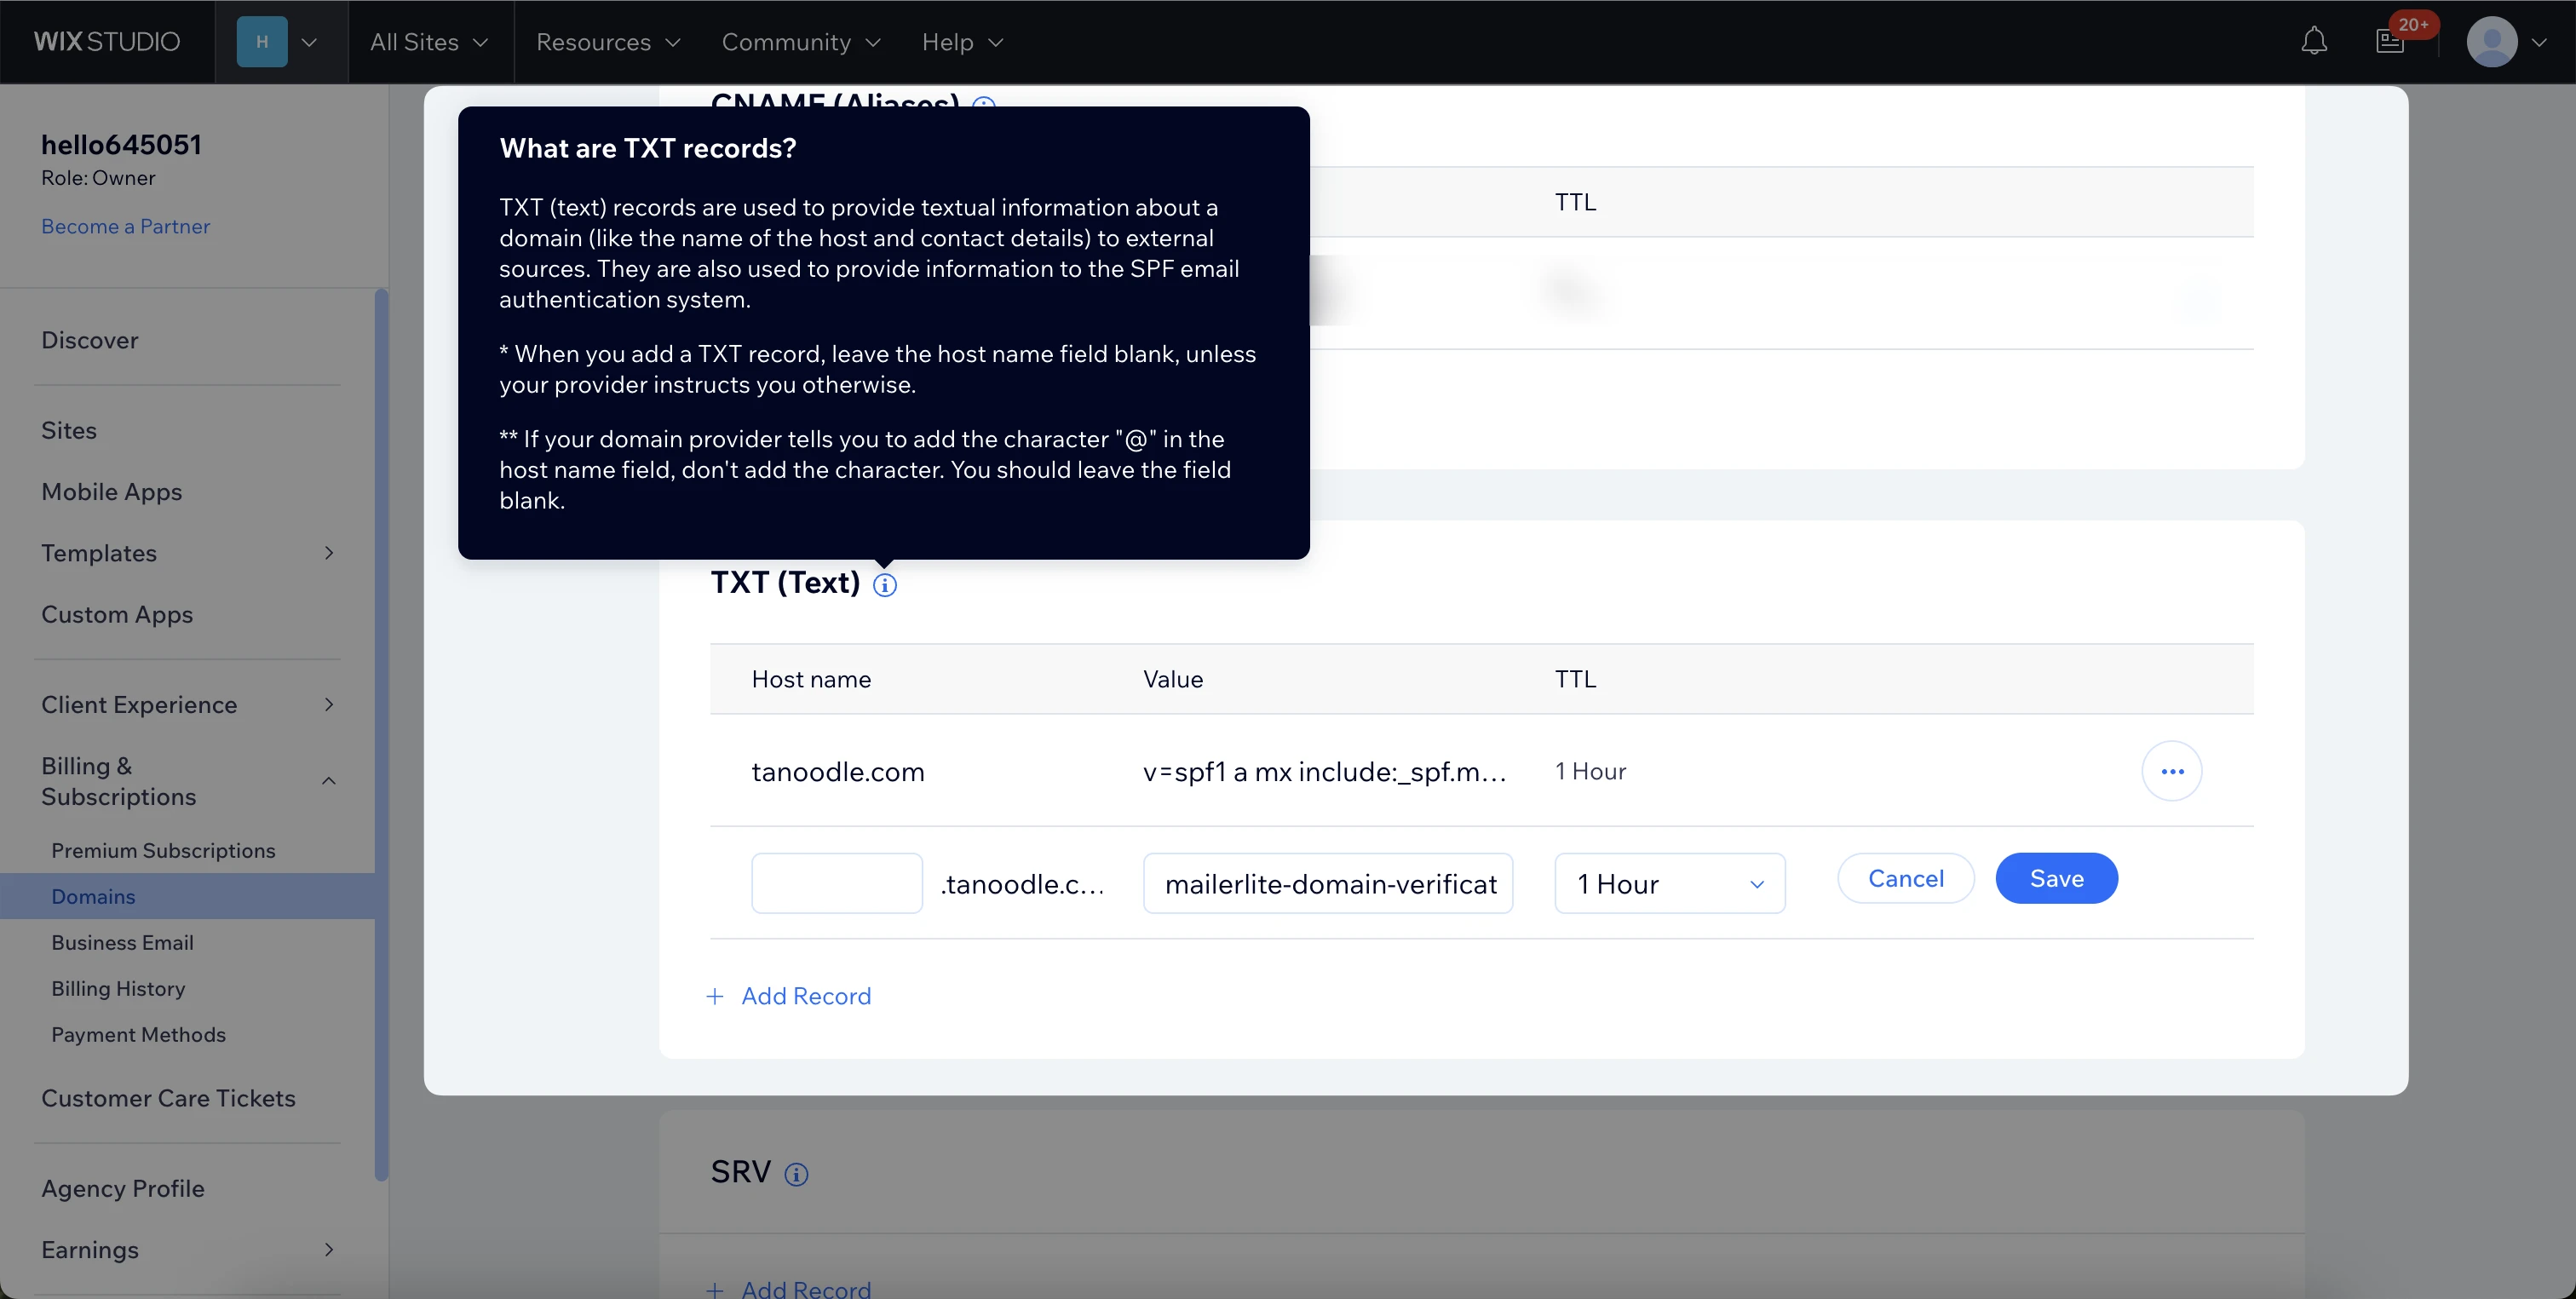
How to add the Domain verification record
On the Manage DNS Records page, click on + Add Record under the TXT (Text) section.
Unless you're adding a subdomain, leave the Host name field box empty as the name of your domain is already automatically included in the record.
In the Value field box, paste the verification value that is given to you in your MailerLite account.
Leave the TTL at 1 hour.
Click Save.
How to get the DNS records approved
Head back to your MailerLite Domains page and click on the green Check DNS records button on the domain authentication window. Once the records are approved, your new domain will be displayed as Authenticated ✅.
In some cases, it may appear that the records were not approved even if all of the information was correctly submitted.
There are 2 reasons why this happens:
It can take the servers up to 24 hours to completely update this information. Most of the time, however, it is approved and updated in a matter of minutes.
Some information has to be rechecked and updated.
🛠️ Need help? For solutions to common issues, check our guide Troubleshooting: Domain authentication.
If you have any questions, contact our friendly support team, and we will gladly assist you.
Please note: While we’re happy to help with any issues taking place on our end, our expertise may be limited when it comes to third-party apps since we cannot access your accounts with those tools, even if they are connected to your MailerLite account. This limits the support we can offer, so we encourage reaching out directly to the support team of those third-party tools for better assistance.
In this case, the Wix support page can be found here.