Note: If you're a Legacy (Classic) user, please log in to your account to access the dedicated Legacy (Classic) Help Center.
💡 Connecting a custom domain to your site is a paid feature available on the Comfort and Power plans.
Once you've created a landing page or website using the MailerLite website builder, a random URL is generated for you automatically. For instance, your landing page URL might be something like https://your-landing-page.subscribepage.io, and your website URL could appear as https://your-website.mailerpage.io.
However, you may want to replace this default domain with your custom domain for a more personalised and professional look. We offer two methods to make this process smooth and straightforward: the automatic setup and the manual setup.
How to add a custom domain to your MailerLite account
Whether you choose automatic or manual setup, the initial steps are the same:
Start by logging in to your MailerLite account and navigating to the Account settings page.
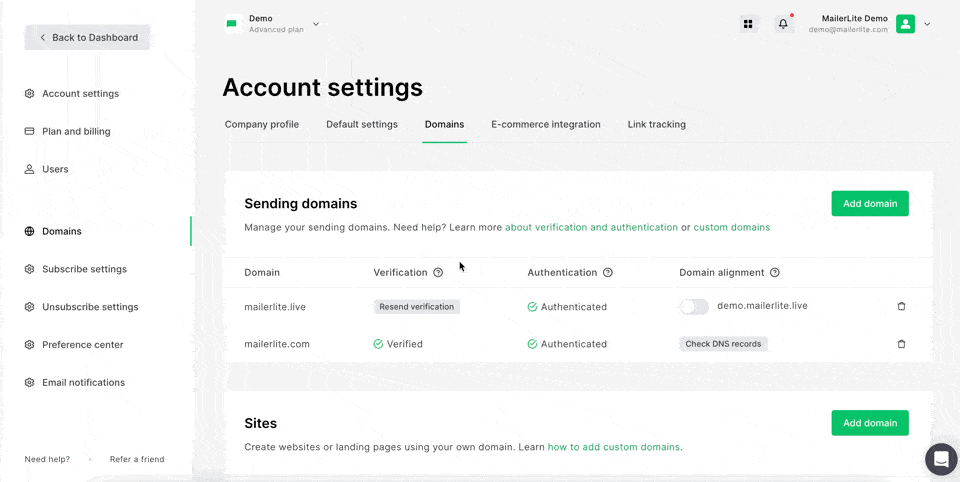
Once you're in the Account settings, click on the Domains tab
Under the Sites section, click the Add domain button.
In the provided field, enter the domain you’d like to connect.
If your domain is already in use, include a subdomain when entering your domain URL, and click Save.
Under Status, click the Manage DNS button.
When setting up a landing page or website on MailerLite, it's important to note that if you choose to use a subdomain like shop.example.com, this subdomain becomes exclusively linked to that page and cannot be used for any other sites.
Adding a root domain or subdomain
What is a root domain?
A root domain is the main and highest-level domain in a website's URL hierarchy. For example, in the URL "https://yourdomain.com," "yourdomain.com" is the root domain. Root domains are often used to represent the primary website or the top level of a website's structure. Subdomains, on the other hand, are used to create additional sections or prefixes within a website, such as "blog.yourdomain.com" or "shop.yourdomain.com."
If your custom domain doesn’t have a functioning website published on it, you can use the root domain for your landing page or website built in MailerLite. For example, yourdomain.com.
If your custom domain already has a functioning website published on it, you can still add it, but you will have to add it with a subdomain because a root domain cannot be connected to more than one page. For example, blog.yourdomain.com.
Note: A subdomain like “www” (e.g. www.yourdomain.com) might override the content on your existing domain. We recommend using this type of subdomain only if you don't have any websites on your root domain.
Automatic setup
After you’ve followed the steps above, you’ll be prompted to log in to your DNS hosting account under the Automatic tab.
If you wish to redirect 'www' traffic to your connected domain, check the provided checkbox (If you don't have a website on your domain yet, we recommend redirecting "www" traffic to your domain).
Log in to your DNS host account using the instructions provided.
Next, you'll see the DNS records that MailerLite will configure for you. Click the Authorize or Connect button to proceed.
MailerLite will attempt to verify the correct setup of your DNS records. You can check the status by clicking the Manage DNS button under Status and then clicking Verify domain. Alternatively, you can refresh the page.
Once the DNS configuration is successful, the button will display Active.
This process can take up to 24 hours.
Manual setup
If you don’t see the Automatic tab or prefer a more hands-on approach, we've got you covered with a manual setup.
After adding your custom domain, start in the Manual tab. Here you’ll find the Name and Value fields to create an A record. Keep this page open; you'll need it.
If you don't have a website hosted on your domain, select the option to redirect 'www' traffic to your domain. This will enable you to add both an
Aand aCNAMErecord.Access the DNS settings page on your domain management platform.
To ensure users can access your landing pages and websites with or without typing "www" in the address bar, add both
AandCNAMErecords to your DNS settings.After correctly configuring the records, click the Check DNS records button to verify your setup.
Keep in mind that it may take up to 24 hours for your DNS settings to propagate worldwide, depending on your hosting provider.
How to enable the SSL certificate
When the CNAME or A-type records have been approved, the process of enabling SSL will automatically begin. You can find the status of your SSL in the SSL column. The process of fully enabling the SSL certificate may take a few hours.
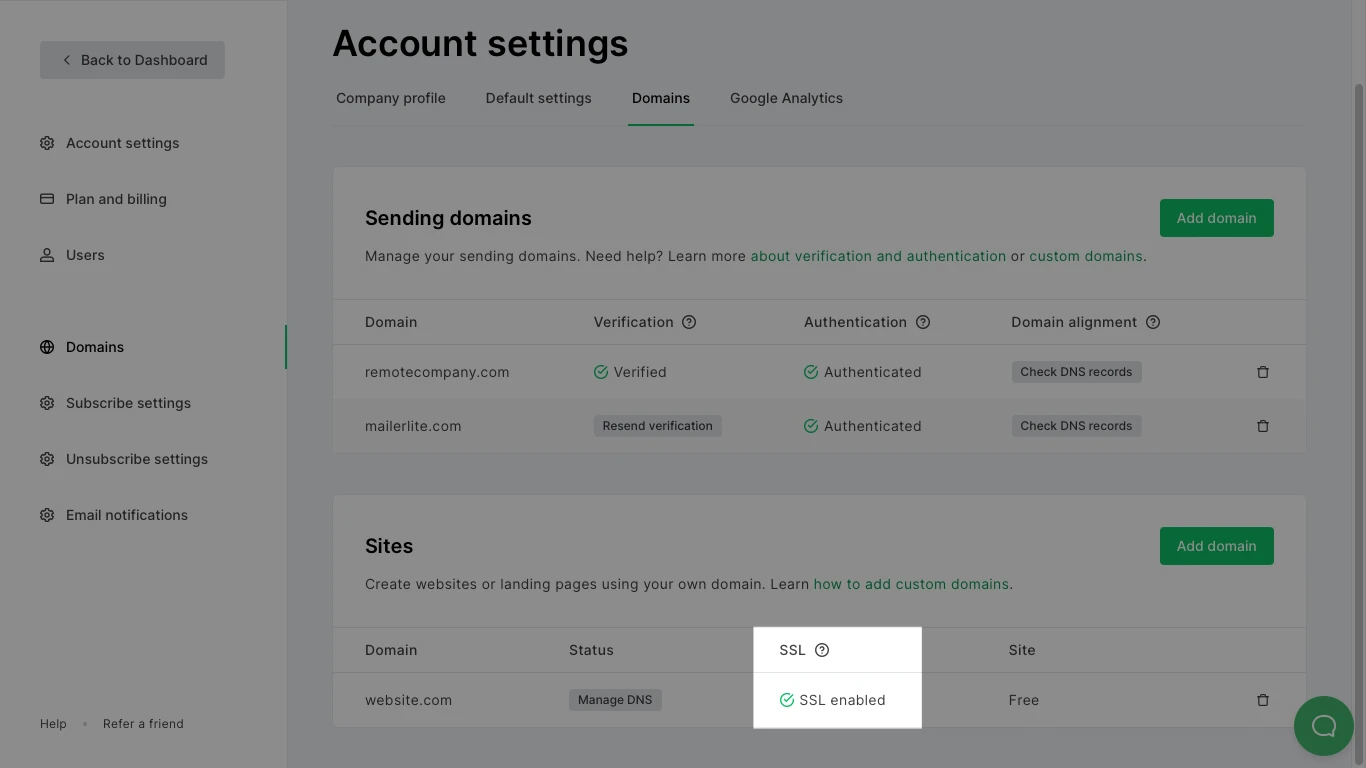
Note: If the SSL has not been enabled after several hours and it is stuck with 🔁 Enabling SSL, check if the DNS page of your domain has an AAAA type record. This type of record pointing to another server will prevent the SSL from being enabled, so it must be removed.
How to connect your domain to a website or landing page
After your custom domain is added to the Sites section and your hosting provider has accepted all the necessary records, you can proceed to link the custom domain to your landing page or website. Remember, custom domains can be connected only when they are Active and SSL is enabled.

To connect a domain to your landing page or website:
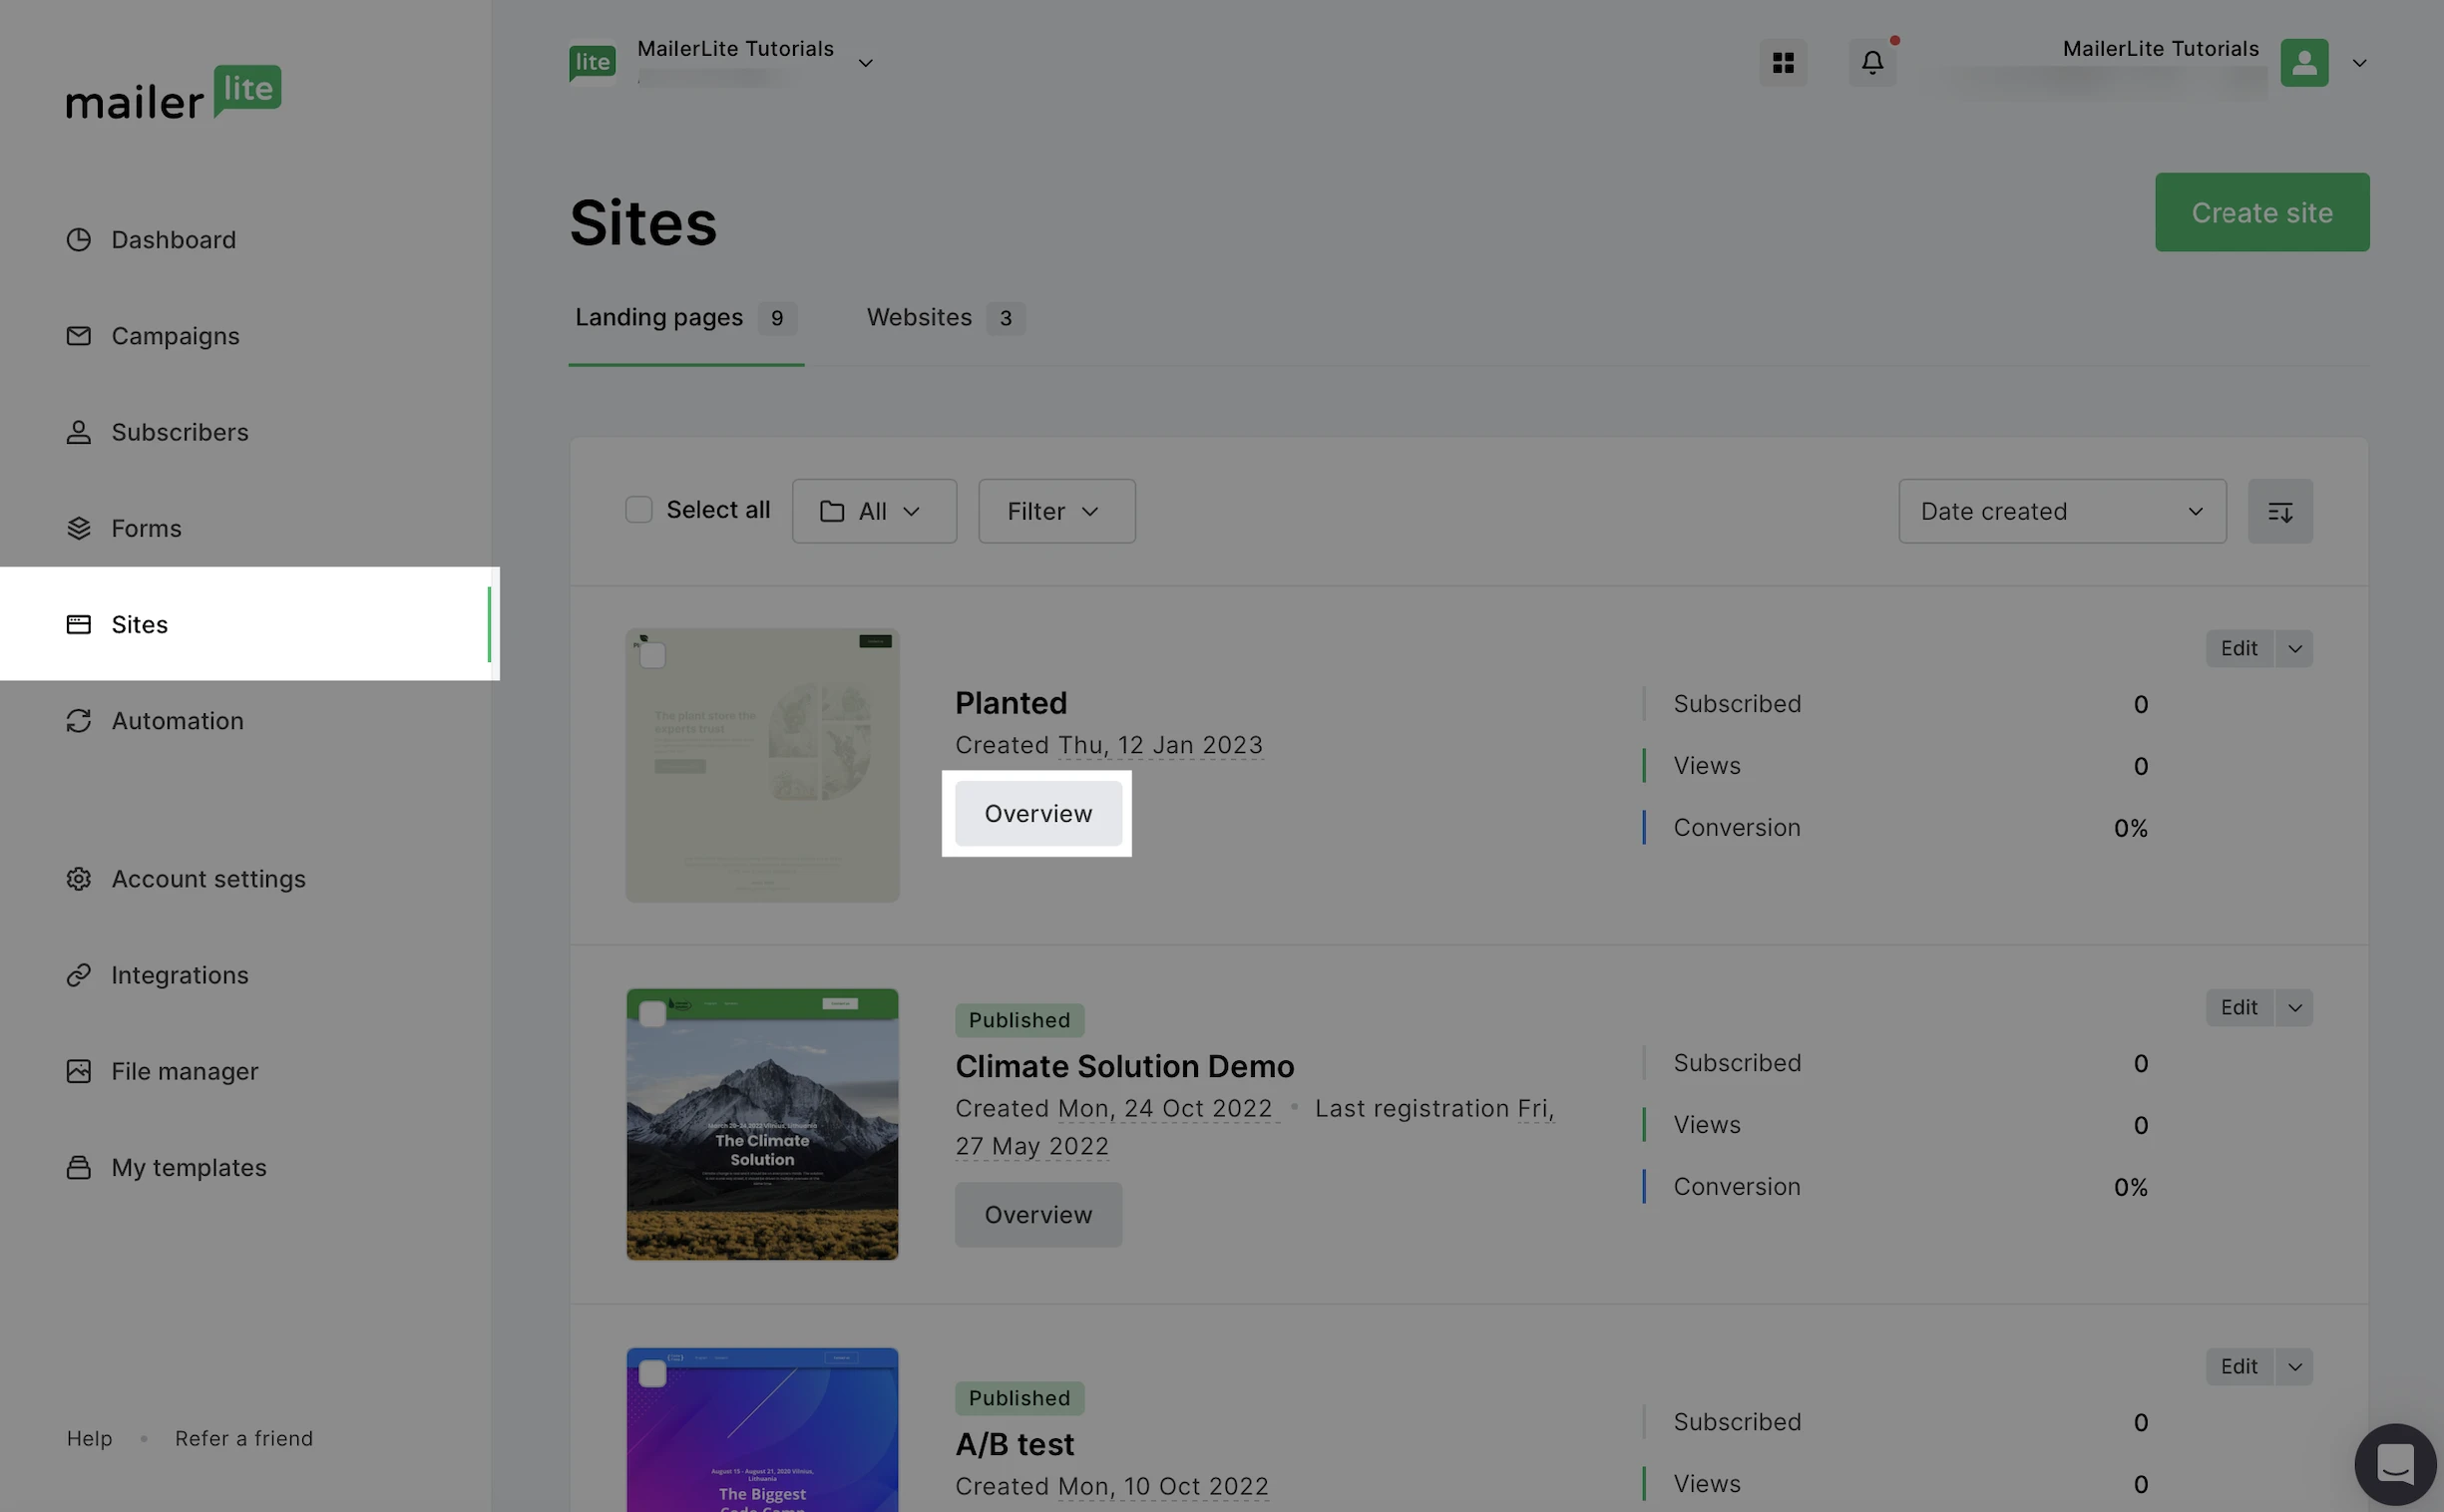
1. Navigate to the Sites page.
2. Click the Overview button for the landing page or website you wish to connect your domain to.
3. Scroll down to Settings and click Edit Settings.
4. Under Landing Page URL, use the dropdown arrow in the URL field to change the default subscribepage.io URL to one of your available custom domains.
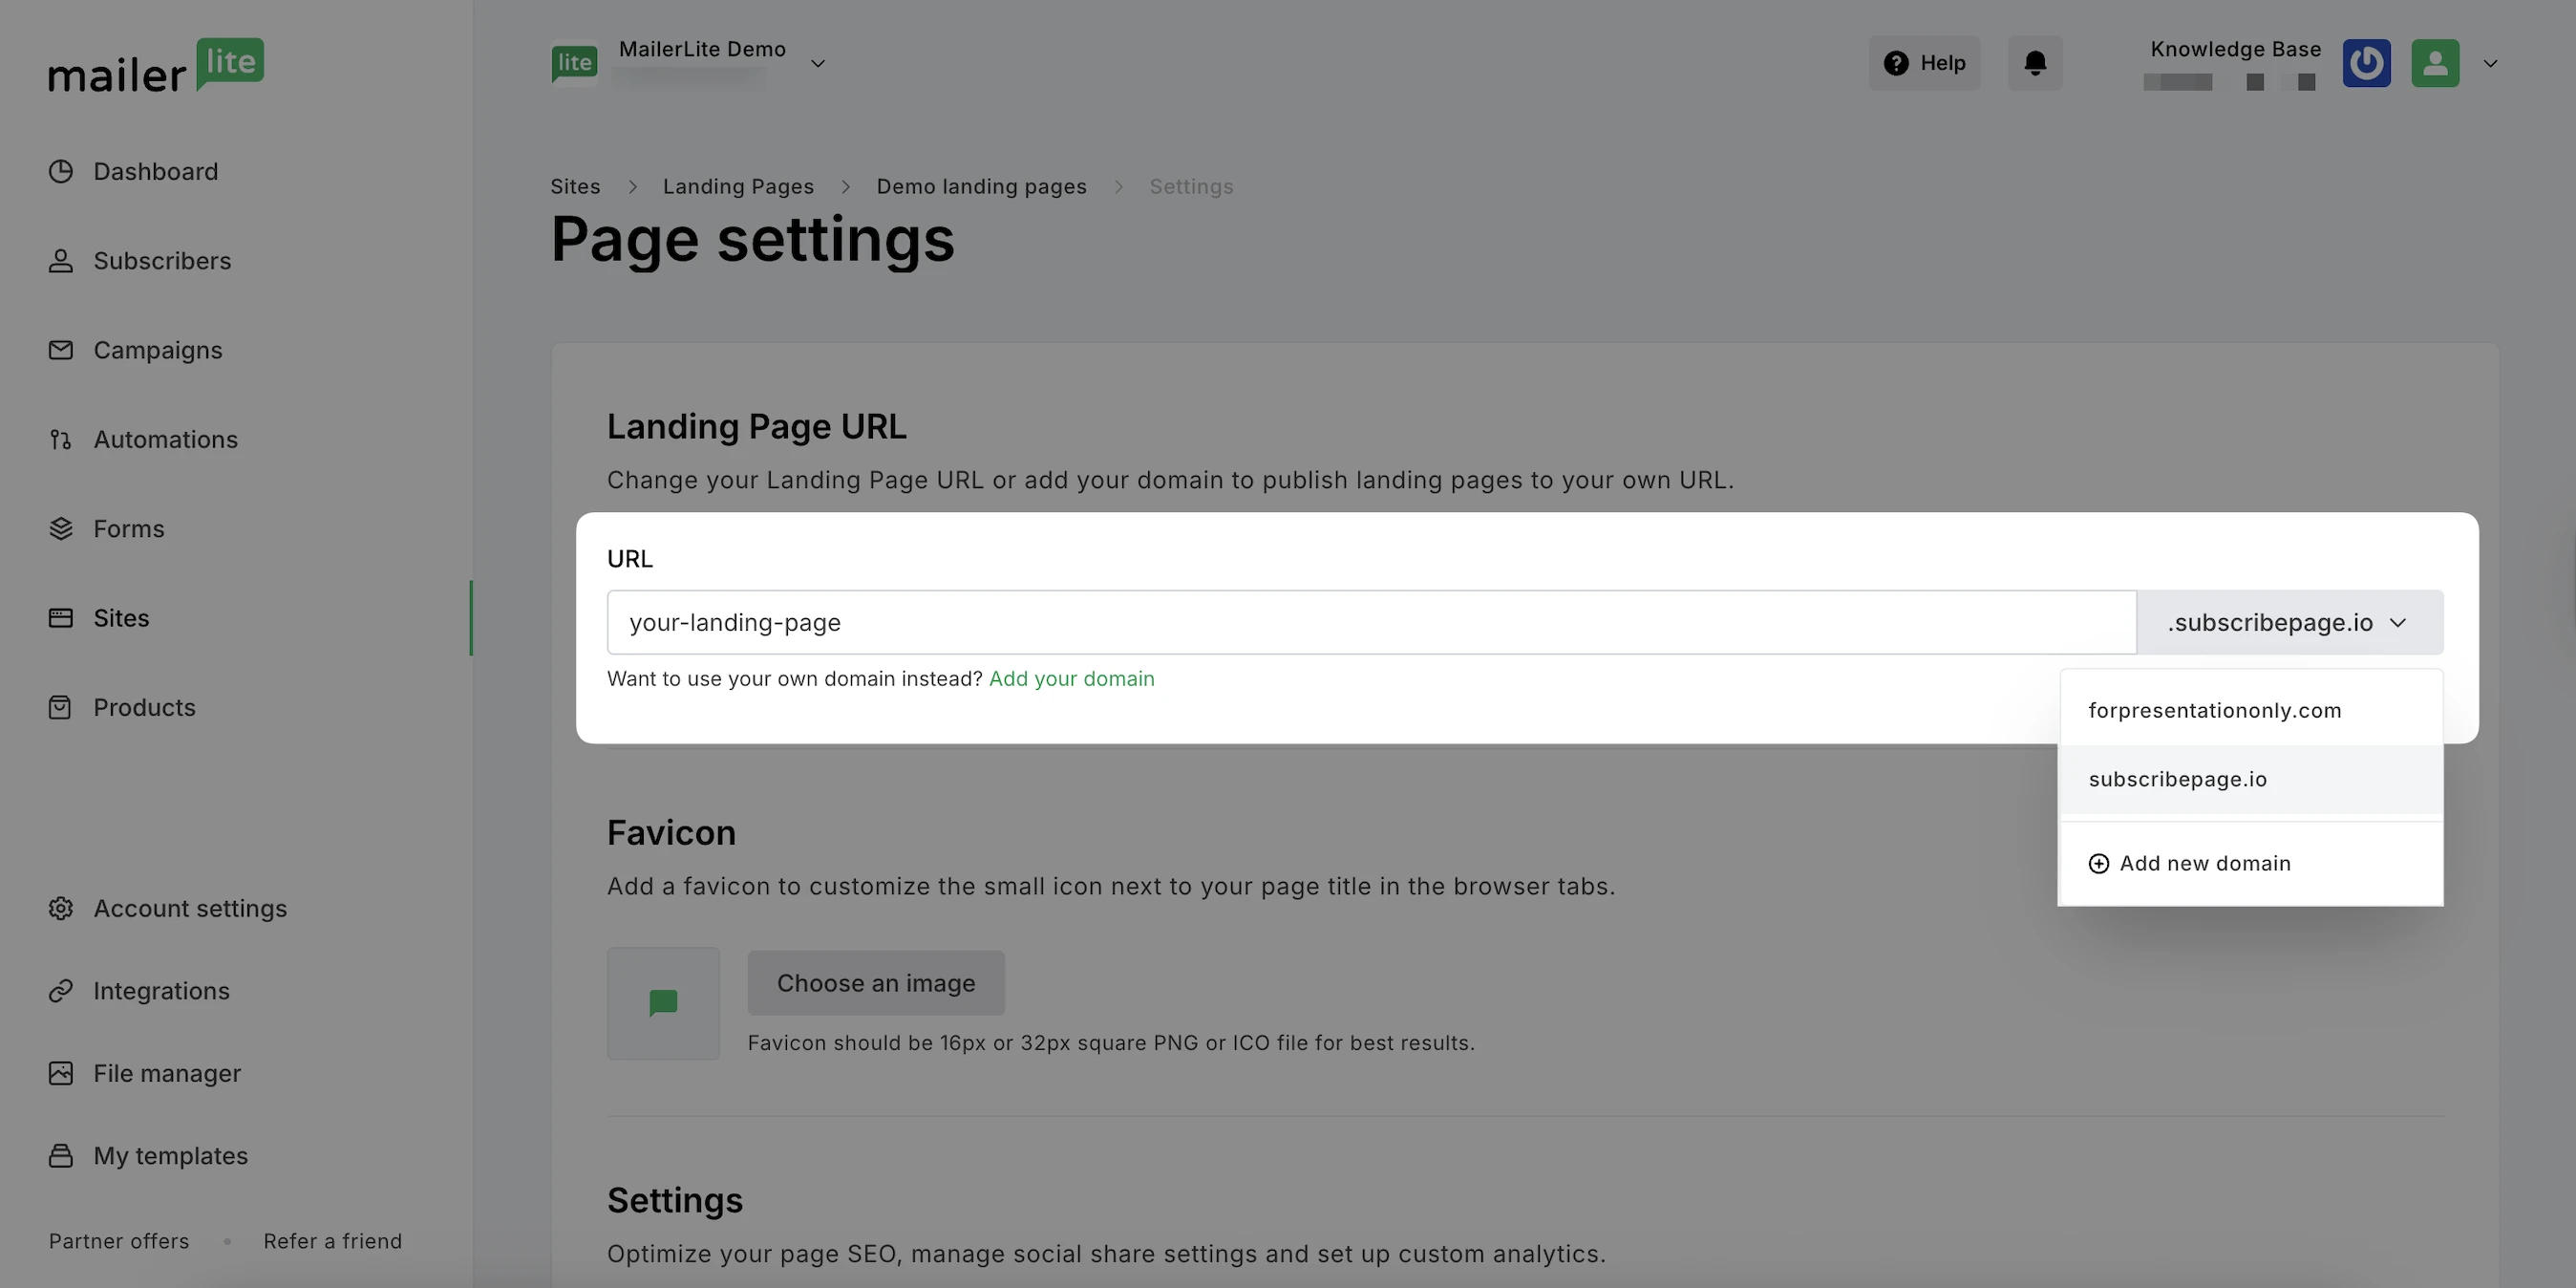
5. Click Save and continue.