No se encontraron resultados...

Cómo crear una campaña RSS

Mantén informados a tus suscriptores cuando publiques en tu blog mediante una campaña RSS.

Las campañas RSS son newsletters o boletines informativos automatizados que contienen entradas de blog o artículos recientes de un sitio web específico y que se envían diaria, semanal o mensualmente.

Si deseas enviar las entradas de tu blog por correo electrónico a tus suscriptores, lo mejor es crear una campaña RSS.

Cada vez que tengas un nuevo post, se enviará automáticamente según la frecuencia que hayas configurado manualmente para ello.

También puedes crear una campaña regular e incluir un bloque RSS. Esto es útil cuando envías un newsletter periódico y quieres incluir algunas entradas de un sitio web.

Sin embargo, ten en cuenta que existen algunas diferencias fundamentales entre ambos.

Para campañas RSS:

  • Sólo es posible tener un canal RSS por boletín.

  • Puedes añadir bloques RSS adicionales, pero no es posible tener un único feed para cada uno.

  • No es posible dar formato a ningún texto de la entrada. Nuestra aplicación muestra los extractos y el contenido completo a medida que se configura el feed. Los feeds pueden mostrar formatos separados y diferentes para los extractos y el contenido completo. En otras palabras, un feed puede mostrar extractos sin formato (por ejemplo: negrita, subrayado, saltos de línea), pero puede mostrar el contenido completo de una entrada con el formato original.

Para campañas regulares con un bloque RSS:

  • Puedes añadir varios bloques RSS. Para cada bloque, puedes decidir cuántas y qué entradas desea incluir en tu newsletter.

  • Cada entrada es su propio bloque, así que puedes darle el formato que quieras (por ejemplo: negrita, subrayado, cambiar el color, añadir personalizaciones, etc.).

  • Puedes tener más de un canal RSS añadiendo cada uno en un bloque RSS diferente.

Cuando crees por primera vez una campaña RSS, verás que el contenido se rellenará inmediatamente con las entradas más recientes del feed.

Sin embargo, este contenido específico sólo se muestra como ejemplo del aspecto que tendrá la campaña RSS en futuros envíos. El feed se comprueba y procesa cinco minutos antes del envío efectivo de la campaña.

Puedes elegir si deseas mostrar sólo las nuevas publicaciones o las ya existentes en cada campaña. Esto es útil si no quieres inundar a tus suscriptores con entradas antiguas que ya han visto. Cada mensaje sólo se enviará una vez. Sin embargo, una campaña RSS no se enviará en absoluto si no hay nuevas entradas.

Actualización de un post antiguo

En la mayoría de los canales RSS, cada entrada tiene un Identificador Único Global (GUID por sus siglas en inglés).

Hay dos formas de reconocer si una entrada es nueva o no: Si el analizador del feed regenera el GUID después de que una entrada se vuelva a guardar o se actualice, la entrada se incluirá en la nueva campaña RSS. Si no se regenera, el puesto no se incluirá.

Si no hay GUID pero el enlace a la entrada cambia, se incluirá la entrada. Si no hay GUID y no se cambia el enlace, no se incluirá la entrada.

Nota: Cuando actualices el contenido de una entrada antigua de tu sitio web, no se enviará como una nueva publicación y tu campaña RSS no lo detectará.

Hay varias formas de obtener la URL de tu feed:

  • En la mayoría de los casos, puedes obtener la URL de tu feed simplemente añadiendo /feed al final de tu dominio. Si tienes un sitio web WordPress, utiliza este formato: sudominio.com/feed.

  • Algunos sitios web ya muestran un icono RSS. Haz clic en él para ir a la página del canal RSS y copiar la URL.

  • Puedes utilizar el código fuente de tu sitio web. Para esta opción, necesitarás el código fuente HTML de tu sitio web. Si utilizas Google Chrome, puedes encontrarlo pasando el ratón por encima de la página web, haciendo clic con el botón derecho y seleccionando la opción Inspeccionar o Ver fuente. A continuación, accederás al código HTML de tu página.

Nota: La opción de Inspeccionar o Ver fuente no está disponible en todos los navegadores.

Dentro del código HTML de tu sitio web, puedes buscar tu canal RSS: Para PC: pulsa Ctrl + F y escribe RSS. Para Mac: pulsa CMD + F: y escribe RSS.

Deberías encontrar un código similar a éste:

link rel="alternate" type="application/rss+xml" title="Canal RSS" href="/feed/"

La URL del canal RSS se encuentra entre las comillas después de href=. En el ejemplo anterior, sería /feed/.

Si ninguna de estas opciones te funciona, tendrás que ponerte en contacto con el administrador de tu sitio web. Para algunos sitios web, habilitar el canal RSS puede tener un costo adicional.

Para crear una campaña RSS:

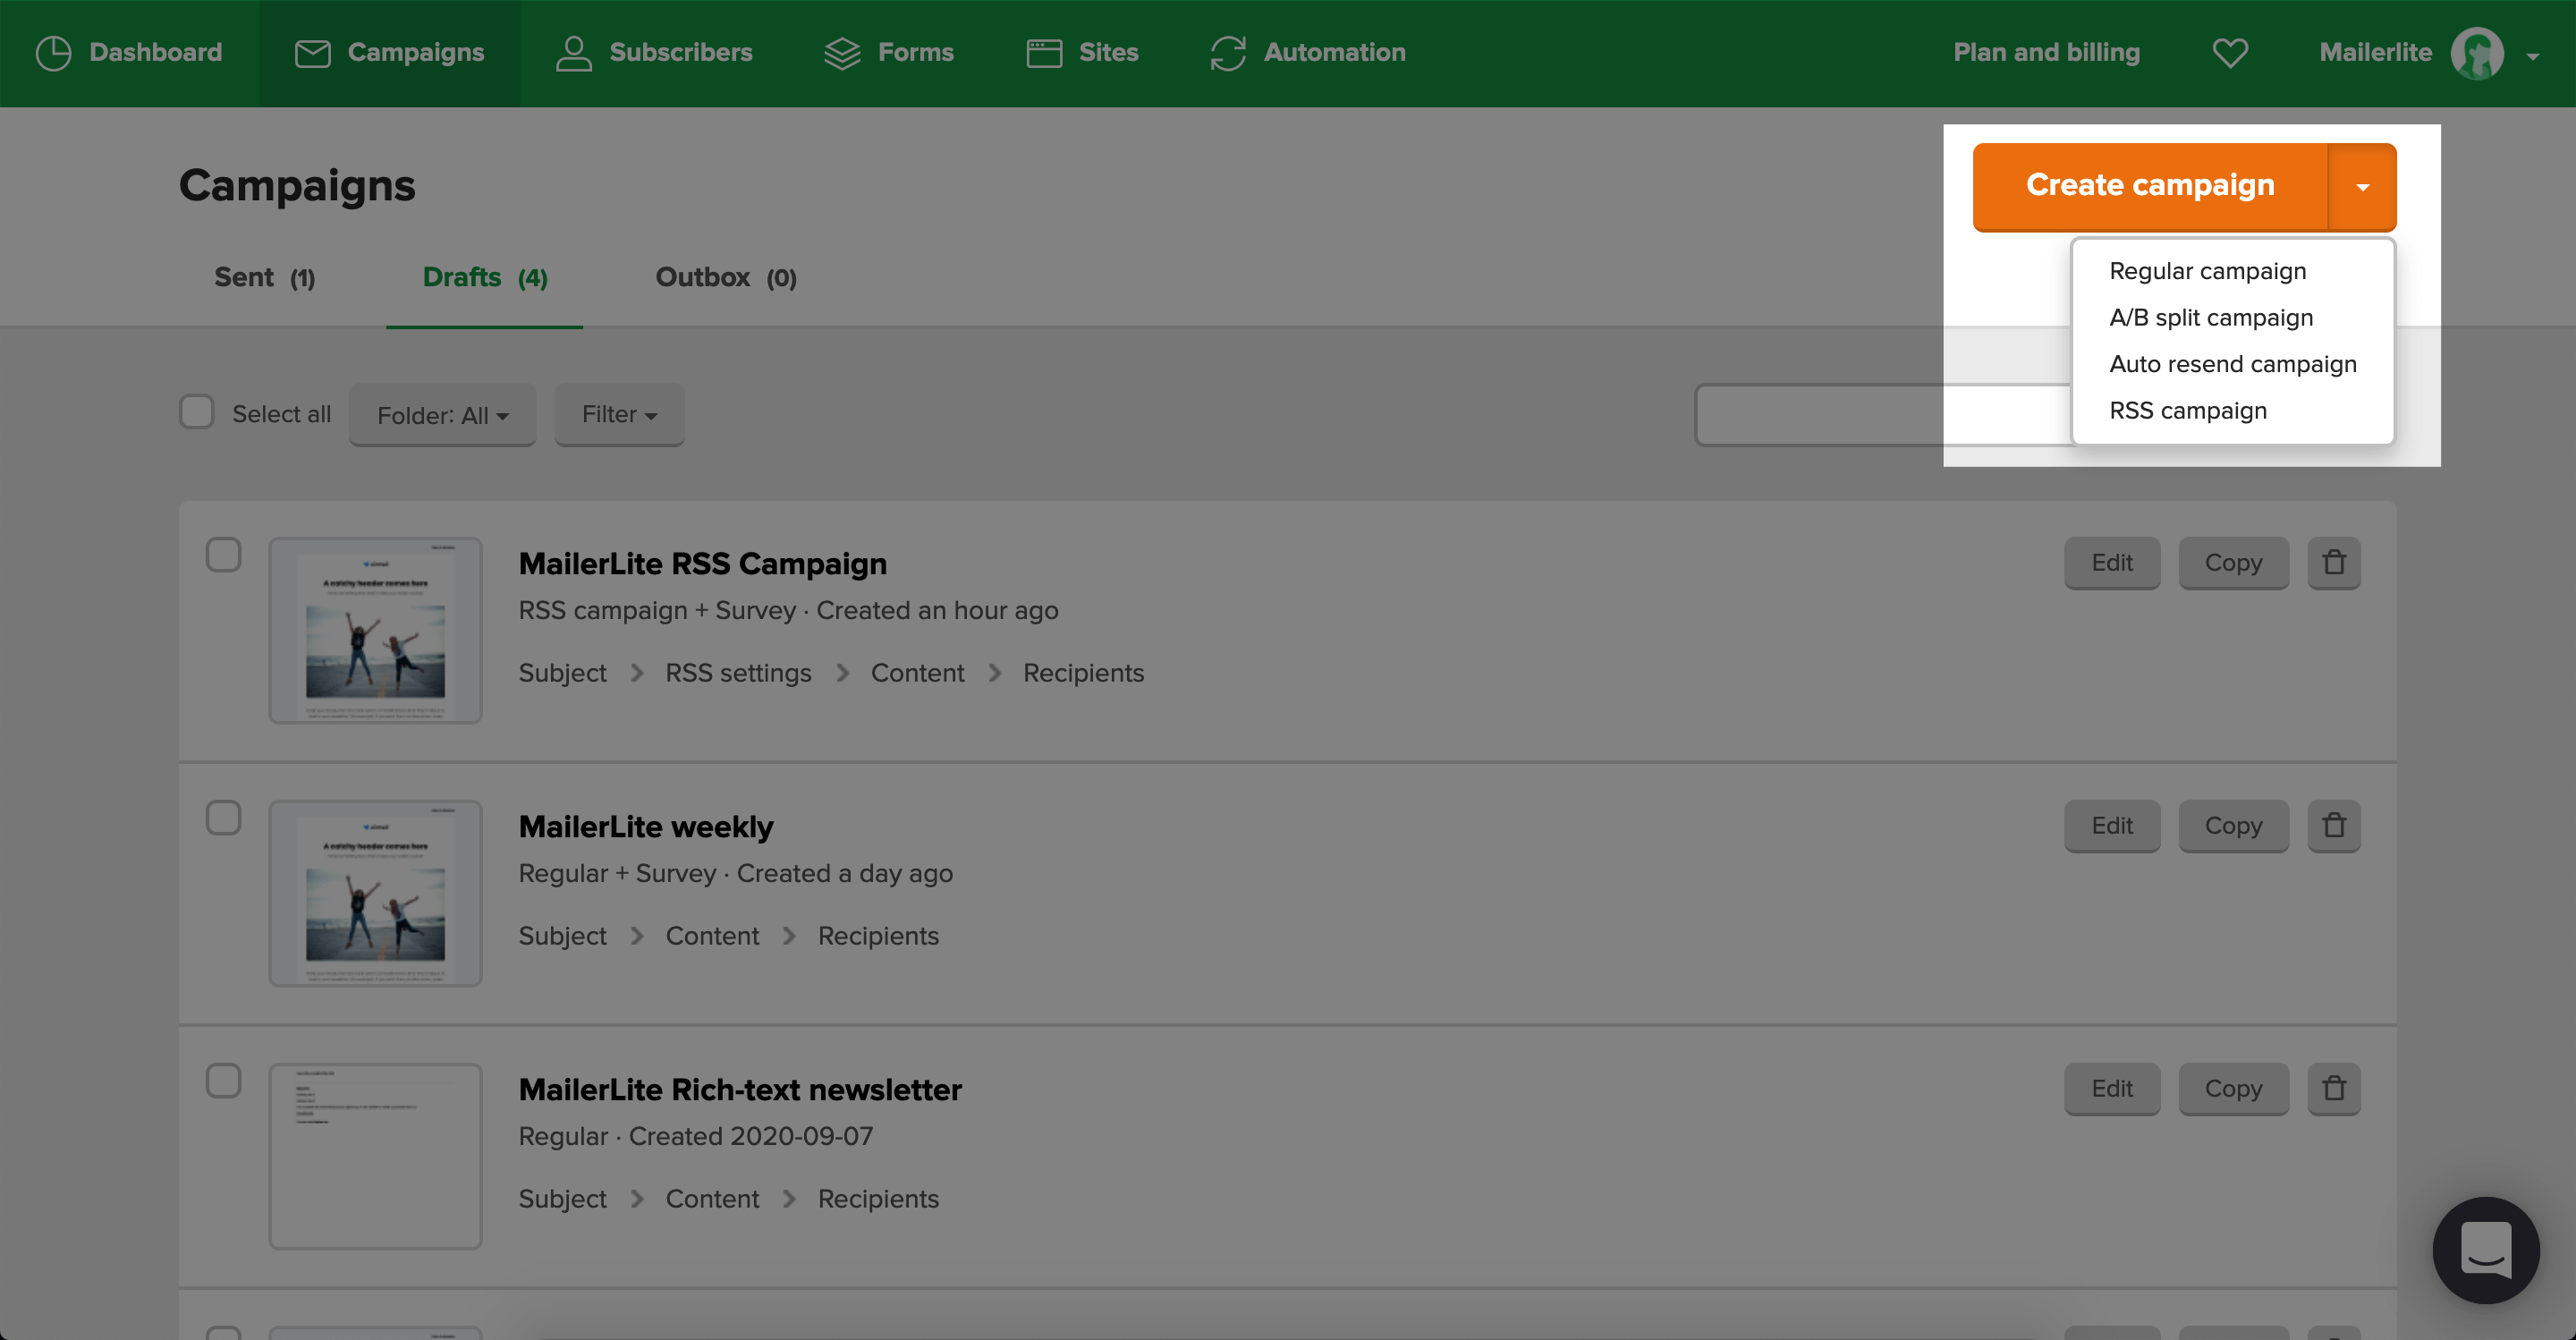
  1. Va a la página Campañas.

  2. Haz clic en Crear campaña.

  3. En Detalles de la campaña, introduce un nombre de campaña interno para tu campaña RSS.

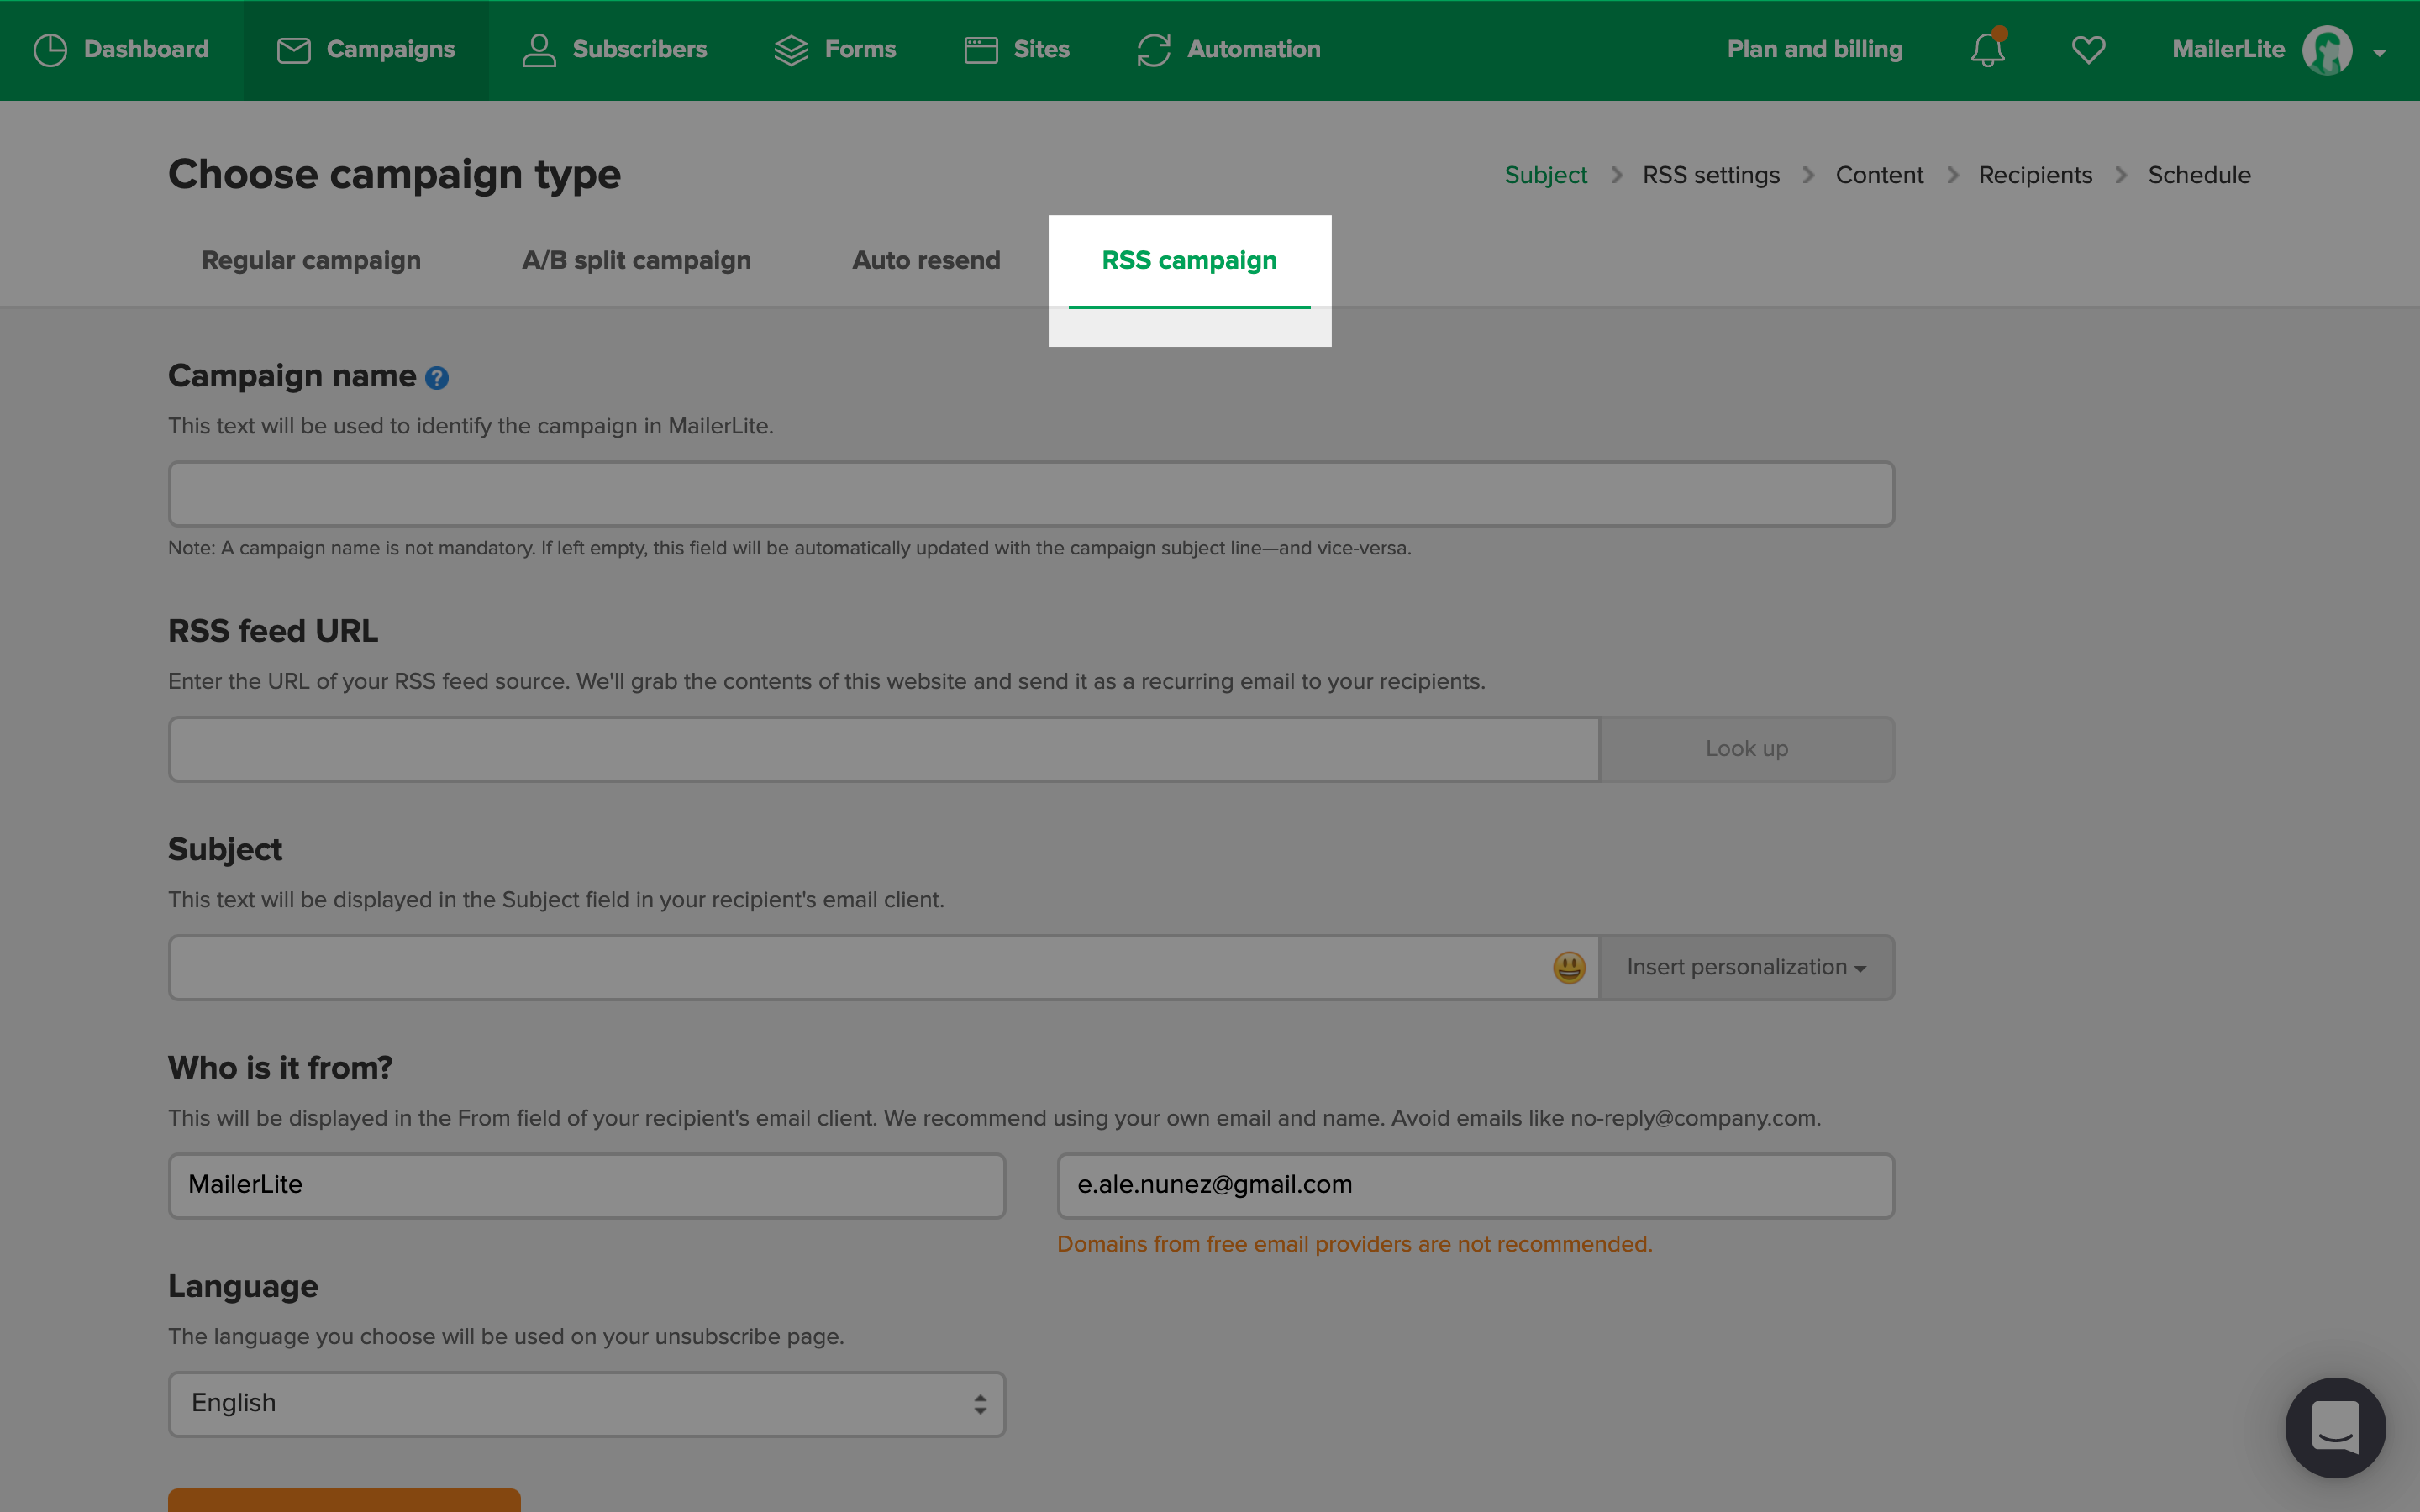
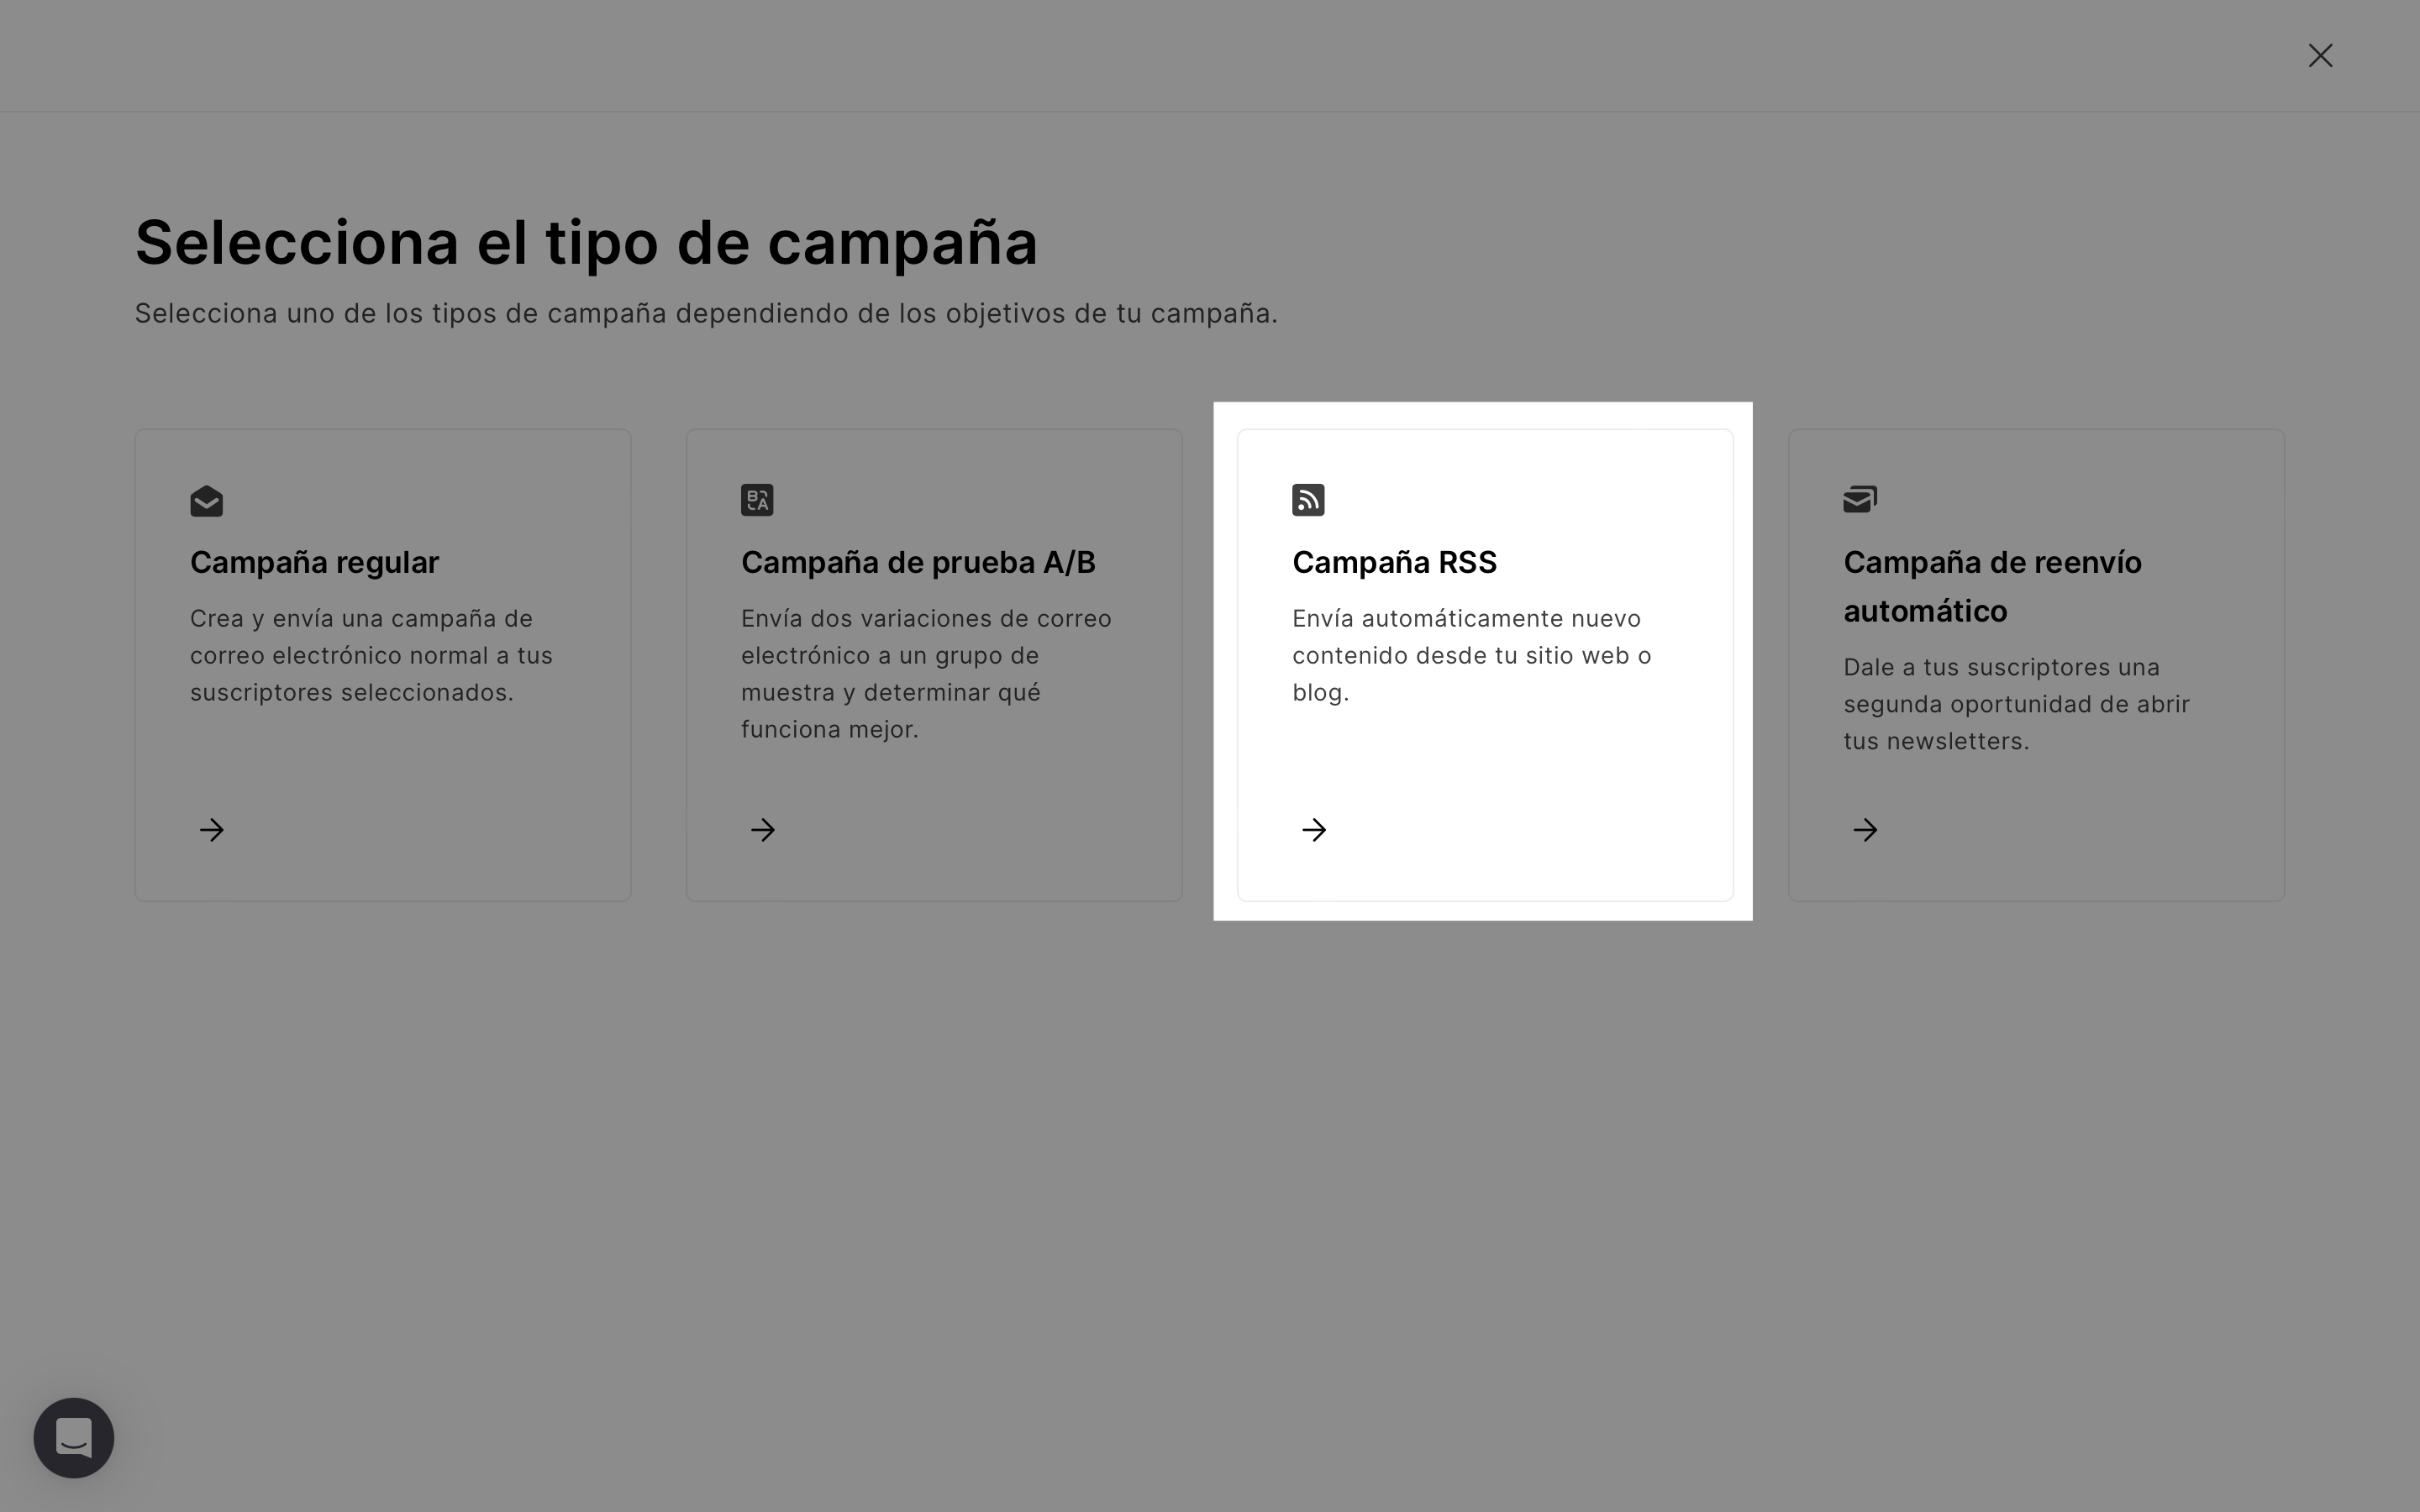
  4. Selecciona el tipo de campaña: Campaña RSS.

5. Haz clic en Guardar y continuar.

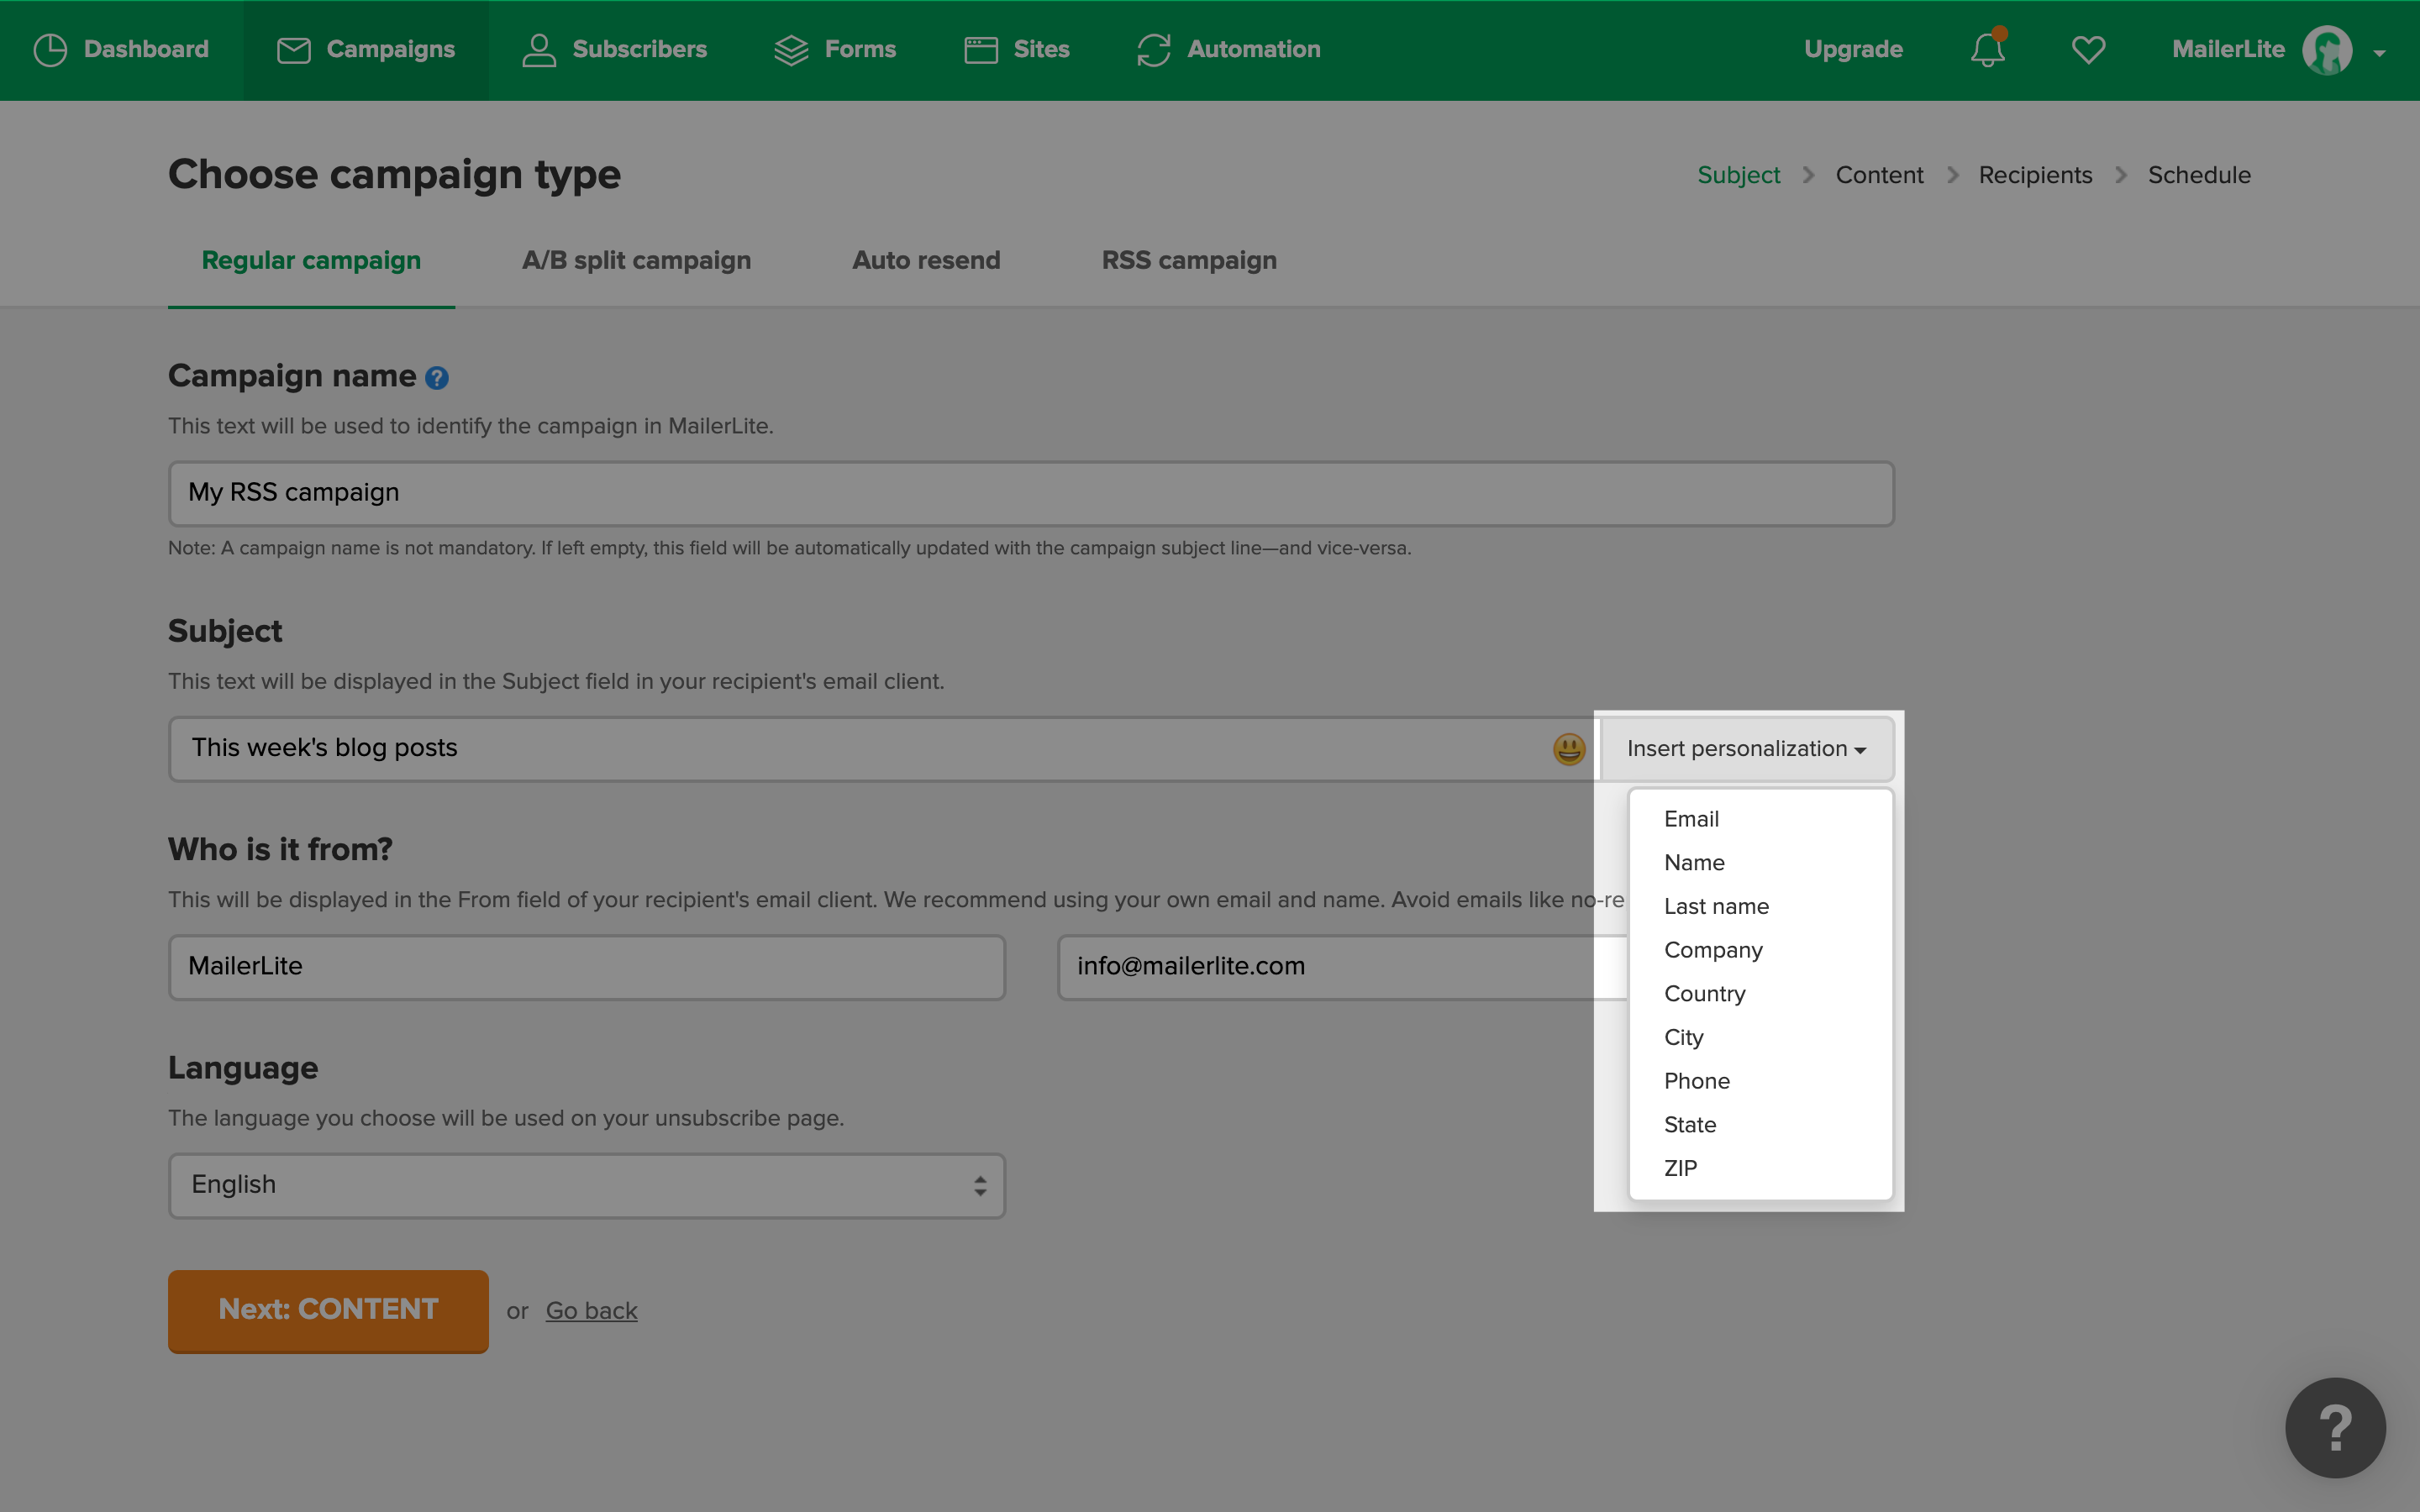
6. Introduce el asunto y la información del remitente y, a continuación, selecciona las Opciones de seguimiento y el Idioma de la campaña.

7. Haz clic en Siguiente paso.

8. Introduce la URL de tu feed RSS.

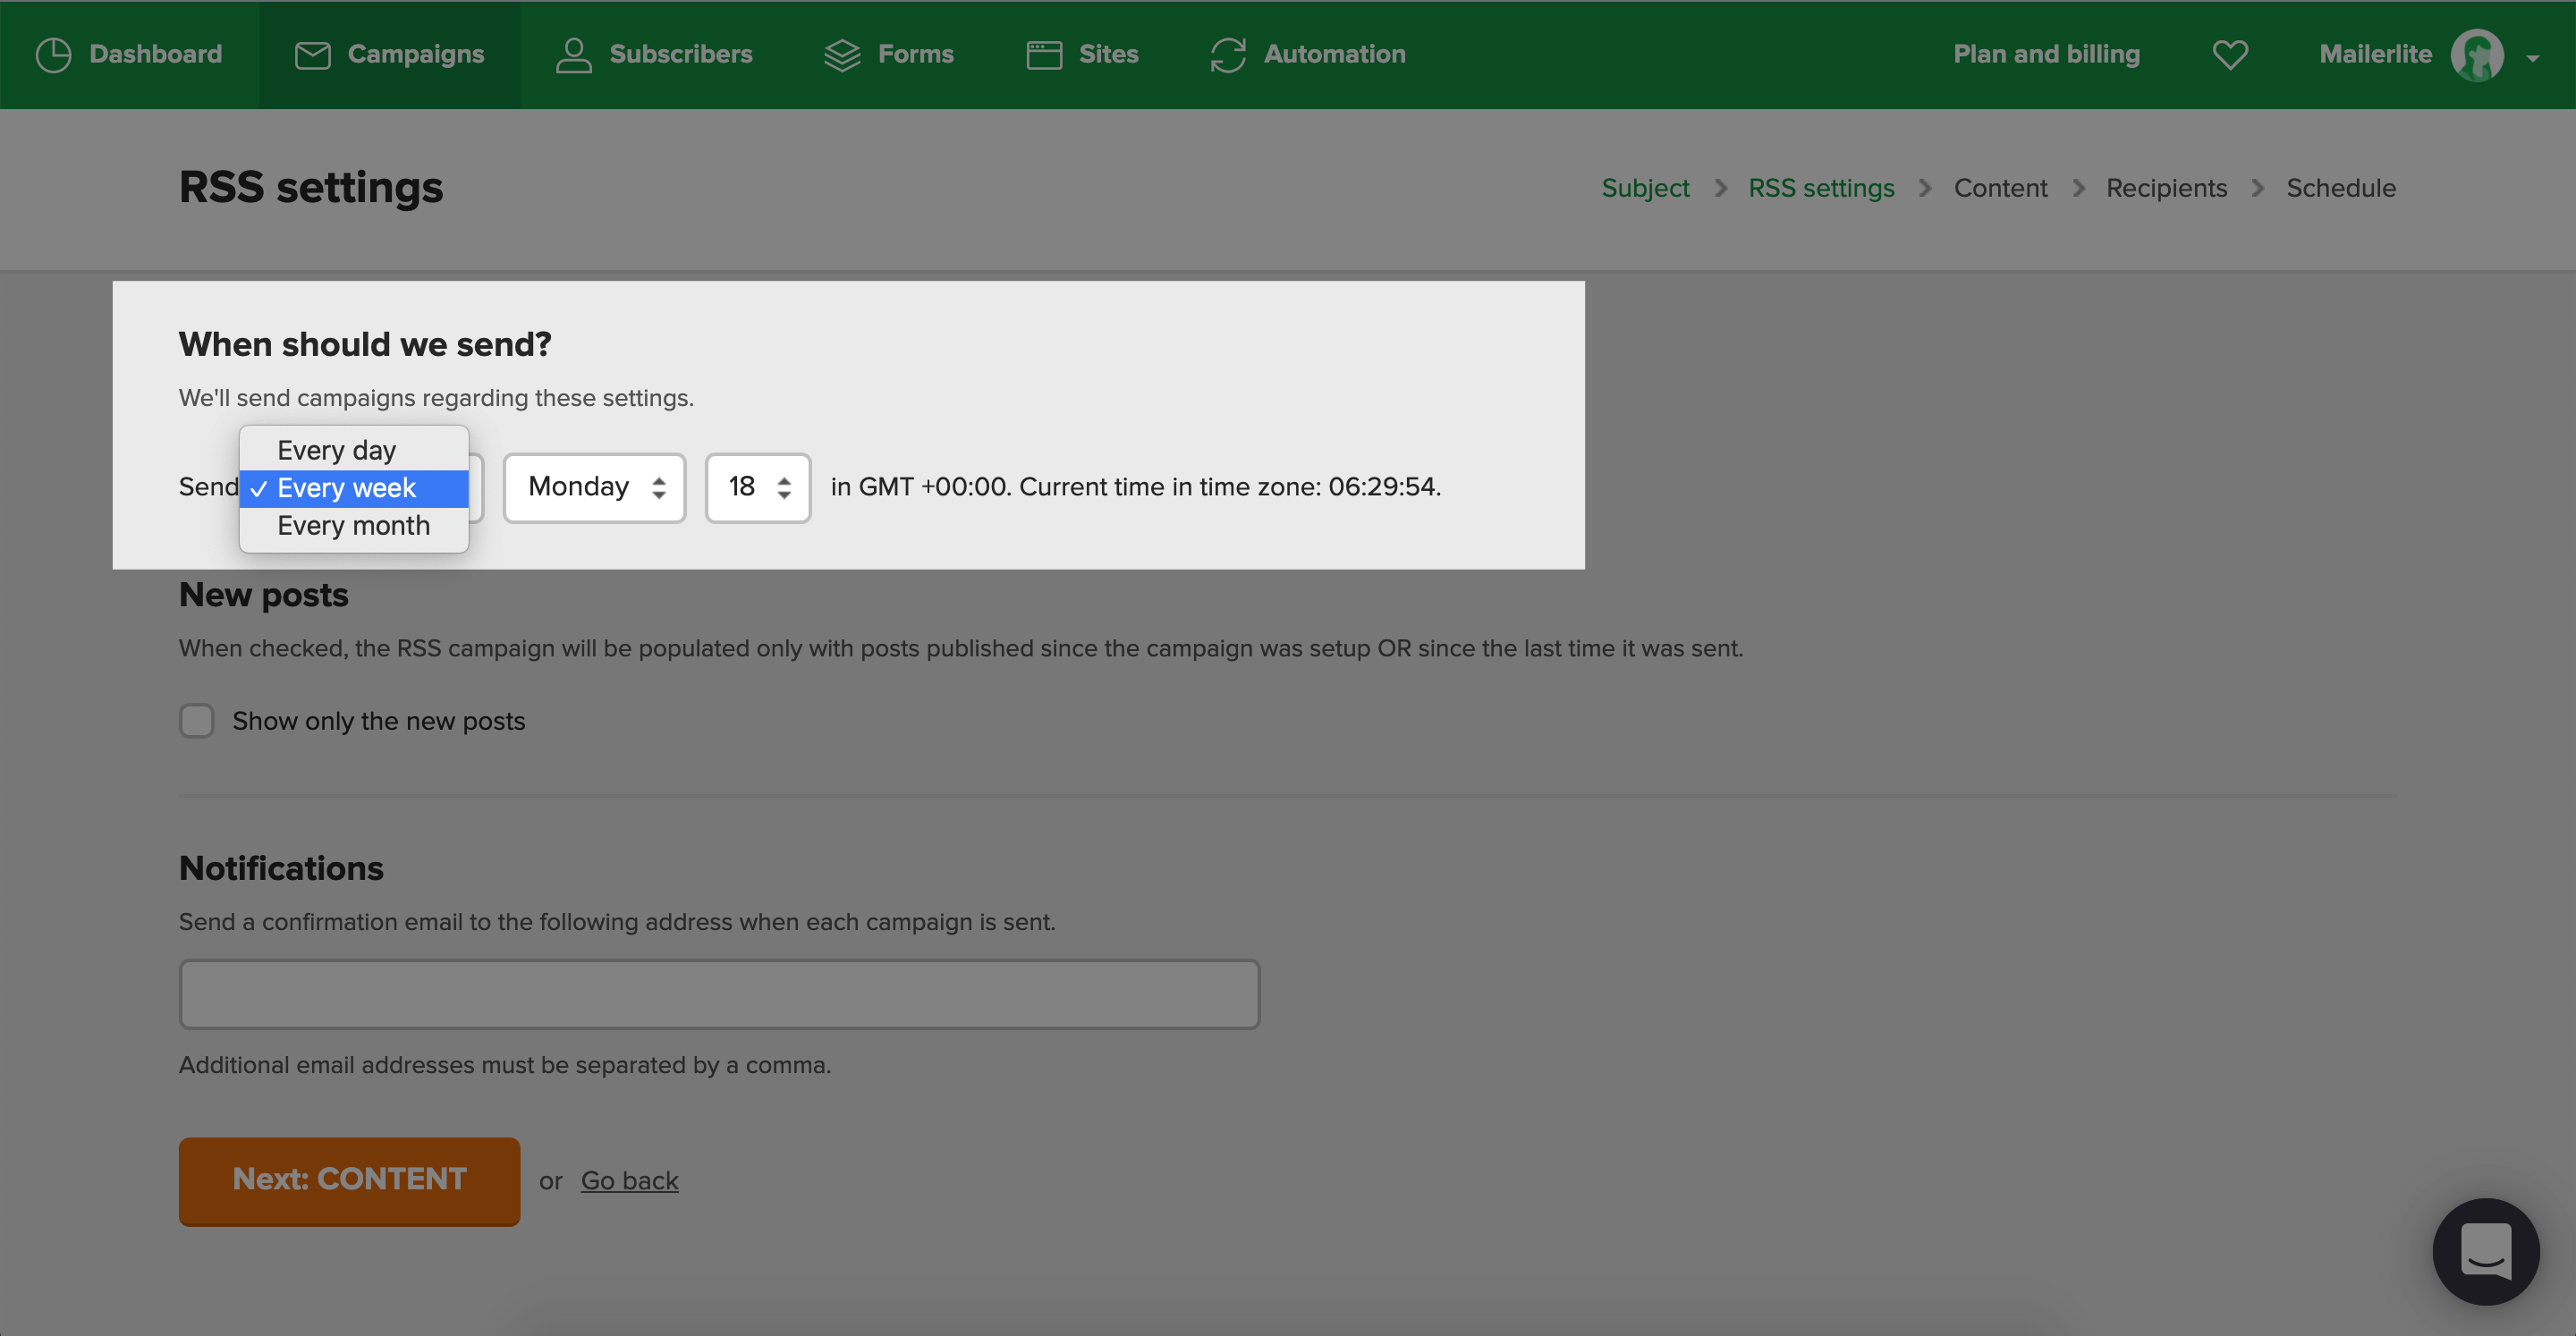
9. En ¿Cuándo debemos enviar? establece la frecuencia, la hora y los días en que deseas enviar tus campañas RSS.

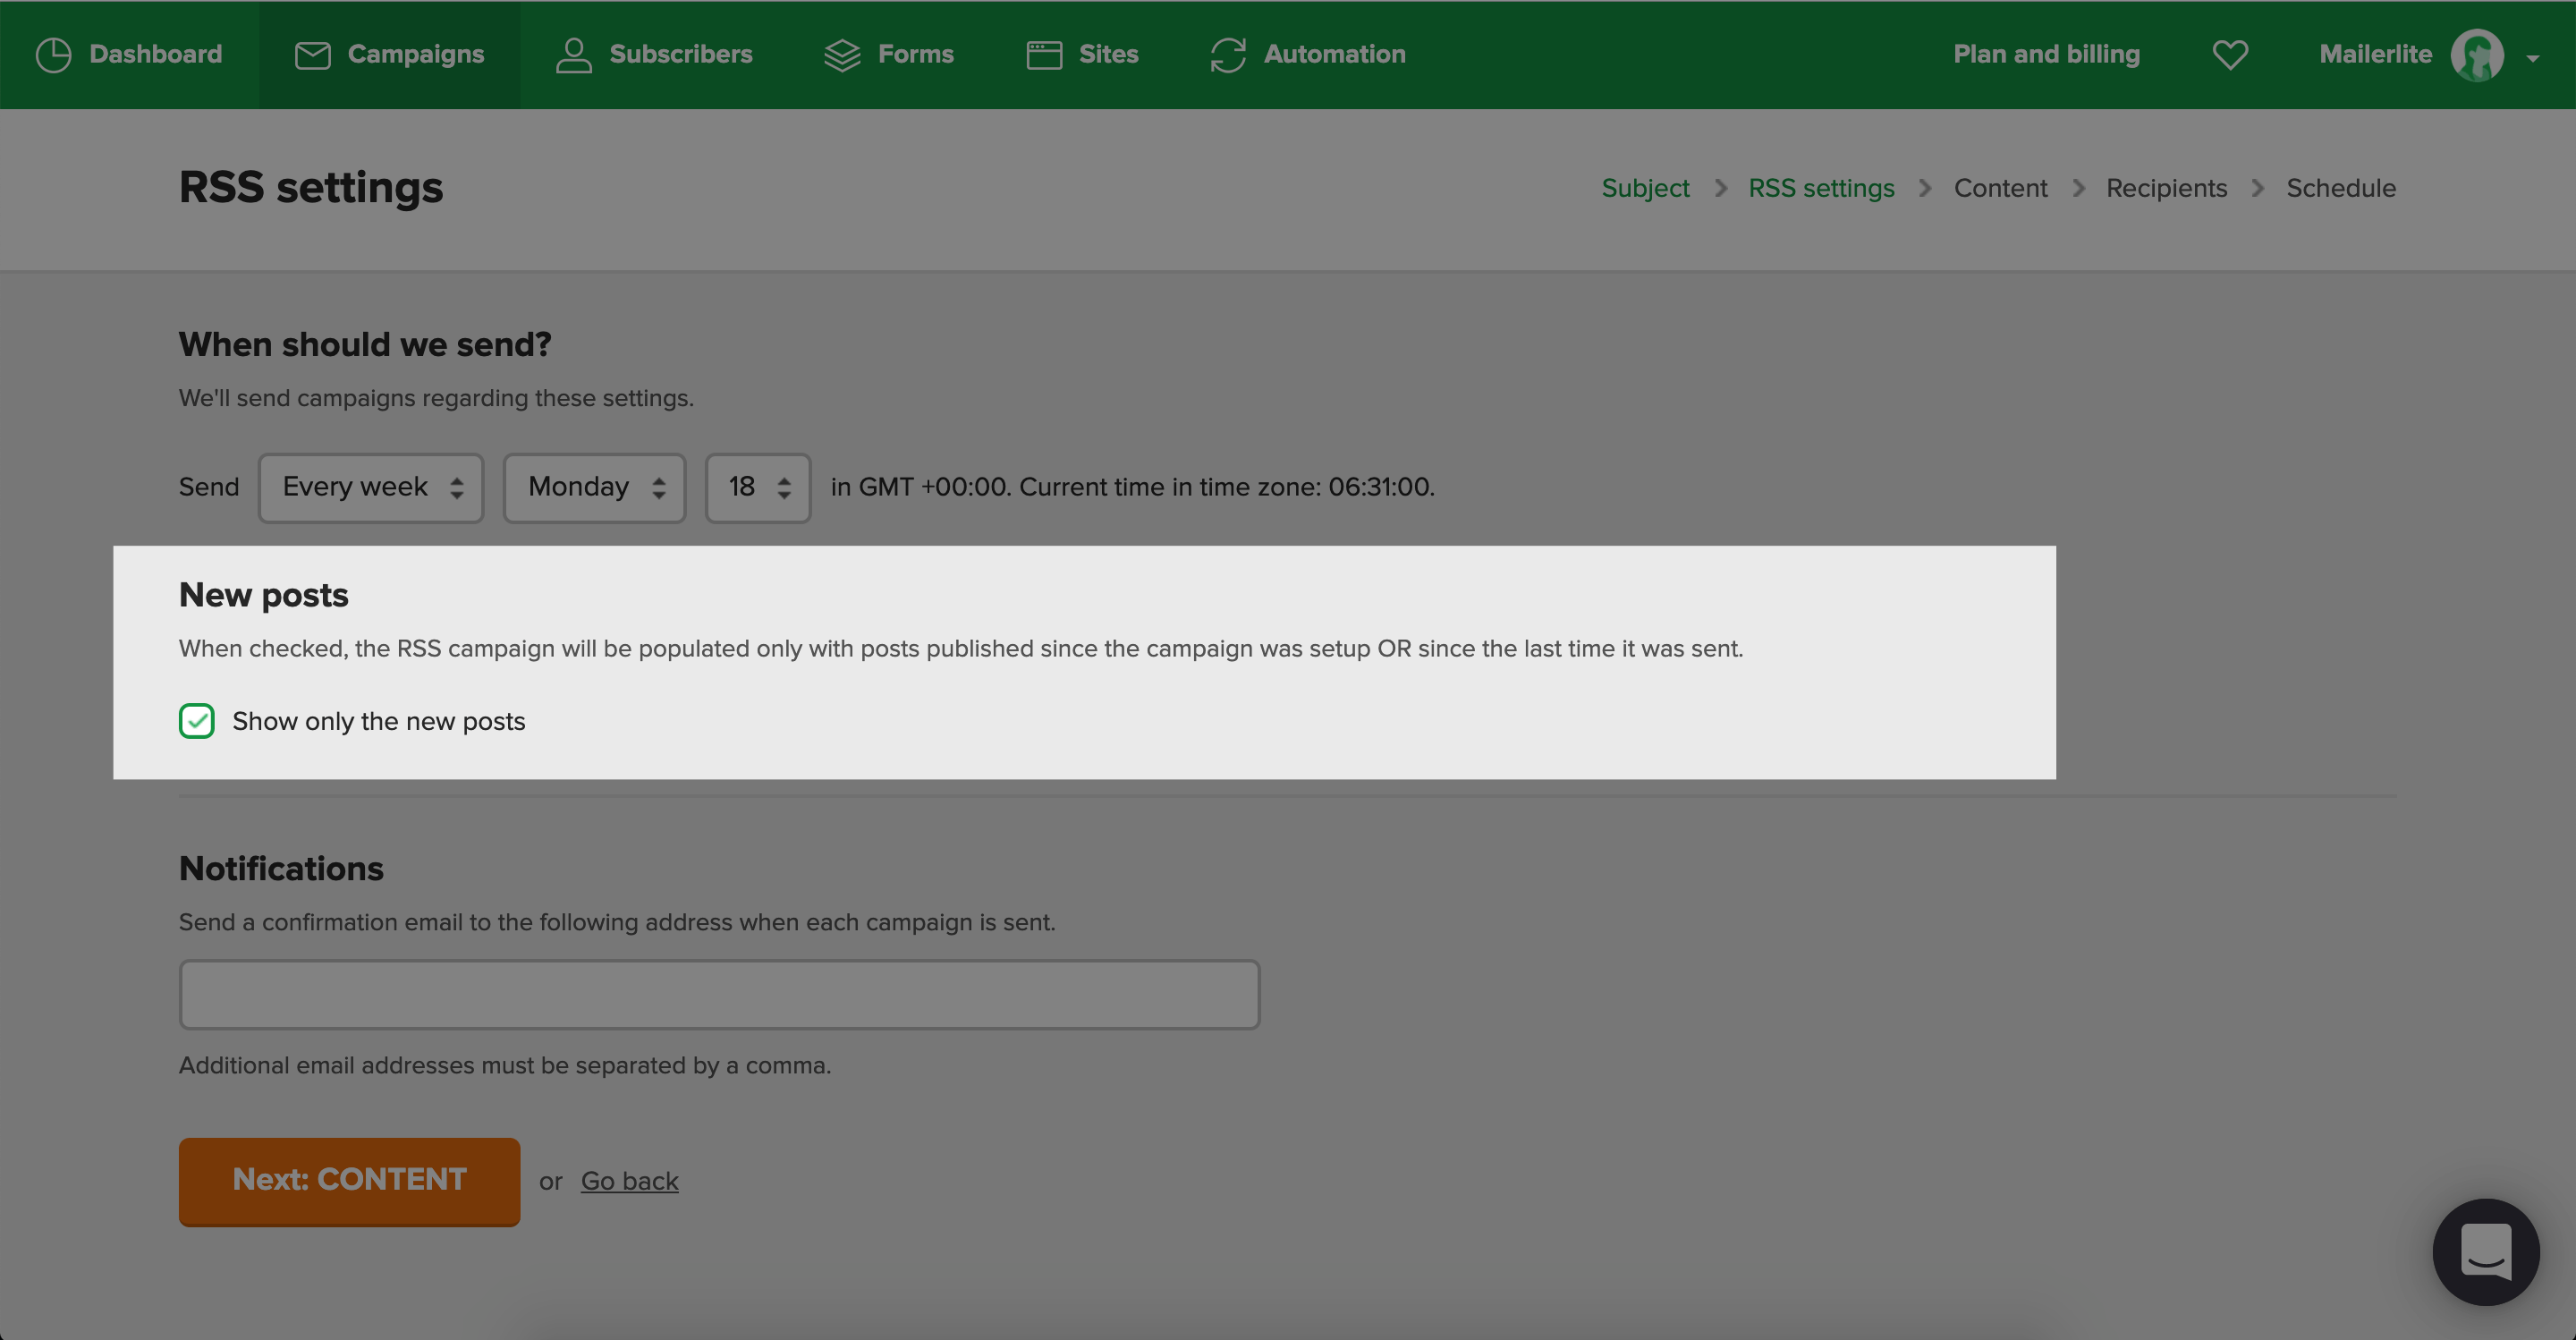
10. Selecciona si deseas o no Mostrar sólo los mensajes nuevos. Si se selecciona esta opción, la campaña RSS sólo se completará con las entradas publicadas después de que se configurara la campaña o desde la última vez que se envió una campaña RSS.

11. En Notificaciones, introduce la dirección de correo electrónico a la que deseas recibir las notificaciones de envío de una campaña RSS.

12. Haz clic en Siguiente: Contenido.

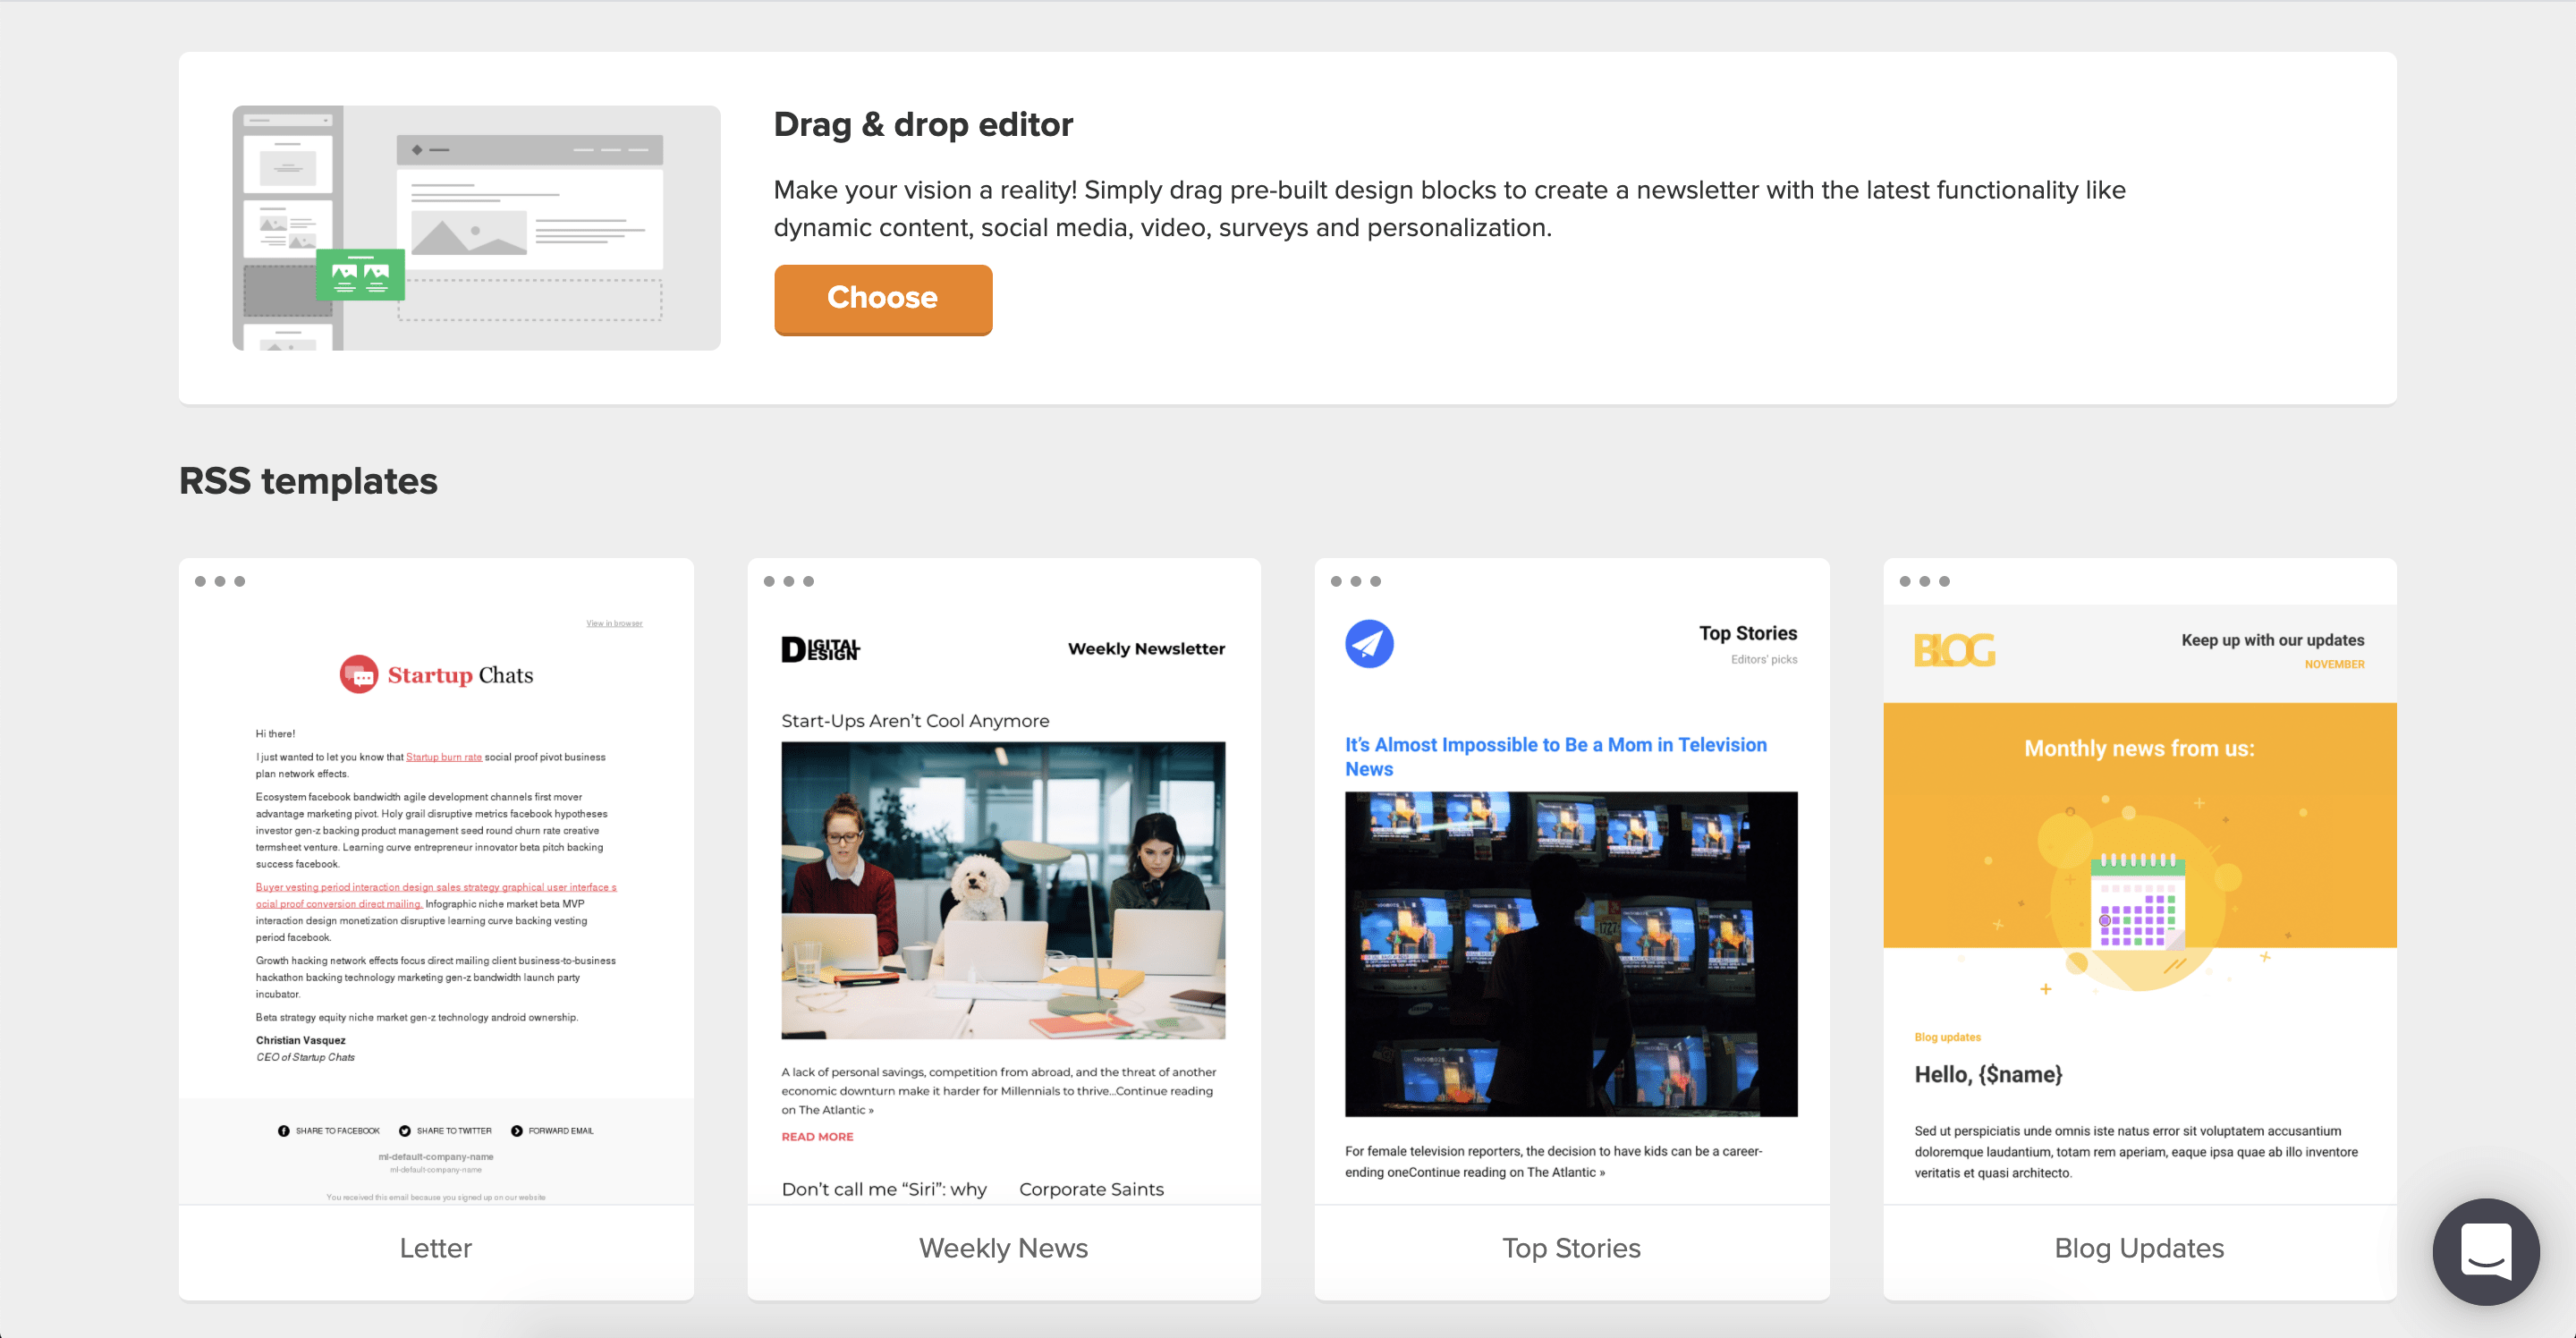
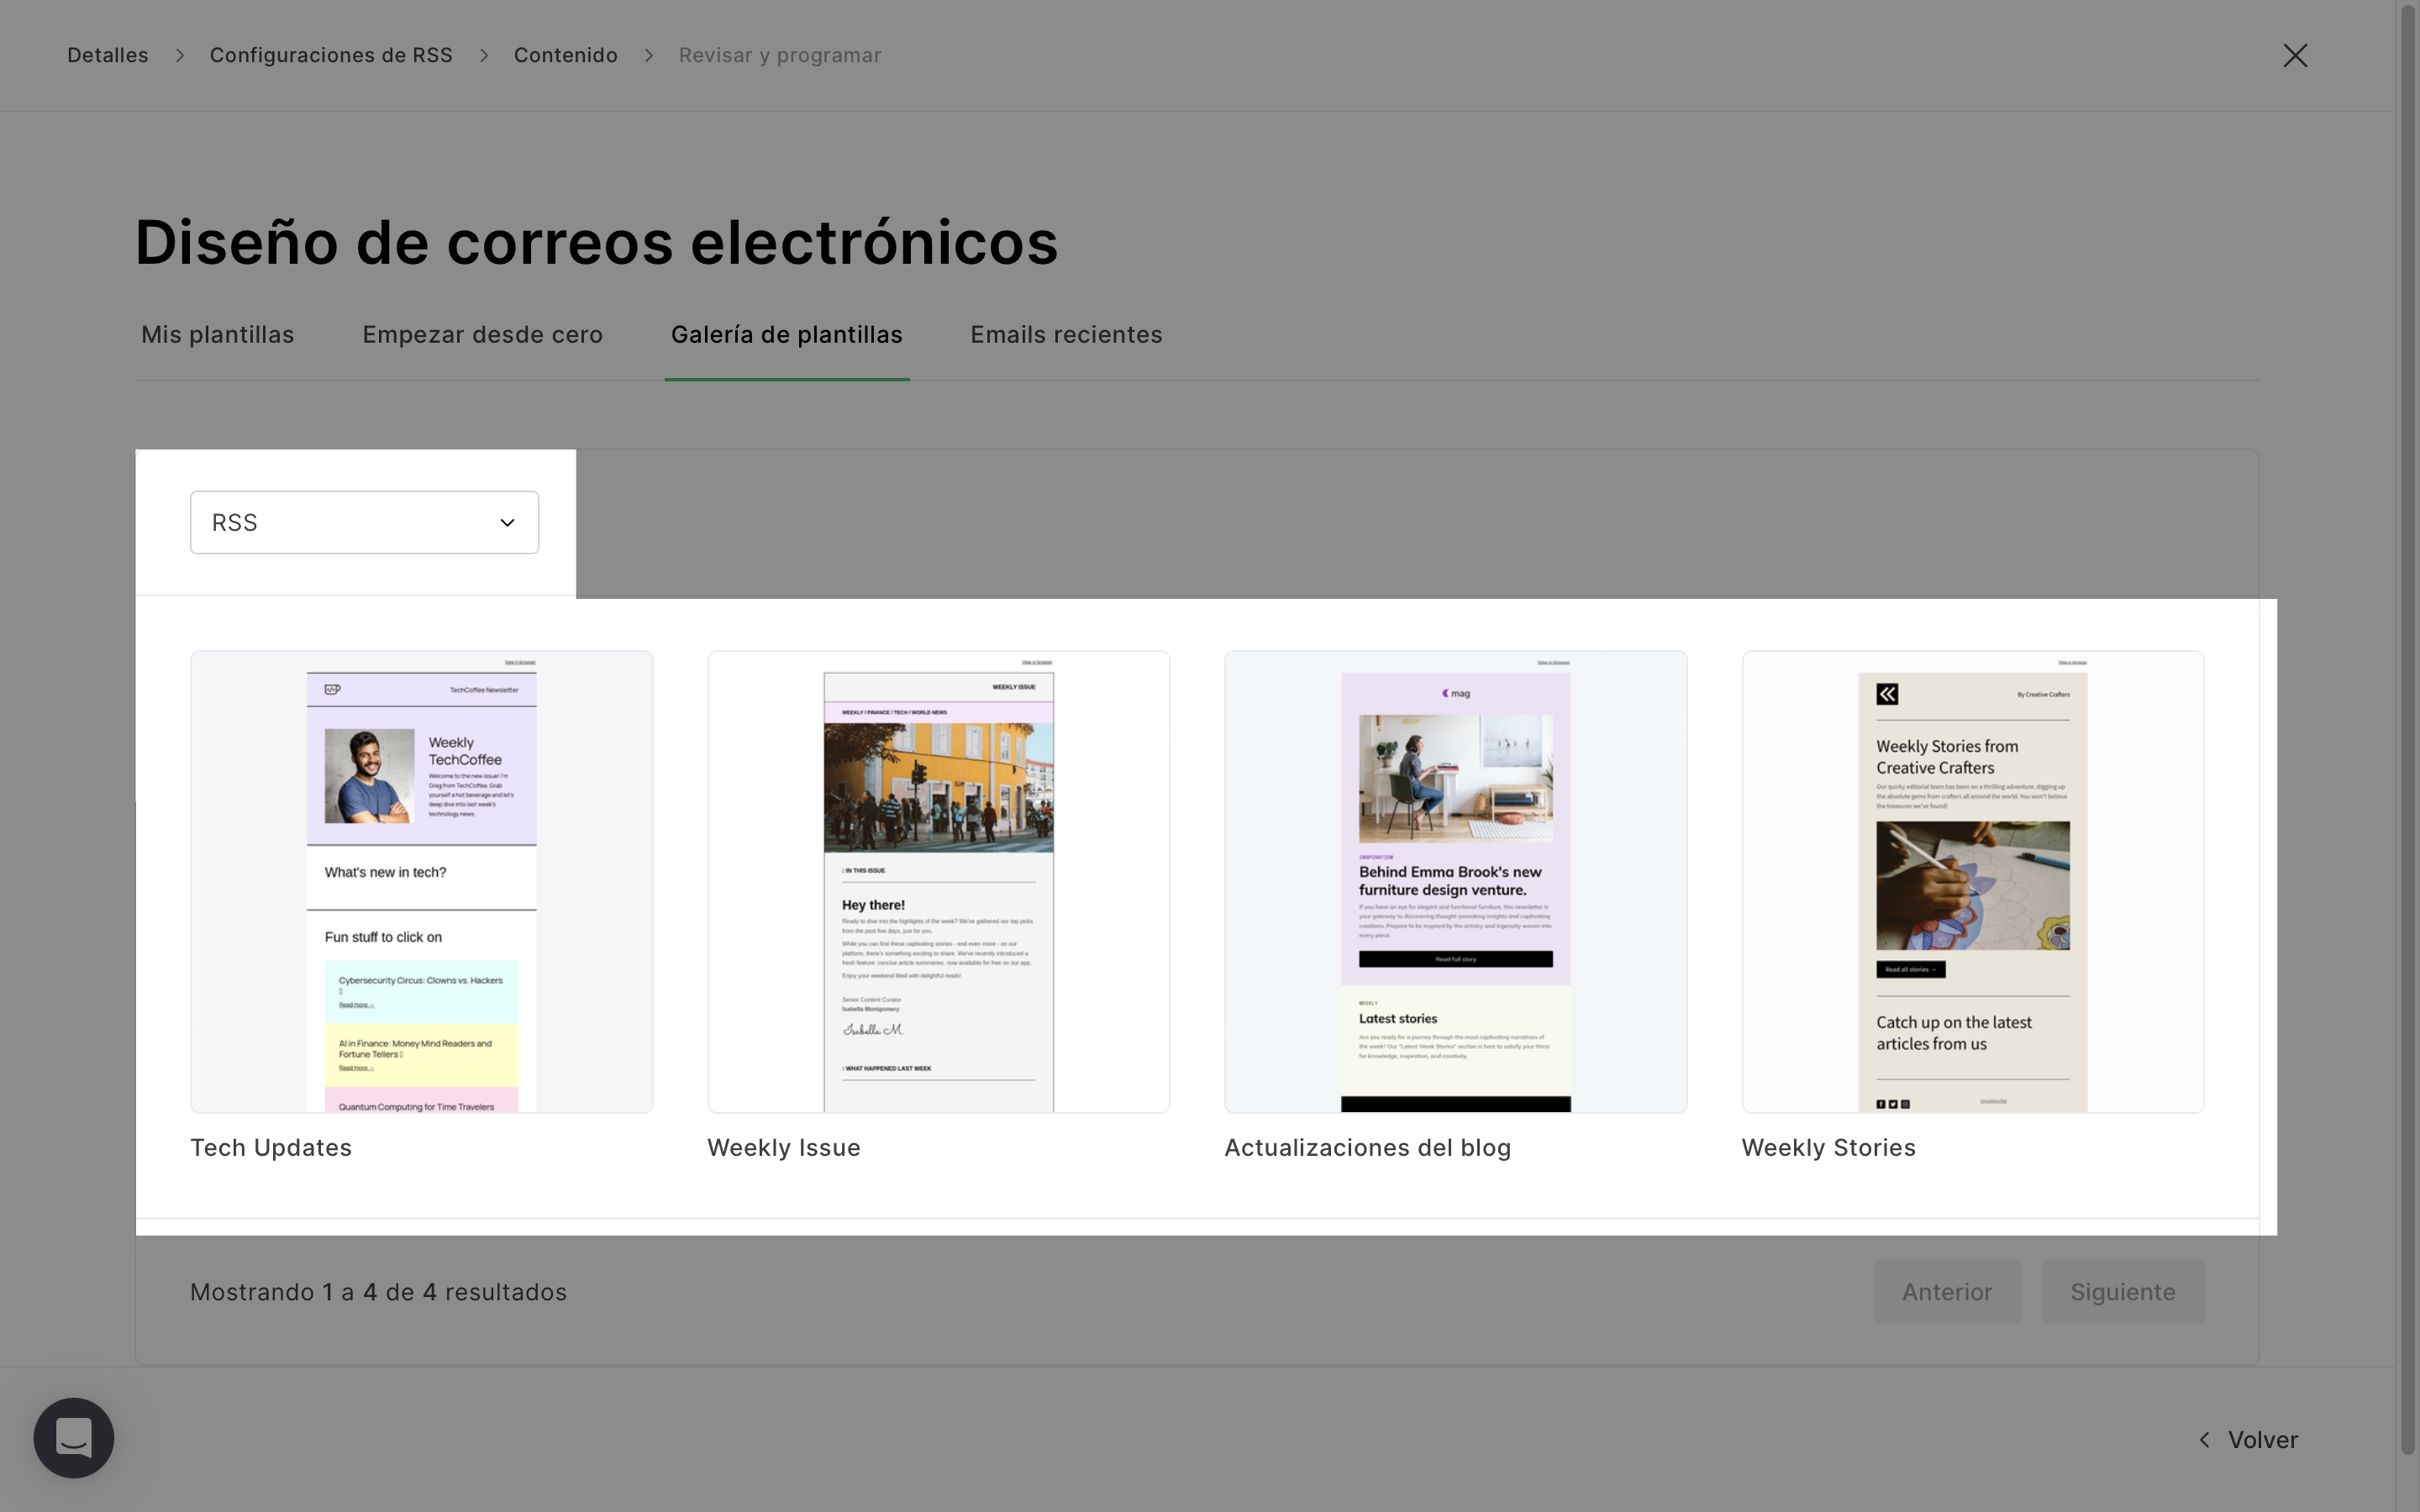
13. Selecciona una Plantilla RSS o selecciona el editor de arrastrar y soltar para crear tu campaña desde cero.

14. Cuando estés satisfecho(a) con el diseño de tu correo electrónico, haz clic en Finalizar edición. Recuerda que este diseño se utilizará para todos los correos electrónicos enviados desde esta campaña RSS.

15. Selecciona los destinatarios de tus campañas RSS automáticas y haz clic en Siguiente paso.

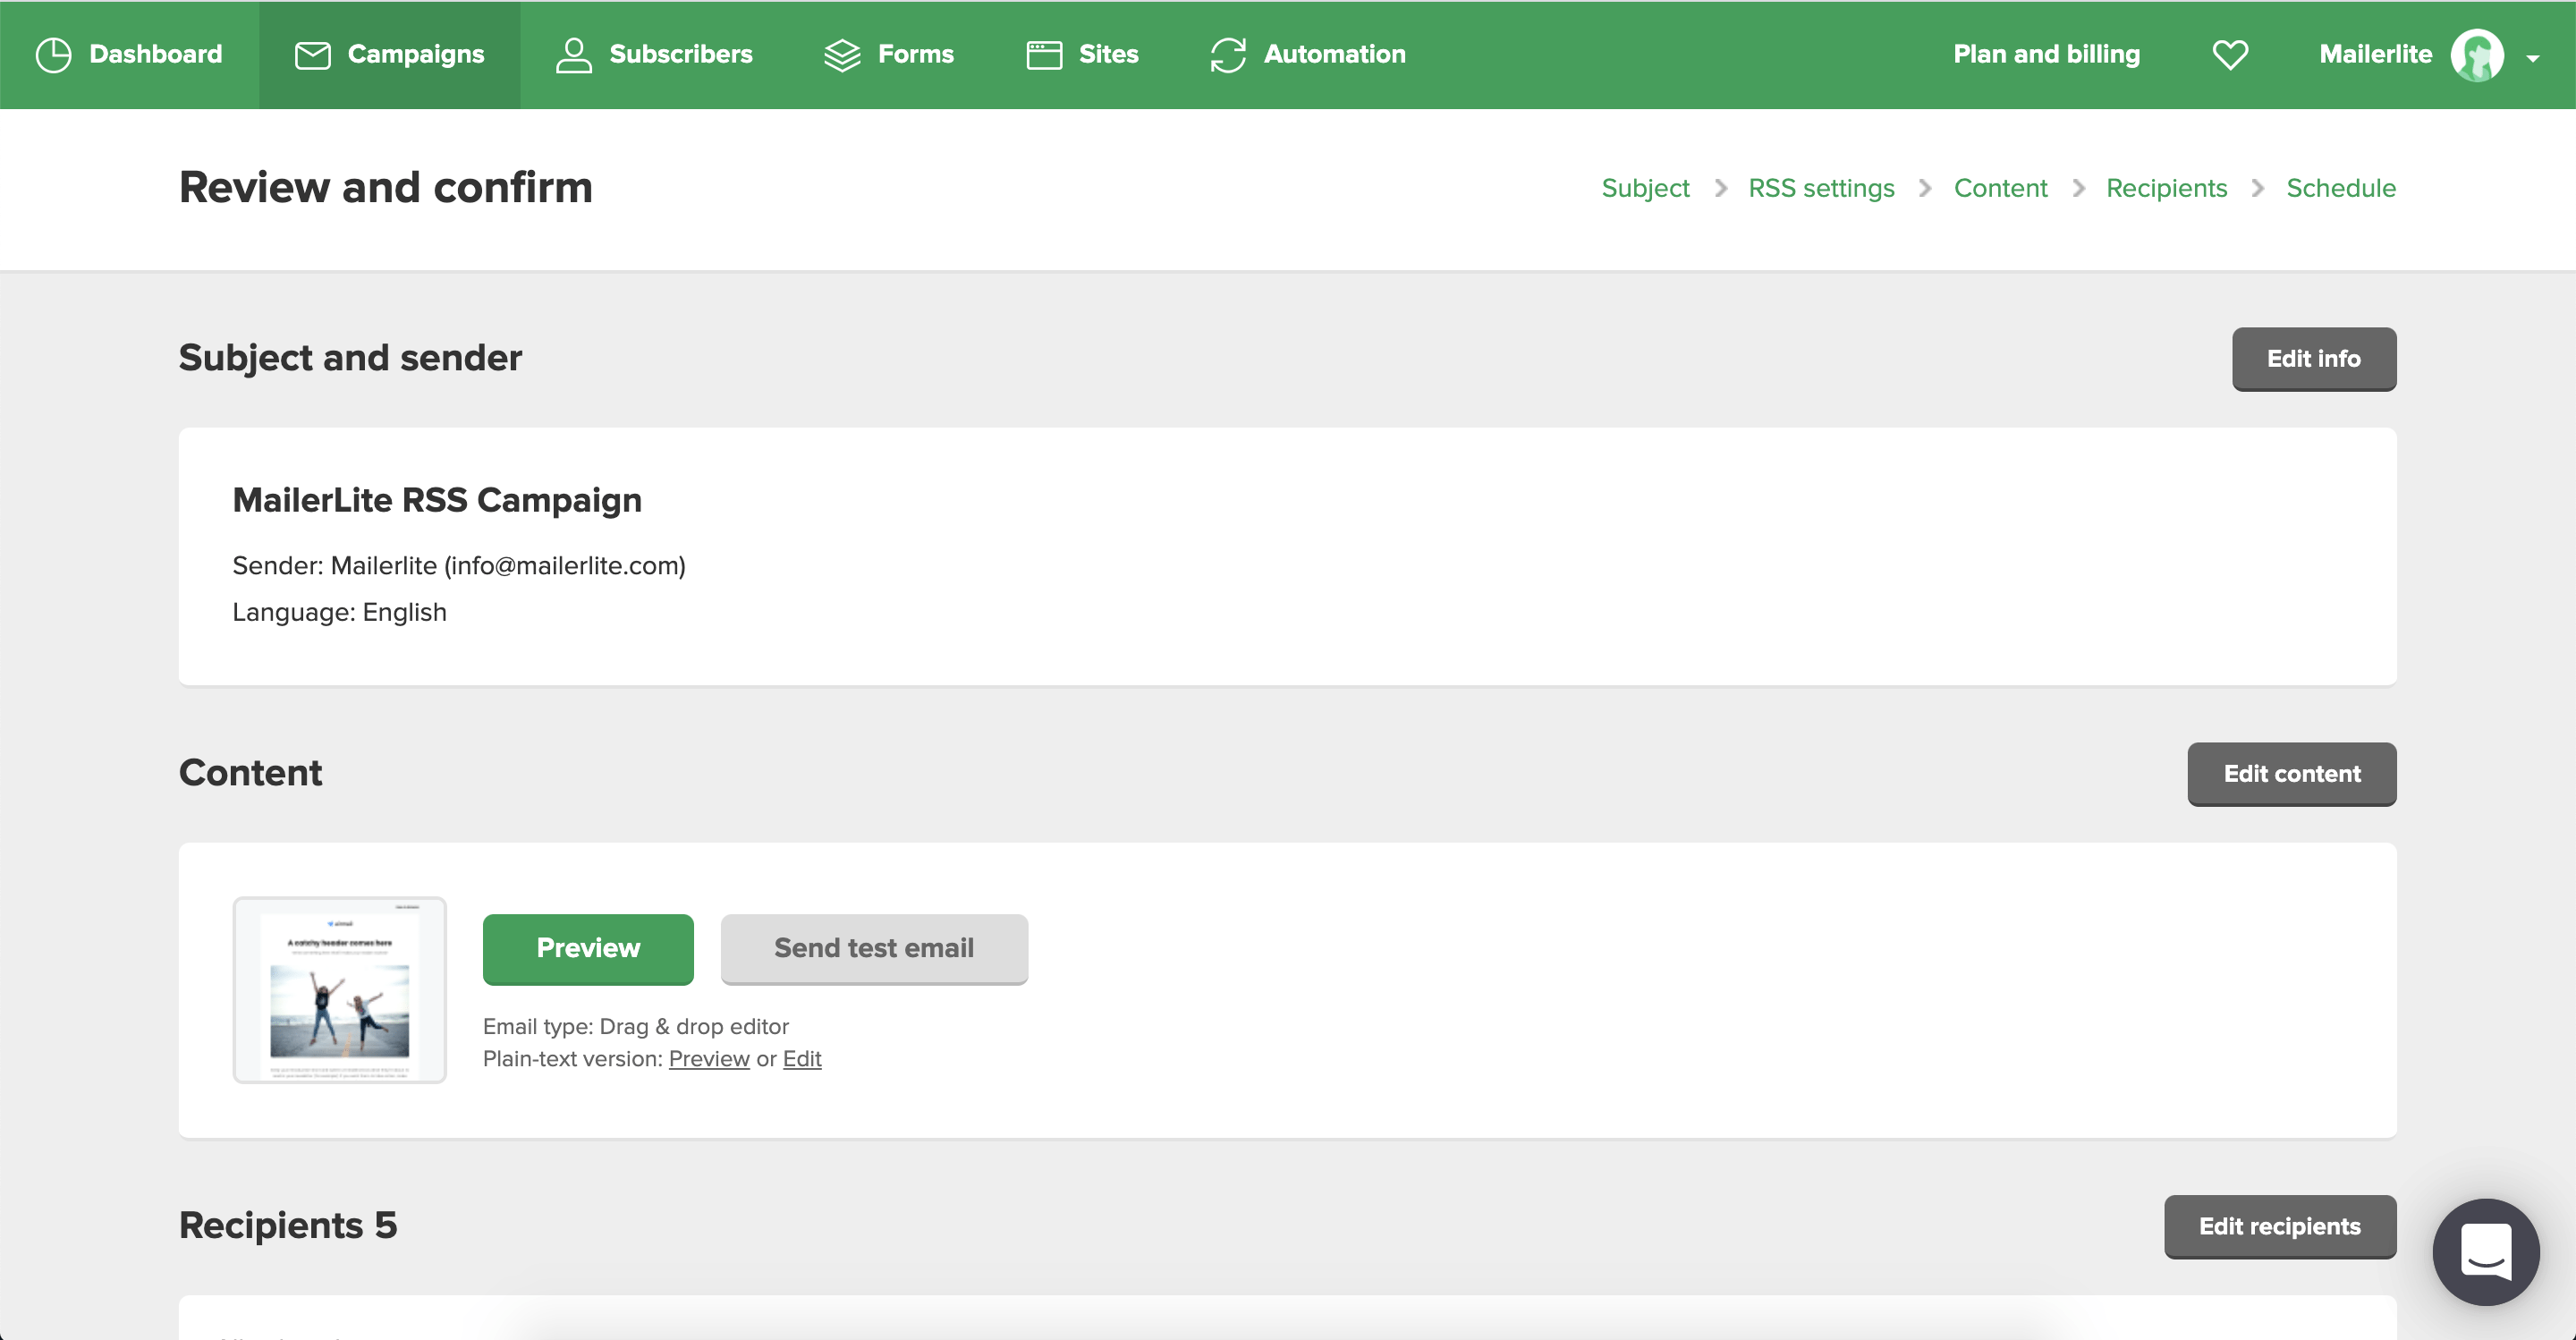
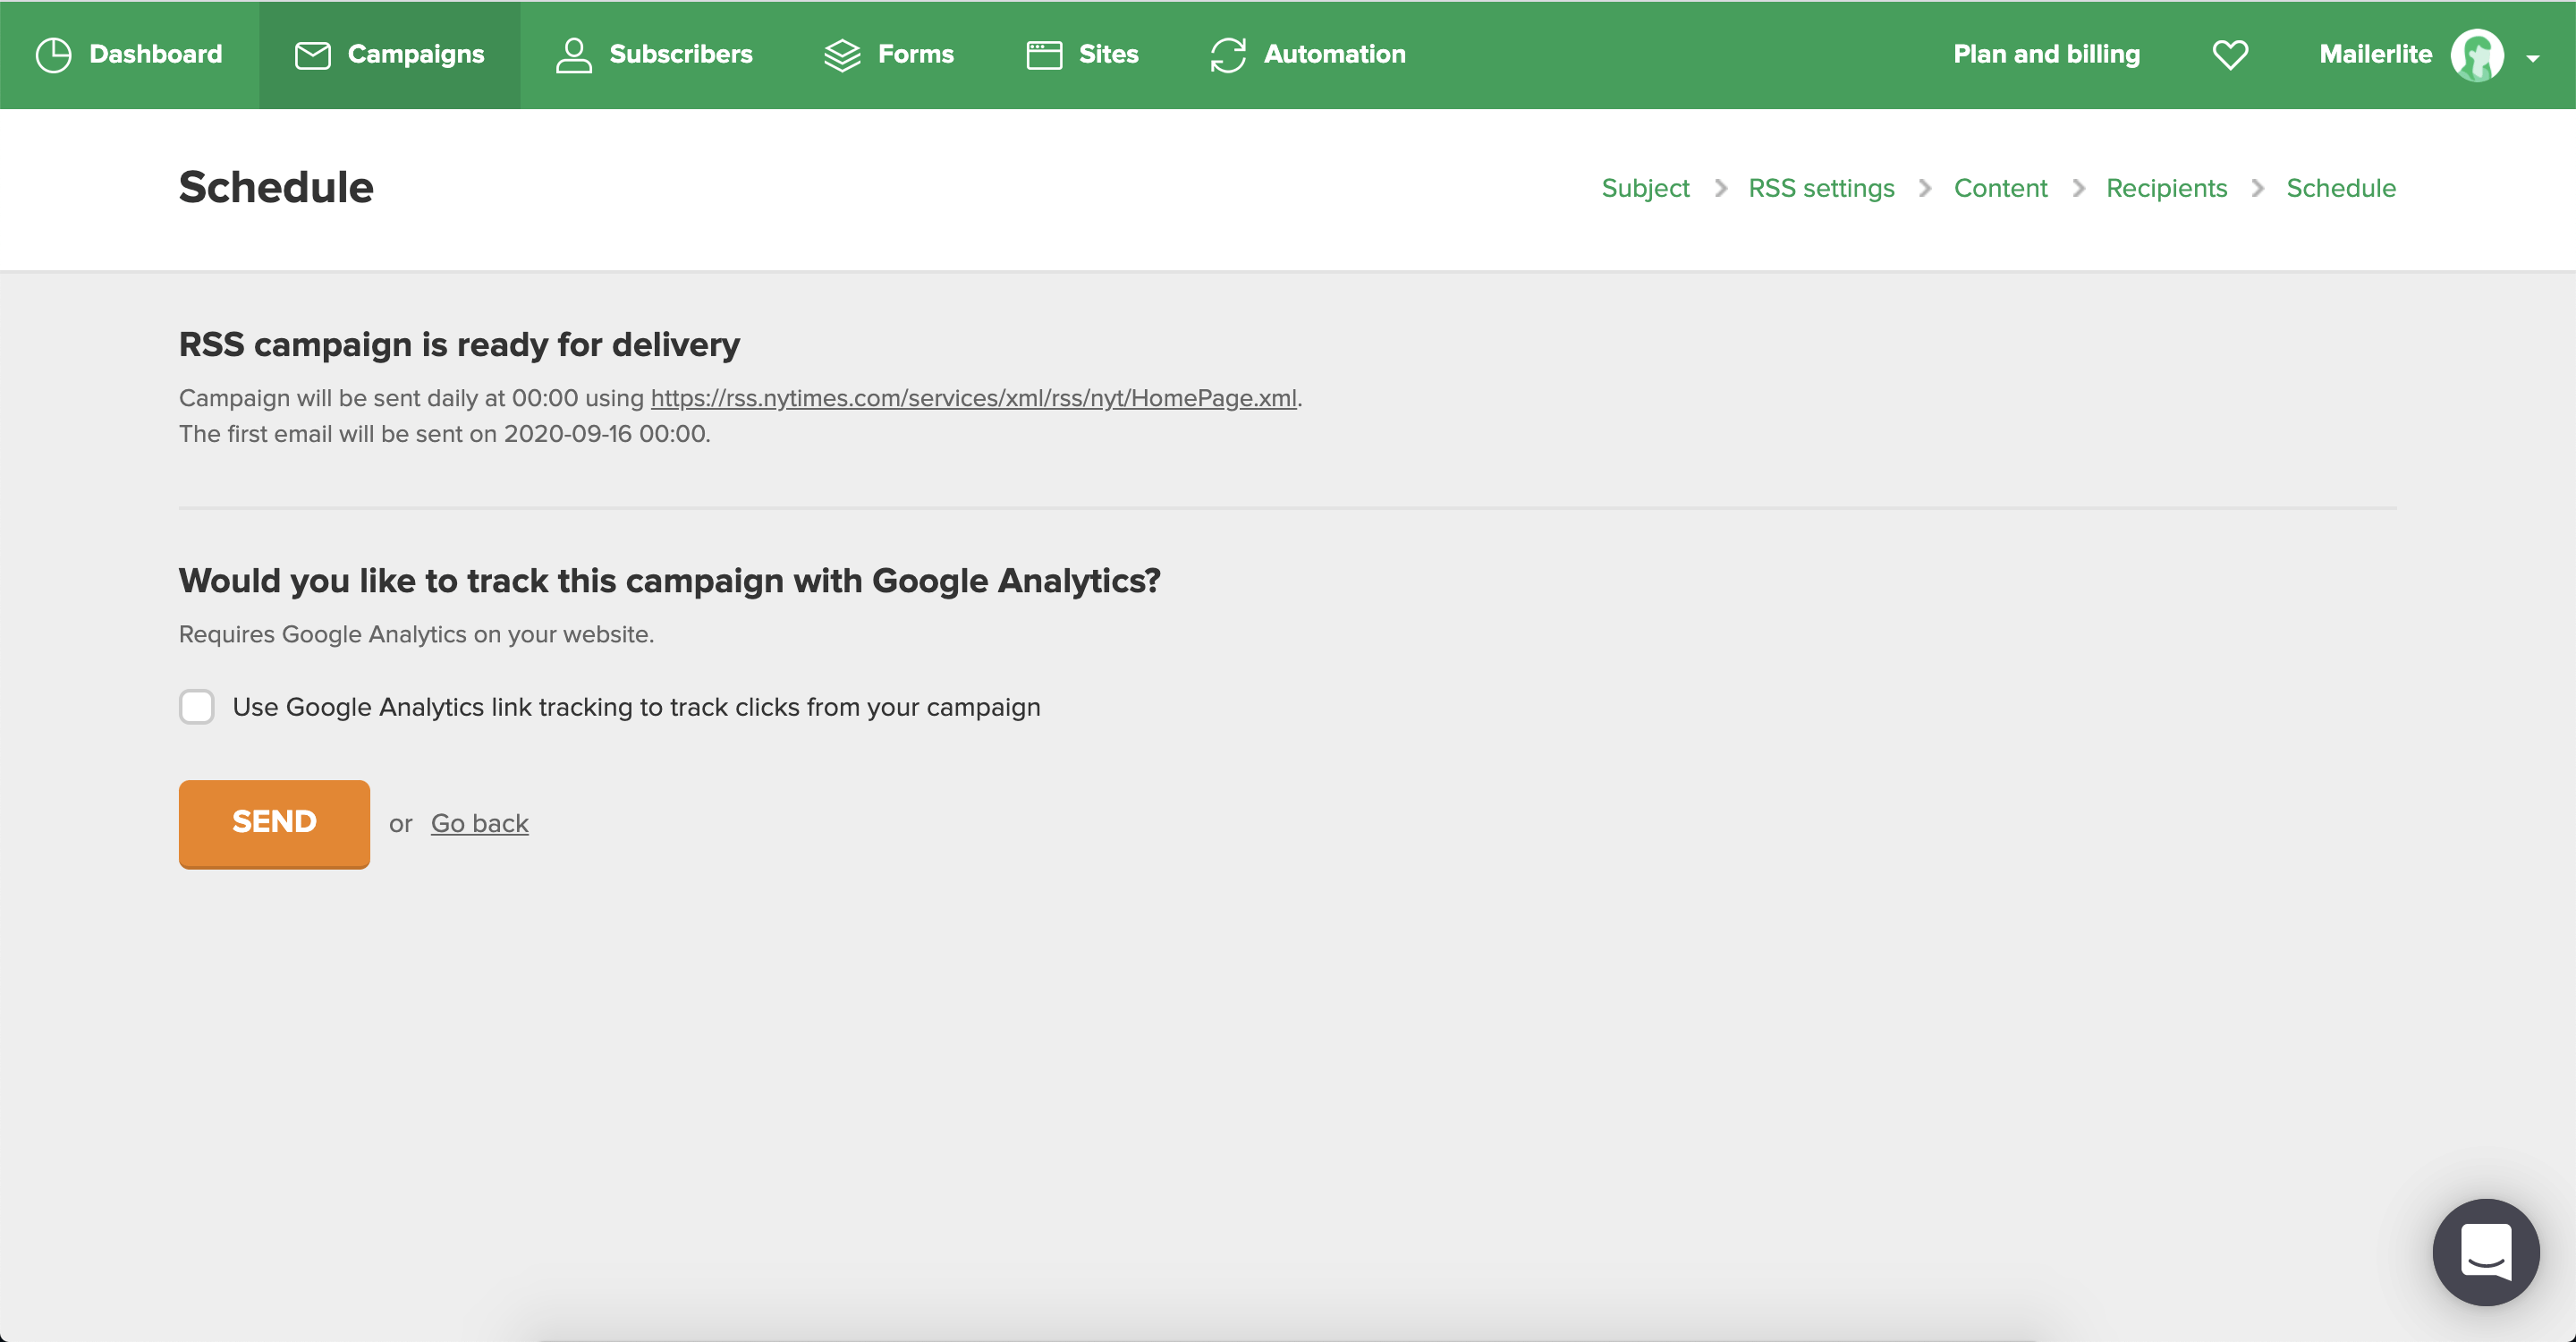
16. Aquí encontrarás la página Revisar y confirmar, donde podrás revisar y editar la configuración RSS y el diseño de la campaña. Para programar tu campaña RSS, haz clic en Siguiente paso seguido de Programar.
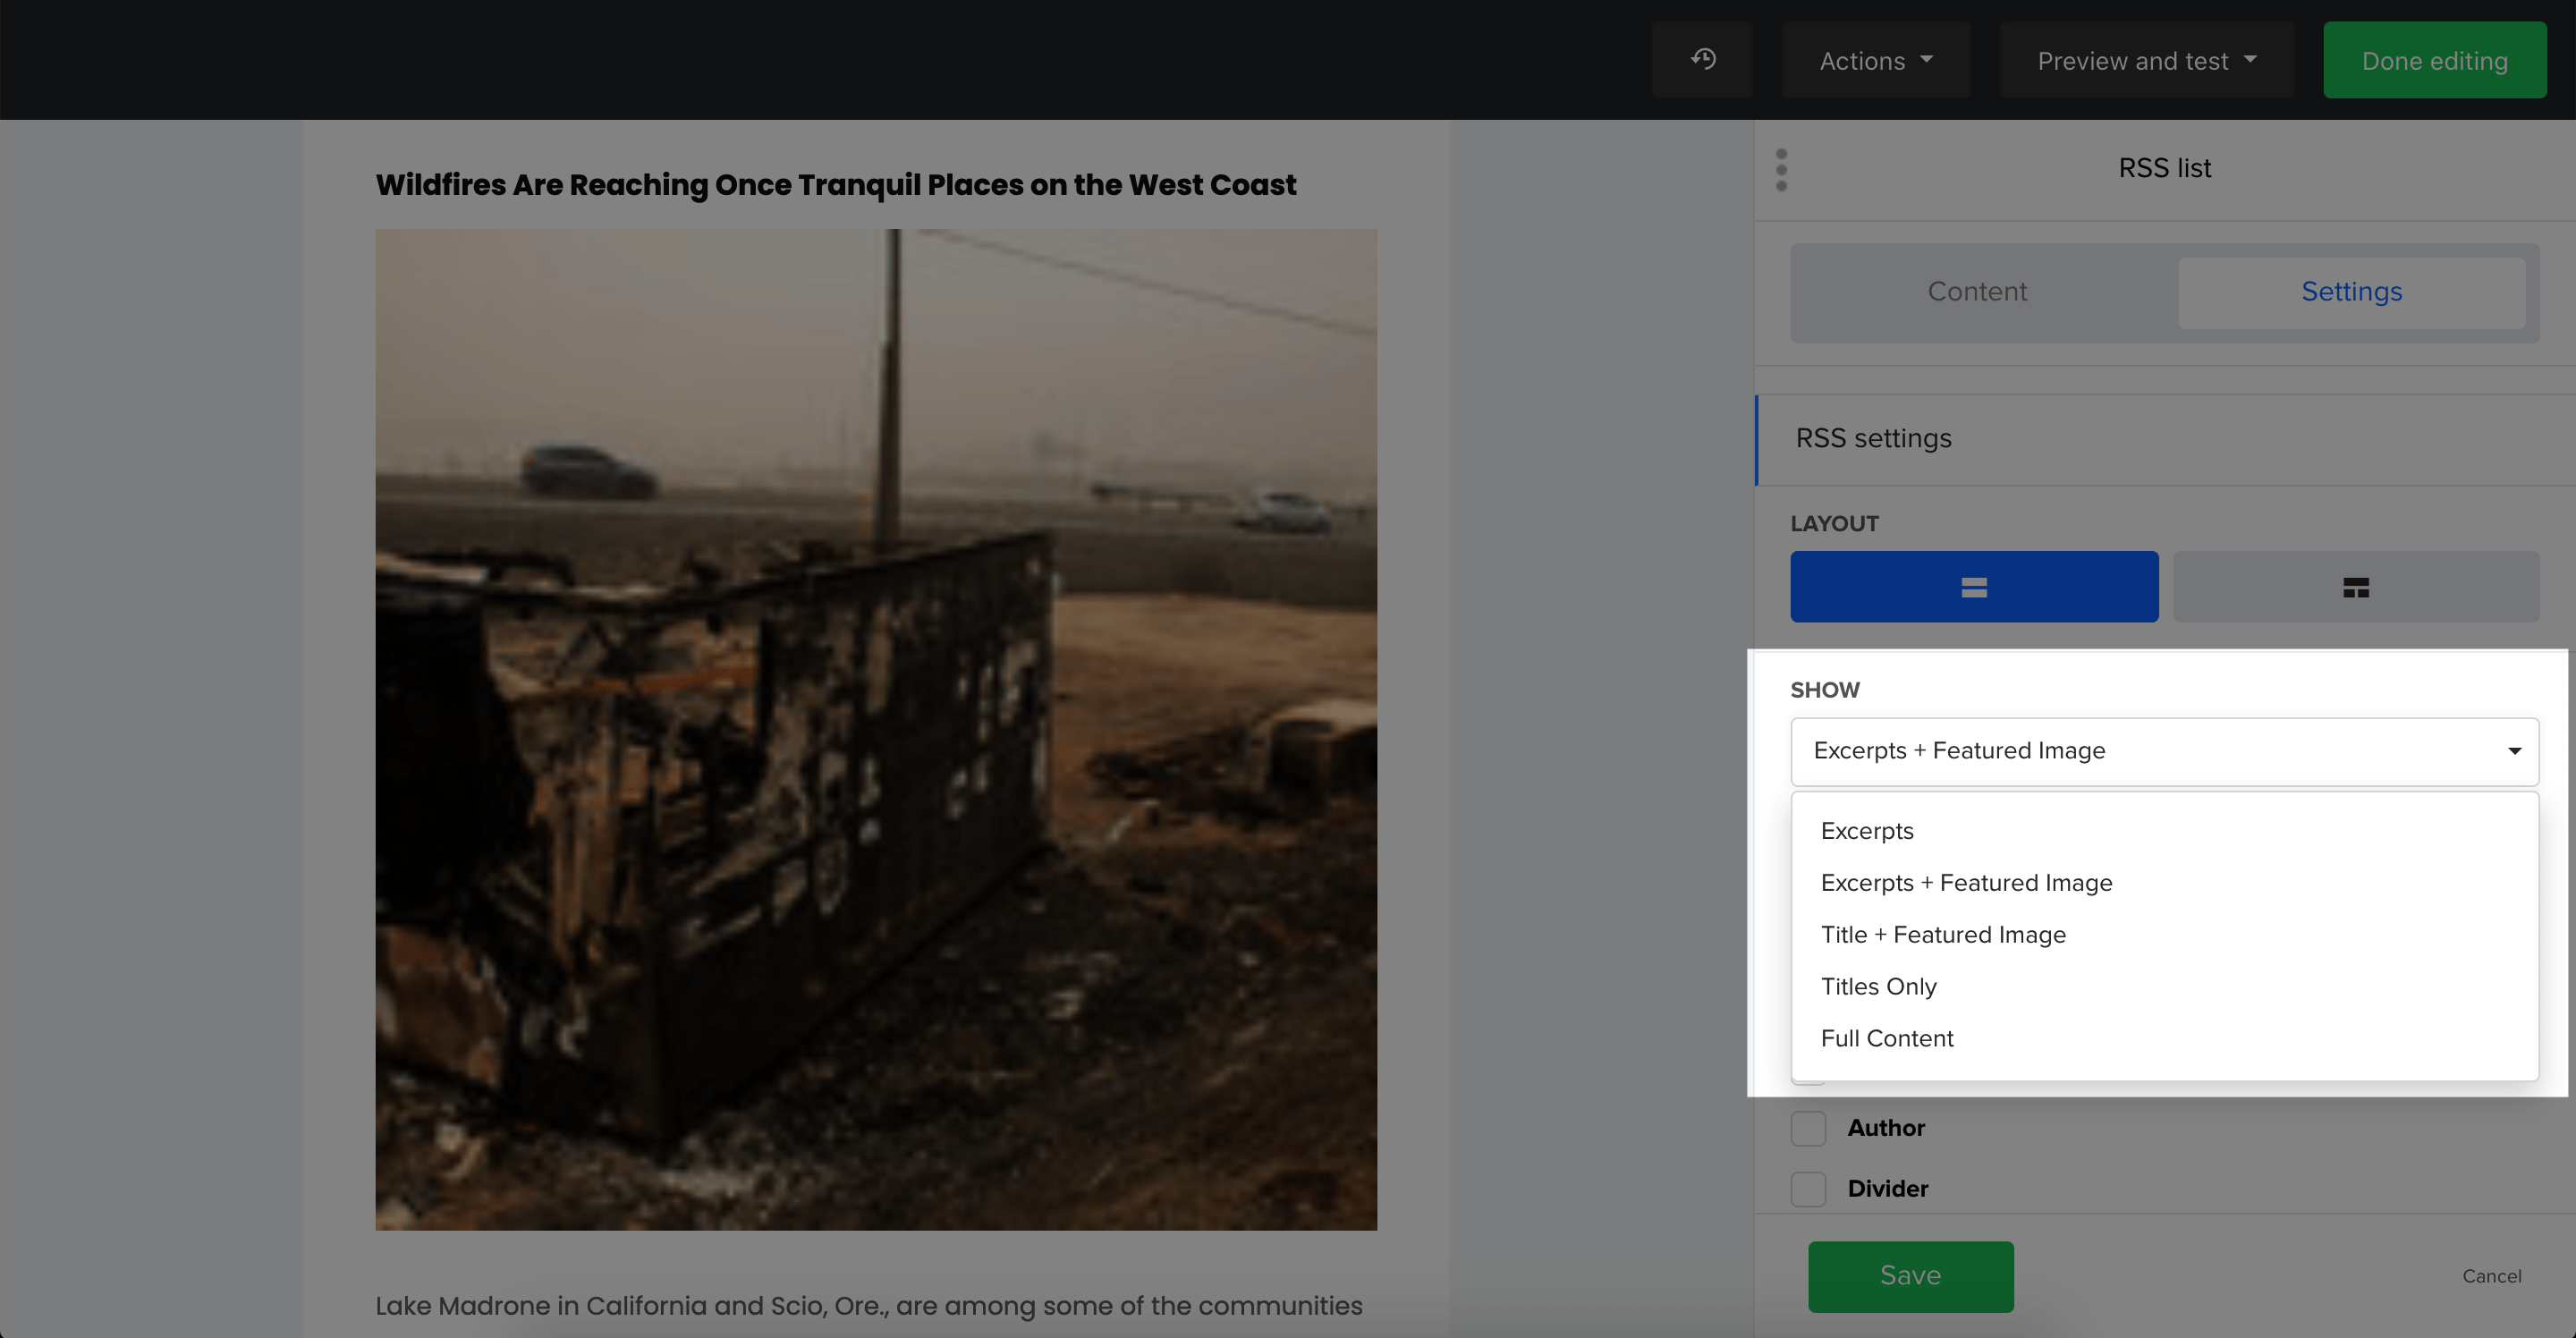
Puedes incluir la imagen destacada de cada entrada en tu campaña RSS.

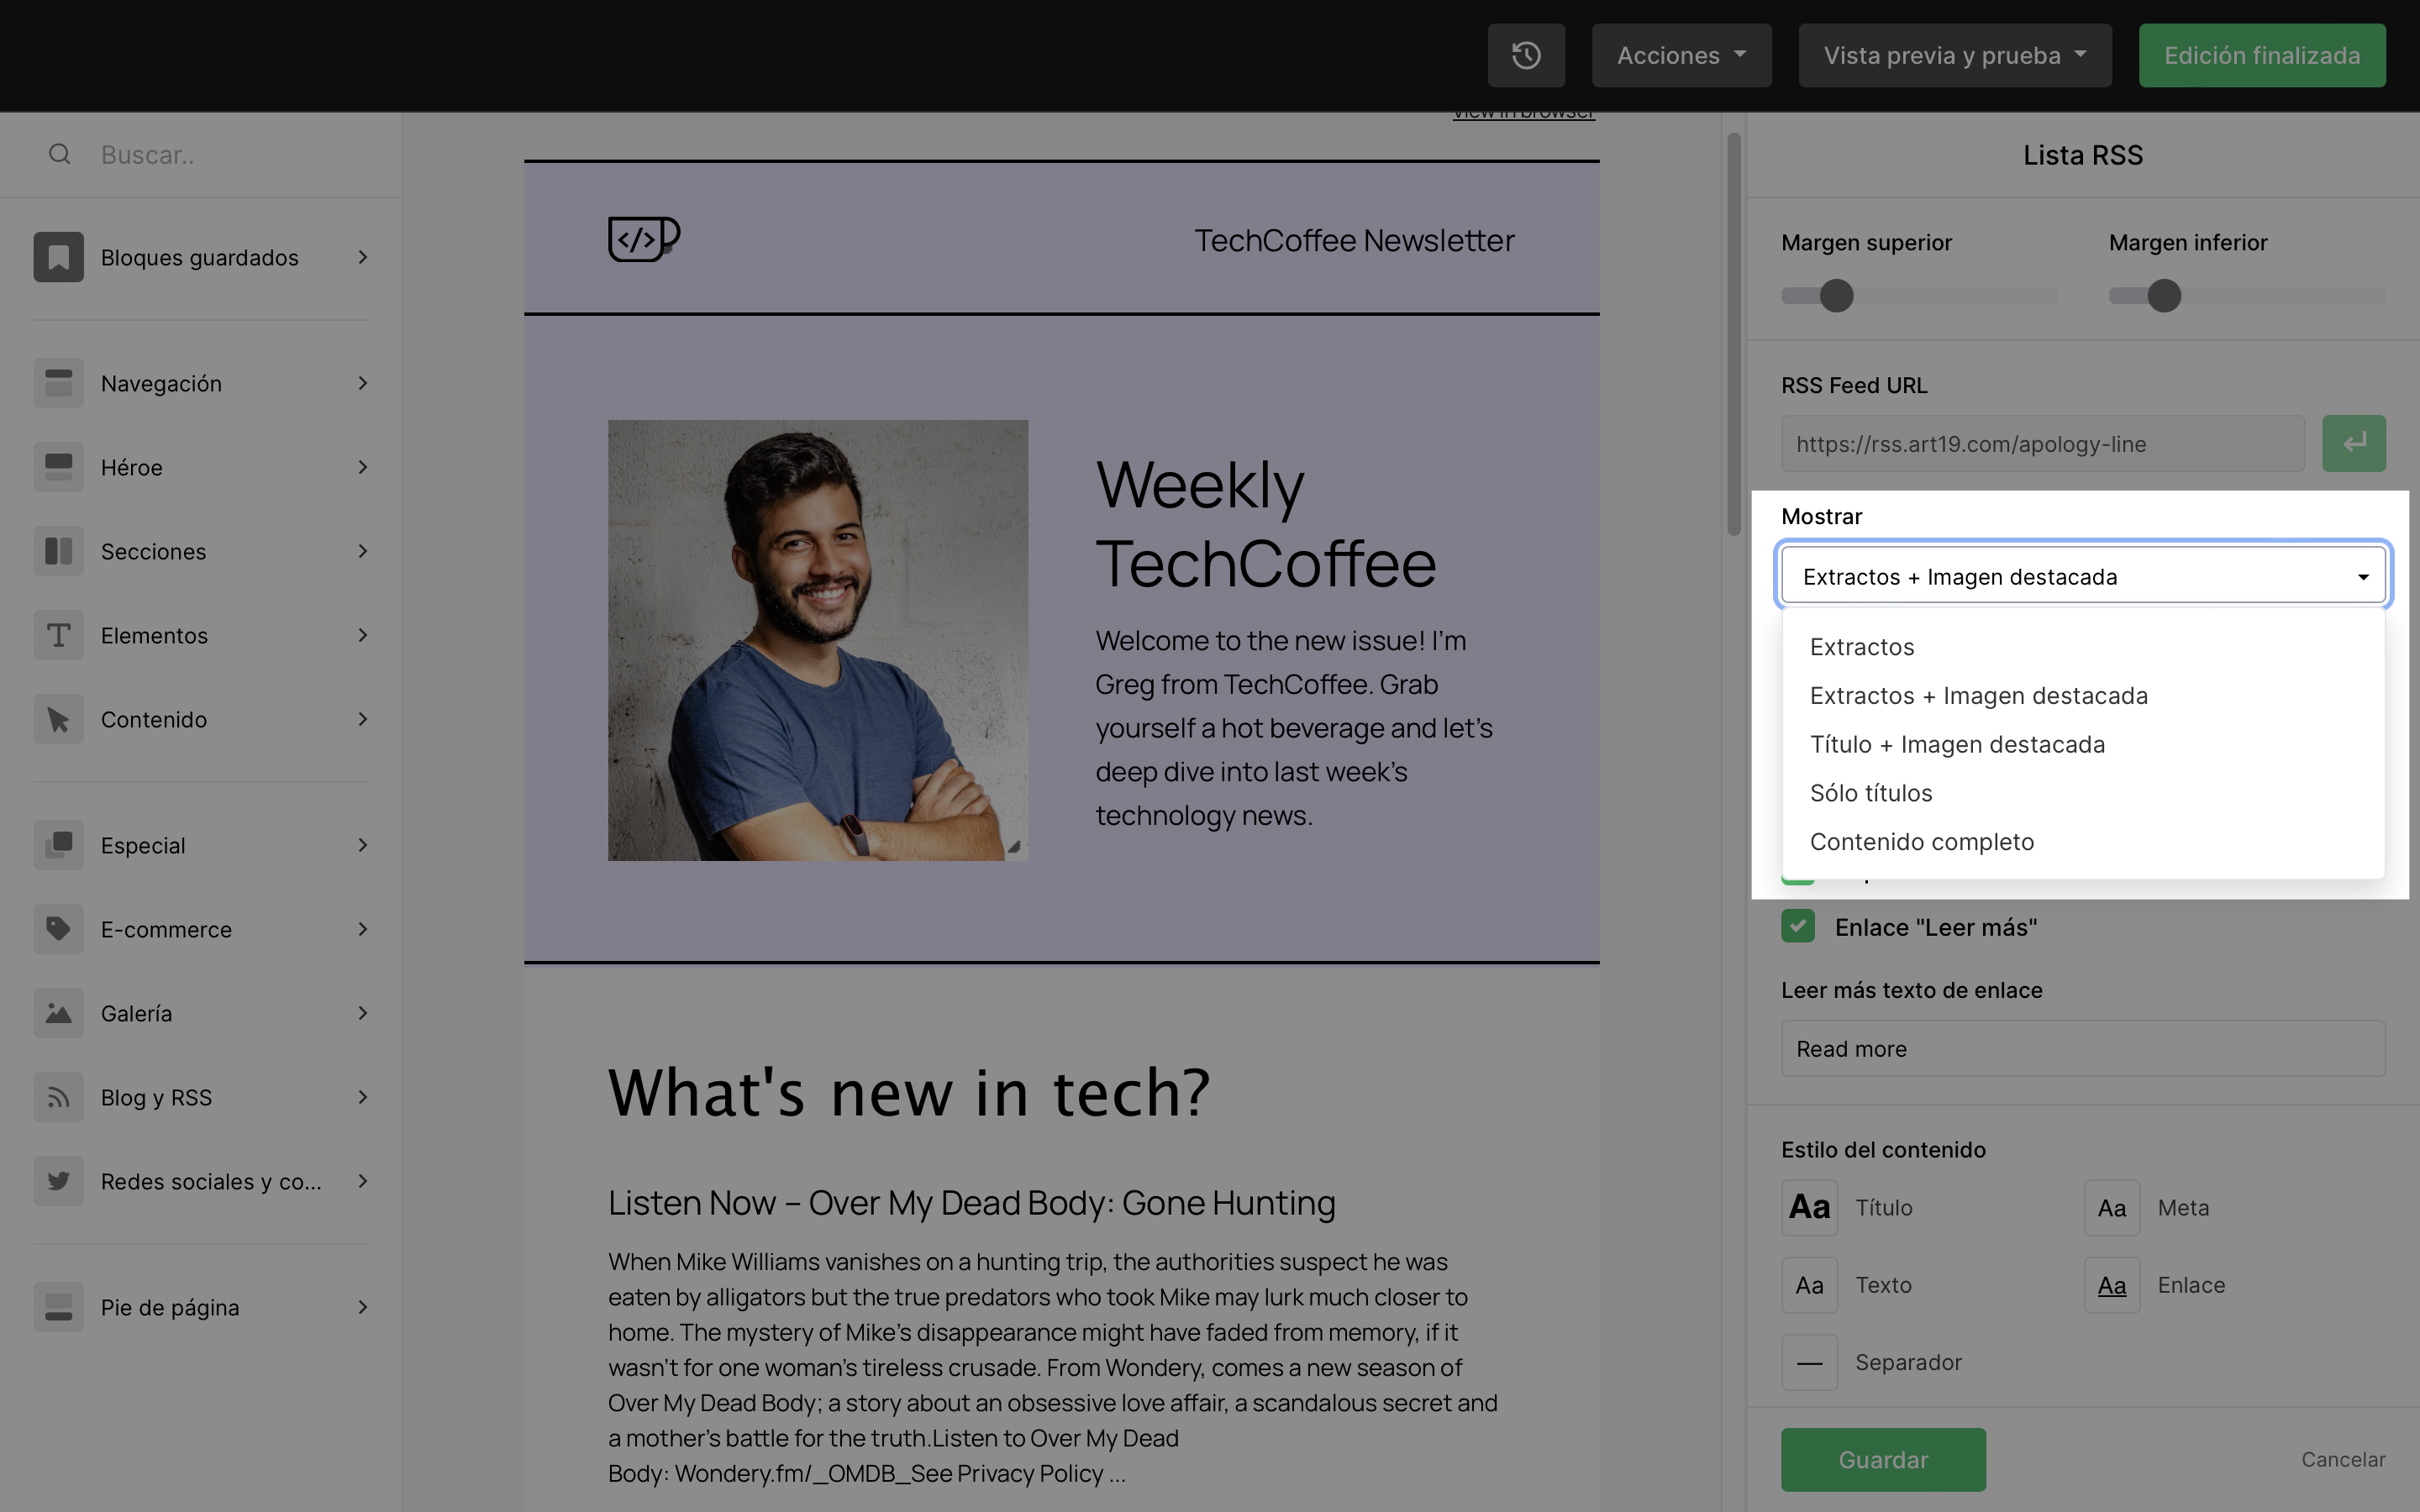
Para añadir una imagen destacada, haz clic en la sección de bloques Blog y RSS en el editor de arrastrar y soltar y arrastra un bloque que incluya una imagen destacada.

Puedes elegir mostrar los extractos + imágenes destacadas, título + imagen destacada o contenido completo.

Ten en cuenta que la imagen destacada debe definirse en una etiqueta <media> en el feed.

Si no hay etiqueta <media>, MailerLite busca imágenes en tu etiqueta principal <content> (o <description> si no hay <content> ) y toma la primera imagen y la coloca como imagen destacada.

Si decides mostrar el contenido completo de una entrada, ten en cuenta que MailerLite muestra primero la etiqueta content:encoded. Si no hay ninguna etiqueta content:encoded, se mostrará en su lugar la etiqueta <description>. Las imágenes mostradas en contenido completo no pueden editarse.

Es posible que algunos canales RSS no proporcionen ninguna imagen destacada. Para que se muestre una imagen, es necesario configurar el feed.

Para los usuarios de WordPress, recomendamos instalar el plugin Featured Image in RSS Feed by MailerLite, que añade imágenes destacadas de las entradas a la salida de tu canal RSS.

Estas variables sólo pueden utilizarse y mostrarse en Campañas RSS. Las variables enumeradas a continuación pueden utilizarse en la línea de asunto o en el contenido de la campaña.

  • {$campaign_date} - muestra la fecha actual en formato "aaaa-mm-dd".

  • {$título_feed} - muestra el título de tu feed.

  • {$last_post_title} - muestra el título de la última entrada de tu feed.

Si tu campaña RSS no se ha enviado en absoluto o como se esperaba, comprueba los motivos a continuación.

No se ha enviado la campaña RSS

MailerLite comprueba y procesa tu feed cinco minutos antes de que esté programado. Si algo va mal con el feed, la aplicación no podrá enviar la campaña.

Estas son las principales razones por las que no se ha enviado una campaña RSS:

  • Sin nuevos posts - Una vez enviada la primera campaña RSS, sólo se enviarán nuevas campañas si se ha publicado un nuevo post.

  • La URL del feed no funciona - Puede que la URL de tu feed ya no sea válida. Puedes validar tu feed aquí.

  • La URL del feed no es pública - Si la URL de tu feed es privada o está protegida, nuestra aplicación no podrá leerla.

  • El feed RSS no está disponible - MailerLite comprueba el feed cuando tu campaña RSS está programada para salir. Si tu feed no está disponible en ese momento, no se enviará la campaña RSS.

  • Las marcas de tiempo de los feeds no son correctas - Un problema con las marcas de los feeds significa que nuestra aplicación no podrá identificar si una publicación es nueva o no.

Se envió una campaña RSS aunque no se publicaron nuevos mensajes

Por defecto, MailerLite activa una campaña RSS sólo cuando tu feed RSS tiene nuevas entradas.

Si la campaña se envió aunque no se publicaron nuevas entradas, puede ser que tu campaña se cancelara desde la Bandeja de salida y se volviera a programar. Una vez que se cancela una campaña, nuestro sistema no puede comparar las campañas que ya se han enviado, por lo que la primera campaña RSS "nueva" envía todos los mensajes recientes.

Además, se puede activar una campaña si se cambia/actualiza la URL de un canal RSS existente. MailerLite reconoce el contenido de tu feed comparando la etiqueta <guid>. Esta etiqueta suele identificar que una entrada es nueva y, por tanto, se enviará una campaña RSS.

La campaña RSS tiene un aspecto diferente después del envío

Los mensajes de una campaña RSS pueden aparecer de forma diferente a como se muestran en el sitio web. La forma en que se muestra una entrada depende de cómo la describa el feed.

  • Formato - Es posible que los extractos no muestren el formato del texto original (por ejemplo: negrita, subrayado, saltos de línea). Esto puede ocurrir cuando el feed de tu sitio no formatea el extracto de la entrada, pero sí su contenido completo. Sólo puedes cambiar el formato de tus entradas en los bloques RSS de las campañas normales, pero no en las campañas RSS. Para las campañas RSS, los extractos y el contenido completo se muestran exactamente como están configurados en el feed.

  • Surtido incorrecto de entradas - No sugerimos utilizar una URL de feed en la que las entradas se ordenen automáticamente por cualquier cosa que no sean las entradas más recientes. Por ejemplo, si la URL de tu feed ordena las entradas según las páginas vistas, no funcionará correctamente en nuestras campañas RSS.

Keep your subscribers updated when you post to your blog by setting up an RSS campaign.

RSS campaigns are automated newsletters containing recent blog posts or articles from a specific website sent on a daily, weekly or monthly basis.

If you want to send your blog posts as emails to your subscribers, then setting up an RSS campaign is the way to go!

Every time you have a new post, it will be automatically sent according to the frequency you manually set up for it.

You can also create a regular campaign and include an RSS block. This is useful when you are sending a regular newsletter and want to include some posts from a website.

However, keep in mind that there are some fundamental differences between both.

For RSS campaigns:

  • It’s only possible to have one RSS feed per newsletter

  • You can add additional RSS blocks, but it’s not possible to have a unique feed for each one.

  • Formatting any of the post’s text is not possible. Our app displays the excerpts and full content as the feed is set up. Feeds may show separate and different formats for excerpts and full content. In other words, a feed may display excerpts without formatting (e.g.: bolding, underlining, line breaks), but it may display the full content of a post with original formatting.

For regular campaigns with an RSS block:

  • You can add several RSS blocks. For each block, you can decide how many and which posts you’d like to include in your newsletter.

  • Each post is its own block, so you can format each however you’d like (e.g.: bold, underline, change color, add personalizations, etc).

  • You can have more than one RSS feed by adding each on a different RSS block.

When you first create an RSS campaign, you’ll see that the content will be immediately filled up with the most recent posts in the feed.

However, this specific content is only shown as an example of what the RSS campaign will look like in future sendings. The feed is checked and processed five minutes before the campaign is actually sent.

You can choose whether you want to show only new posts or existing posts in each campaign. This is helpful if you don’t want to flood your subscribers with older posts they have already seen. Every post will only be sent once. However, an RSS campaign will not send at all if there are no new posts.

Updating an old post

In most RSS feeds, each post has a GUID (Globally Unique Identifier).

There are two ways we can recognize whether a post is new or not: If the feed’s parser regenerates the GUID after a post is resaved or updated, the post will be included in the new RSS campaign. If it’s not regenerated, the post won’t be included.

If there is no GUID but the link to the post changes, the post will be included. If there is no GUID and the link is not changed, the post won’t be included.

Note: When you update the content of an old post on your website, it will not be sent out as a new publication and your RSS campaign will not pick up on that.

There are a few ways you can get your feed URL:

  • In most cases, you can get your feed URL by simply adding /feed at the end of your domain if you have a WordPress website, using this format: yourdomain.com/feed.

  • Some websites have an RSS icon shown already. Click on it to head to the RSS feed page and copy the URL.

  • You can use your site’s source code. For this option, you’ll need the HTML source code of your website. If you are using Google Chrome, you can find it by hovering your mouse over your webpage, right-clicking and selecting the option to Inspect or View Source. You are then taken to your page's HTML code.

Note: The option to Inspect or View source is not available in every browser.

Within your website's HTML code, you can search for your RSS feed: For PC: press Ctrl + F, then type RSS. For Mac: press CMD + F: then type RSS.

You should find a code similar to this one:

link rel="alternate" type="application/rss+xml" title="RSS Feed" href="https://www.yourdomain.com/feed/"

The RSS feed URL is found between the quotes after href=. In the example above, it would be https://www.yourdomain.com/feed/.

If neither of these options works for you, you’ll have to contact your website administrator. For some websites, enabling the RSS feed may have an additional cost.

You can include the featured image of each post in your RSS campaign.

To add a featured image, click on the RSS block in the Drag & drop editor and then select the Settings tab.

You can choose to show the excerpts + featured images, title + featured image, or full content.

Please note that the featured image should be defined in a <media> tag in the feed.

If there is no <media> tag, MailerLite searches for images in your main <content> (or <description> if there is no <content> ) tag and takes the first image and places it as the featured image.

If you choose to show the full content of a post, please note that MailerLite displays the content:encoded tag first. If there is no content:encoded tag, the <description> tag will be displayed instead. Images displayed in full content cannot be edited.

Some RSS feeds might not have a provided featured image at all. To have an image displayed, your feed would need to be configured.

For WordPress users, we recommend installing the Featured Image in RSS Feed by MailerLite plugin which adds featured images from posts to your RSS feed output.

These variables can be used and displayed only in RSS Campaigns. The variables listed below can be used in the subject line or in the campaign’s content.

  • {$campaign_date} – displays the current date in a “yyyy-mm-dd” format.

  • {$feed_title} – displays the title of your feed.

  • {$last_post_title} – displays the title of your feed’s last post.

There are two ways you can create an RSS campaign on Campaigns:

  • Click on the drop-down arrow next to the orange Create Campaign button and select RSS Campaign.

  • Click on the orange Create campaign button. On the next page, select the RSS campaign tab.

Once you have selected to create an RSS campaign, you will be prompted to give your campaign. a name and insert the RSS feed URL of your site.

Click on the Lookup button to verify that your feed is valid and can be used for the RSS campaign. You’ll see a green check if it’s valid and a red check if it’s not.

Then, type the Subject of the RSS Campaigns. The same subject will be used for all RSS campaigns sent. With variables, you can personalize your subject to include the date, last post title, feed title, and more.

Add the name of the sender, which will be displayed in the From field of your recipient’s email client, and the sender email address.

Lastly, choose the language of your campaign. This will also be the language that your unsubscribe page is displayed in. This page is shown to anyone who decides to unsubscribe.

When this is finalized, click Next: RSS settings.

RSS settings

On the next page, you can choose the sending frequency of your RSS Campaign to send on a daily, weekly or monthly basis, and at a specific time in a specific time zone.

Next, choose whether you want the RSS campaign to Show only new posts. This means the RSS campaign will only be populated only with posts published after the campaign was set up OR since the last time the RSS campaign was sent.

This is helpful if you don’t want to flood your subscribers with older posts they have already seen. Every post will be sent only once.

When Show only new posts is unchecked, the campaign will be fully populated with the most recent posts, regardless of their publish date which can include older posts. Keep in mind, though, that the RSS campaign will not be sent if there are no new posts on the feed.

If it’s your first time sending out an RSS campaign, and you check to Show only new posts, your latest campaign will send regardless of whether or not it was posted to your blog before or after you scheduled your RSS campaign.

Lastly, type your email in the Notifications field if you wish to receive an email notification every time your RSS campaign is sent.

When you’re done, click Next: CONTENT.

Email design

Choose whether you want to use one of your templates, create a campaign from scratch or use one of our 60+ predesigned campaign templates, four of which are RSS specific templates.

After choosing, you’ll be redirected to the Drag & drop editor. The feed from your website will be shown in the RSS blocks of the newsletter.

Note: Save your work every time by clicking on the green Save button located at the bottom of the page whenever you are editing a block.

Click Done editing on the top-right side of the page whenever you are done editing the campaign. Remember that this design will be used for all of the emails sent from this RSS campaign.

On the next page, choose the recipients for your RSS campaign, then click Next: Review and confirm.

You’ll be prompted to review the subject and sender, content, recipients, and RSS settings. Click on the Edit button of the respective section you wish to modify if any.

Then, click Next: Schedule when you are ready to schedule your campaign.

Scheduling

In the last section, review the time and frequency of when the RSS campaign will be sent. If you want to edit this setting, head back to the RSS settings step.

Lastly, choose whether you’d like to track this campaign with Google Analytics.

If your RSS campaign was not sent at all or as expected, check the reasons below.

RSS campaign was not sent

MailerLite checks and processes your feed five minutes before it is scheduled to be sent. If something is wrong with the feed, the app won’t be able to send the campaign.

Here are the main reasons why an RSS campaign was not sent:

  • No new posts - Once the first RSS campaign has been sent, further campaigns will only be sent if a new post has been published.

  • Feed URL is broken - It might be that your feed URL is not valid anymore. You can validate your feed here.

  • Feed URL is not public - If your feed URL is private or protected, our app won’t be able to read it.

  • RSS feed is not available - MailerLite checks the feed when your RSS campaign is scheduled to go out. If your feed isn't available at that time, the RSS campaign won't be sent.

  • Feed timestamps aren’t correct - An issue with the feed stamps means that our app will not be able to identify whether a post is new or not.

RSS campaign was sent although no new posts were published

By default, MailerLite triggers an RSS campaign only when your RSS feed has new posts.

If the campaign was sent although no new posts were published, it might be that your campaign was canceled from the Outbox and rescheduled. Once a campaign is canceled, our system can't compare which campaigns have been sent already, so the first "new" RSS campaign sends all recent posts.

Furthermore, a campaign can be triggered if an existing RSS feed URL is changed/updated. MailerLite recognizes the content in your feed by comparing the <guid> tag. This tag is usually an identification that a post is new and so an RSS campaign will be sent.

RSS campaign looks different after sending

Posts in an RSS campaign may appear differently from how they are displayed on the website. The way a post is rendered depends on how the feed describes it.

  • Formatting - The excerpts may not display the original text’s format (e.g.: bolding, underlining, line breaks). This can happen when your site’s feed doesn’t format the post’s excerpt, but it can format its full content. You can only change the formatting of your posts in RSS blocks of regular campaigns, but not in RSS campaigns. For RSS campaigns, the excerpts and full content are displayed exactly as they are set up in the feed.

  • Wrong assortment of posts - We don’t suggest using a feed URL where the posts are automatically sorted by anything other than the most recent posts. For example, if your feed URL sorts the posts according to page views, this won’t work properly on our RSS campaigns.

Editado por última vez: 28 de ago. de 2023