La integración de MailerLite para WooCommerce te permite sincronizar automáticamente tus clientes de WooCommerce con tus suscriptores de MailerLite.
Cómo configurar el plugin MailerLite para WooCommerce
Para instalar el plugin MailerLite para WooCommerce:
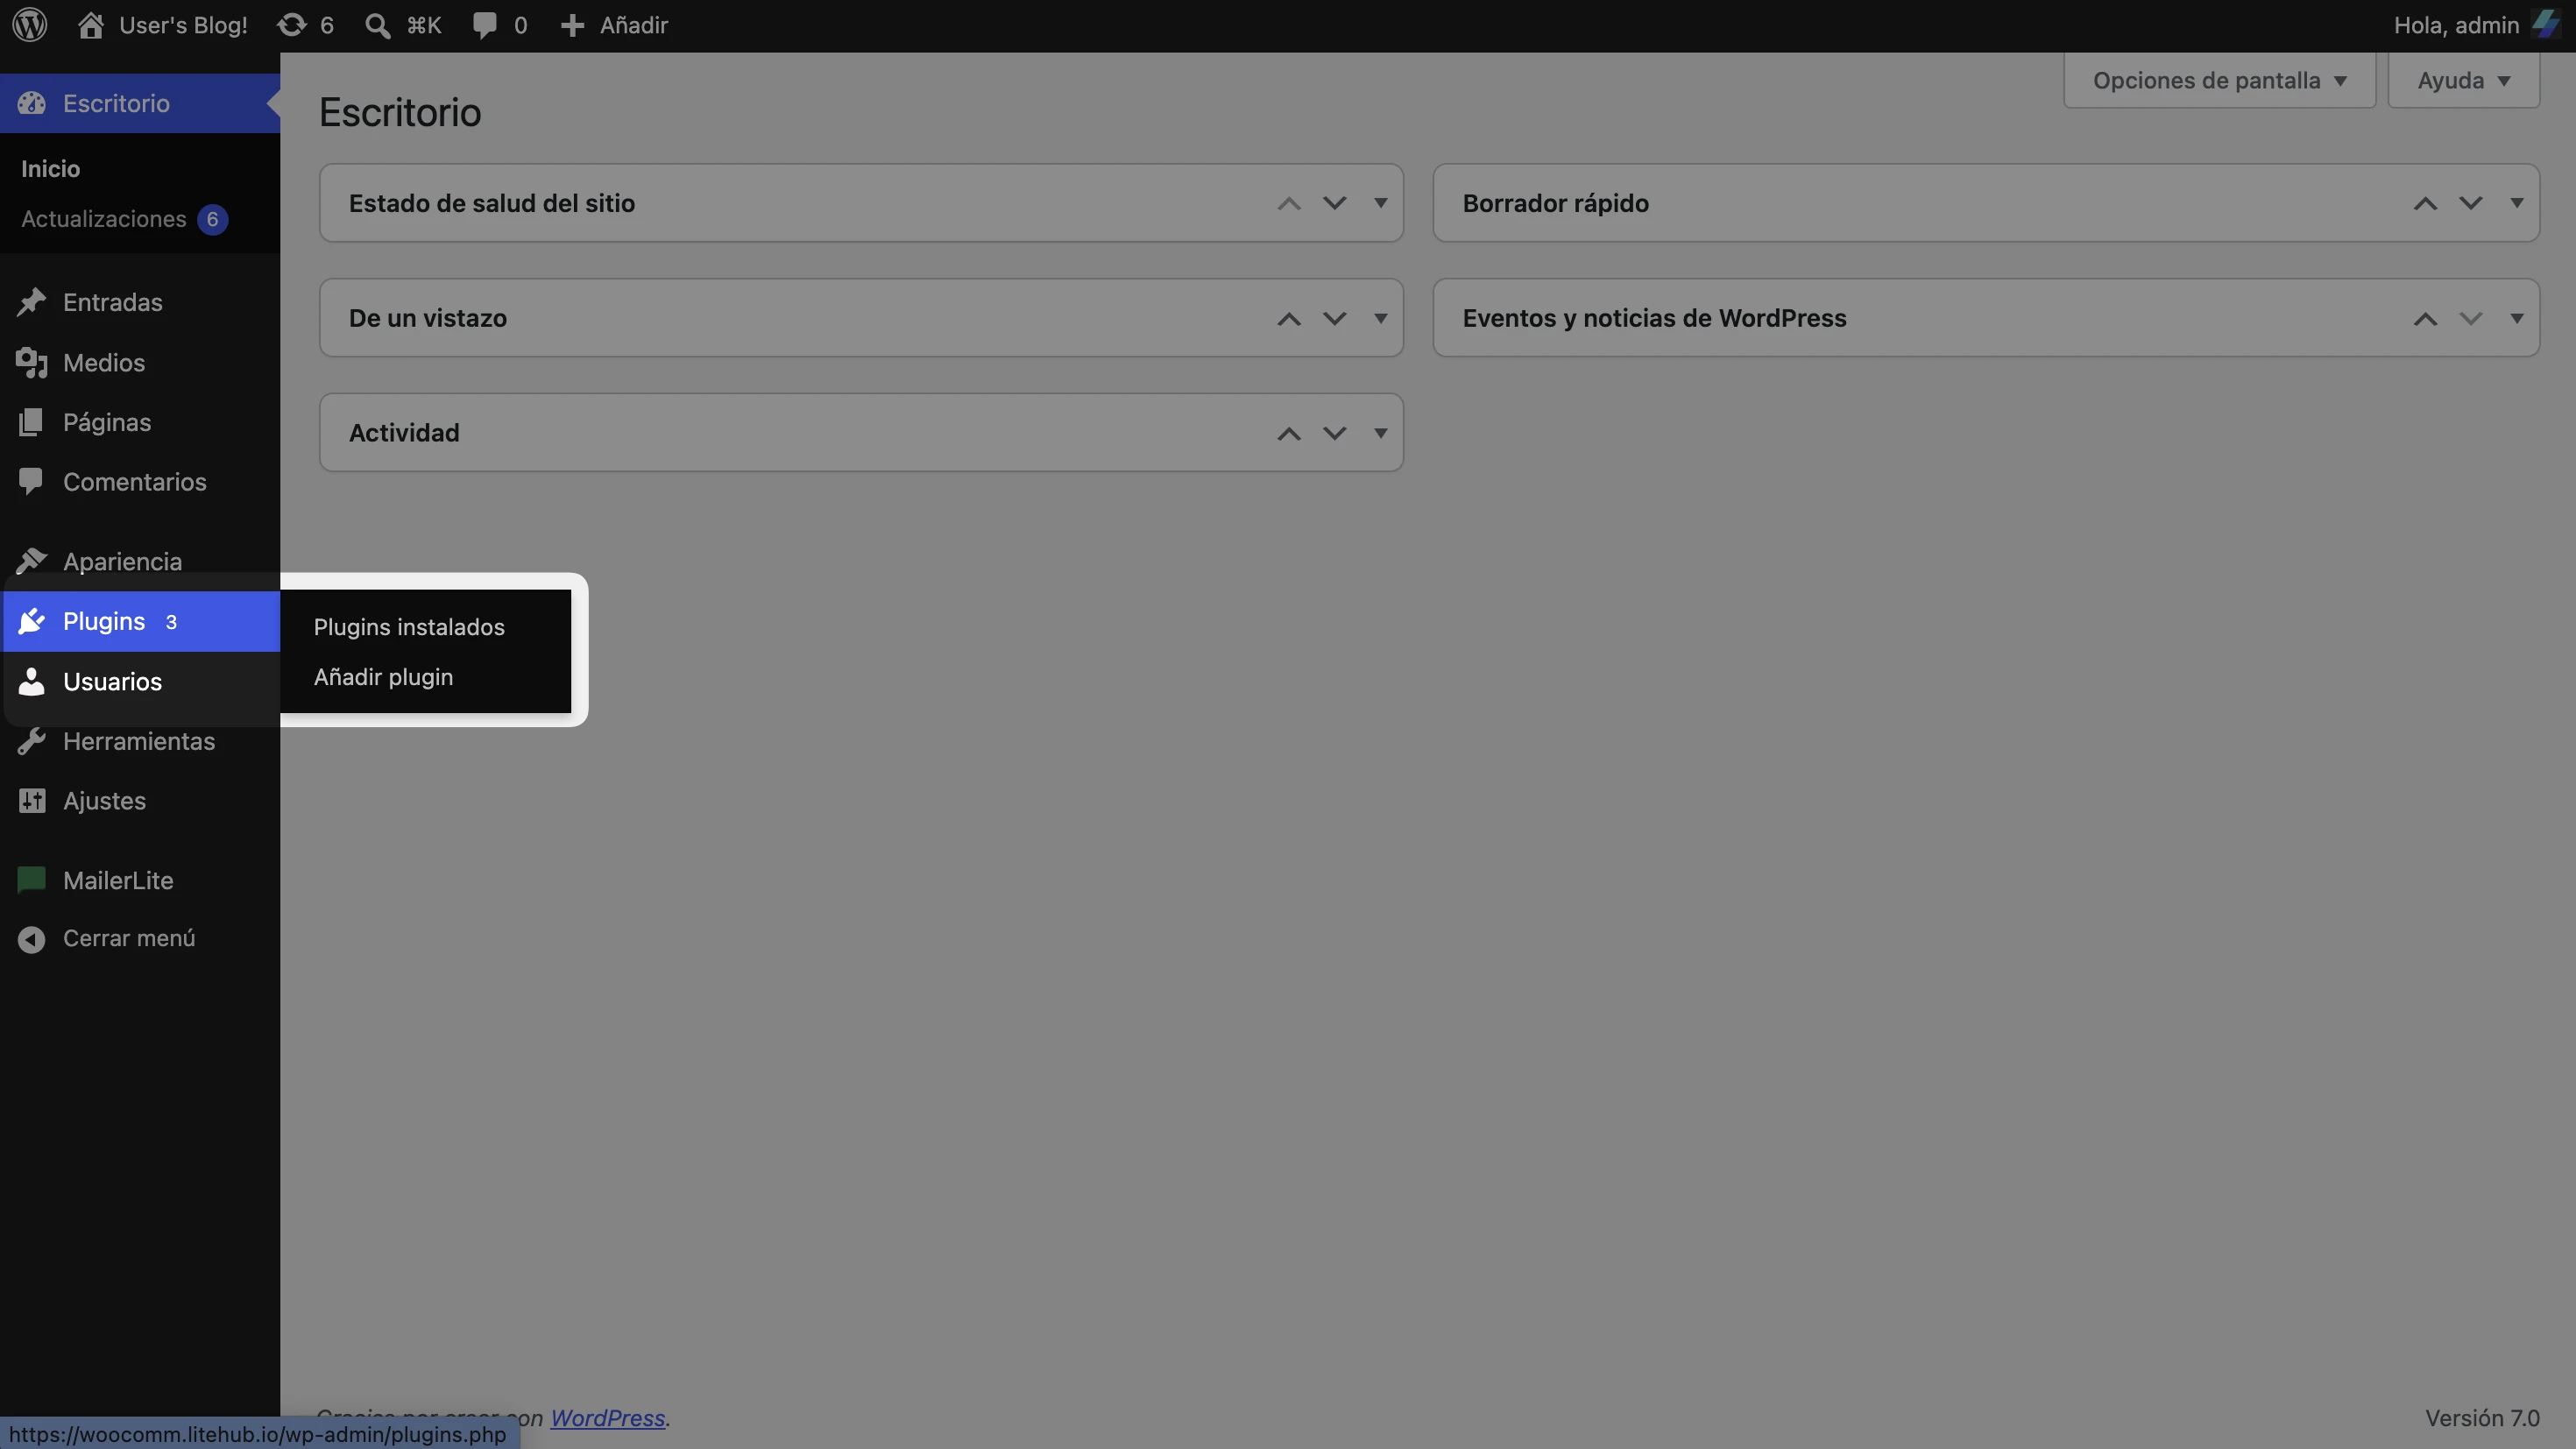
Ve a tu panel de control de WordPress.
En la barra lateral, haz clic en Plugins seguido de Añadir nuevo.
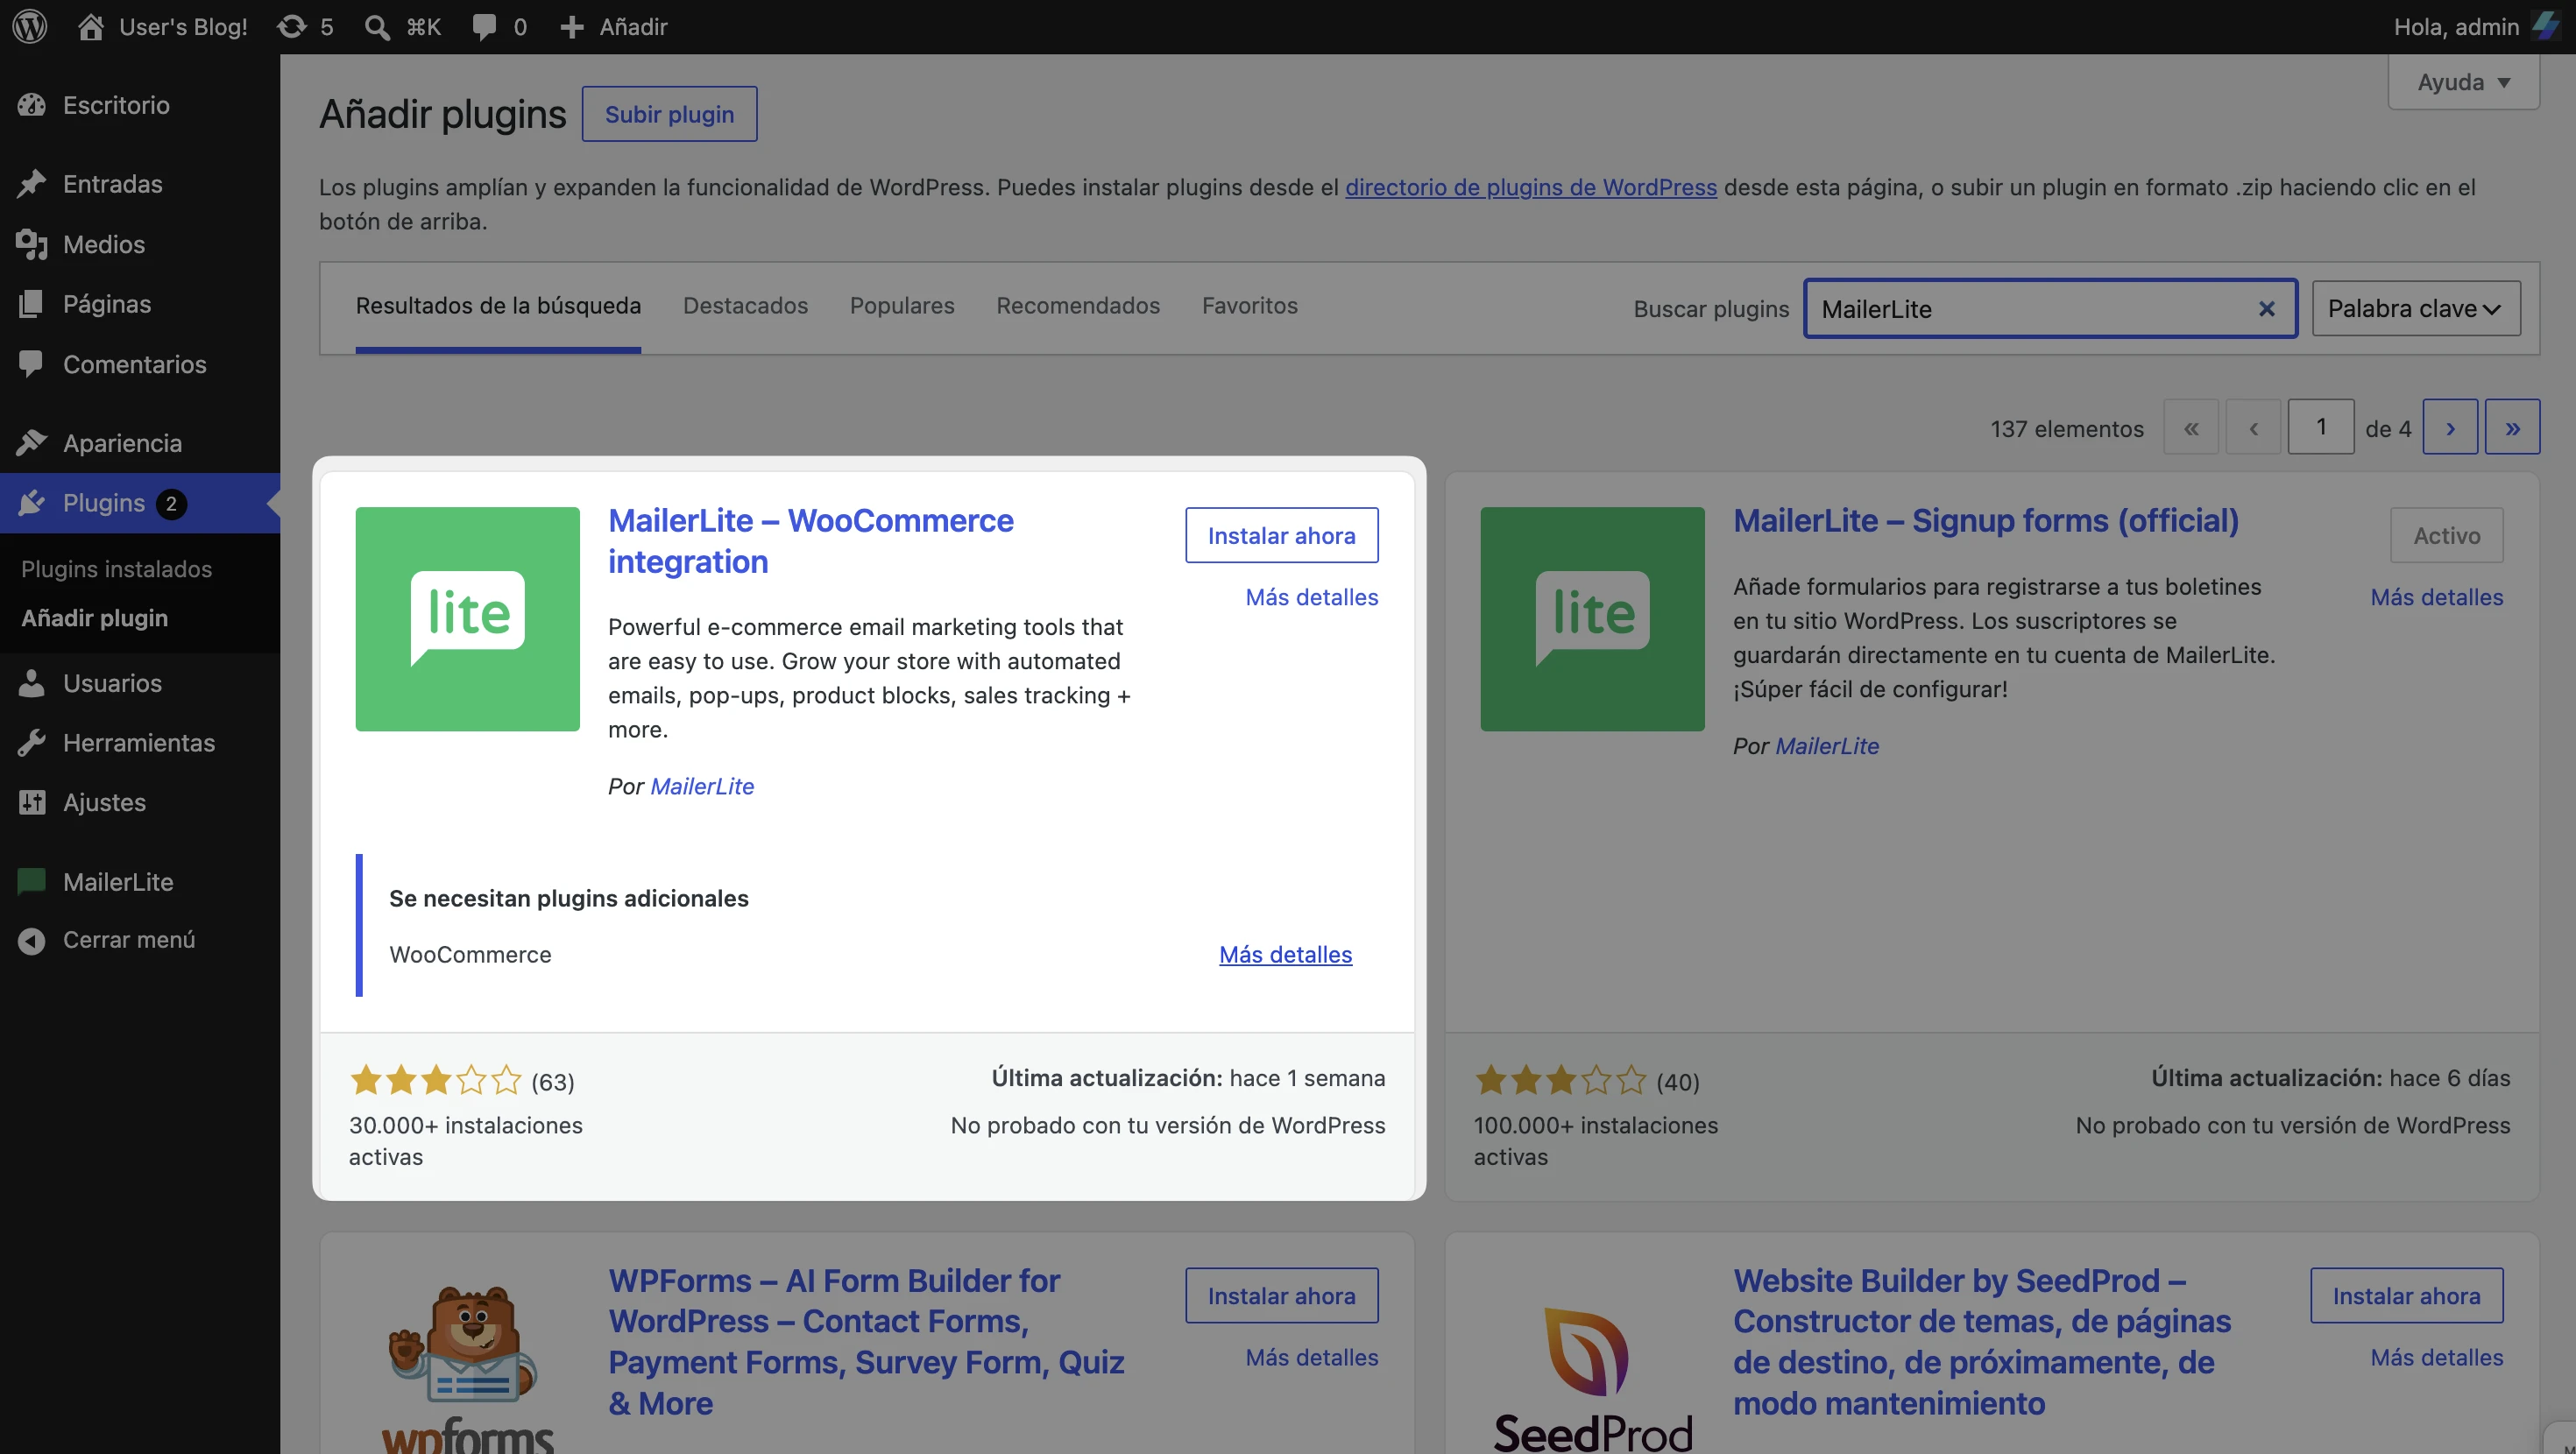
Utiliza el campo de búsqueda para buscar "MailerLite" y localizar el plugin WooCommerce - MailerLite.
Haz clic en Instalar ahora seguido de Activar.
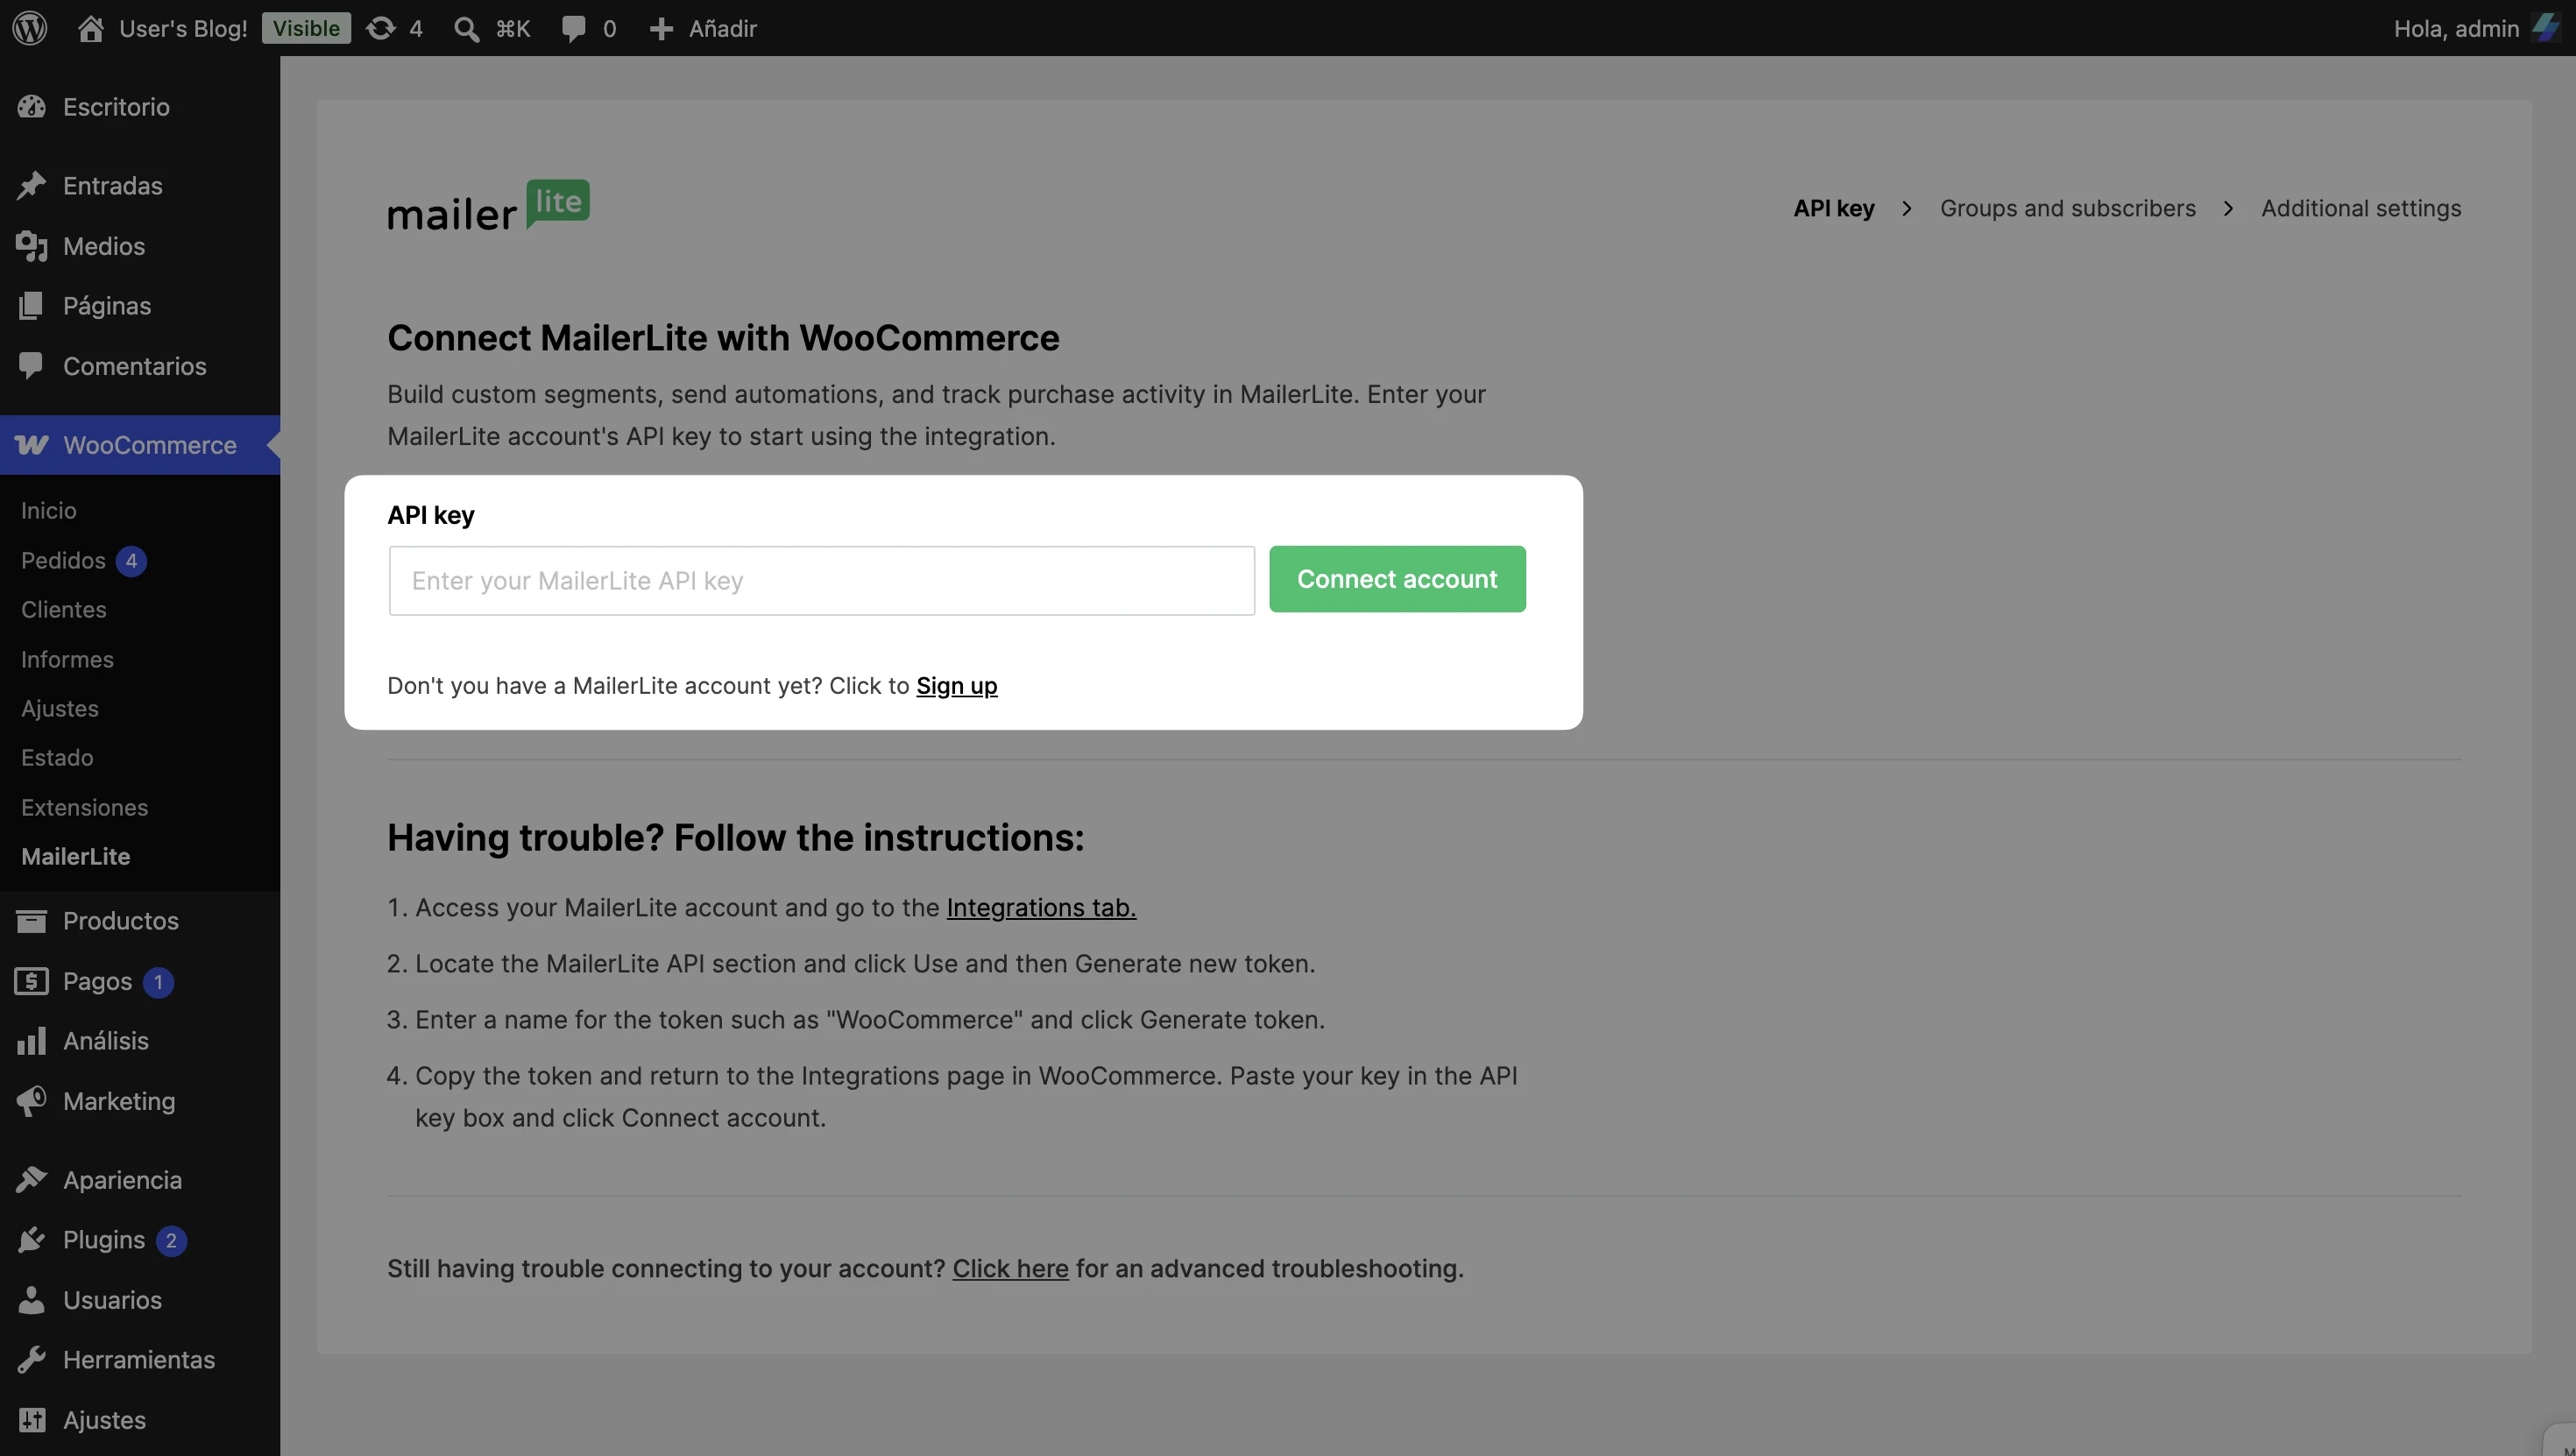
En la barra lateral, haz clic en WooCommerce y elige la pestaña MailerLite.
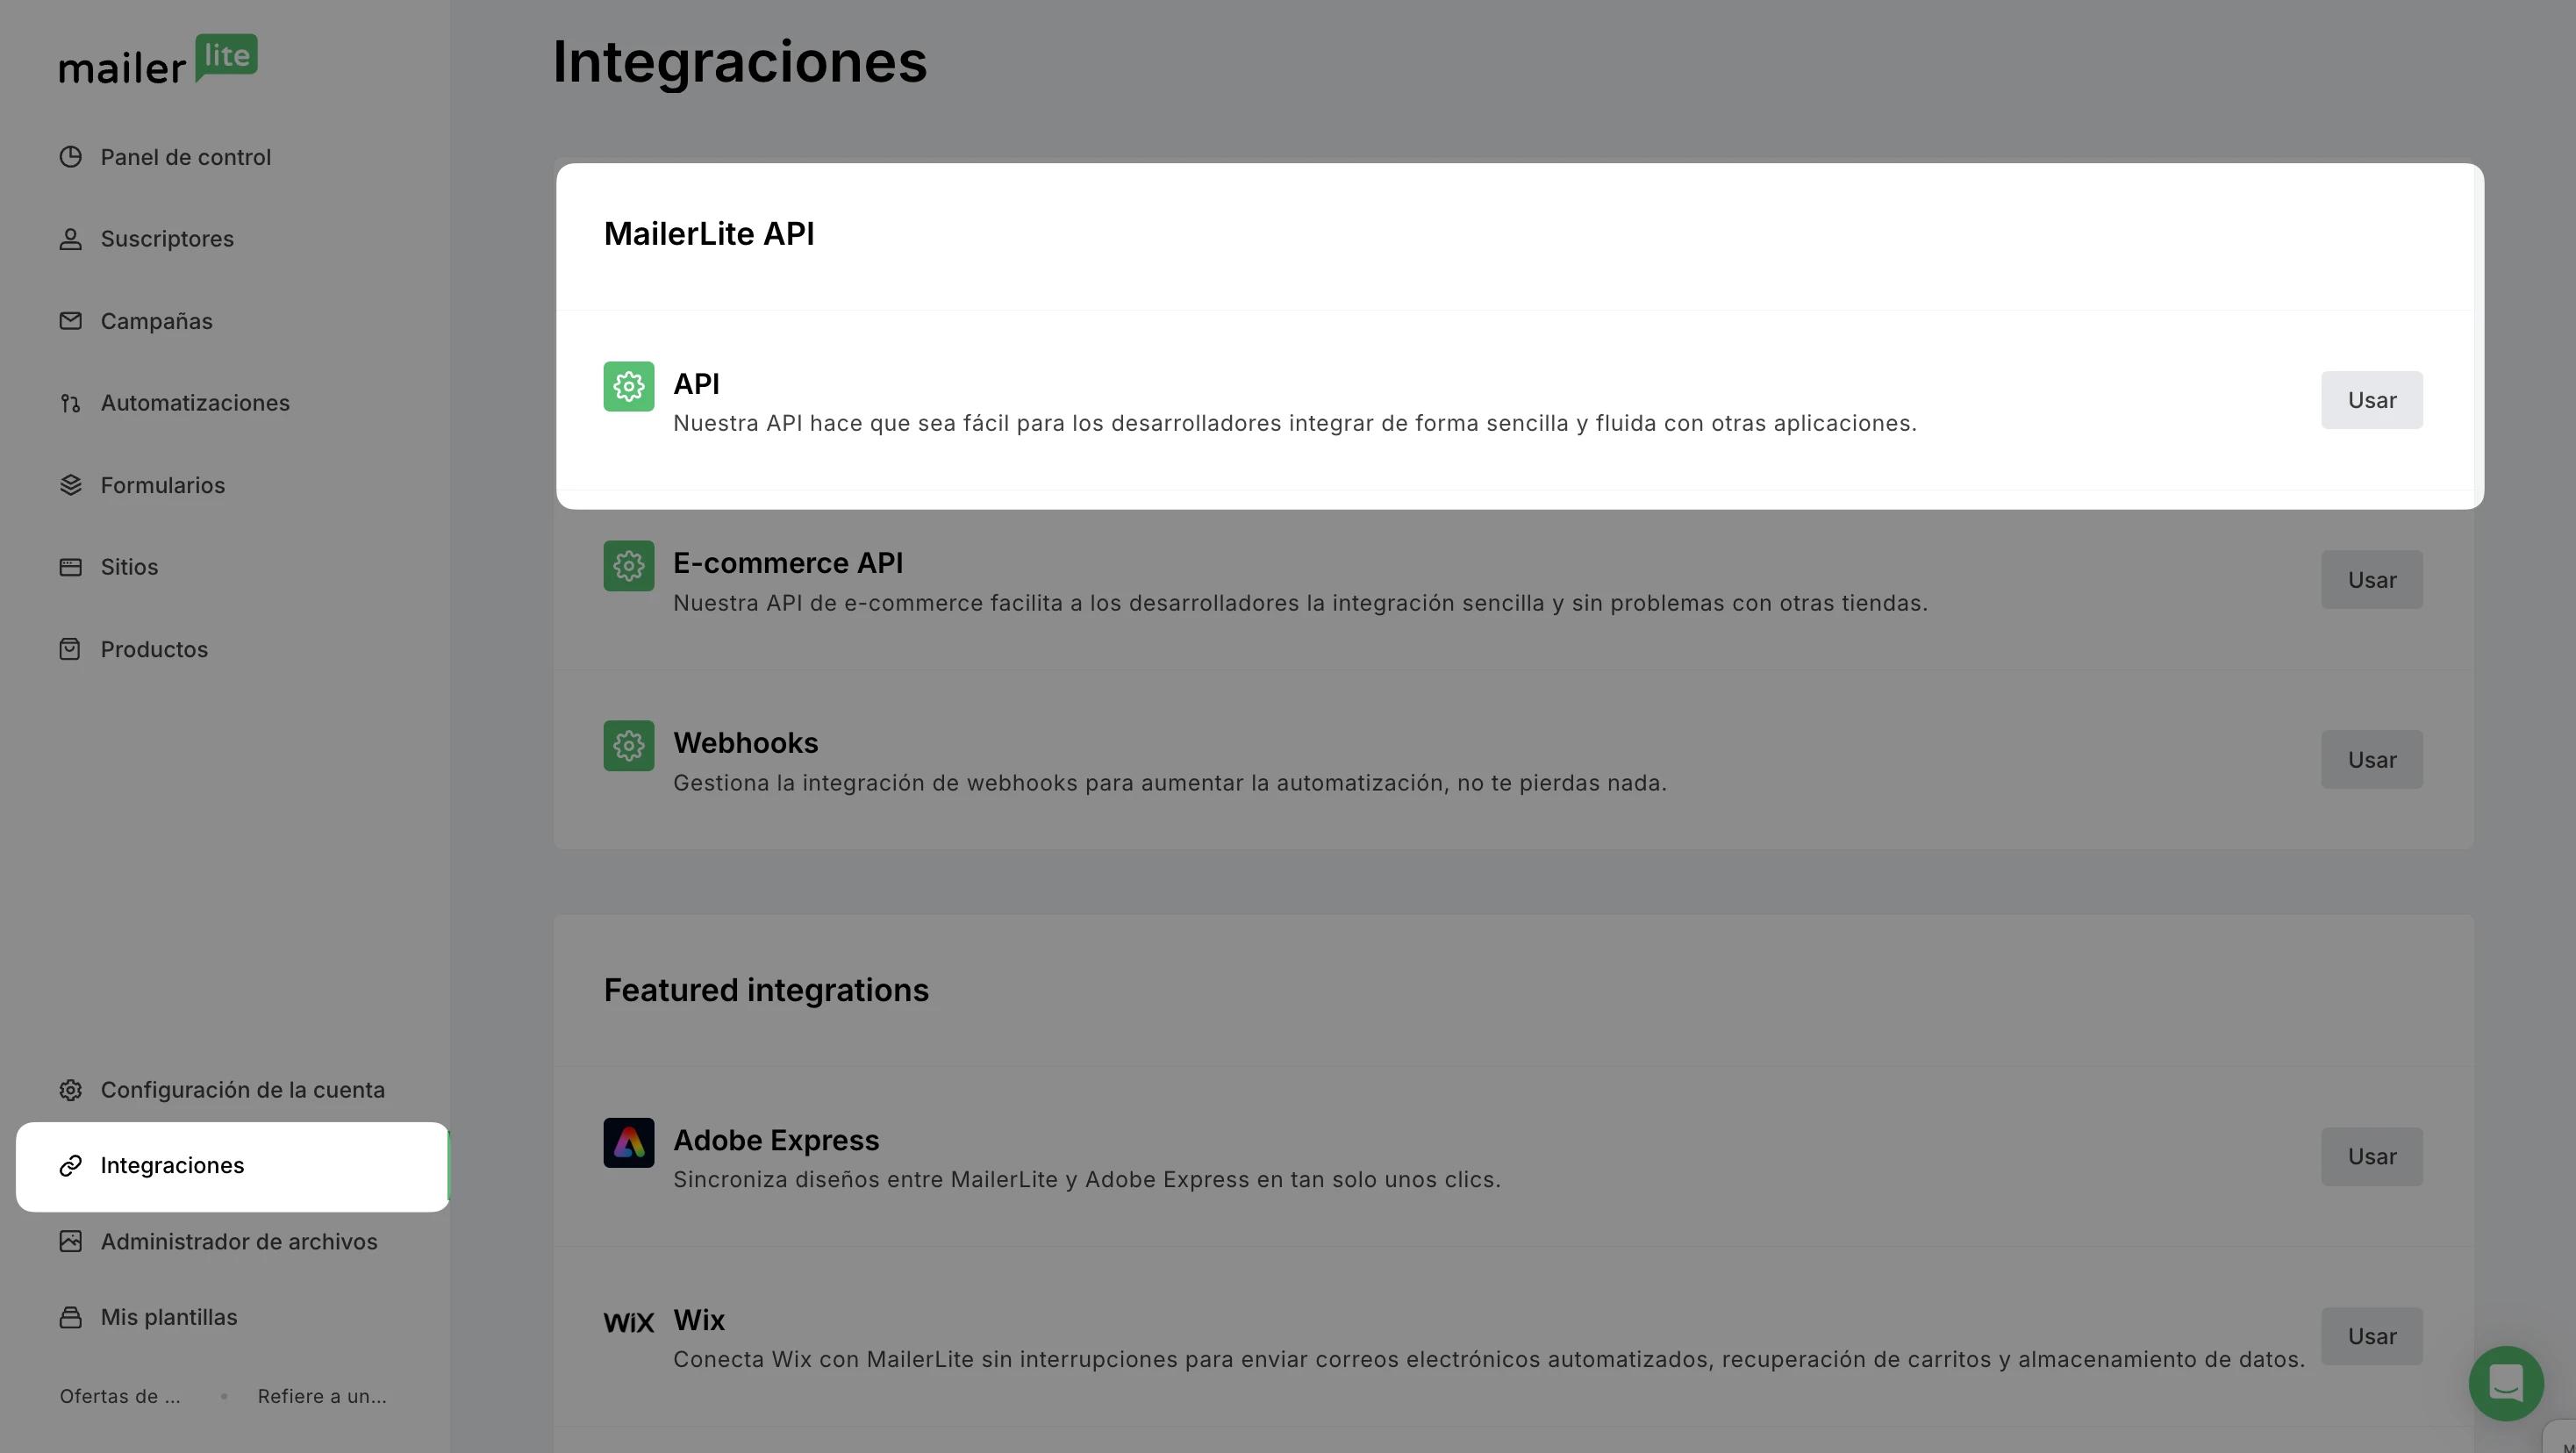
Necesitarás tu clave API. Para encontrarla, abre tu cuenta de Mailerlite y ve a la pestaña Integraciones.
Localiza la sección Mailerlite API y haz clic en Usar.
Haz clic en Generar nuevo token.
Introduce un nombre para el token como "WooCommerce" y haz clic en Crear token.
Copia el token y vuelve a la página de MailerLite en WooCommerce. Pega tu clave en la casilla Clave API y haz clic en Conectar cuenta.
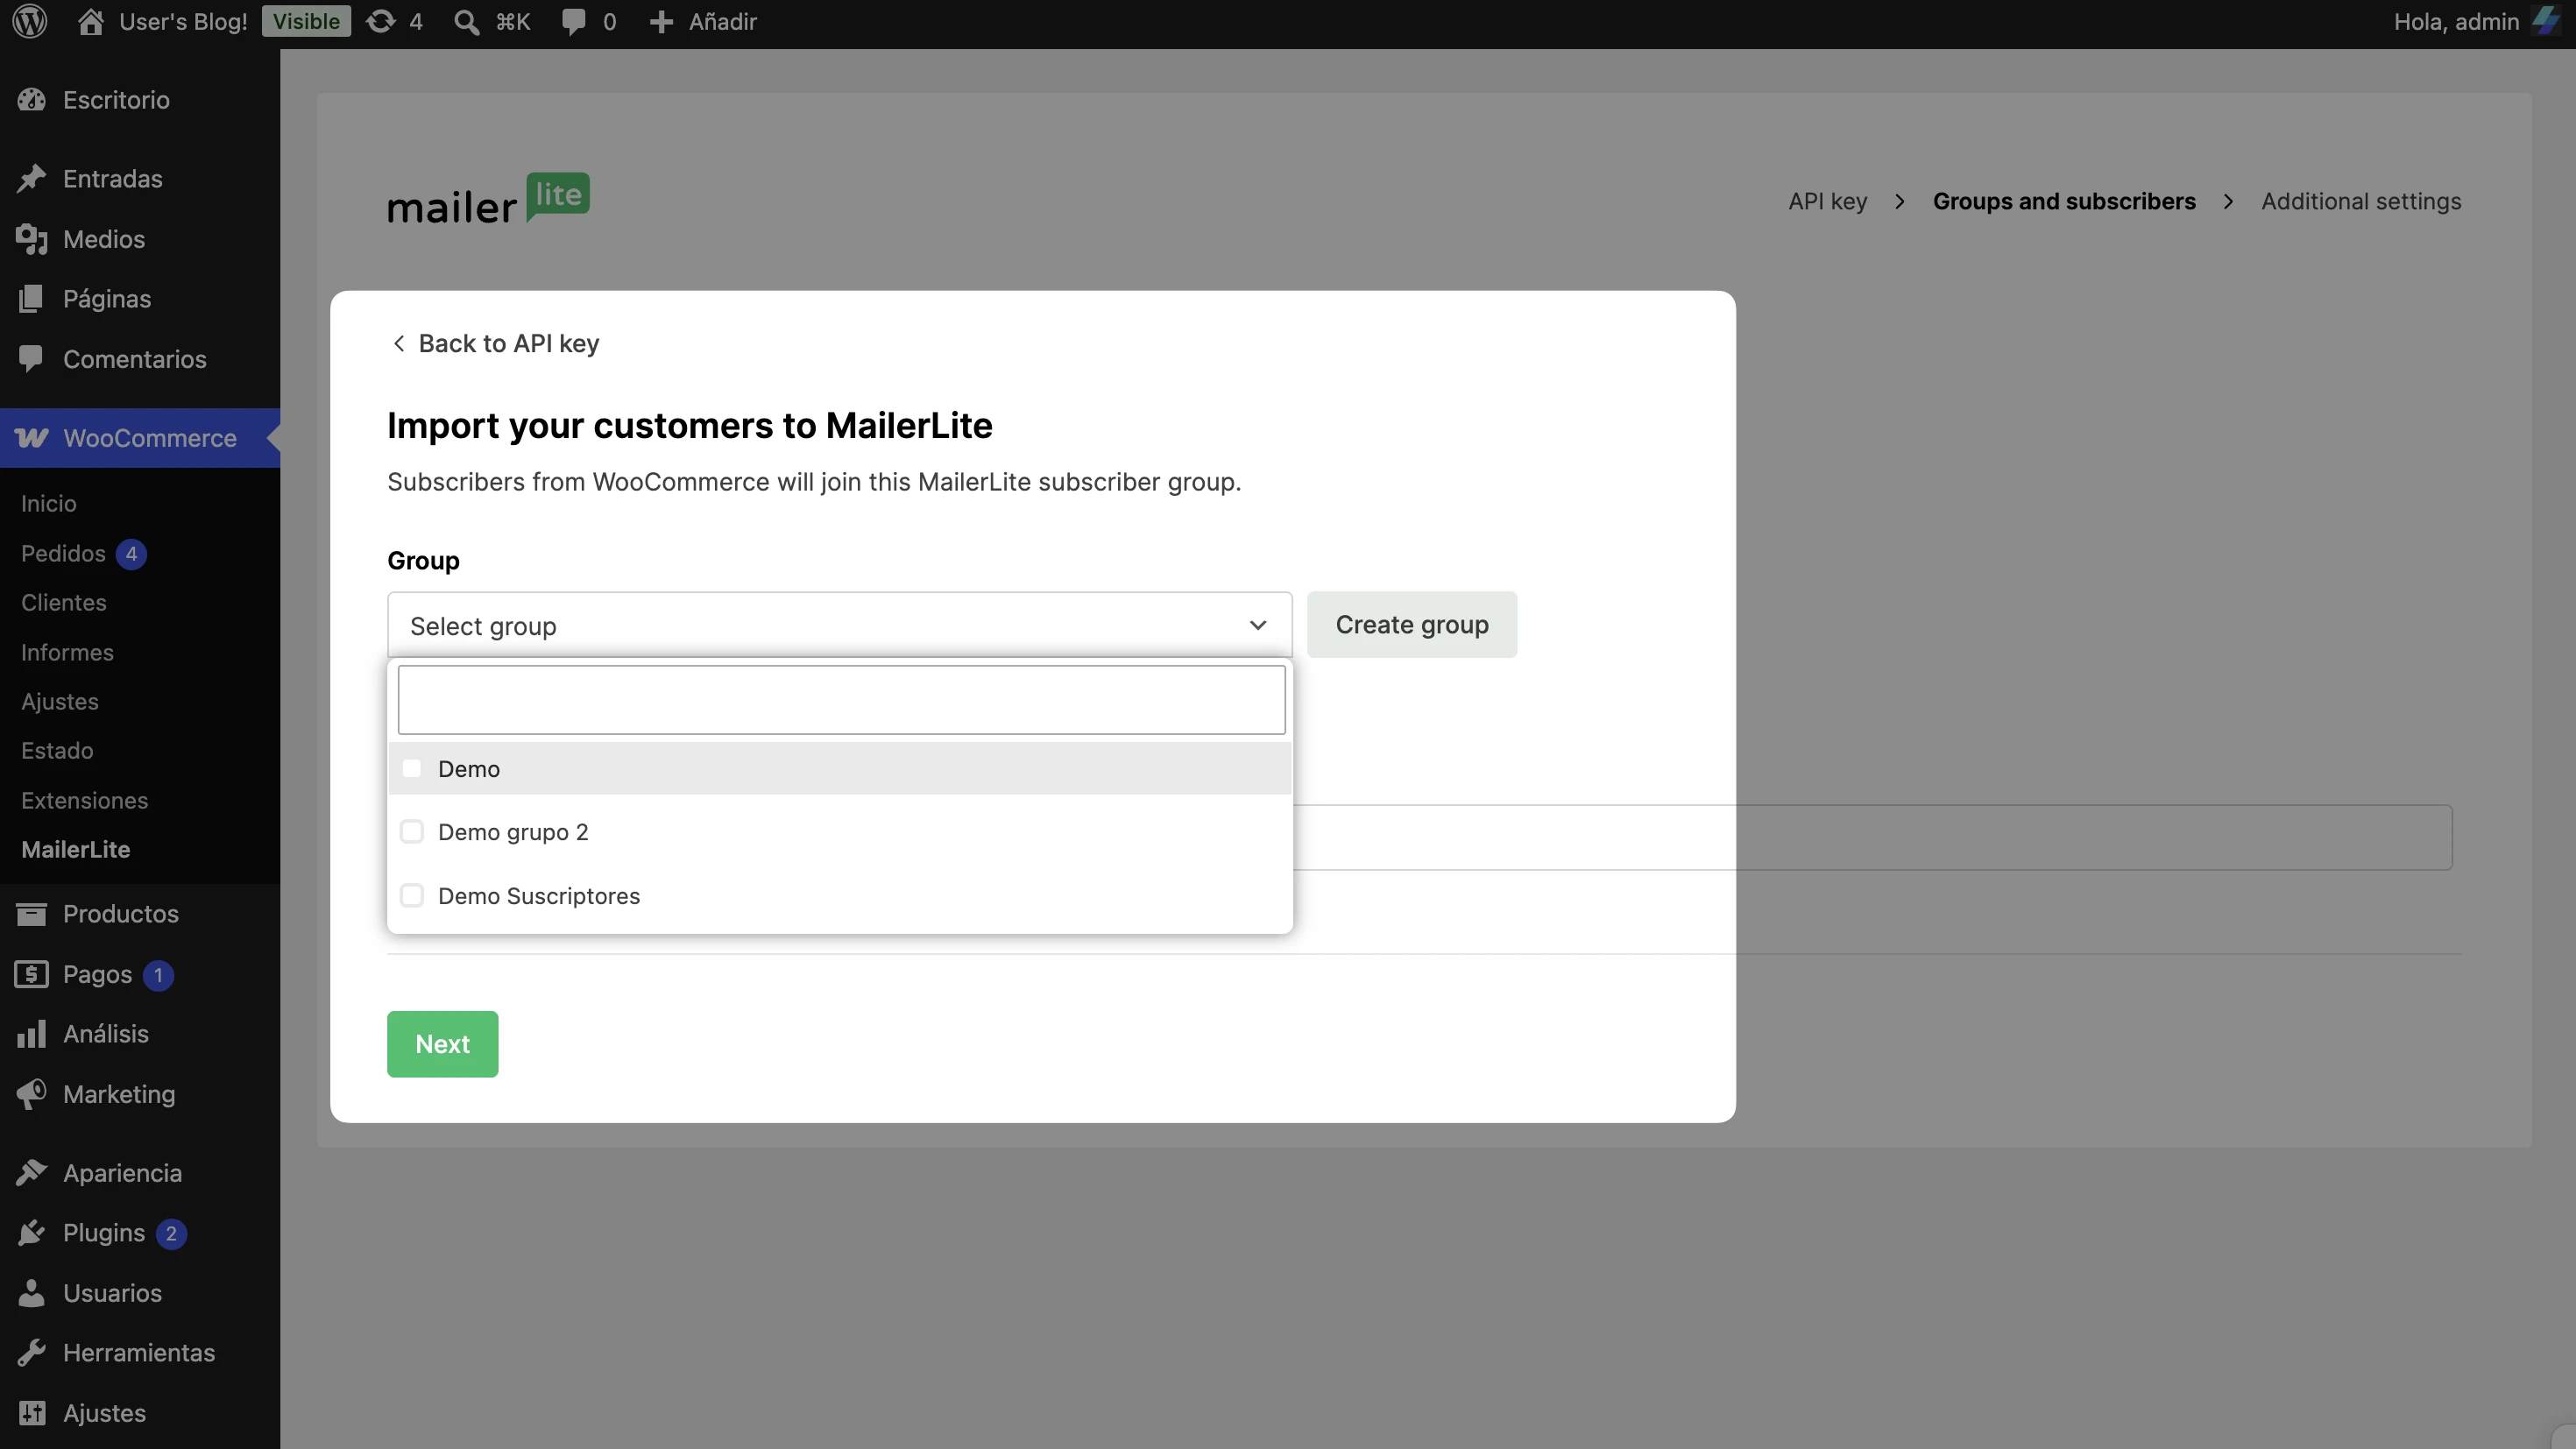
Selecciona el grupo de MailerLite o crea un nuevo grupo al que se añadirán tus clientes de WooCommerce después de que realicen una compra y se suscriban a tu boletín.
Haz clic en Iniciar importación.
Y ya está. Tu cuenta de WooCommerce ya está conectada a tu cuenta de MailerLite.
Sincronizar clientes de WooCommerce con MailerLite
Cuando instales el plugin WooCommerce-MailerLite, tus suscriptores existentes en MailerLite tendrán sus datos de compra sincronizados.
Además, todos los nuevos suscriptores que acepten unirse a tu lista de correo se añadirán automáticamente a MailerLite.
Los clientes que ya existían en tu lista de WooCommerce pero que no existían en tu lista de MailerLite no se sincronizarán, junto con los nuevos suscriptores que se registren sin aceptar email marketing.
Los campos de suscriptores de Woocommerce
Cuando sincronizas tus clientes de WooCommerce con MailerLite, sus datos se sincronizan junto con ellos, incluyendo su nombre, dirección de correo electrónico e información sobre sus pedidos. Esta información se añade a los campos de tus suscriptores. A continuación, puedes crear segmentos utilizando estos campos.
Los campos de WooCommerce incluyen:
Woo orders count: el número de pedidos realizados por el suscriptor
Woo total spent: el importe total que el suscriptor ha gastado en tu tienda de WooCommerce
Accepts marketing: indica si el suscriptor ha dado su permiso para recibir emails de marketing.
Además de usar estos campos para recopilar datos, también puedes utilizarlos para buscar suscriptores y crear segmentos.
Añade tus productos en una newsletter
¿Necesitas ayuda para crear un newsletter? Descúbrelo aquí ➡️ Cómo crear y programar una campaña.
El elemento Productos del editor de arrastrar y soltar te permite añadir tus productos de WooCommerce directamente en tus campañas de MailerLite.
Esto importará automáticamente las imágenes, descripciones y precios de tus productos, con un enlace directo a tu tienda de WooCommerce.
Para añadir un producto a tus newsletters:
Abre tu campaña en el editor de arrastrar y soltar.
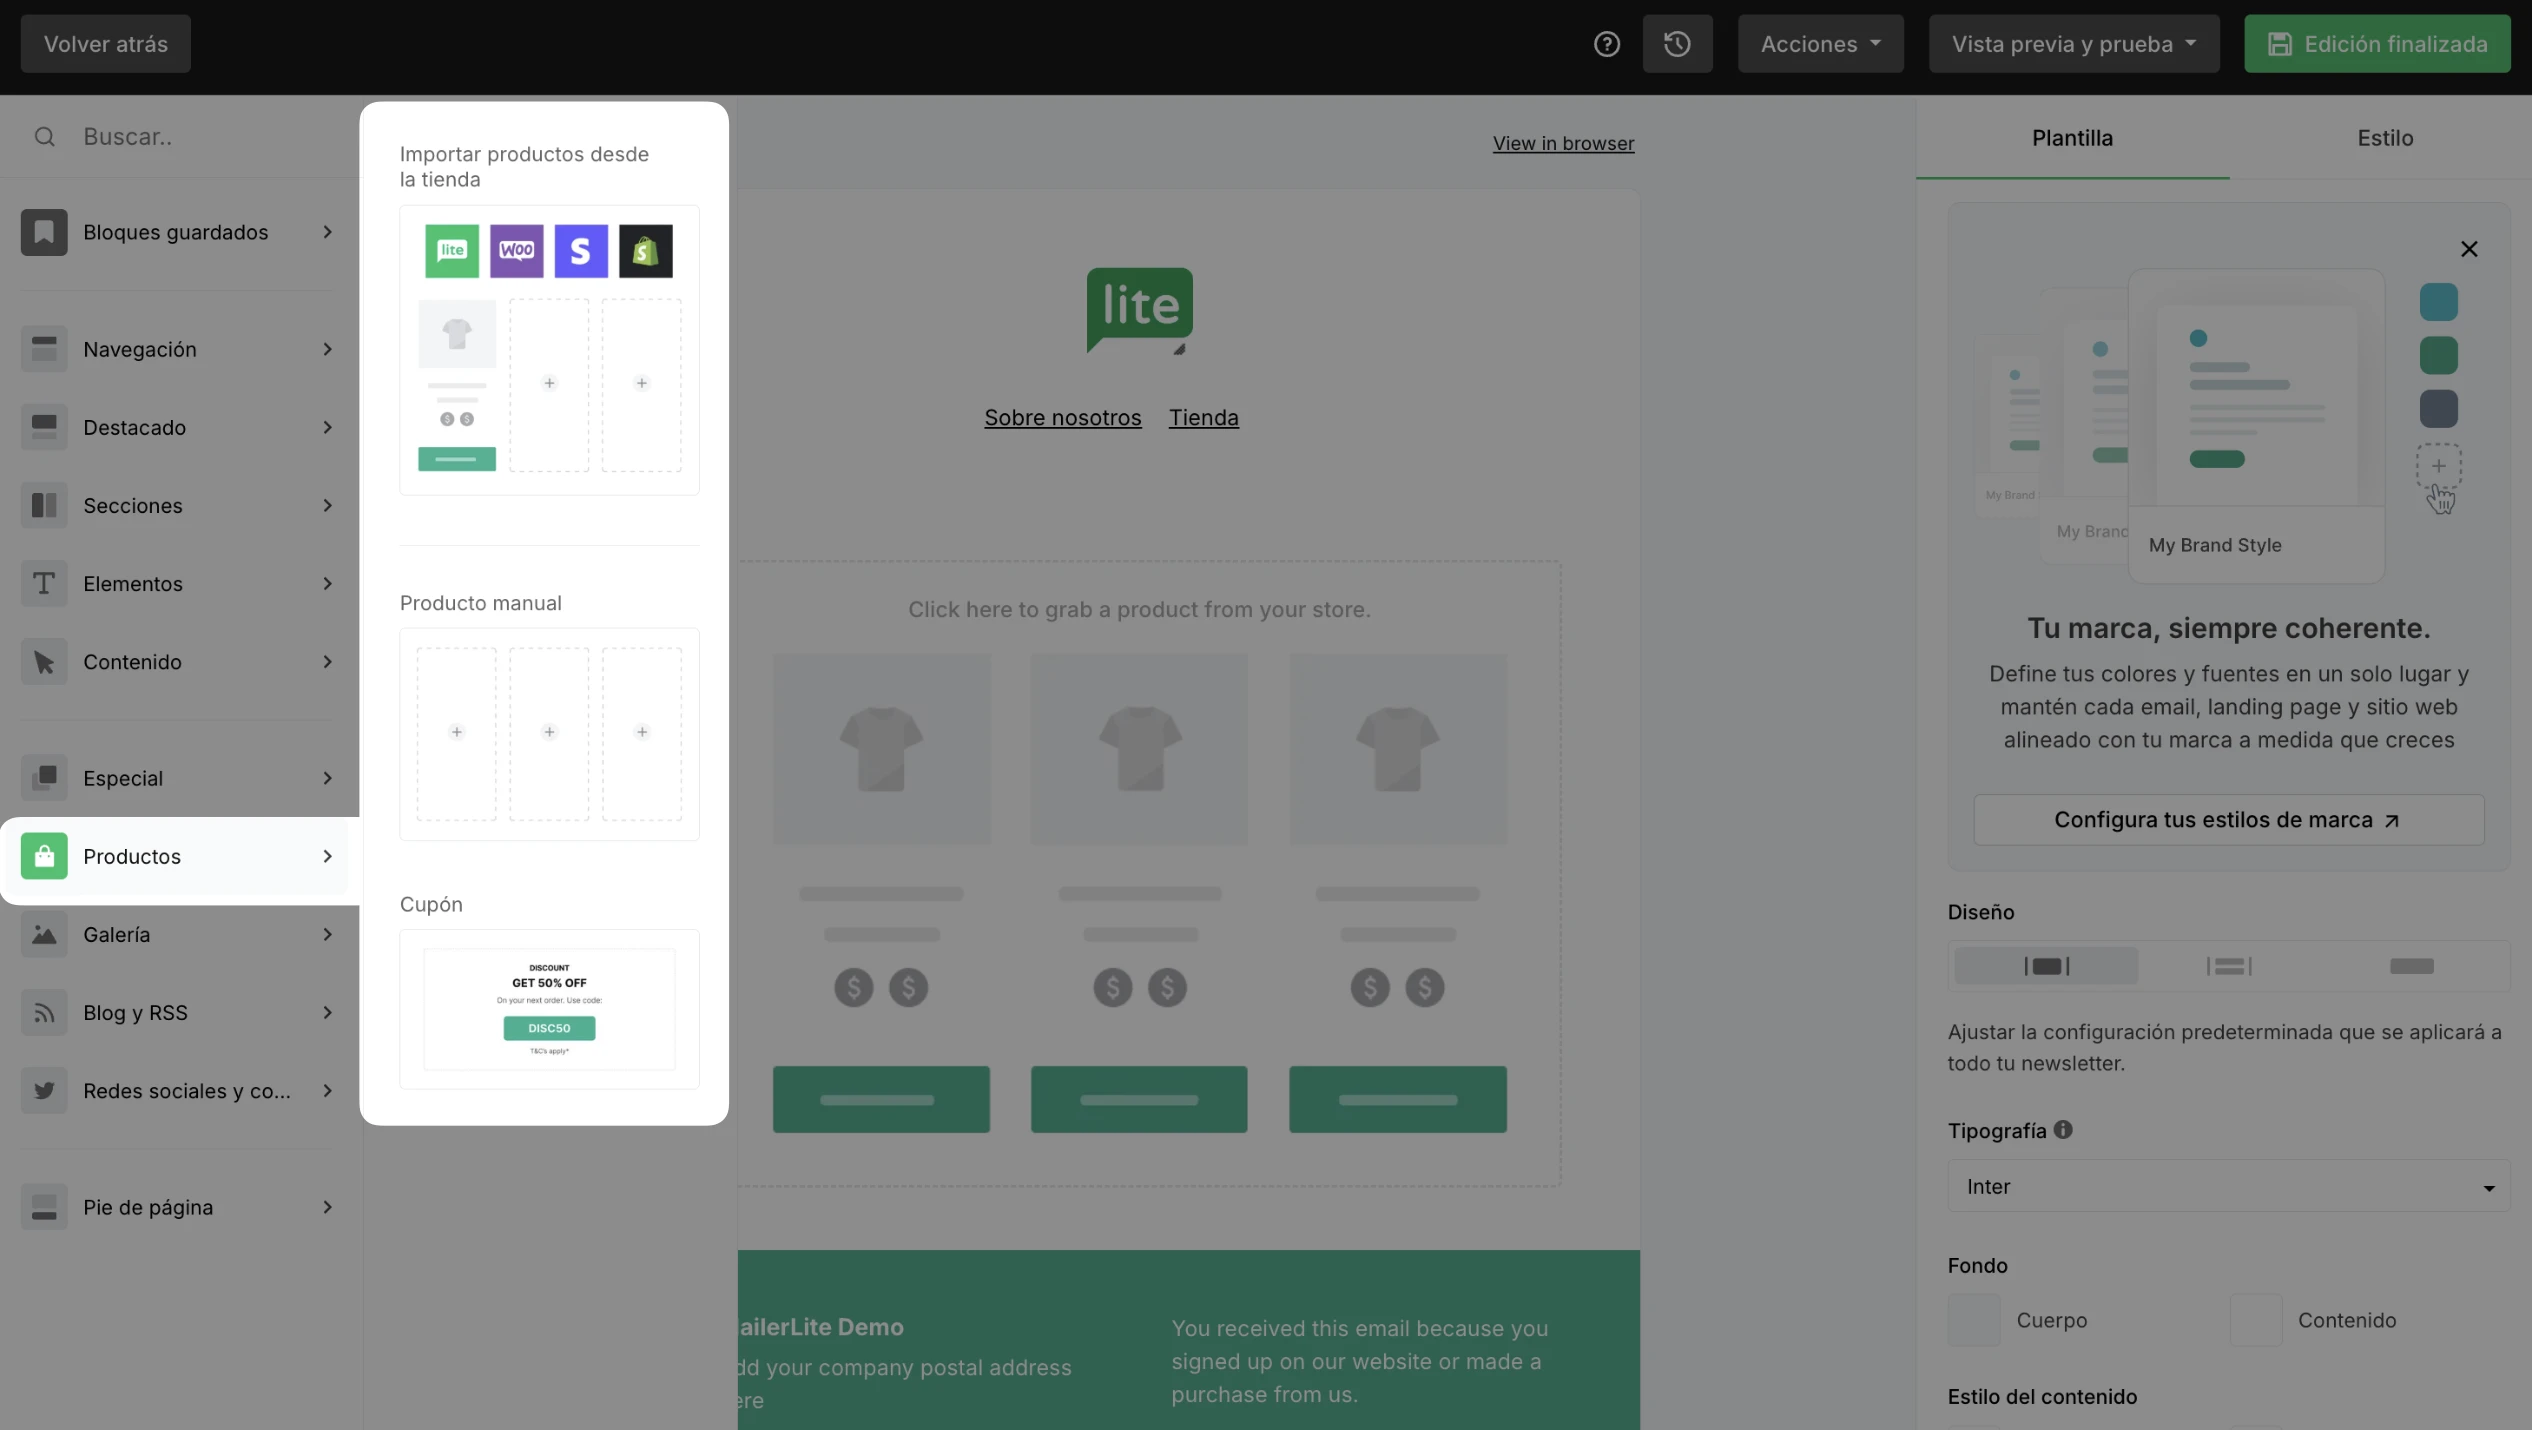
En la sección Productos, encontrarás la opción Importar desde tiendas. Simplemente arrastra y suelta el elemento en tu email.
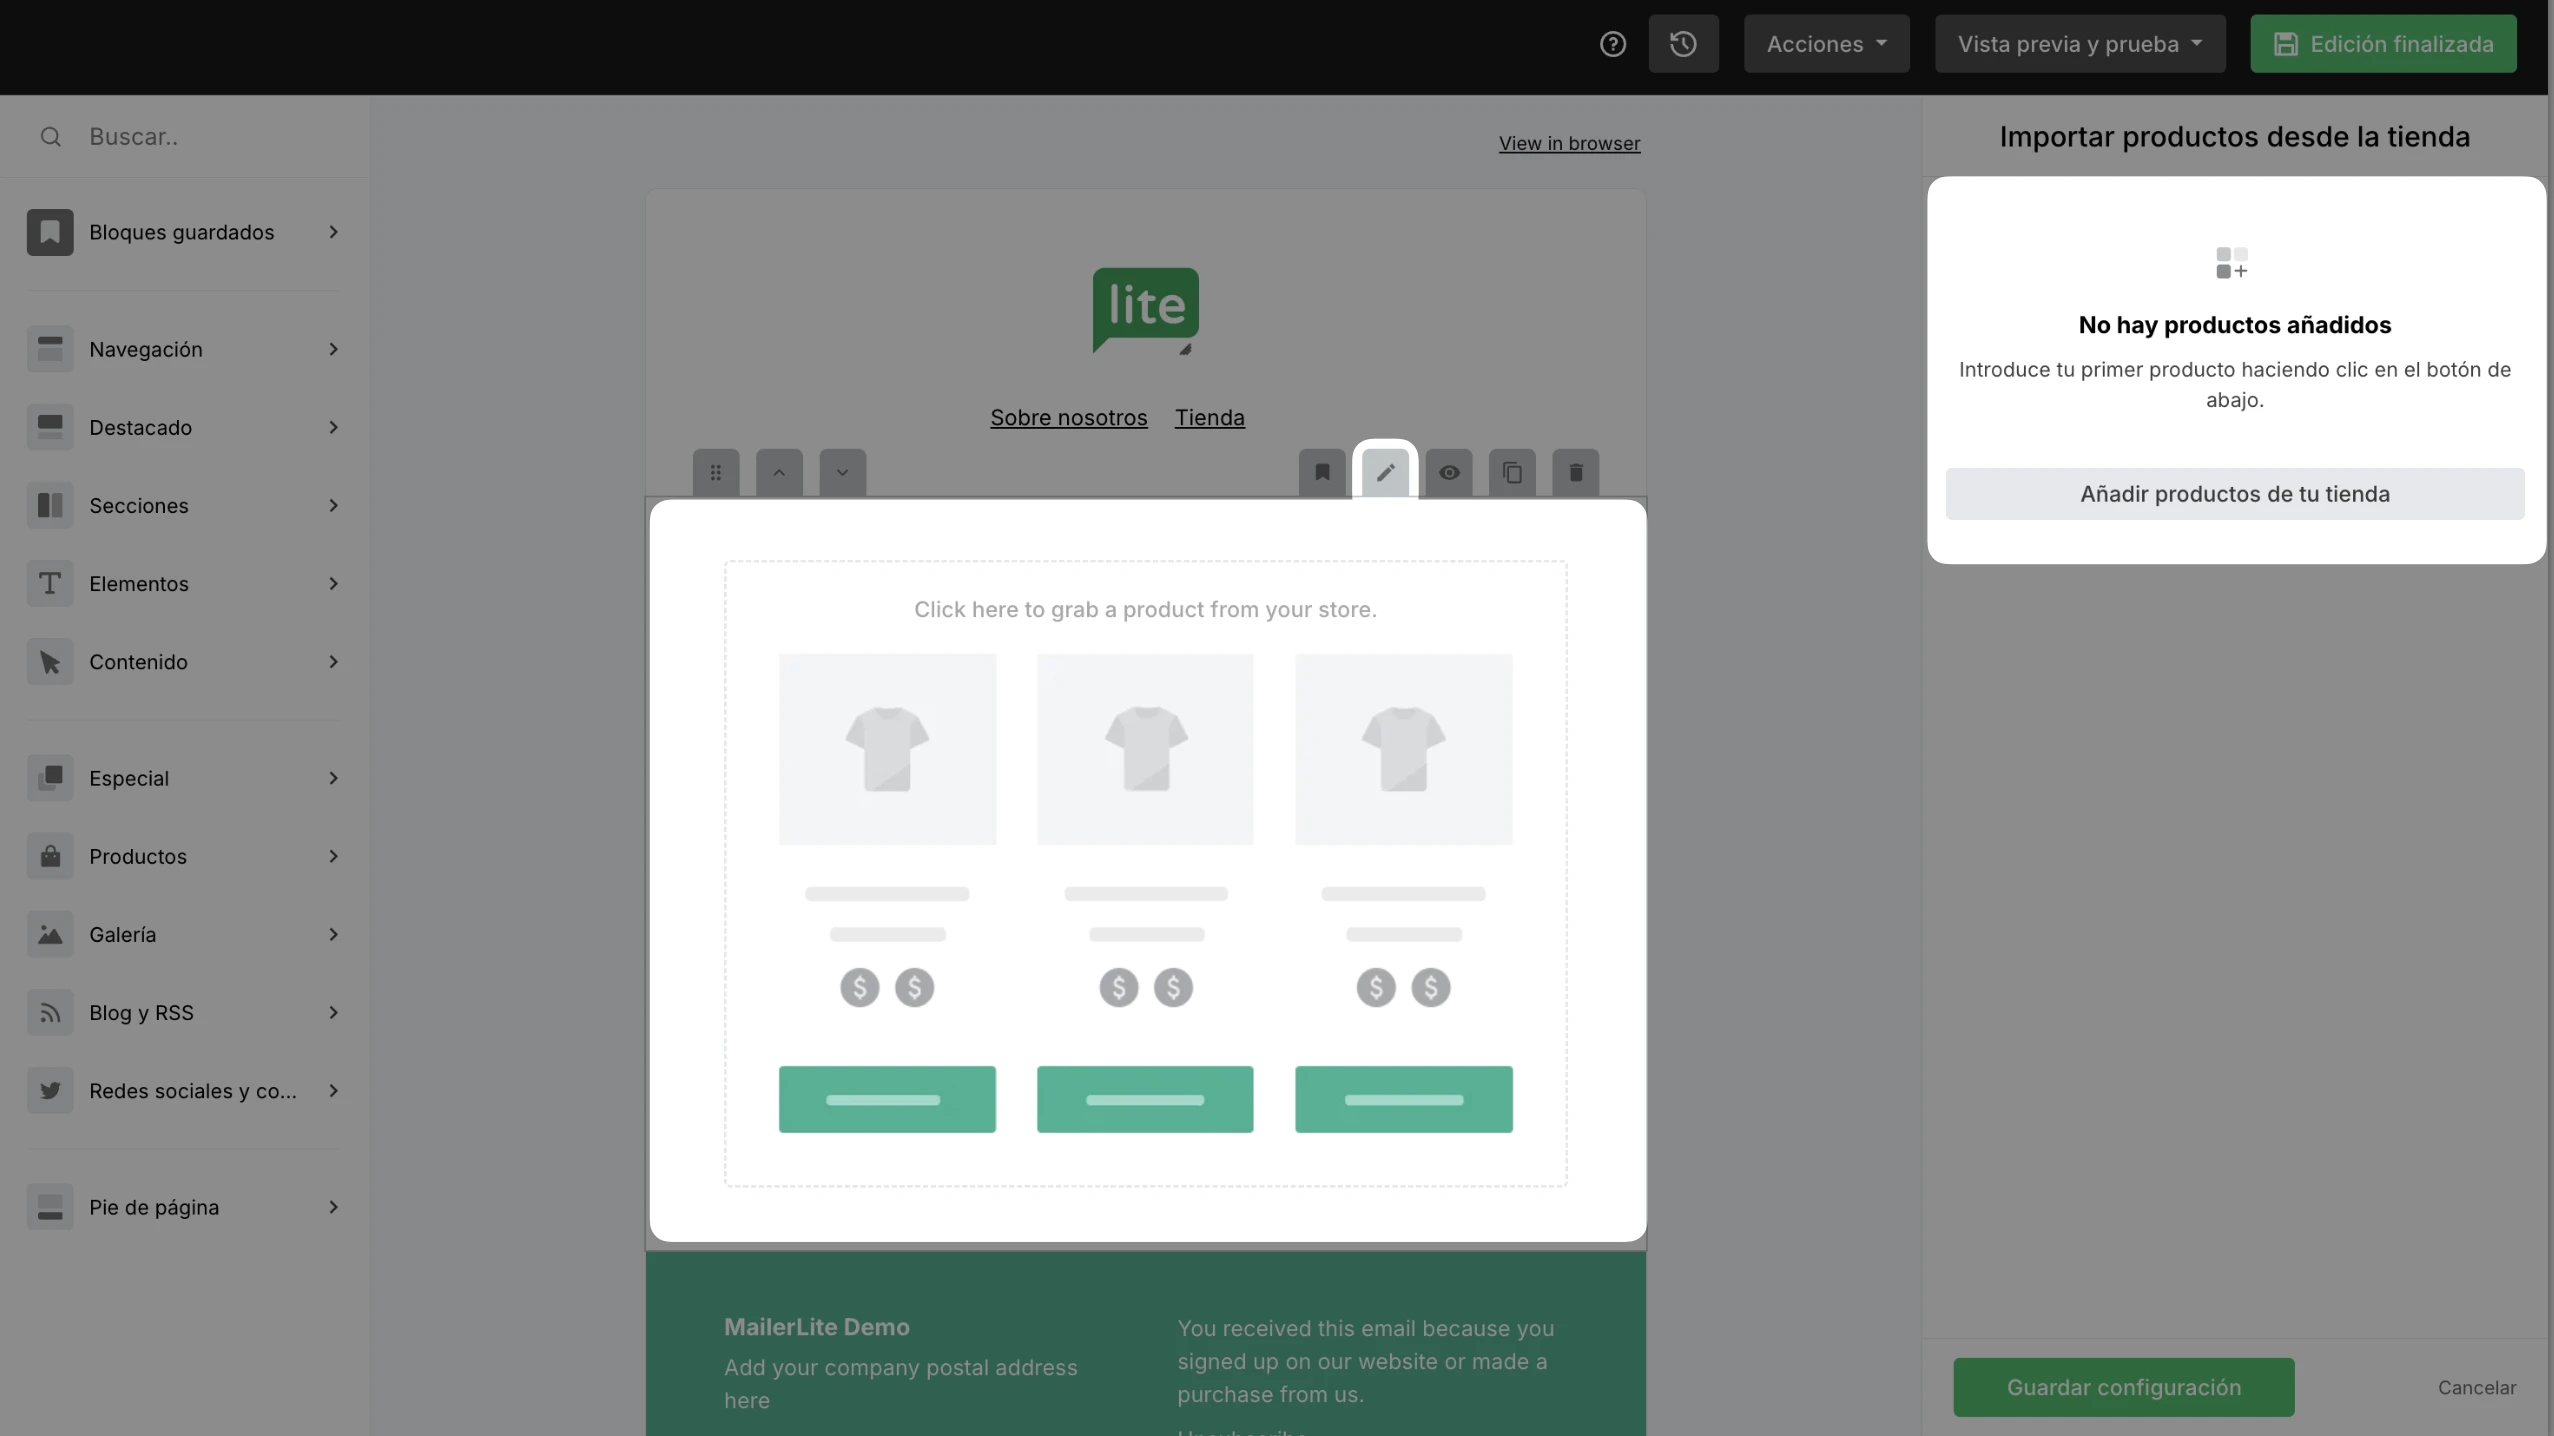
Haz clic en el bloque para abrir la configuración en el panel derecho. Usa el botón Añadir productos de tu tienda para agregar productos desde WooCommerce.
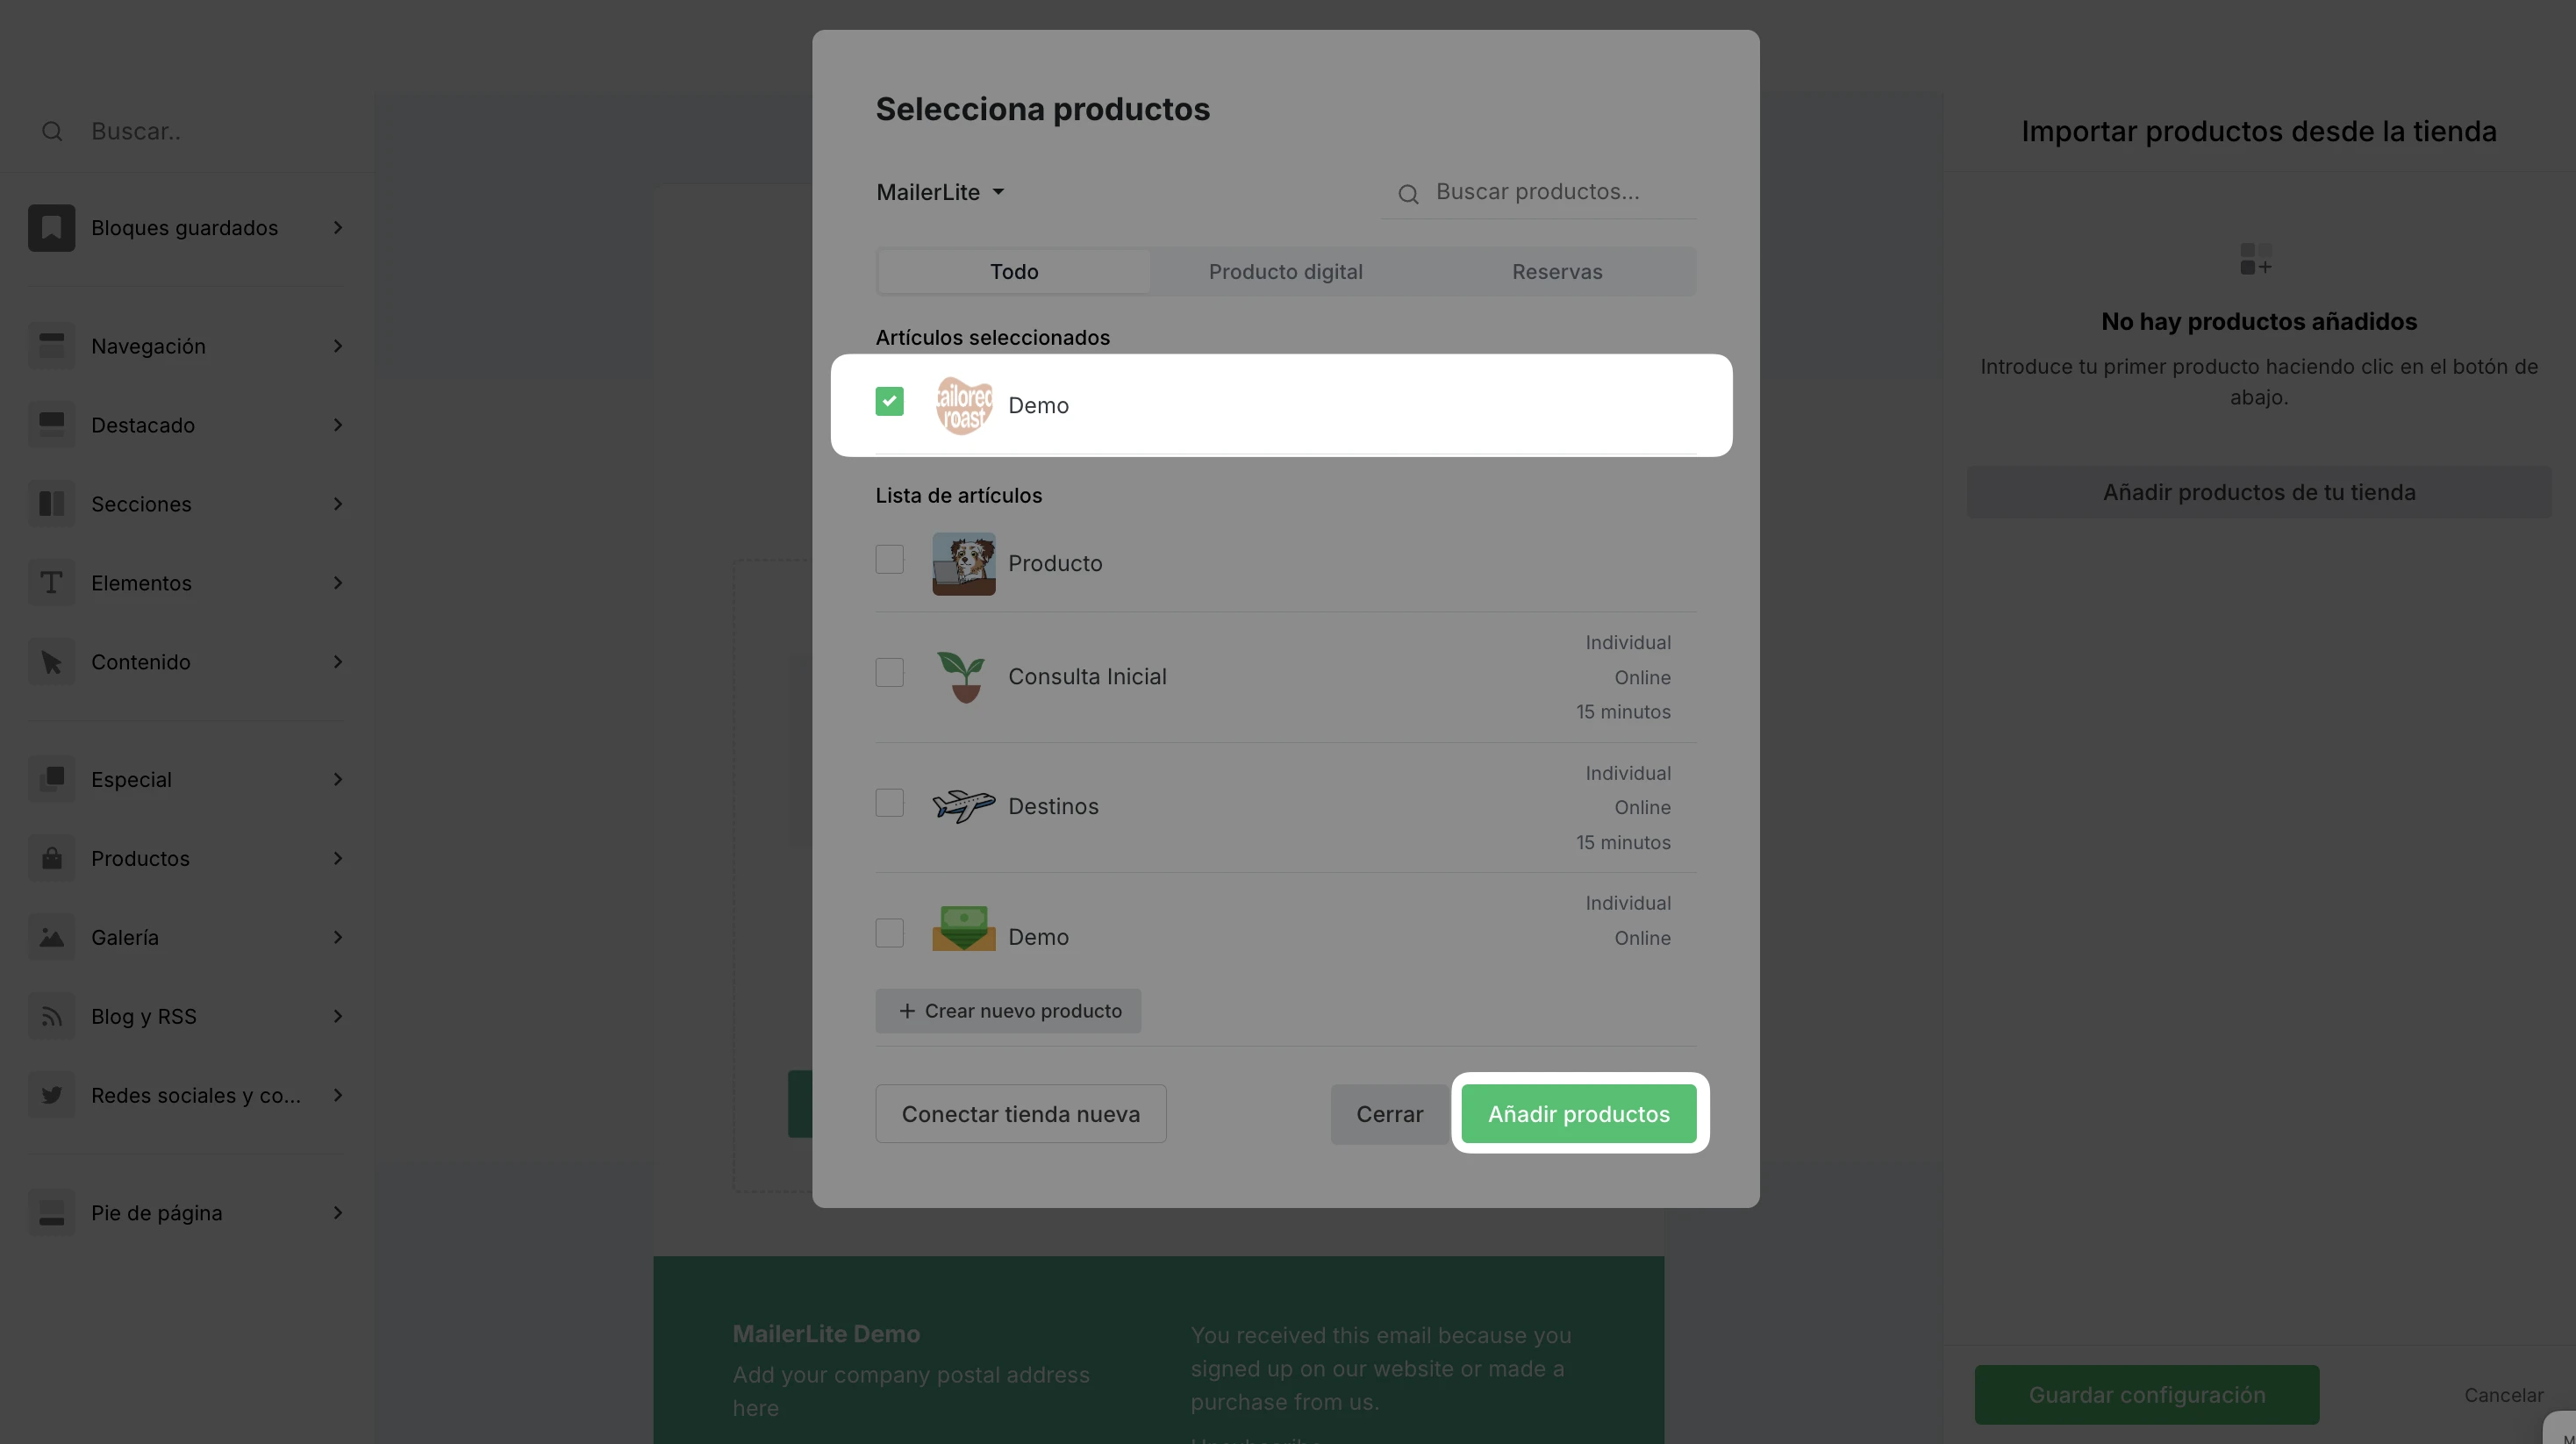
Si tu cuenta tiene varias tiendas conectadas, asegúrate de seleccionar tu tienda de WooCommerce en el menú desplegable.
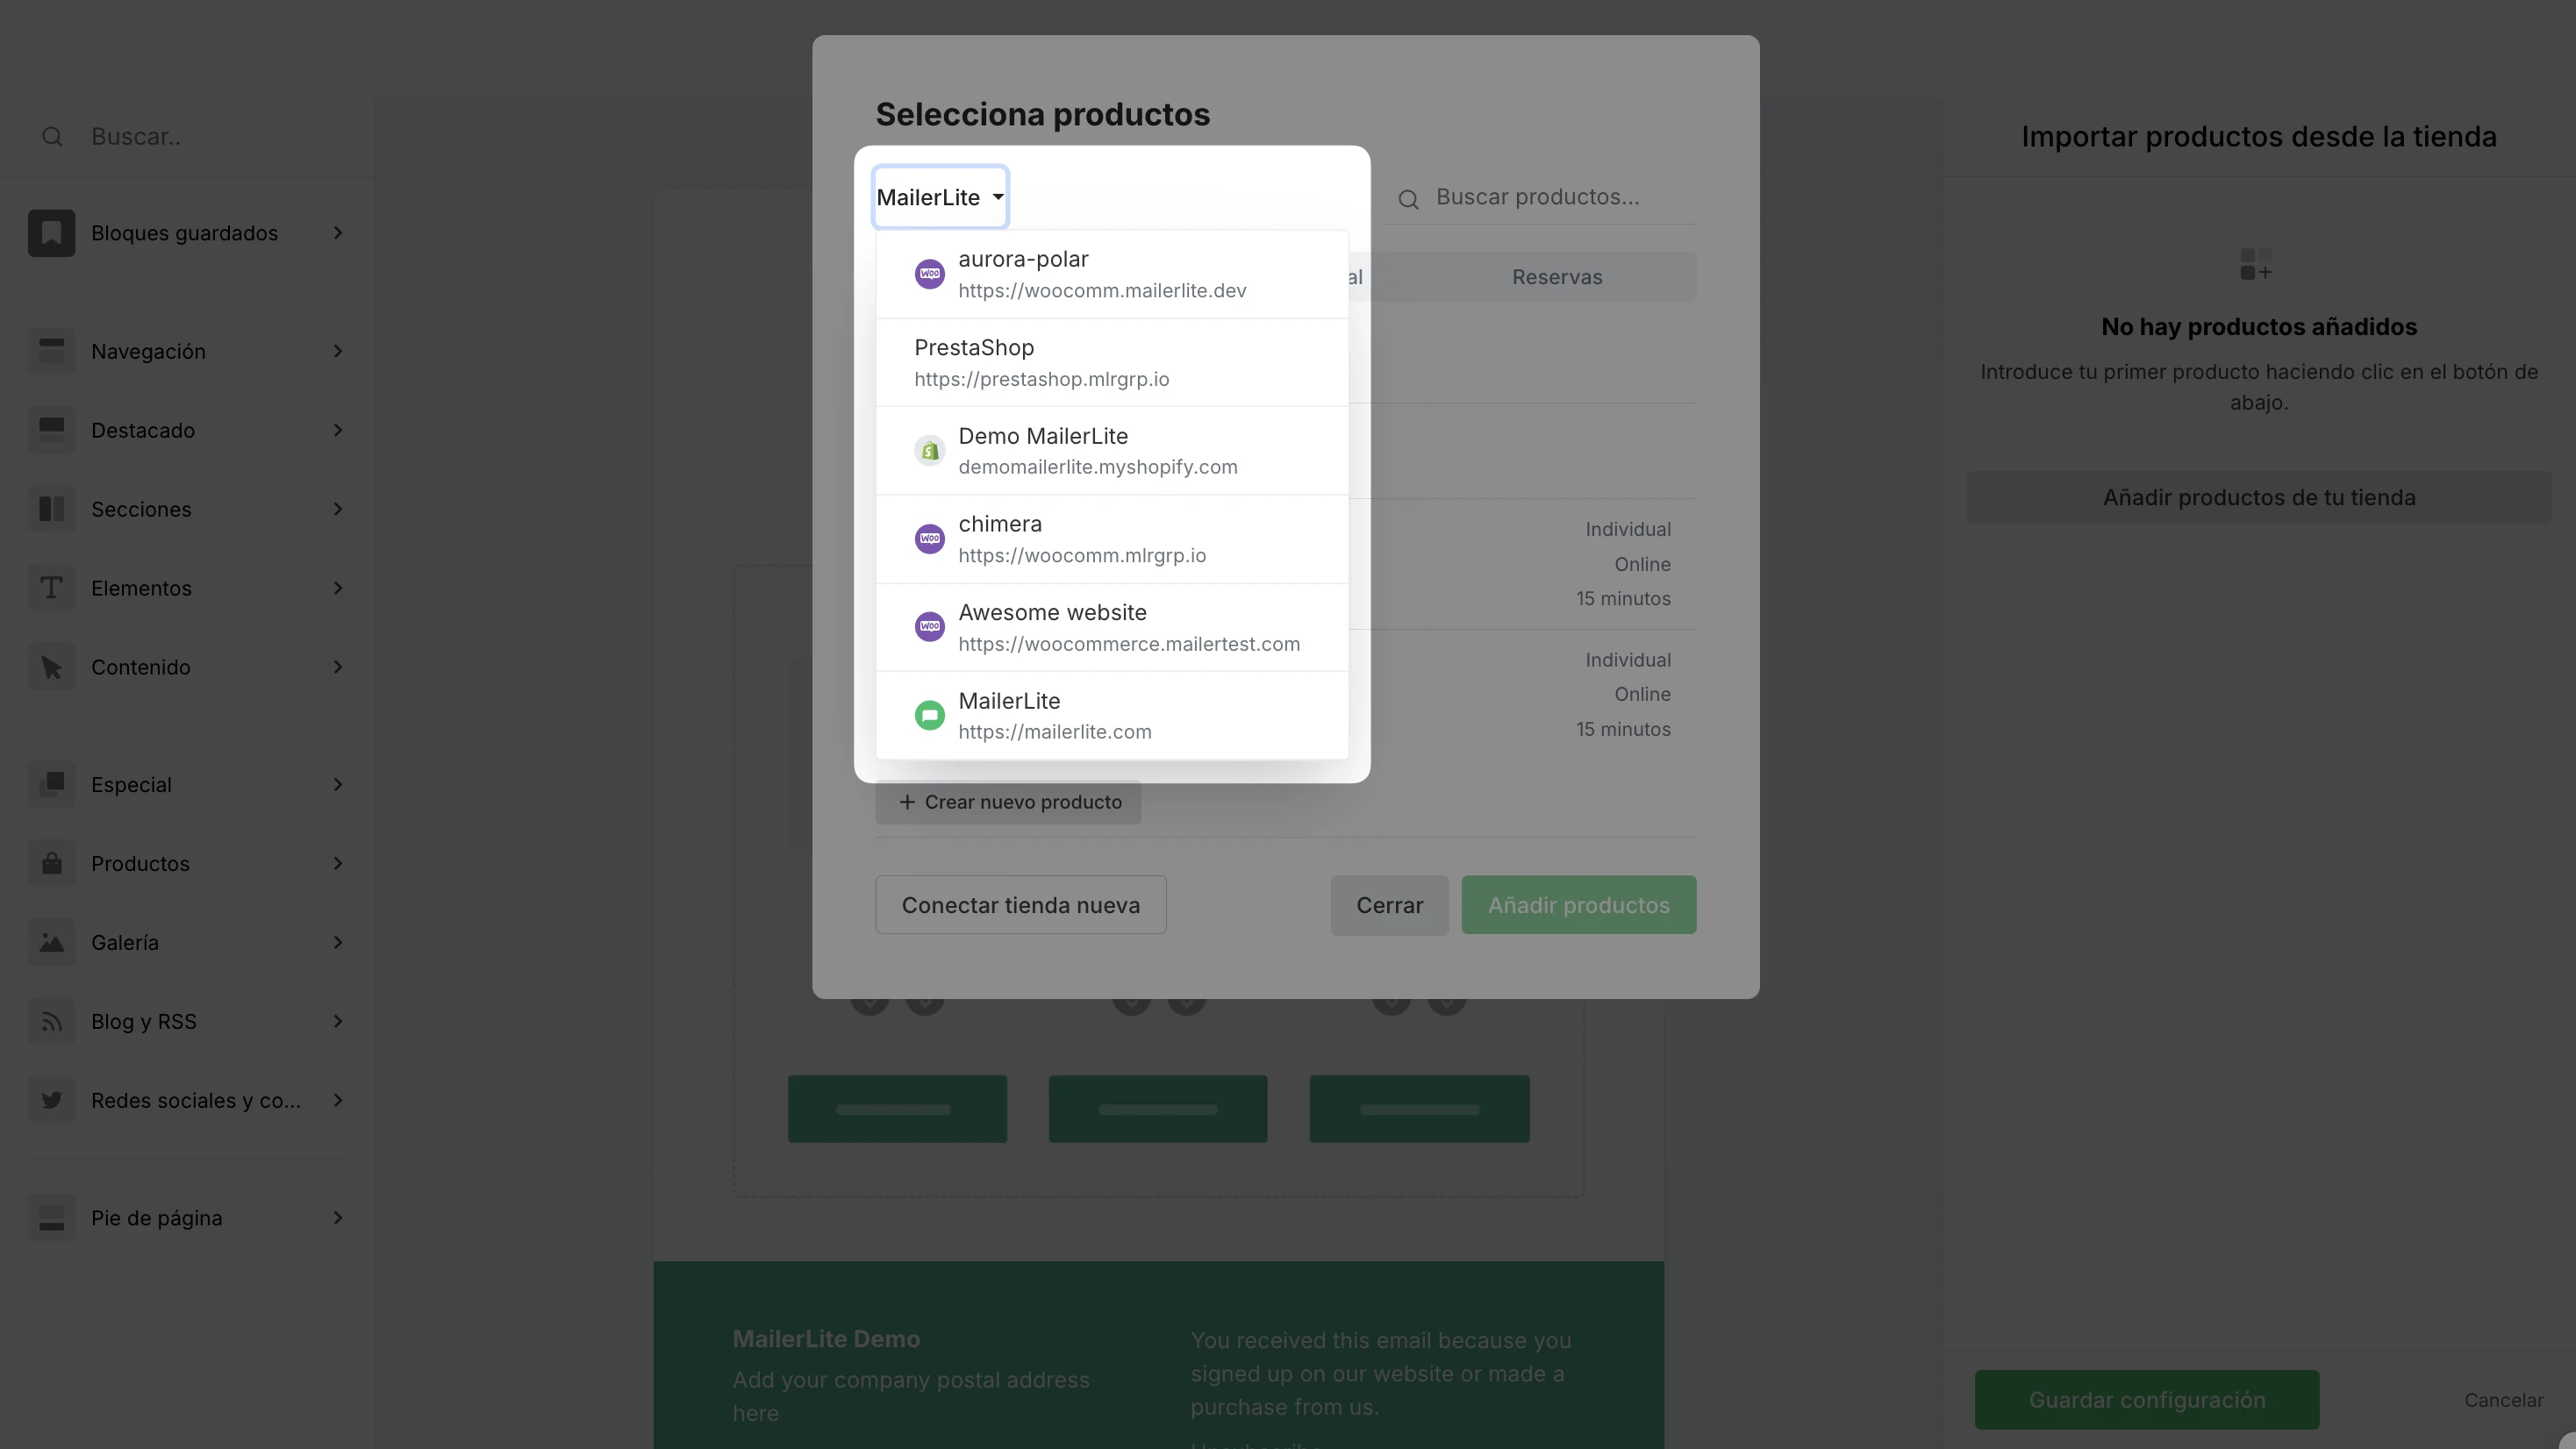
Puedes elegir mostrar un solo producto o varios. Una vez seleccionado el producto, haz clic en Añadir productos.
Haz clic en el bloque para abrir la configuración en el panel derecho. Desde aquí, puedes ajustar elementos como la posición de la imagen, la alineación, y elegir qué detalles se muestran, como el precio y la descripción.

Haz clic en Guardar configuración para guardar tus cambios.
Cuando hayas terminado de editar tu campaña, haz clic en Terminar de editar.
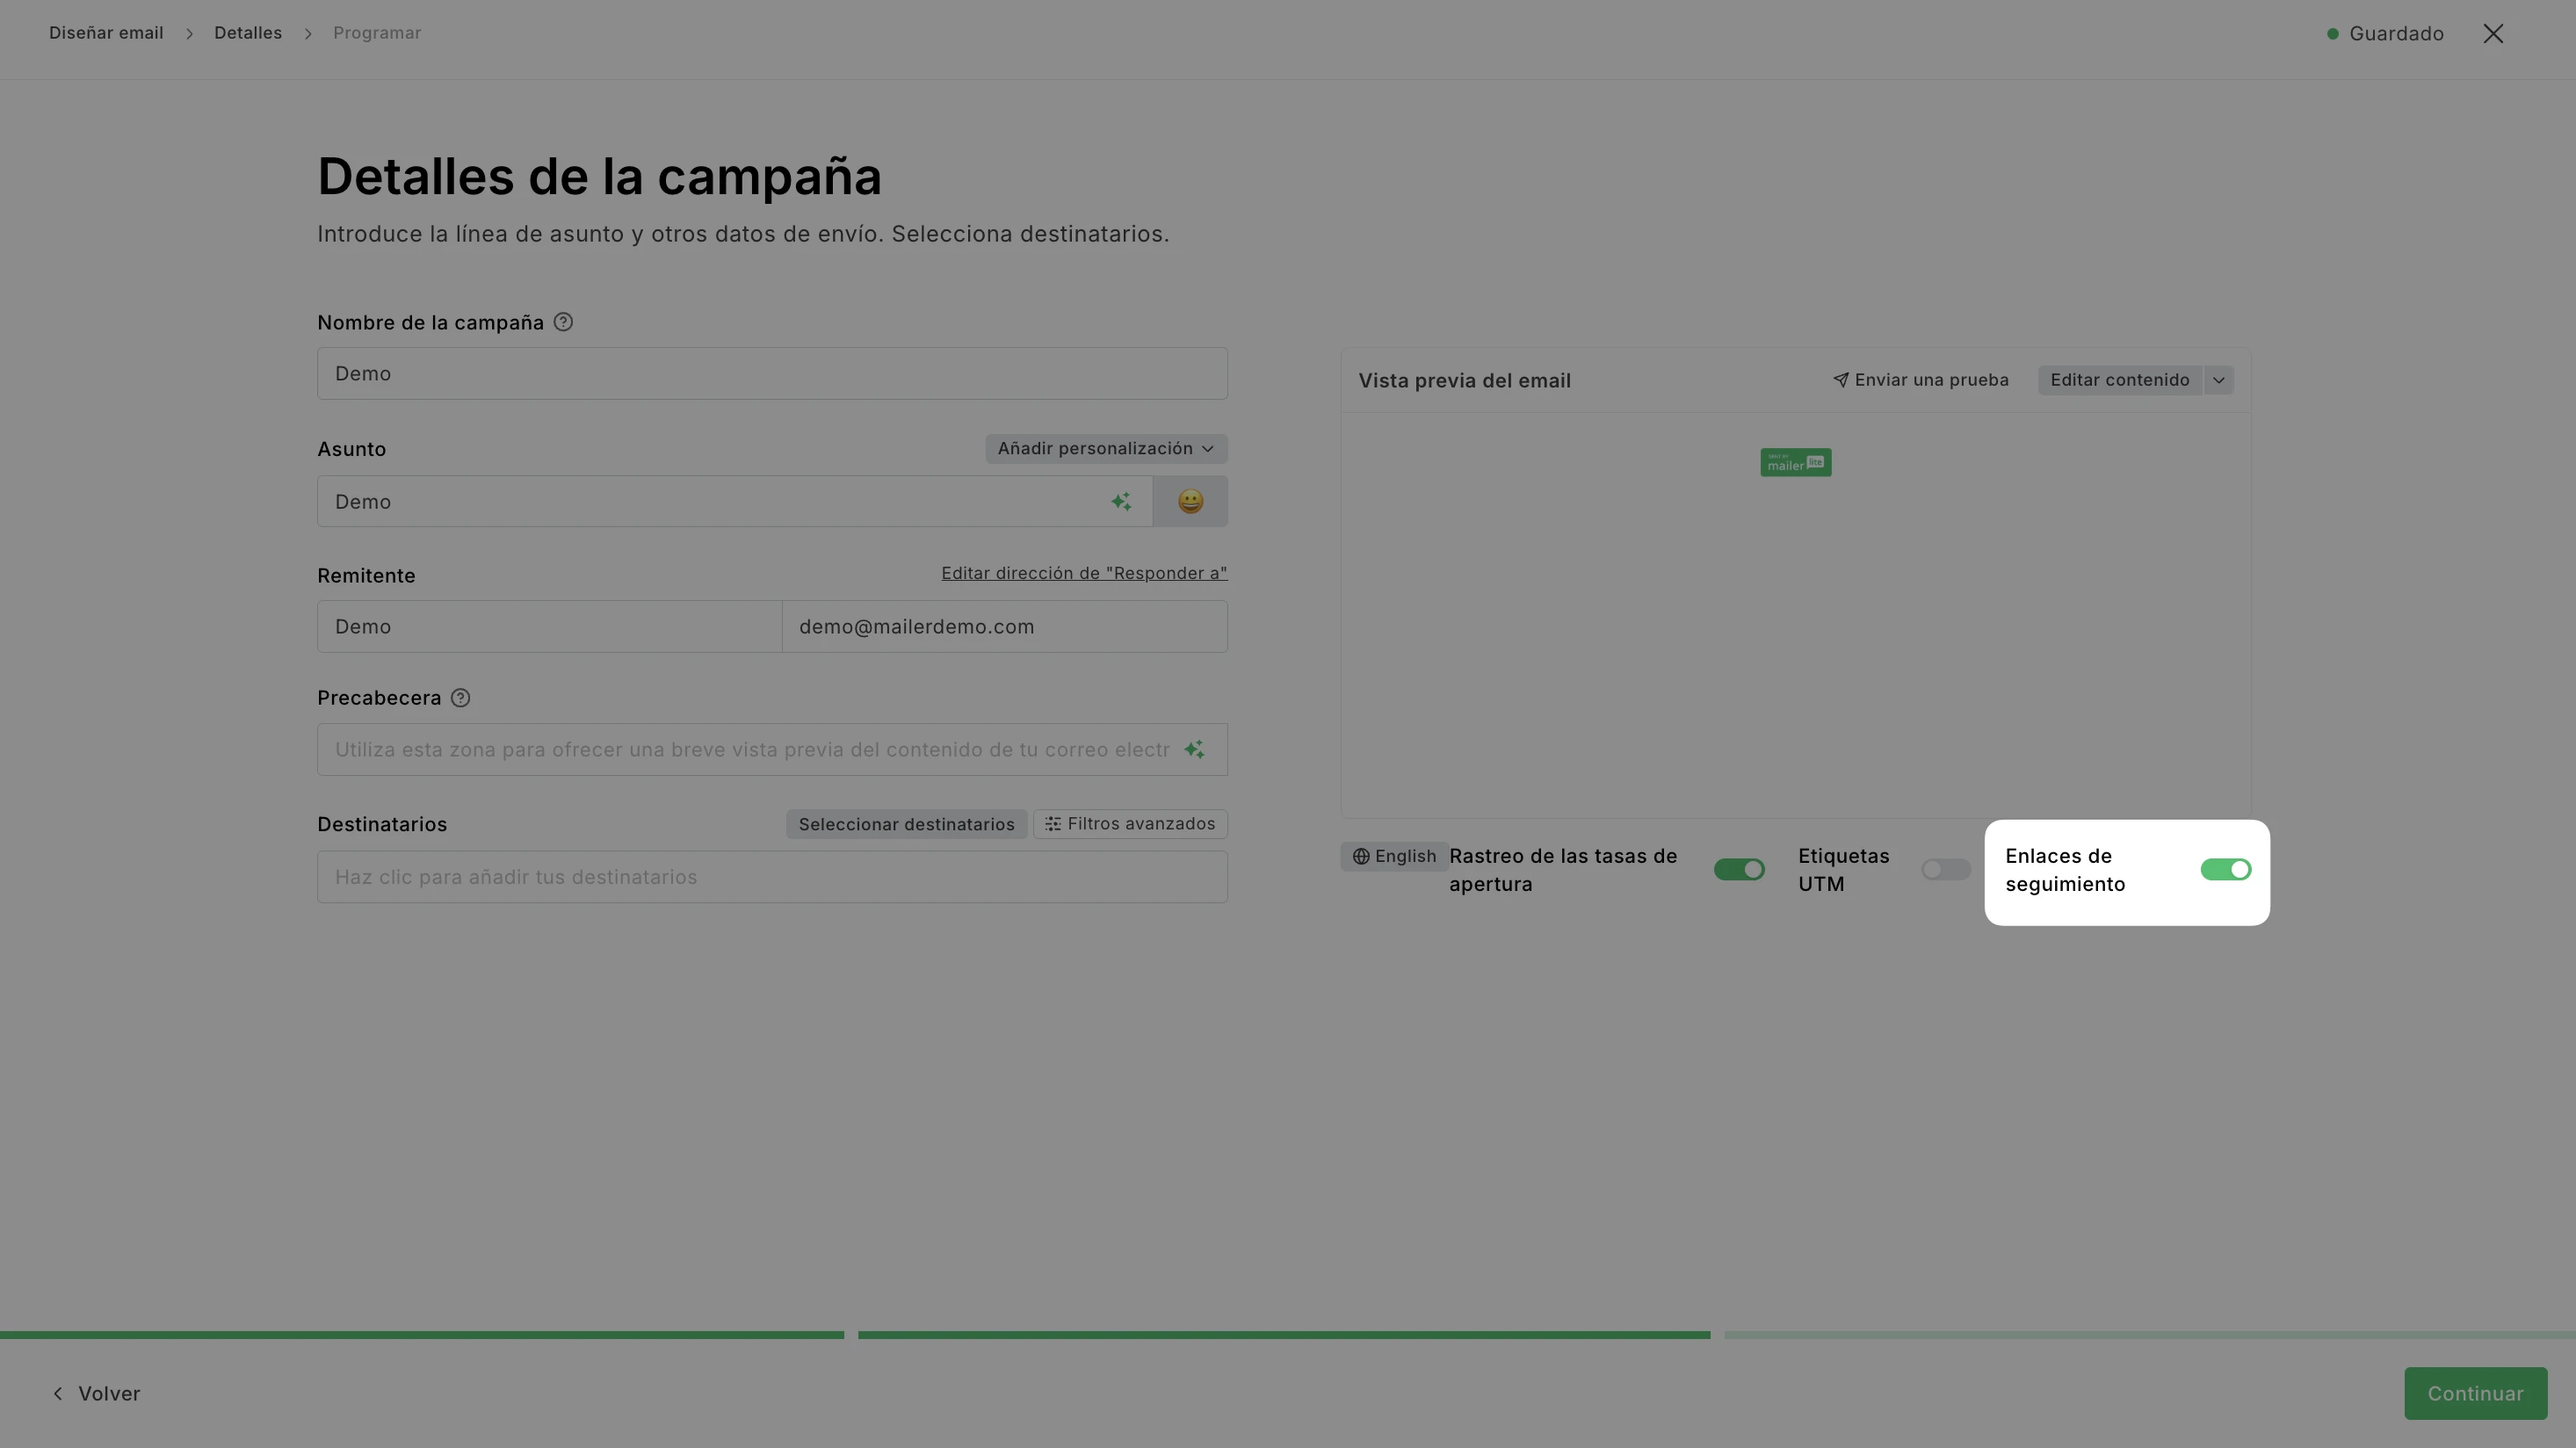
En la página de detalles de la campaña, completa la línea de asunto, el preencabezado y selecciona los destinatarios a quienes enviarás la campaña.
⚠️ Importante: Para asegurarte de que los productos de WooCommerce incluidos en tu campaña sean rastreados en MailerLite, activa la opción Rastrear enlaces.
Cuando un suscriptor compra tu producto de WooCommerce a través del newsletter y completa la transacción, el pedido quedará registrado en el informe de la campaña, en la pestaña Pedidos.
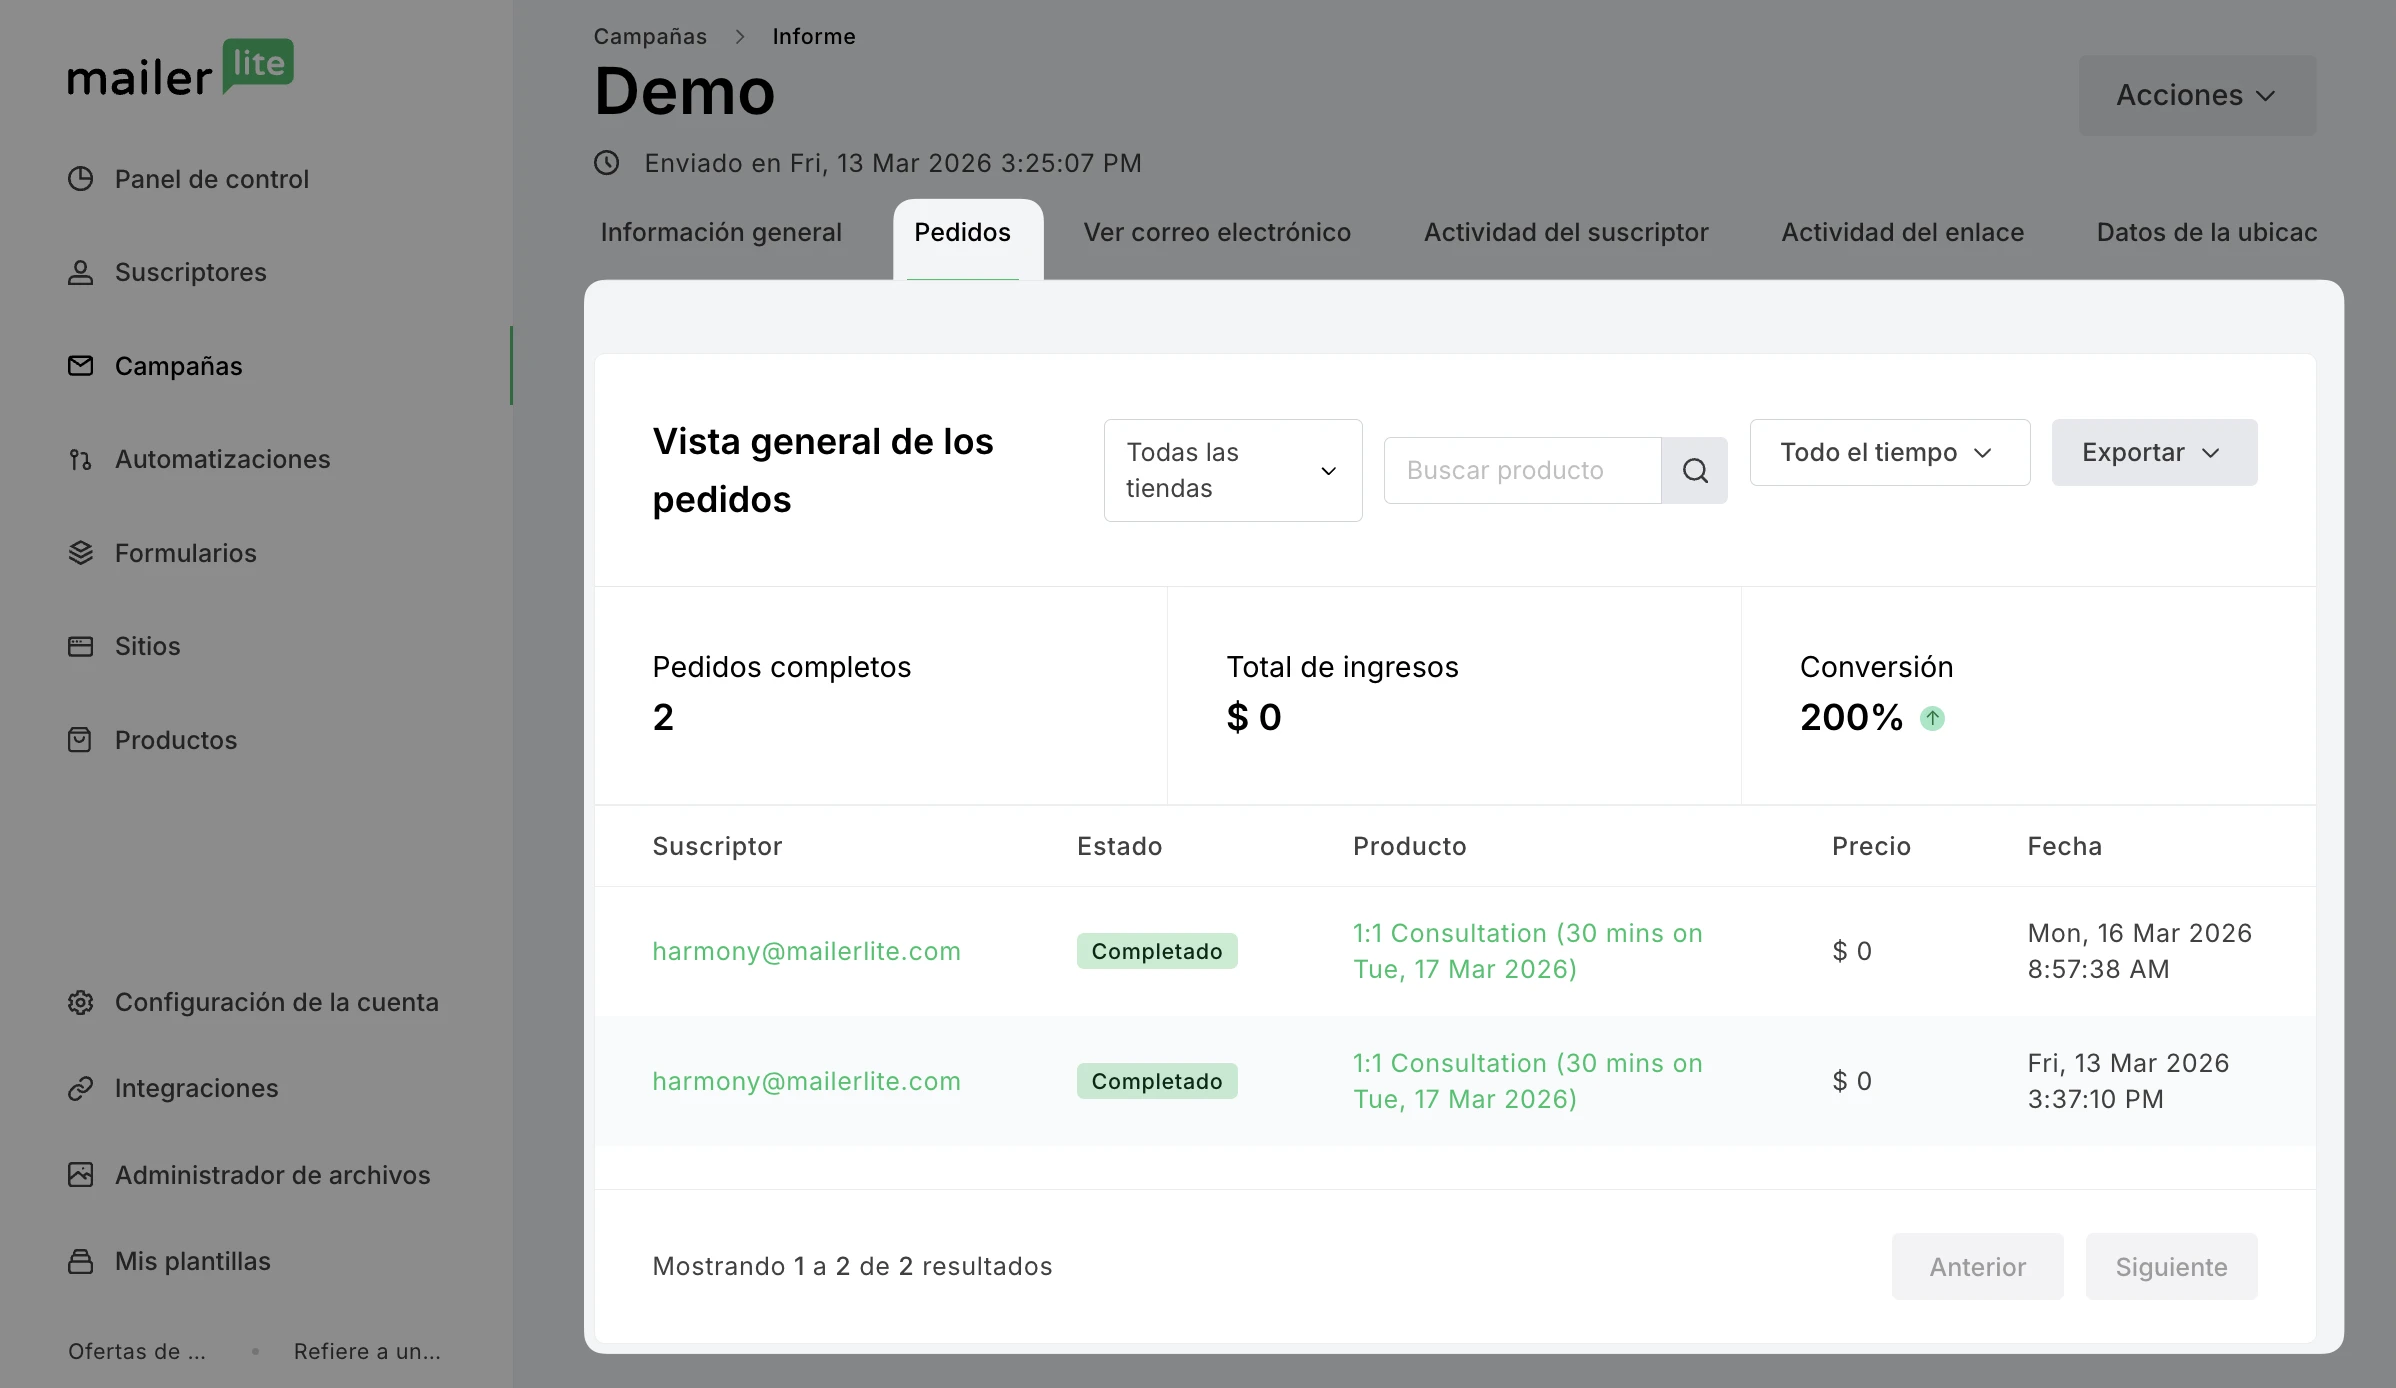
💡 Nota: Es posible que los datos de Ingresos totales en el informe de tu campaña no coincidan con la cifra del campo Woo total spent de tu suscriptor. Esto se debe a que Ingresos totales hace referencia únicamente a los ingresos generados a través de esa campaña de MailerLite. El campo Woo total spent incluye todas las compras, incluidas las que no se han realizado a través de MailerLite.
Añade tus productos de WooCommerce en una landing page
¿Necesitas ayuda para crear una landing page? Descúbrelo aquí ➡️ Cómo crear una landing page.
Para promocionar tus productos de WooCommerce en una landing page:
En el editor de landing pages, ve a Elementos y consulta la categoría Especial para localizar el elemento Productos.
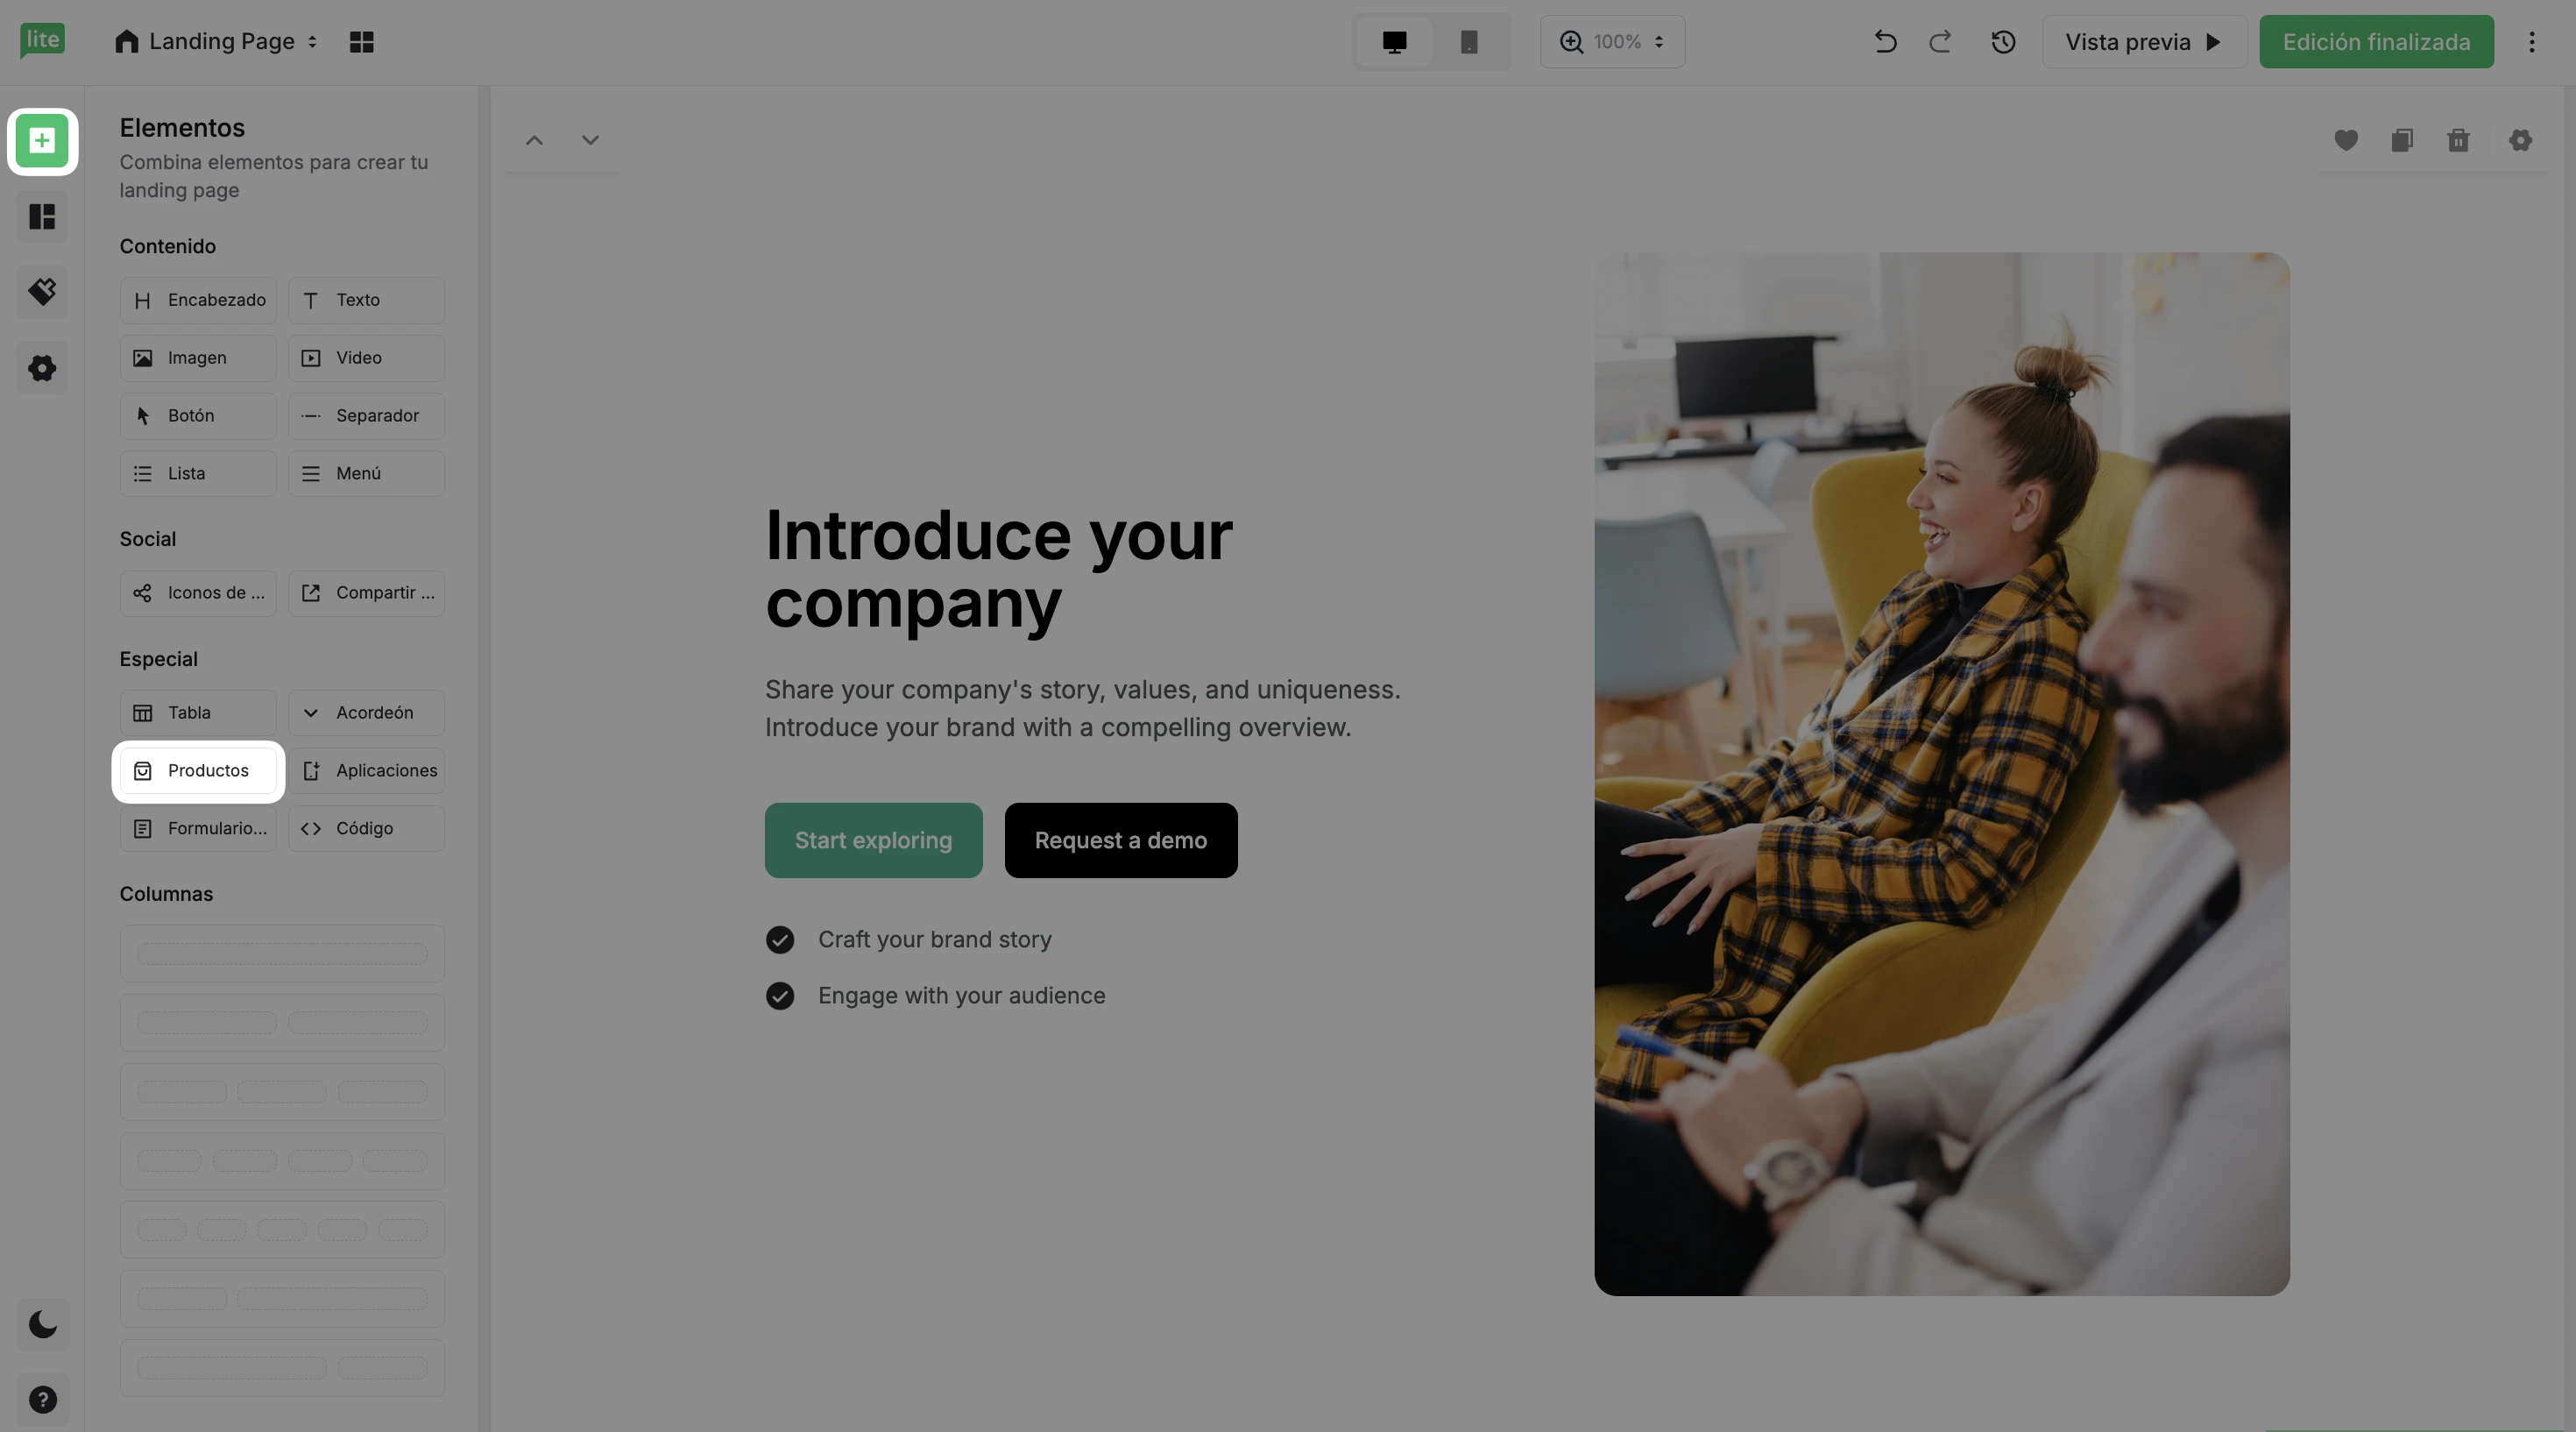
O bien, en Secciones, puedes encontrar secciones de múltiples productos en la categoría Precios y compra.
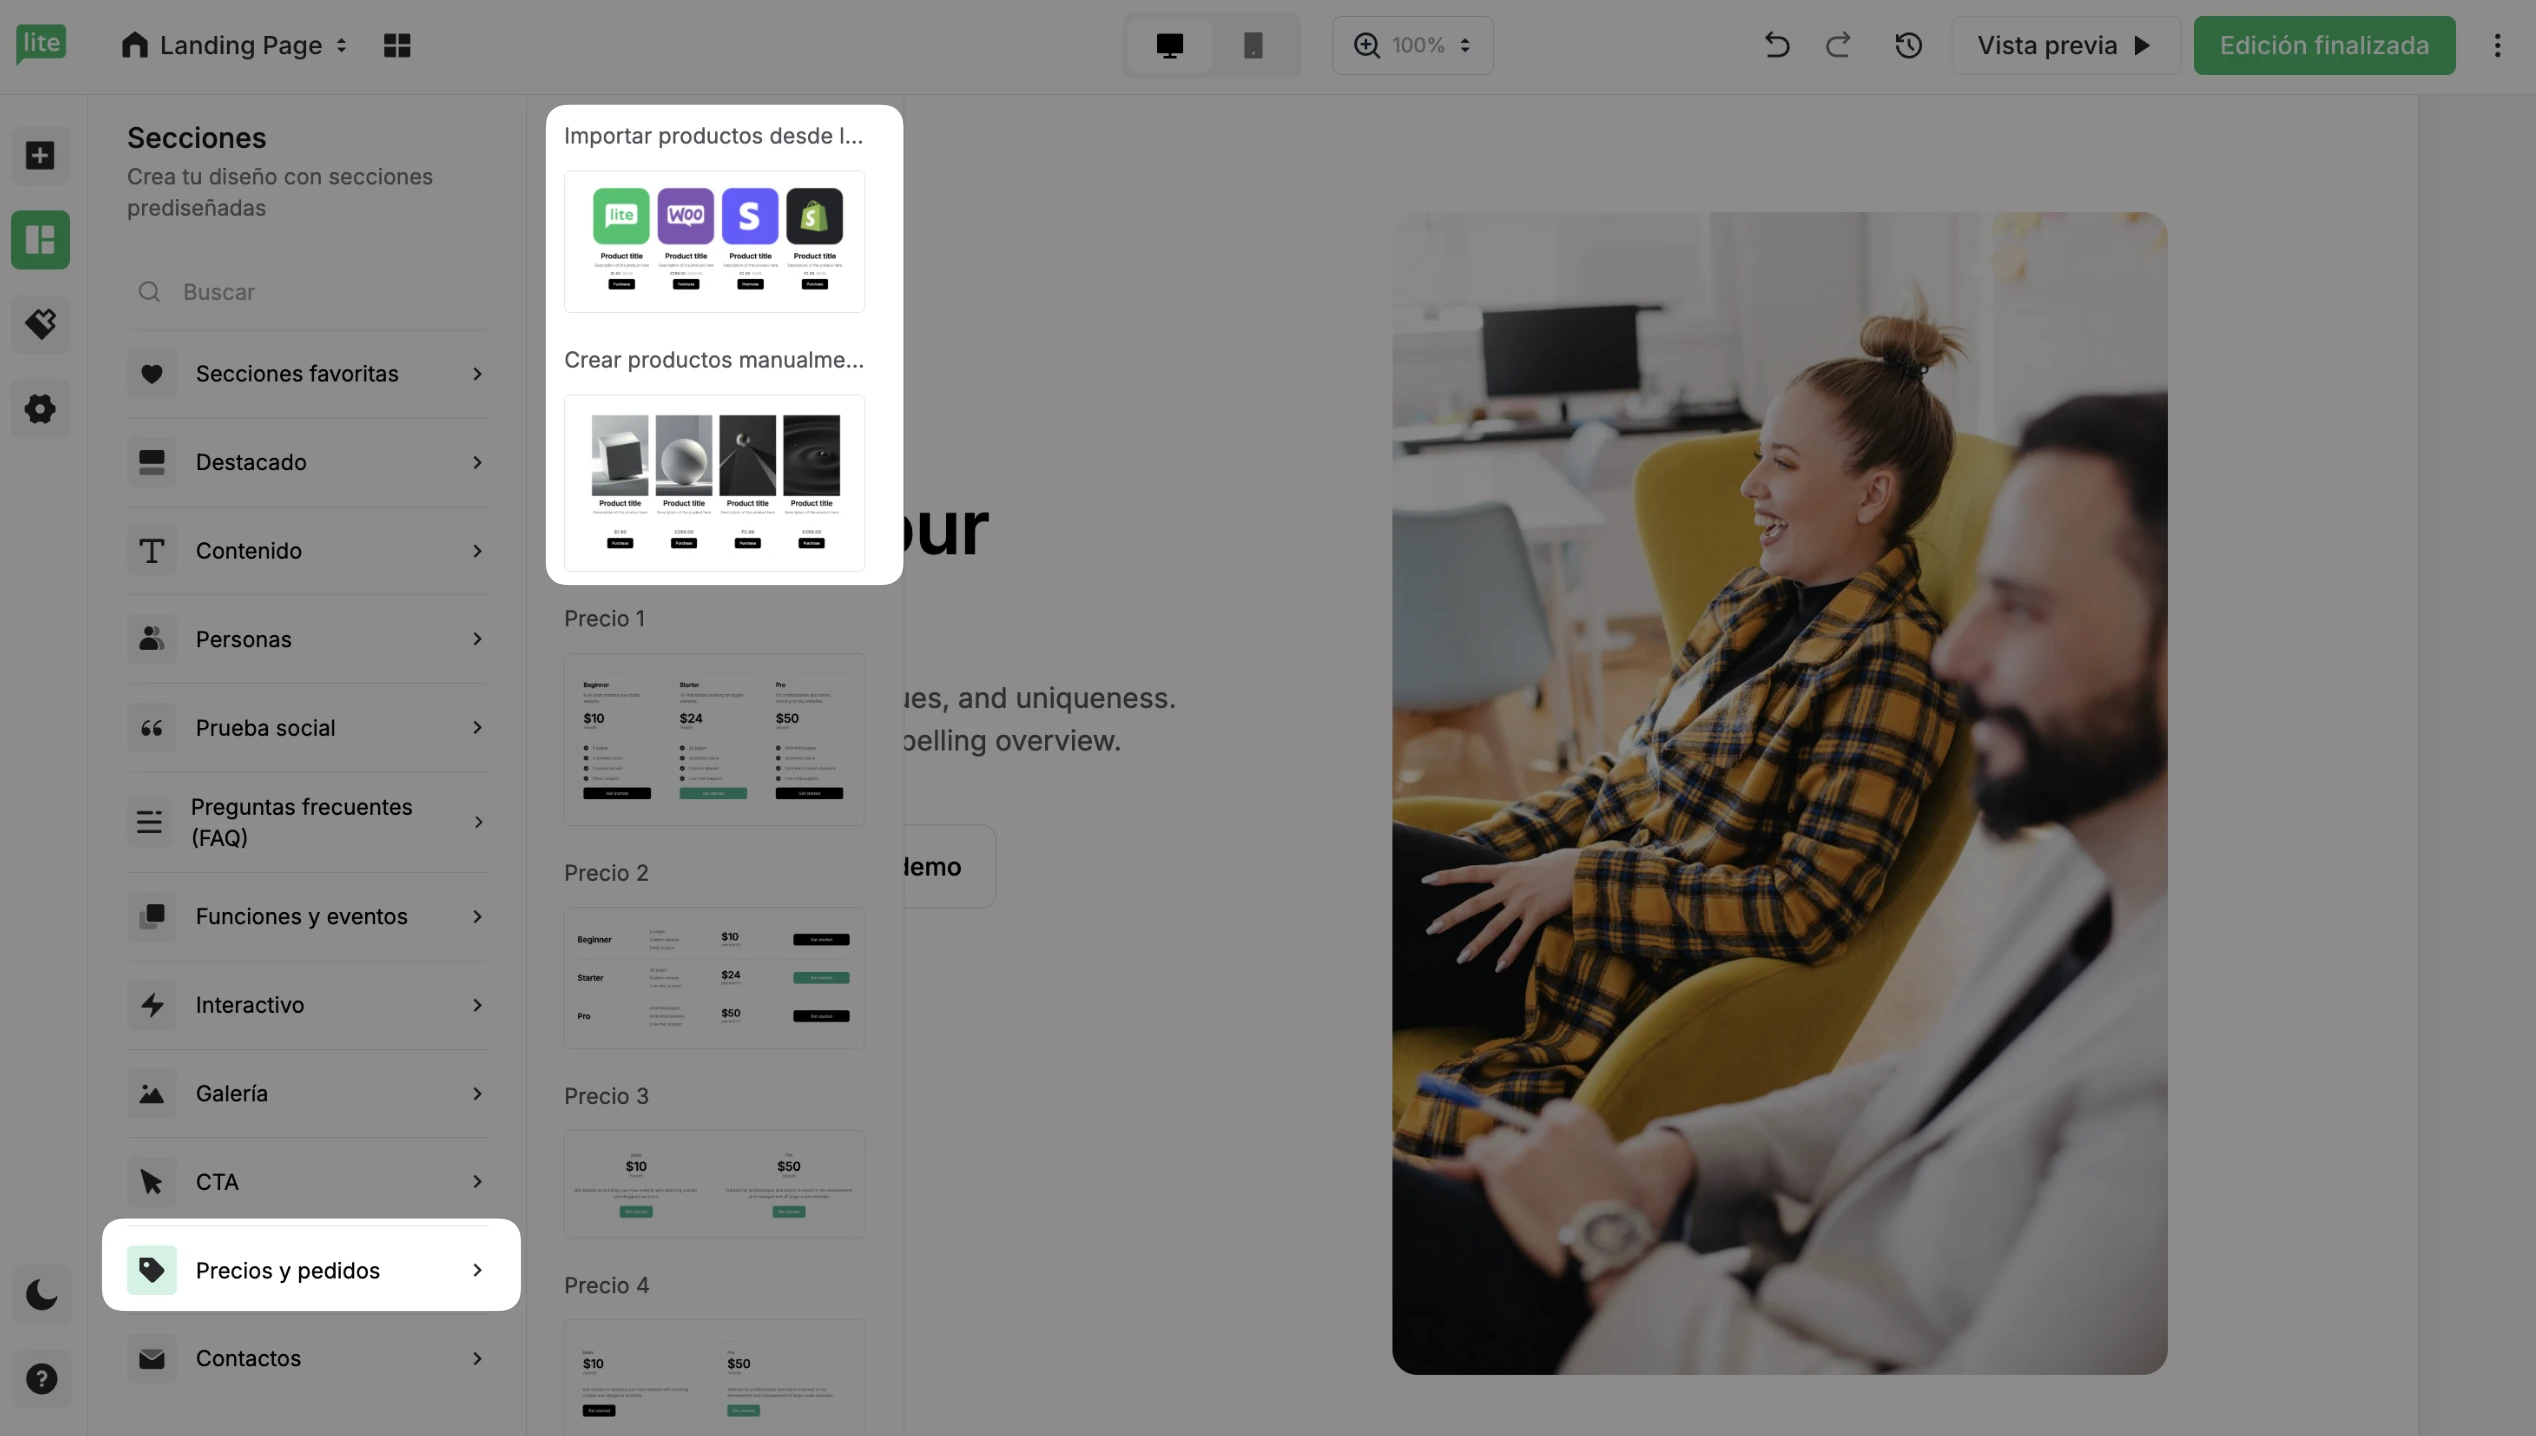
Arrastra y suelta cualquiera de estos elementos en tu landing page para añadir tus productos de WooCommerce.
Haz clic en el icono de Configuración para abrir el panel de la derecha.
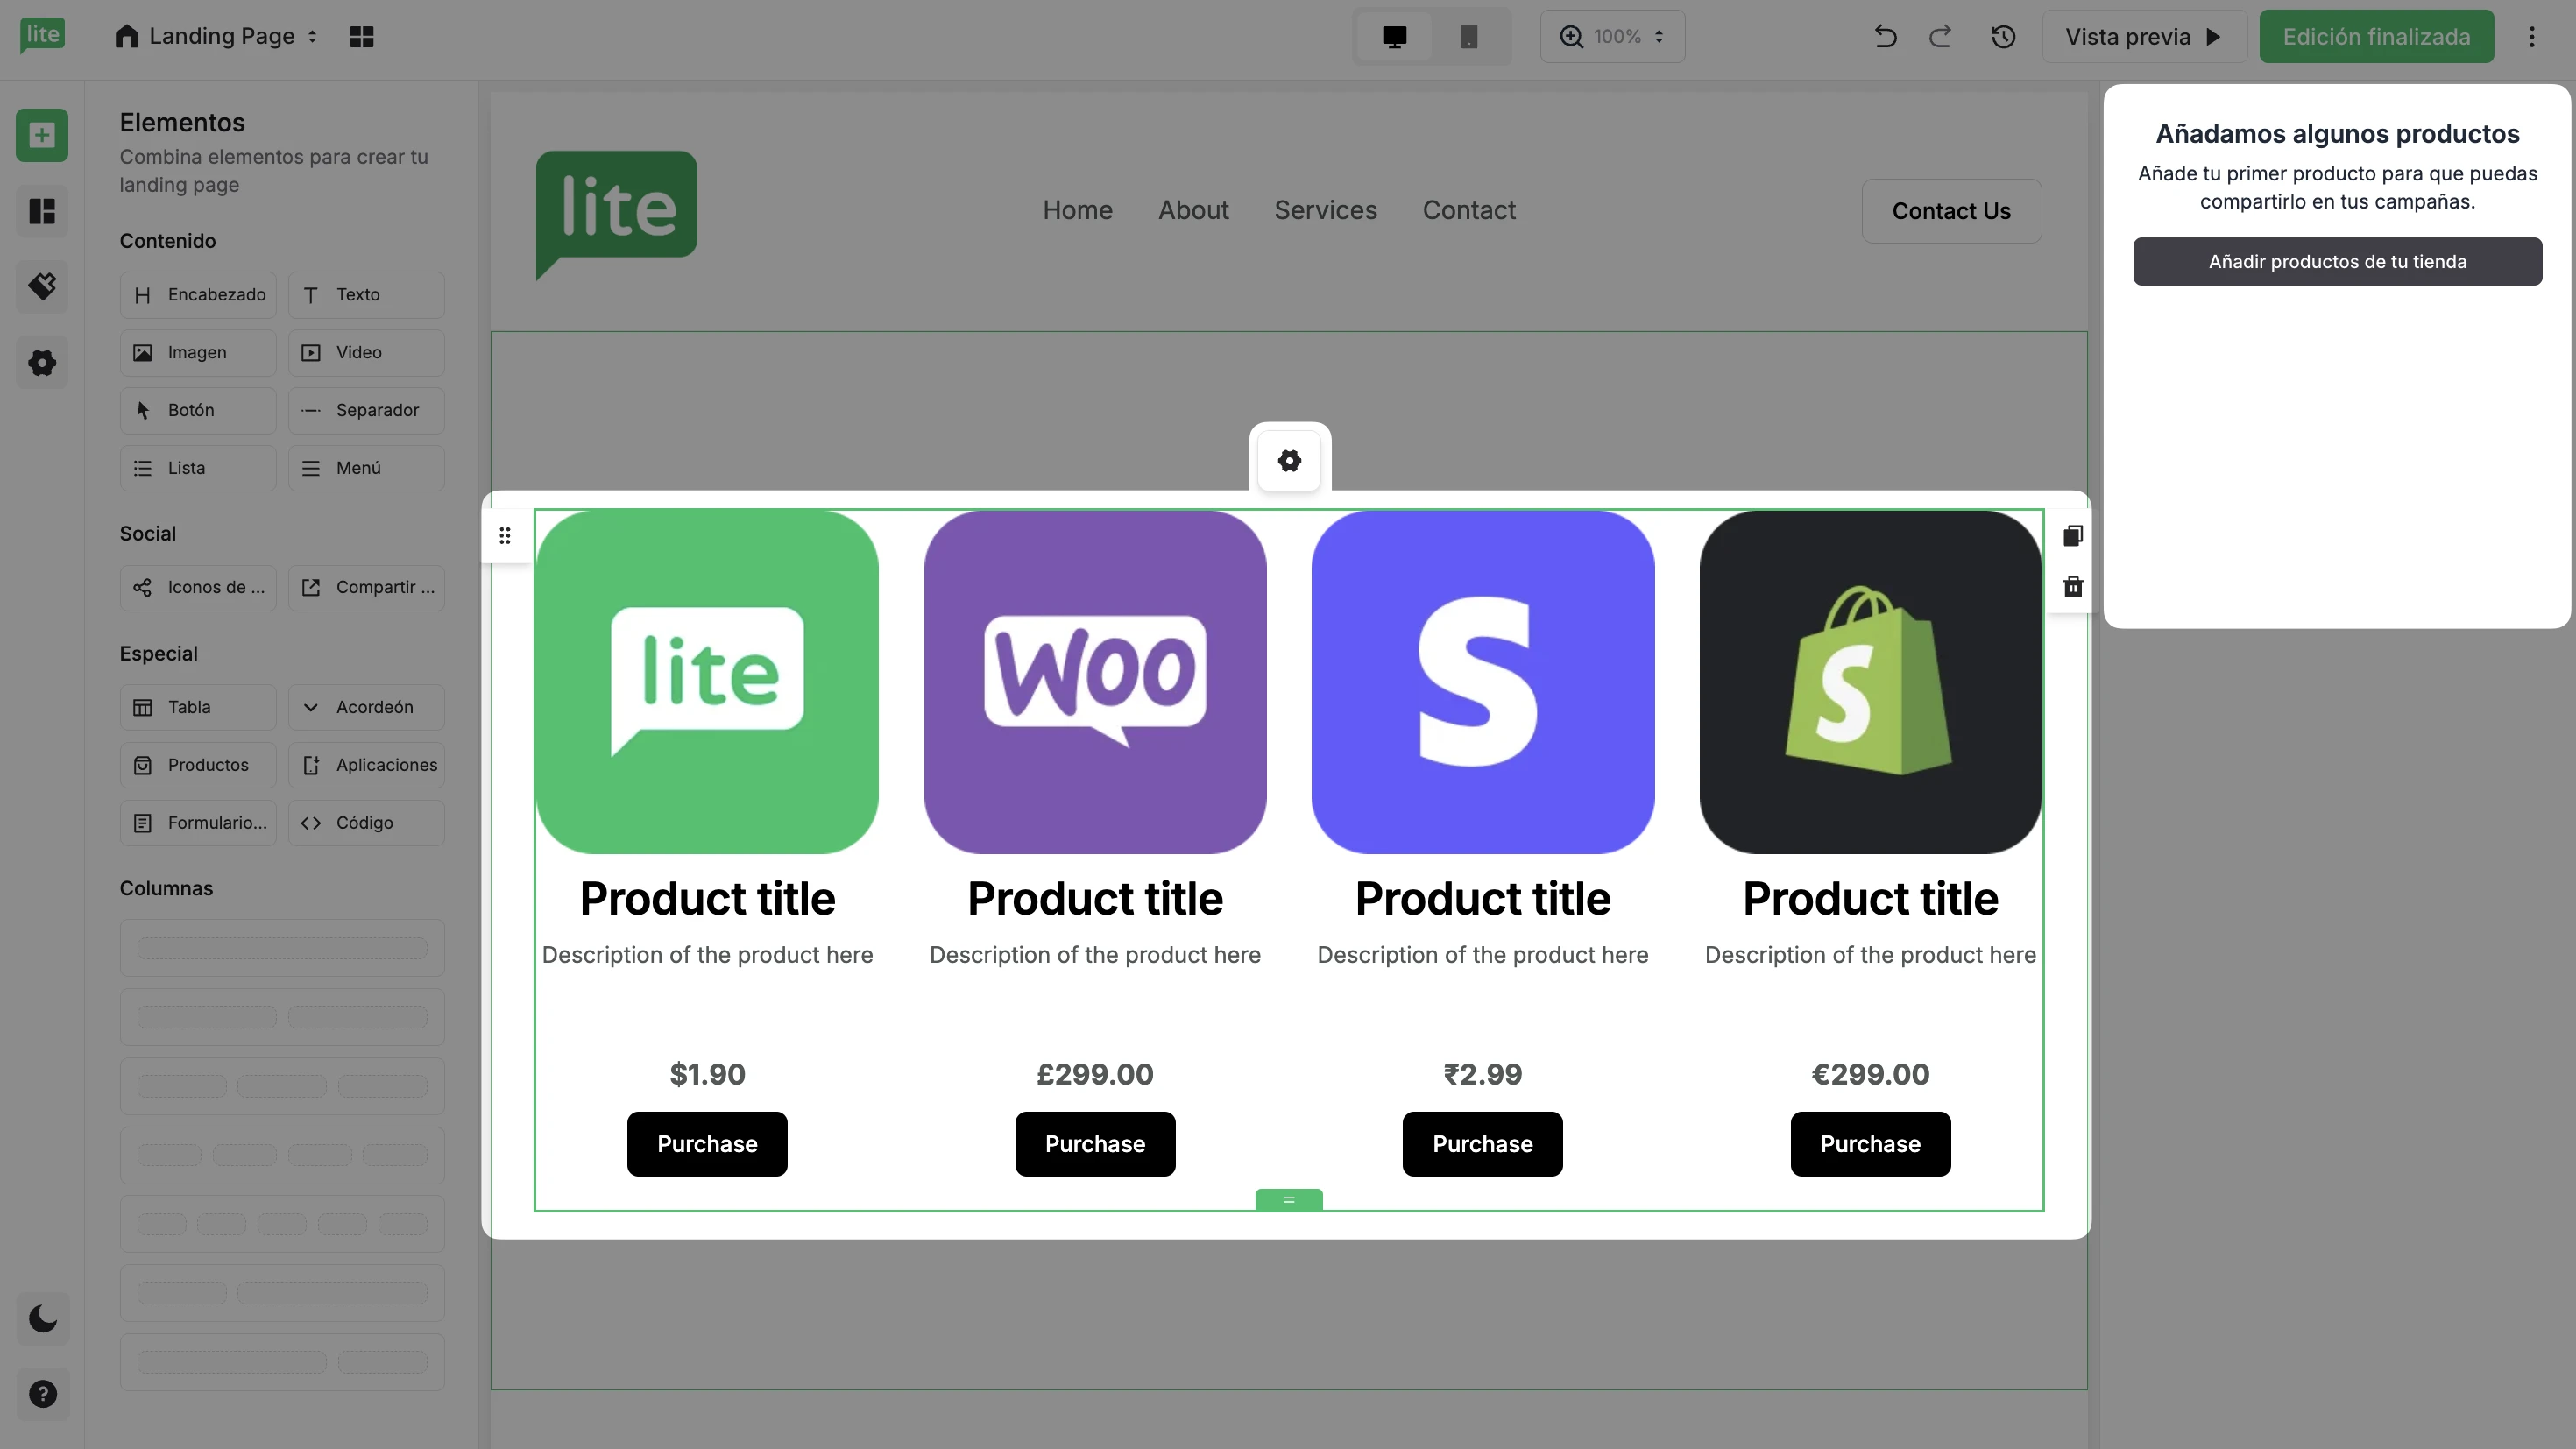
Selecciona Añadir productos de tu tienda para elegir los productos que deseas agregar a esta página.
Si tienes varias tiendas de e-commerce conectadas a tu cuenta de MailerLite, selecciona tu tienda de WooCommerce.
Una vez que hayas seleccionado tus productos de WooCommerce, haz clic en Añadir productos.

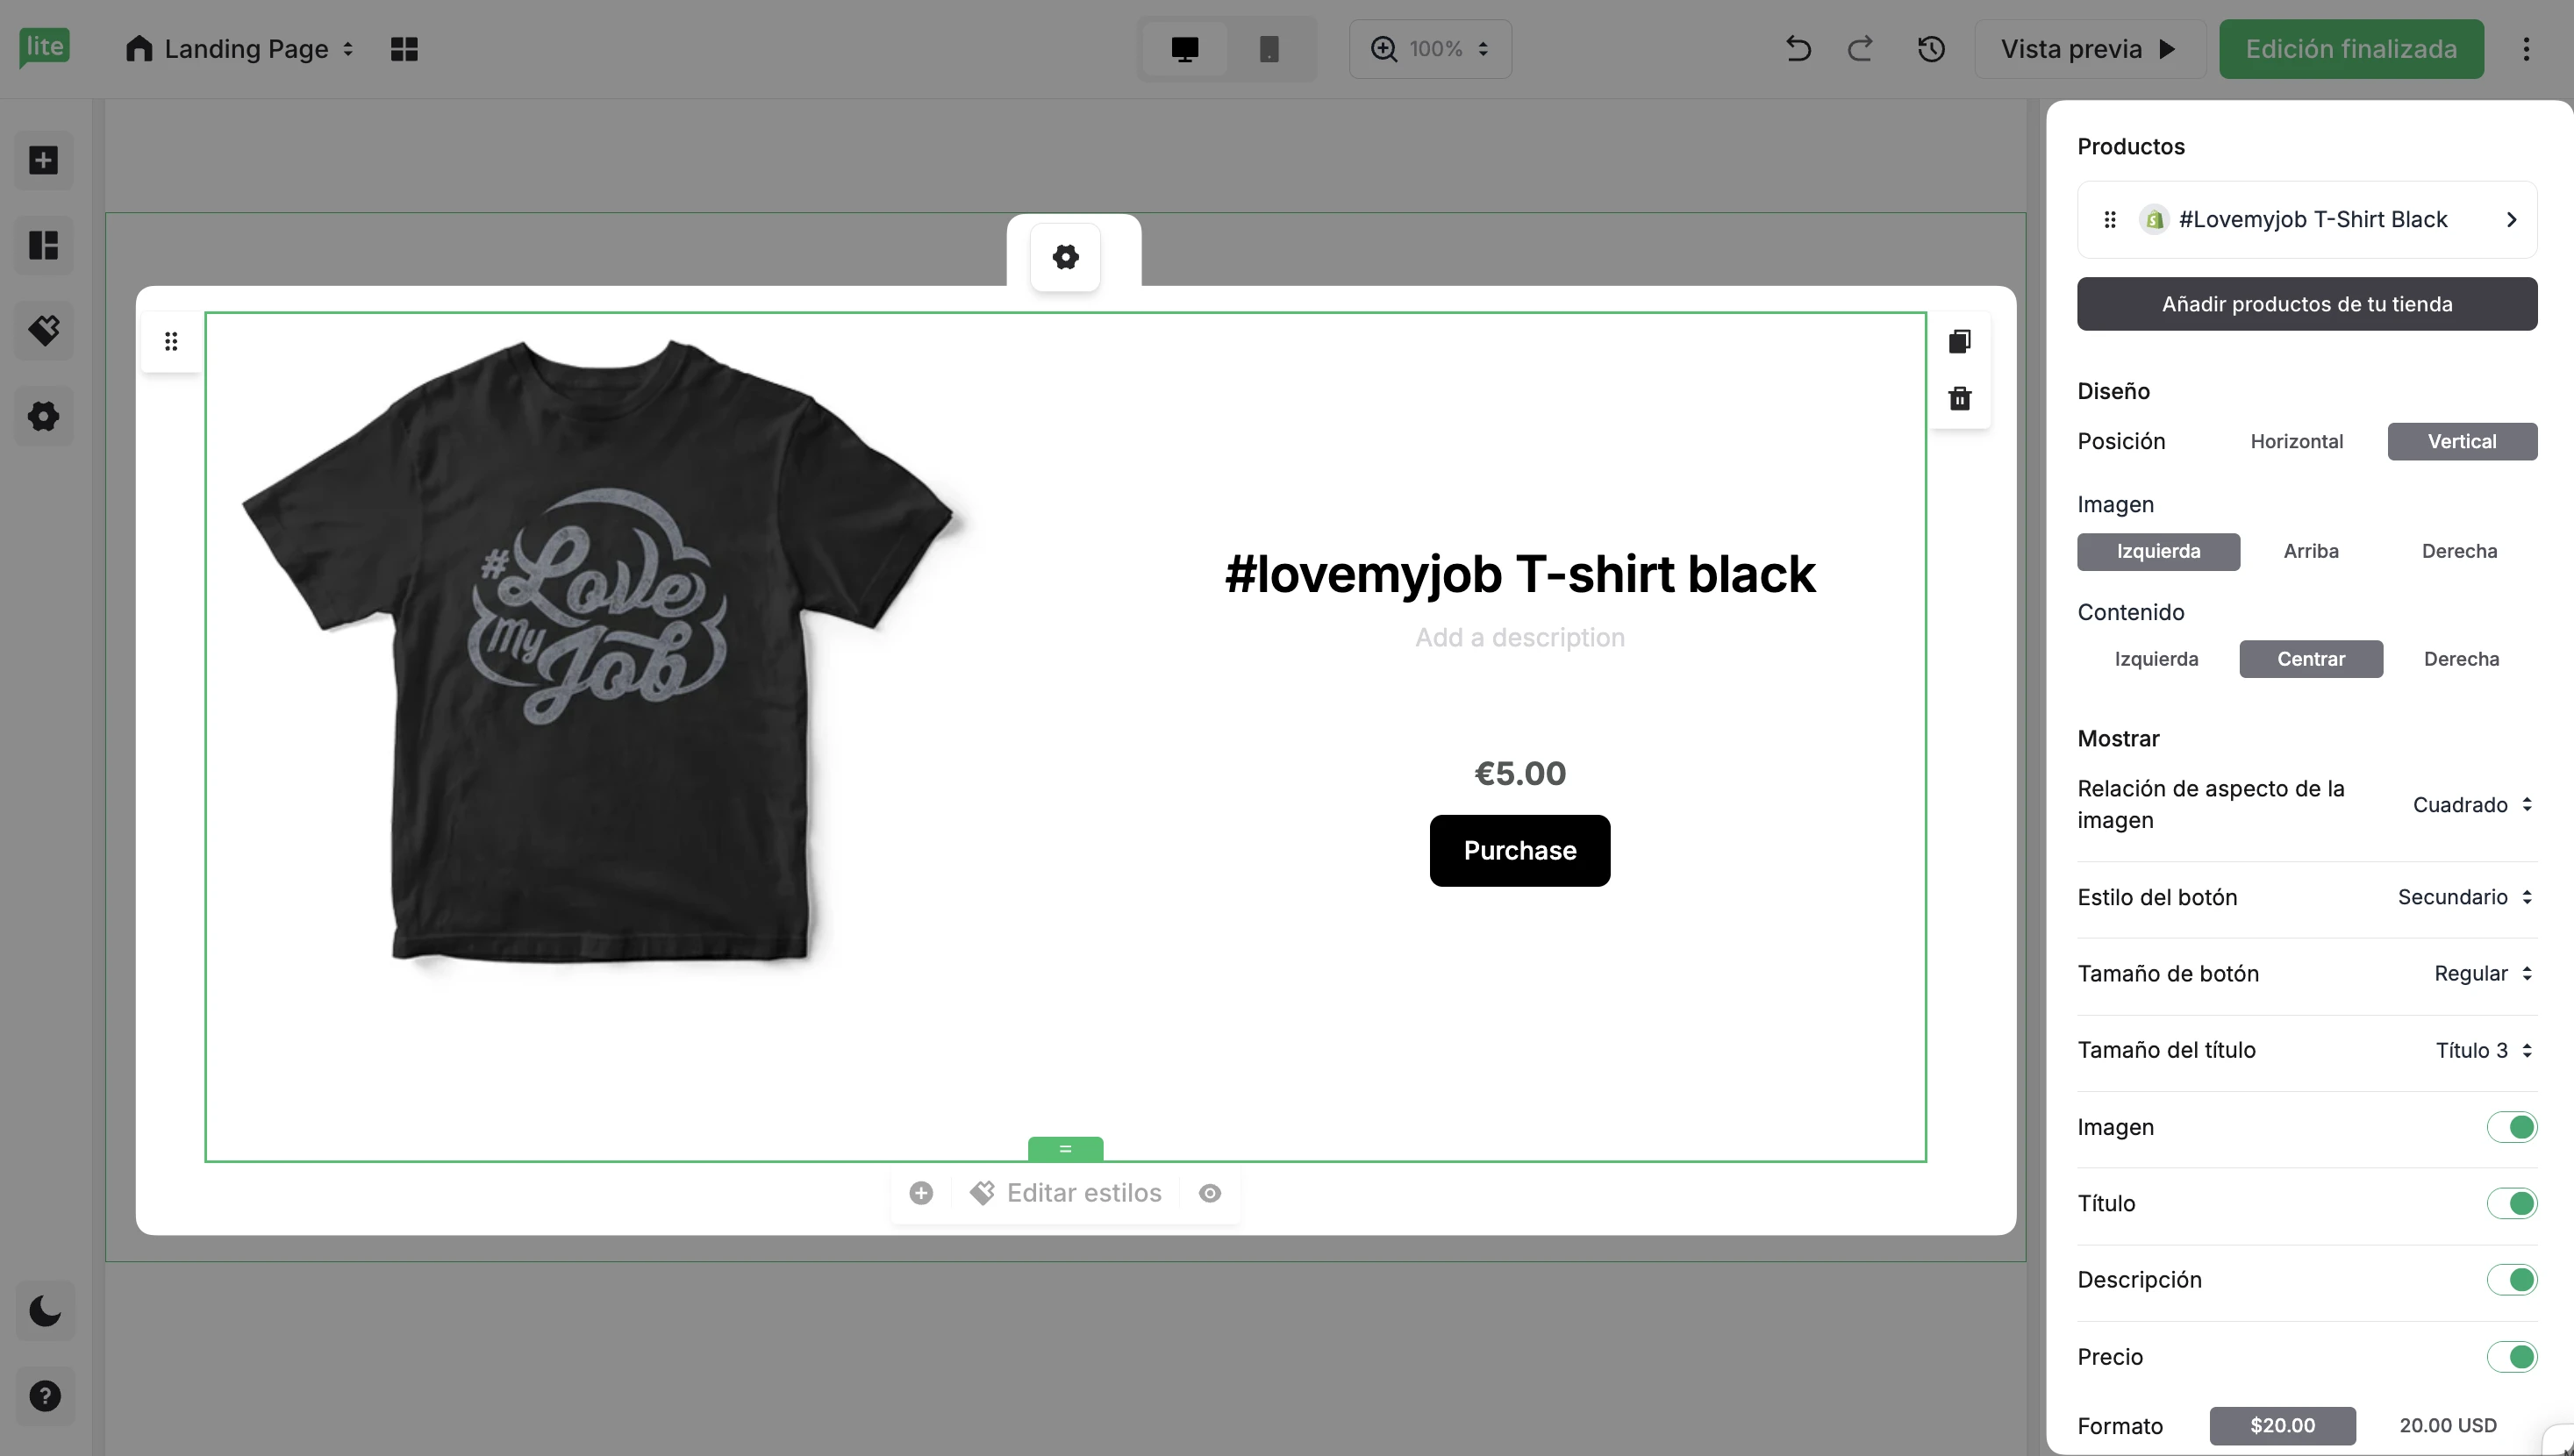
Una vez añadidos tus productos, haz clic en el botón Configuración para abrir las opciones en el panel derecho. Aquí puedes editar la vista del Producto y la vista de Confirmación, así como ajustar los parámetros de Diseño, Contenido y Botón.
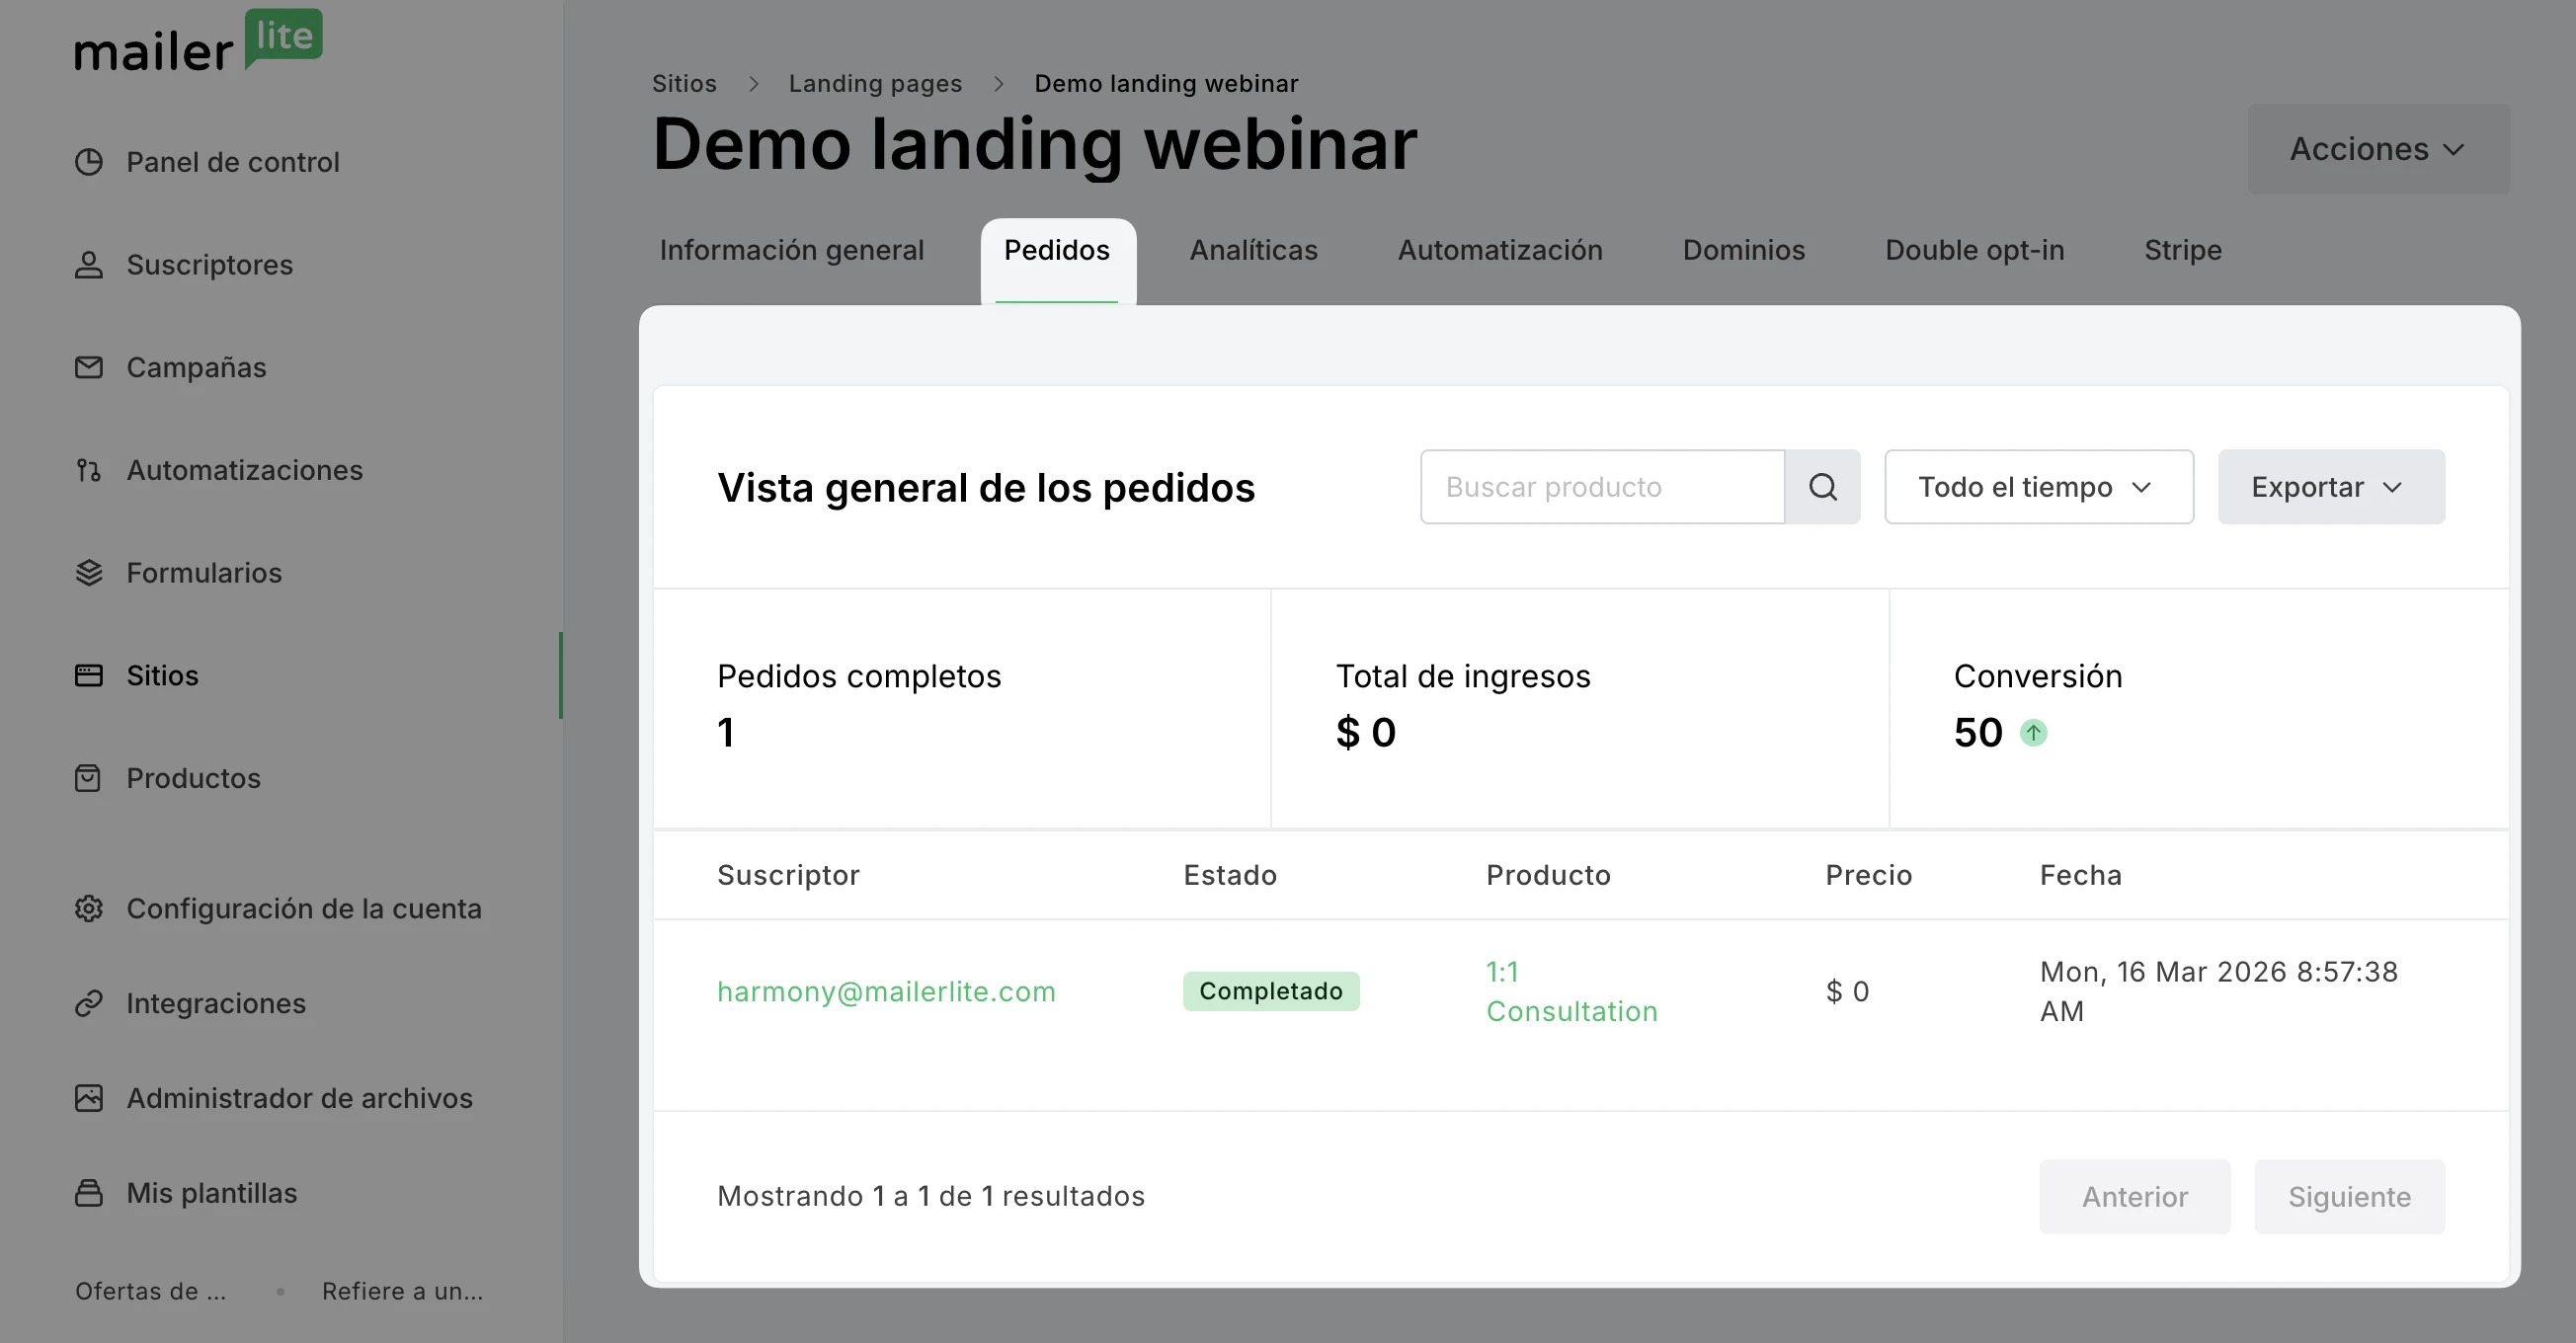
Cuando un suscriptor compra tu producto de WooCommerce a través de la landing page y completa la transacción, el pedido quedará registrado en el informe del sitio, en la pestaña Pedidos.
Activadores de automatización de e-commerce
¿Necesitas ayuda para crear automatizaciones? Consulta nuestra guía ➡️ Cómo crear un flujo de trabajo de automatización.
Cuando conectas tu tienda de WooCommerce, los datos de clientes y pedidos se envían a tu cuenta en tiempo real.
Las automatizaciones de MailerLite (concretamente los activadores de e-commerce) utilizan estos datos para iniciar flujos de trabajo automáticamente en función de las acciones de los clientes, como cuando alguien realiza un pedido o abandona su carrito.
La integración con WooCommerce es compatible con los siguientes activadores de e-commerce:
Carrito abandonado
Pago abandonado
Compra cualquier producto
Compra un producto específico
Compra de una categoría
Frecuencia de compra
Para que se active una automatización con un activador de e-commerce, los clientes de tu tienda también deben ser suscriptores del newsletter y haber aceptado recibir comunicaciones de marketing de tu parte. Esto puede hacerse completando cualquiera de tus formularios de suscripción, o marcando la casilla para aceptar el marketing durante el proceso de pago.
💡 ¿Tienes curiosidad sobre cómo funcionan estos activadores? Descubre cómo utilizarlos en nuestro artículo Activadores de automatización de e-commerce.
Cómo solucionar problemas con la integración de WooCommerce
Si un cliente de tu tienda de WooCommerce realiza una compra y no se añade a tu lista de suscriptores activos o no activa una automatización basada en compras, puedes revisar los siguientes factores:
Estado del pedido: en plataformas como Shopify y WooCommerce, el estado del pedido debe estar marcado como Pago pendiente, En proceso o Completado en la tienda para que se active una automatización de e-commerce.
Acepta marketing: si tu cliente no marcó la casilla para aceptar el marketing por email durante el proceso de pago, no podrá sincronizarse con tu cuenta de MailerLite.
Además, en la página de tu pedido, en la esquina inferior derecha, encontrarás una ventana llamada MailerLite. La información de esta ventana está pensada para ayudarte a verificar que tus clientes se sincronizan correctamente. Hay seis factores en la ventana de MailerLite que puedes revisar:
Signed up for mailing list: indica si el suscriptor ha aceptado el marketing o se ha suscrito a tu lista de correo
Subscribed to mailing list: indica si el suscriptor se ha añadido correctamente. Por ejemplo, si tienes activado el doble opt-in para API, los suscriptores no se añadirán a la lista hasta que confirmen su suscripción en su bandeja de entrada
Already in the subscriber list: indica que el suscriptor ya estaba previamente suscrito a tu lista de correo antes de realizar esta compra
Subscriber data updated: indica que el suscriptor existente ha sido actualizado con la nueva información incluida en este pedido
Order data submitted: indica si la información del pedido del suscriptor se ha añadido a MailerLite
Order tracking completed: indica que el cliente, junto con los datos de su pedido, se han añadido correctamente a MailerLite y la sincronización se ha completado
Si las imágenes de tus productos de WooCommerce no se cargan en los bloques de e-commerce de MailerLite, asegúrate de que las imágenes estén en formato JPG o PNG. El formato WEBP no es compatible.