Note: If you're a Legacy (Classic) user, please log in to your account to access the dedicated Legacy (Classic) Help Center.
You've come to the right place to learn how to connect your favorite AI tools to your MailerLite account. The MailerLite MCP (Model Context Protocols) server seamlessly integrates with MailerLite's APIs, enabling your AI tools to interact directly with your account data. This guide will walk you through configuring various AI tools to get you started 🚀
How to connect your AI tool
Currently supported AI tools
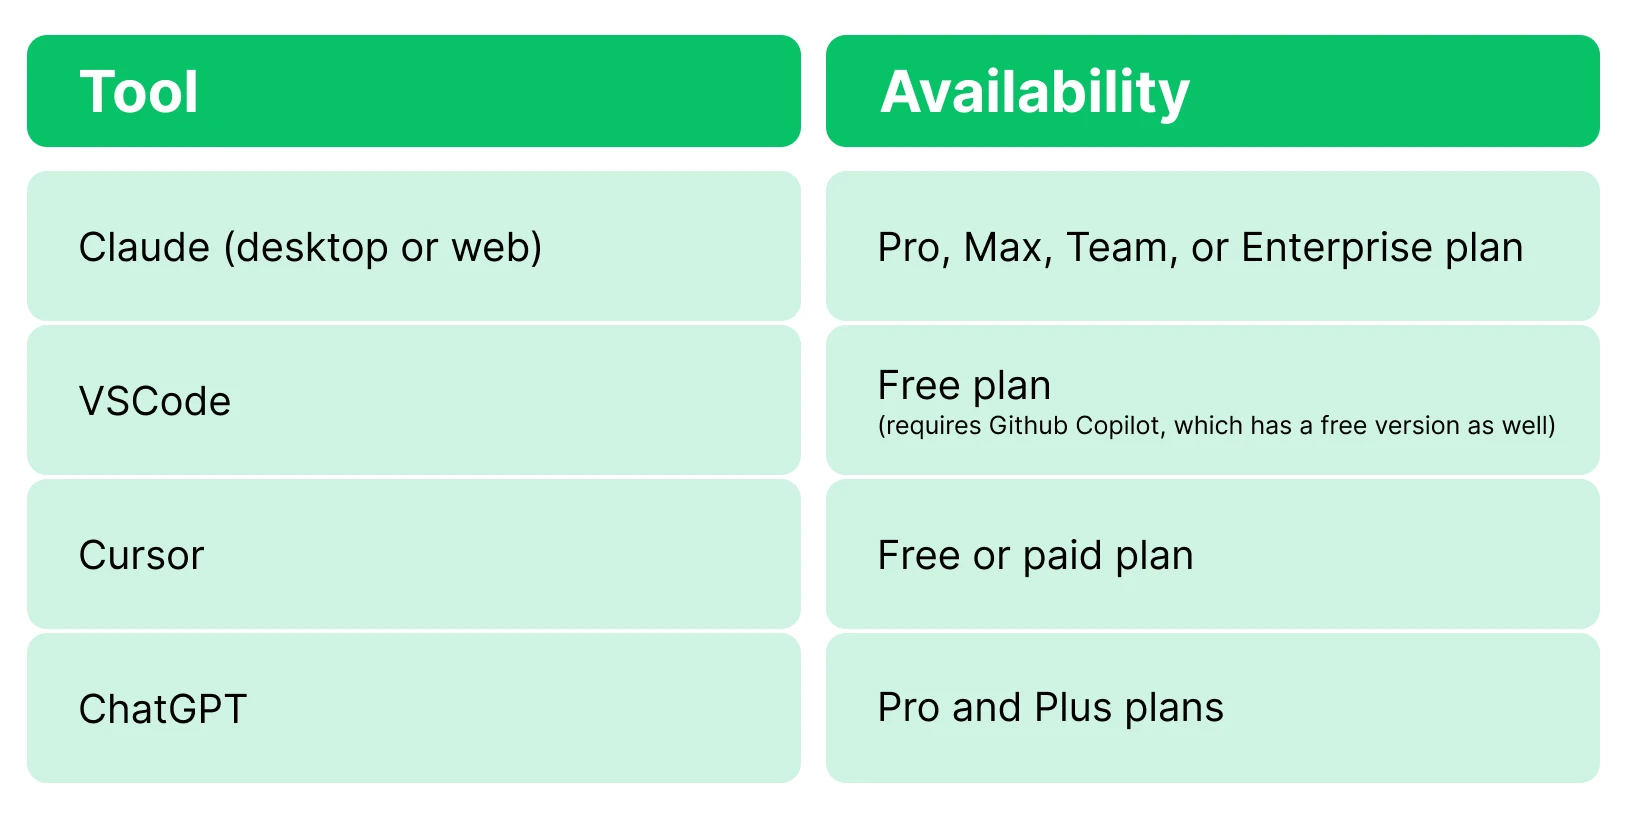
The MailerLite MCP server is designed to work with any MCP-compatible client. The following tools have been tested and have specific instructions below:
🔒 A note on data privacy and authorization
Before you connect, it's important to understand what this means for your data.
By connecting your AI tool to the MailerLite MCP server, you are granting that specific AI tool permission to access and manage your MailerLite data (like subscriber lists, campaigns, and performance metrics) on your behalf.
MailerLite is not sending any of your data to an AI tool. You are in full control. This connection simply enables the AI tool you choose to communicate with your MailerLite account when you give it a command.
The Connection URL
The only piece of information you'll need to connect some of our tools is the MailerLite MCP Server URL. Copy this address and paste it into the setup screen for that specific tool:
MailerLite MCP Server URL: https://mcp.mailerlite.com/mcp
Claude (desktop or web)
You can follow these steps on both the Claude website and the desktop app.
Make sure you have the latest Claude installed. If you're using the app, please ensure it's updated to the latest version.
Open Claude by launching the desktop app or by navigating to their website in your browser.
In the Claude chat interface, look directly under the text input field and click the tool icon.
From the menu that appears, select Add connectors.
On the next screen, click the Manage connectors button, and then click the Add custom connectors button.
A form will appear. Fill it out as follows:
- Name: i.e.
MailerLite(This is for your own reference).- Remote MCP server URL: Paste the server URL: https://mcp.mailerlite.com/mcp
Click the Add button to save the new connector.
After adding it, you will see 'MailerLite' in your list of available connectors. Click the Connect button next to it.
You will be automatically redirected to the MailerLite website in your browser. Choose the specific account you wish to connect to.
Review the permissions screen and click the Authorize button.
After authorizing, you will be brought back to the Claude app. The connection is now active.
VSCode
Our VSCode integration works directly with GitHub Copilot, allowing you to manage your MailerLite account from within your code editor.
What you'll need
The Visual Studio Code app installed on your computer
The GitHub Copilot extension installed and enabled in VSCode. (Good news: Copilot has a free version that is fully compatible with this integration)
How to connect
With VSCode and Copilot ready, simply click the link below.This link begins the installation process inside your VSCode app.
Your web browser will show a pop-up asking for permission to open VSCode. Click Allow.
In the new window, click the Install button to complete the setup.
That’s it! The MailerLite MCP is active and ready to use in VSCode.
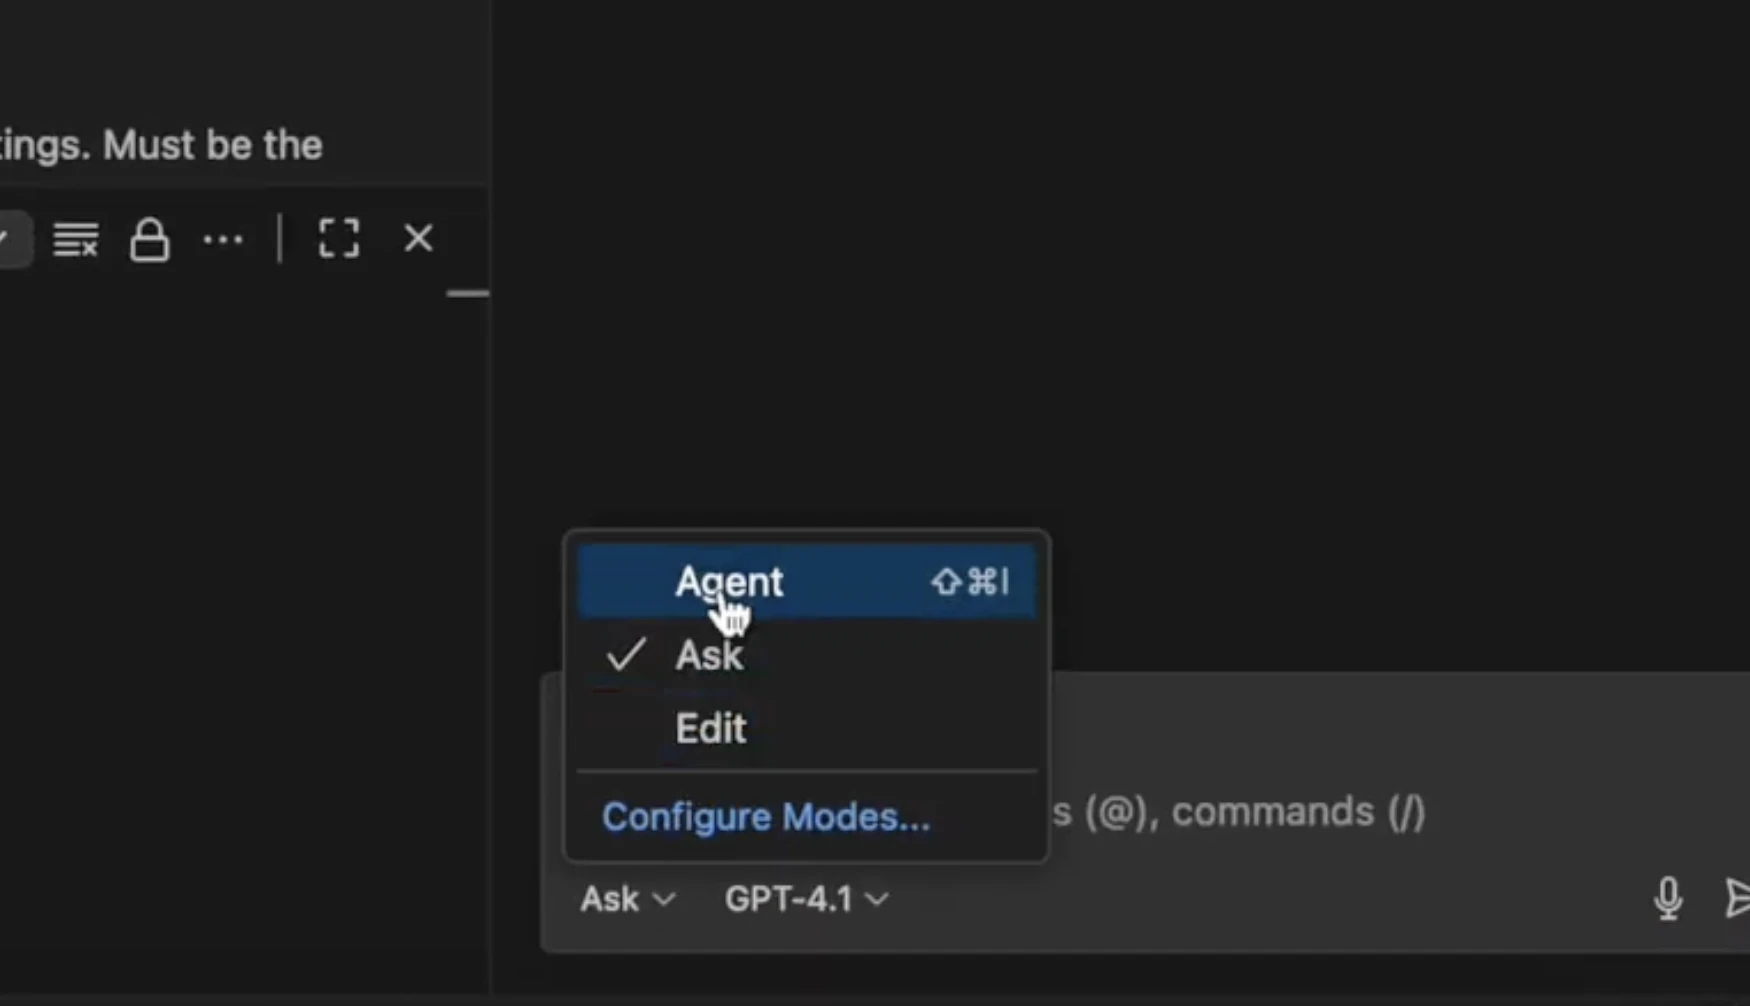
If the connection does not appear successful, you may need to enable Agent - located in the chat section.
Cursor
First, make sure you have the Cursor application installed on your computer.
Once Cursor is installed, click the link below. This will launch Cursor and begin the connection process.
Add to CursorYour web browser will show a security prompt asking for permission to open Cursor. Click Allow.
In the new window, click the Install button to start the setup.
The MailerLite connector will show a status message. Click the link that says Needs login to start the authorization.
Review the permissions and click the Authorize button.
In the last pop-up window that appears, simply click the Open button to finalize the connection.
That’s it! The MailerLite MCP is active and ready to use in Cursor.
⚠️ A note on tool limits for Cursor's Free plan
If you are using Cursor on the free plan, you might see an “Exceeding total tools limit” warning. This is because the free plan currently supports a maximum of 40 active tools from a single connector.
How to manage this: You have full control over which tools are active. To stay within the limit, you can go to the MailerLite MCP connector settings within Cursor. Simply click on individual tool names (e.g., add_subscriber, create_campaign) to enable or disable them as needed. This allows you to customize the toolset for your current task.
ChatGPT
OpenAI has released a beta feature where you can fully utilize the power of MCPs for Pro and Plus plans.
In order to connect our MCP to ChatGPT, you need either a Pro or Plus plan (team plans are not yet supported by OpenAI for this feature).
How to connect our MCP to ChatGPT:
From your profile settings on the bottom left hand corner select Settings.
Go to Connectors > Advanced Settings.
Toggle Developer Mode.
Then go Back and hit Create in the top right hand corner.
You’ll be taken to a pop-over called New Connector.
A form will appear. Fill it out as follows:
a. Name: MailerLite (This is for your own reference)
b. MCP Server URL: Paste the server URL: https://mcp.mailerlite.com/mcp
Tick the “I trust this application” checkbox at the bottom.
Click Create.
You will be automatically redirected to the MailerLite website in your browser. Choose the specific account you wish to connect to.
Review the permissions and click the Authorize button.
Now head over to a new chat in ChatGPT.
Click the + icon > More and select Developer Mode.
Almost there! Start a new chat and navigate to Add Sources > and toggle MailerLite.
MailerLite is now officially active and ready to use within ChatGPT!
Example prompts to get you started
Not sure where to begin? Here are a few examples of what you could ask your AI assistant right now:
"Identify my top 3 performing newsletters from the last quarter and tell me what they have in common?"
"Show me a comparison of my weekly newsletters vs. my promotional emails this year. Which type gets more clicks?"
"Find my best-performing automation and tell me which email in the sequence has the highest drop-off rate."
"Help me clean up my list by creating a segment of subscribers who haven't opened an email in the last 6 months."
"Show me a breakdown of my subscribers by country."
Full list of available tools
Once connected, your AI has access to a wide range of tools to manage your MailerLite account. Here's what it can do:
Subscriber management
add_subscriber: Add a new subscriber or update existing (supports email, name, fields, groups)get_subscriber: Get subscriber info by ID or emailupdate_subscriber: Update subscriber information (non-destructive)list_subscribers: List all subscribers and filter by status (active, unsubscribed, unconfirmed, bounced, junk)get_subscriber_activity: Get activity history for a subscriberget_subscriber_count: Get total count of subscribersdelete_subscriber: Delete a subscriber (keeps info for re-subscription)forget_subscriber: GDPR-compliant complete removal of subscriber dataget_single_import: Get details of a single import
Campaign management
create_campaign: Create a new email campaign (regular, A/B, resend types)get_campaign: Get specific campaign detailslist_campaigns: List all campaigns and filter by status and typeupdate_campaign: Update campaign details (name, subject, from, content)delete_campaign: Delete a campaignschedule_campaign: Schedule a campaign to be sentcancel_campaign: Cancel a scheduled campaignget_campaign_subscribers: Get subscribers who received a campaign with filters
Group management
list_groups: List all subscriber groupscreate_group: Create a new subscriber groupupdate_group: Update group namedelete_group: Delete a groupget_group_subscribers: Get subscribers in a groupassign_subscriber_to_group: Add a subscriber to a groupunassign_subscriber_from_group: Remove a subscriber from a groupimport_subscribers_to_group: Bulk import subscribers to a group
Segment management
list_segments: List all segmentsget_subscribers_in_segment: Get subscribers in a segment and filter by statusupdate_segment: Update segment namedelete_segment: Delete a segment
Automation management
list_automations: List all automations and filter by name, group, enabled statusget_automation: Get single automation detailsget_automation_activity: Get subscriber activity for an automation and filter by statuscreate_automation: Create a draft automationdelete_automation: Delete an automation
Form management
list_forms: List forms by type (pop-up, embedded, promotion)get_form: Get single form detailsupdate_form: Update form namedelete_form: Delete a formget_form_subscribers: Get subscribers who signed up through a form
Authentication
get_auth_status: Get current authentication status
Webhook management
list_webhooks: List all webhooksget_webhook: Get specific webhook detailscreate_webhook: Create a new webhook with name, URL, and eventsupdate_webhook: Update webhook details including enabling/disablingdelete_webhook: Delete a webhook
Frequently Asked Questions
What is MCP?
MCP stands for Model Context Protocols.
At its core, it's a standardized set of rules that allows AI assistants (Models) to communicate with external services like MailerLite.
Normally, for an AI to use a service, a developer has to write custom code to connect them. MCP eliminates this need by creating a universal language. It lets MailerLite advertise its functions like add_subscriber or create_campaign as a standard set of "tools." Any AI that understands the MCP standard can then automatically see and use these tools to carry out your requests.
What does the MCP server for MailerLite do?
The MCP server acts as a secure bridge between your AI tool and your MailerLite account. It translates the standard commands from your AI into specific actions within MailerLite, like adding a subscriber or analyzing a campaign. This allows your AI tool to understand and use MailerLite's features without needing a complex, custom-built integration.
What are some examples of things I could do with it?
You can ask your AI assistant to perform complex analysis or carry out tasks in plain language.
For example, you could ask:
"Identify my top 3 performing newsletters from the last quarter and tell me what they have in common?"
"Help me clean up my list by creating a segment of subscribers who haven't opened an email in the last 6 months."
"Find my best-performing automation and tell me which email in the sequence has the highest drop-off rate."
Who is this MCP server intended for?
It's for anyone who uses AI assistants and wants to make their email marketing workflow more efficient. This includes:
Marketers and business owners who want to quickly analyze data and manage tasks without deep-diving into the MailerLite interface
Developers and power users who want to integrate email marketing into their scripts and automated workflows
Anyone looking to save time by delegating their MailerLite tasks to an AI assistant
Is it difficult to set up?
No, it’s designed to be straightforward. For many AI tools like ChatGPT, it's as simple as finding MailerLite in a "Connectors" list and clicking "Connect." For others, it typically involves copying and pasting the server URL into a settings field. This article provides detailed, step-by-step instructions for all supported clients.
What kind of MailerLite data can an AI tool/LLM access via this server?
By authorizing a connection, you grant your chosen AI assistant permission to access the data needed to perform your requests. This includes information across several categories:
Subscriber data: Names, emails, status, groups, fields, and activity history
Campaign data: Content, settings, and performance metrics like open and click rates
Groups and segments: Lists of your subscriber groups and segments
Automations and forms: Details about your automation workflows and forms
You are always in control of this connection. For a complete breakdown of every available function, please see the Full list of available tools section in this guide.