The MailerLite Manager iOS mobile application allows you to manage your email campaigns, monitor performance, and manage subscribers on the go.
Note: To use this app, you must have an account with the new MailerLite and be using an Apple device running iOS 15.0 or later. MailerLite Classic users can use the MailerLite Classic Manager app.
If you're a Legacy (Classic) user, please log in to your account to access the dedicated Legacy (Classic) Help Center.
App Features
The MailerLite Manager App for iOS devices allows you to manage your email campaigns and subscribers with an array of features:
Create and send rich-text emails.
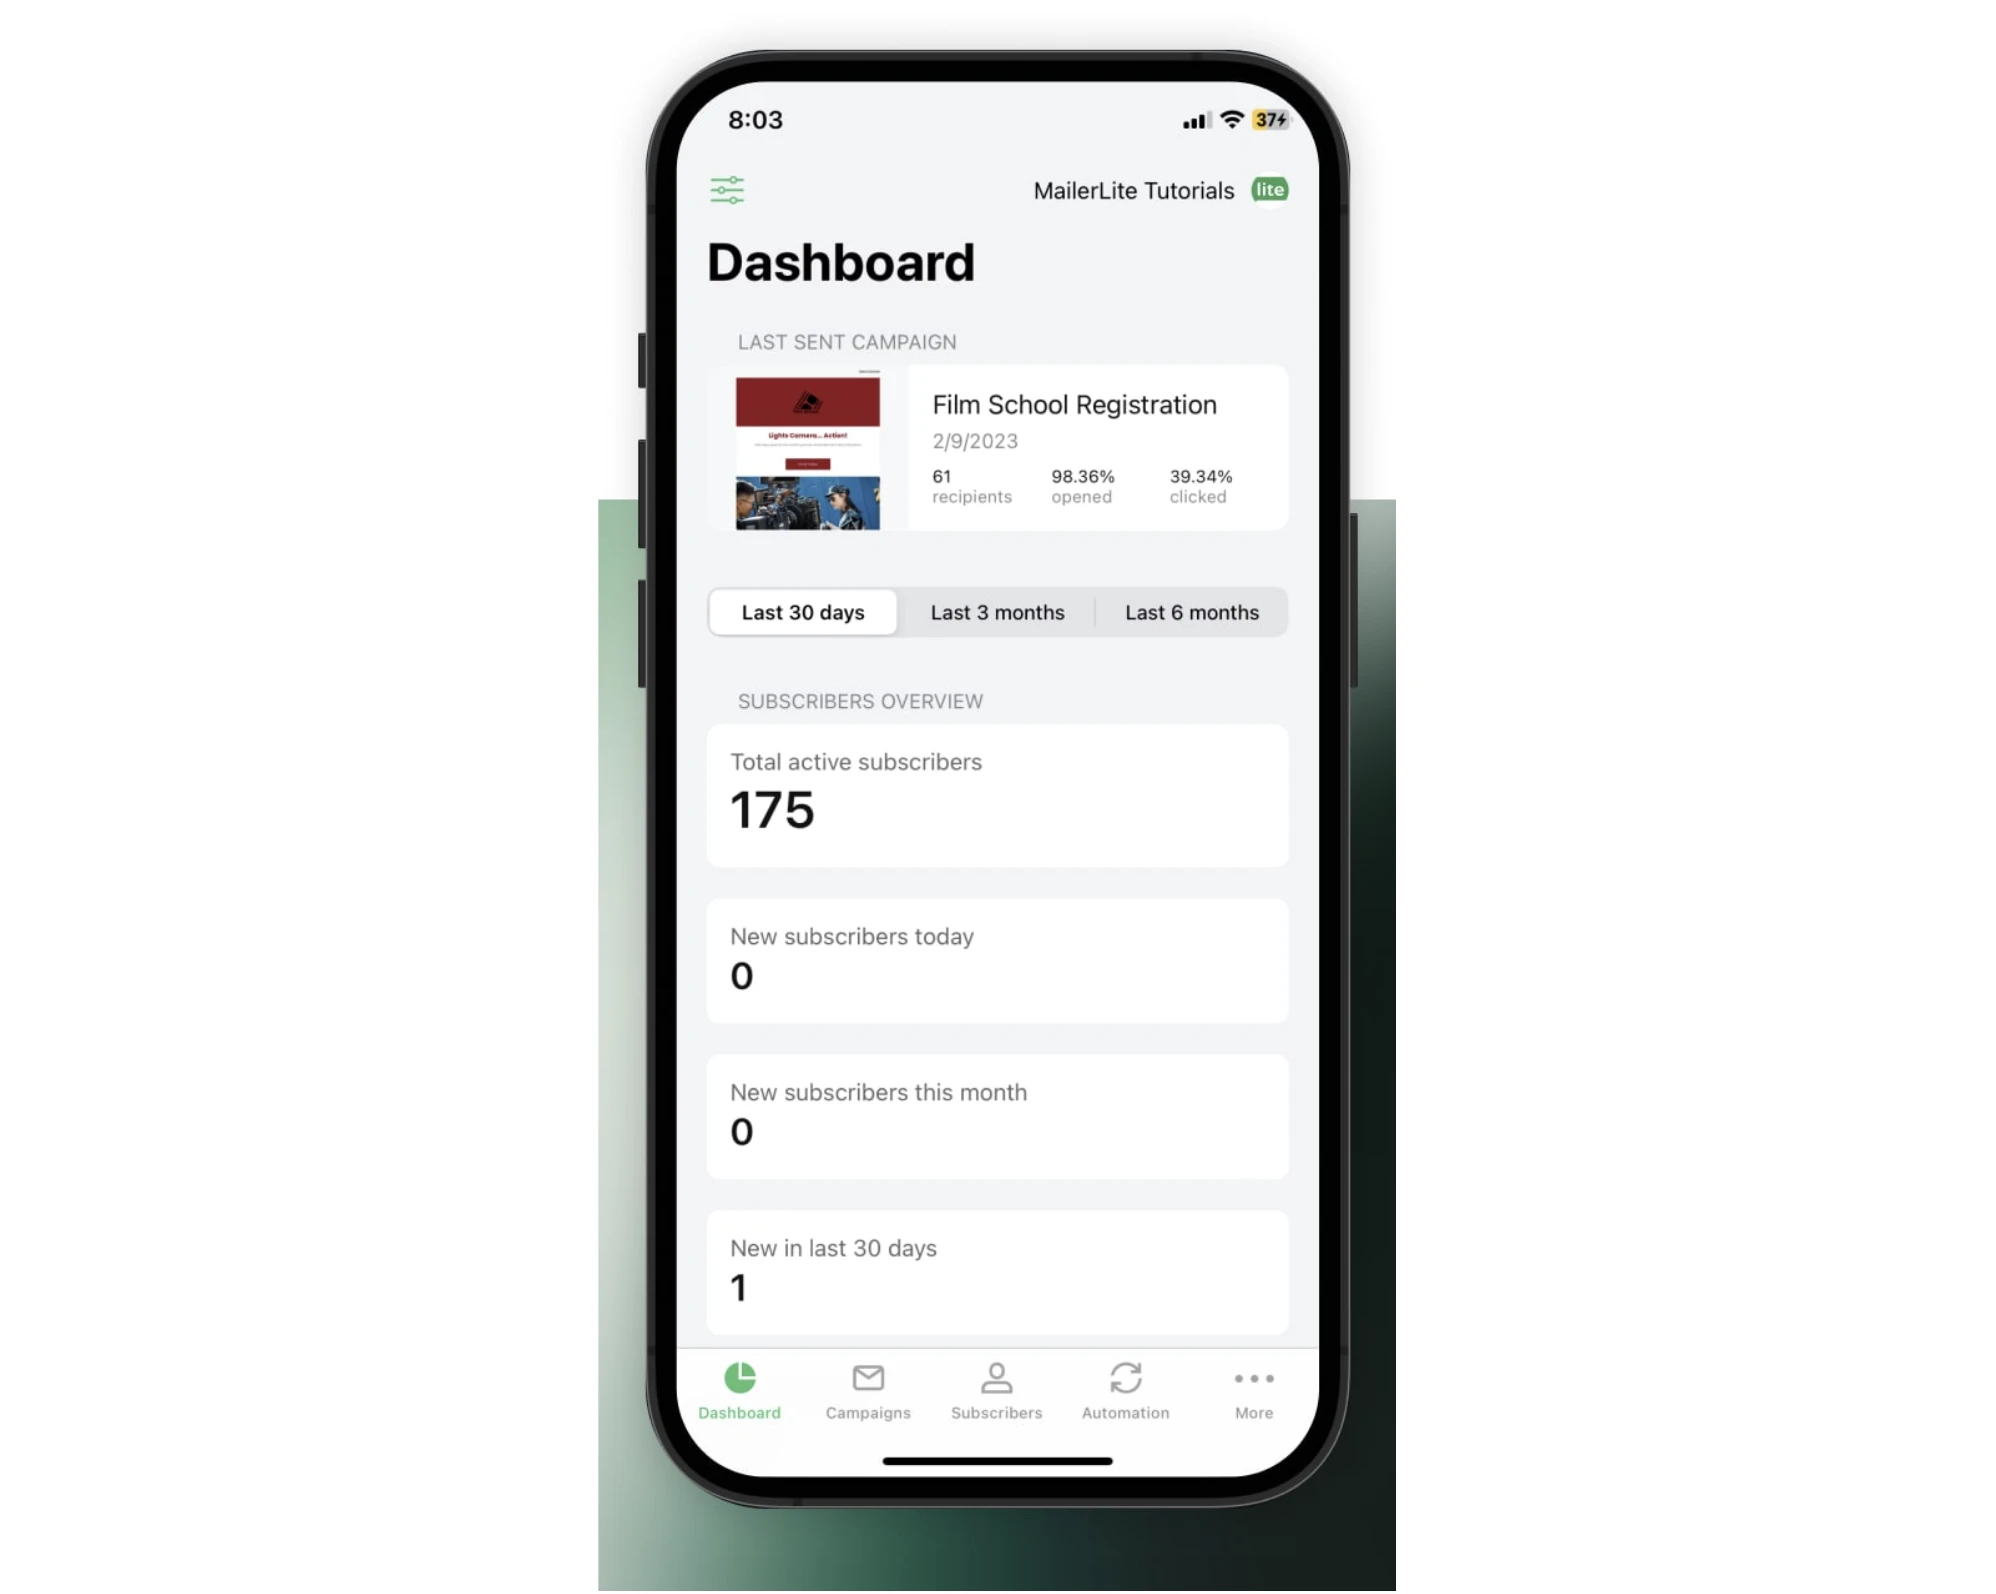
Dashboard: Monitor email metrics, form and automation stats, e-commerce sales, and new subscribers.
Preview and schedule campaigns.
Import subscribers
Monitor automations, form, and site analytics
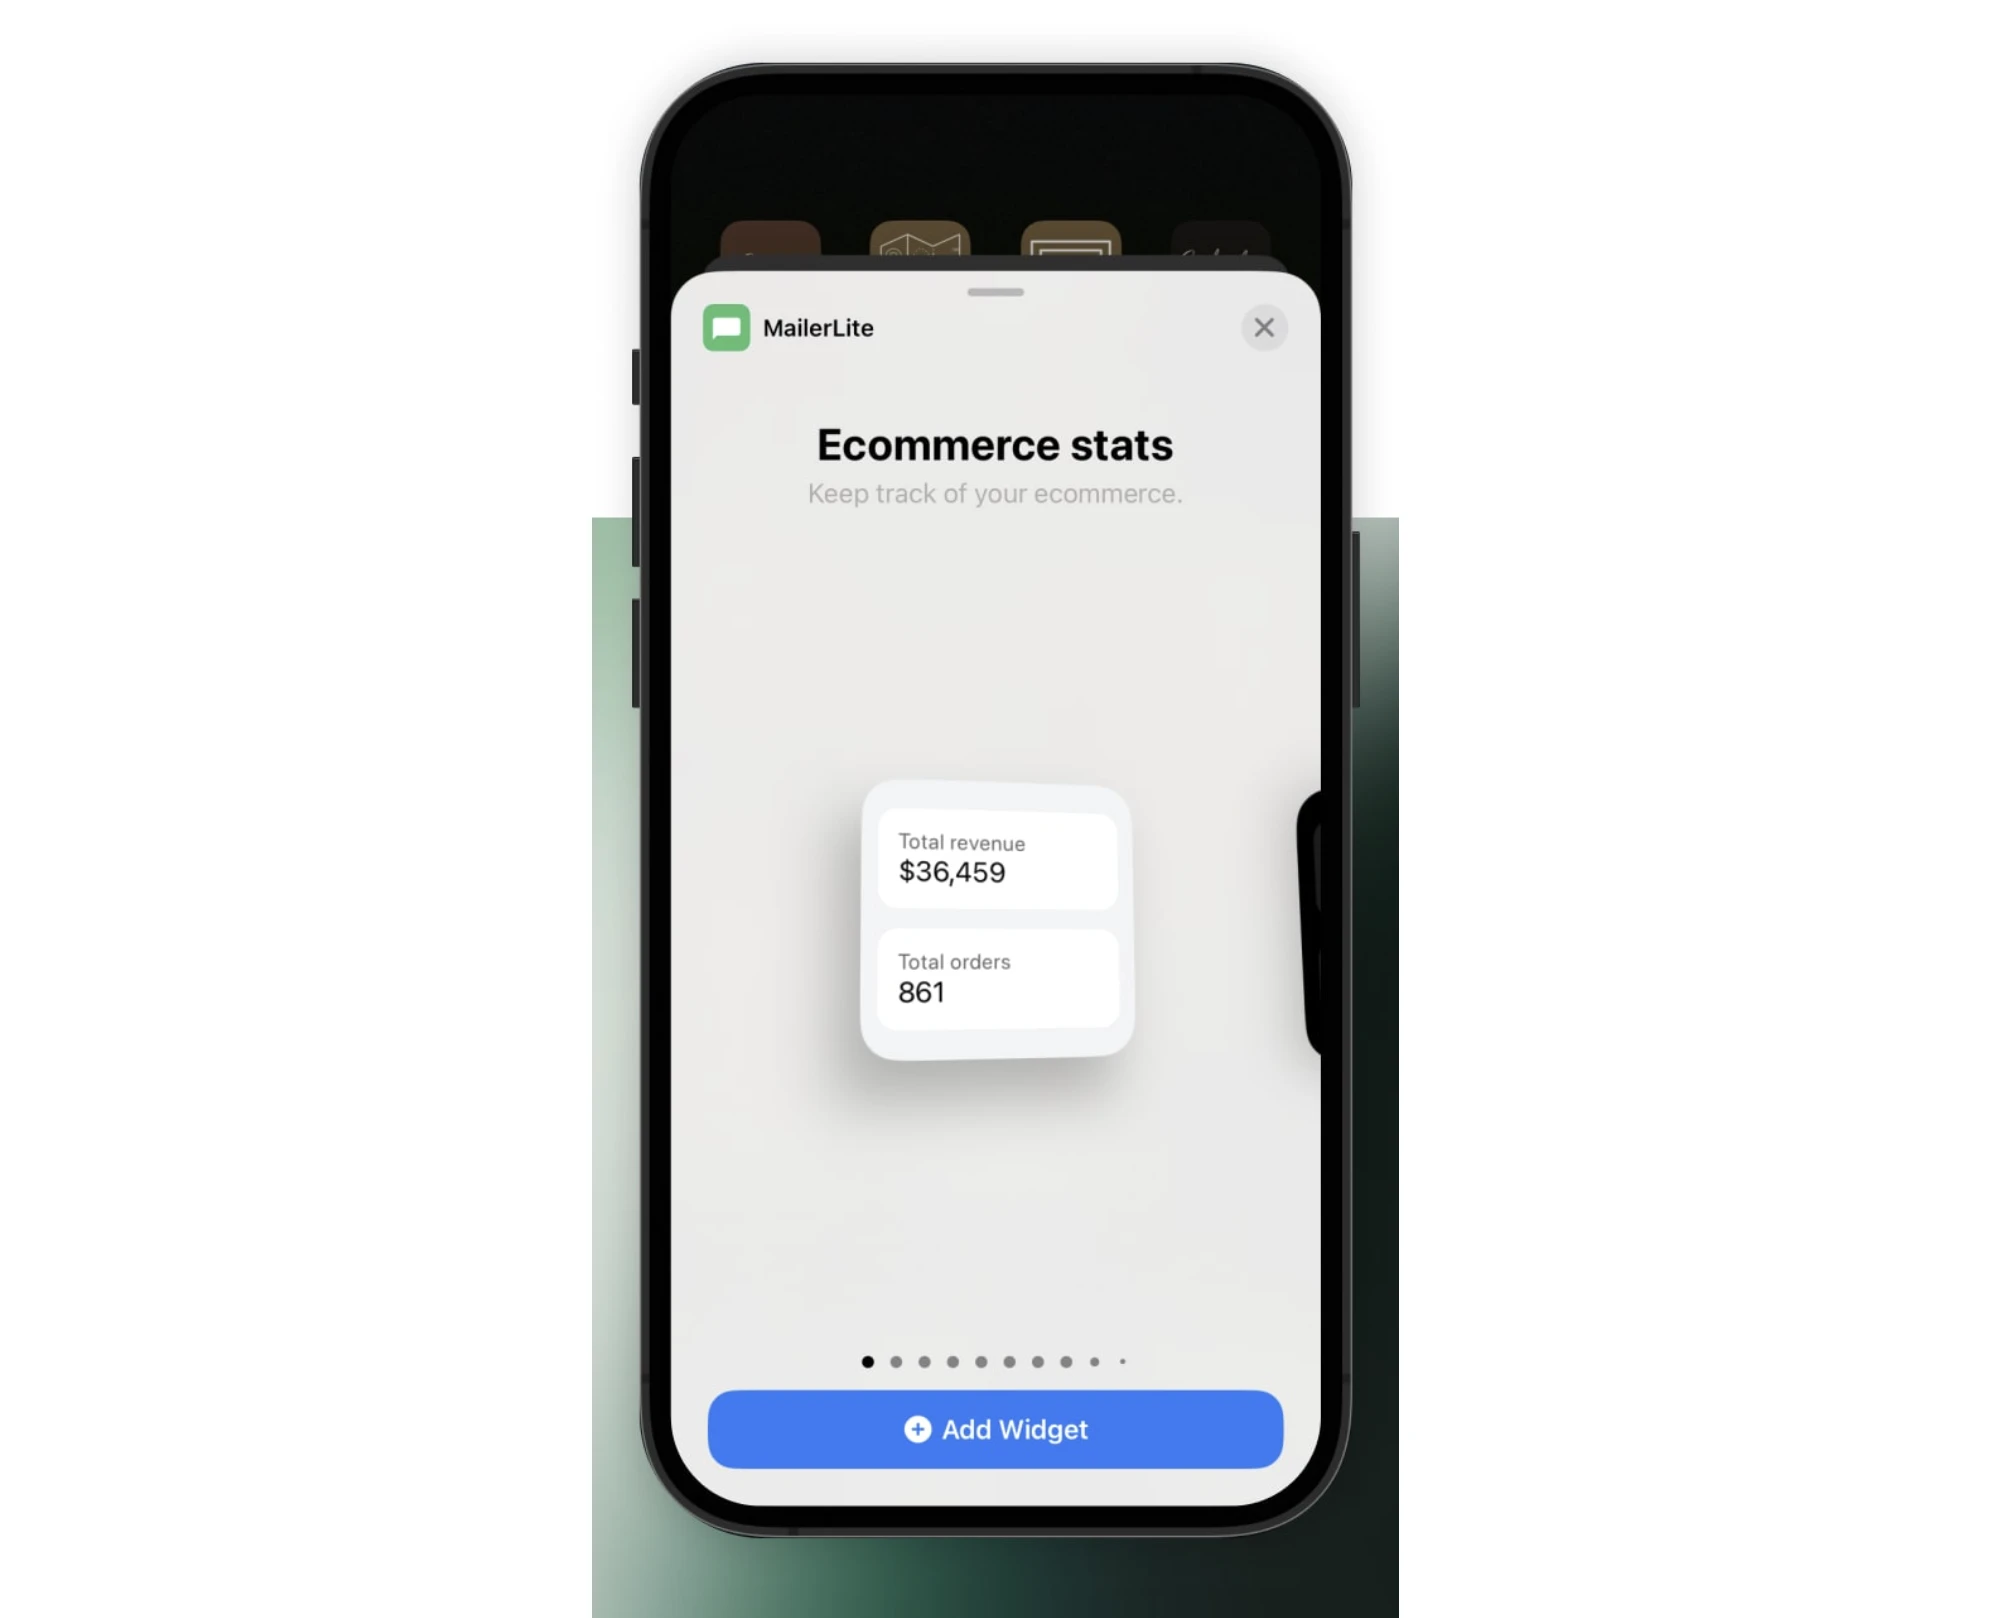
Add home and lock screen widgets
Access to educational resources
Customizing your dashboard
The MailerLite Manager app allows you to customize your dashboard by hiding, displaying, or rearranging specific sections. This helps you stay on top of the data that's most important to you.
To customize your dashboard:
Open the app to view the Dashboard.
Tap the three horizontal lines in the top left corner of the screen to open the Dashboard menu.
From there, you can add or remove the information that is shown on your Dashboard by toggling the option ON or OFF.
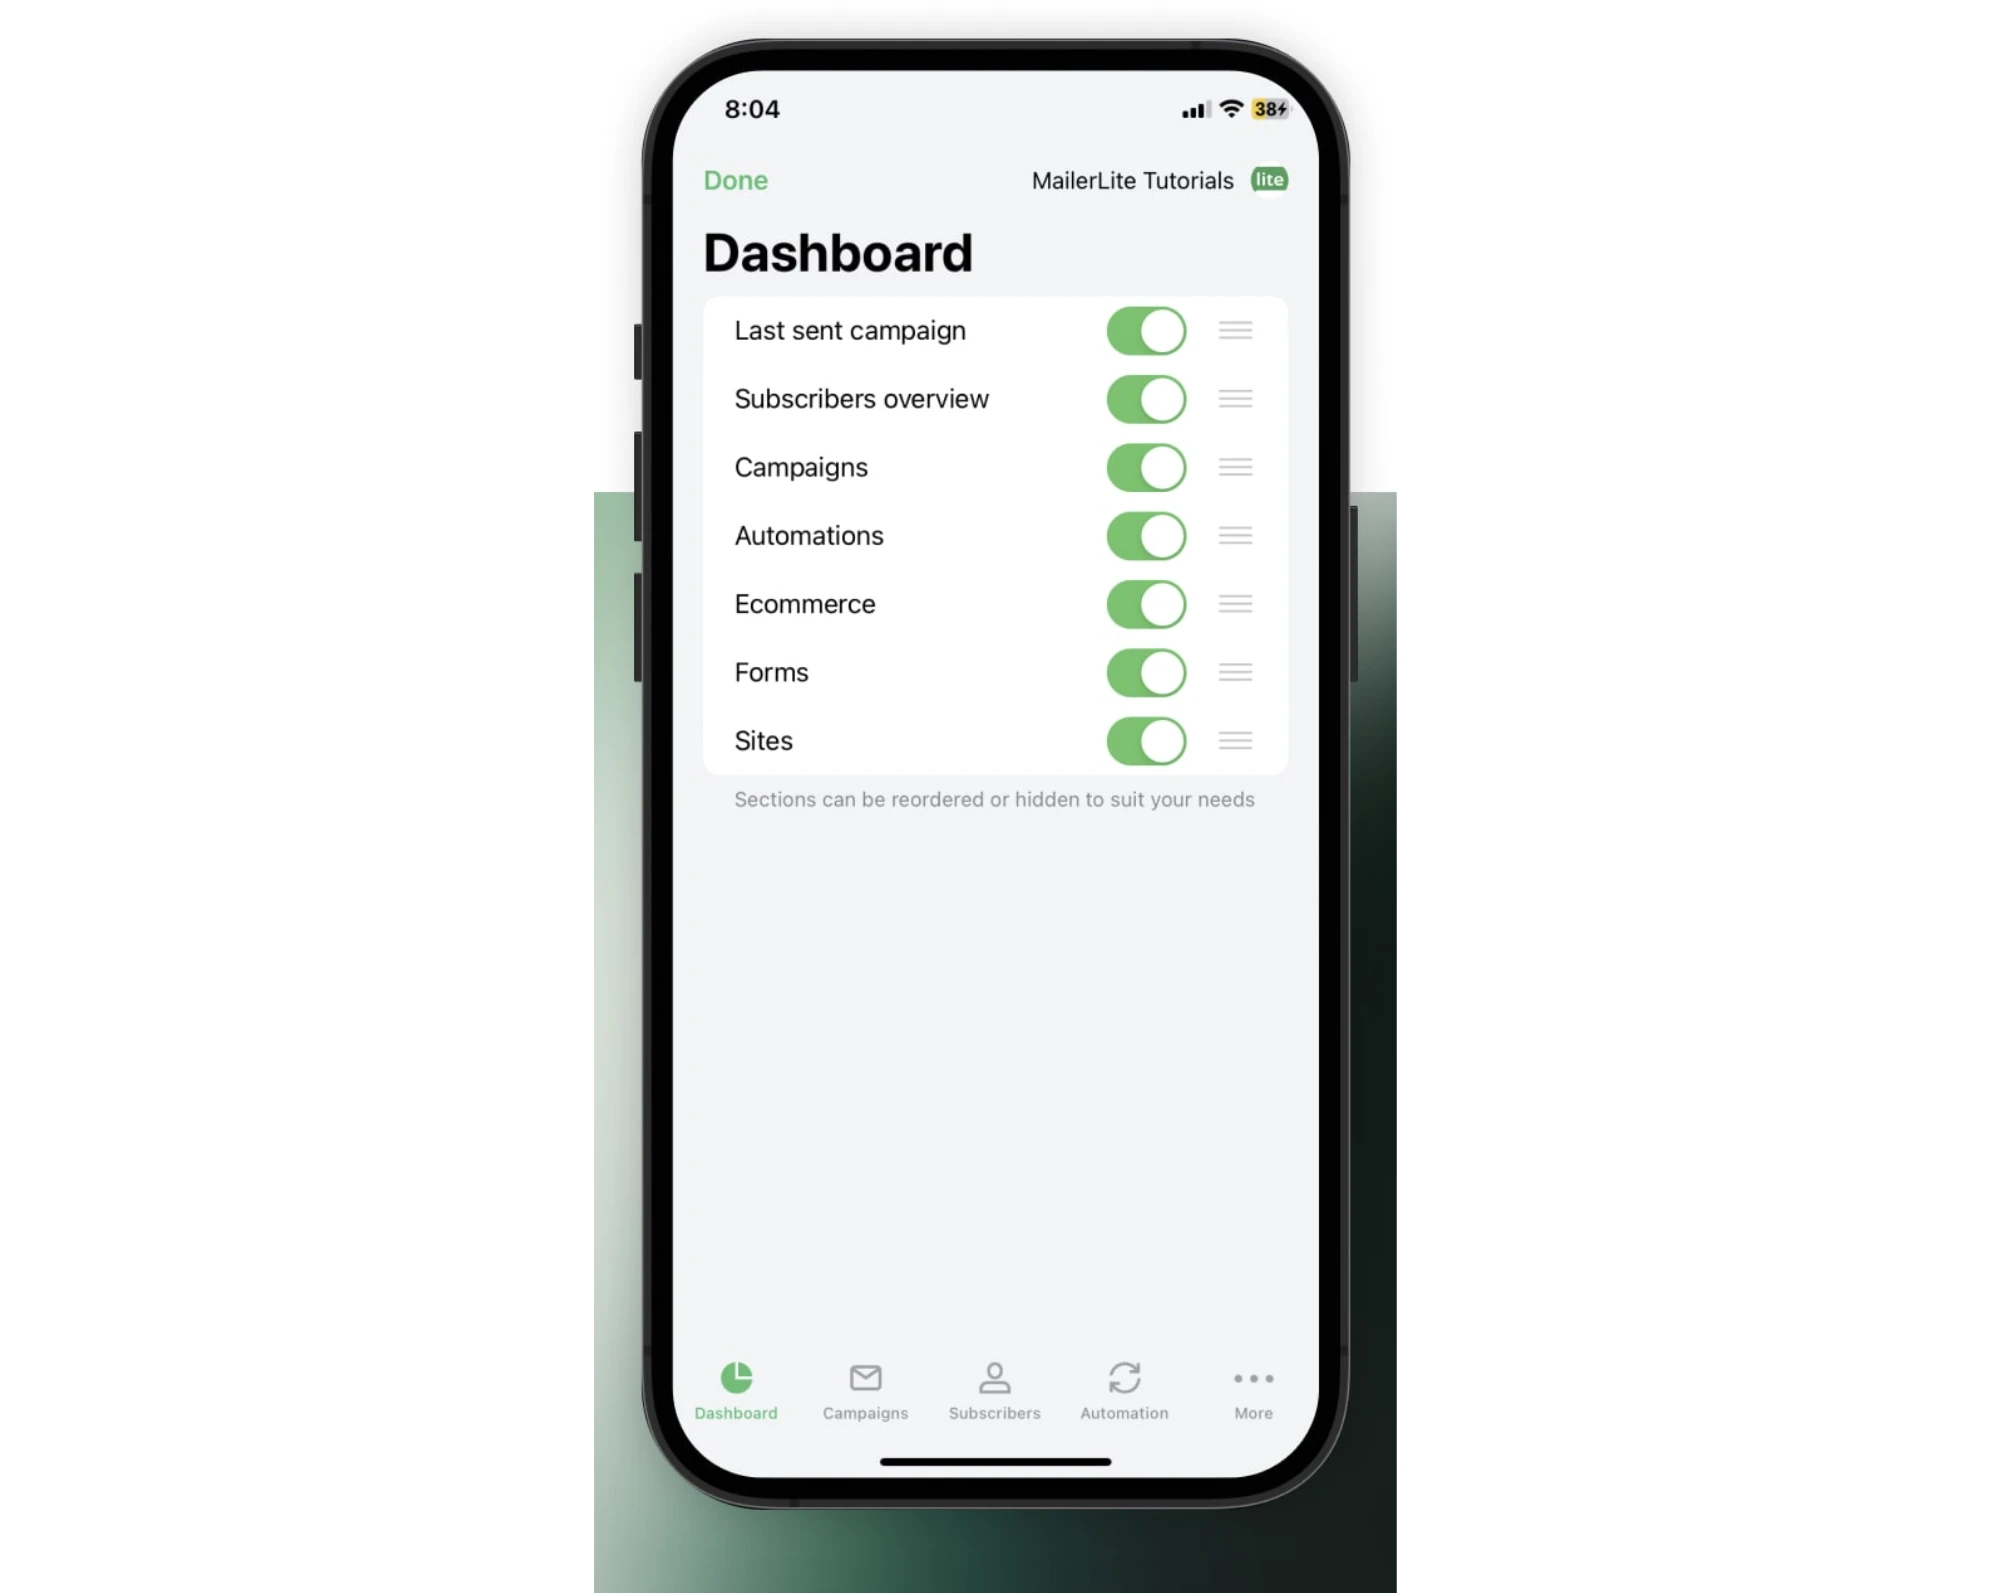
4. You can also reorder the cards by tapping and holding on the three horizontal lines next to each card and dragging it to the desired location.
5. Tap Done.
How to send campaigns
Keep in mind, it is only possible to send rich-text campaigns in the iOS app. Other editors, such as the drag & drop and HTML editor, are only available on the desktop version of MailerLite.
To send a campaign:
Open the app and navigate to the Campaigns tab.
Click the New Campaign option in the upper right corner.
Choose a Campaign name, Subject, Sender name, Sender email, and Language.
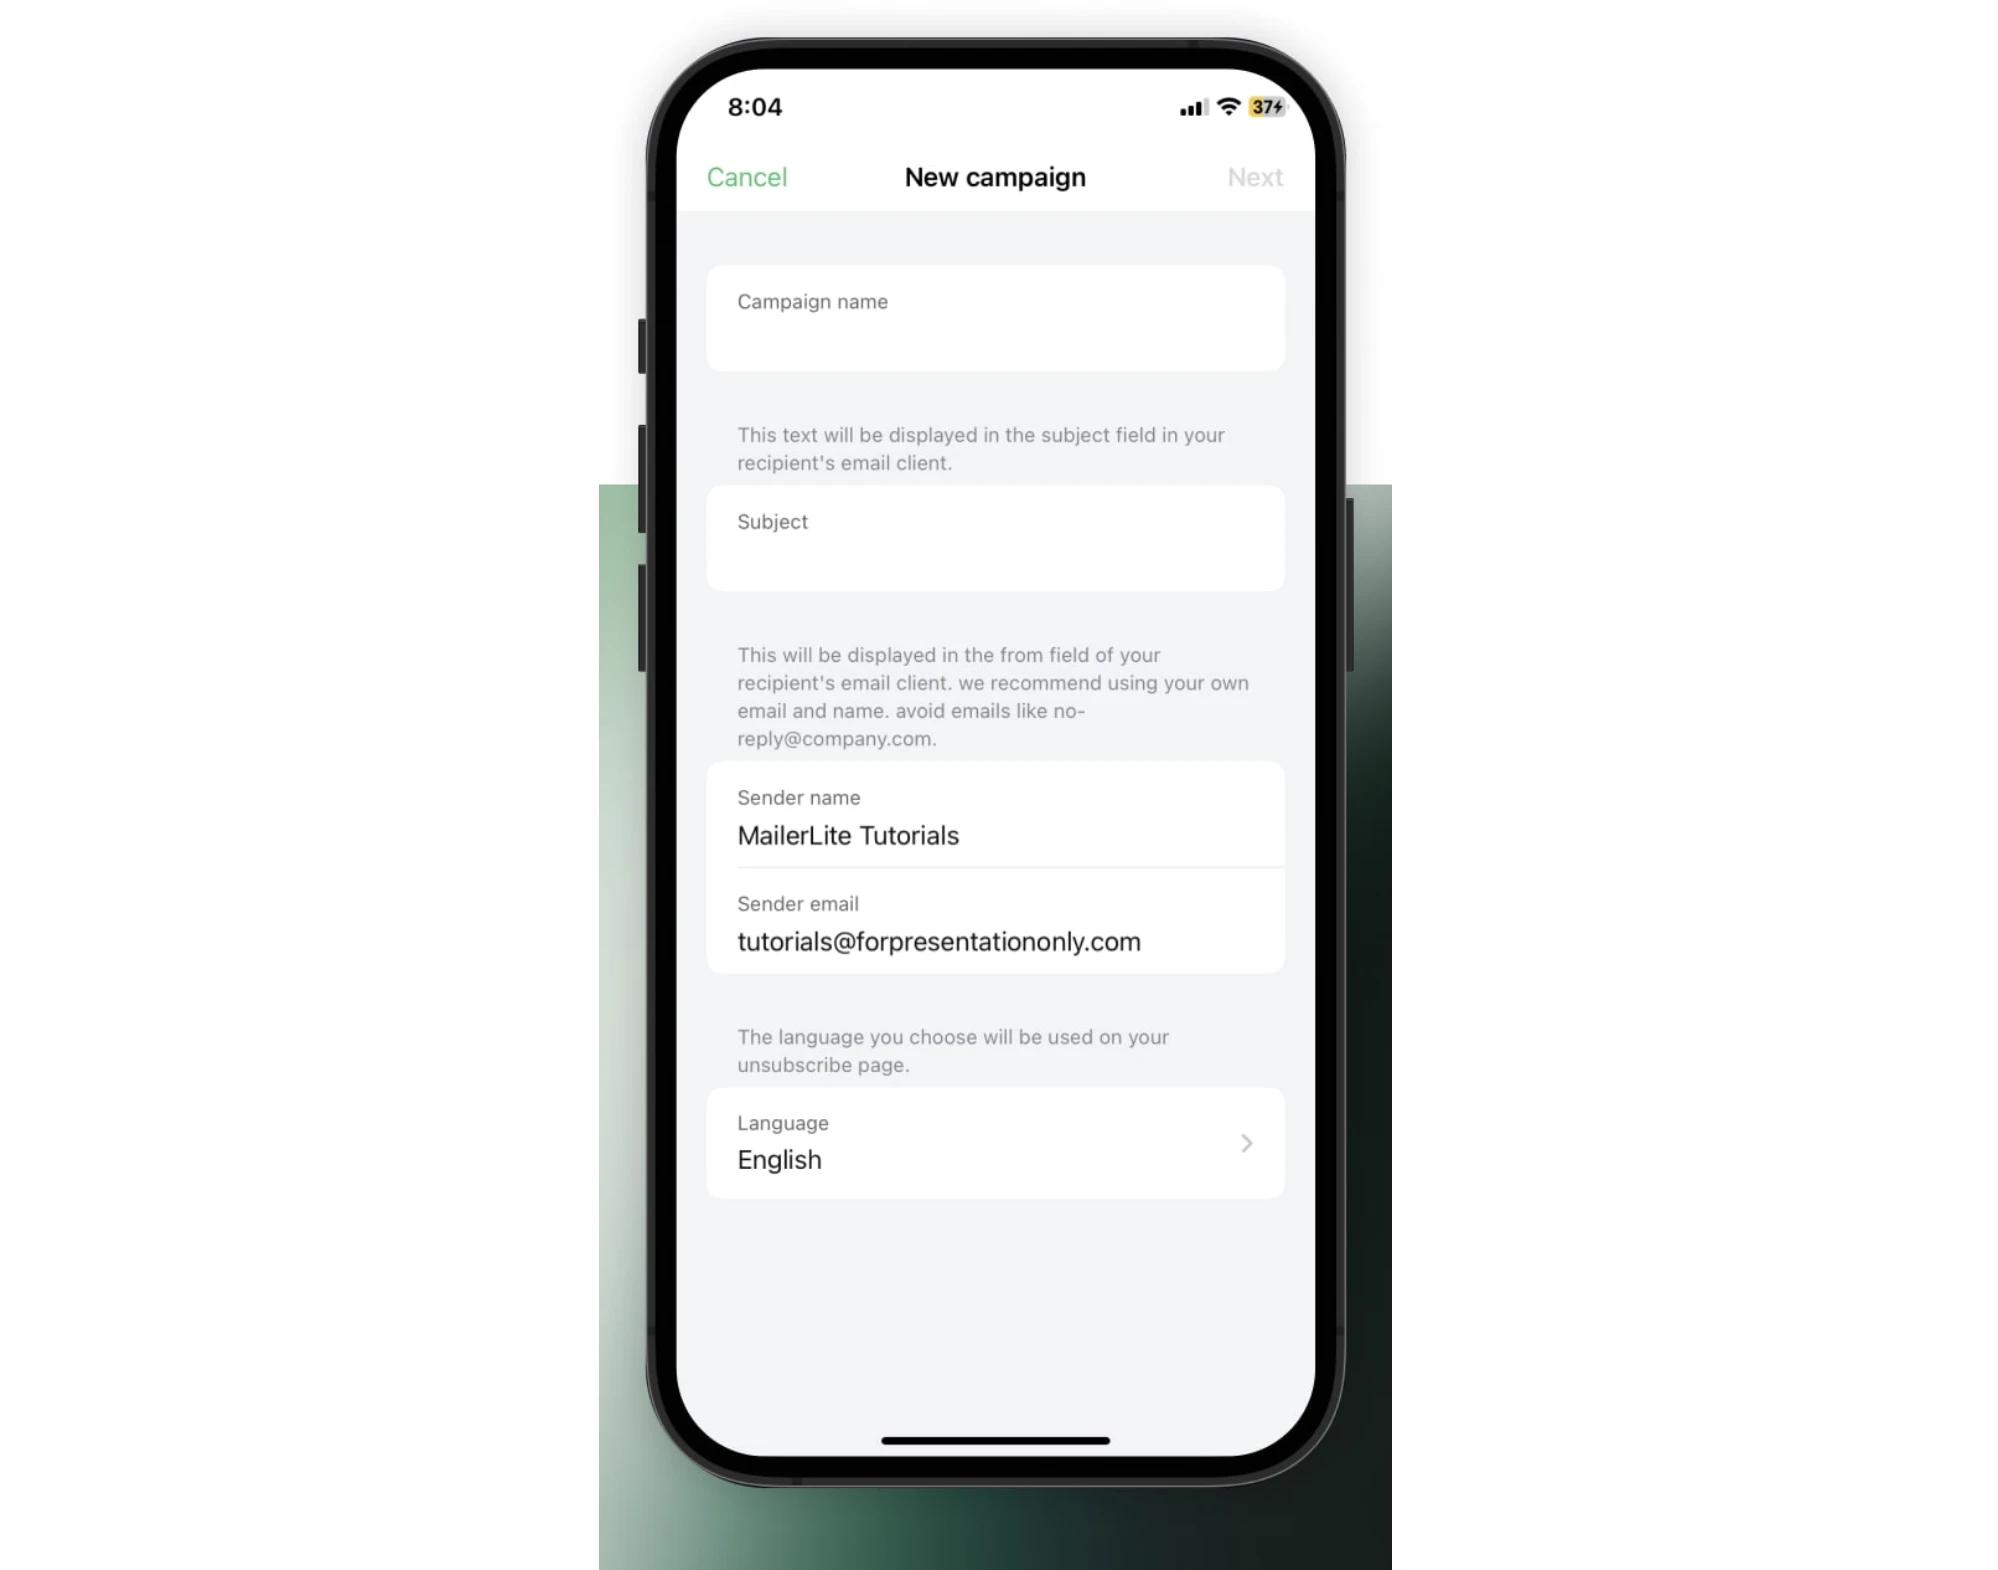
4. Click Next.
5. On the Content page, begin writing your email text.
6. To preview the email, click the Preview icon in the upper right corner.
7. To choose an image, select the image icon on the toolbar that appears above the mobile keyboard. You can take a photo with your phone’s camera, or select a photo from your albums.
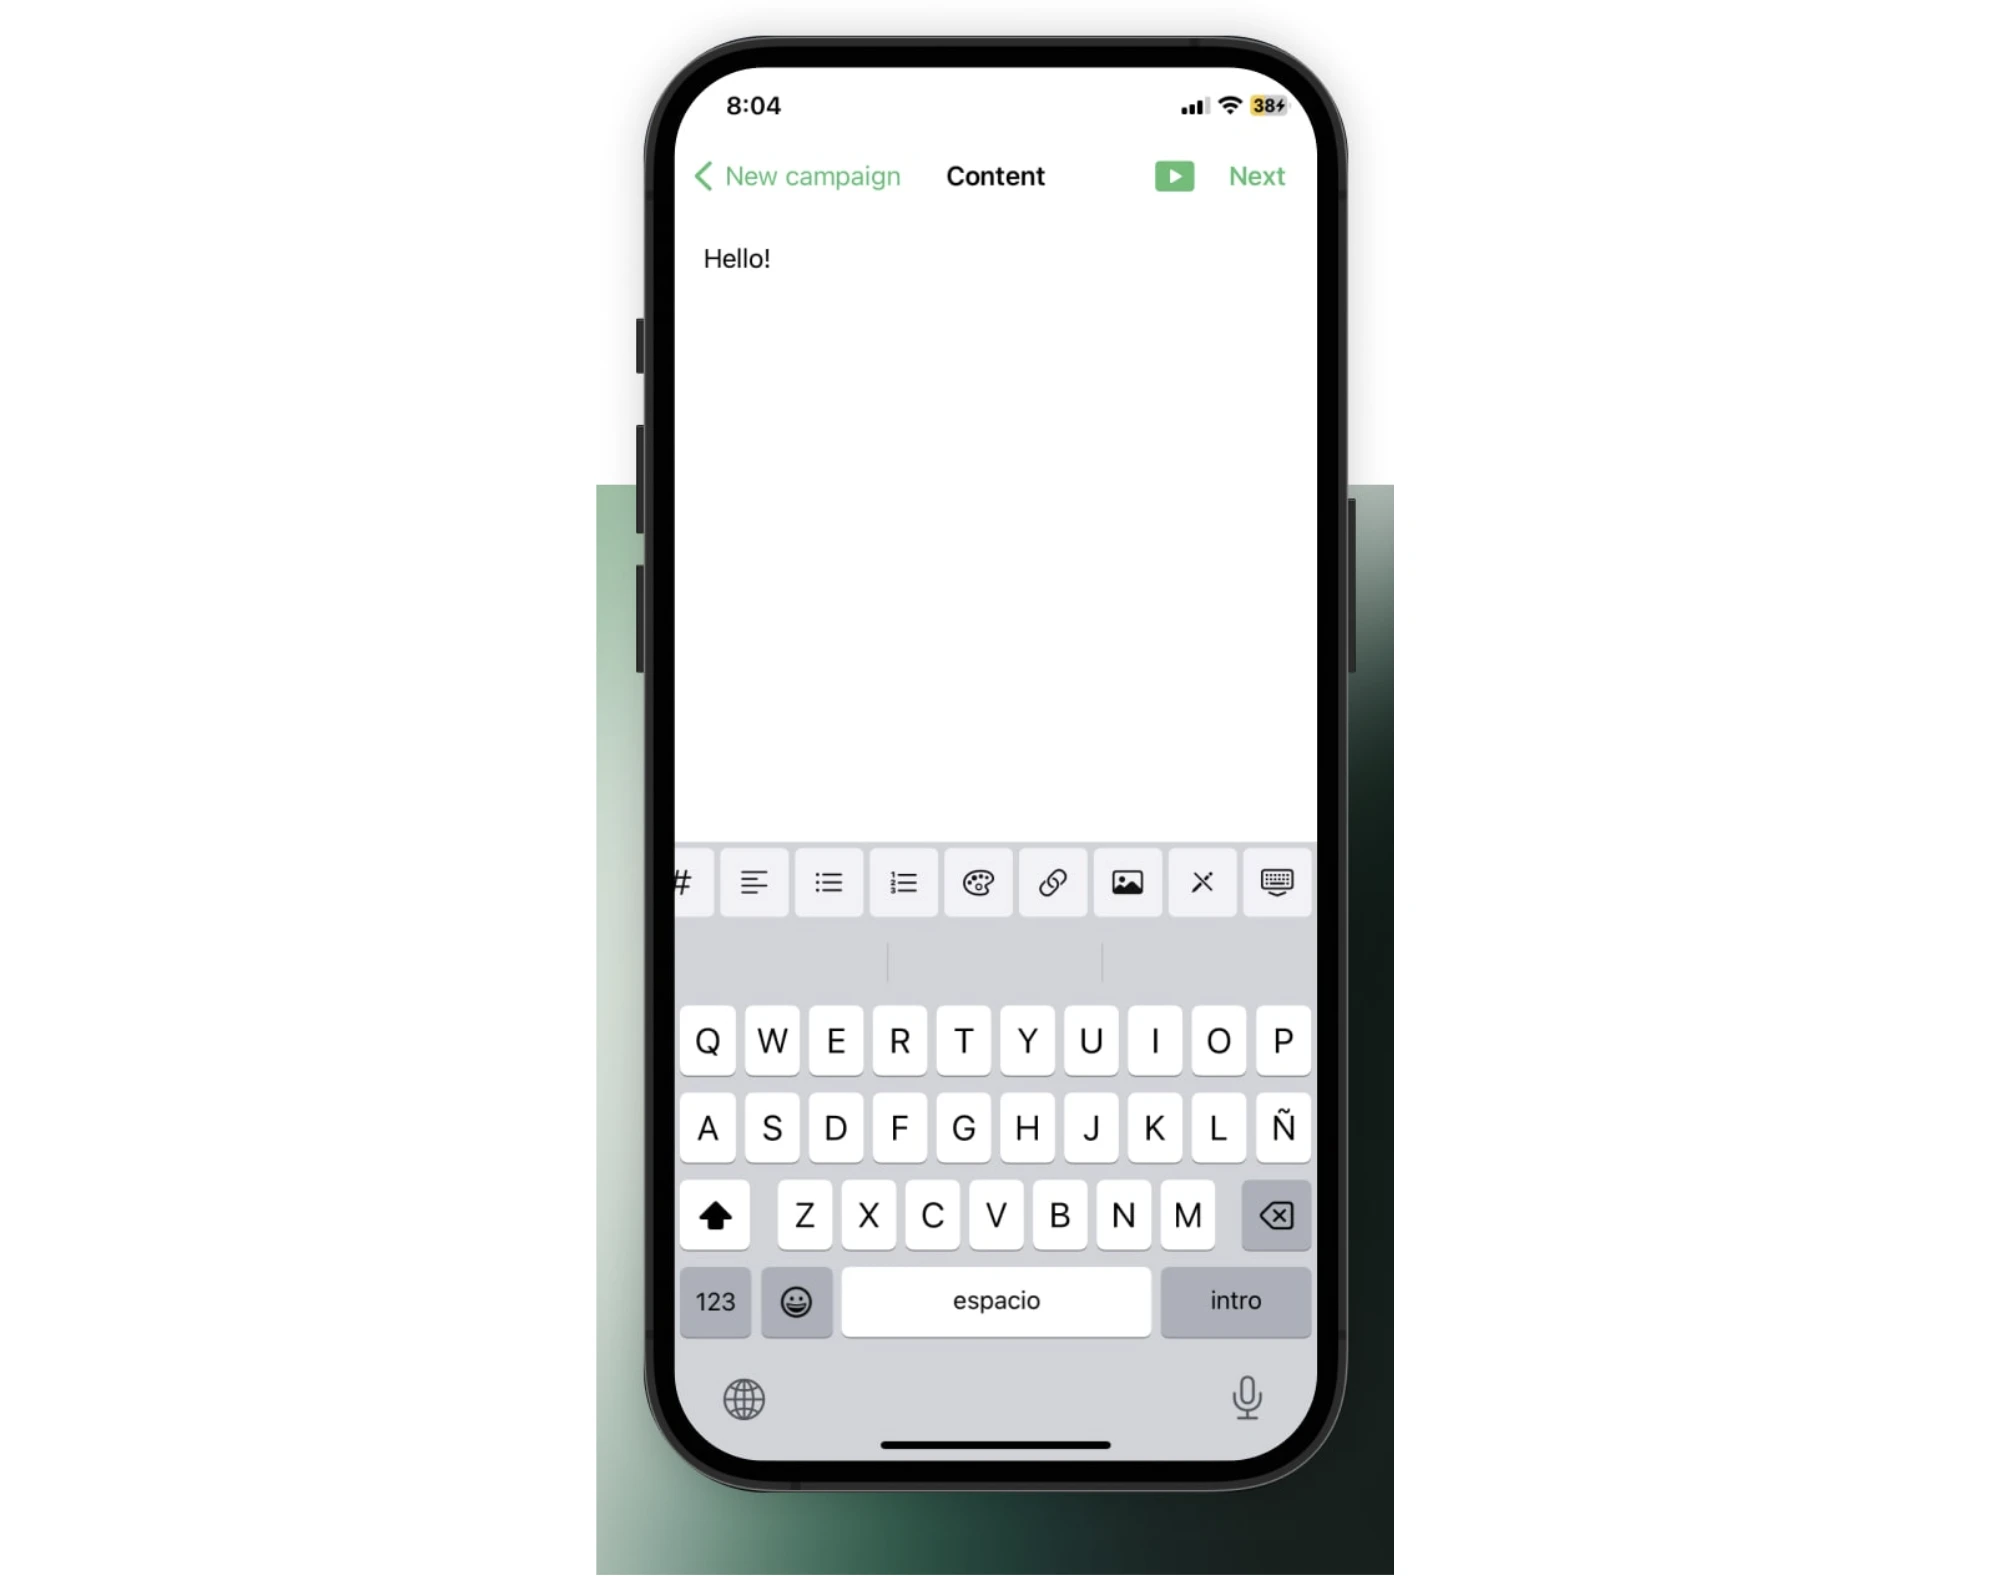
8. Click Next.
9. Choose the recipients for your campaign.
10. Click Save & Review.
11. Review the campaign and click Schedule.
12. Choose a time to send your campaign.
Previewing and Scheduling Campaigns
To preview a campaign:
Navigate to the Campaigns tab.
Choose your campaign.
Click View Campaign.
Click the Preview email button.
All emails created in MailerLite can be scheduled and sent within the mobile app. Keep in mind that while it is possible to send these campaigns, it is not possible to edit emails created with the drag & drop or custom HTML editor on the mobile app.
To schedule and send a campaign:
Navigate to the Campaigns tab.
Choose the Drafts tab.
Select your campaign.
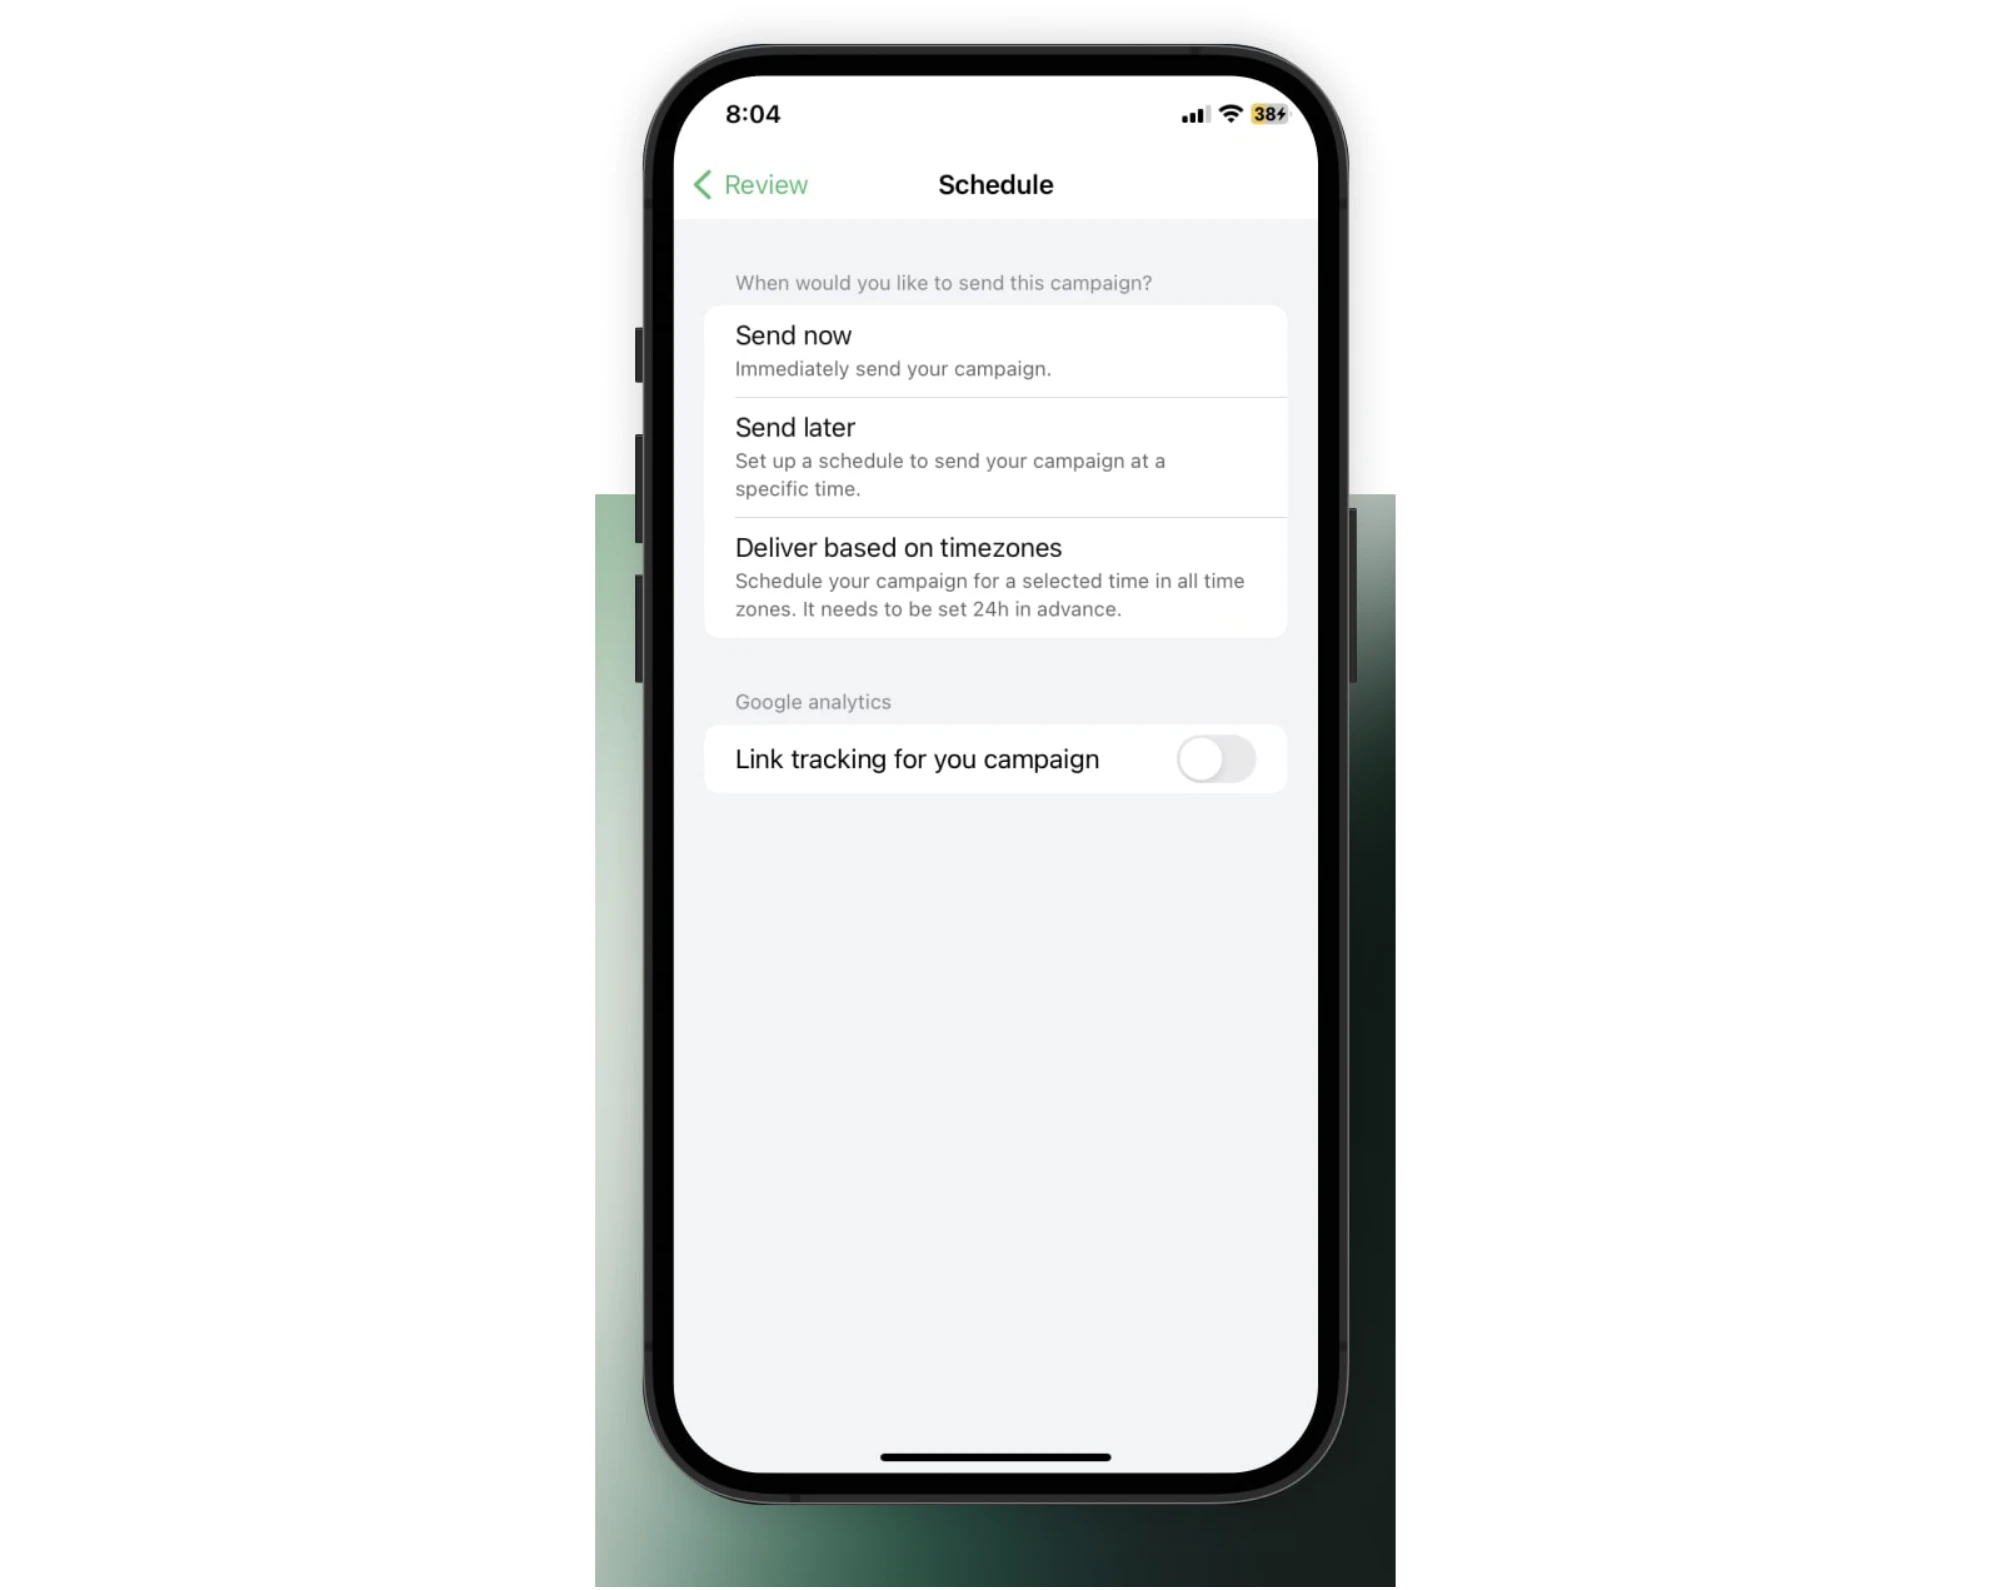
Click Confirm and schedule in the top right corner.
Choose to send the campaign immediately, schedule it for the future, or deliver by timezone.
Managing Subscriber Activity
The MailerLite Manager app allows you to review subscriber segments and interest groups, add new subscribers, import subscribers from your device, and unsubscribe, delete, or forget a subscriber.
To view subscriber groups and segments:
Navigate to the Subscribers tab.
To review subscriber segments and interest groups, tap the Segments or Groups tabs at the top of the screen.
To add new subscribers:
Click the + icon in the top right corner.
Choose to add a single subscriber, import from your device’s contacts, import from a CSV or TXT file, or scan the contact with your device’s camera.
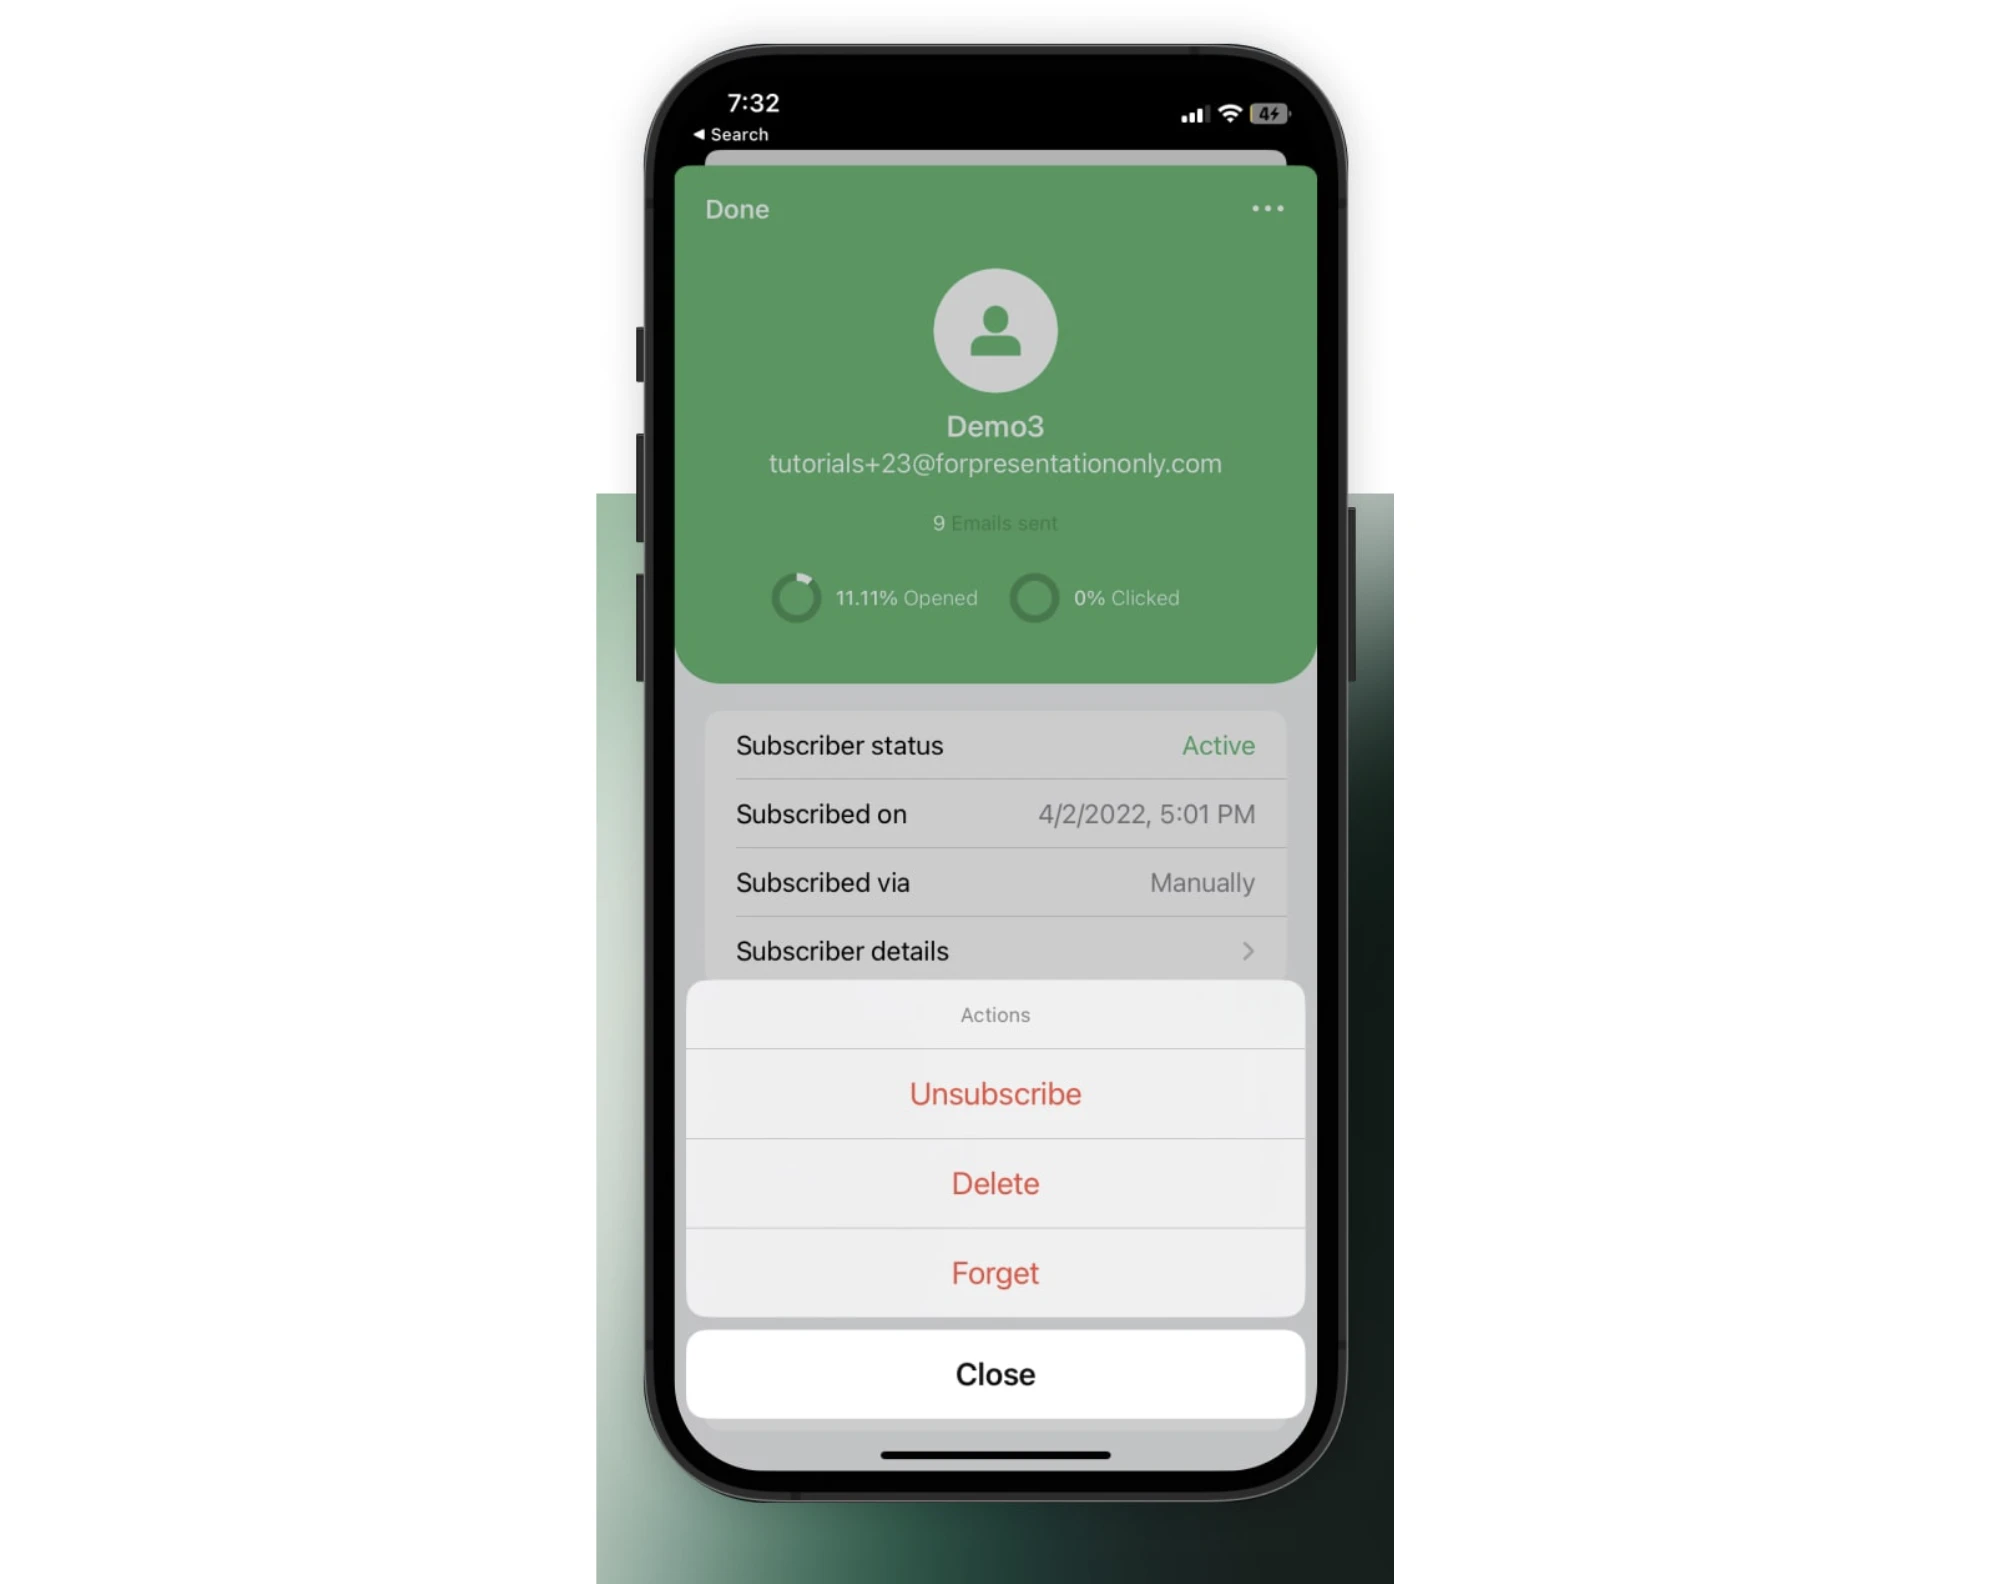
To unsubscribe, delete, or forget a subscriber:
Select the subscriber's name or email to open their profile.
Click the three dots icon in the upper right corner and choose the desired action.
Automation settings
In the Automation tab, you can monitor the performance of the automations in your MailerLite account. View automation activity, analytics, and even turn a workflow OFF/ON straight from the mobile app. To do this:
Click the Automation tab.
Choose a workflow to view.
Use the Status toggle to enable or disable an automation. Scroll down to view metrics related to your workflow.
Click the three horizontal dots in the upper right corner to Rename, Duplicate, or Delete a workflow.
Although it is possible to preview automation emails in the mobile application, it is not possible to edit workflow emails within the app.
Forms, sites, and more
Click the More tab to open the options to view forms, sites, and your MailerLite file manager.
Forms
It is possible to view, duplicate, delete, and reset the statistics of your MailerLite forms within the mobile application. To do this:
Choose the Forms page.
Select your Pop-up, Embedded, or Promotions form.
Use the Status toggle to publish or unpublished the form, and the Double opt-in toggle to enable or disable double-opt-in for that specific form.
Scroll down to Reset stats, Duplicate, or Delete a form.
Sites
View the metrics for your landing pages and websites right from the mobile application. To do this:
Choose the Sites page.
Select your Landing page or Website.
Use the Published toggle to publish or unpublished the form, and the Double opt-in toggle to enable or disable double-opt-in for that specific site.
From the Groups section, you can edit the groups associated with the website.
Scroll down to Reset stats, Duplicate, or Delete a site.
File Manager
Manage your files and keep your assets organized from within the app. Choose the File Manager page to view your files, as well as upload images from your mobile device. To do this:
Choose the File manager page.
Click the three horizontal dots in the upper right corner.
Choose to Take photo, Upload photo, or Create folder.
Photos added to your file manager from your mobile device will also sync to your MailerLite account.
Account Settings
The MailerLite Manager app allows you to view your account settings, switch accounts, and contact customer support.
To access account settings:
In the top right corner of the screen, click your account name.
Choose the Account settings tab.
In the Settings menu, you will find various options related to your account:
Switch Accounts: Allows you to switch between multiple MailerLite accounts
Notifications: Manage your push notification preferences for the app.
Resources: Access MailerLite’s education library of help articles, video tutorials, the MailerLite Academy and community, and our legal policies. You can also use the Contact form to get in touch with customer support.
Setting Up Lock-Screen and Home-Screen Widgets
Introduced with iOS 16, lock-screen and home-screen widgets provide quick access to important information and features within the MailerLite Manager app.
To add a widget:
On your device's home screen, tap and hold an empty space until the apps start to wiggle.
Tap on the + button in the top left corner.
Search for the MailerLite Manager app and select it.
Choose the desired widget size and tap on the Add Widget button.