Hooray! You can now build your own website (including a blog)
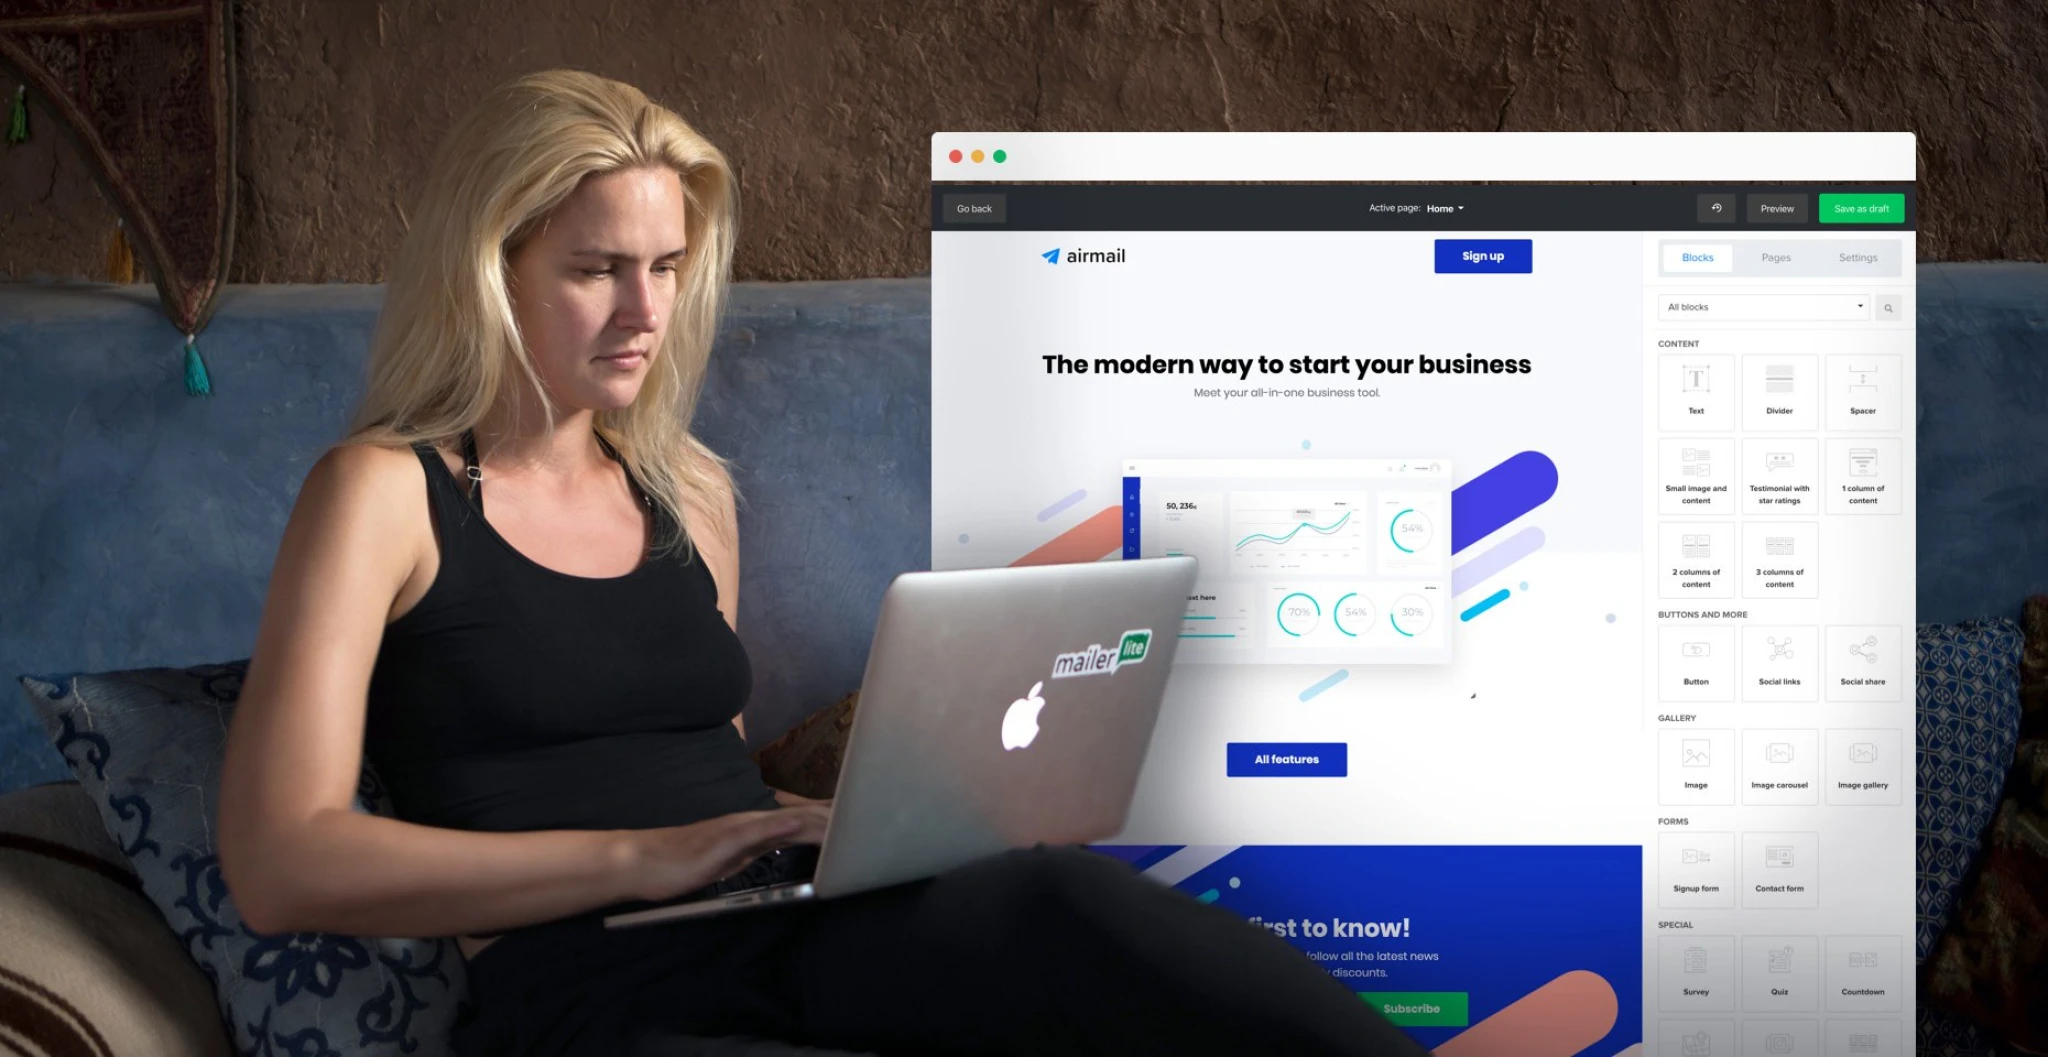
We started with email campaigns, then we introduced landing pages and now we’re proudly presenting websites! Yes, with our new website builder you can build entire websites, right in your MailerLite app.
Using the same drag & drop builder you’re used to, you can now create a homepage, separate website pages and even a blog section with articles. You get to make a website of your own in no time without any coding required. Excited yet? We hope so!
Ready to build a website of your own today? (pretty cool, we know)
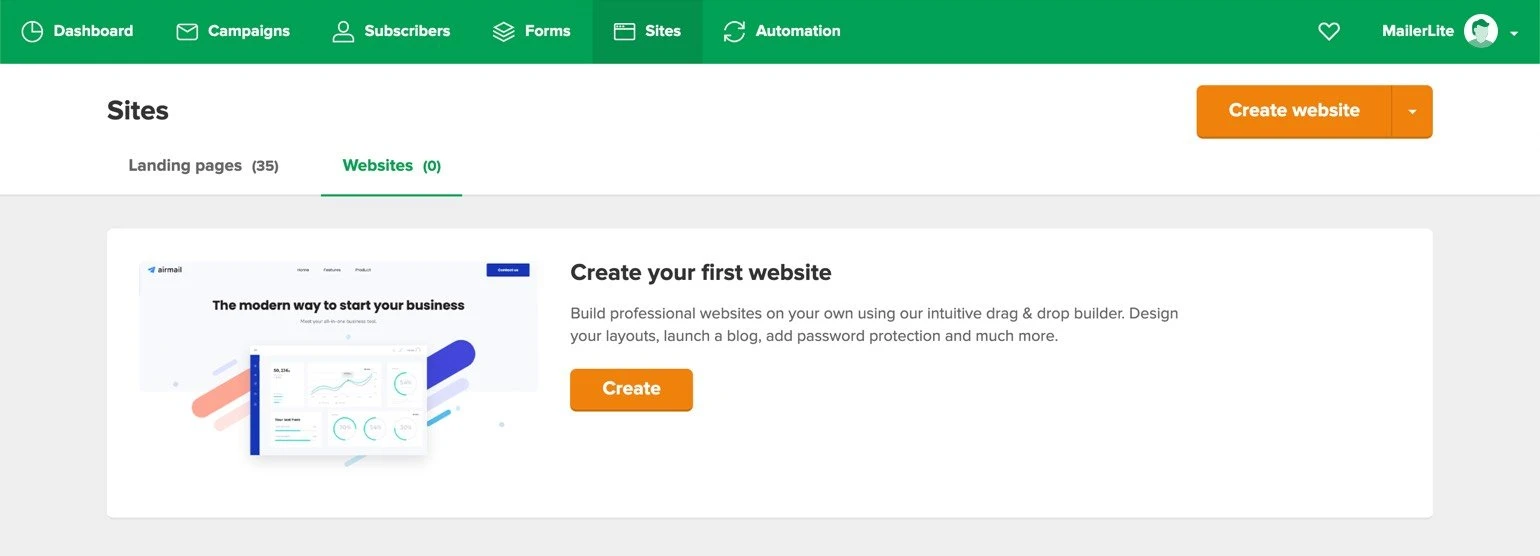
We’ve put a lot of effort into creating new features that’ll help you build awesome websites. To get started with your first website, go ahead and navigate to Sites in the app. You’ll see the new tab Websites next to landing pages. Click on the tab and press the orange button to create your website.
Congratulations, that’s the start. The rest of this process will be just as easy. If you have a few hours to spare today, we can get your website up and running before the day ends!
Create and manage your website pages
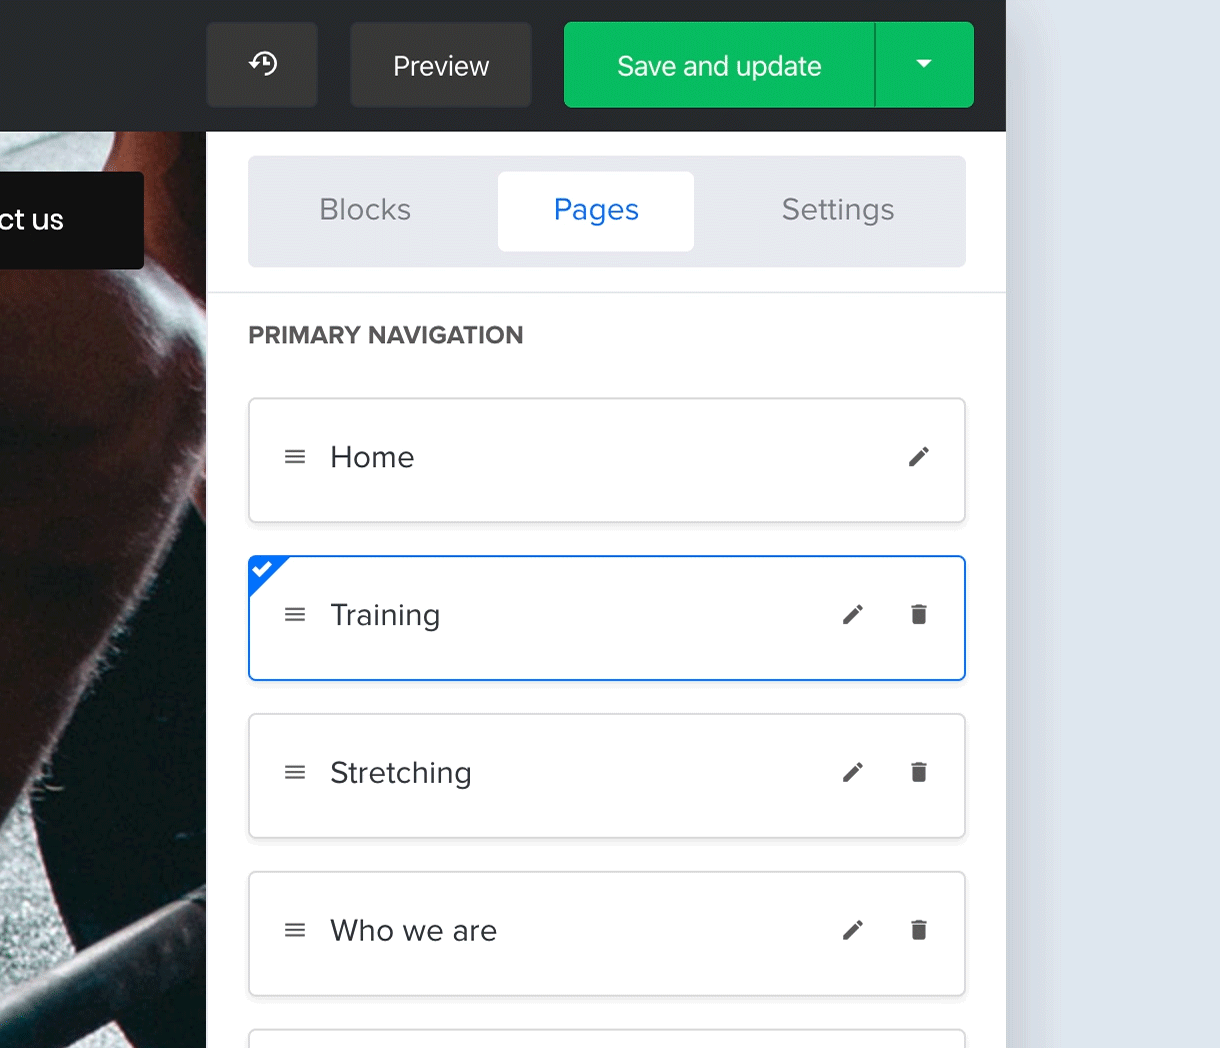
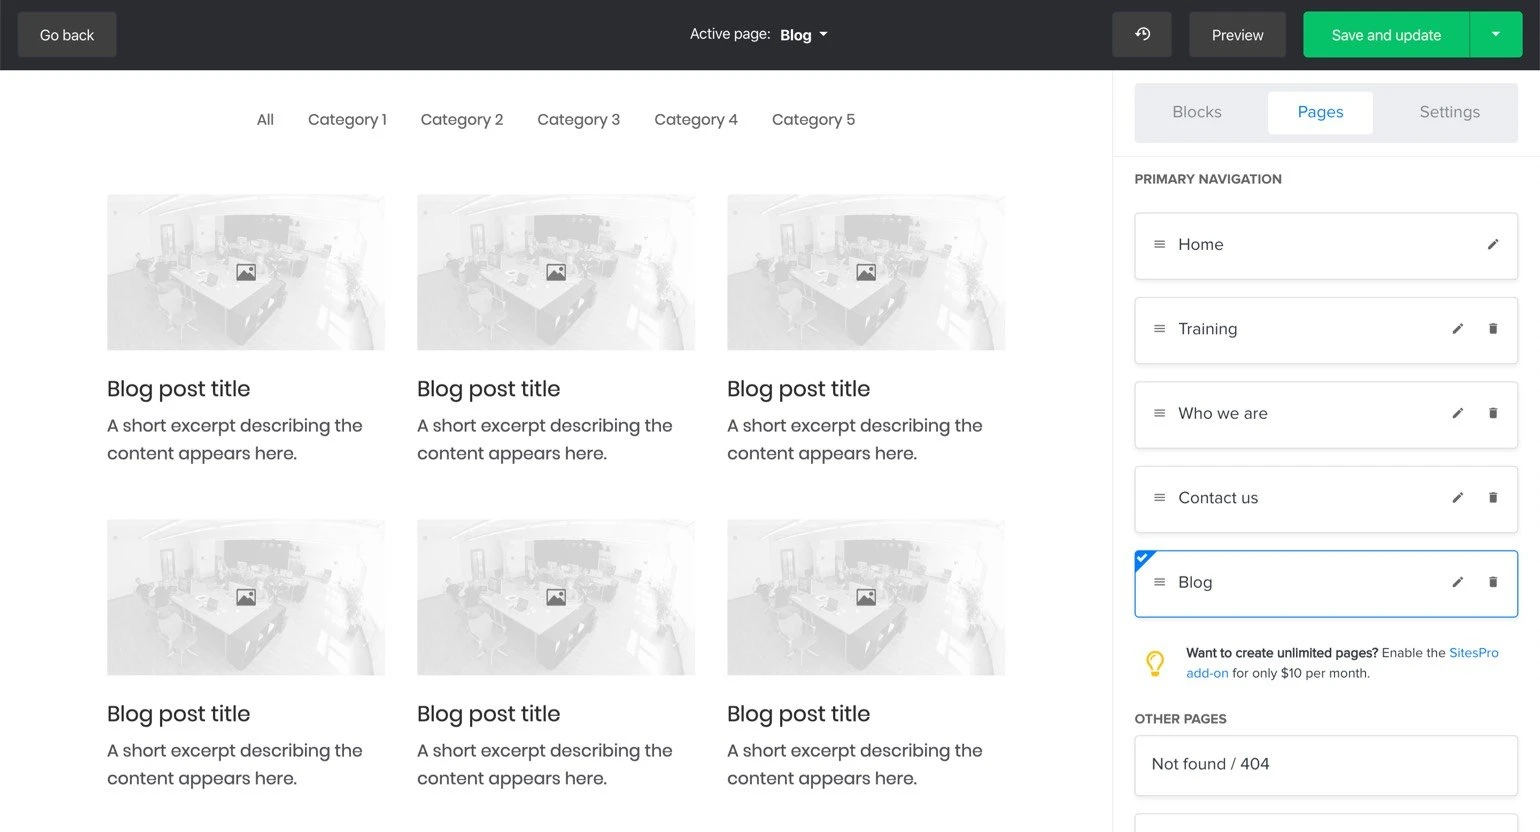
If you think about it, a website is a collection of pages that are all intertwined. The base of your website is a Home page, which is automatically created and ready to be filled with content upon opening the website builder. To expand your website, click on the Pages tab and then on Create new.
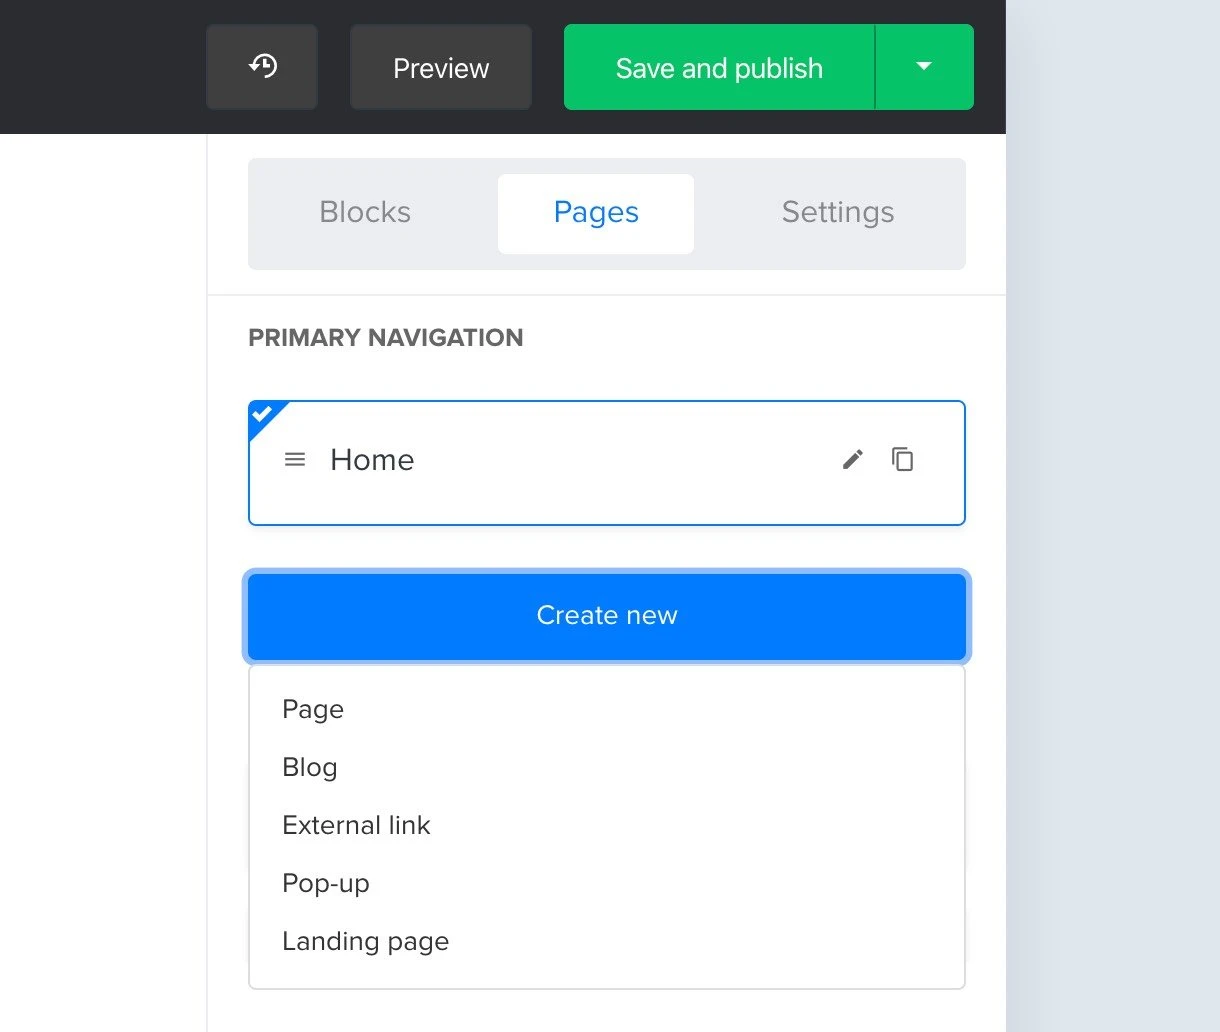
You can choose from a variety of options:
Page: Add a blank page that you can design. The slug is automatically created when you add a name but can be changed afterward. Any page can be set as the homepage.
Blog: Create a blog article overview page. Articles can be created in the Blog tab on the website overview page in the app. Each website can have 1 blog.
External link: Add a URL that redirects to an external web page.
Pop-up: Use the dropdown to select 1 of your existing pop-ups.
Landing page: Use the dropdown menu to pick a landing page to link to.
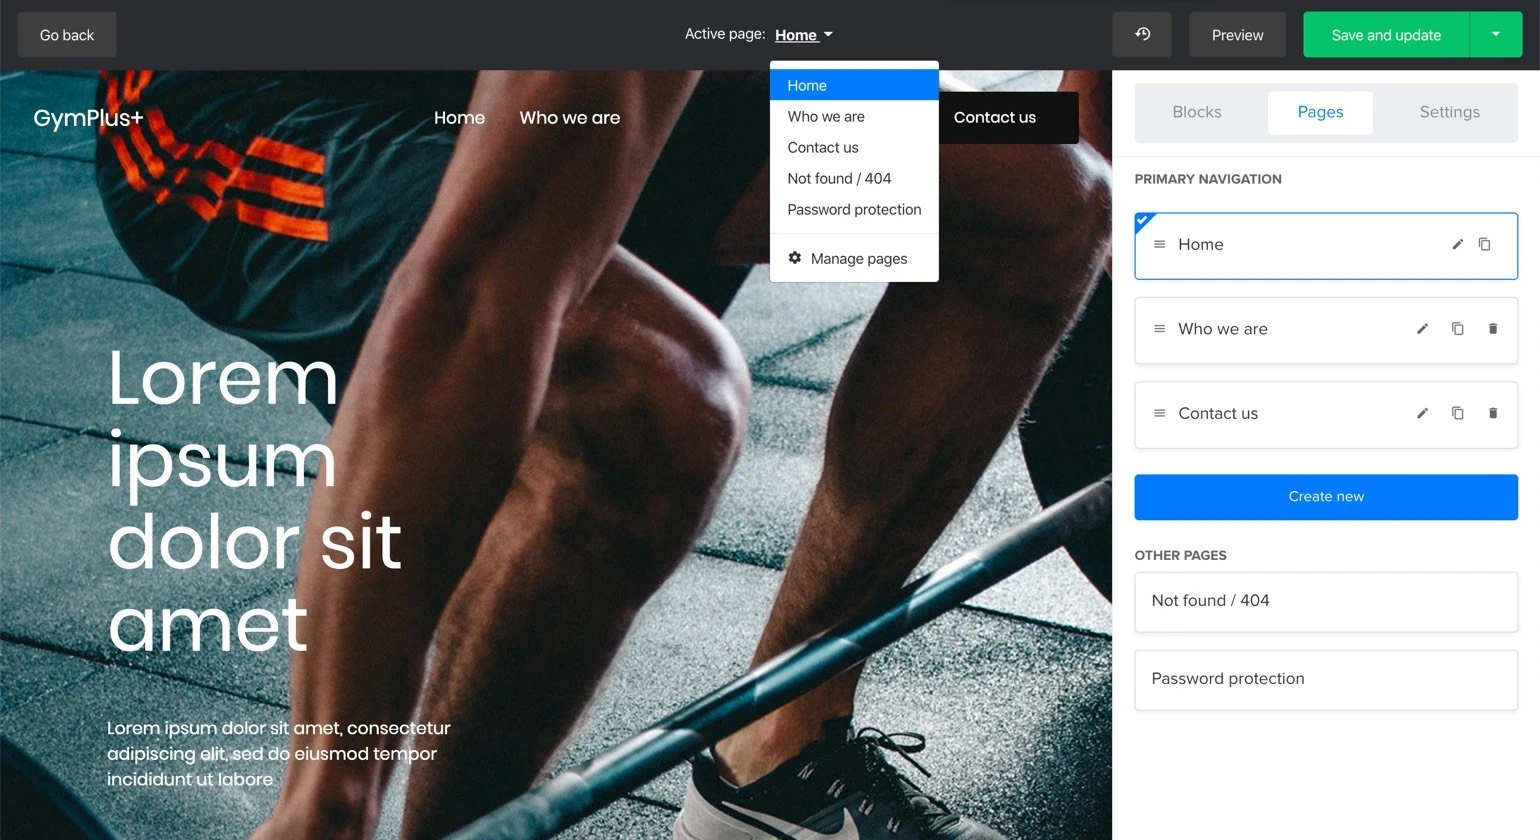
To edit a page, switch between the pages in the sidebar’s tab. You can also switch and check which page you’re currently editing in the black bar at the top of the editor.
1. Individual page features
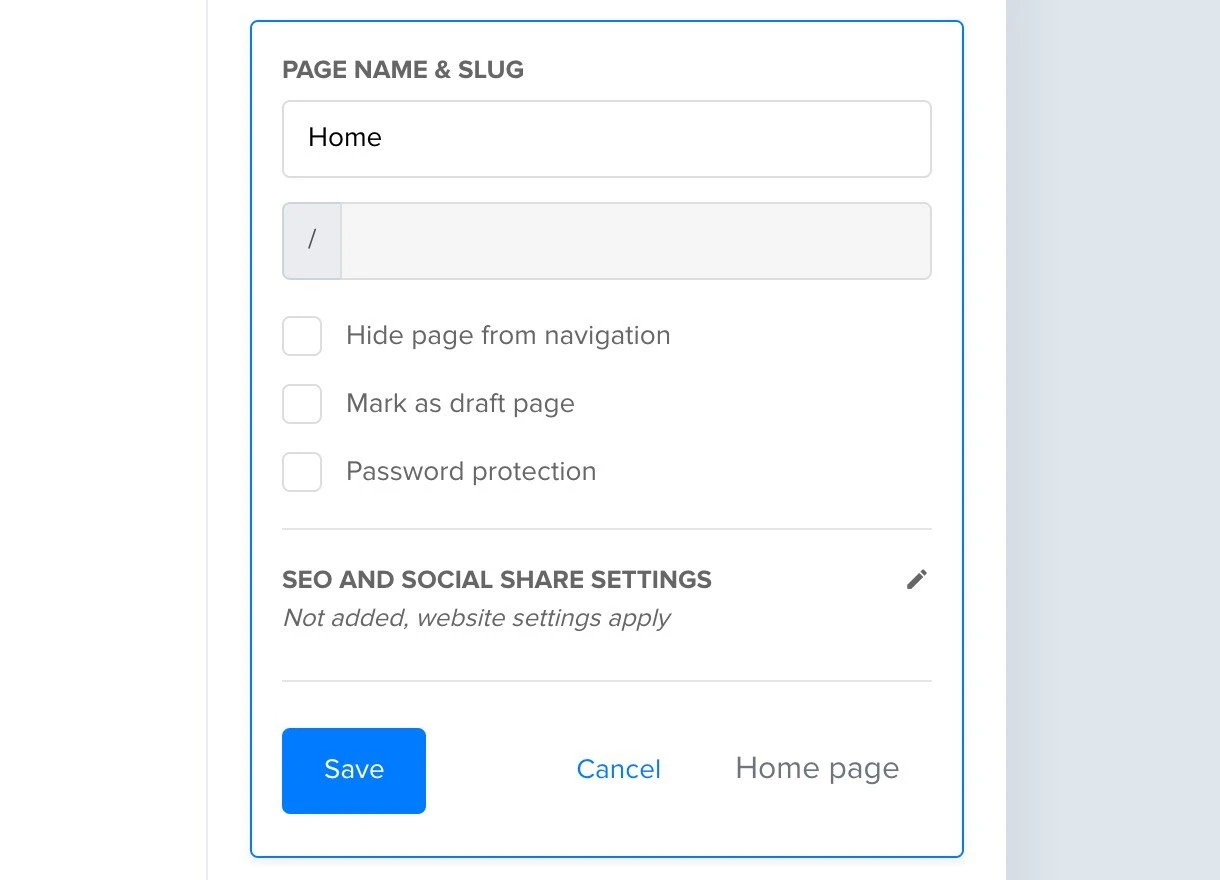
Hide pages from the navigation
Each page automatically appears in your website’s primary navigation. If you’d like to hide it, activate this option. This will only hide your page in the navigation, but of course, you can still link to it using our smart linking system.
Mark as a draft page
Page not ready for the public eye yet? This option will mark your page as a draft, making sure the content is not publicly accessible. If you make a draft page, don’t forget to also activate the hidden option, so your page won’t show up in the navigation and redirect to a 404-page.
Password protection
Select this option if you want to protect your page with a password. Enter the password of your choice here and others can only access the page if they know the magic code word. Great for promoting exclusive content that people can only access by subscribing to your newsletter!
SEO and social sharing settings
Optimize each specific page for search engines and social sharing. Here’s where you can add your SEO-optimized title, keywords and description. If you don’t add any settings here, we’ll take your general website settings and apply those.
Second-level navigation
Do you want to create a fold-out menu within your navigation? You can! To organize a page so it appears in a menu, drag it slightly on top of the page above it. You’ll see how the page will be positioned slightly more right. In the website navigation, you’ll see an arrow pointing down that unfolds a menu with this page.
2. Default page settings
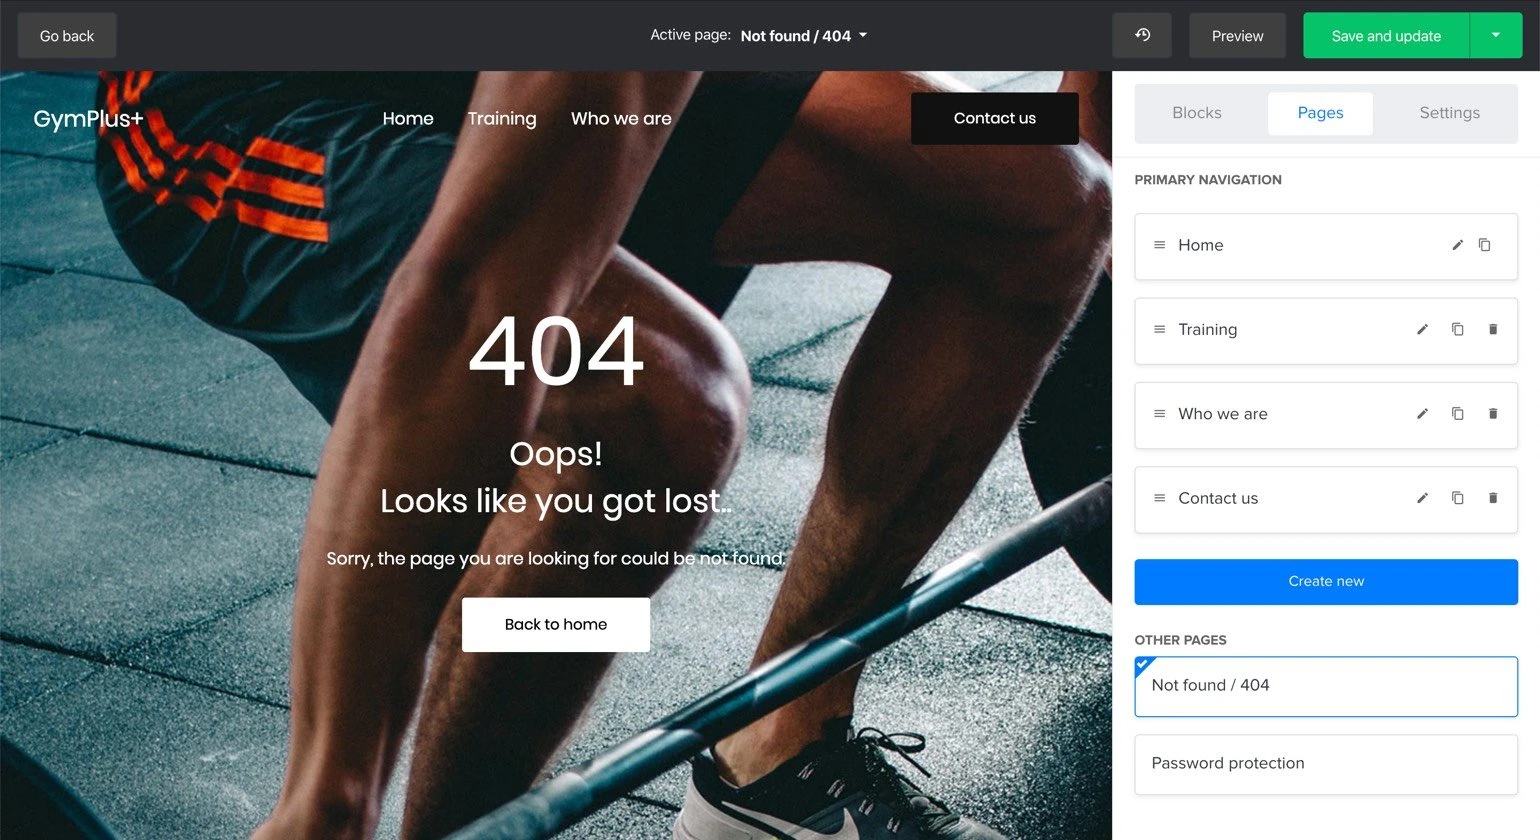
404 error or page not found
A 404 message will show up when visitors accidentally make a mistake in the URL, when a page doesn’t exist anymore or when your page is marked as a draft. With this setting, you can edit the message displayed or add additional content blocks.
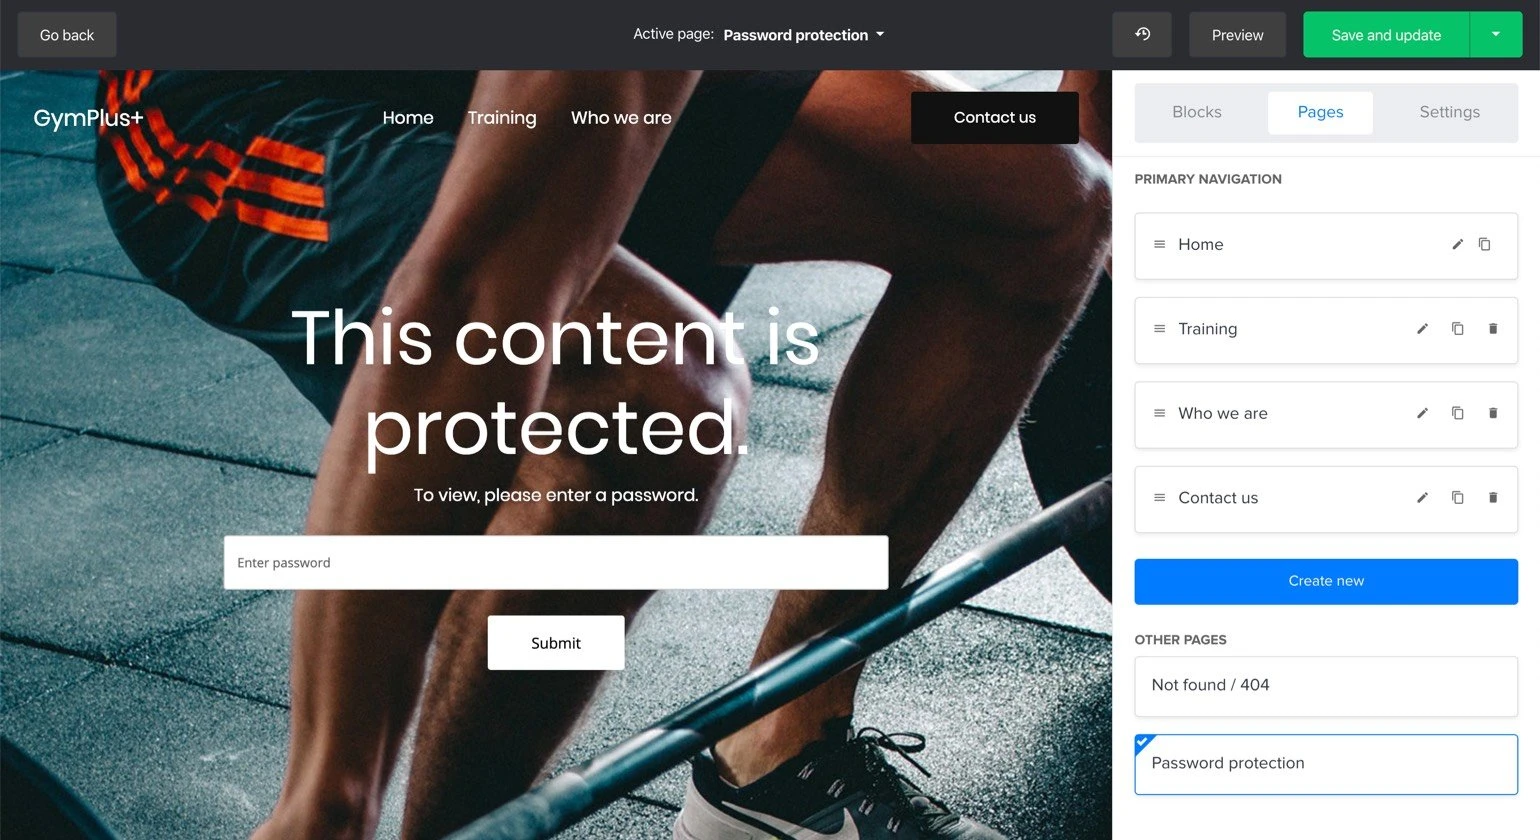
Password protection
If you’ve activated the password protection option, this is where you can design the landing page to unlock your content. Keep it simple with just the unlock field or add an image or text.
Design your new website
With the MailerLite website builder, you can easily build and design your website exactly in the way you want to.
With the design settings, you can change your design globally so the same design settings apply to all of your internal pages. Inline editing is available so you can edit text content in the same way as our rich-text editor.
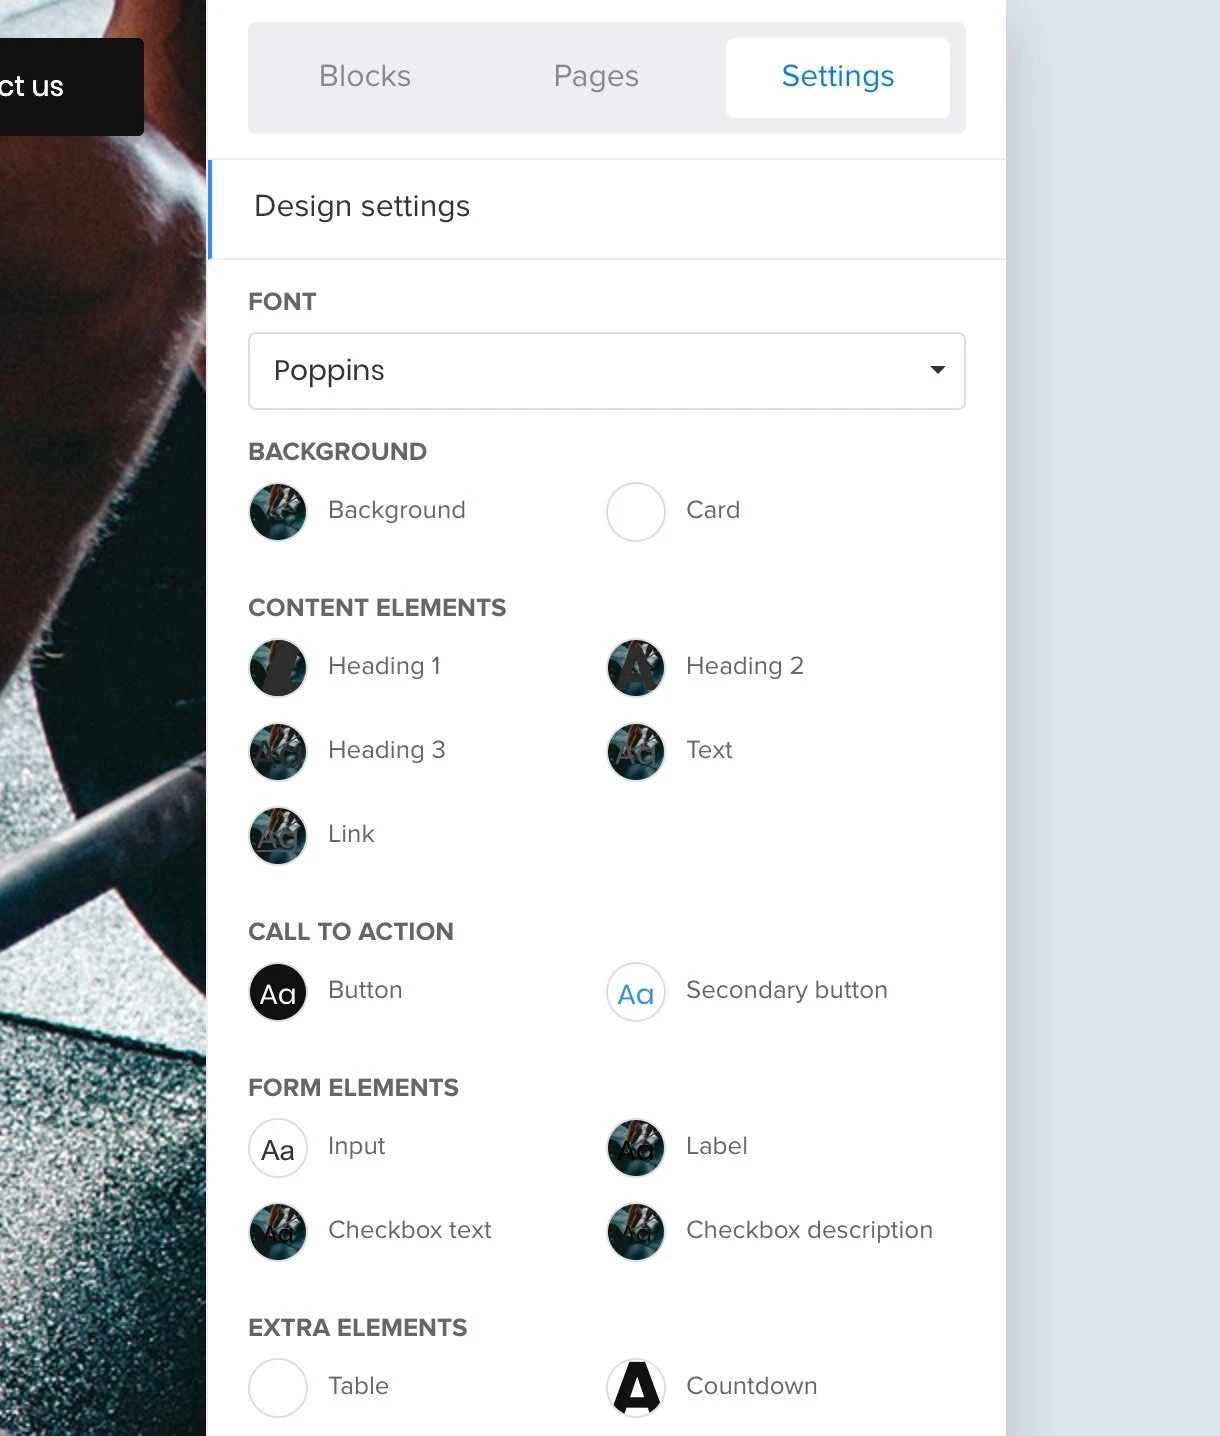
Over 20+ content blocks help you design your pages
With the website builder, you can drag & drop over 2content blocks to create a website within no time. We’ve prepared many content blocks, from image carousels to contact forms. All blocks are divided into categories so you can easily navigate between them. The search feature helps you to find blocks faster.
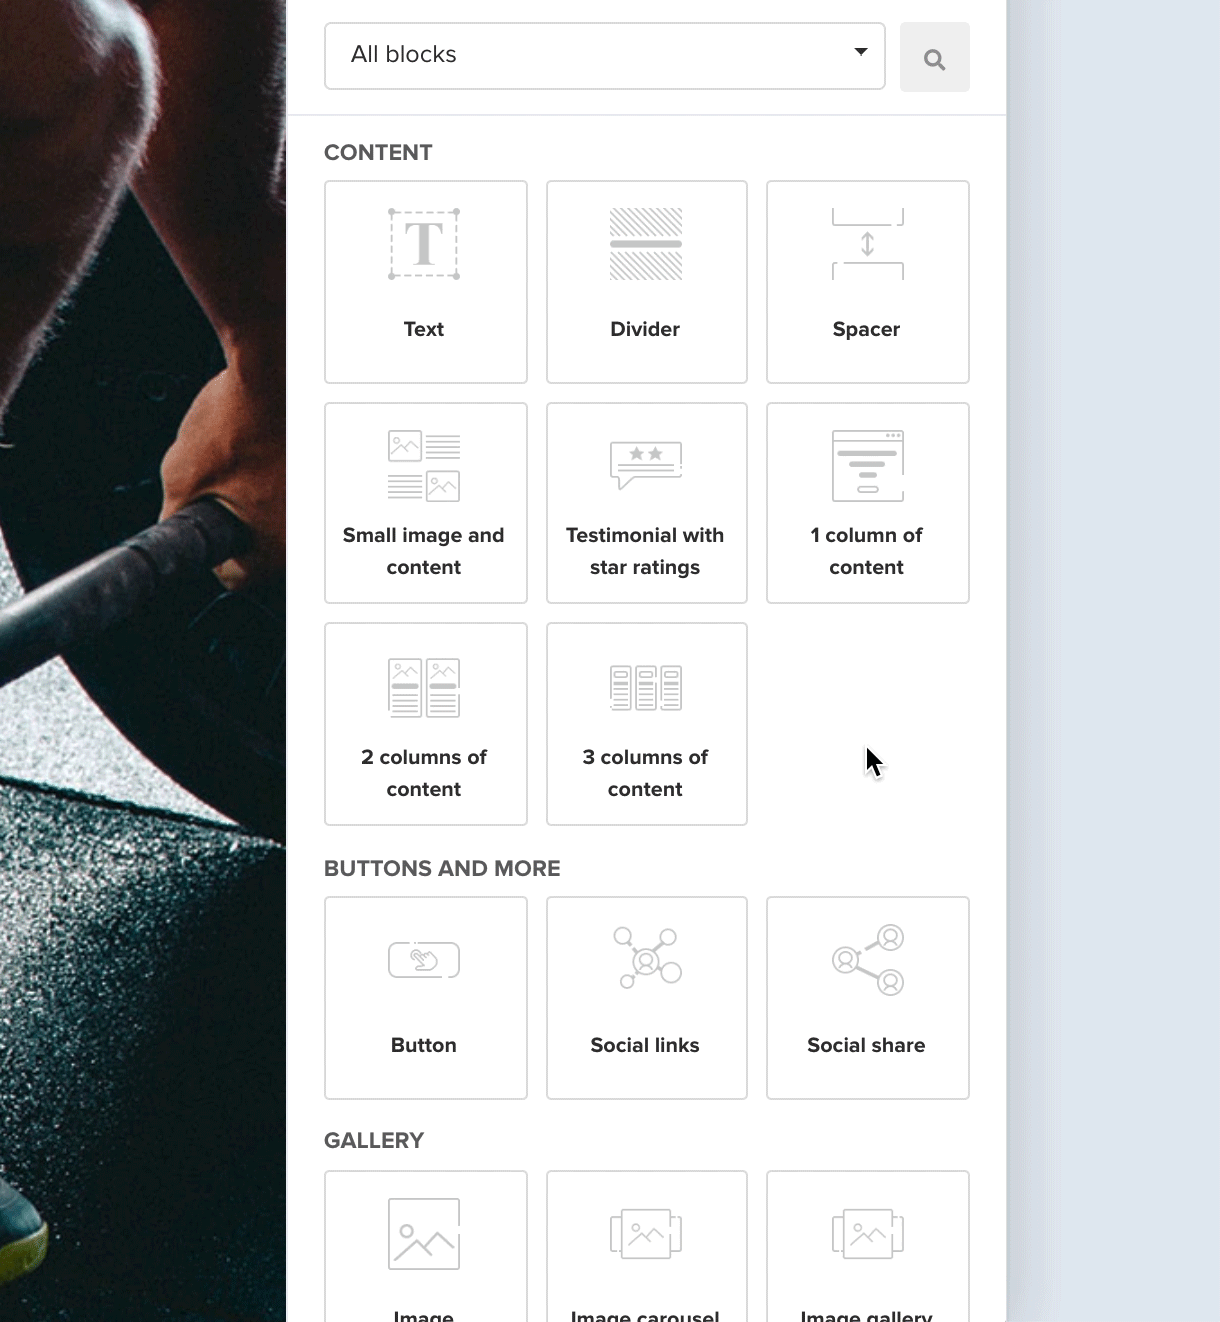
But first, let’s have a closer look at our favorite content blocks: signup forms, surveys and quizzes.
Signup forms
As in our landing page builder, you can also insert subscribe forms on your website pages. Simply drag the signup form block into your page and start collecting subscribers.
Surveys and quizzes
Don’t forget that you can add a survey or quiz to your website! These content blocks can be found under the Special category. Surveys are a great way to get to know your current audience and attract new email signups.
The survey blocks come with a variety of question templates, such as satisfaction score, NPS, multiple-choice questions and like/dislike questions. The quiz block lets you select the correct answer, our back-end organizes the results for each participant. With the settings, you can customize the survey and quiz templates to your liking.
Start your own blog
Each website also comes with a blog, if you’d like to make use of that. To create the blog overview, pick Blog after selecting Create new. You’ll see a page with placeholders that automatically get filled once you start writing and adding blogs.
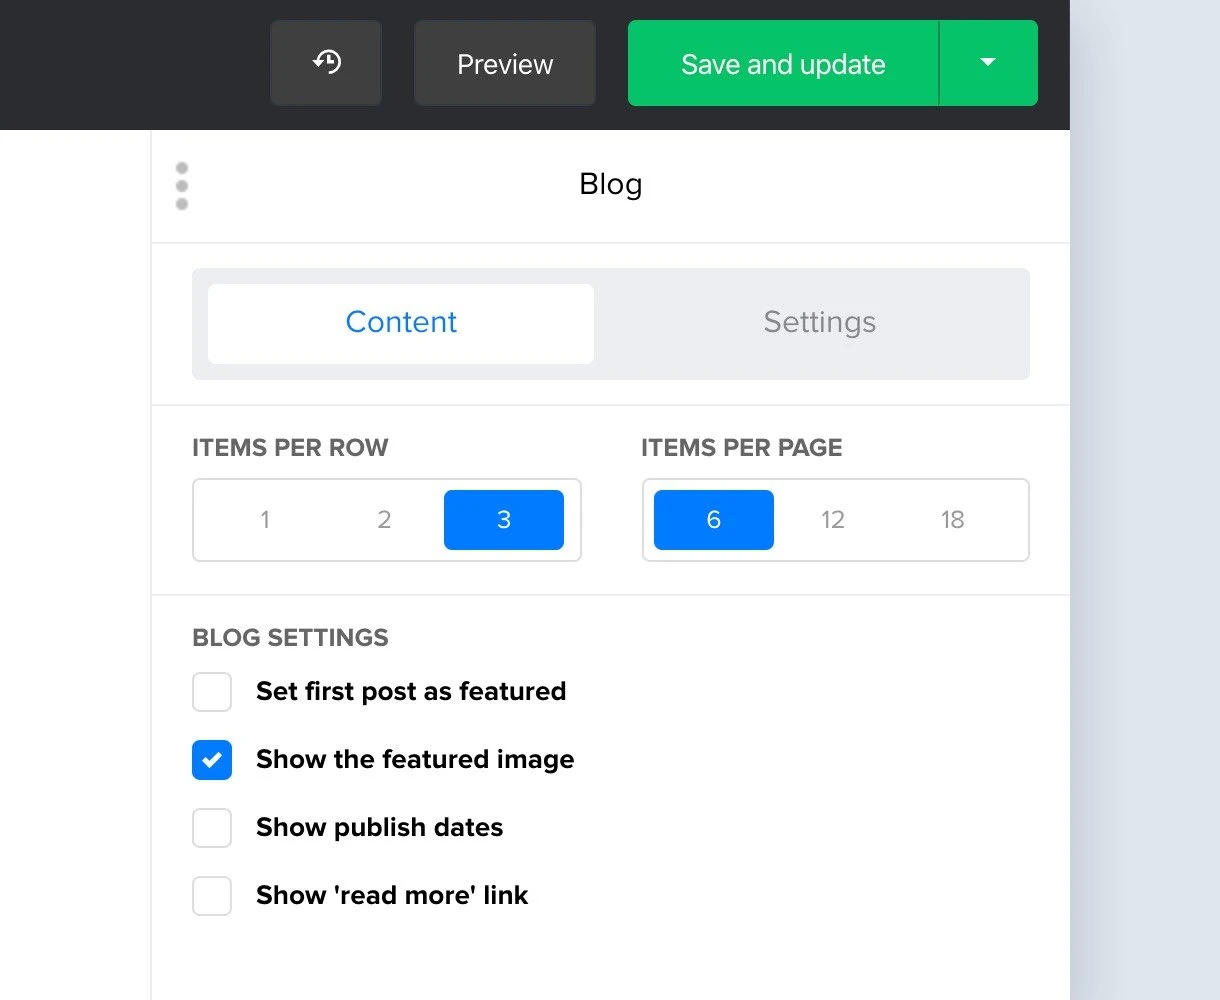
The main post area can’t be changed, but you can click on the Edit icon and change how many posts are shown per page and per row. You can also tweak the blog settings. In the Settings tab, you can play around with the design.
How to write a blog post
Once you’re happy with your design you can save your website (publish or save as draft). In your website dashboard, you’ll now see a tab called Blog.
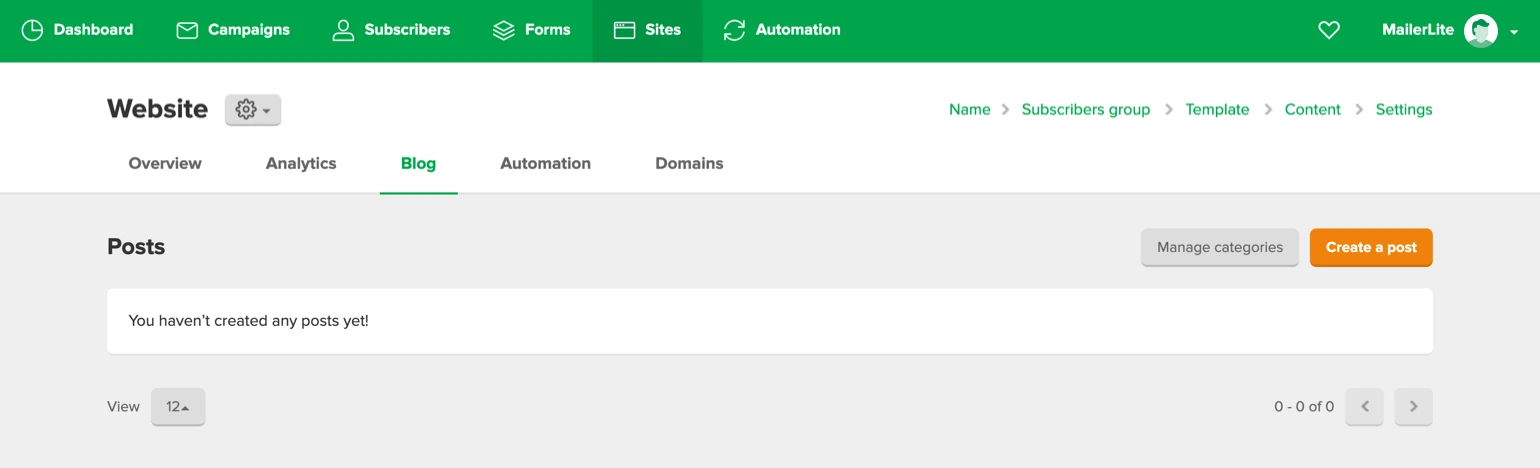
This is where your posts are stored. If you’d like to create your first post, just click Create a post. In the next step, you can add:
Post title: This is the first part of your blog post that your readers will see.
Excerpt: A short summary of what your post is about.
Categories (if any): To group related posts together and quickly tell readers what a post is about.
Featured image: A representation of the content or mood of your post.
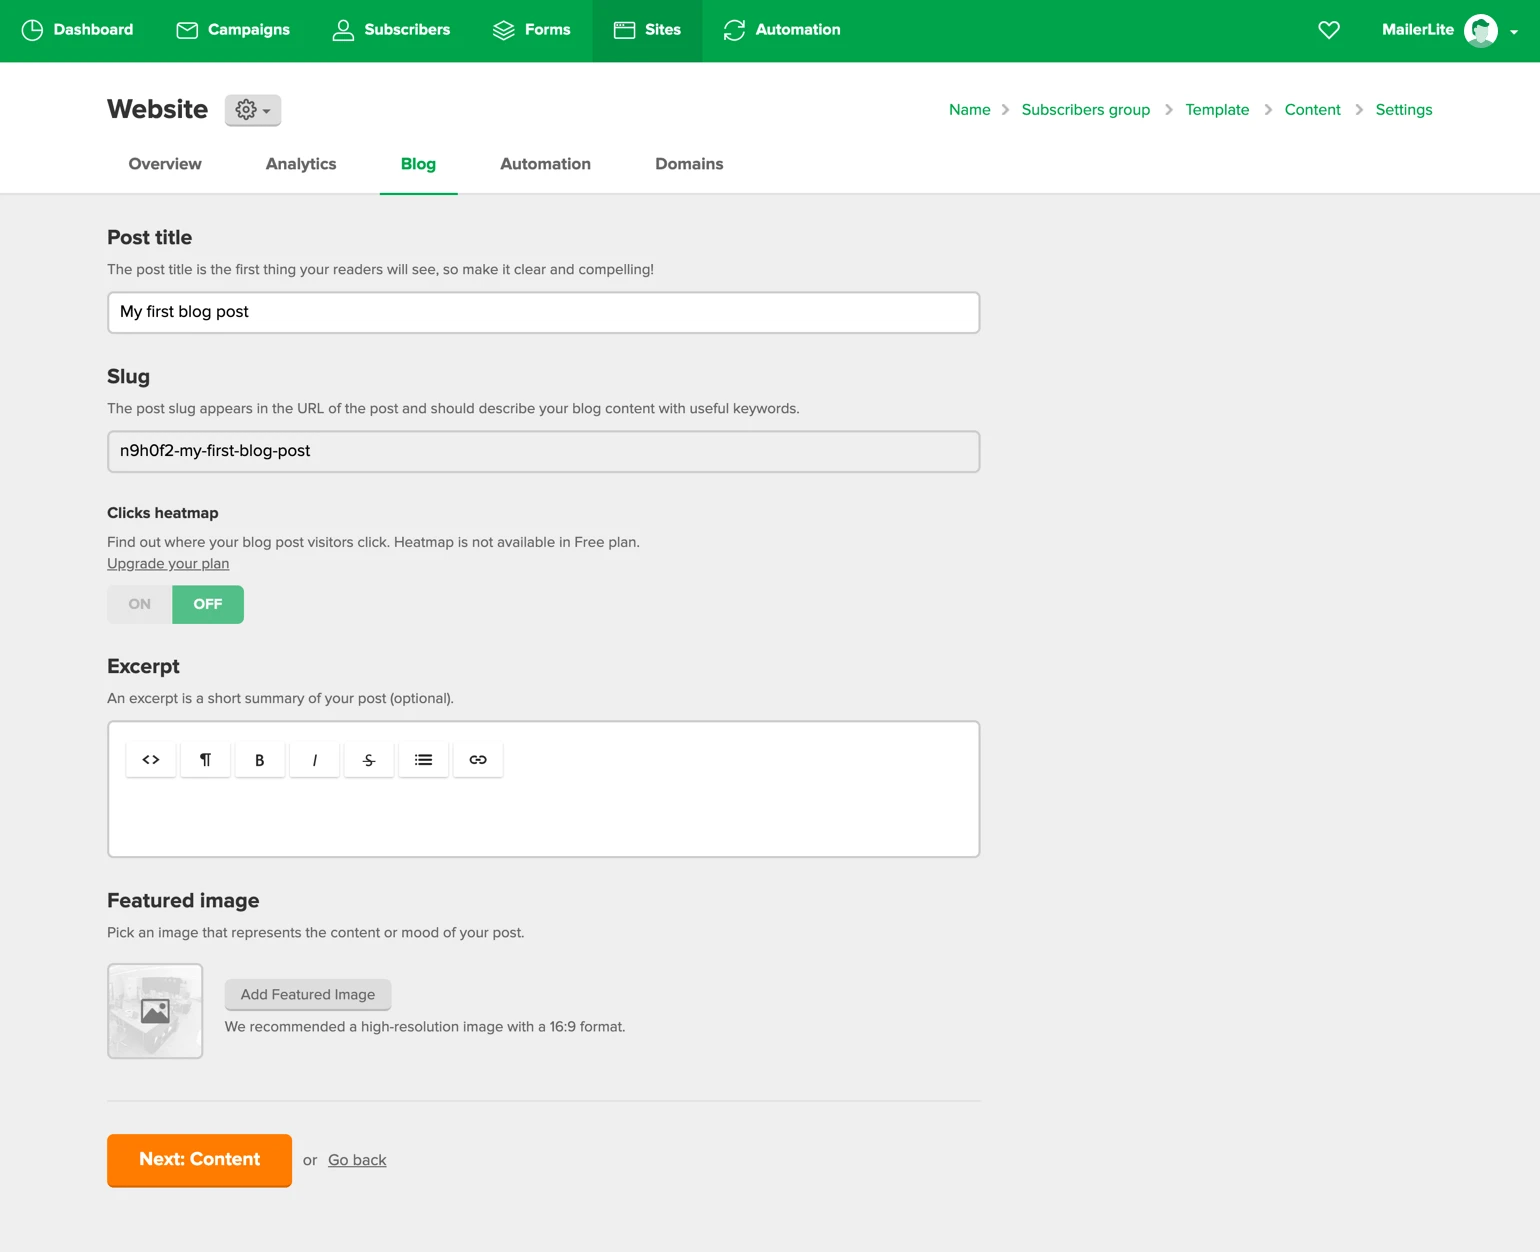
All these details can be changed later on, so don’t worry about it too much in the beginning. Click Next: Content to start writing your post. These are the highlights of the post editor.
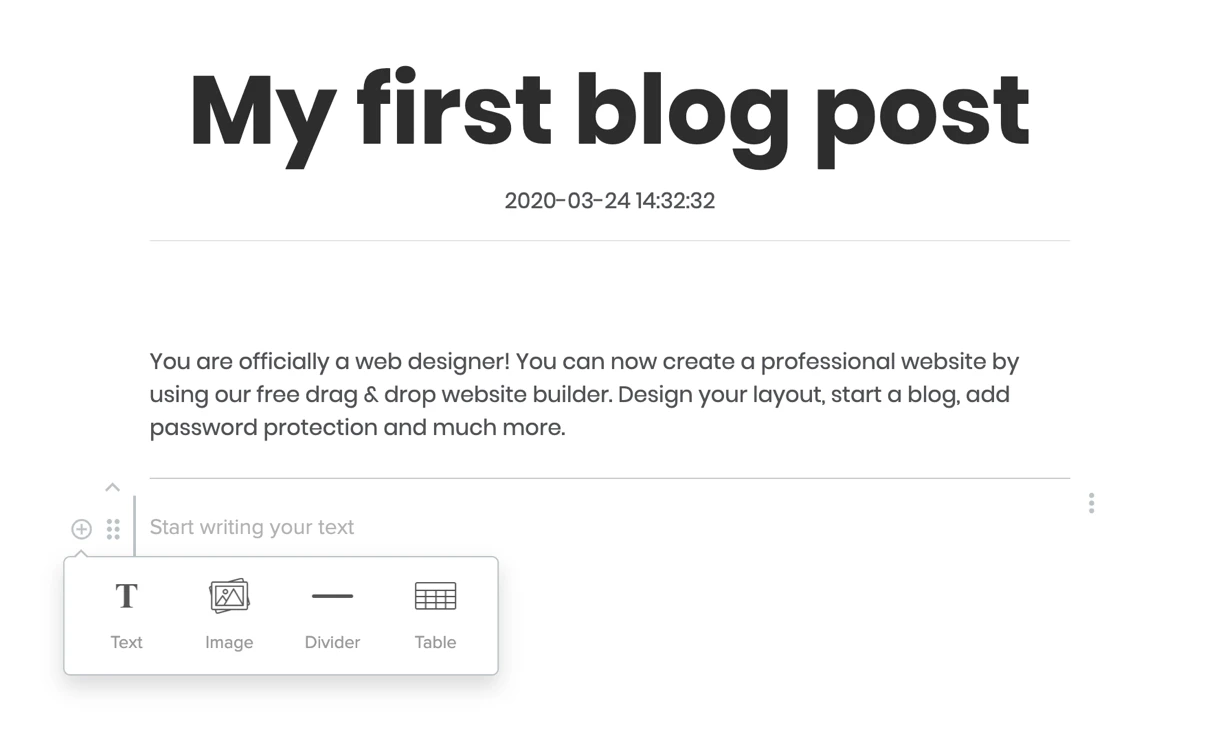
Seamlessly edit inline
Whatever you’re changing in the editor is a direct reflection of what your final post will look like.
Add your text and change the text color, size and more. Whenever you hit enter, the new paragraph is automatically converted into a text block so you can easily edit and change it. Each text block can be added, changed and moved as you go. Just drag the entire paragraph to another place and structure your text until you’re completely happy.
The available content blocks for posts are:
Text
Image blocks
Dividers
Tables
Dividing your posts into categories
Make it easier for yourself and your readers to find posts related to a certain category. To add a new category, click on Manage categories in the Blog tab. Then click Create new and add a clear, straightforward name for your category. All your added categories will show up in the post settings so you can link each post to the right category.
Publishing your website
Once you’ve created your website, you can choose to publish it directly or wait until later. If a website is not published, no one can see it when clicking on the URL.
You can make changes to a published website at any time. While you’re making changes to an already published page, your new changes will first become visible when you click Update and publish.
You can spend as much time as needed updating and revising your content. When you’re 100% ready, you can update your changes and make them publicly visible. The same goes for blog posts.
Website settings
In the website settings, you can change the website URL or add your own domain to create a personal URL.
Underneath that, you'll find the option to change your website’s favicon.
To make sure your website can be found by the masses, we’ve added the option to optimize for search. This means you can add SEO descriptions for ranking. You can find these settings under the SEO settings tab.
In the Social share tab, you can edit how to display your website when it’s shared on social networks. Add a title, description and image.
Under Analytics and custom code, you can get technical. If you’d like to track the performance on Google and Facebook, you can do so by activating Google Analytics and Facebook tracking, or by adding custom code between the <head></head> tags.
If you don't want to track any of your visitor's data, you can select the option to disable tracking here.
You can also add your own custom code in the header and page code injection fields.
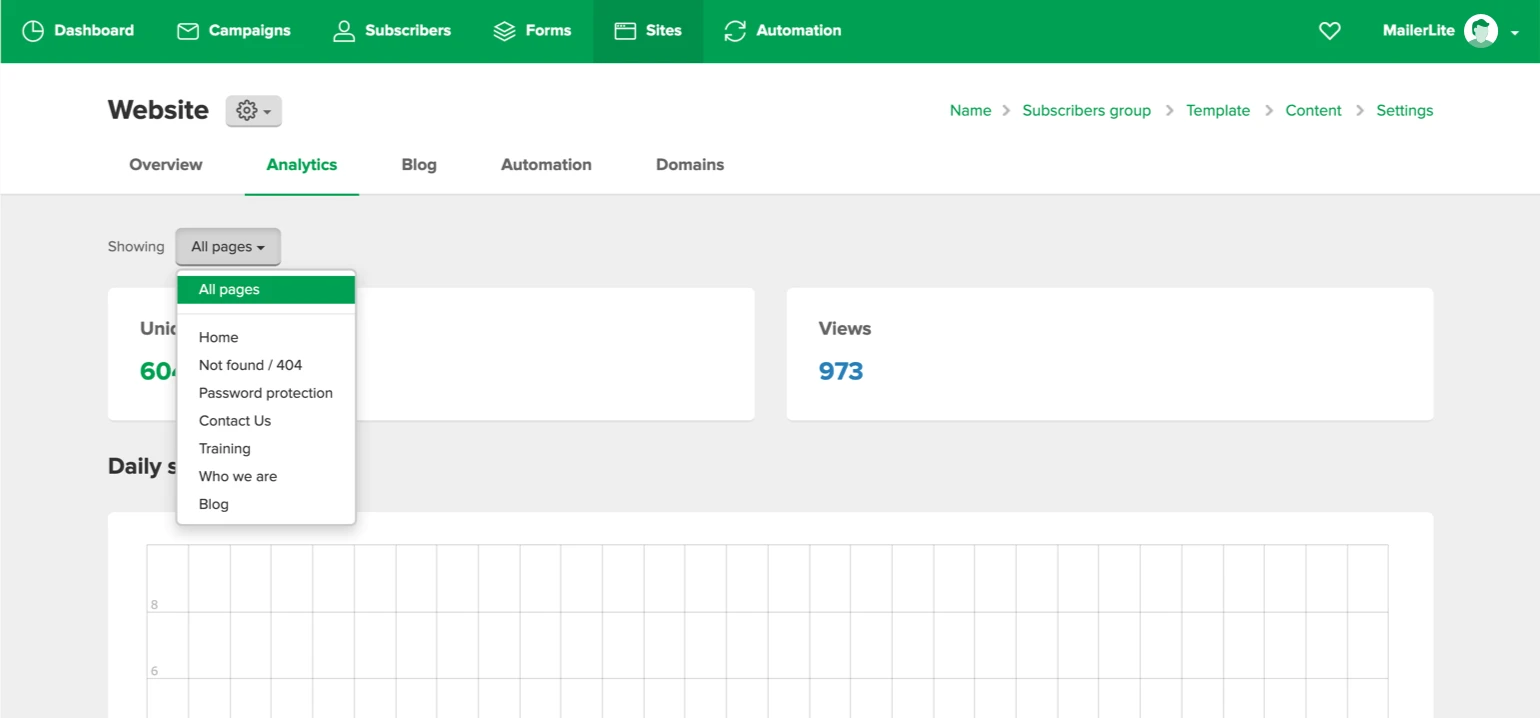
Website analytics
In your website dashboard on the Analytics tab, you can see how many unique visitors and total views your website has received. When your website has more than 1 page, you can filter each page to check the individual page analytics.
Another cool feature is click heatmaps. With this visual, you can track how visitors interact with your pages and find out which content elements or page layout work best for you. This option is available for individual pages too.
Pricing
You can create 1 published website with 5 internal pages with your MailerLite plan. Want to build more? You can create an unlimited amount of websites and pages by purchasing the SitesPro add-on for $10/month. If you already have SitesPro, you don’t need to buy it again.
As for using your own domains, this is possible when you use a paid plan or the SitesPro add-on.
Now it’s your turn!
The website builder is now available on your MailerLite dashboard, have fun with it! Let us know what you think in the comments below. If you have any questions or come across anything you’d like for us to add to the website builder, please send us an email.
