Note: If you're a Legacy (Classic) user, please log in to your account to access the dedicated Legacy (Classic) Help Center.
If you use LearnWorlds to sell online courses, connecting it with MailerLite helps you keep your email list in sync and take your email marketing to the next level.
This guide will show you how to integrate LearnWorlds with your MailerLite account so you can automatically add students and leads to groups, sync their data, and personalize your emails with custom fields.
What the integration can do:
Automatically add new leads and students to your MailerLite groups
Use auto-tags based on user actions like enrolling or completing a course
Sync LearnWorlds custom fields with MailerLite for better segmentation
Trigger automated email sequences using MailerLite workflows
Step 1: Prepare your MailerLite account
Before setting up the connection, make sure your MailerLite account is ready by creating groups where you’ll organize contacts coming from LearnWorlds. To do this:
Navigate to Subscribers.
Choose the Groups tab.
Click Create group.
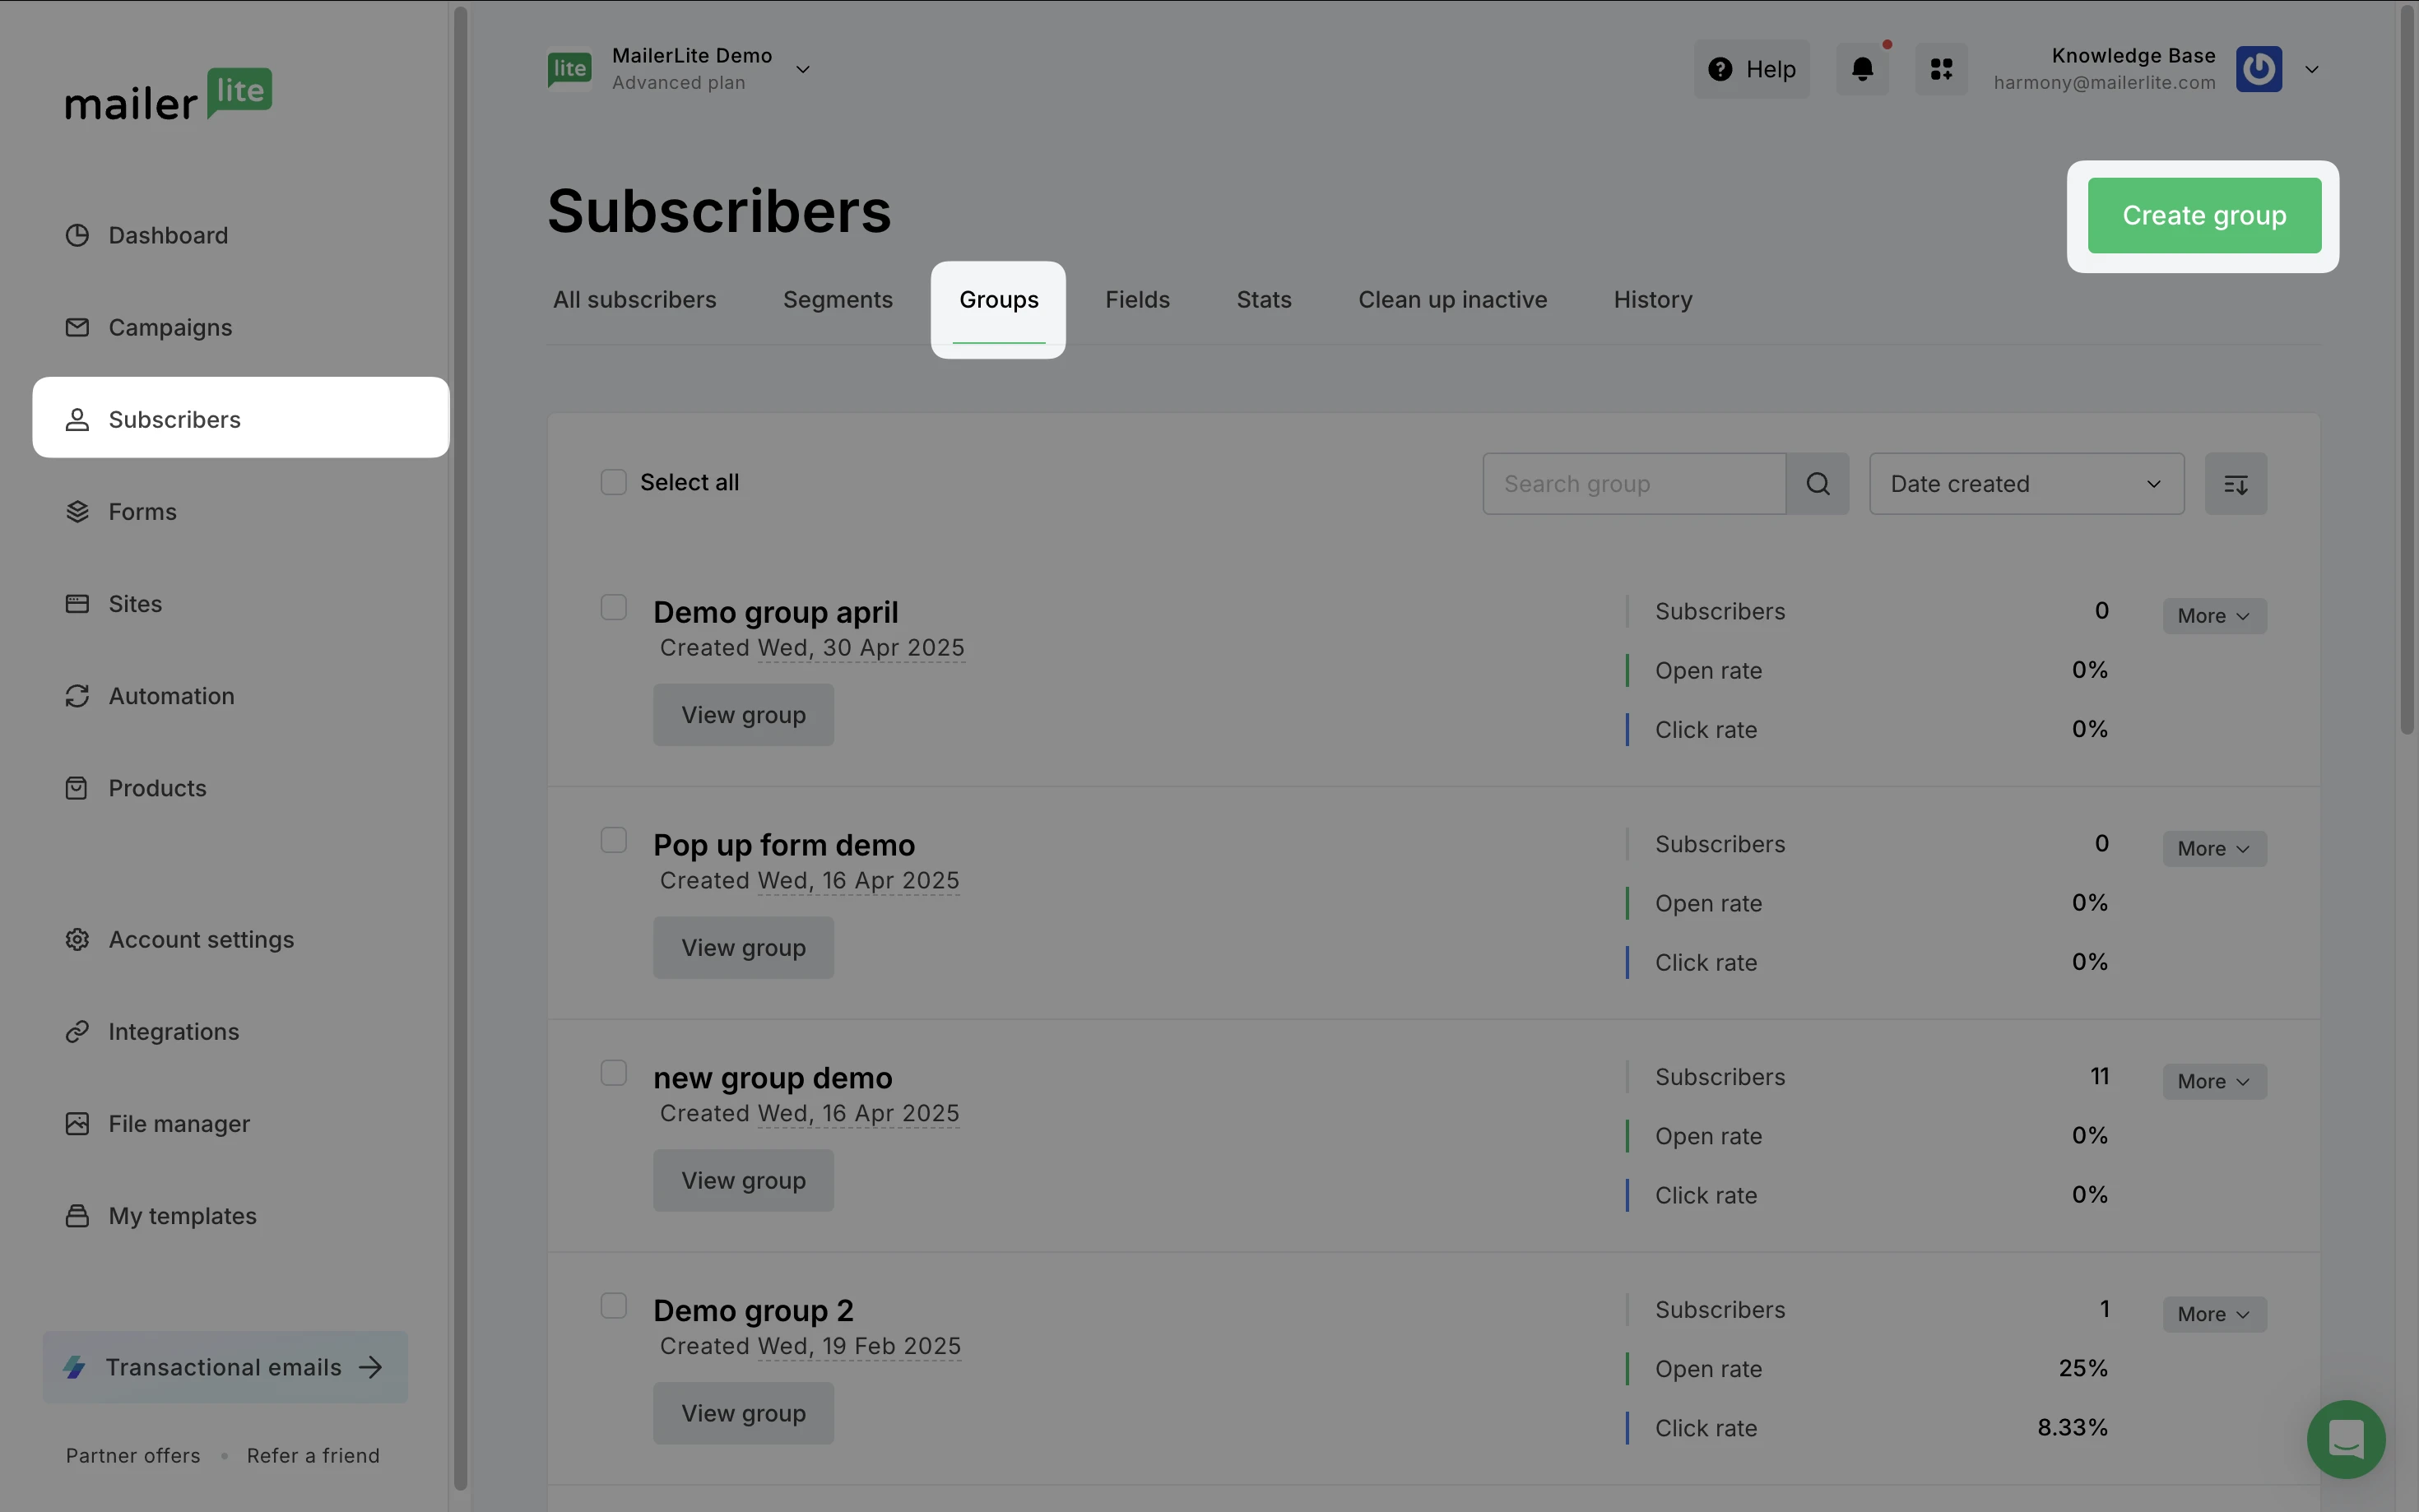
For example, you might create one group for Leads and another for Students.
Step 2: Enable the integration in LearnWorlds
Now it’s time to connect LearnWorlds with MailerLite. In LearnWorlds:
Choose the school that you wish to connect.
Go to Settings
Choose Integrations → Email integrations.
Find MailerLite and check the Activate box.
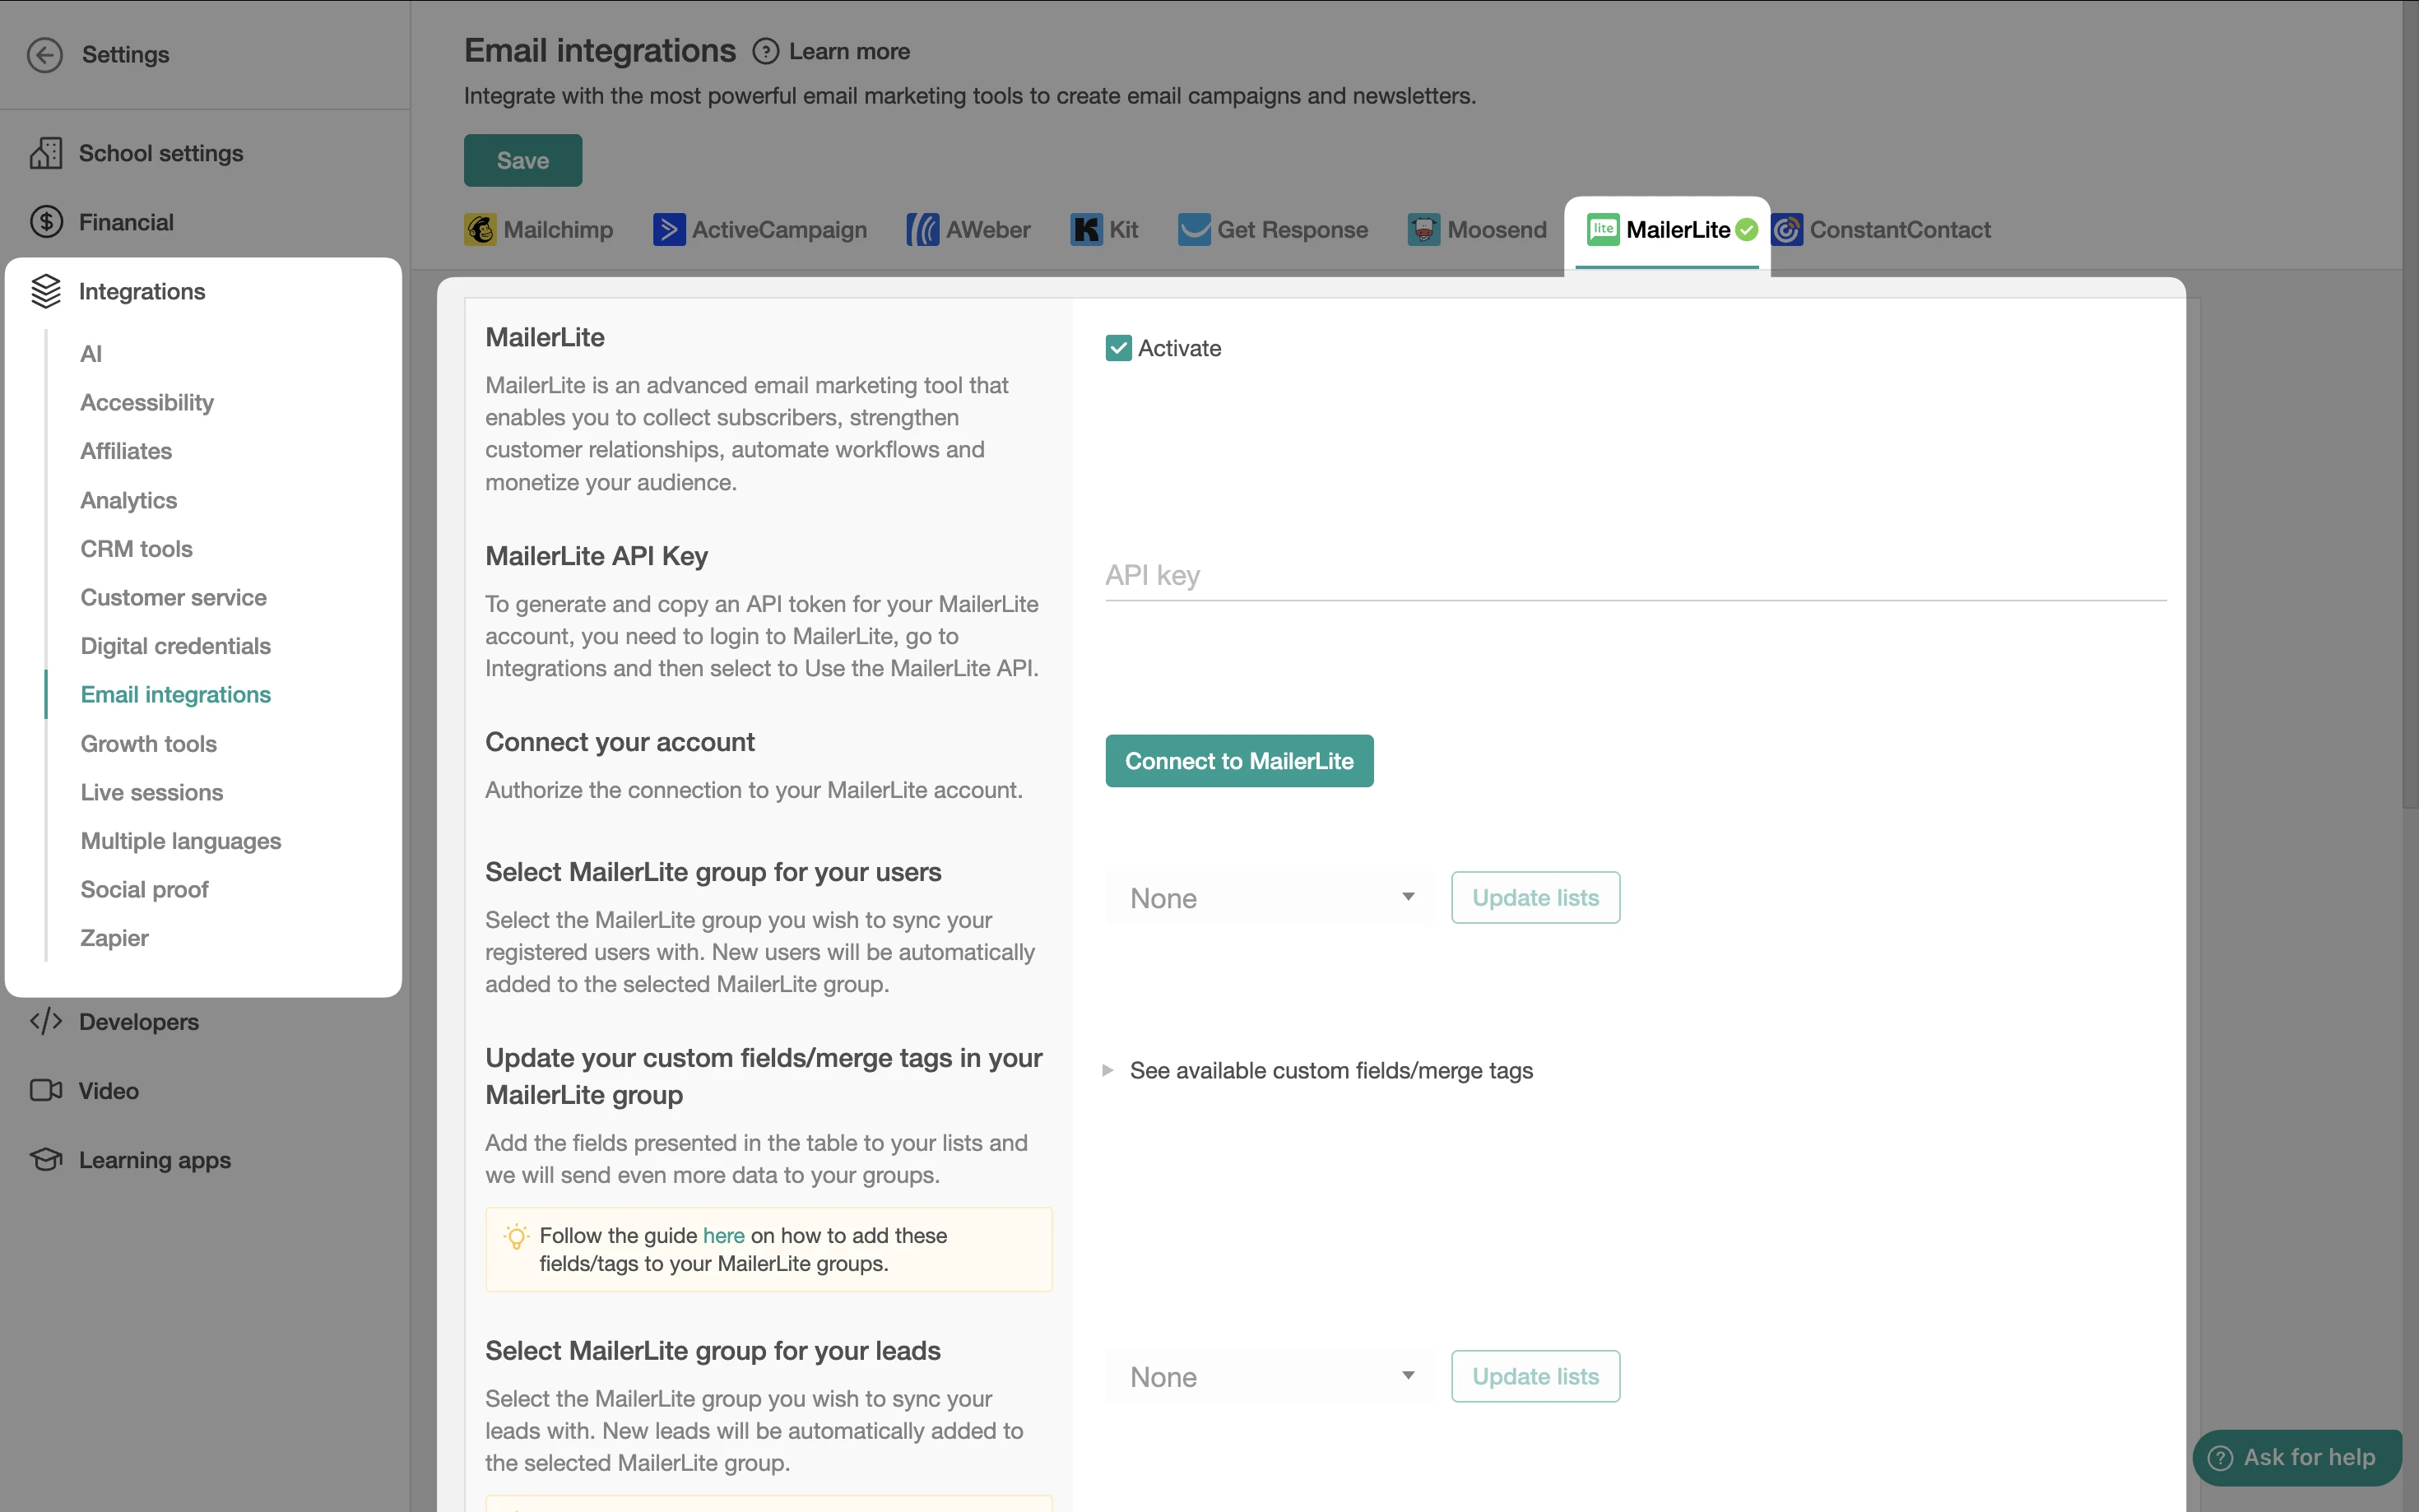
5. Open MailerLite in a new tab and go to Integrations → Developer API to generate an API token.
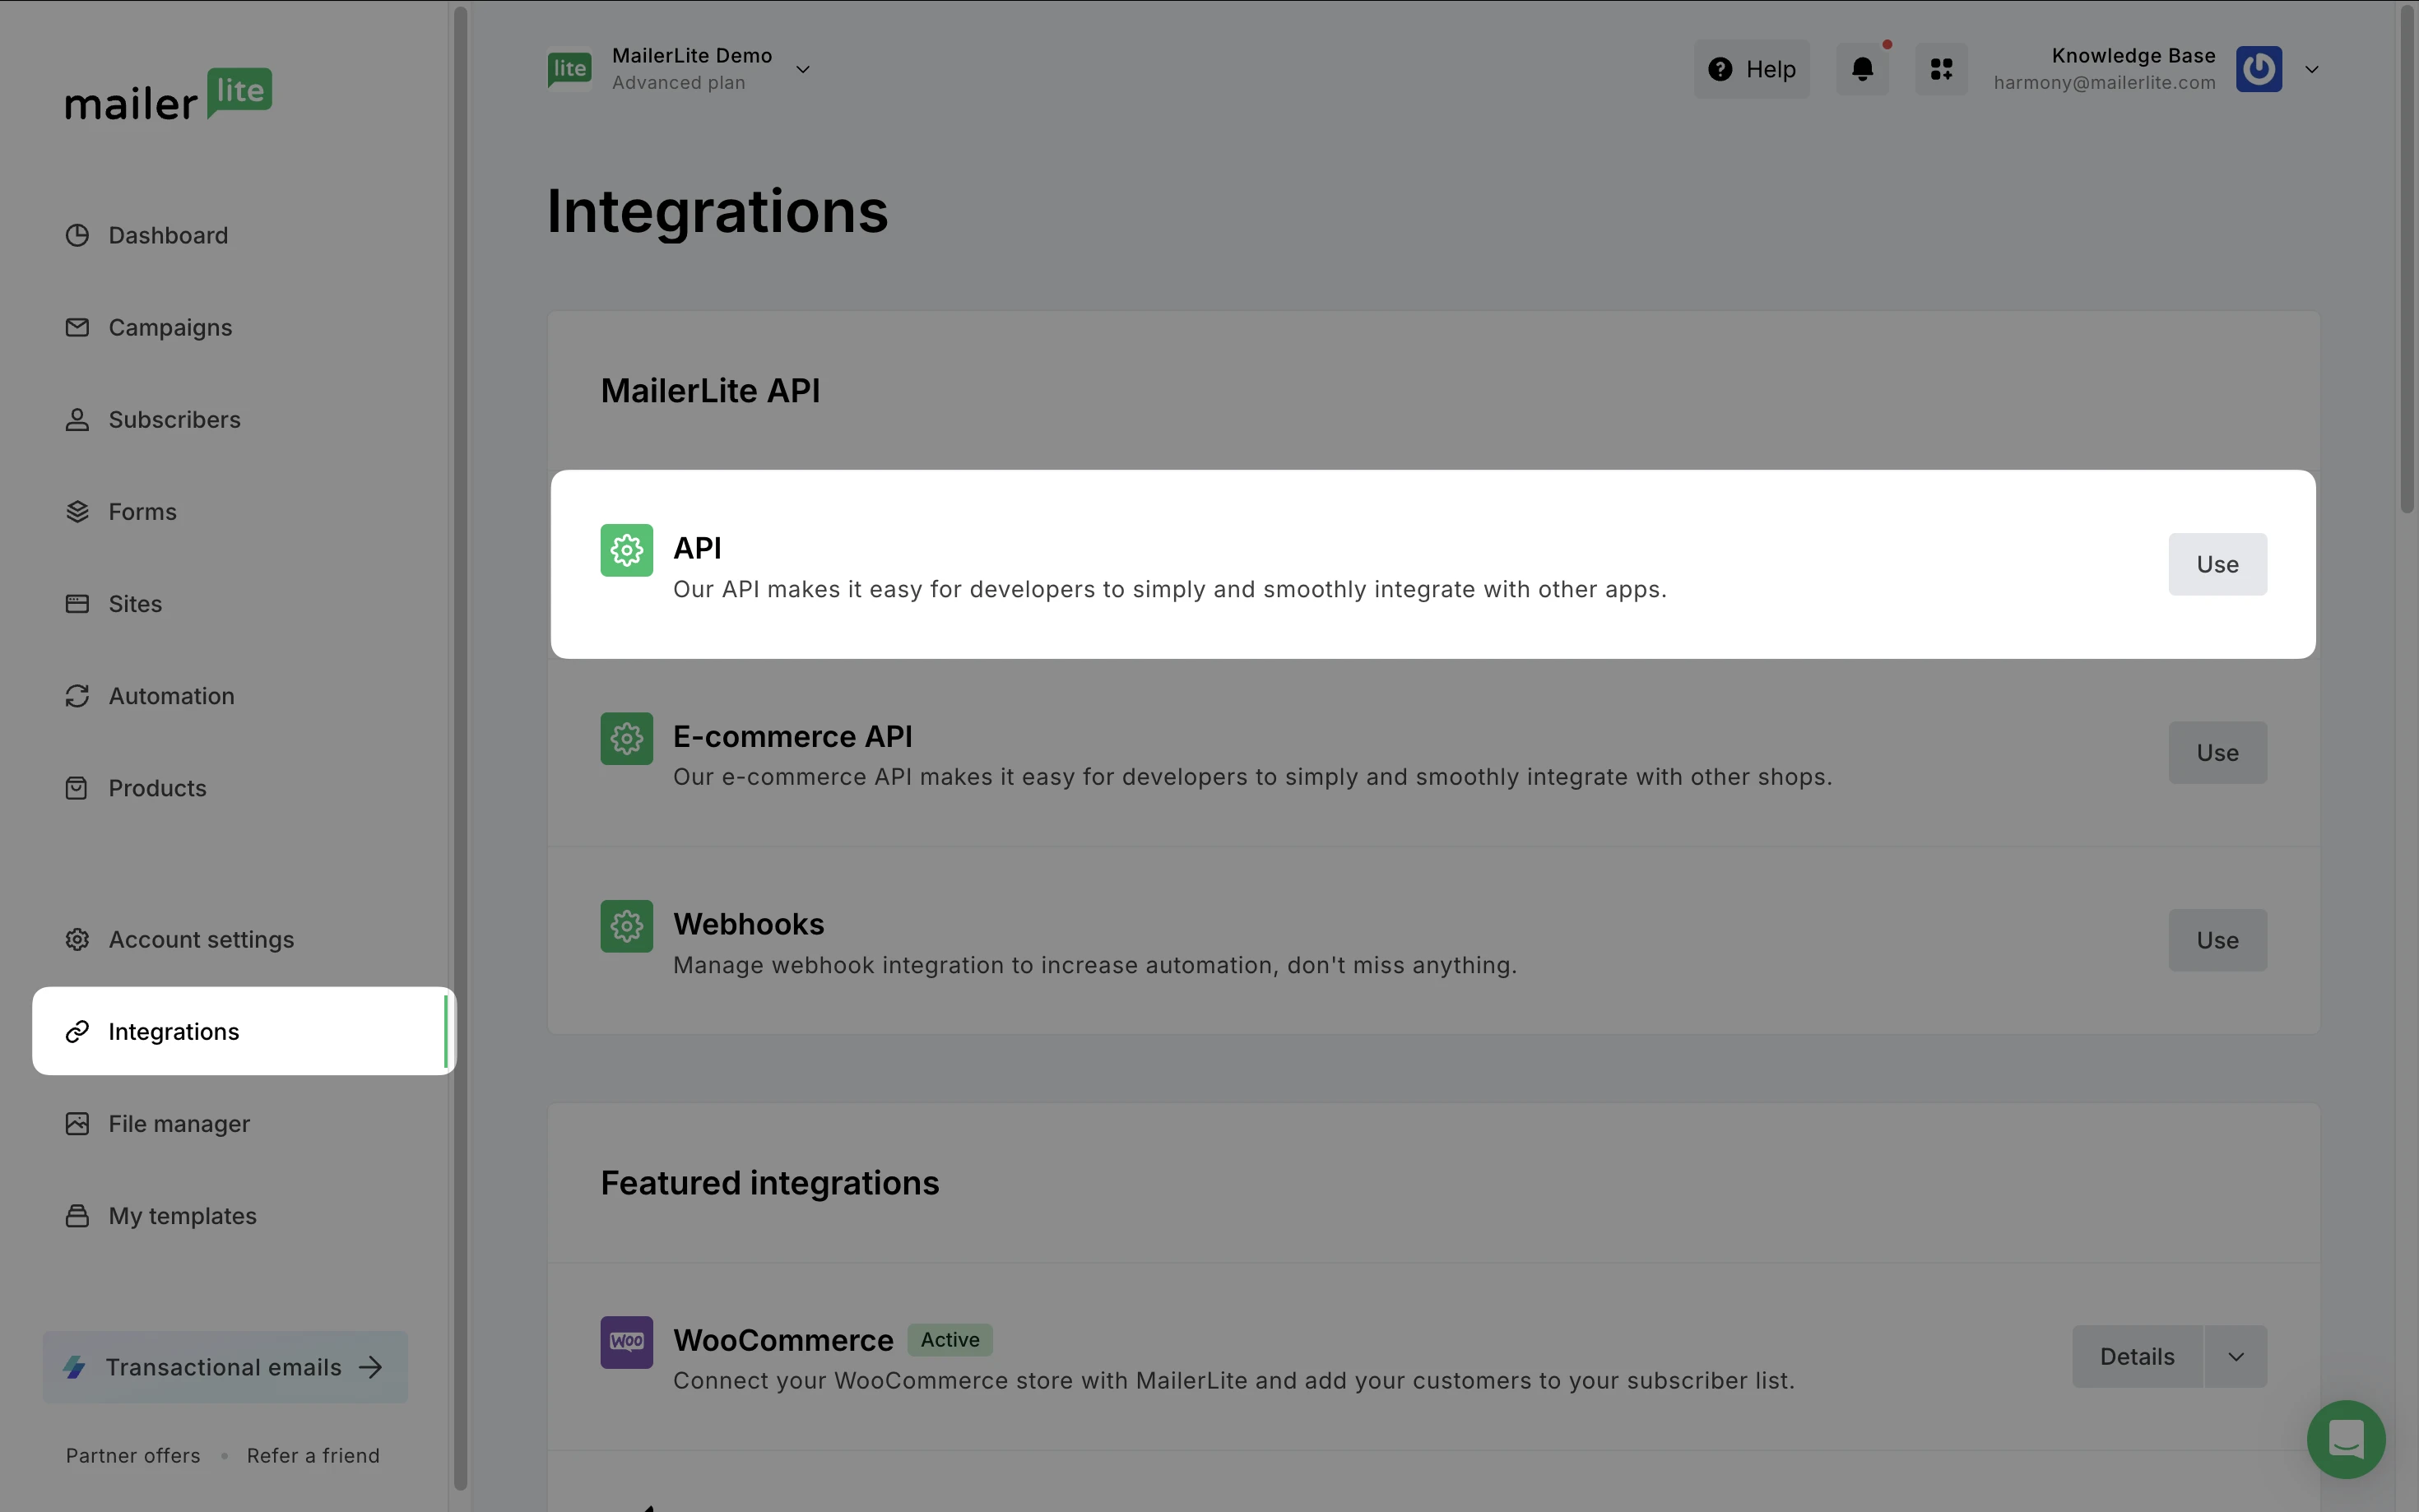
6. Copy this token and paste it into LearnWorlds.
7. Click Connect to MailerLite.
✅ That’s it! Your LearnWorlds school is now linked to your MailerLite account.
Step 3: Choose your MailerLite groups
Once connected, you’ll be asked to choose which MailerLite groups you want to sync:
Registered users (your course students)
Leads (people who sign up through lead capture forms)

Pick the groups you created earlier in MailerLite and assign them accordingly in LearnWorlds.
Step 4: Sync custom fields (optional but recommended)
To personalize your campaigns even more, you can sync custom data from LearnWorlds to MailerLite. This data will appear in MailerLite as field data.
What can be synced:
Sign-up data (name, email, etc.)
User behavior (e.g., course progress, UTM tracking)
Lead information from newsletter forms or widgets
Note: Custom fields will only appear in MailerLite after they’ve been created in LearnWorlds and used at least once.
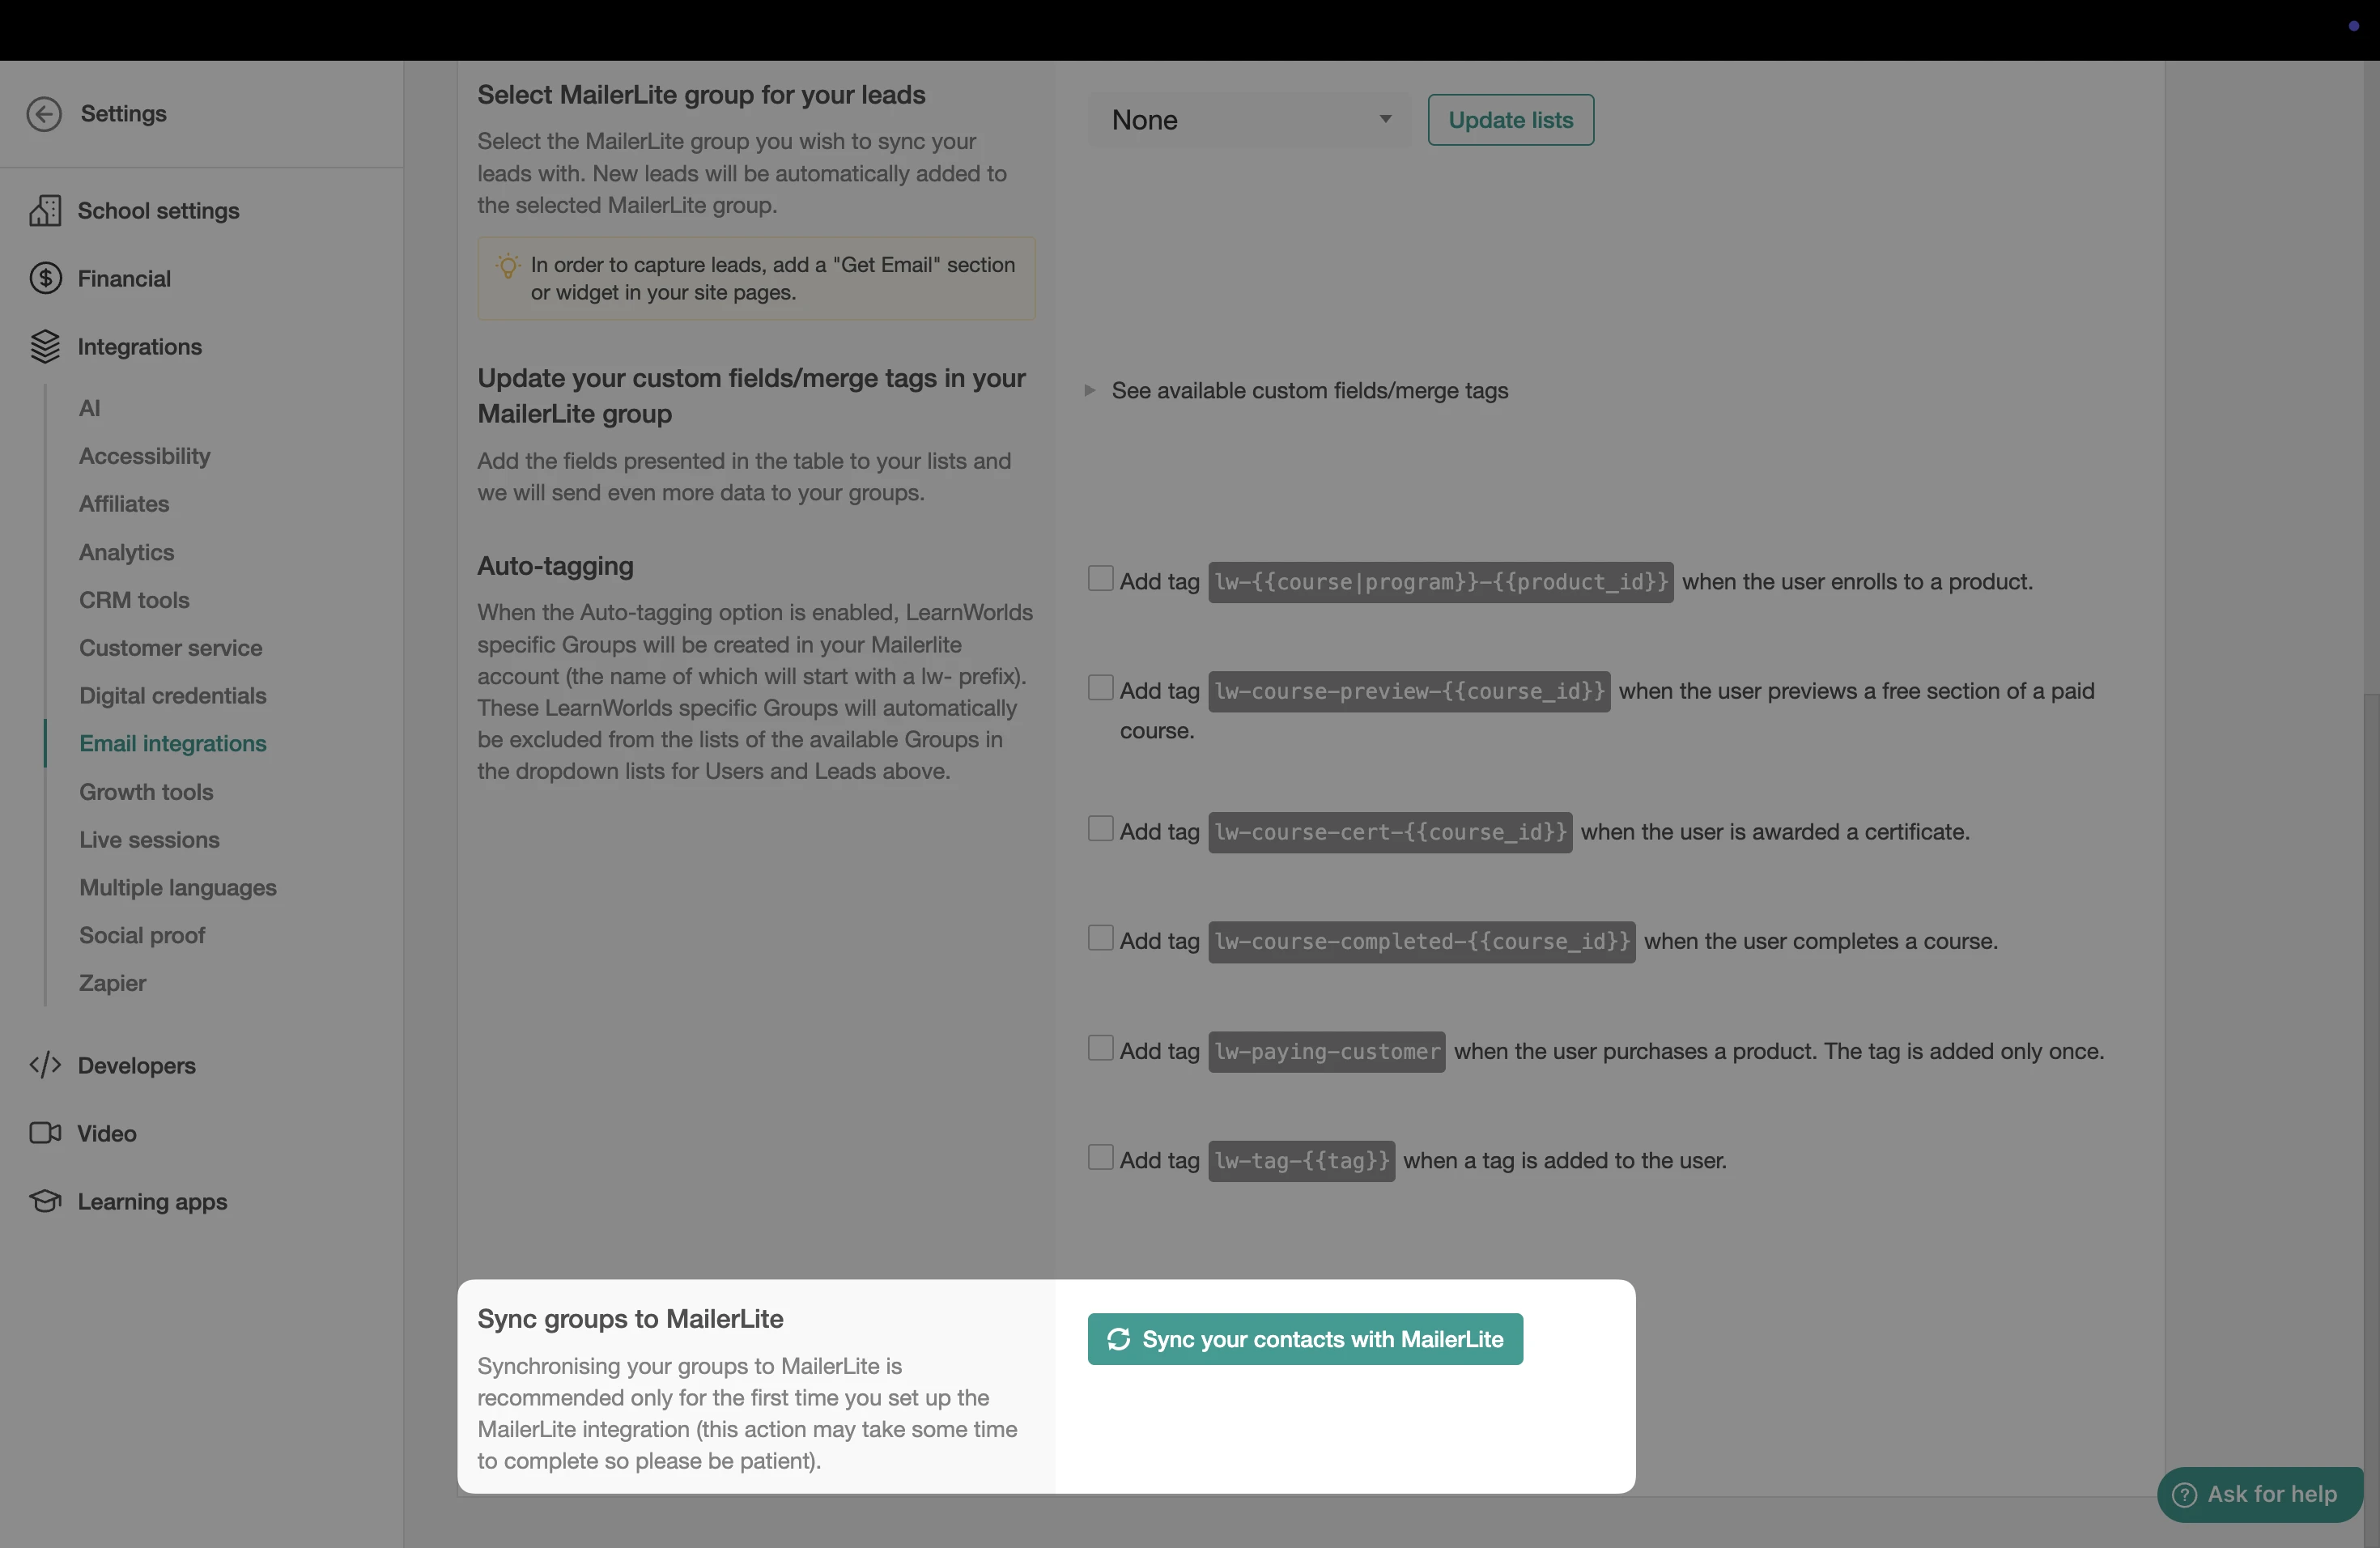
Step 5: Enable auto-tagging for users
LearnWorlds can automatically apply tags to users in MailerLite based on their activity in your school. These tags will be used to create new groups in your connected MailerLite account.

Some actions that trigger tags:
Course enrollment (free or paid)
Completing a course
Previewing content
Earning a certificate
Making a purchase (tag: lw-paying-customer)
These groups are added in real-time and can be used in MailerLite to trigger automation or segment your audience.
📝 Make sure to click Save after enabling auto-tagging in LearnWorlds.
Step 6: Sync existing contacts (first-time only)
When you connect LearnWorlds to MailerLite for the first time, we recommend running a full sync to send over your existing users and leads.
In LearnWorlds, click Sync your contact with MailerLite.
2. Wait for the sync to complete (this can take a few minutes if you have a large list).
After this initial sync, all new contacts added through LearnWorlds (manually, via API, or through lead forms) will be automatically synced with MailerLite.