Note: If you're a Legacy (Classic) user, please log in to your account to access the dedicated Legacy (Classic) Help Center.
What are custom fields?
A field is what holds the information a subscriber enters into a signup form.
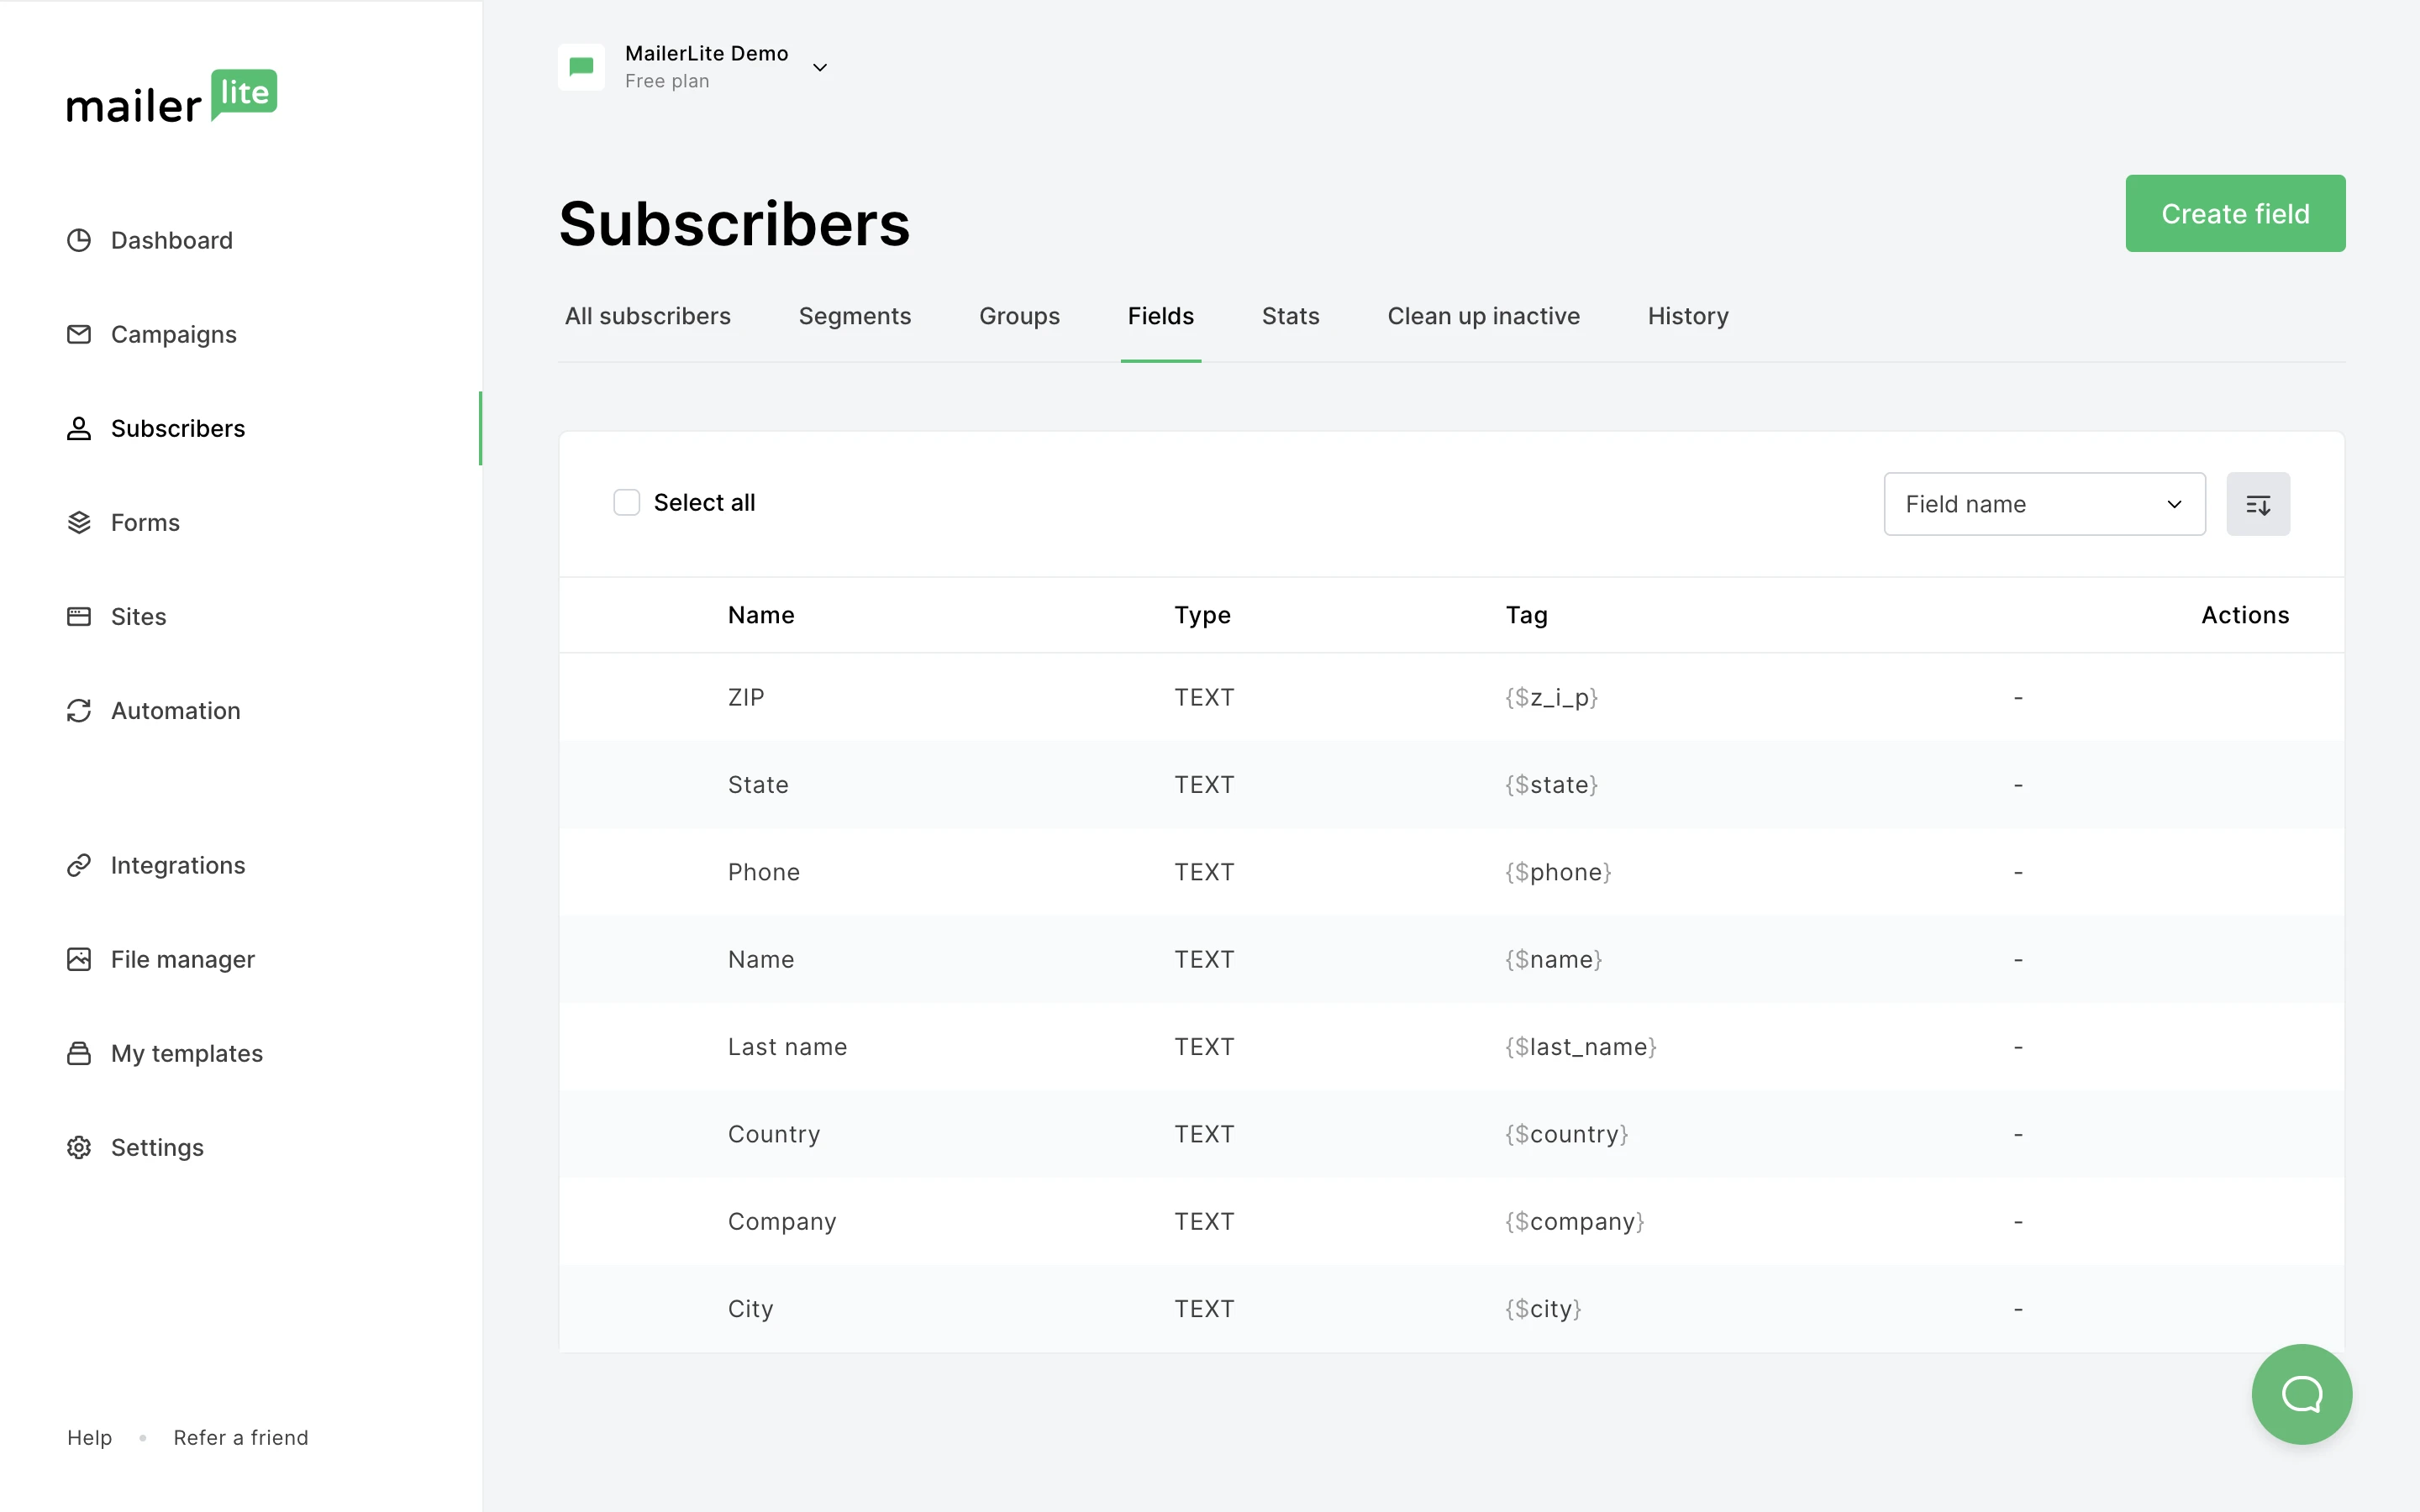
There are nine default fields that exist in MailerLite when you create an account: Name, Last name, Email, Phone, Company, Country, State, City, and Zip.
Custom Fields are fields that you create in addition to these default fields. You’ll need to create a custom field if you want to gather additional information about your subscribers. You can use the additional information to further manage your subscribers and personalize your campaigns.
How to create custom fields
To create custom fields:
Head to the Subscribers page.
Find the Fields tab and click Create field in the top right-hand corner.
Enter the field name and the field type. There are three field types: Text, number, and date.
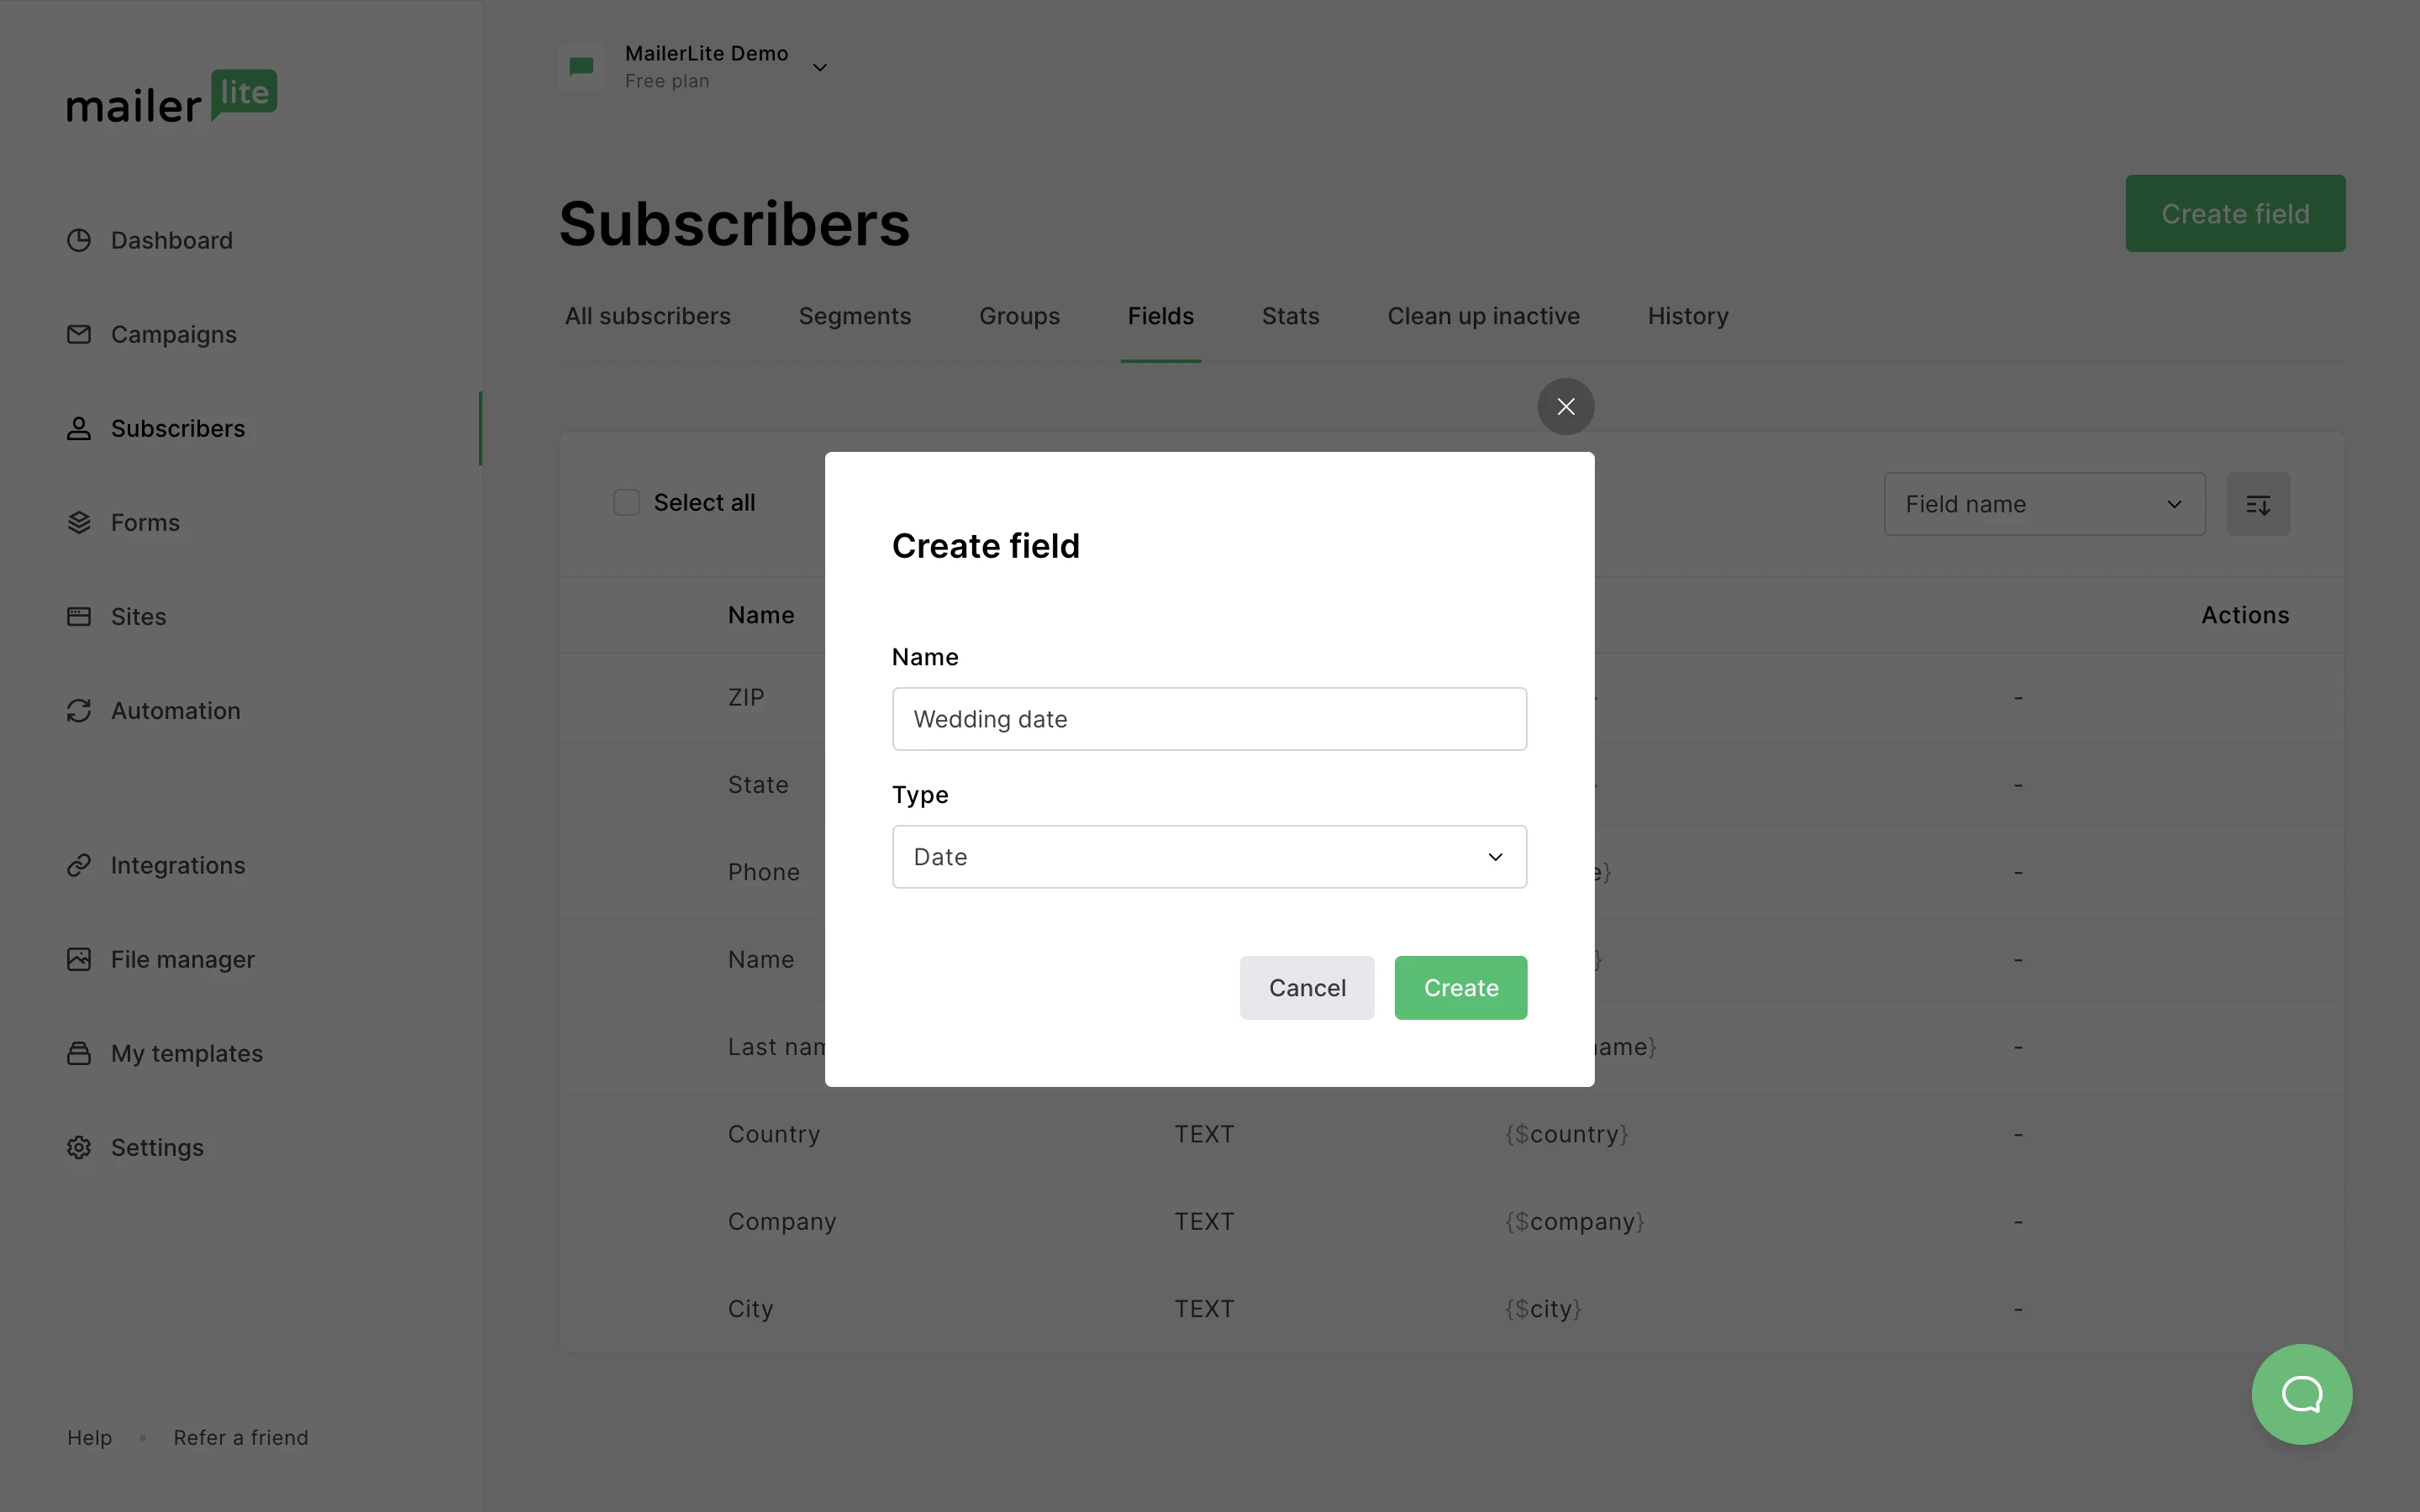
Once you have entered your field name and type, click Create.
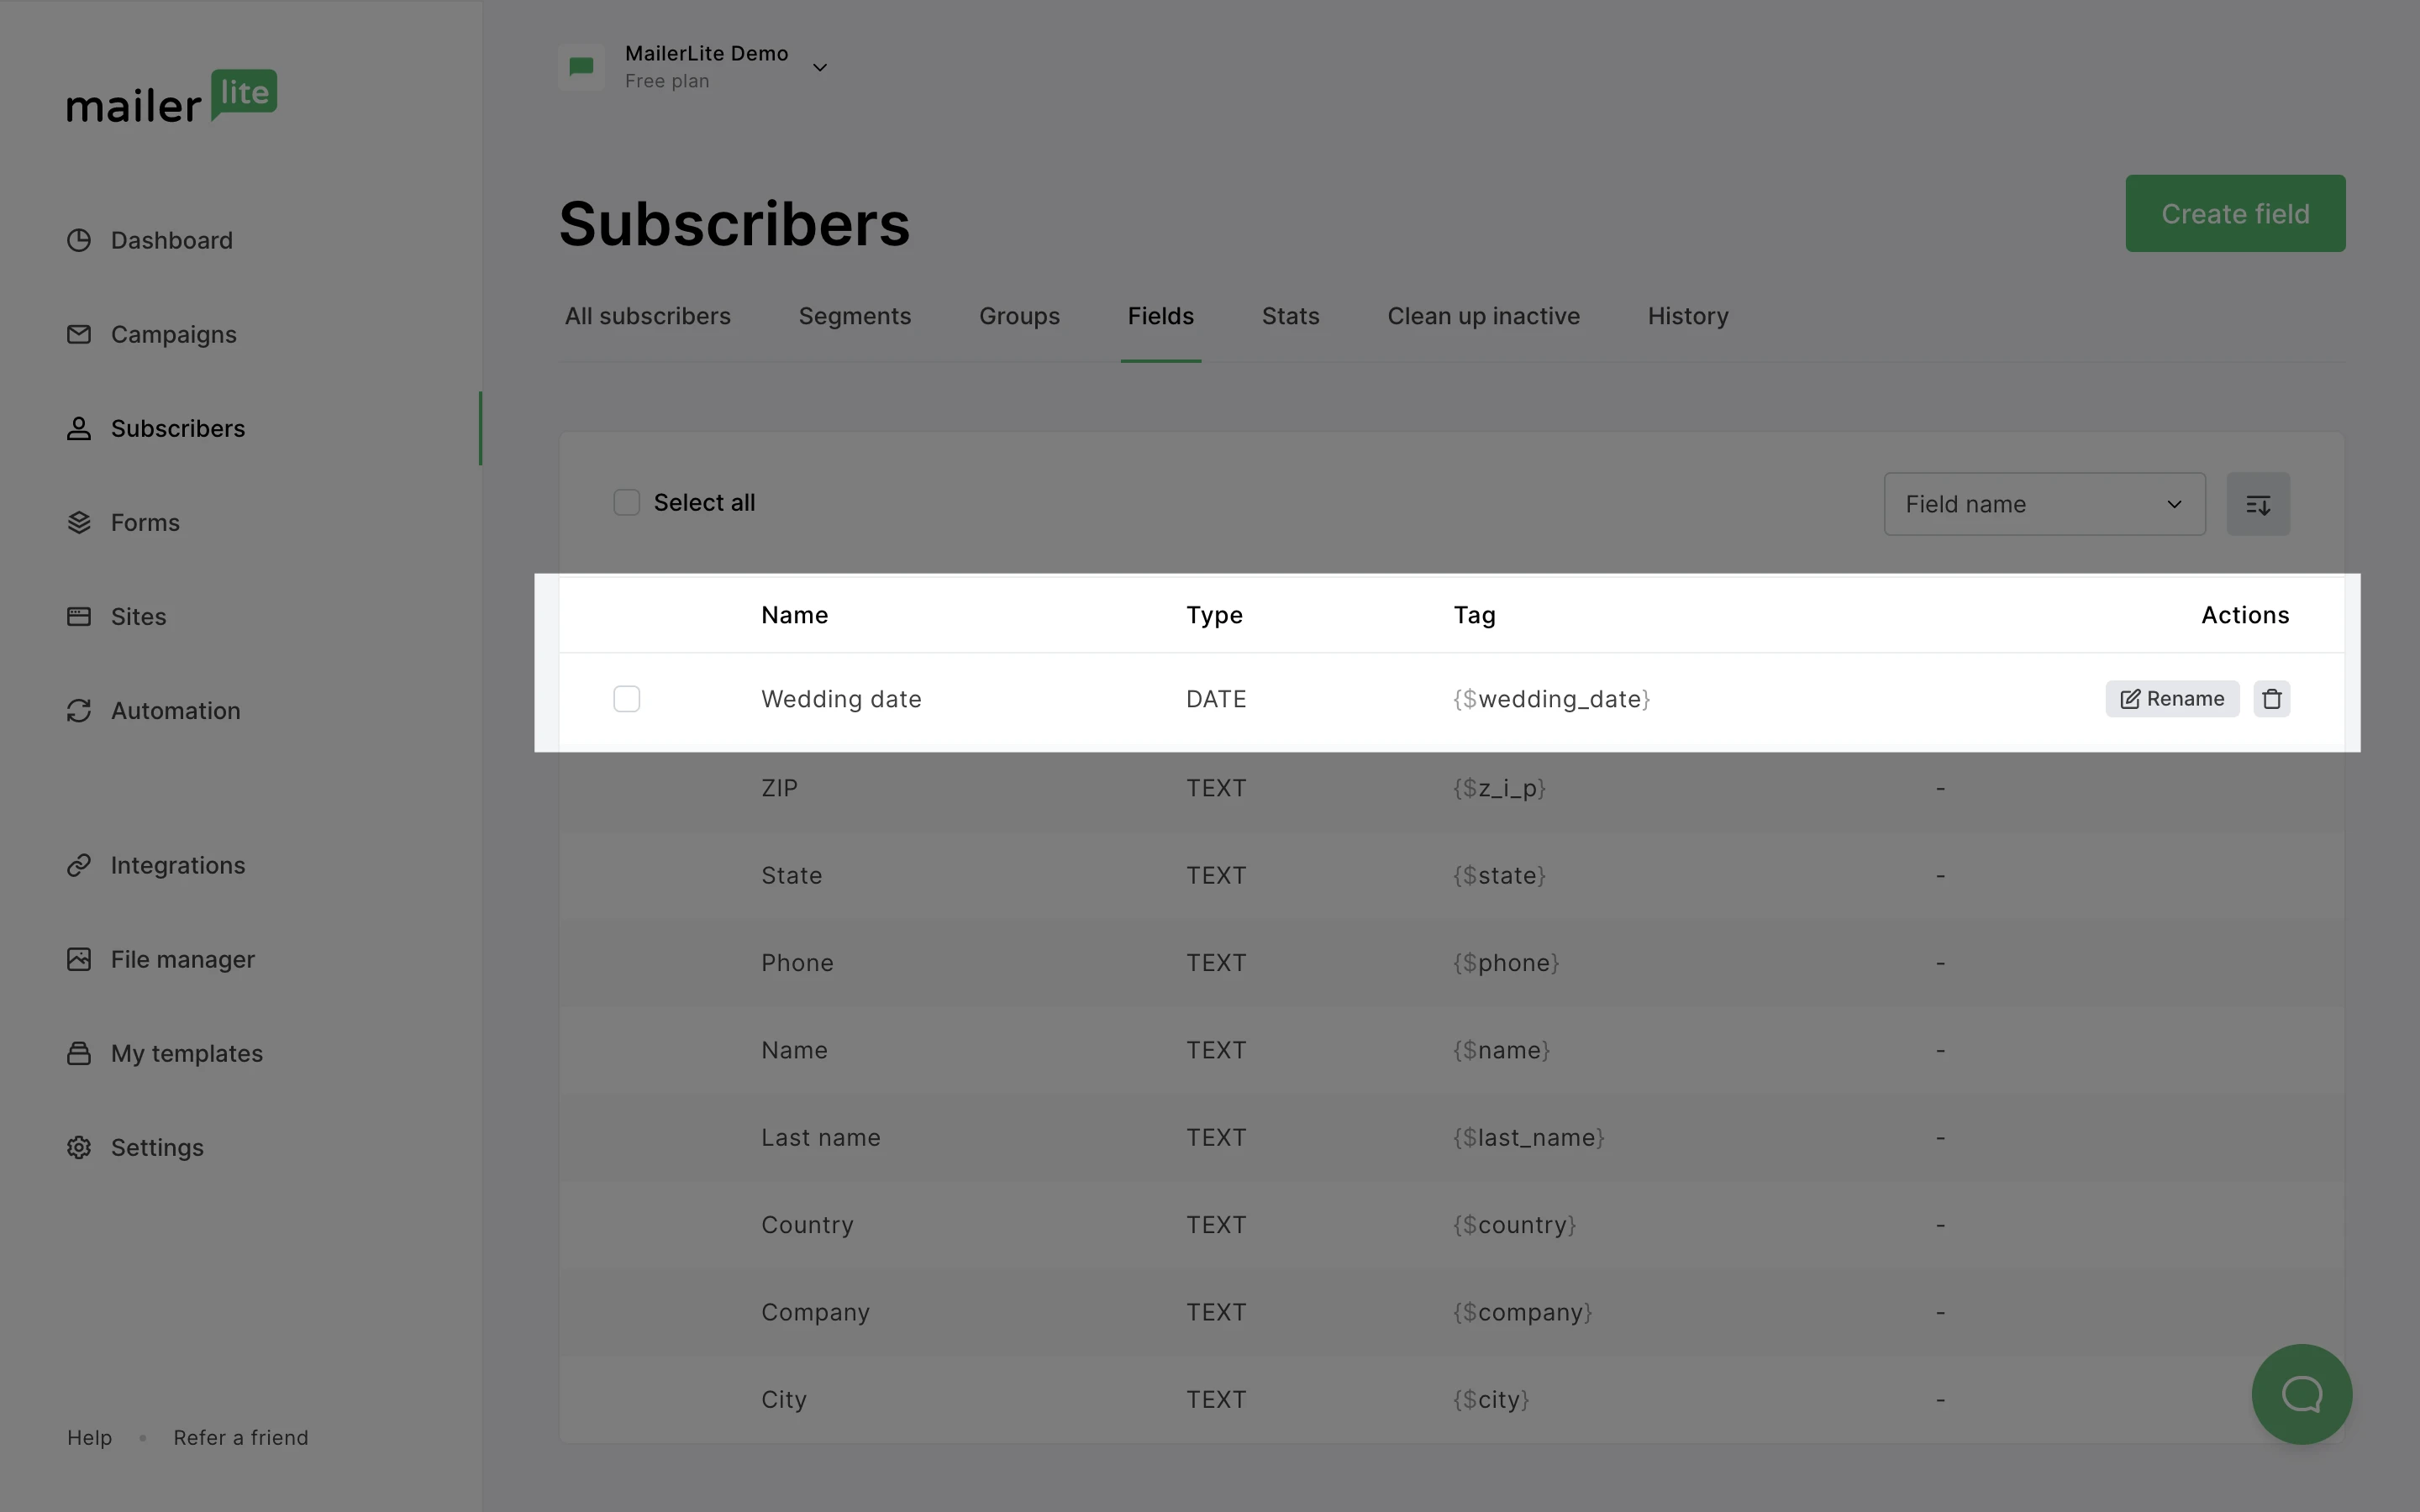
Your new field will appear on your Fields page.
Email personalization using custom fields
Every field in MailerLite has an accompanying Tag, including the fields you created yourself.
For example:
{$email} – inserts your subscriber’s email address.
{$name} – inserts your subscriber’s first name (if it’s available).
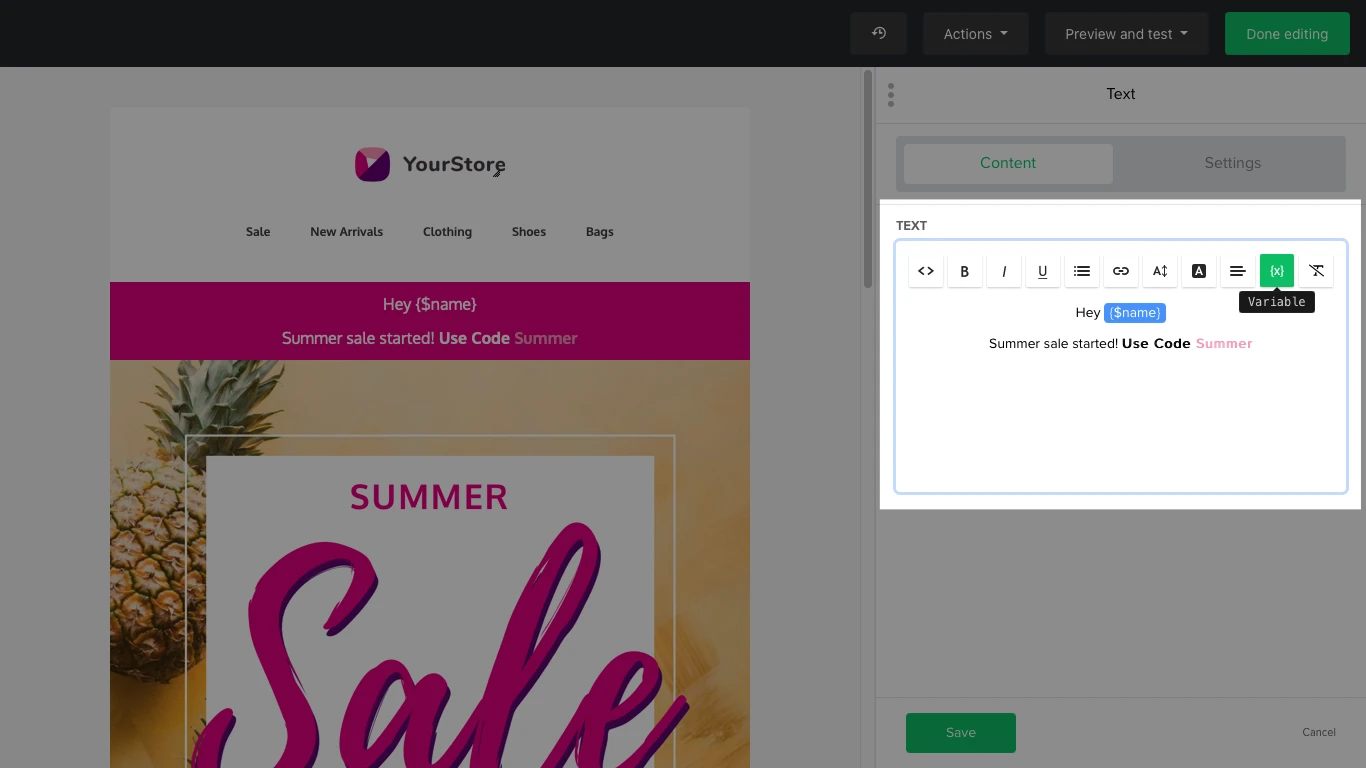
Personalized variables are an excellent way to personalize your campaign. For example, rather than writing “Hey guys!” or “Dear readers”, you can speak directly to each subscriber by using the name entered in their Name field.
To add personalized variables to your campaign using the Drag and drop editor, we recommend using the Variable button {x}. This will allow you to choose from all of your available merge tags.
See our guide for more info: How to use variables in MailerLite.
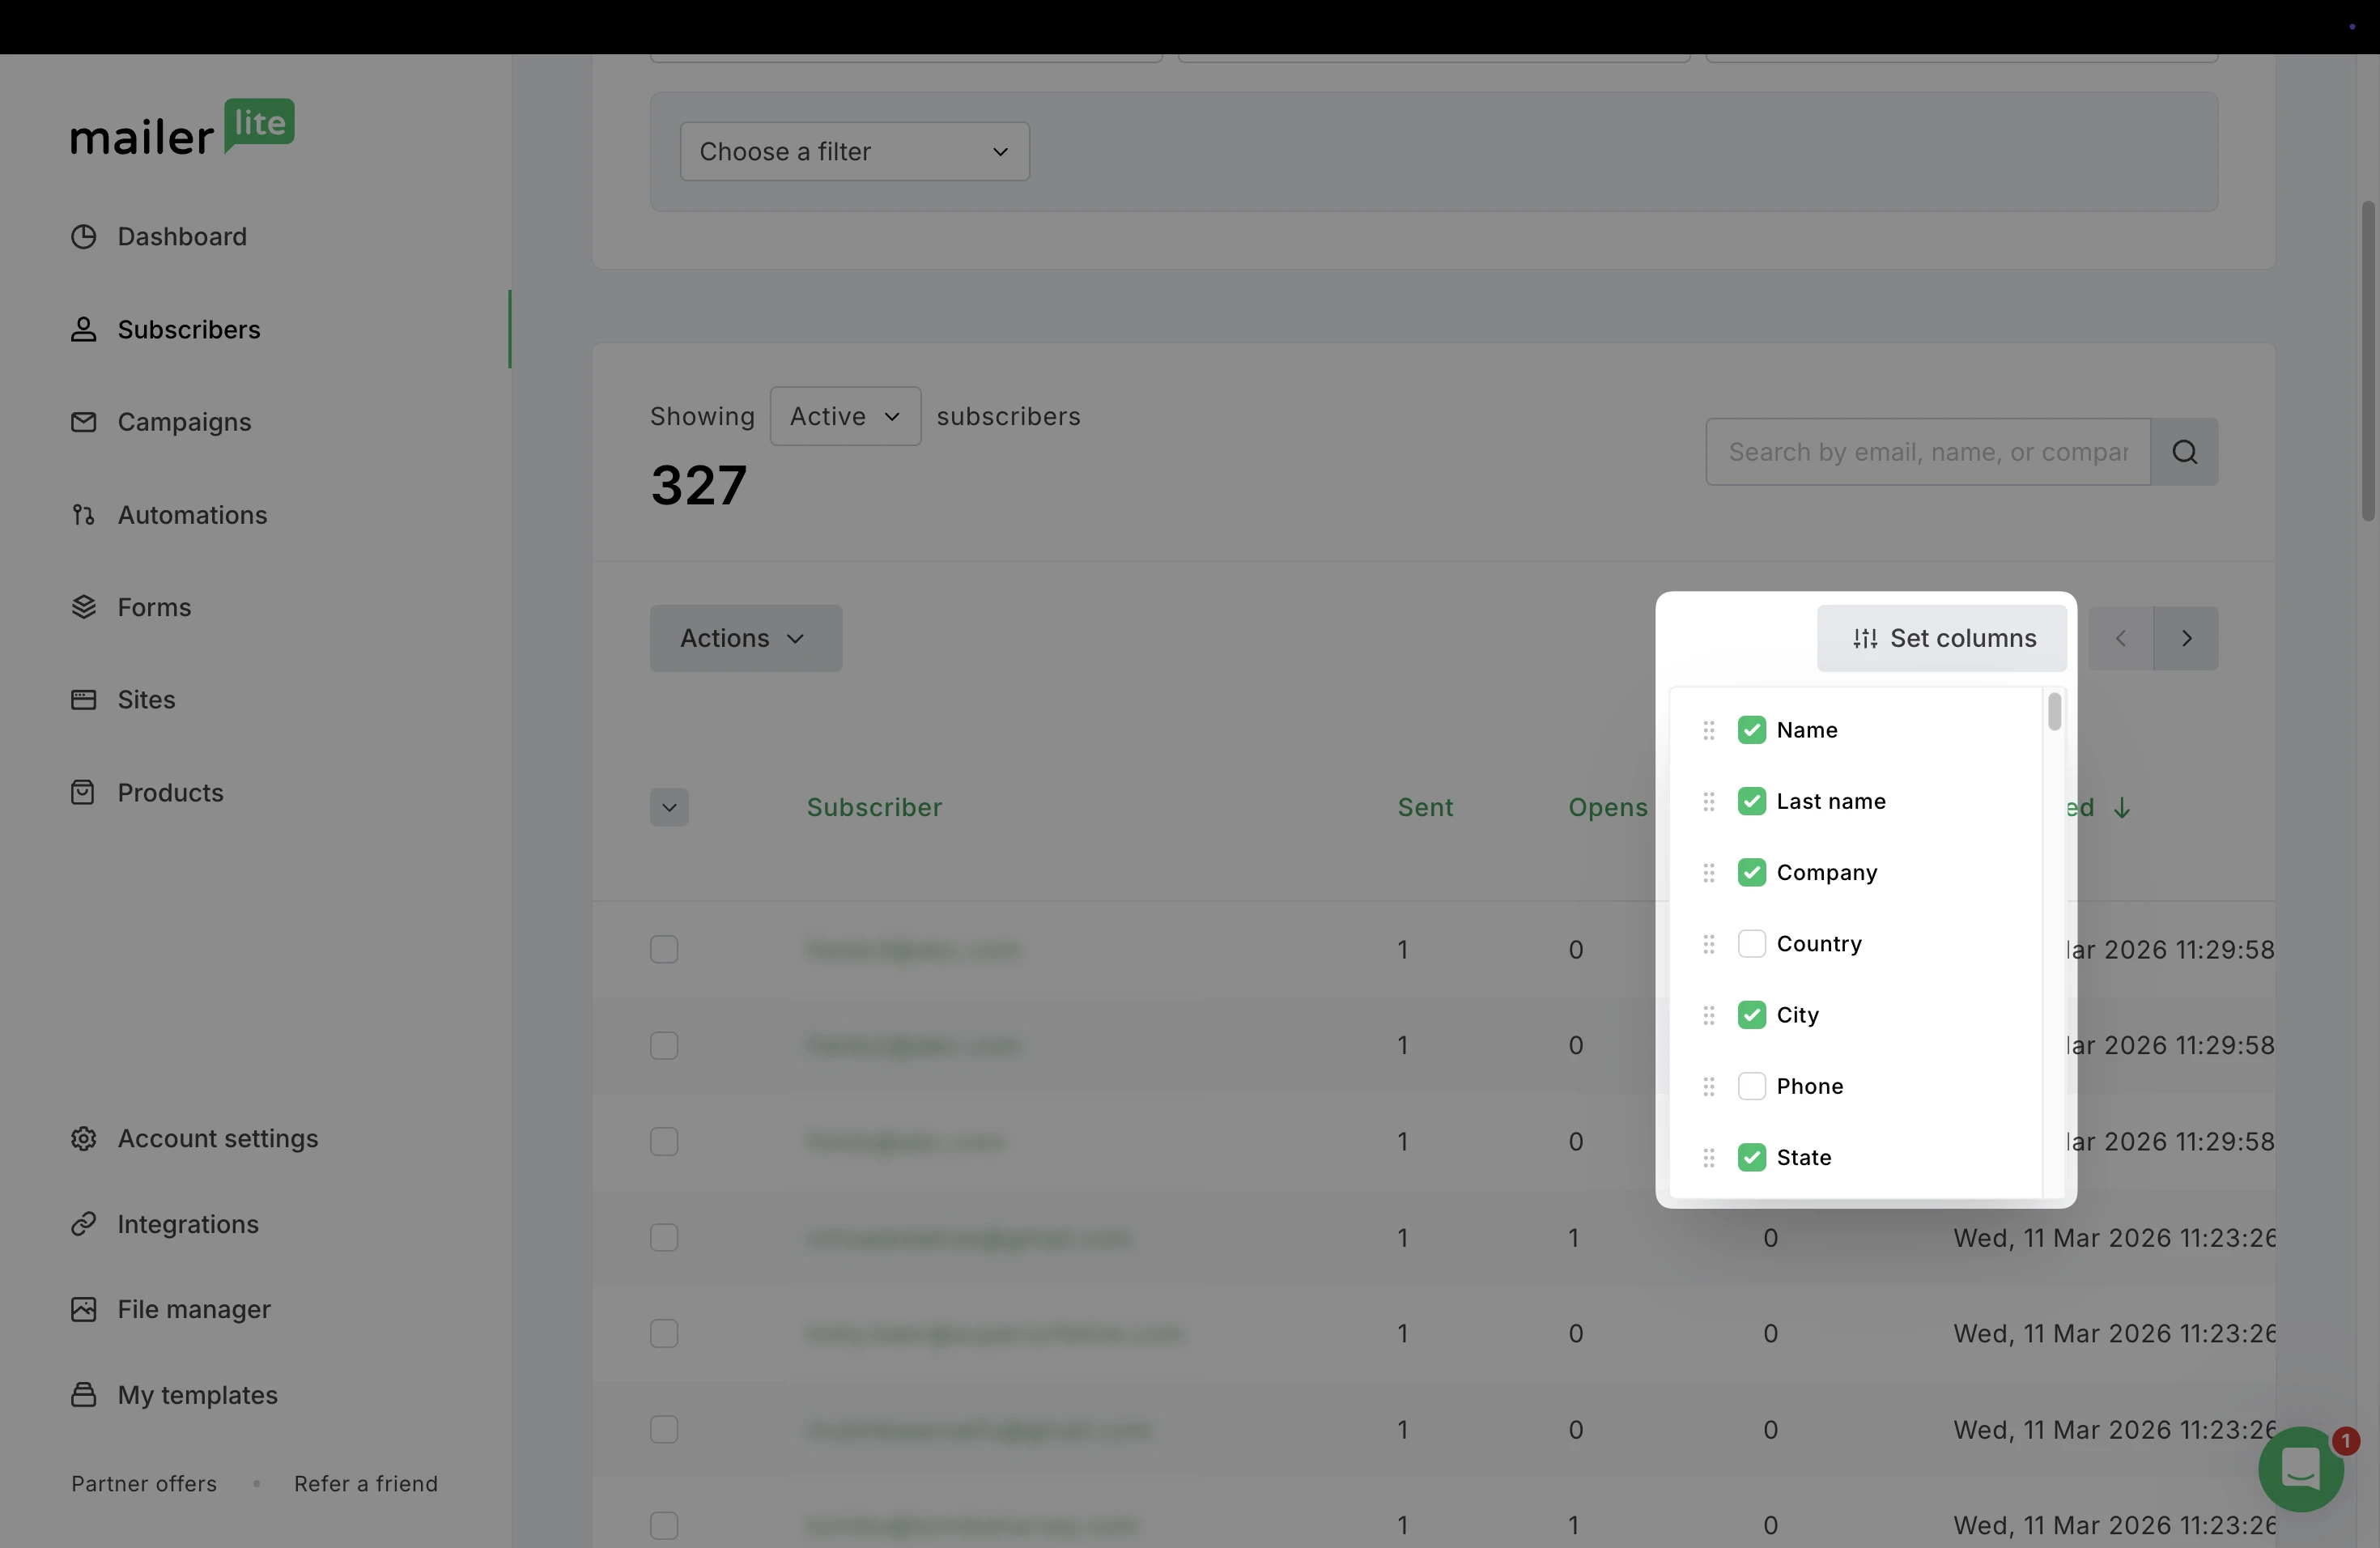
How to display additional fields in the general overview
When viewing your mailing list on the Subscribers page, you can see your subscribers’ email address, opens, clicks, the date they subscribed, and their location. If you wish to add data from custom fields to the general overview:
Click Set columns.
Select all the additional fields you wish to display.
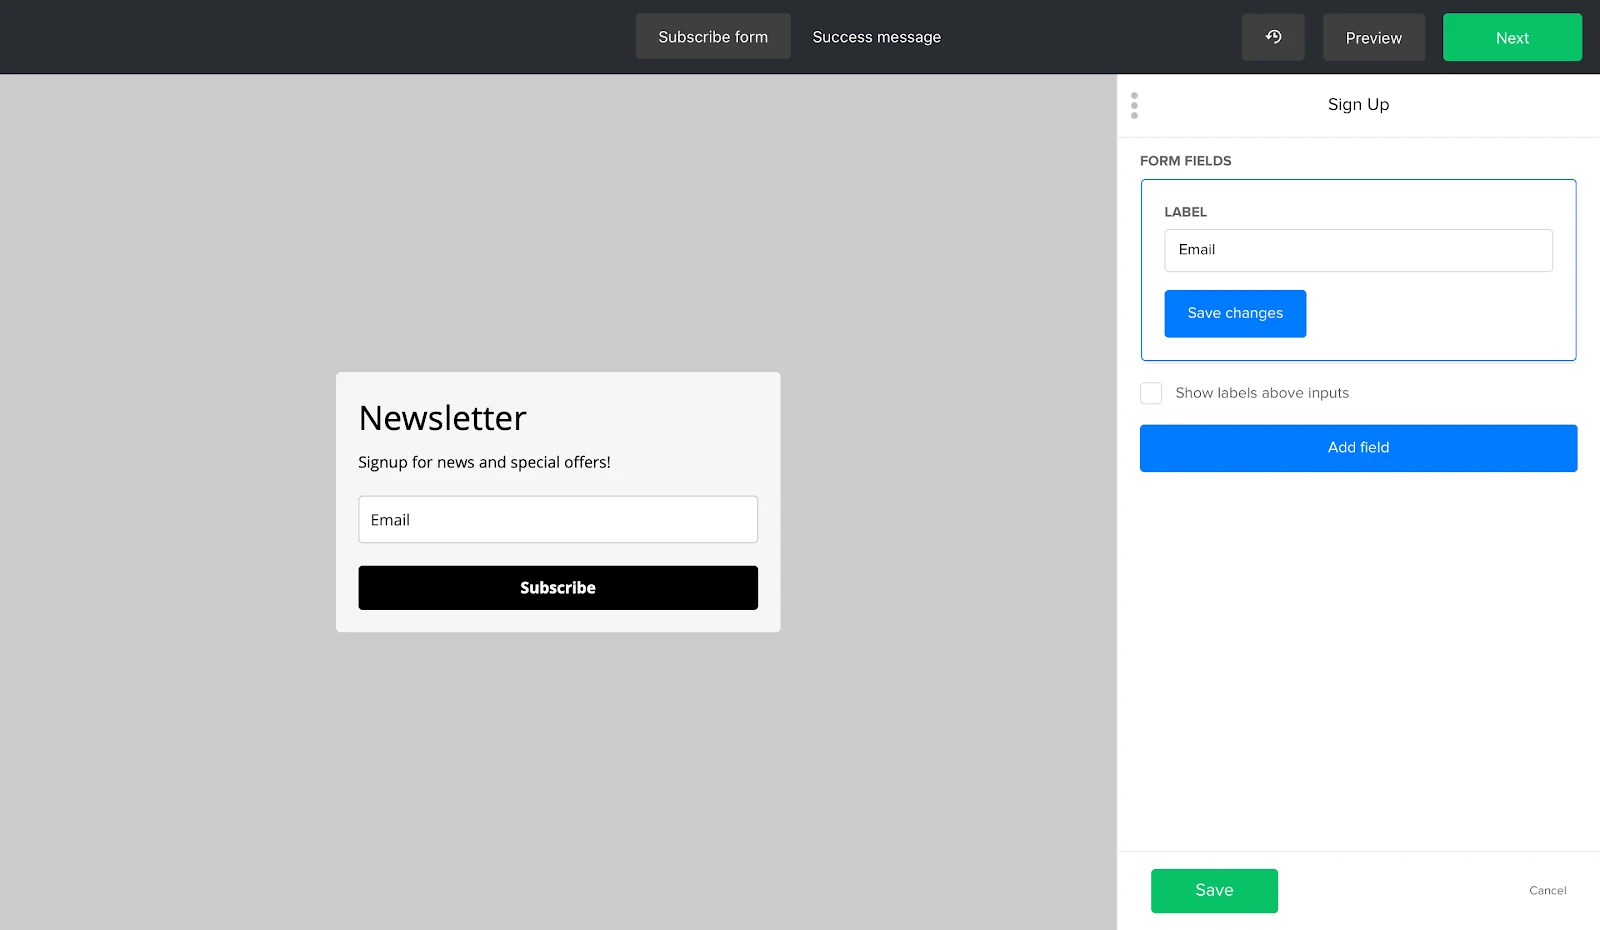
How to add custom fields to forms
To collect more information about your subscribers, you can add any custom field to your pop-up, embedded form or landing page. That way, subscribers can provide this data themselves when they sign up.
To add custom fields to your forms:
Click the Edit button next to the title of your form to open your form editor.
Click the Email field to access settings for your form.
In the right-hand panel, click Add new field.
You can then select which field you would like to add and how you would like to label it depending on your design preferences.
Bulk updating custom fields for subscribers
Once you've created custom fields to collect additional subscriber information, you might find the need to update these fields in bulk — whether for new subscribers you're adding or existing ones.
1. Create the custom field. If you haven't already, create the custom field you need by following the steps outlined in the "How to create custom fields" section above.
2. Prepare your subscriber list:
Navigate to Subscribers > Add subscribers.
Prepare a file for import. This file should include a column for each piece of information you're updating or adding, including the new custom field data.
3. Import your file:
Import your prepared file. Ensure your file includes a column with the data for your newly created custom field.
During the import process, you will be prompted to match the columns in your file to the existing fields in MailerLite. Ensure you match the column containing your custom field data to the corresponding custom field you created.
4. Complete the import: Once you've matched all necessary fields, complete the import process. Your subscribers' records will now be updated with the new custom field data.
💡Note: For steps on importing subscribers, including formatting your import file correctly, refer to our help article on importing subscribers.
Preference Center: How subscribers can edit their own details
Using the Preference center in your MailerLite account (paid plans only), your subscribers can choose their preferences and edit their own information.
See our guide for more information: How to use the Preference Center.