Note: If you're a Legacy (Classic) user, please log in to your account to access the dedicated Legacy (Classic) Help Center.
What is a segment?
Segmentation is a powerful tool that allows you to target or organize specific audiences within your mailing list. A Segment is an organized list of subscribers automatically generated by a set of conditions.
Before you create your first segment, it’s important to know the difference between segments and groups.
How to create segments
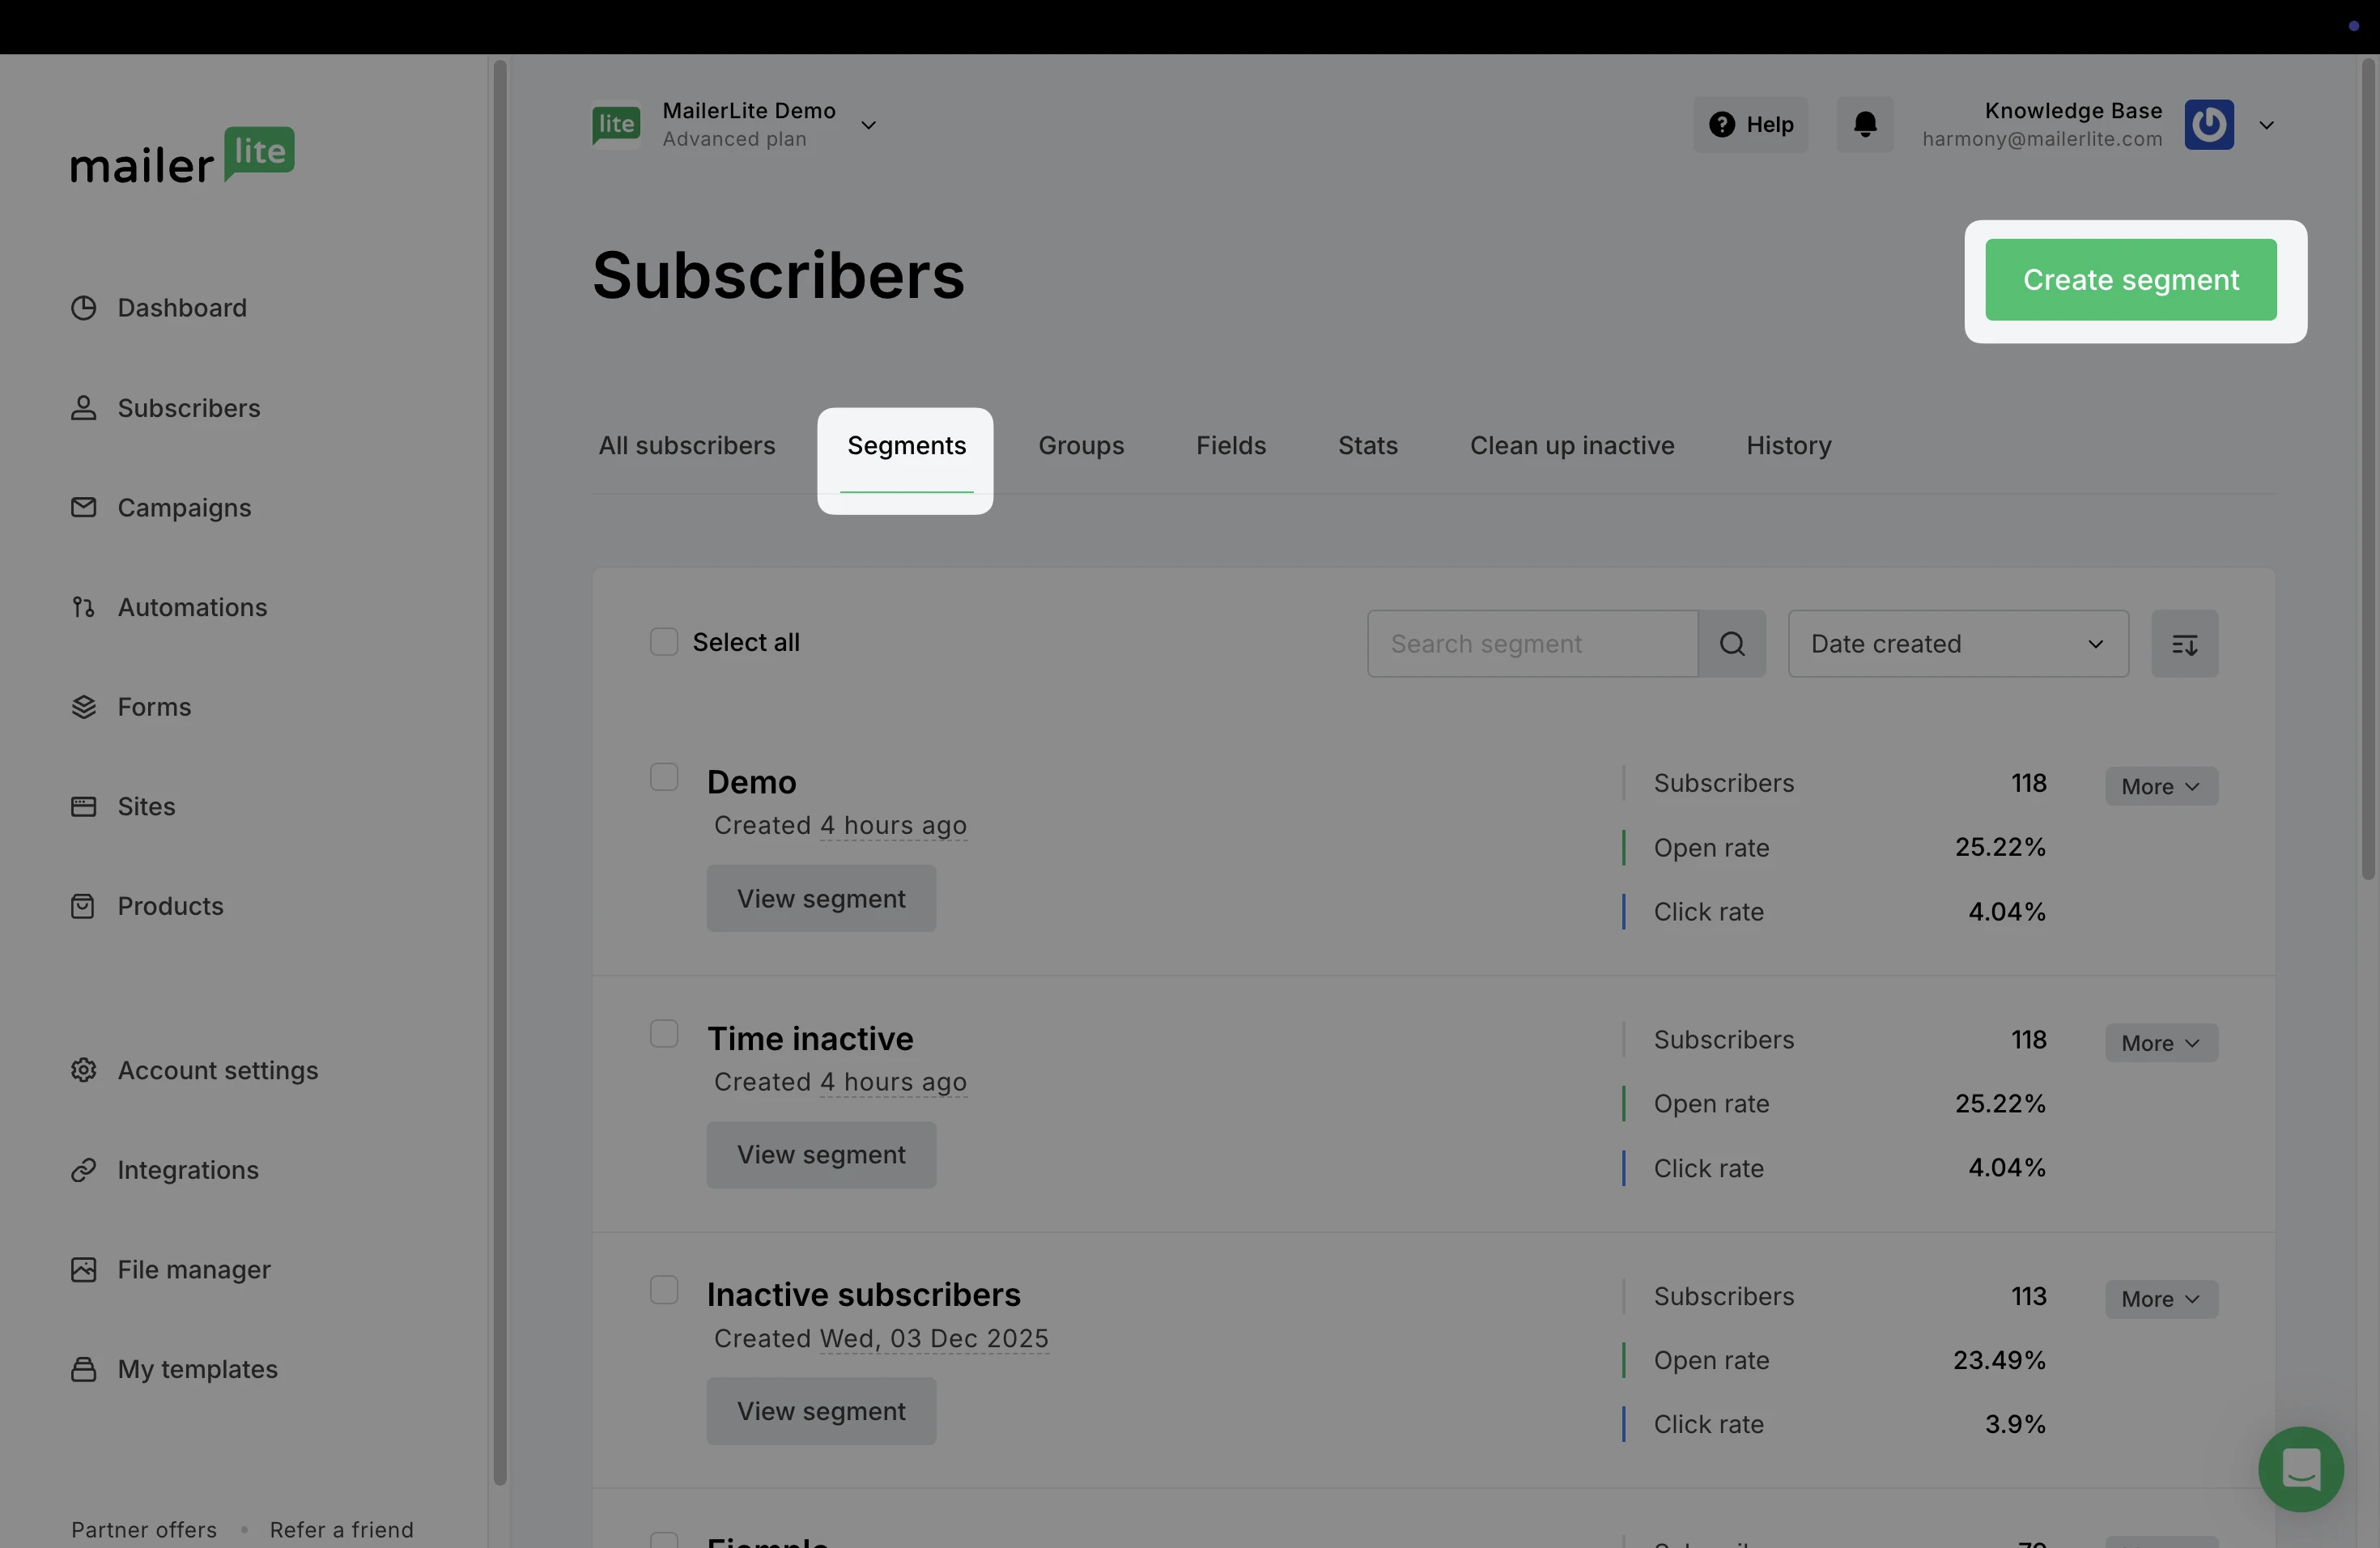
Navigate to the Subscribers page.
Select the Segments tab.
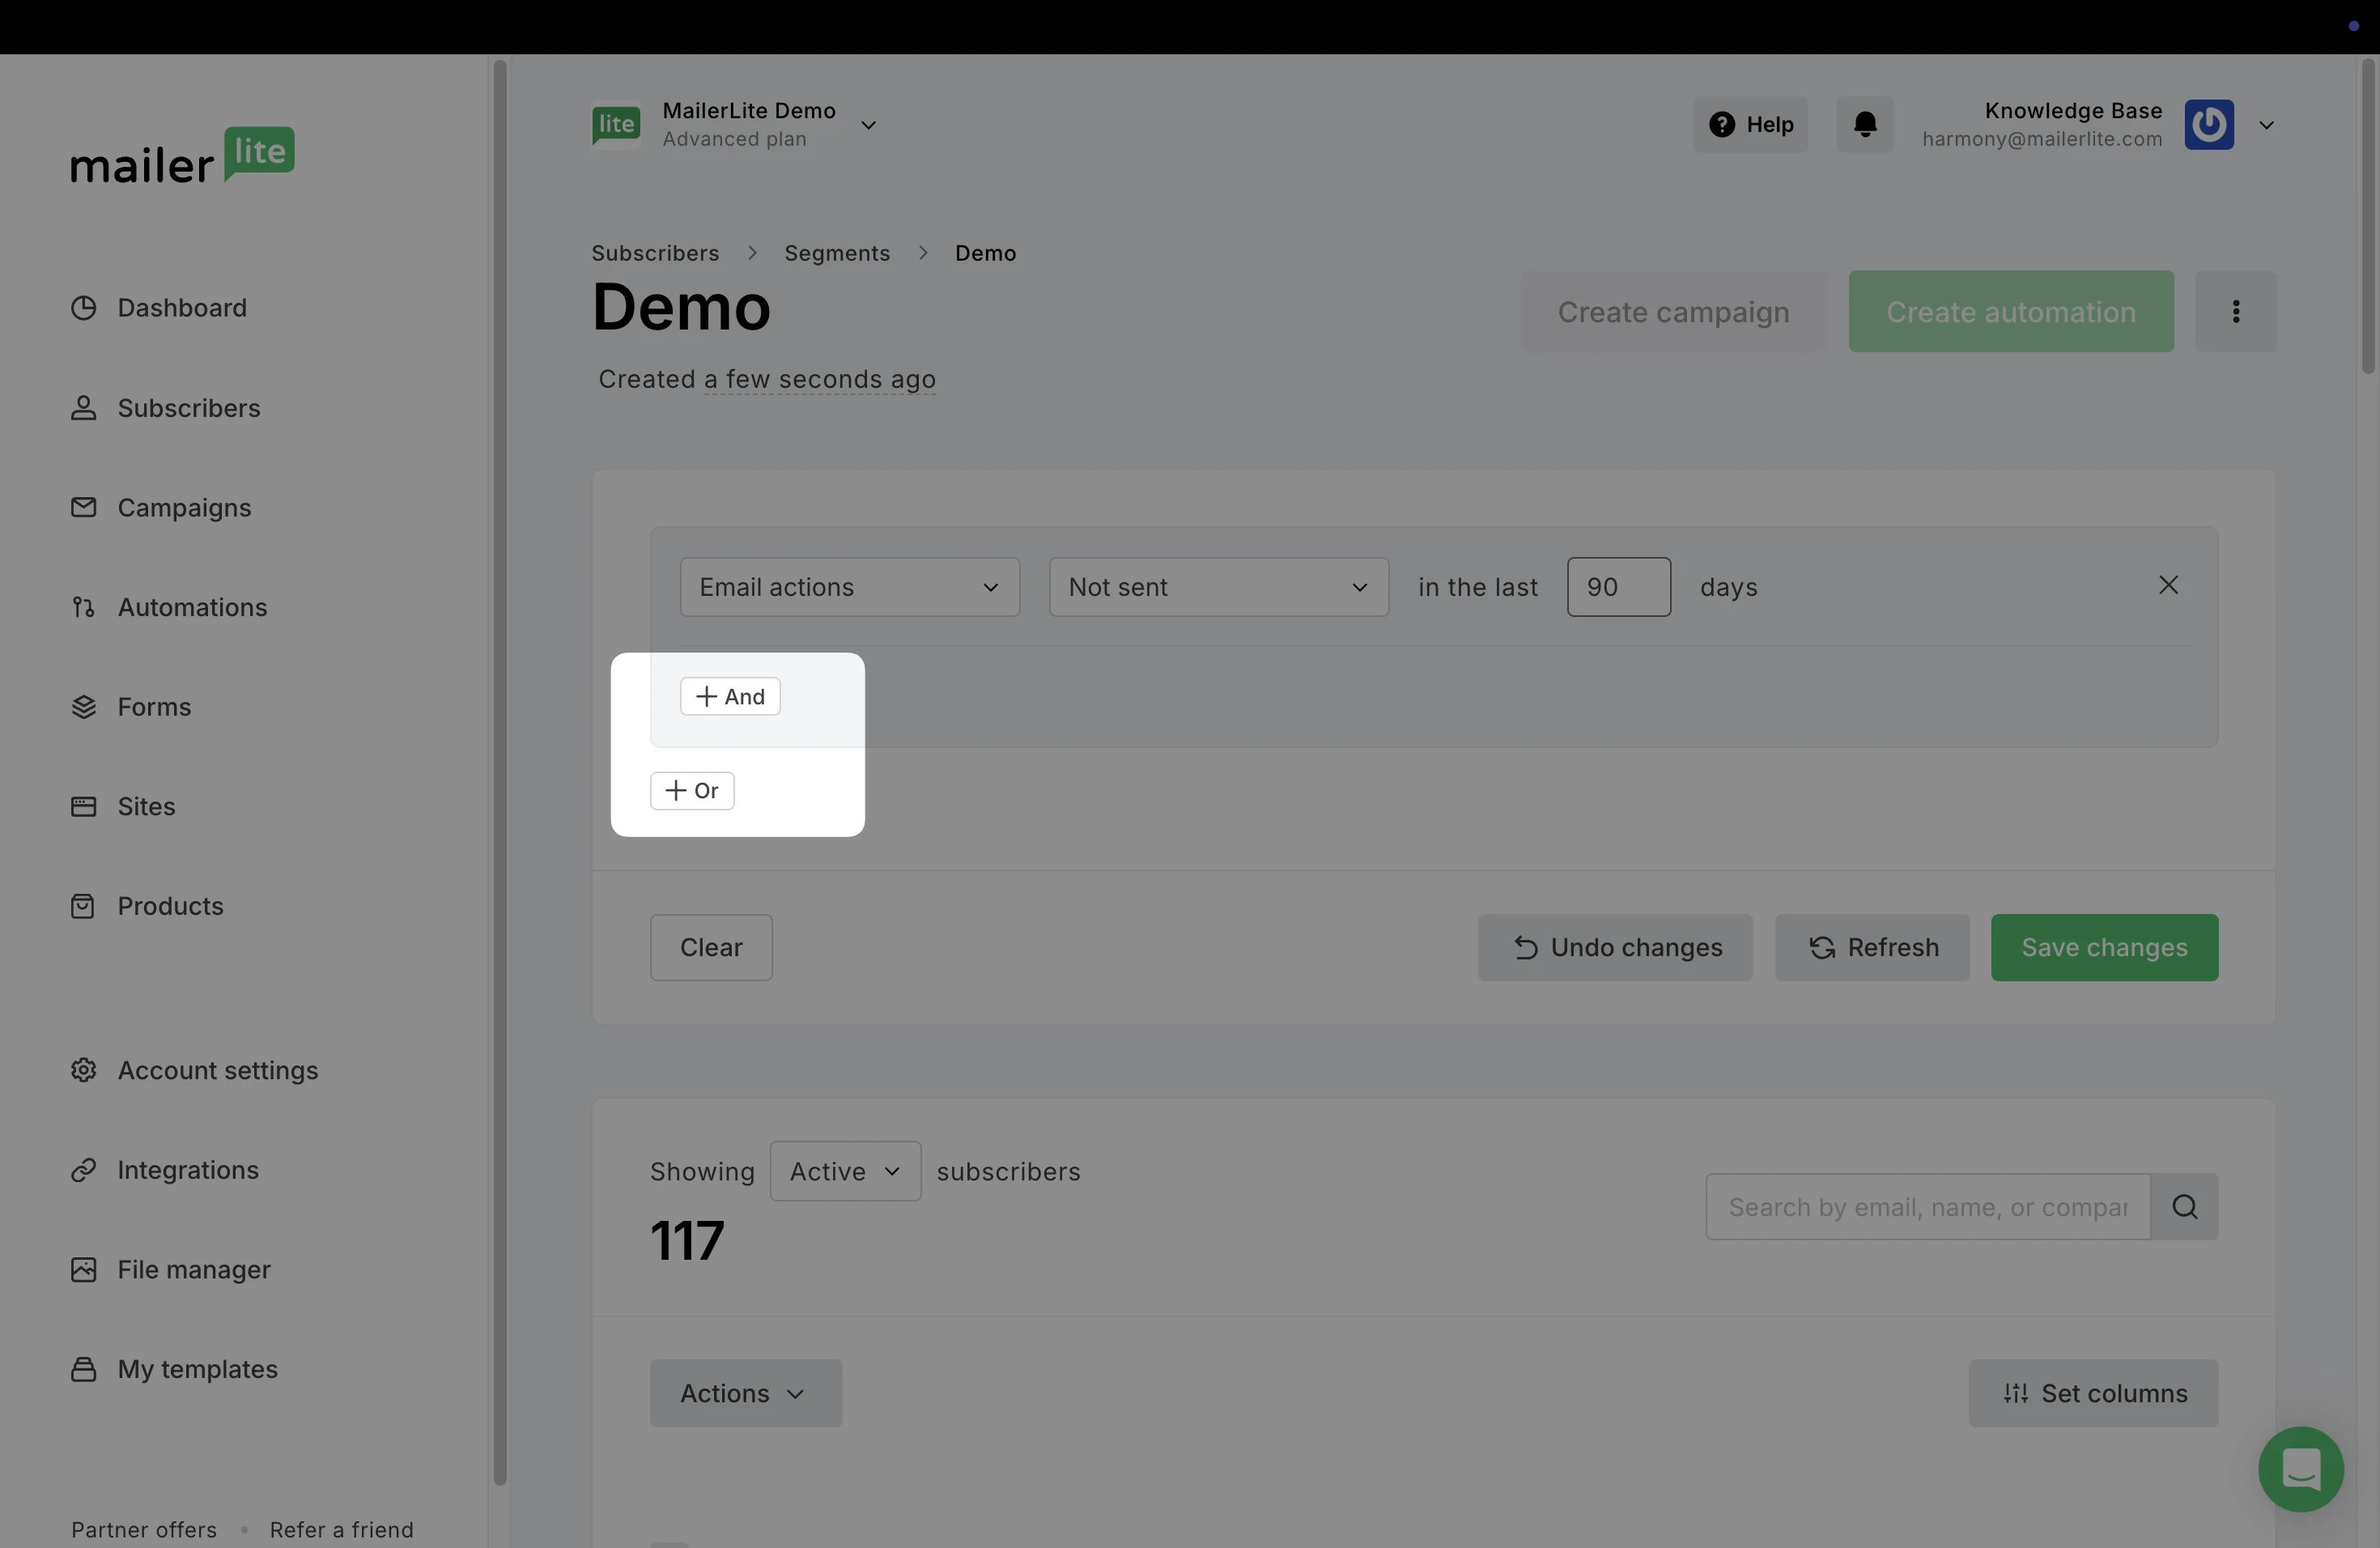
Click Create segment.
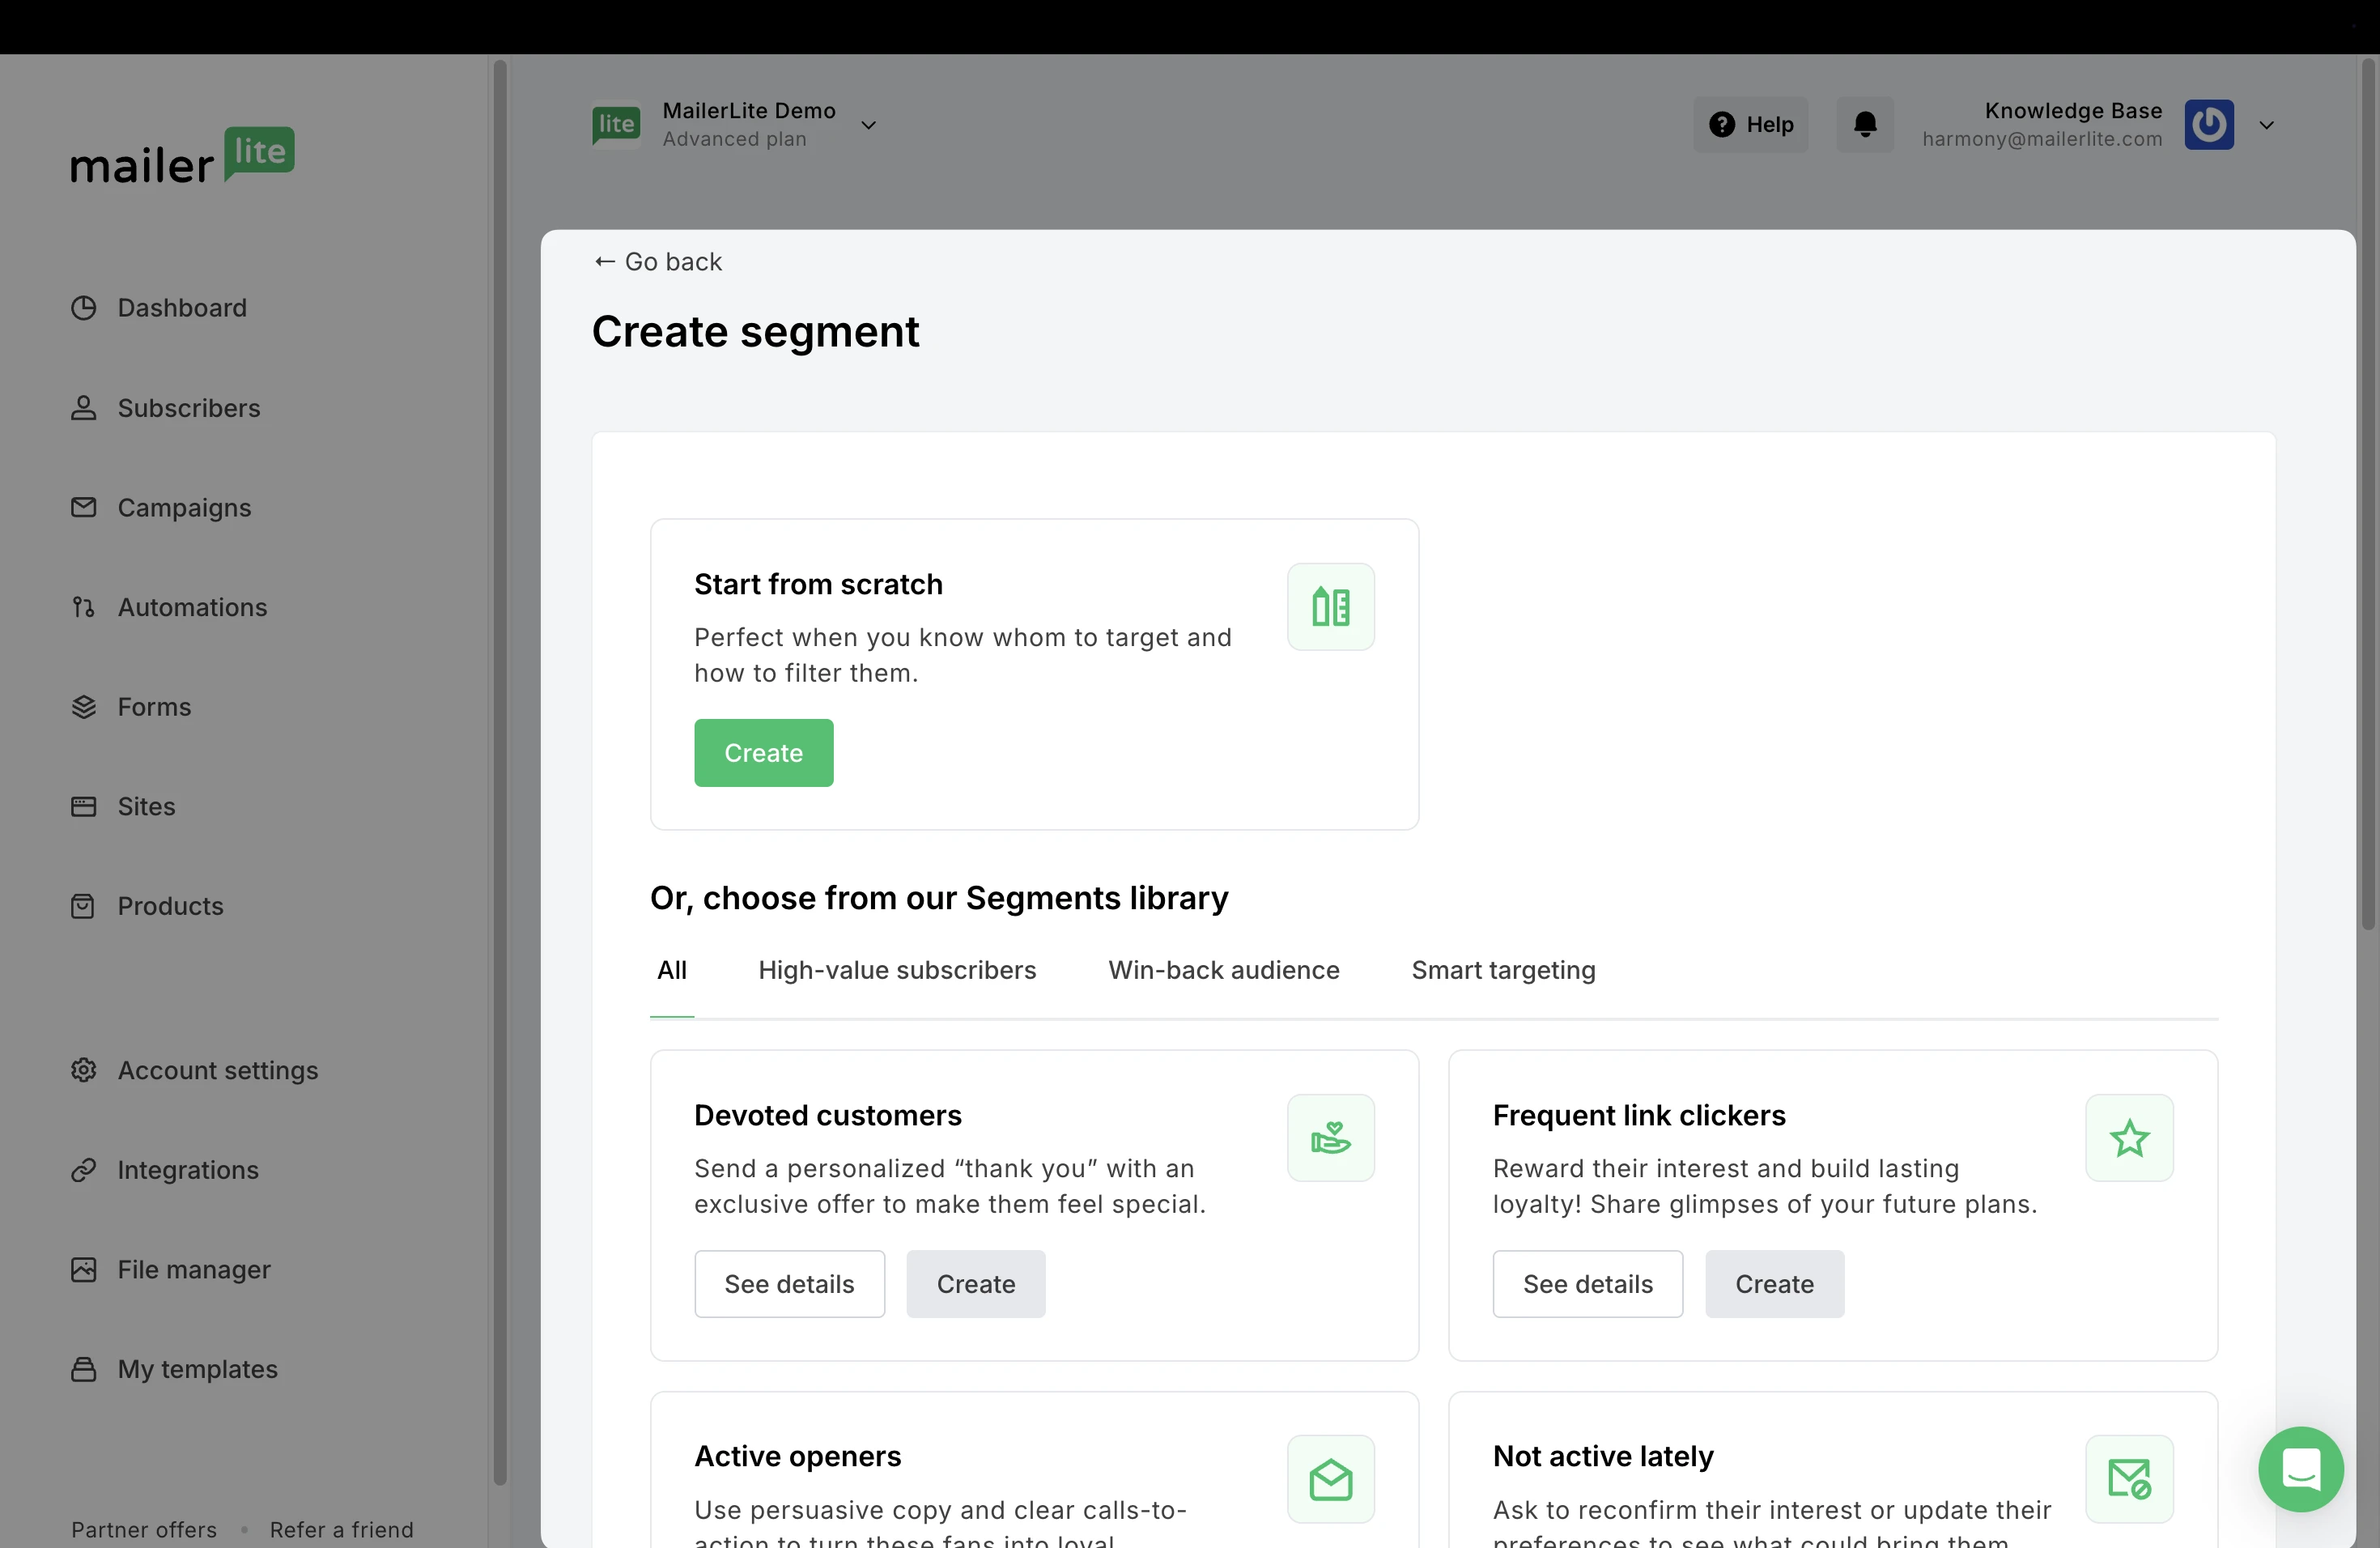
Choose to create a segment from scratch by clicking Create, or choose pre-made filters from our segment library.
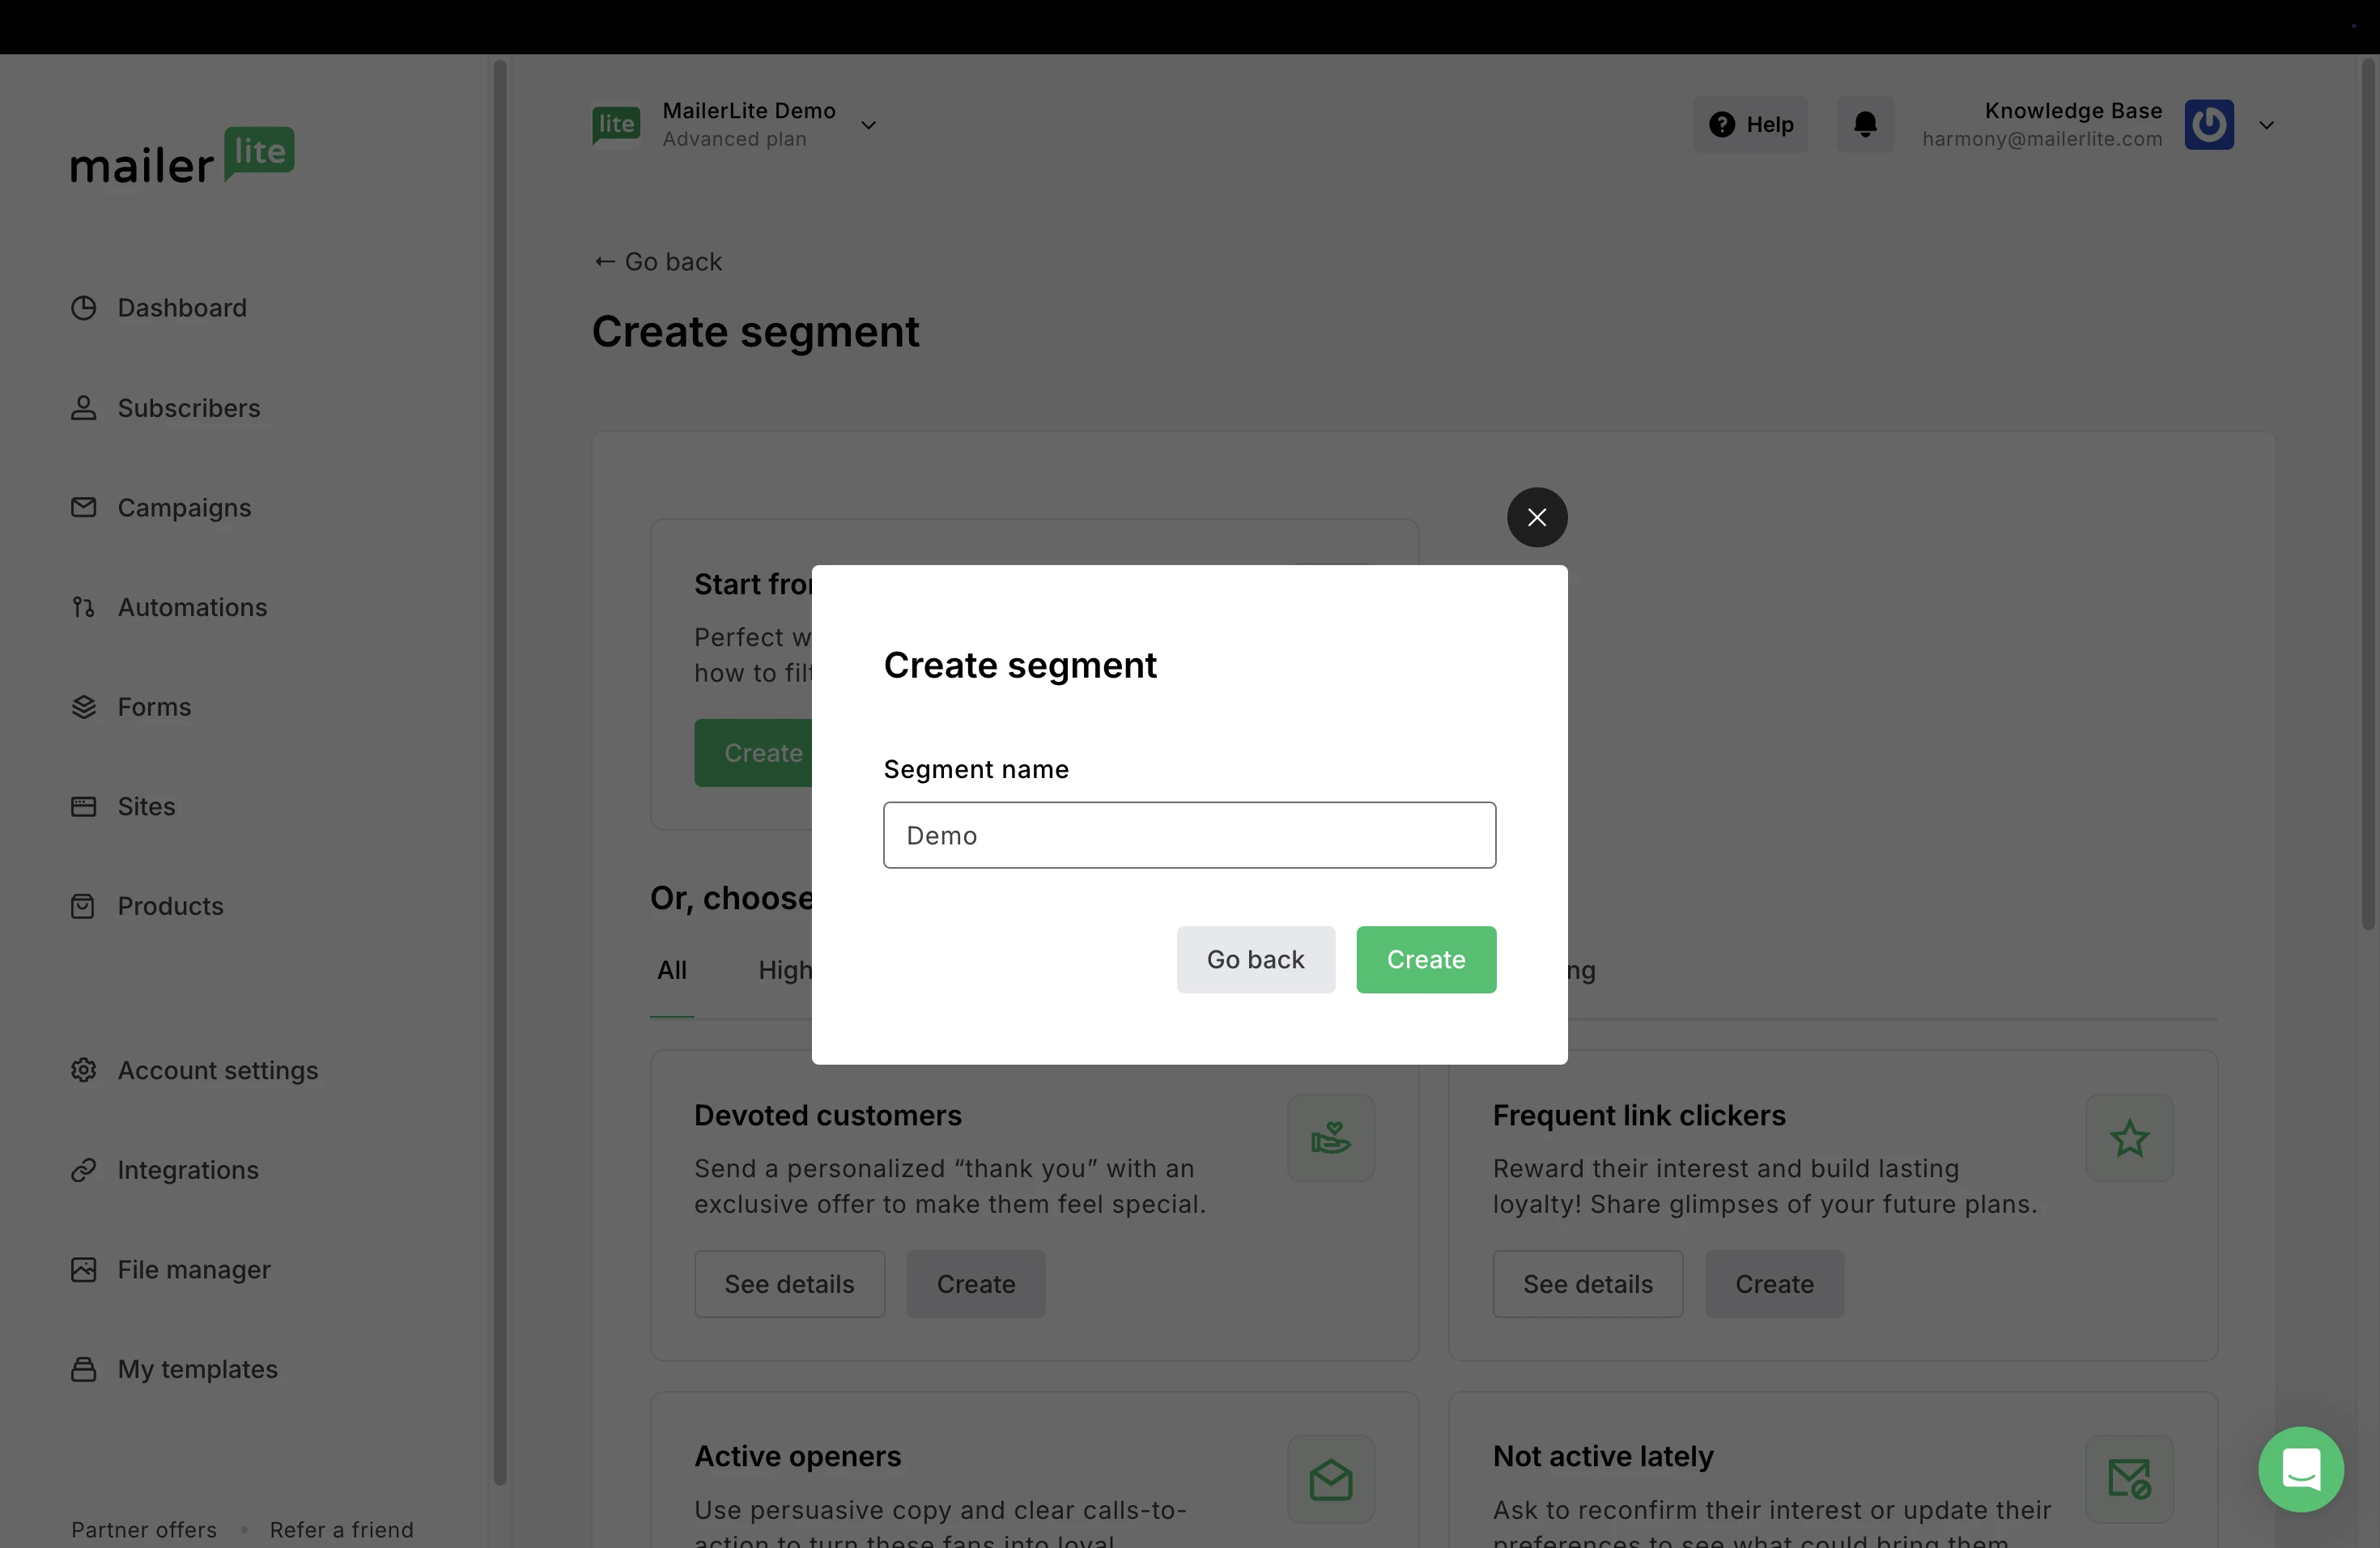
Give your segment a name.
Choose the filter(s) that will become the conditions of your new segment. When setting conditions, pay attention to whether you are creating “and” rules, or “or” rules. If you have condition 1 set and condition 2 set, then subscribers need to meet both of those conditions to be included in the segment.
Once filters have been added, click Save changes.

If you have condition 1 set or condition 2 set, then subscribers only need to meet one of the conditions in order to be included in the segment.
Once a segment is created, all past and future subscribers who meet those conditions will be included in the segment automatically.
In the same way, if a subscriber no longer meets the conditions of the segment after it was created, they will be automatically removed.
How to use segments
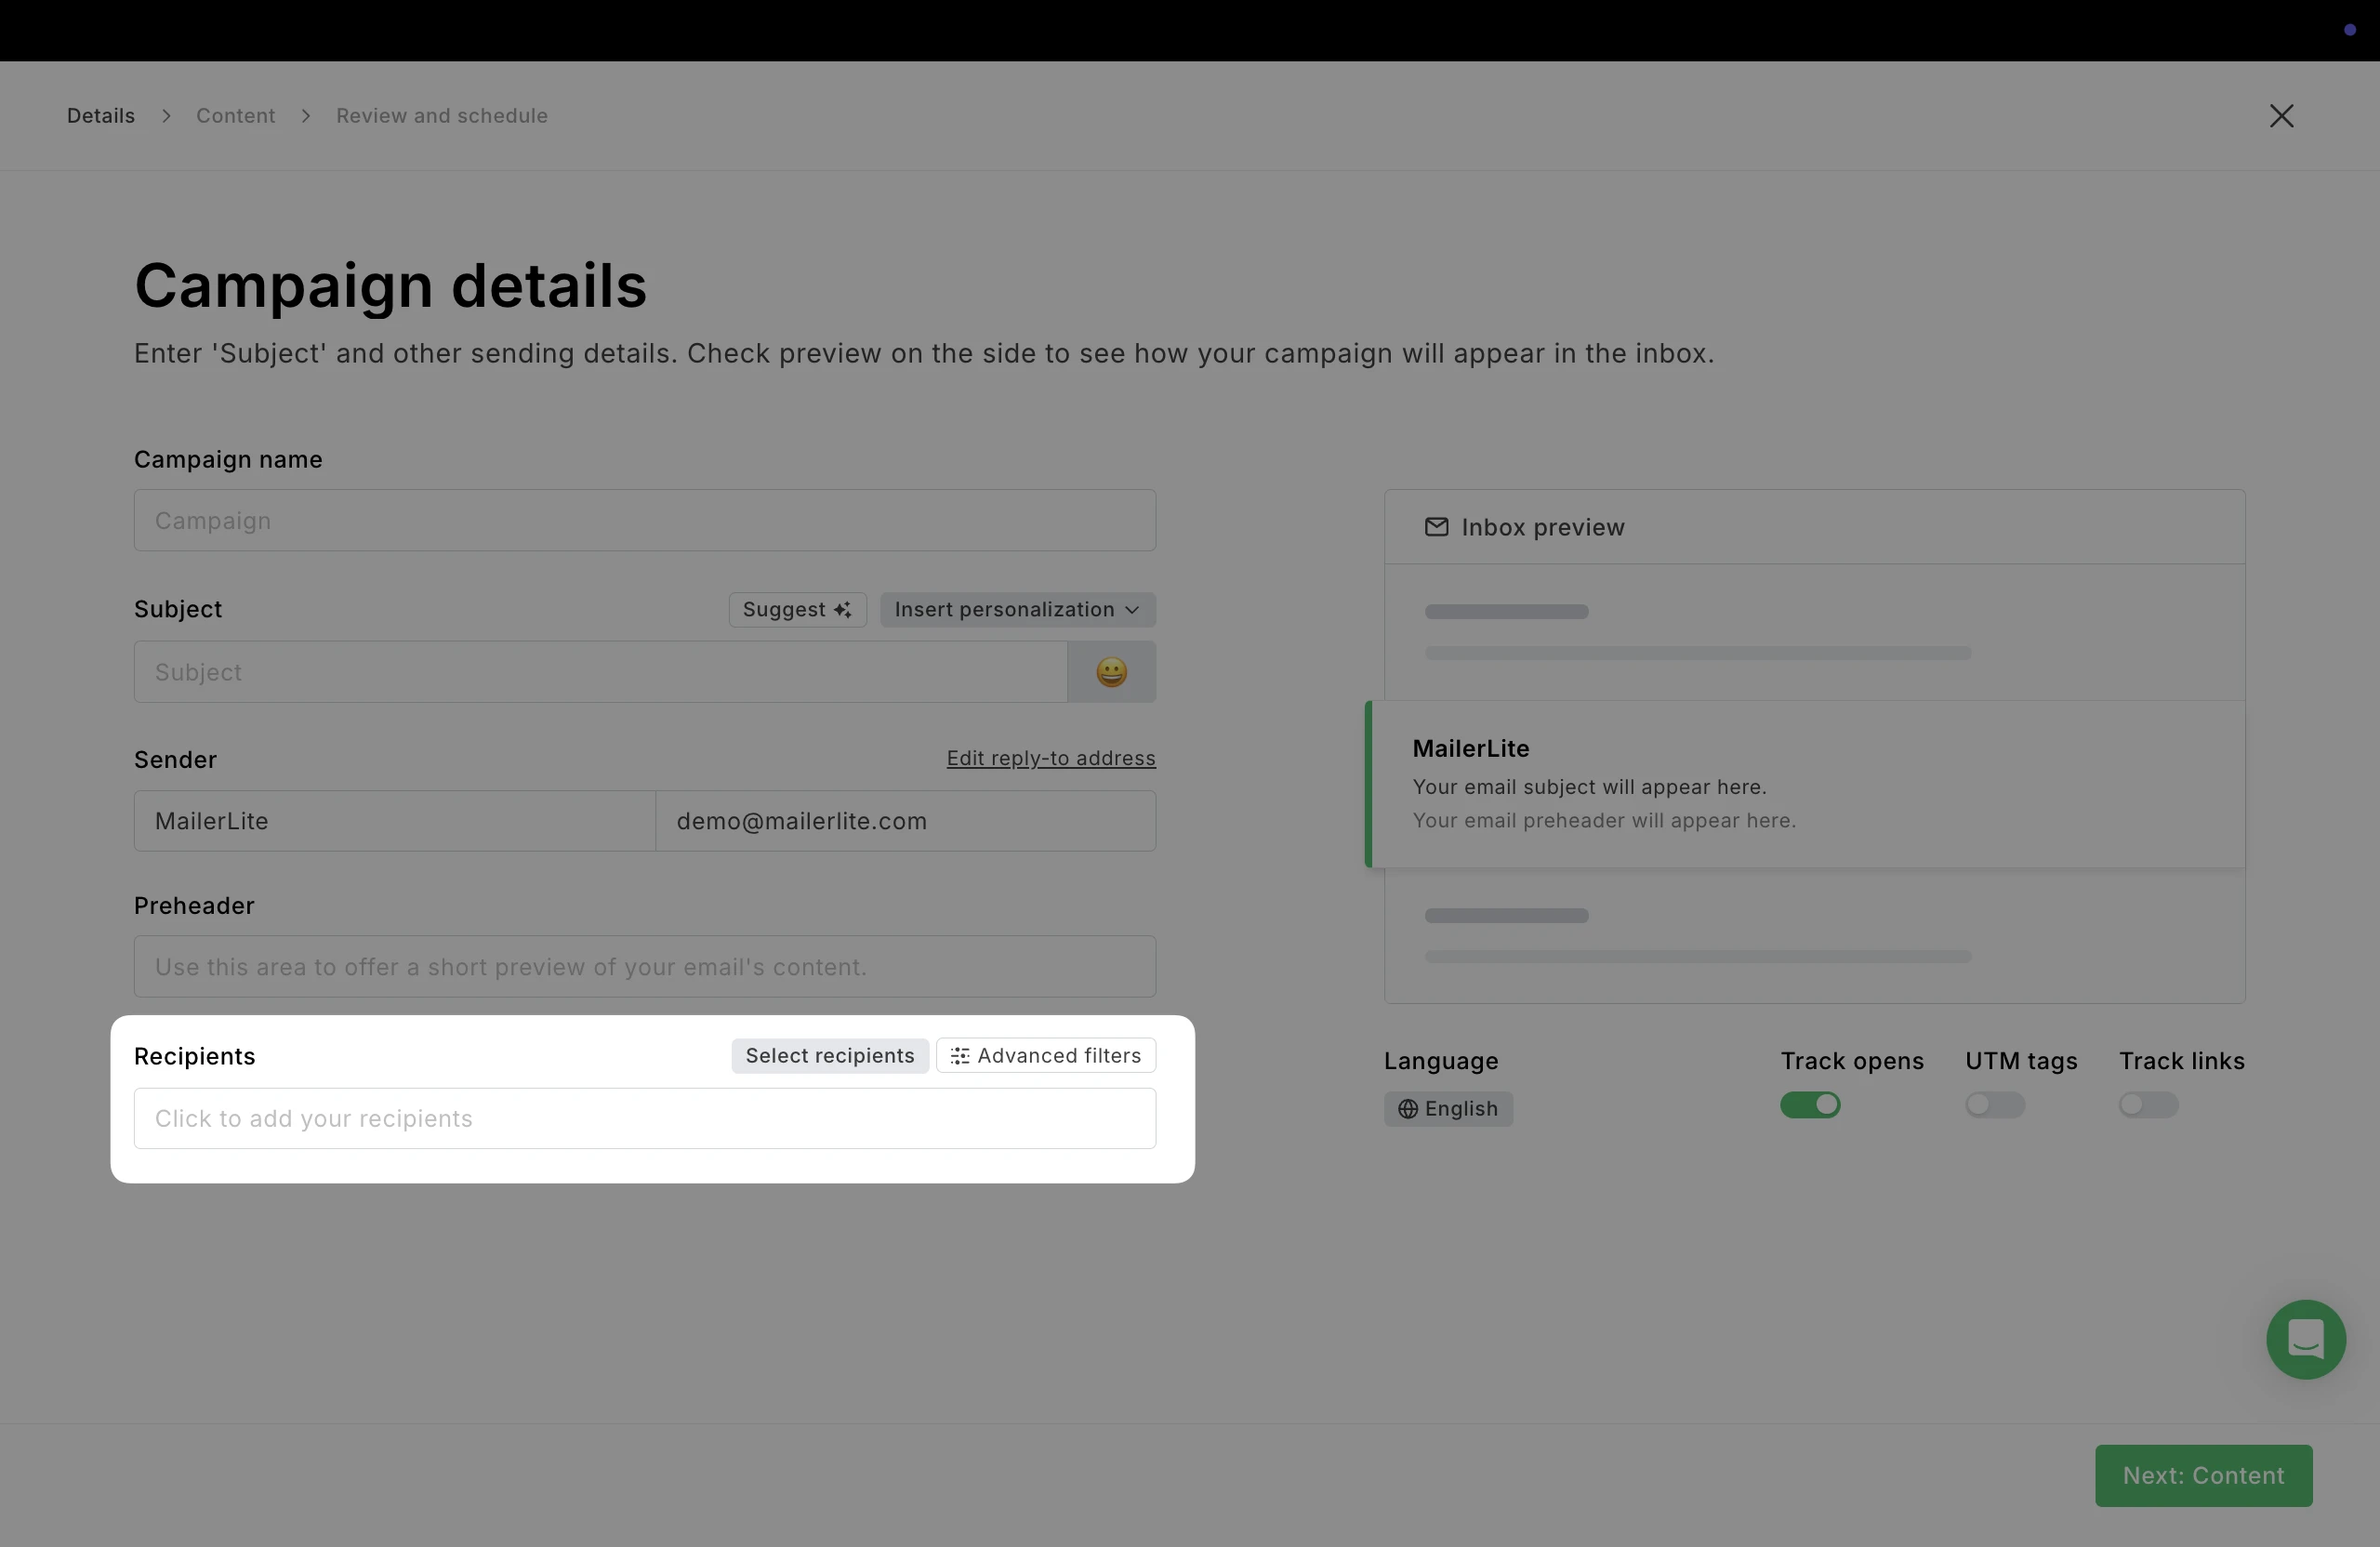
Segments can be used as recipients of any campaign. They can also be excluded from any campaign if the segment contains subscribers whom you do not want to receive a particular newsletter.
To include a segment in a campaign:
When choosing your recipients, select the segment you wish to receive your campaign.

To exclude a segment from a campaign:
When selecting recipients, click the Exclude segment button to the right of the segment you do not want to receive that newsletter.
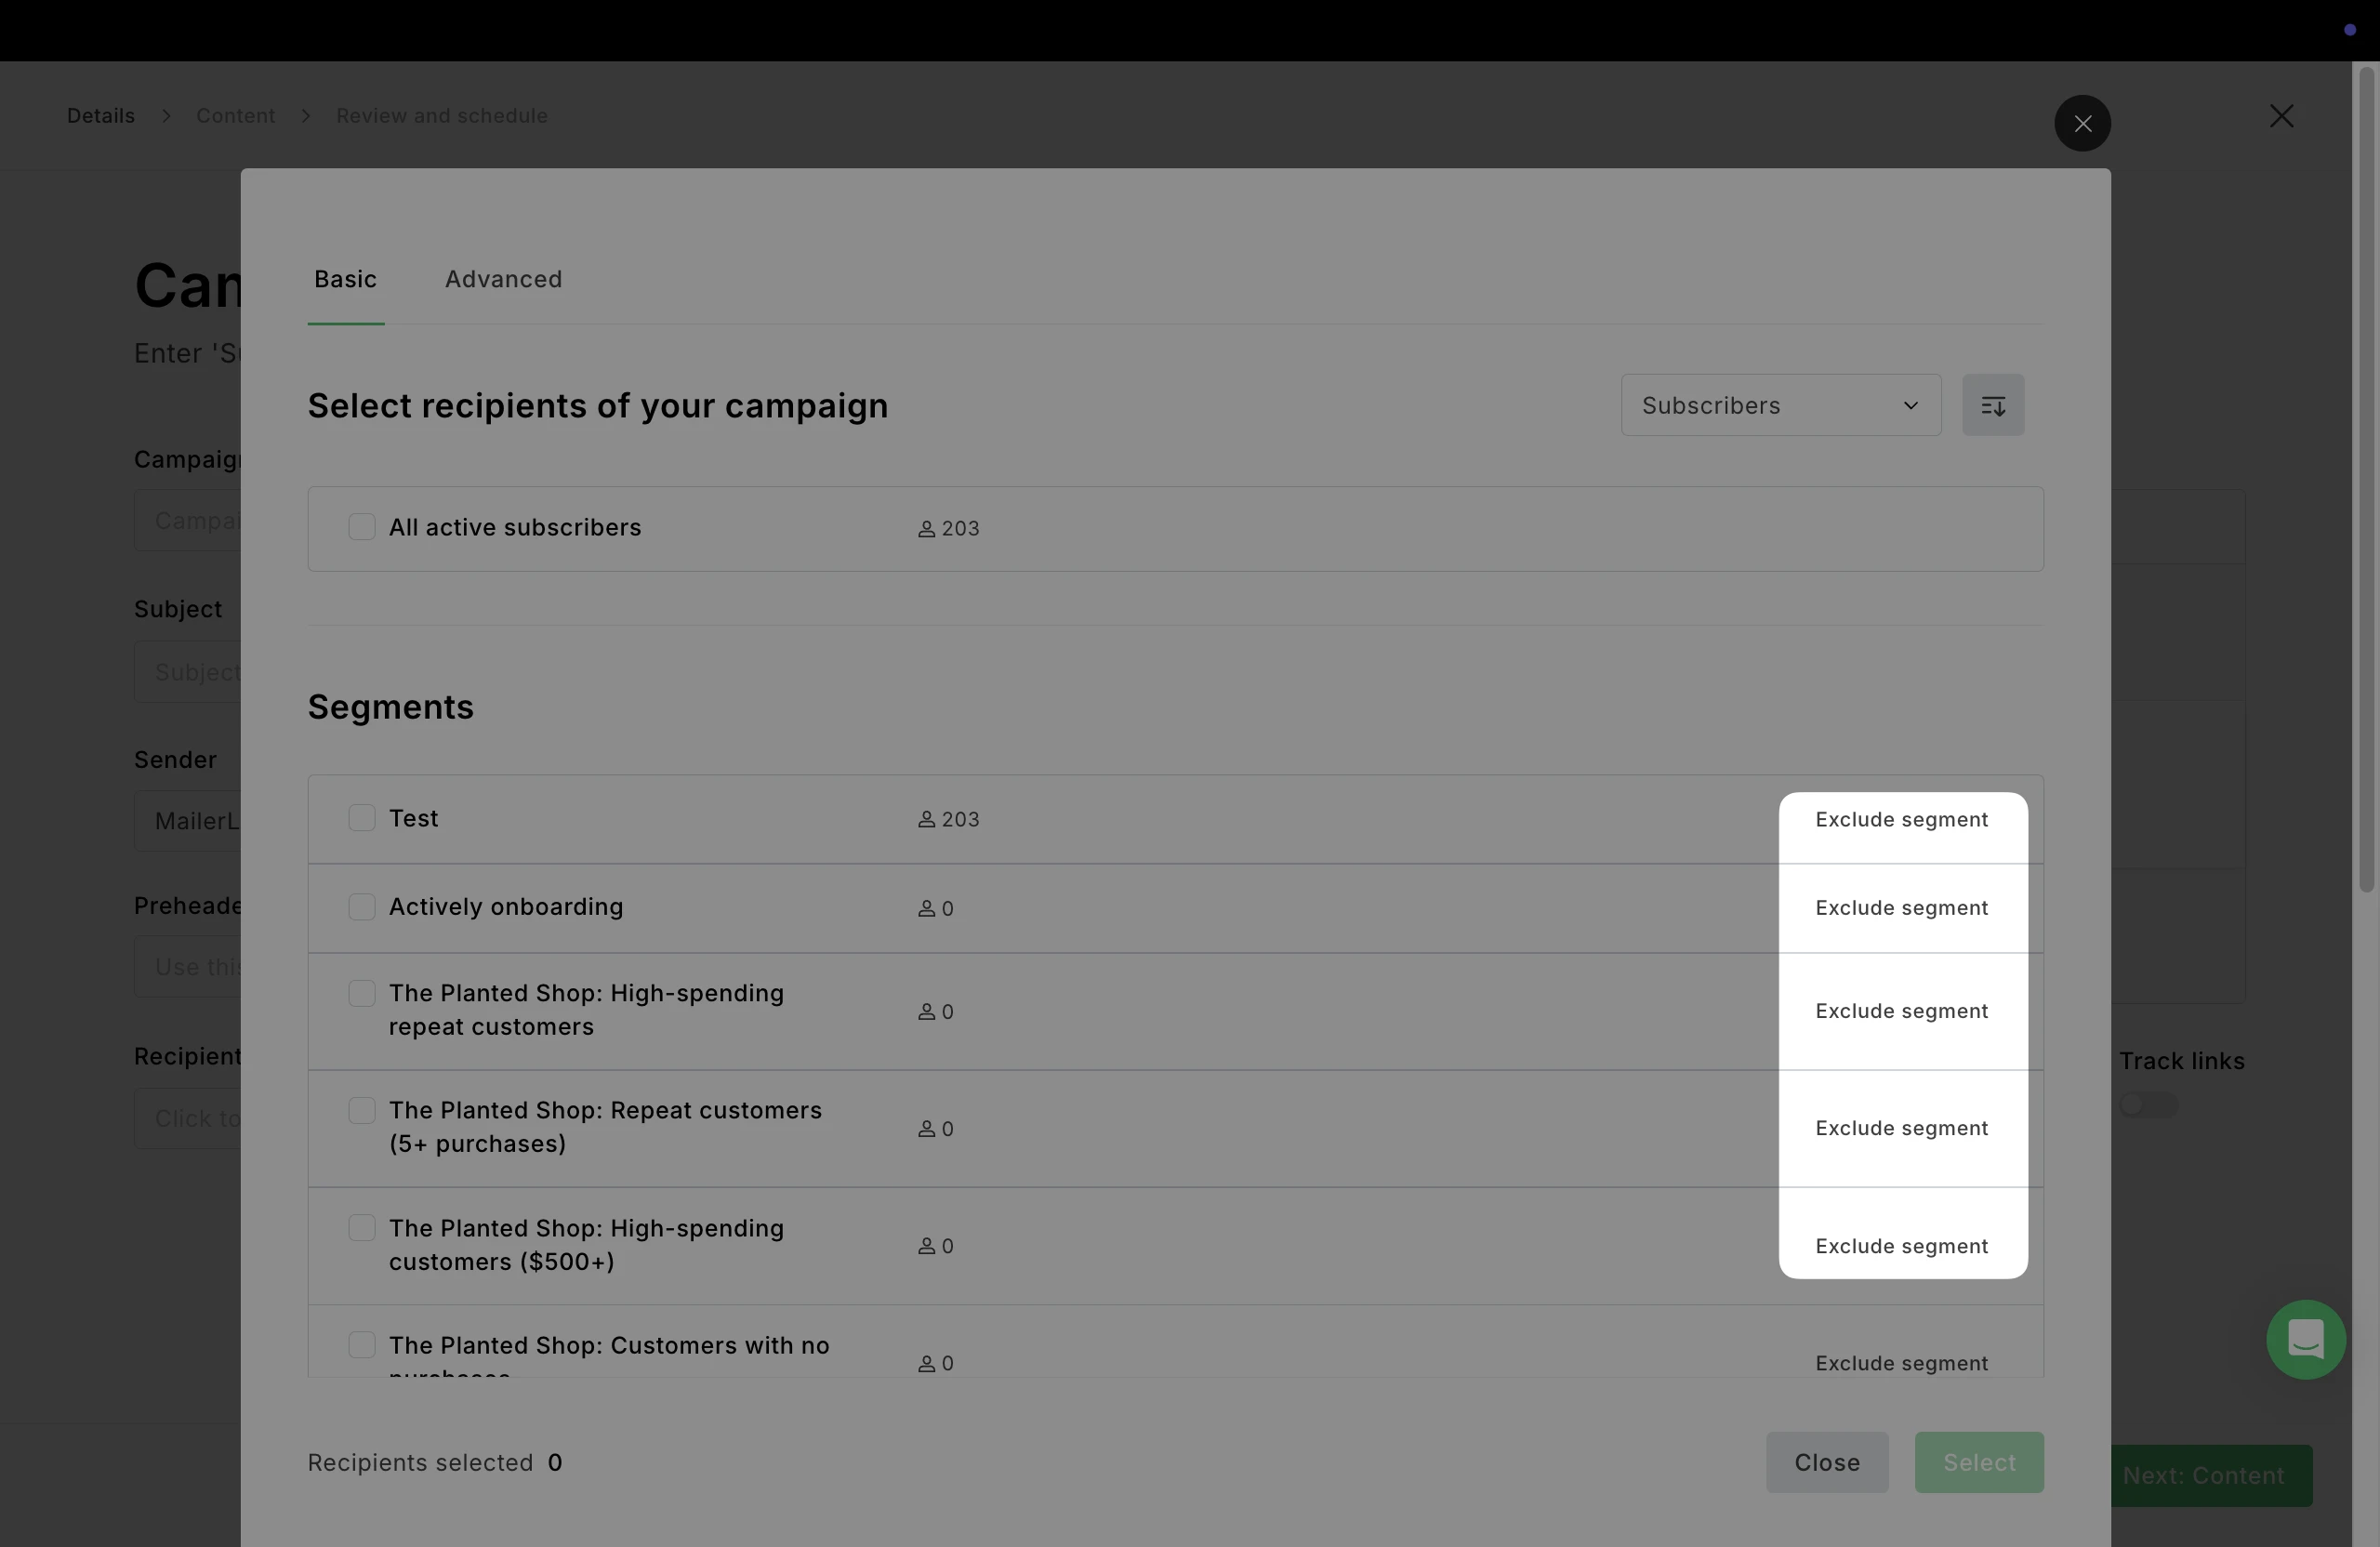
Note: If a subscriber belongs to more than one segment or group, and one of the segments/groups is included in your recipients while the other is excluded, the subscriber will not receive the newsletter. Exclusion supersedes inclusion.
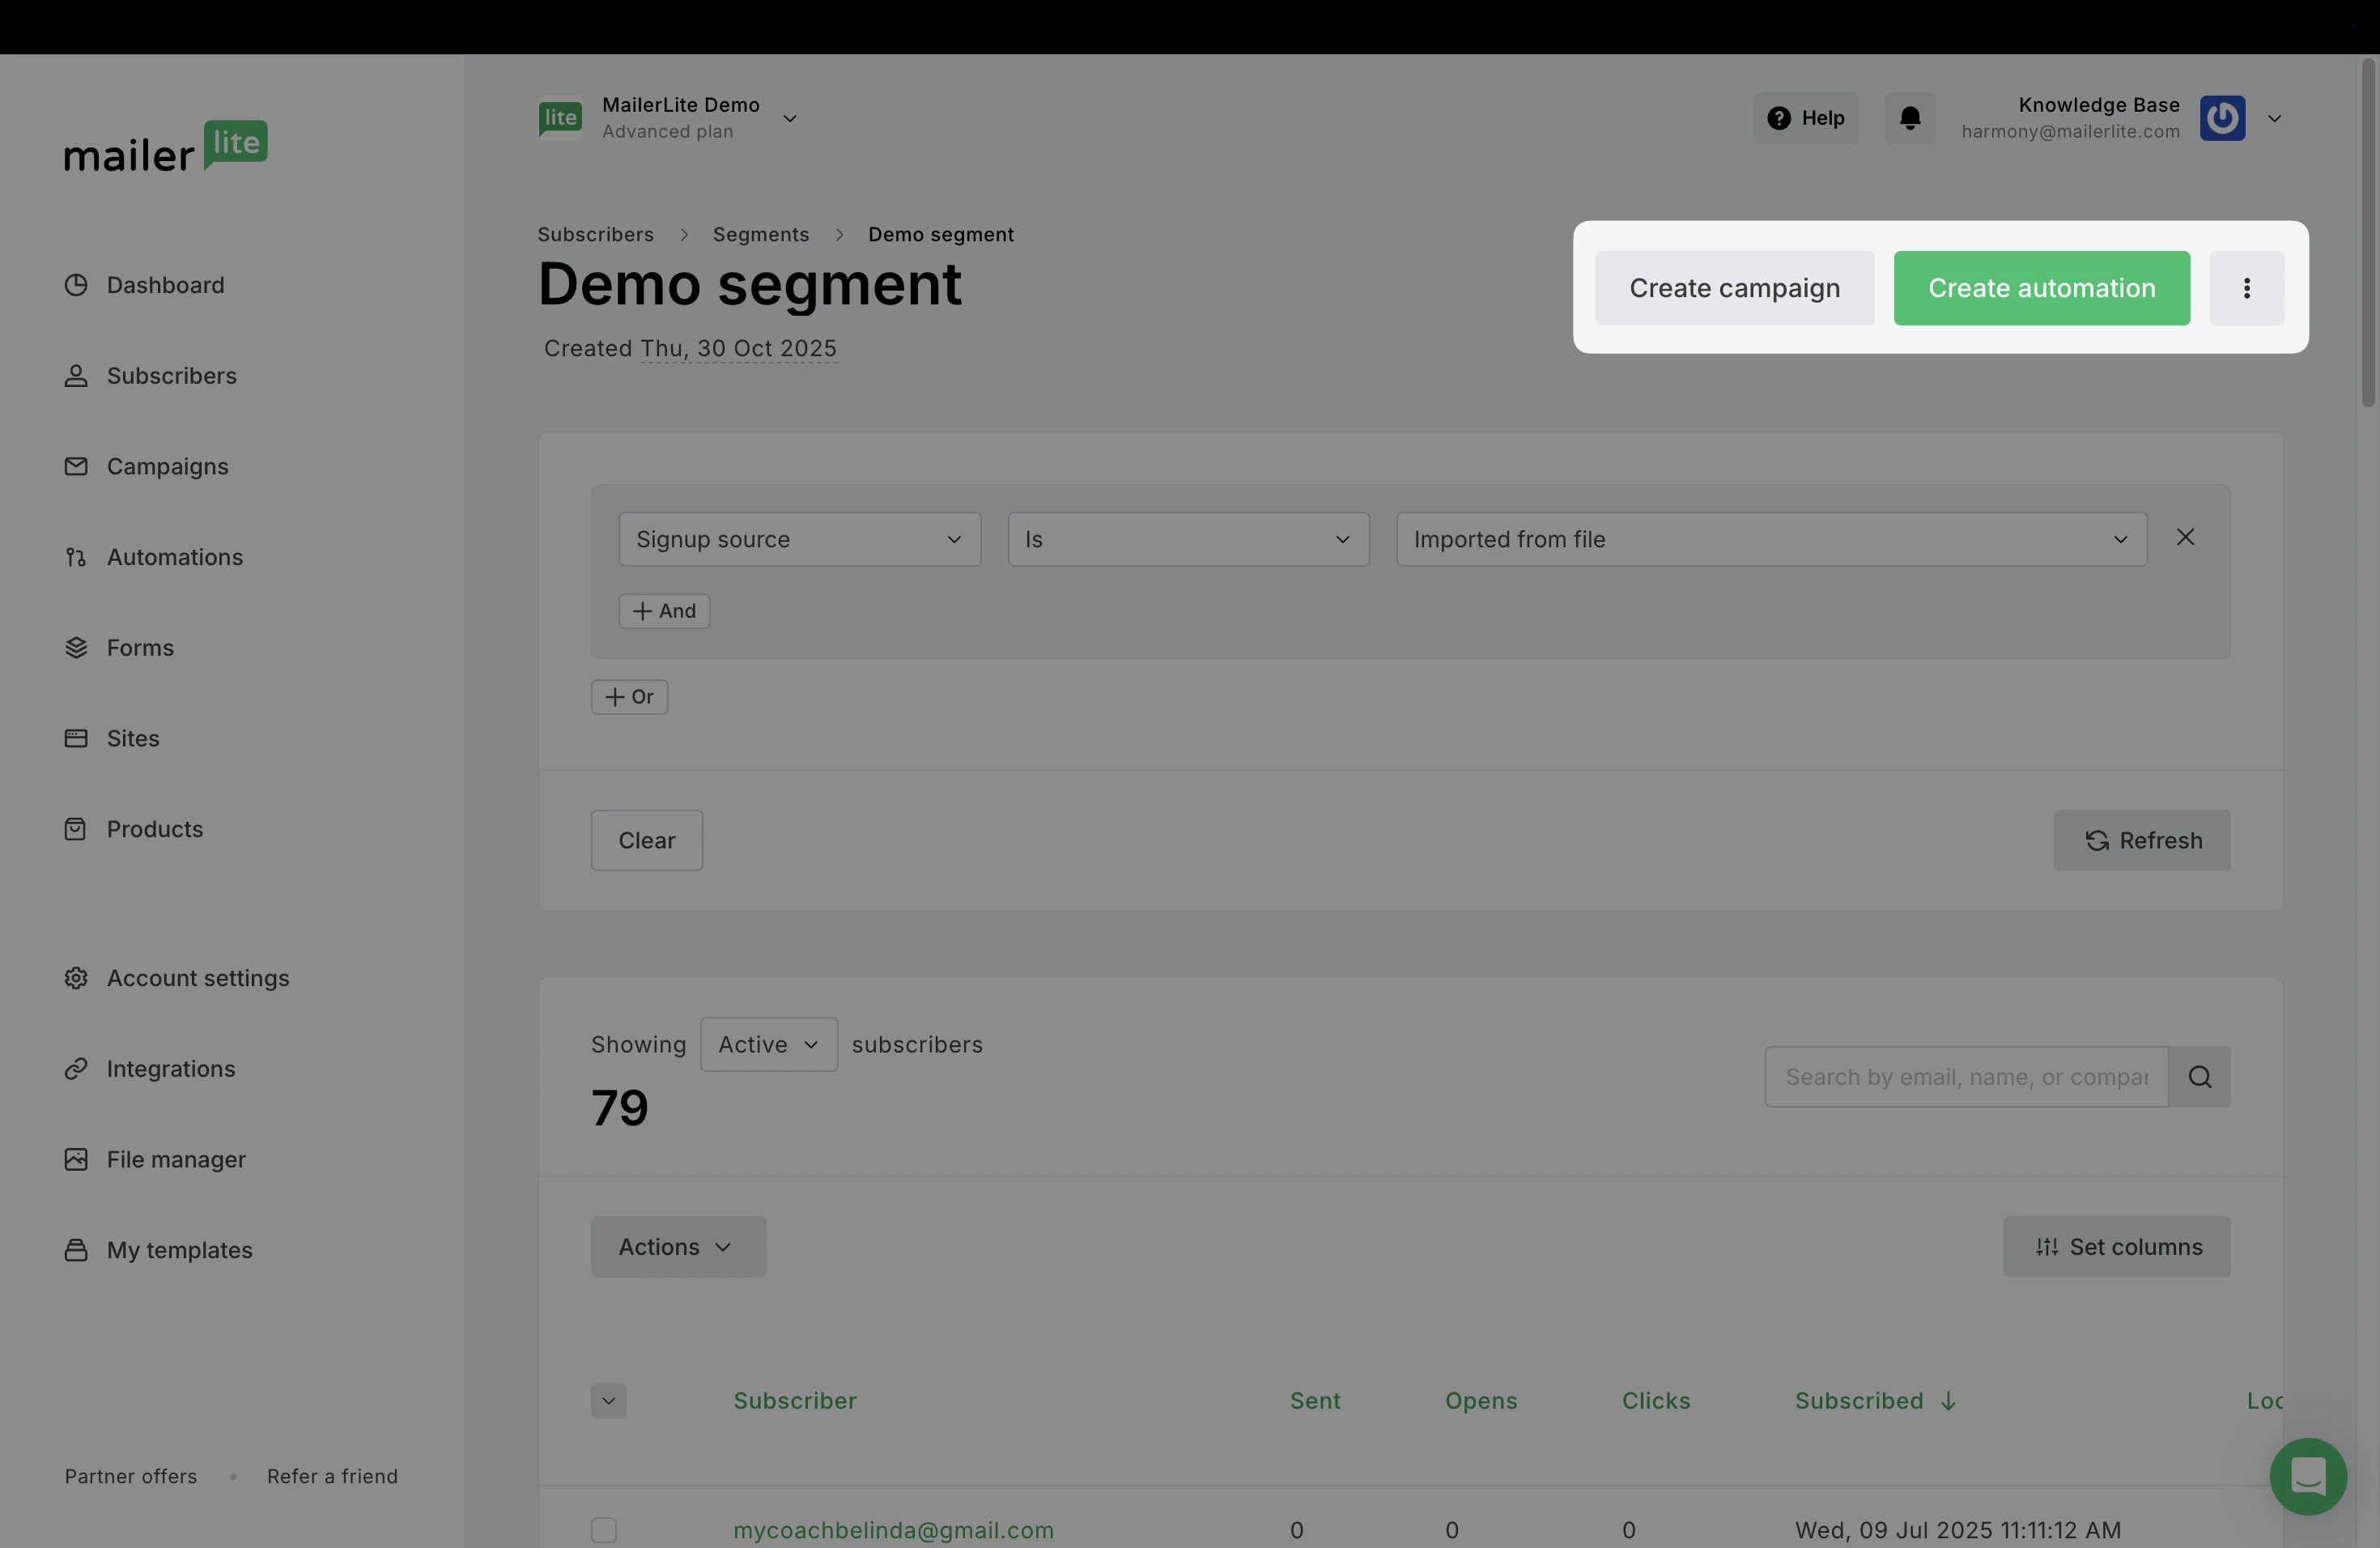
It is also possible to start creating a campaign to send to your segment directly from the Segments page. To do this:
Once you have created a segment and saved the filters, click Create campaign.

From there, you will be taken to the campaign creation page and can begin designing your email.
Once you are done editing and arrive on the Campaign details page, you will see your segment already added under Recipients.

How to use segments in an automation
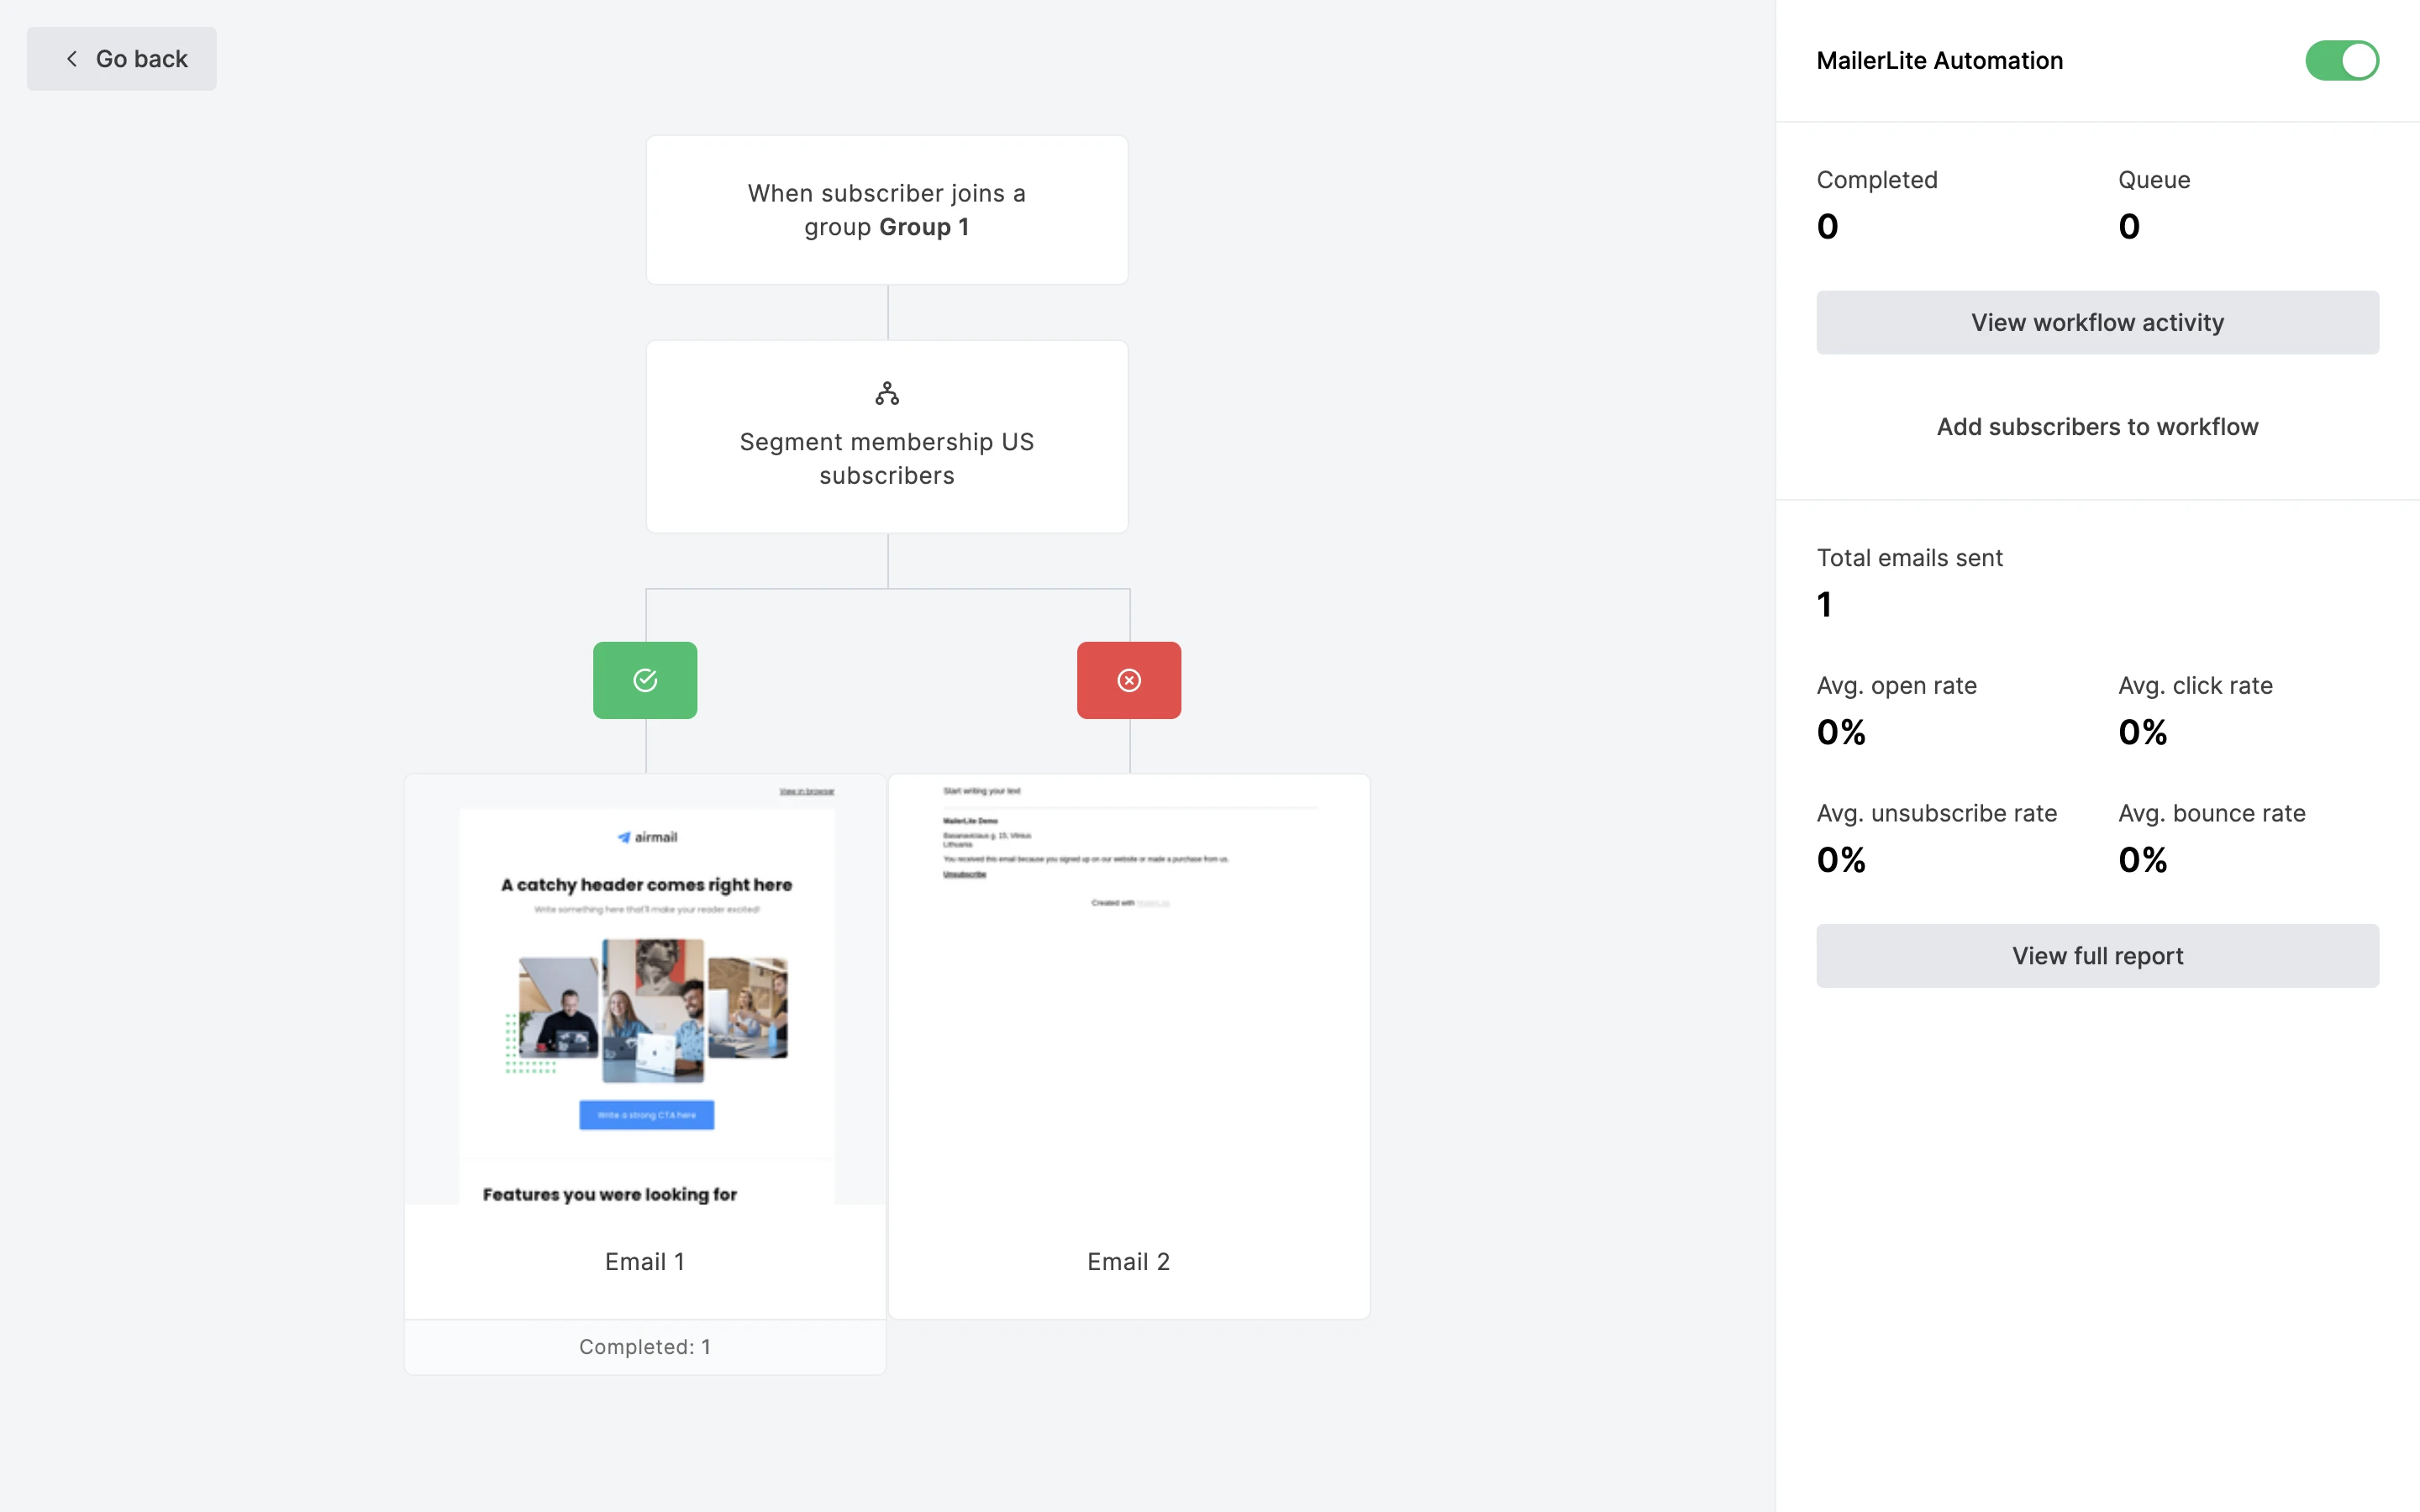
When creating an automation workflow, you can use the Condition step to alter the outcome of your workflow depending on a rule you set.
One of the options for the Condition step is Segment membership. To use your segment as a Condition step in an automation workflow:
Add a Condition step to your workflow.
In the sidebar, set the condition as Segment membership and select the segment you wish to use as the condition. This will split your workflow into two paths depending on whether your subscriber is included in the segment or not.
Add additional steps for each path.
Your workflow may look something like this.
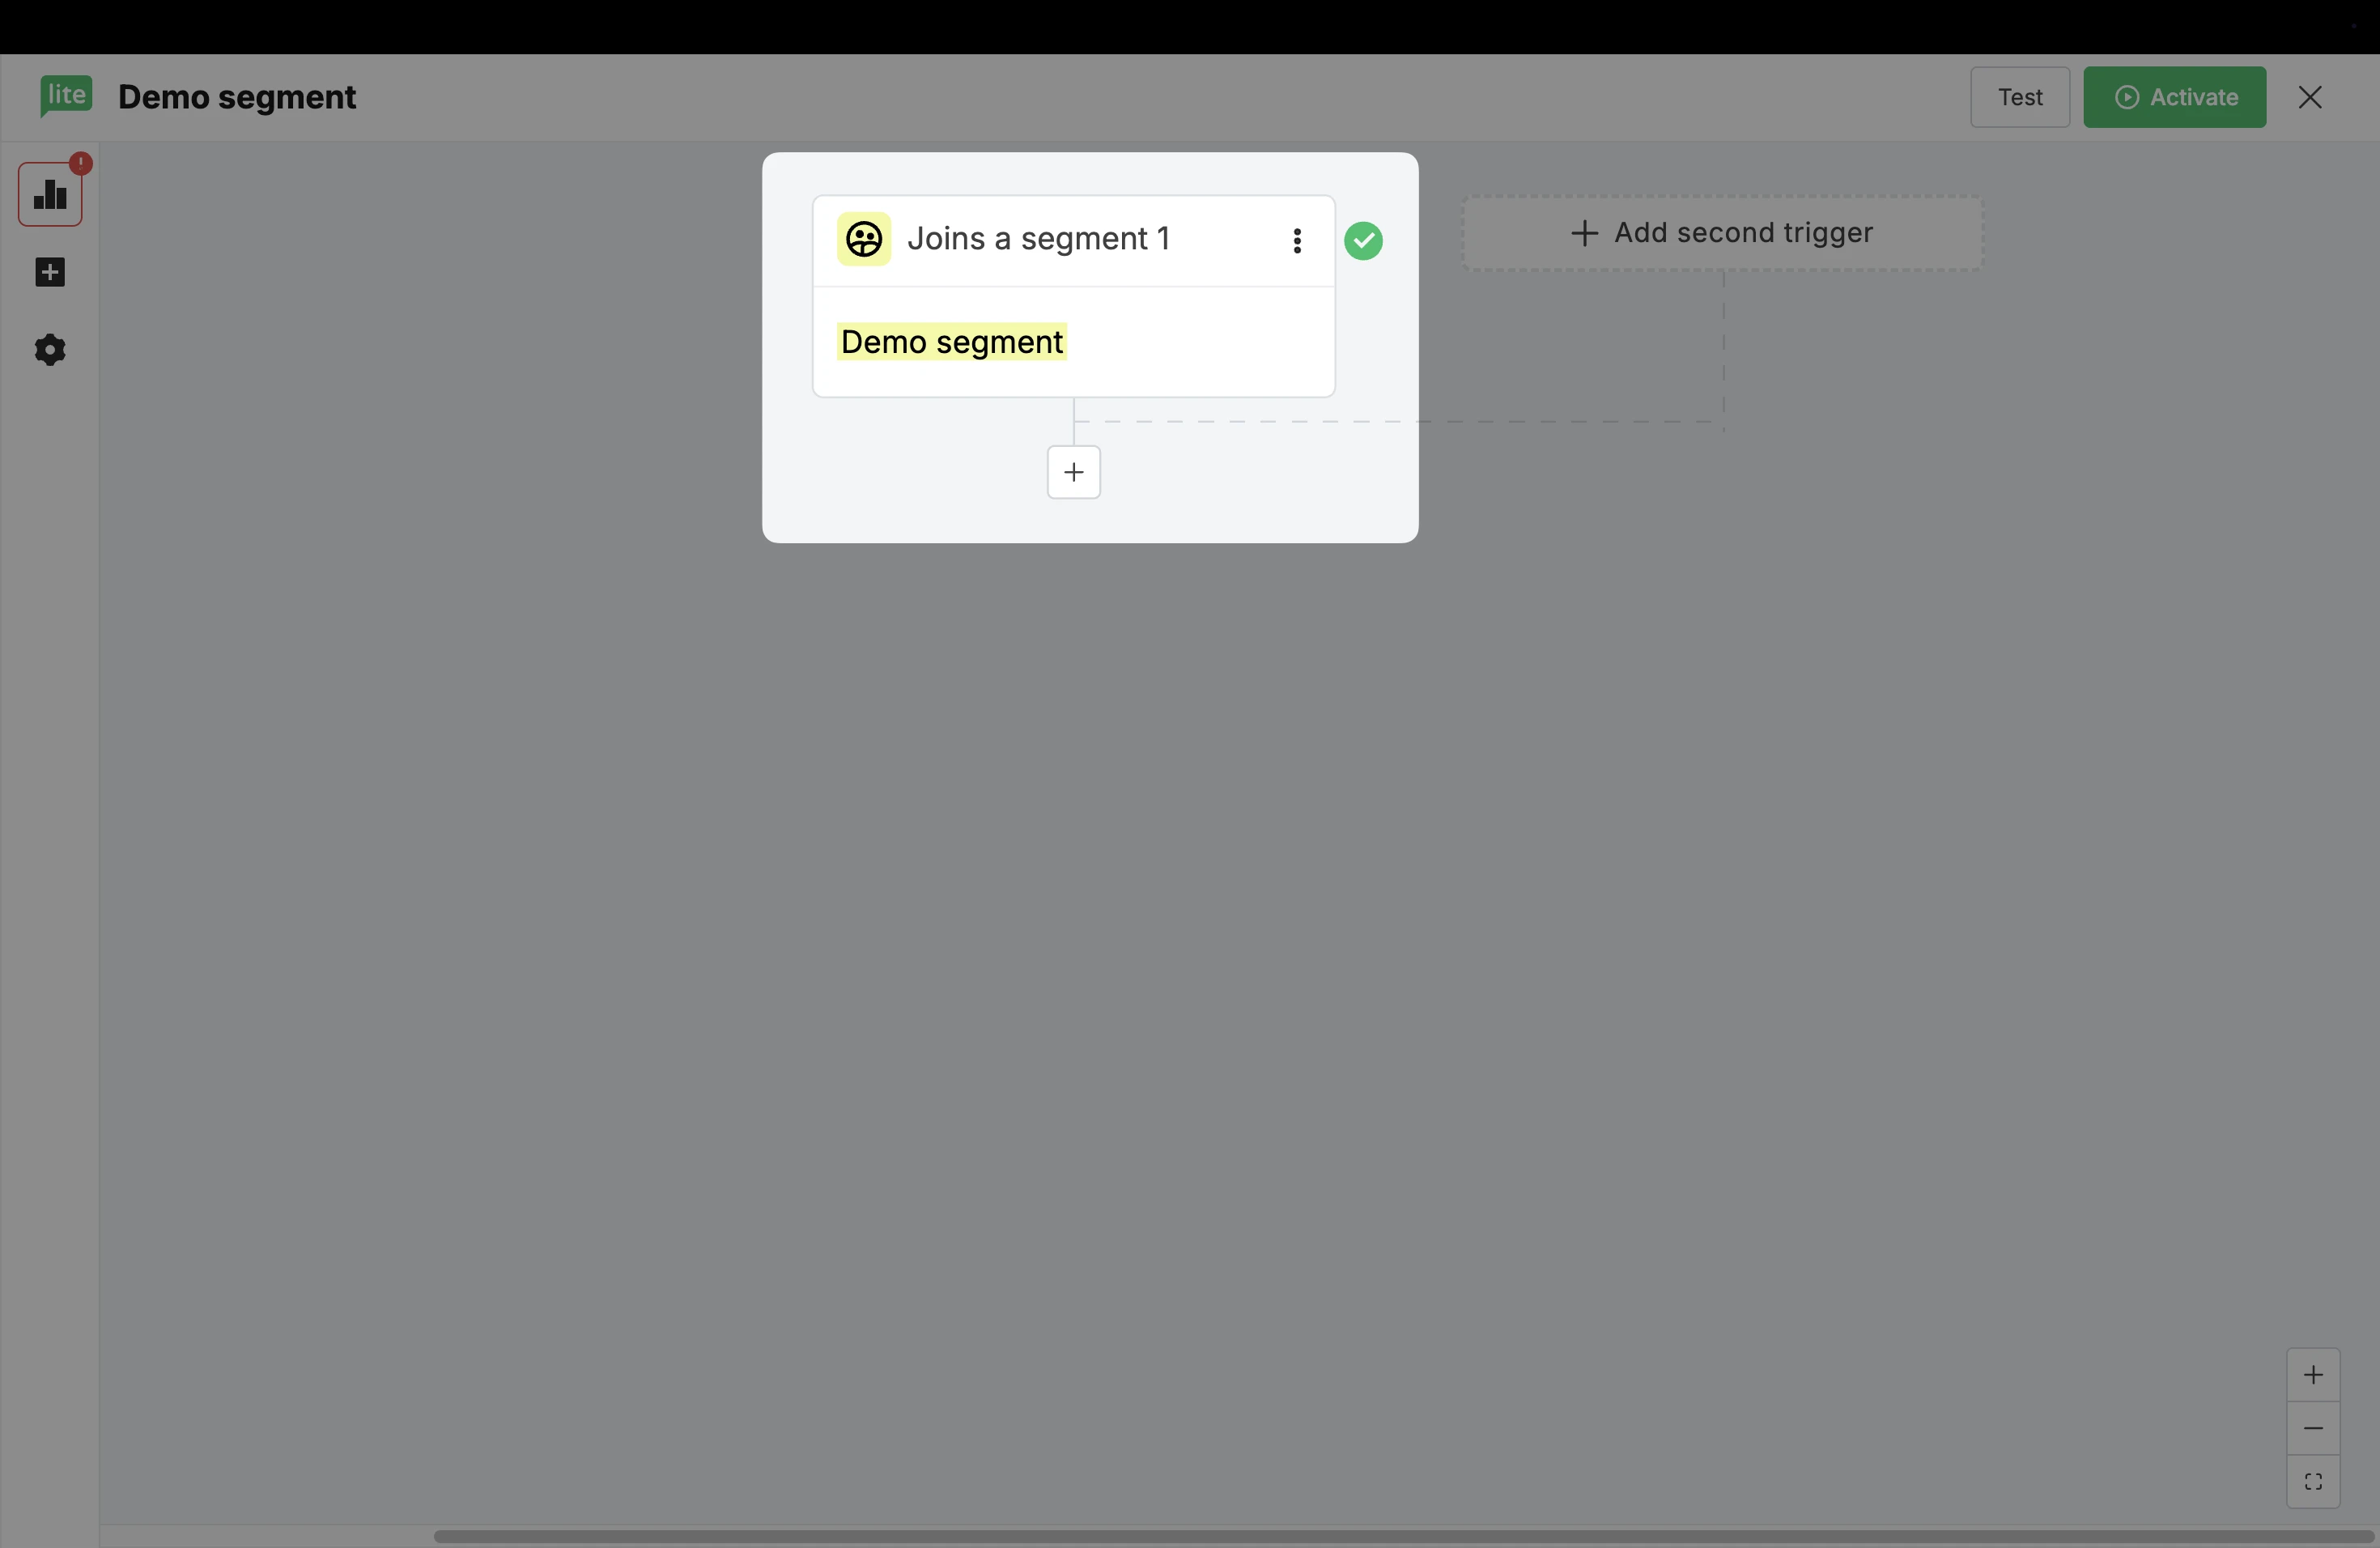
It is also possible to create an automation directly from the Segments page.
Once you have created a segment and saved the filters, click Create automation.
2. This will create a new automation with the segment added as the workflow trigger.
When creating a segment based on automations, you can filter subscribers depending on their activity within a specific automation workflow.
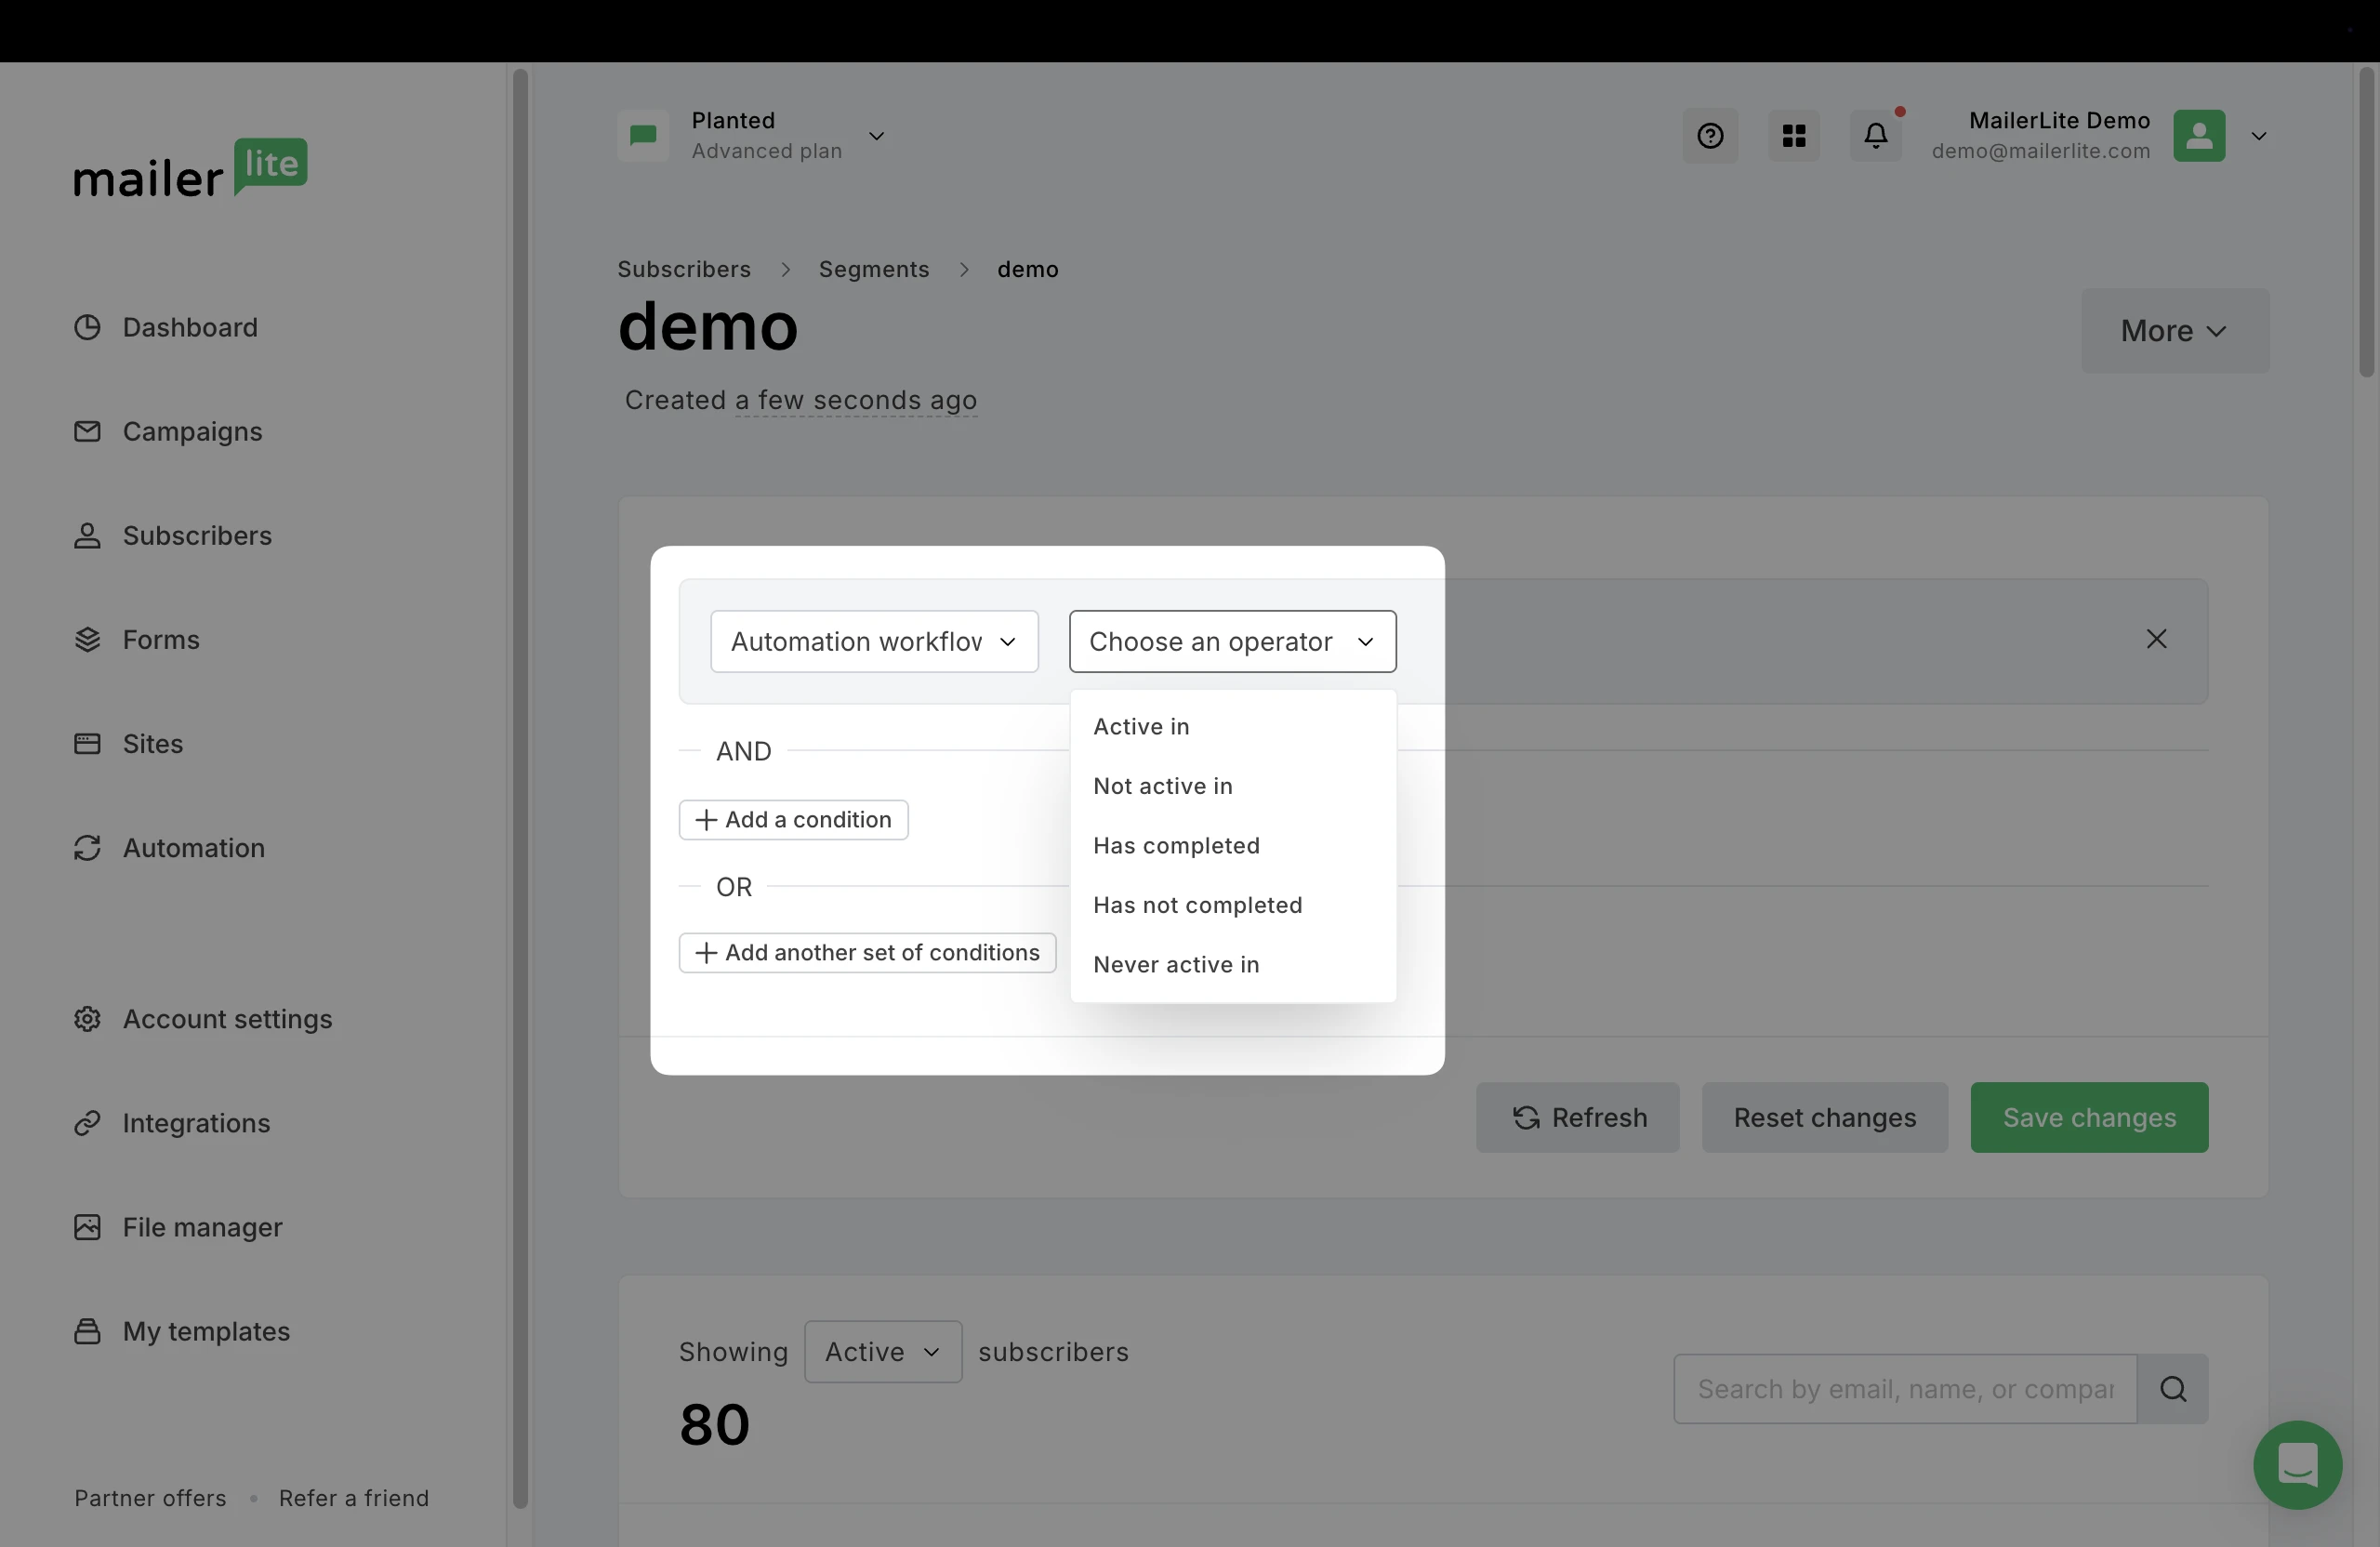
The options are:
Active in: Subscribers who are currently moving through the selected automation workflow.
Not active in: Subscribers who are not currently in the selected automation. They may have completed it, exited early, or been removed.
Has completed: Subscribers who have finished all steps of the selected automation.
Has not completed: Subscribers who started the selected automation but have not finished all the steps.
Never active in: Subscribers who have never entered or triggered the selected automation.
✨ Get inspiration on how to utilize segmentation.
What if my segment isn’t working?
So people are subscribing to your newsletter but they aren’t being added to any segments. What should you do?
If you are using multiple filters to create your segment, make sure you have correctly created them using the "and" or "or" option. You can check this by navigating to the Segments tab on Subscribers and selecting the segment you want to double-check.
If some subscribers are being added to your segment, but not all of them; double-check that the subscriber in question applies to the filter conditions you have set. You can find this information in each subscribers profile
Click on any subscriber’s email address to open their profile. Once in their profile, scroll down to Subscriber details.

Here you’ll be able to see all fields, groups, or stats that you have used as your segment’s conditions.
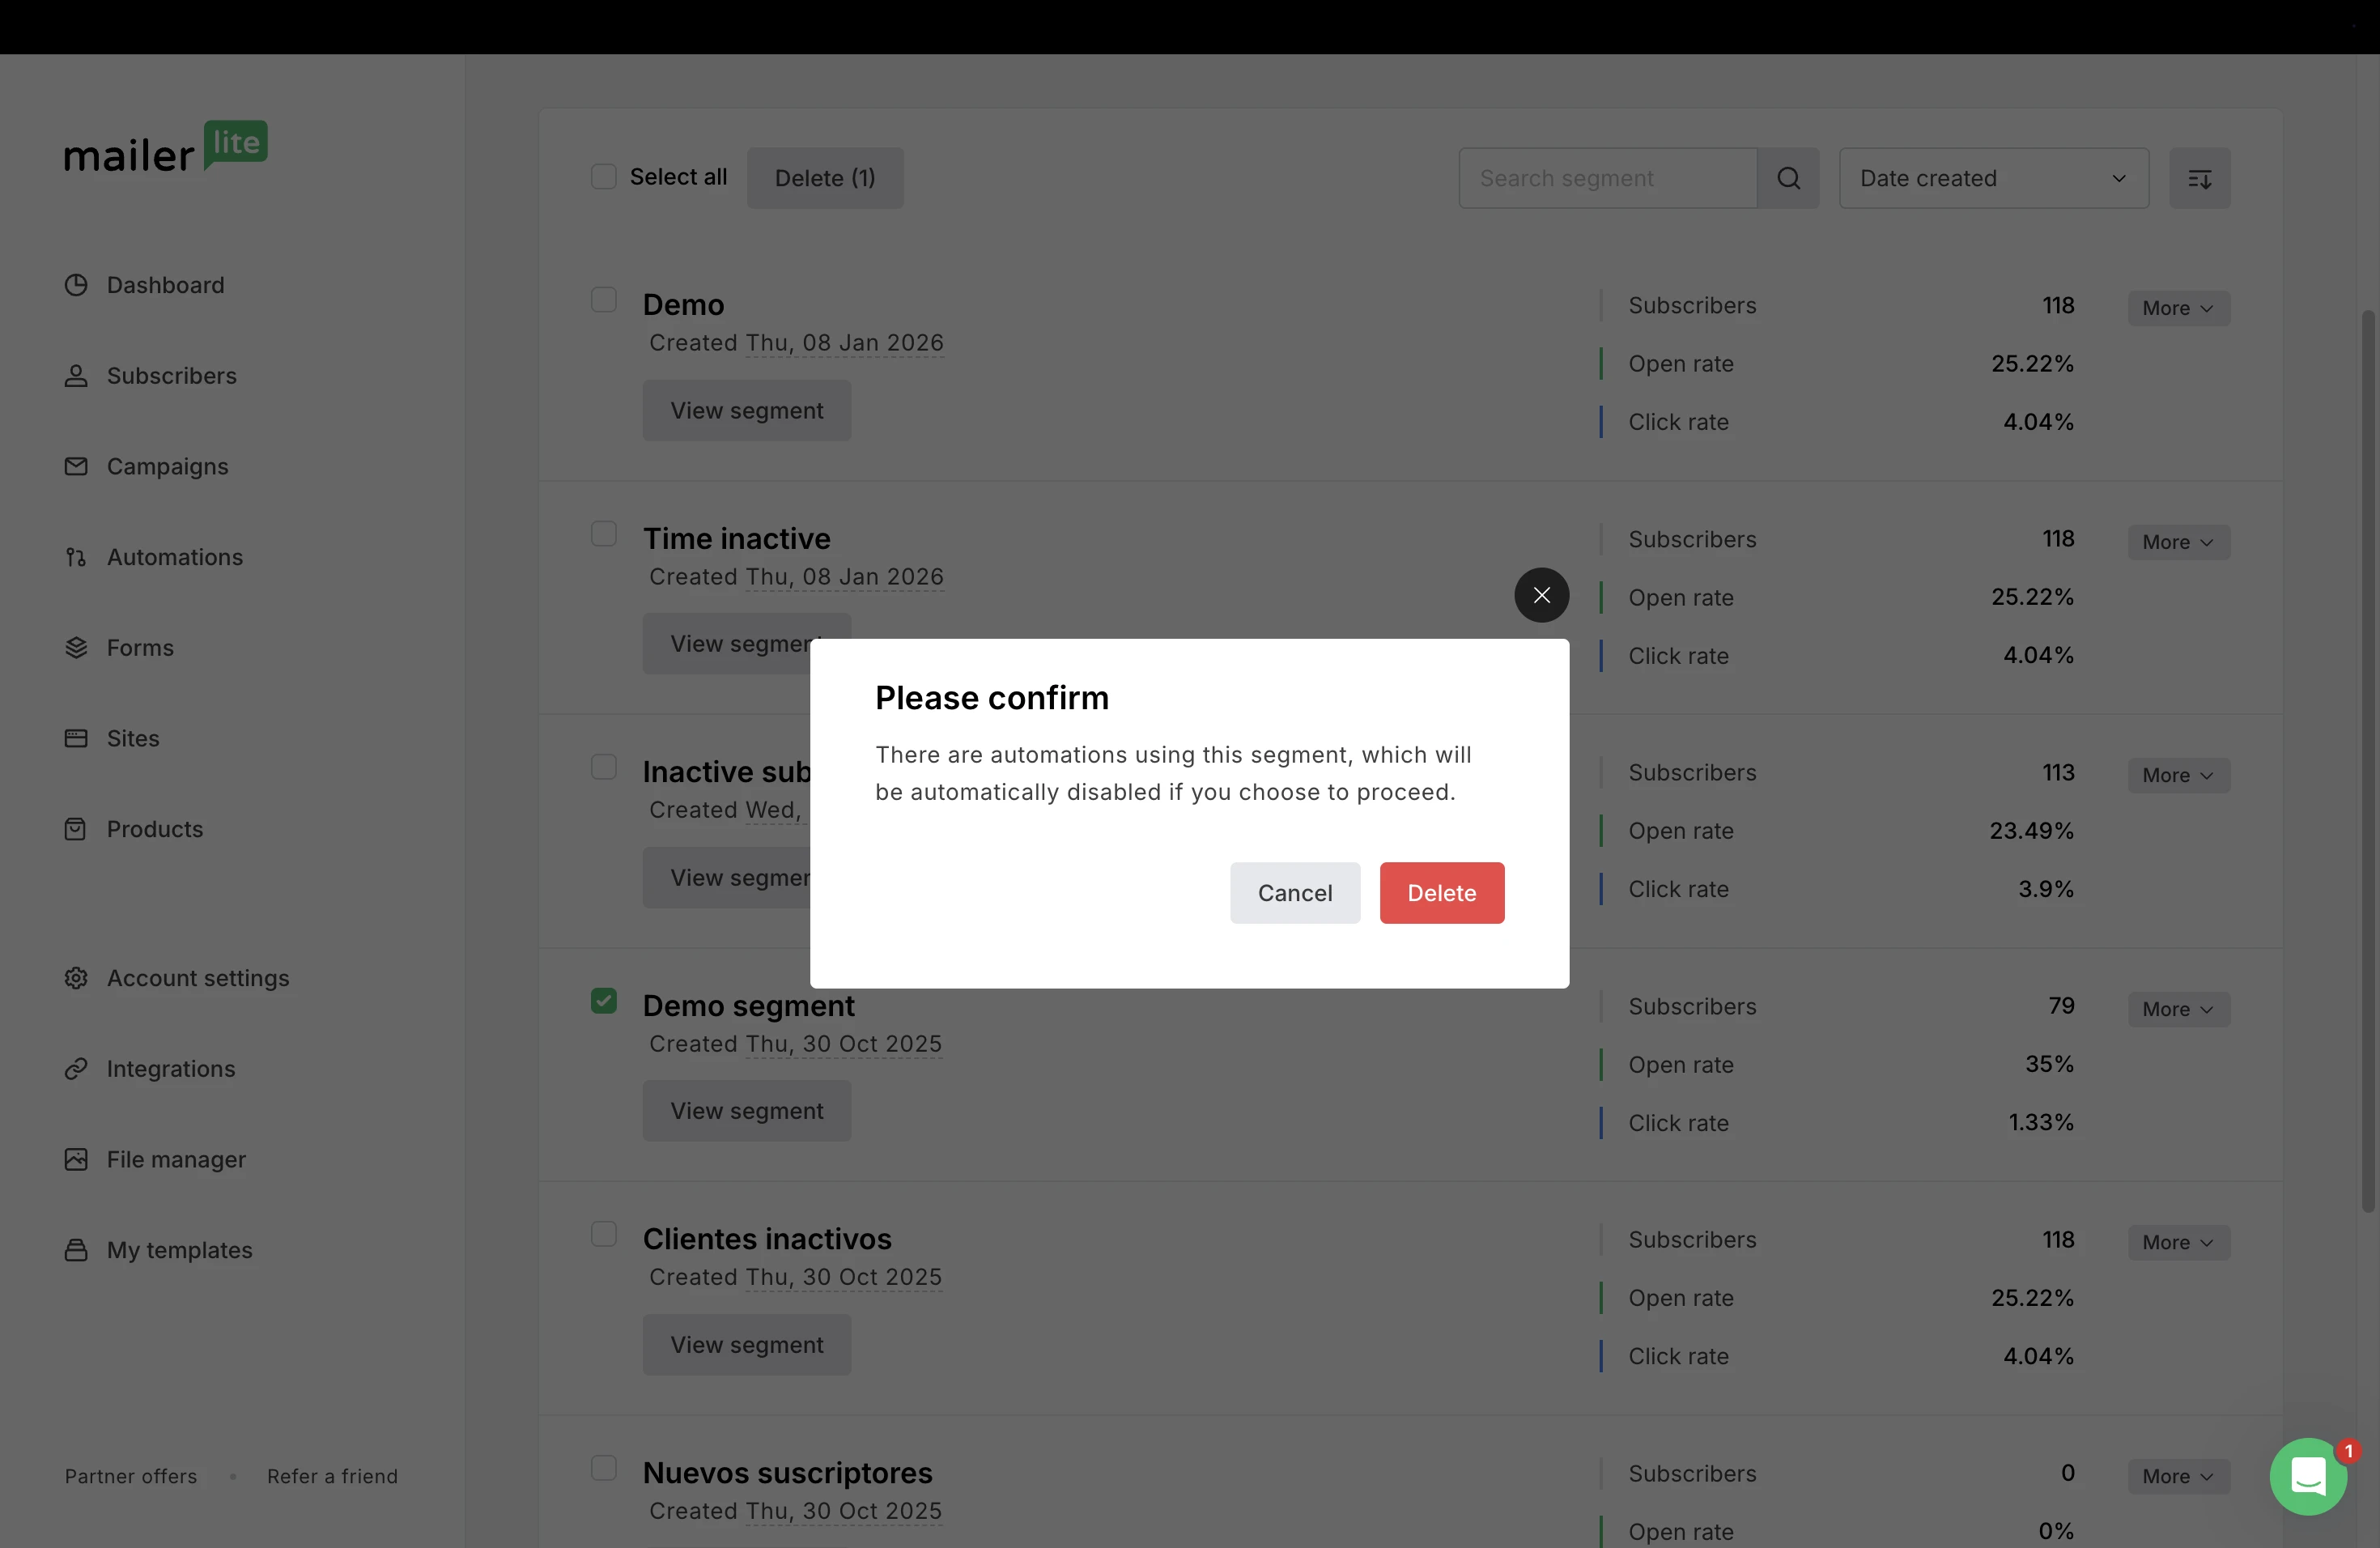
Deleting a segment
To delete a segment:
Navigate to the Subscribers page, then click on the Segments tab.
Select the segment(s) you wish to delete.
Click Delete.
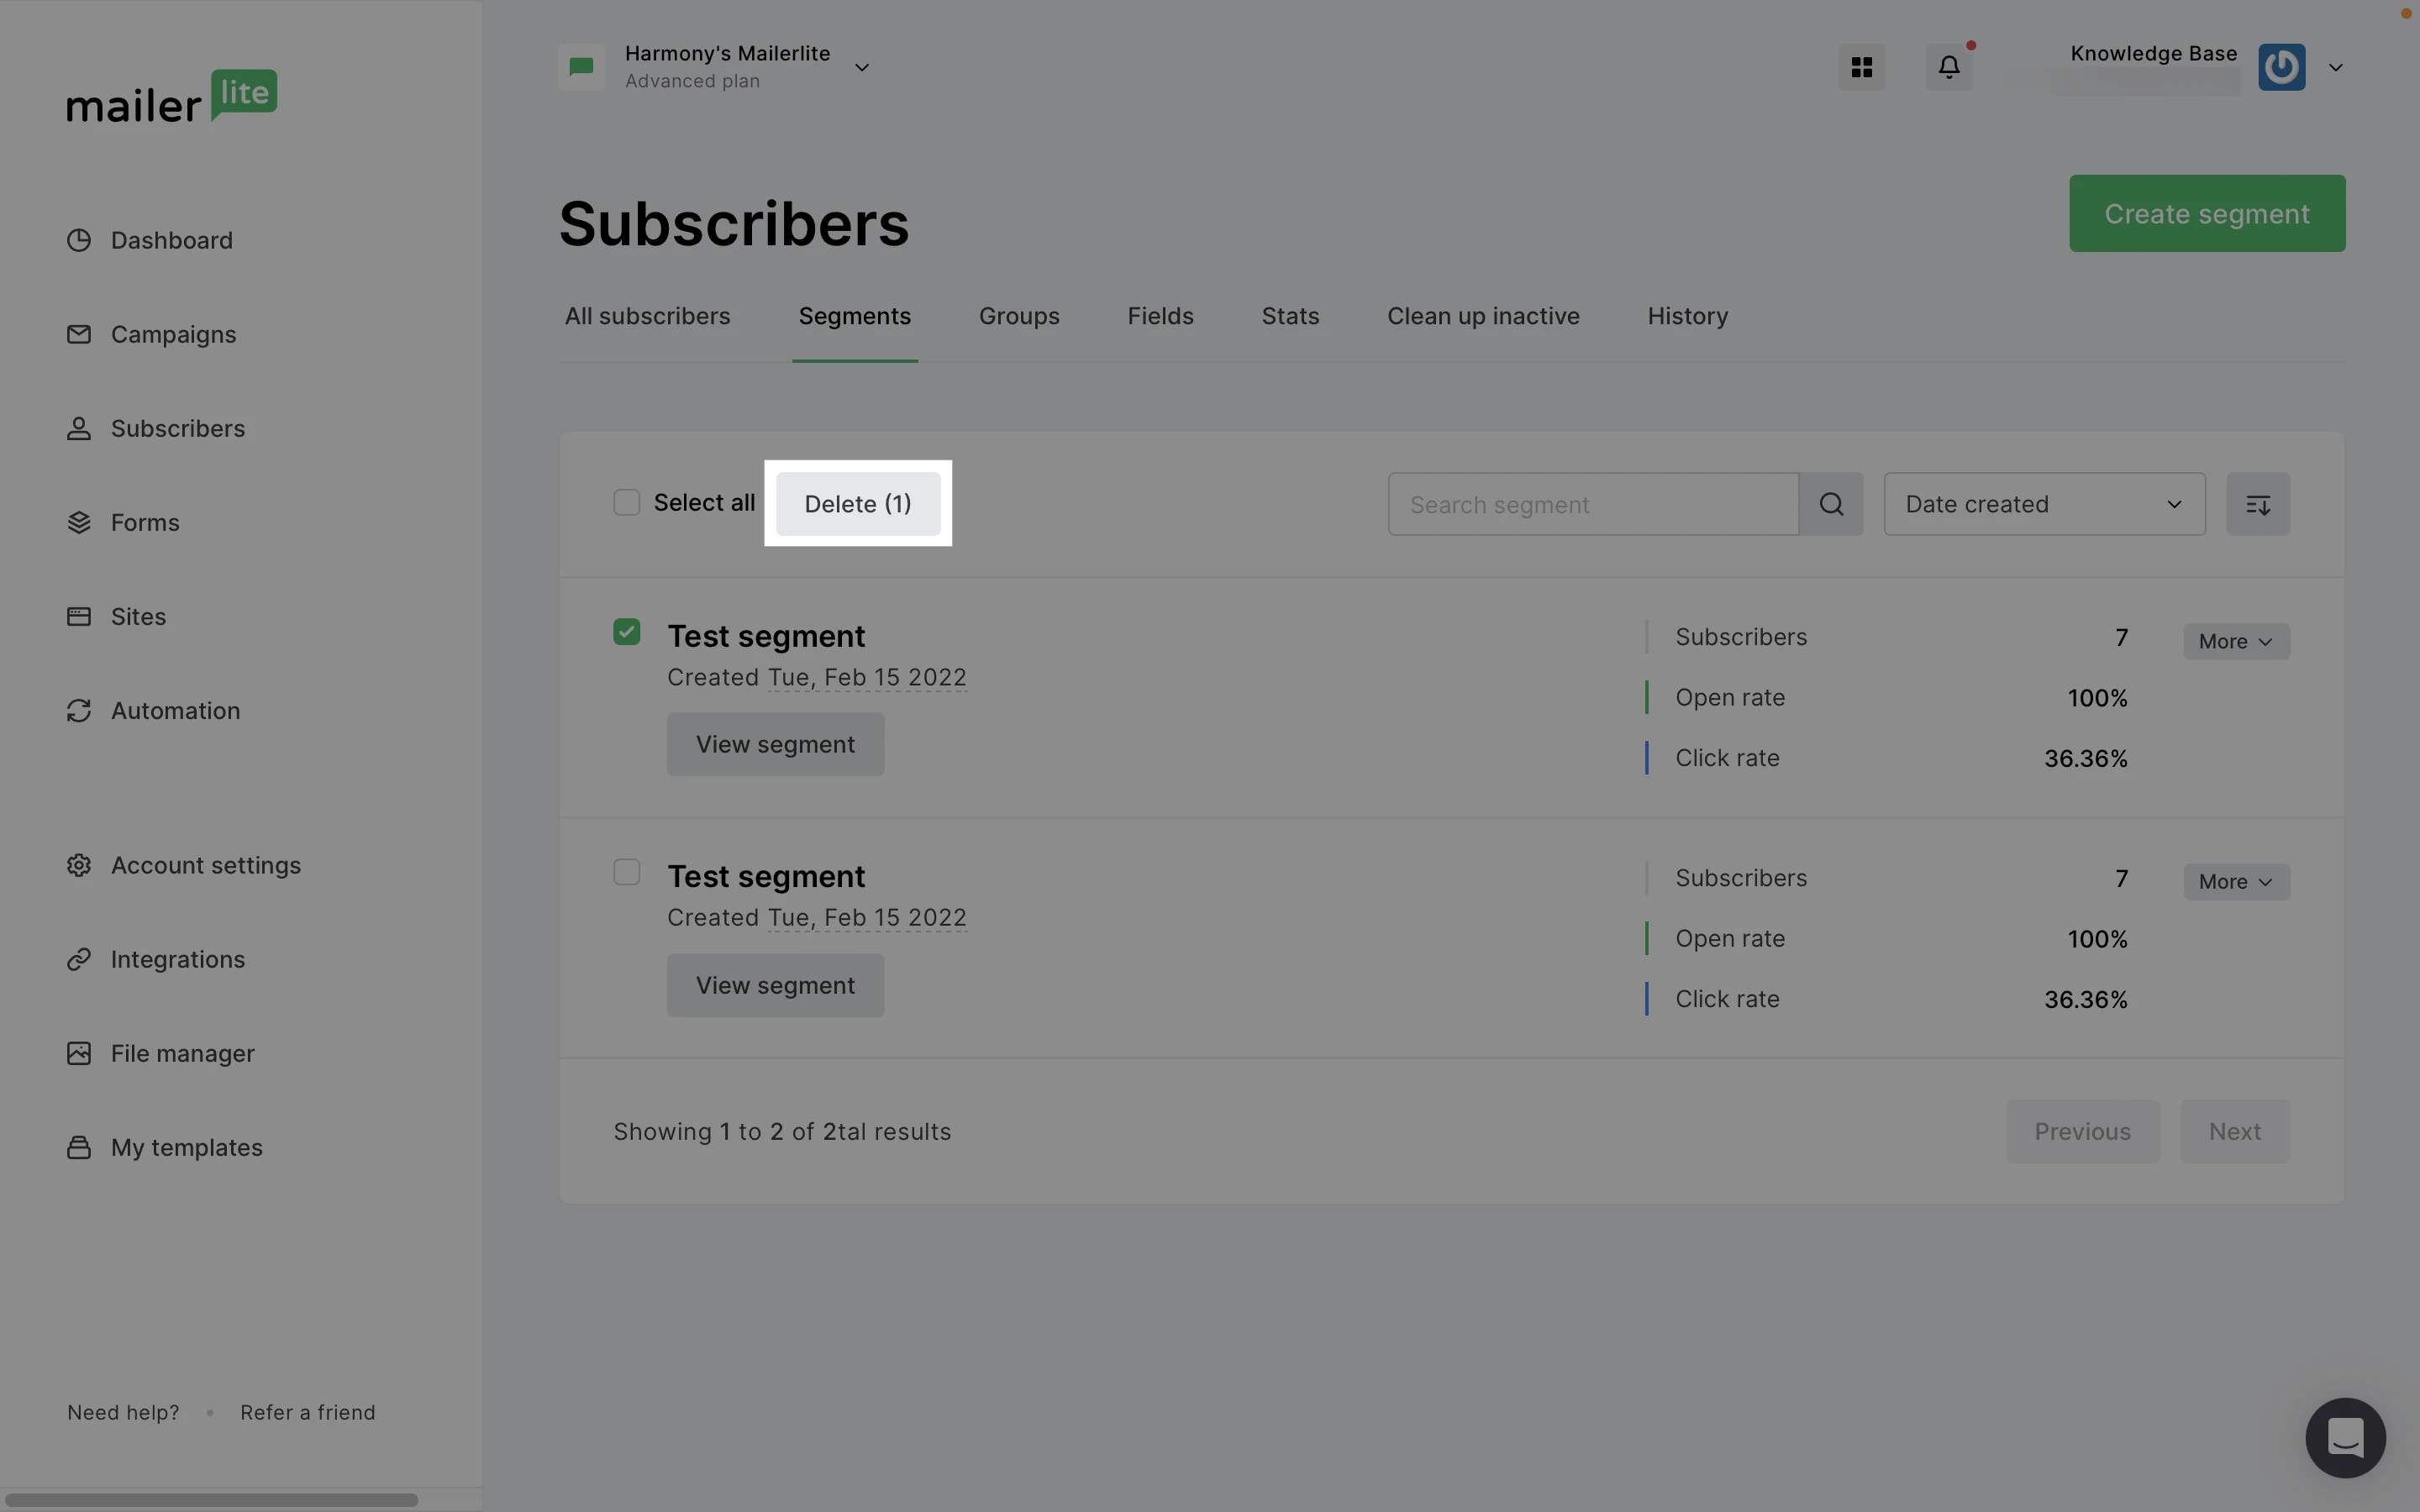
Note: Deleting a segment will only delete the segment itself, not the subscribers inside it.
If the segment is currently being used in an active automation or scheduled campaign, you will be asked to confirm before deleting the segment.
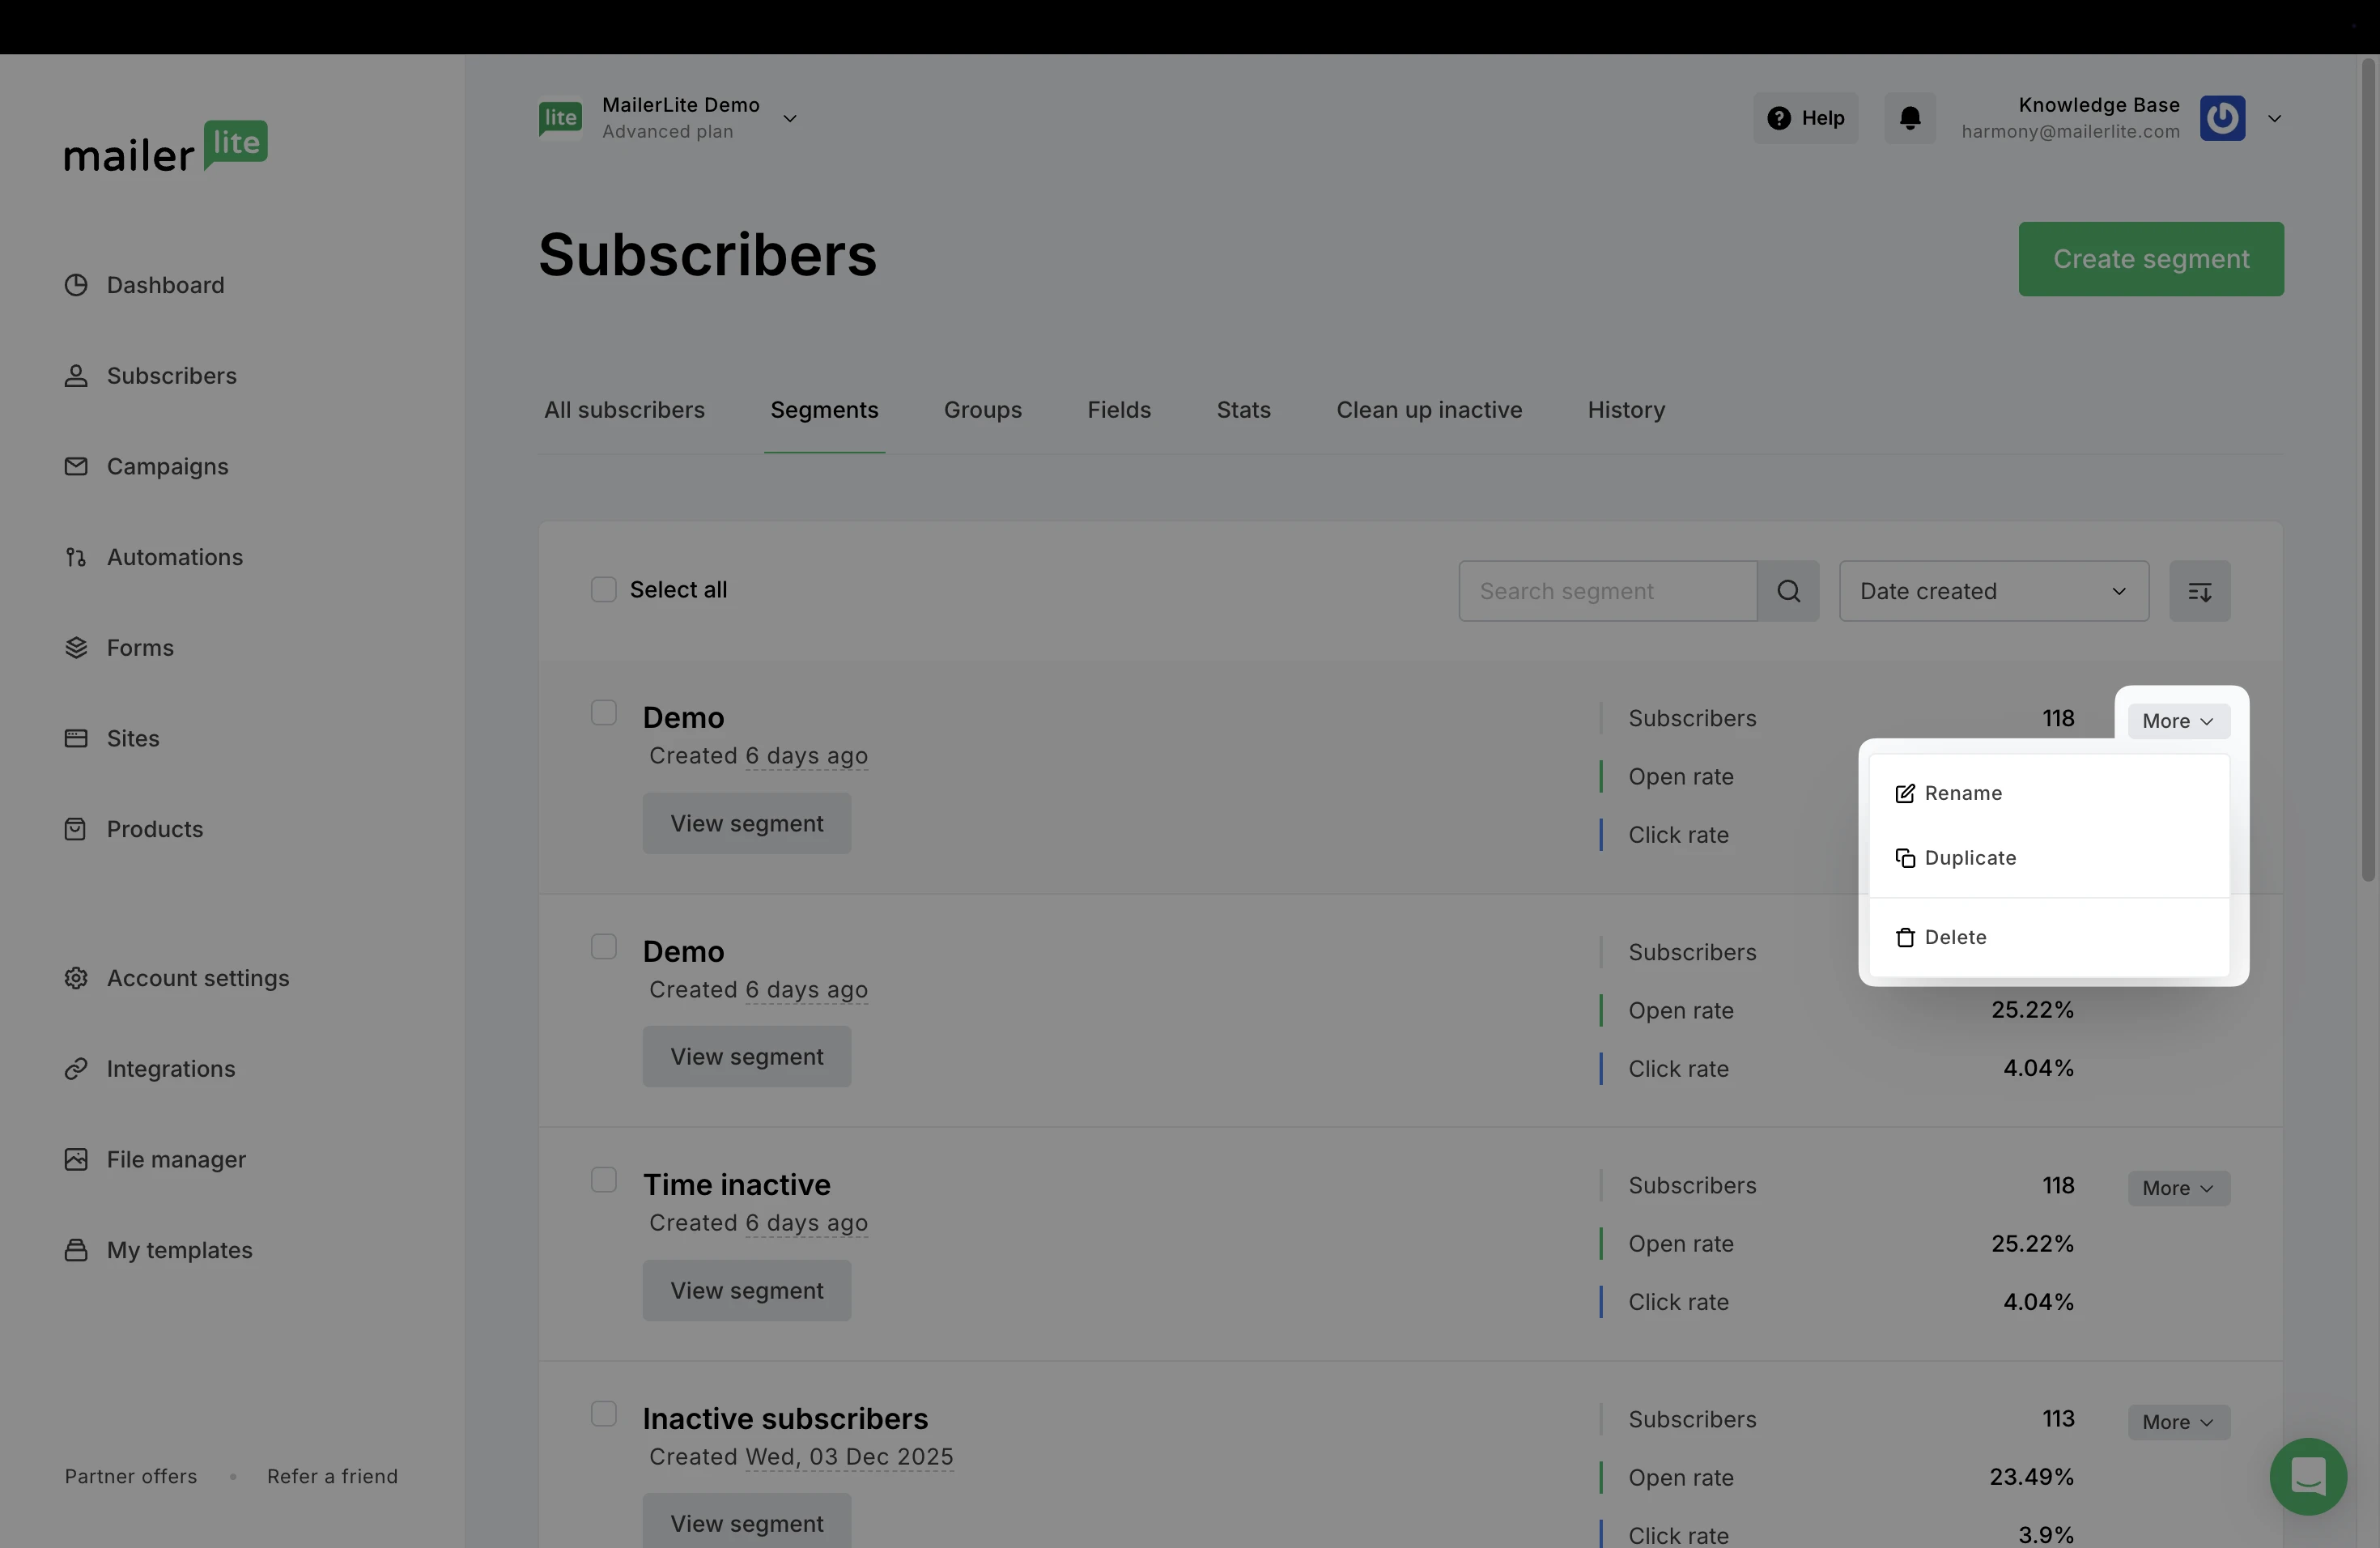
Rename or duplicate segments
To change the name of your segment, or to create a copy of a specific segment:
Navigate to the Segments tab.
Click More.
Choose Rename or Duplicate.
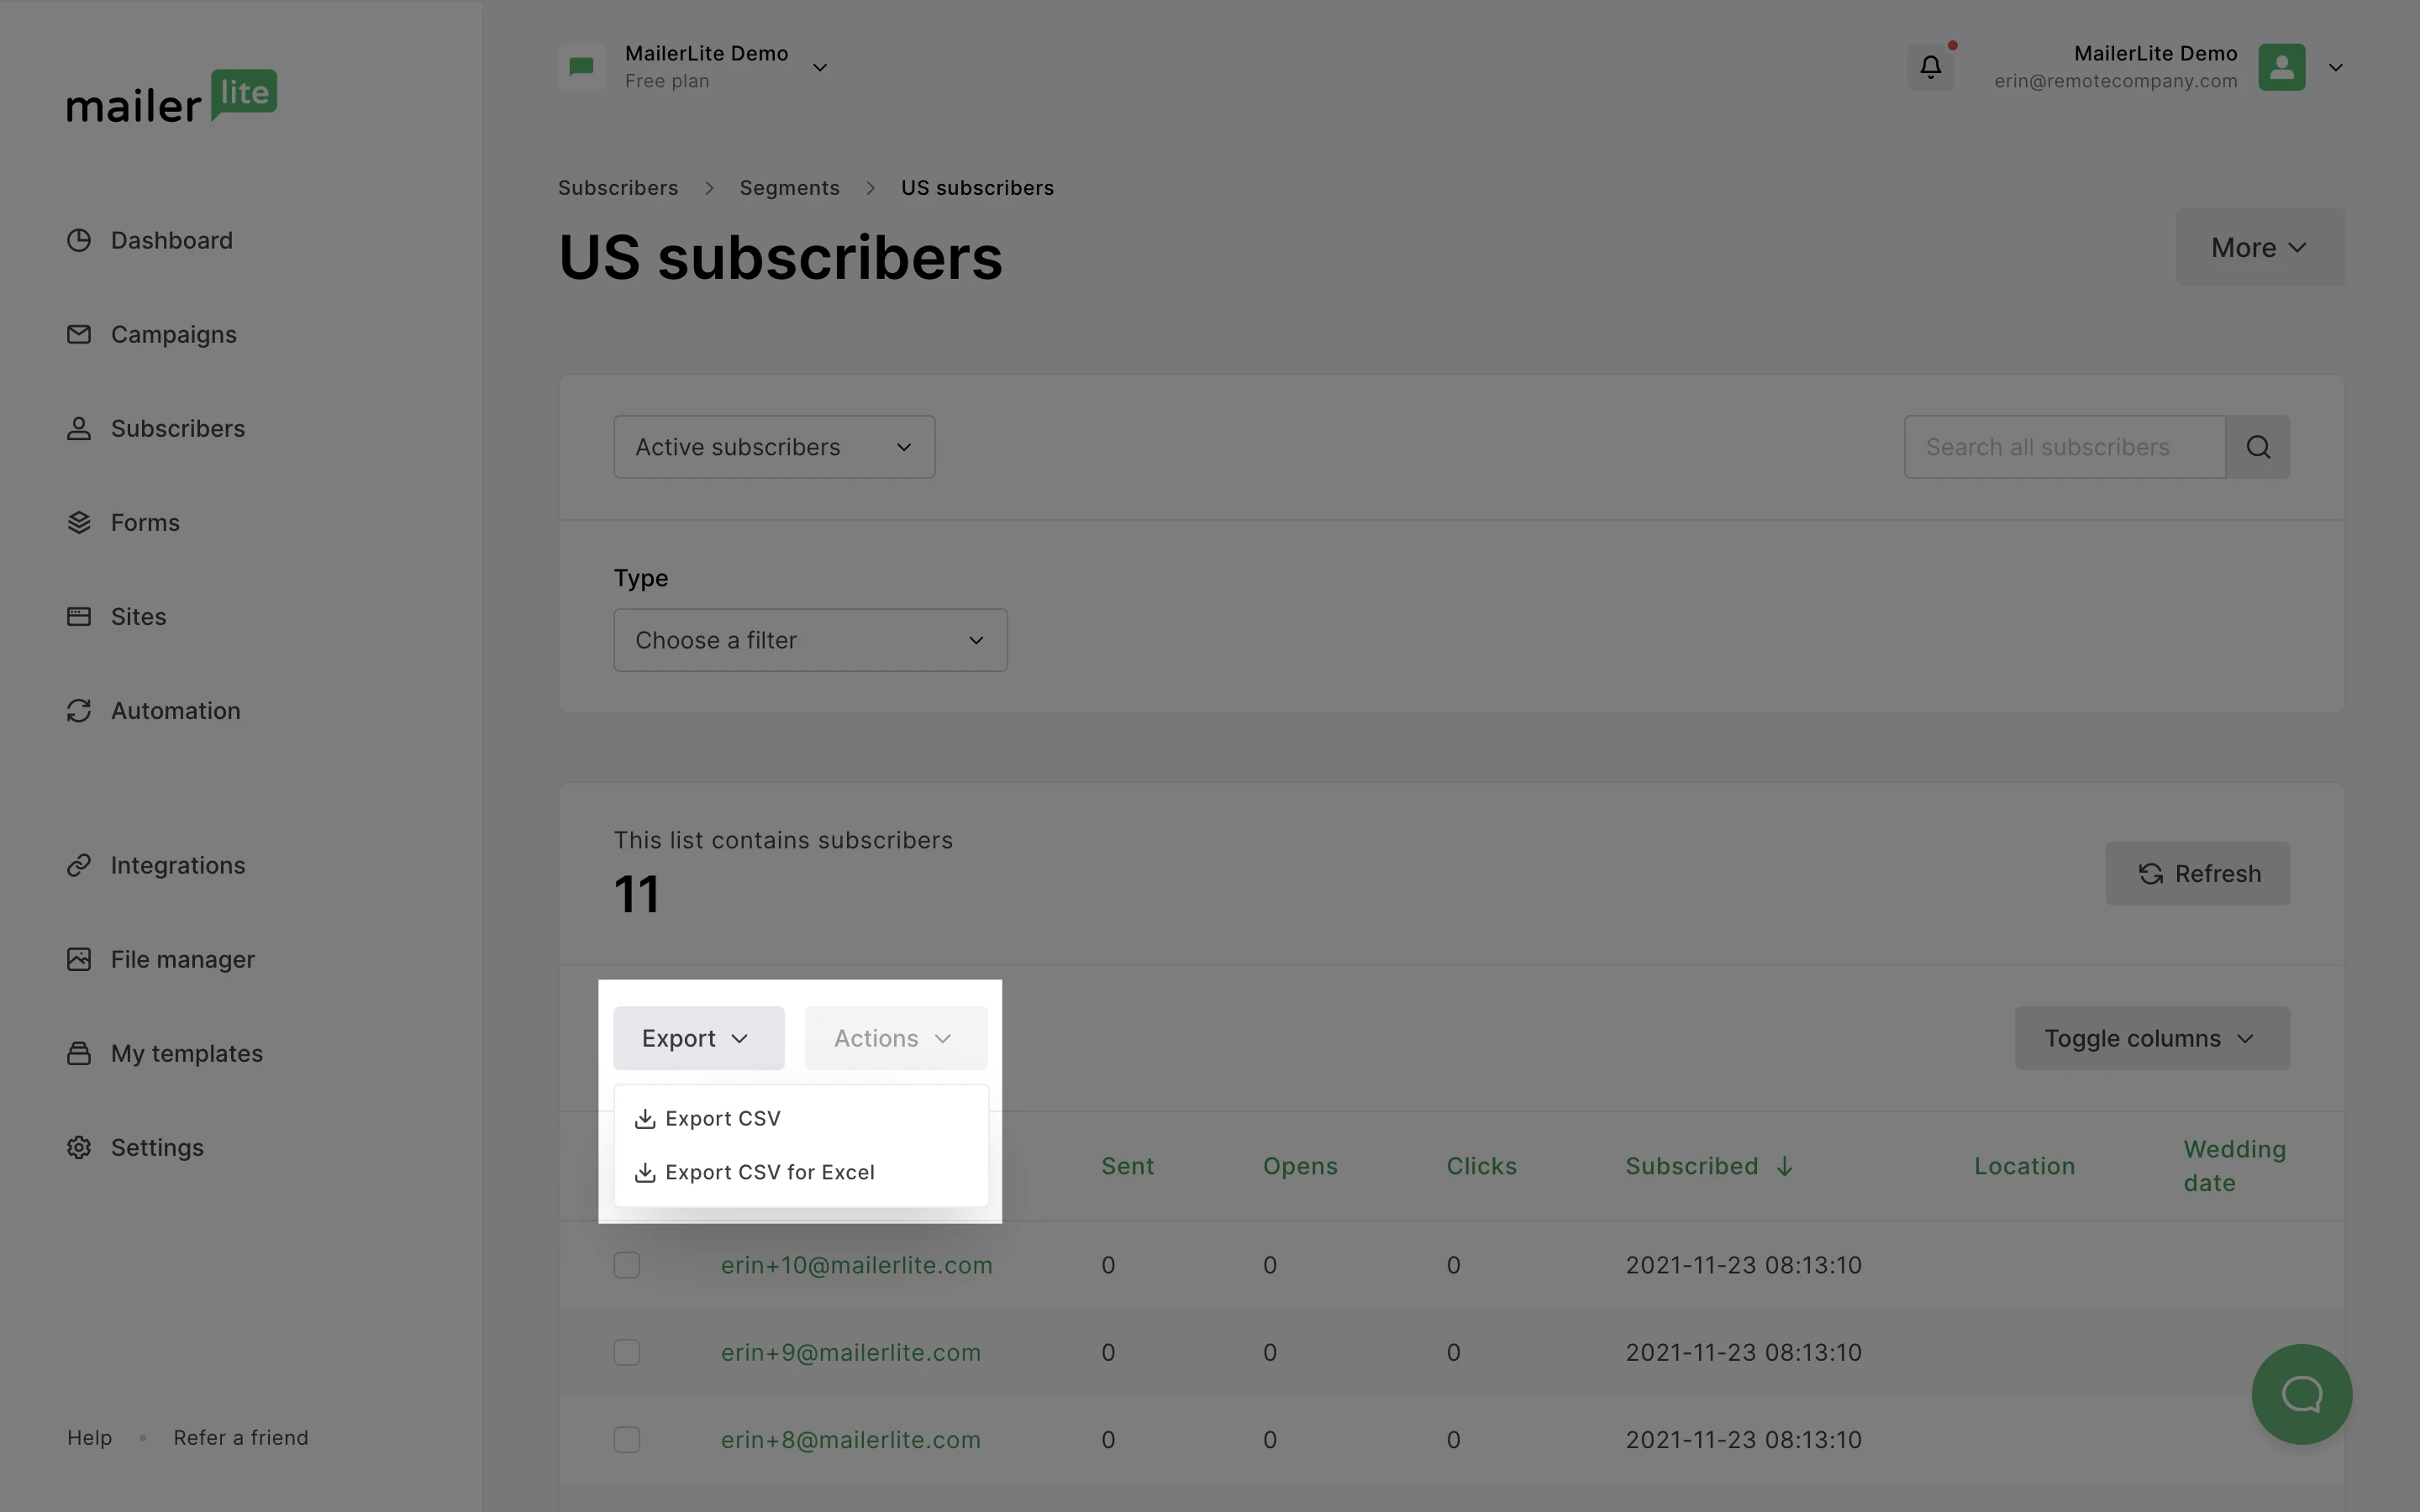
How to export subscribers by segment
To export subscribers by segment:
Navigate to the Subscribers page, then click on the Segments tab.
Click View segment.
Click the Export button and select your preferred file type.