Note: If you're a Classic user, please log in to your account to access the dedicated Classic Help Center.
What is a pop-up form?
A pop-up form is usually a small window with a message that appears while a visitor is browsing your website. They’re an excellent way to promote your newsletter and collect subscribers.
How to create a pop-up form
To create a pop-up form:
Navigate to the Forms page.
Click on the Pop-ups tab.
Click Create form.
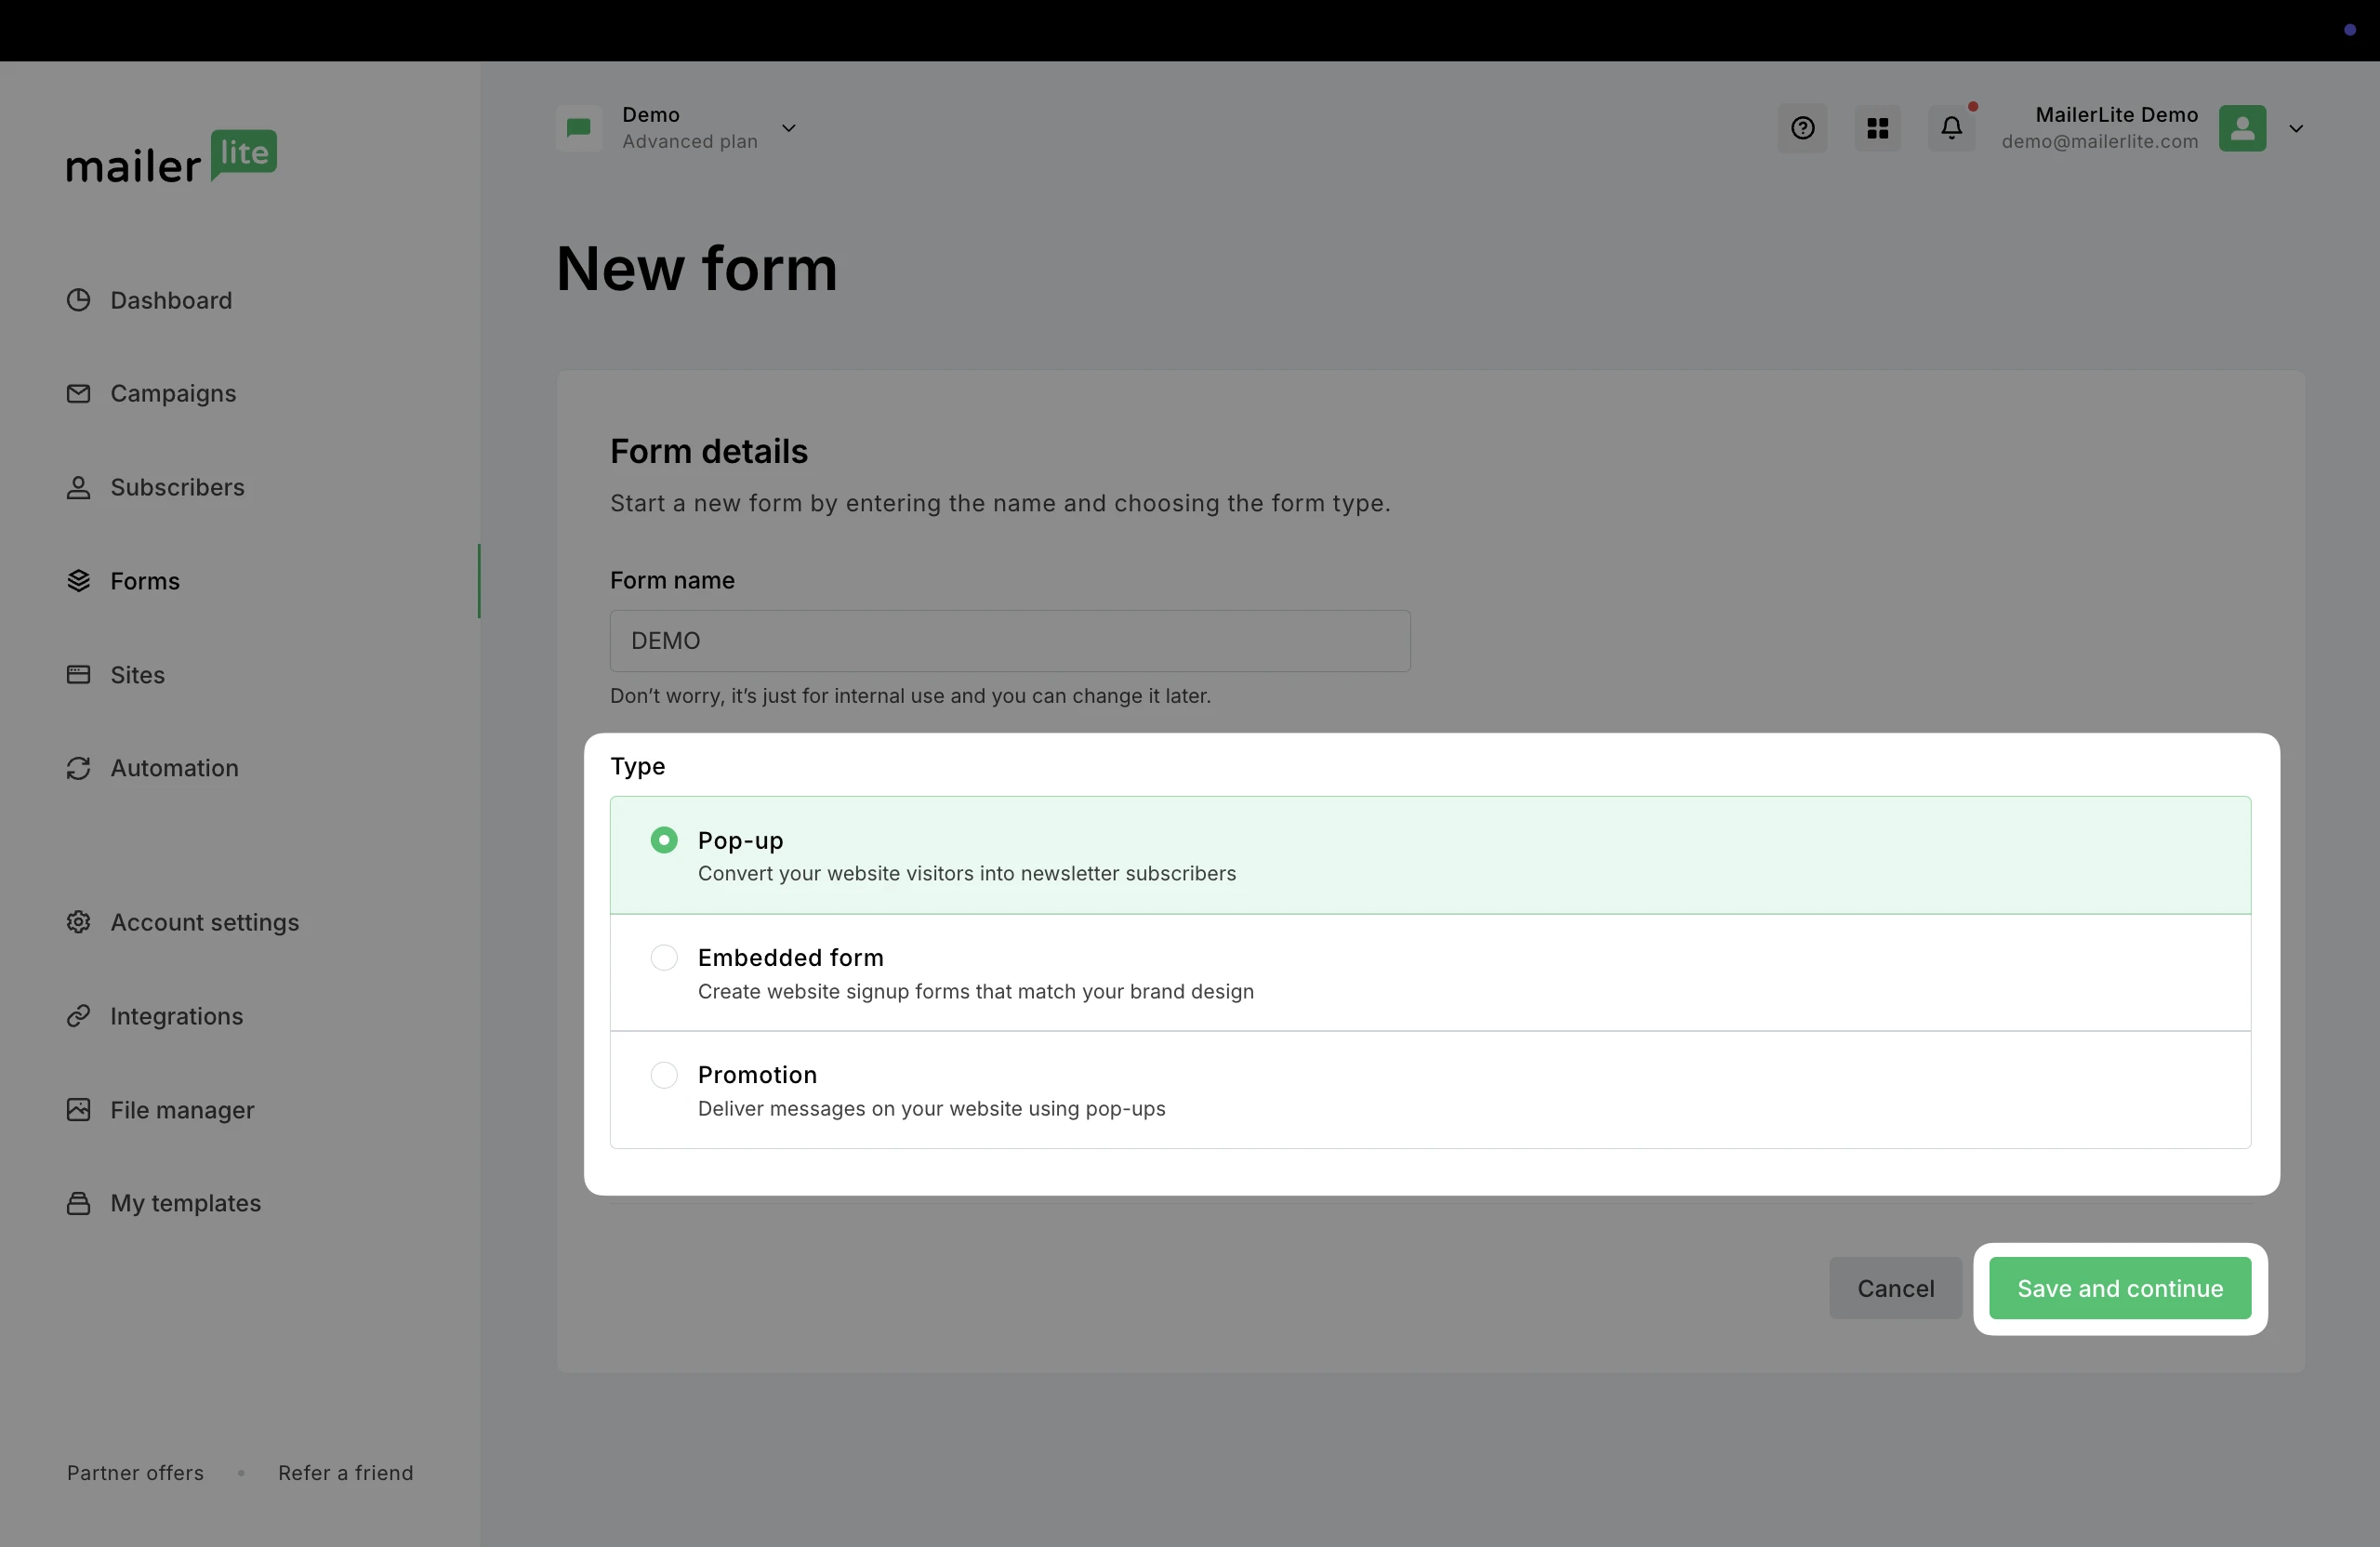
4. Name your pop-up and make sure the form type: Pop-up is selected.
5. Click Save and continue.
6. Select at least one group for your pop-up form. When subscribers complete your pop-up form they will be added to the group(s) you select here.
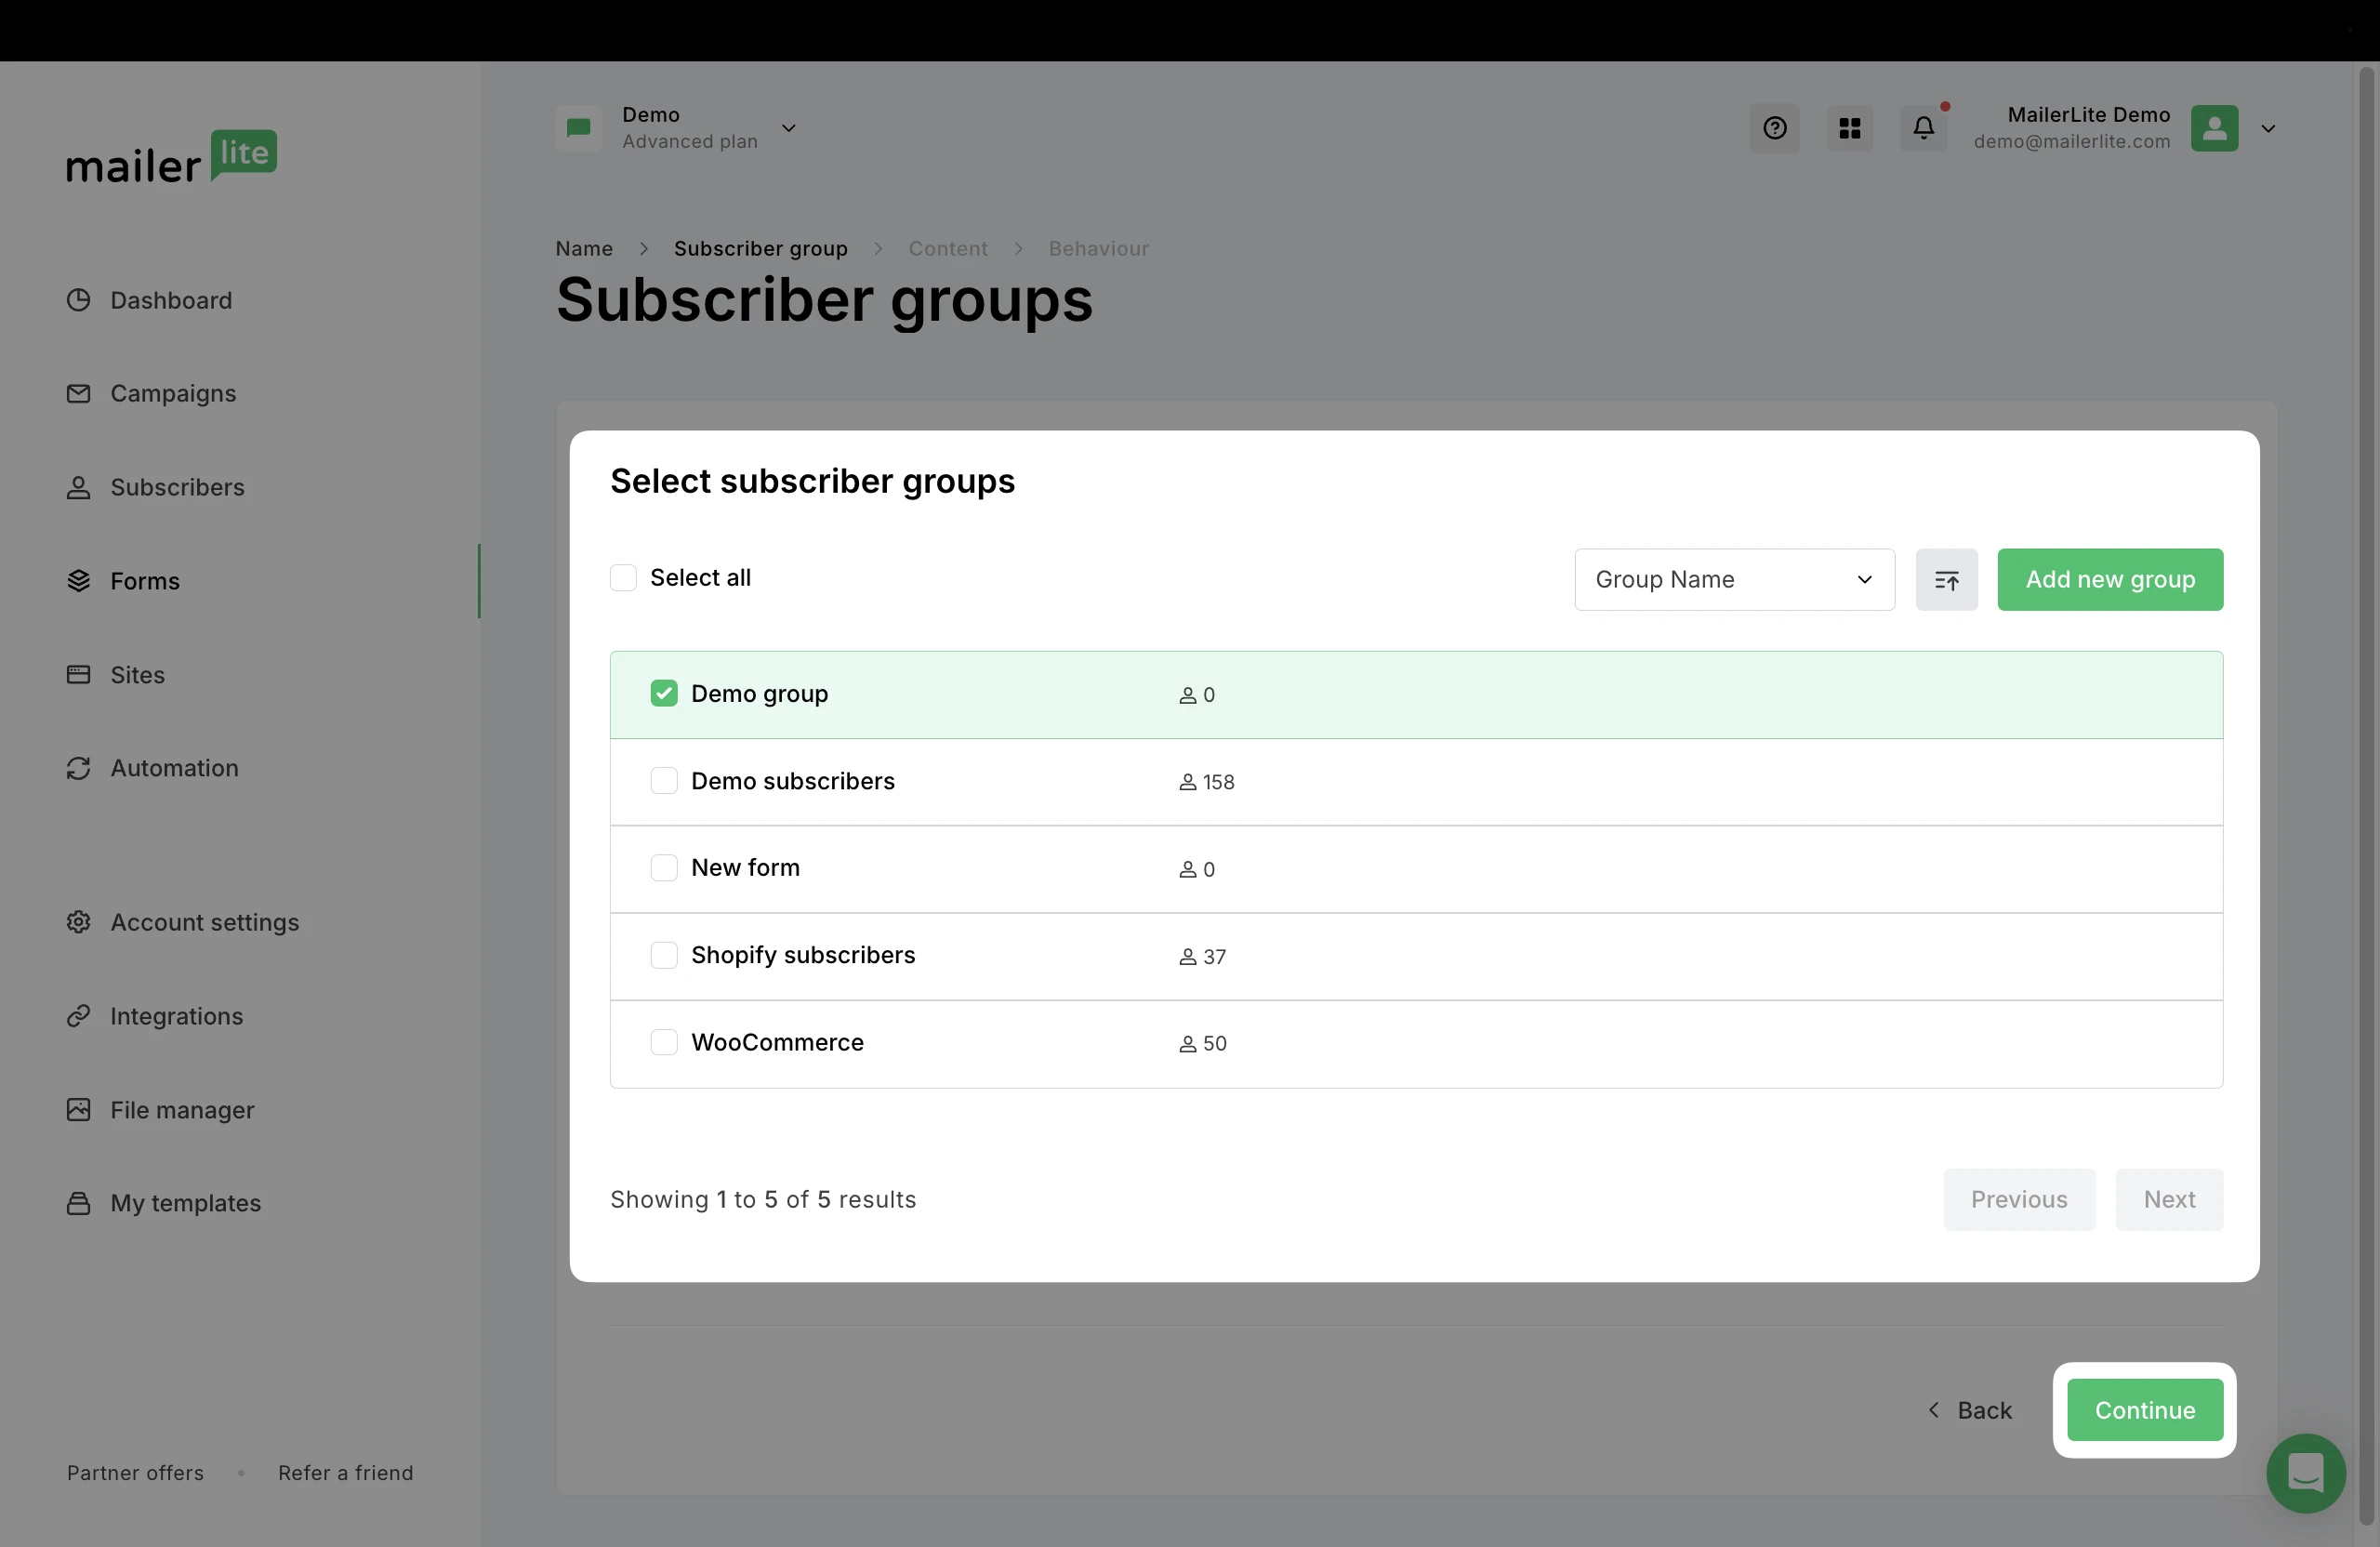
7. Click Continue.
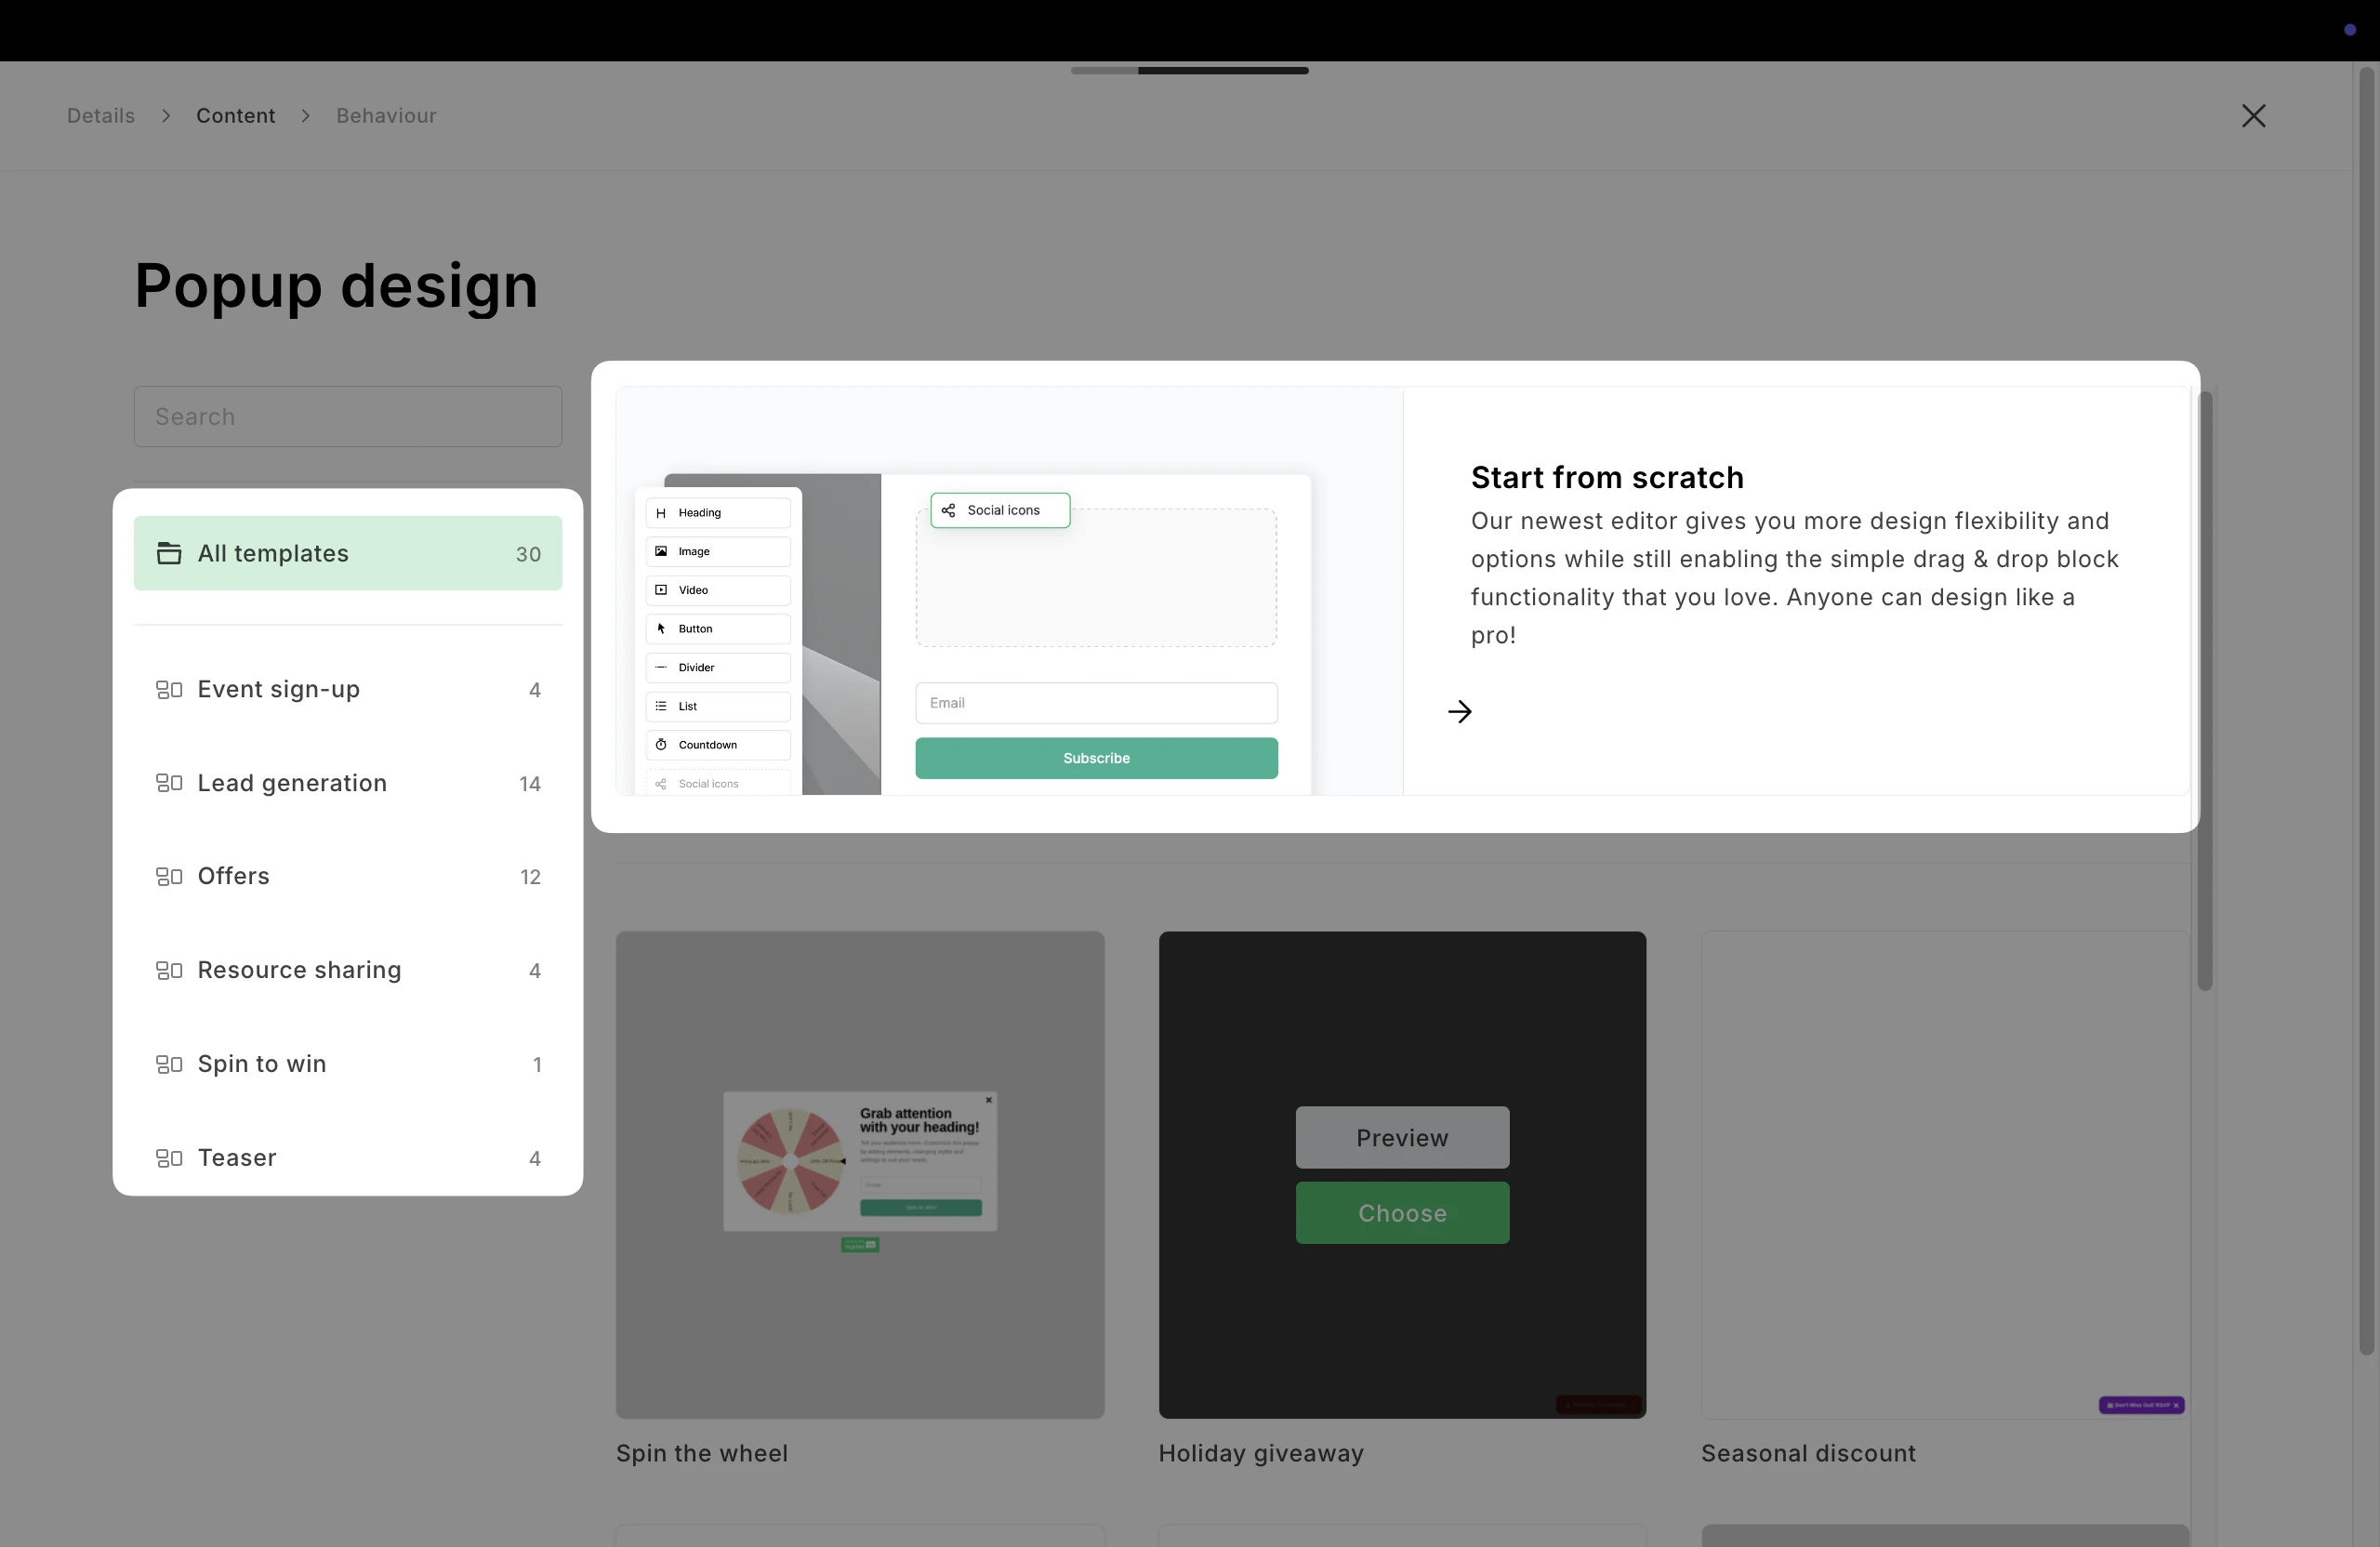
8. Choose to Start from scratch, or select a pop-up form template. Once selected, the pop-up form editor will open.
9. Edit the heading and text of your pop-up form by double clicking the text you wish to edit and typing directly into the block on your pop-up form.
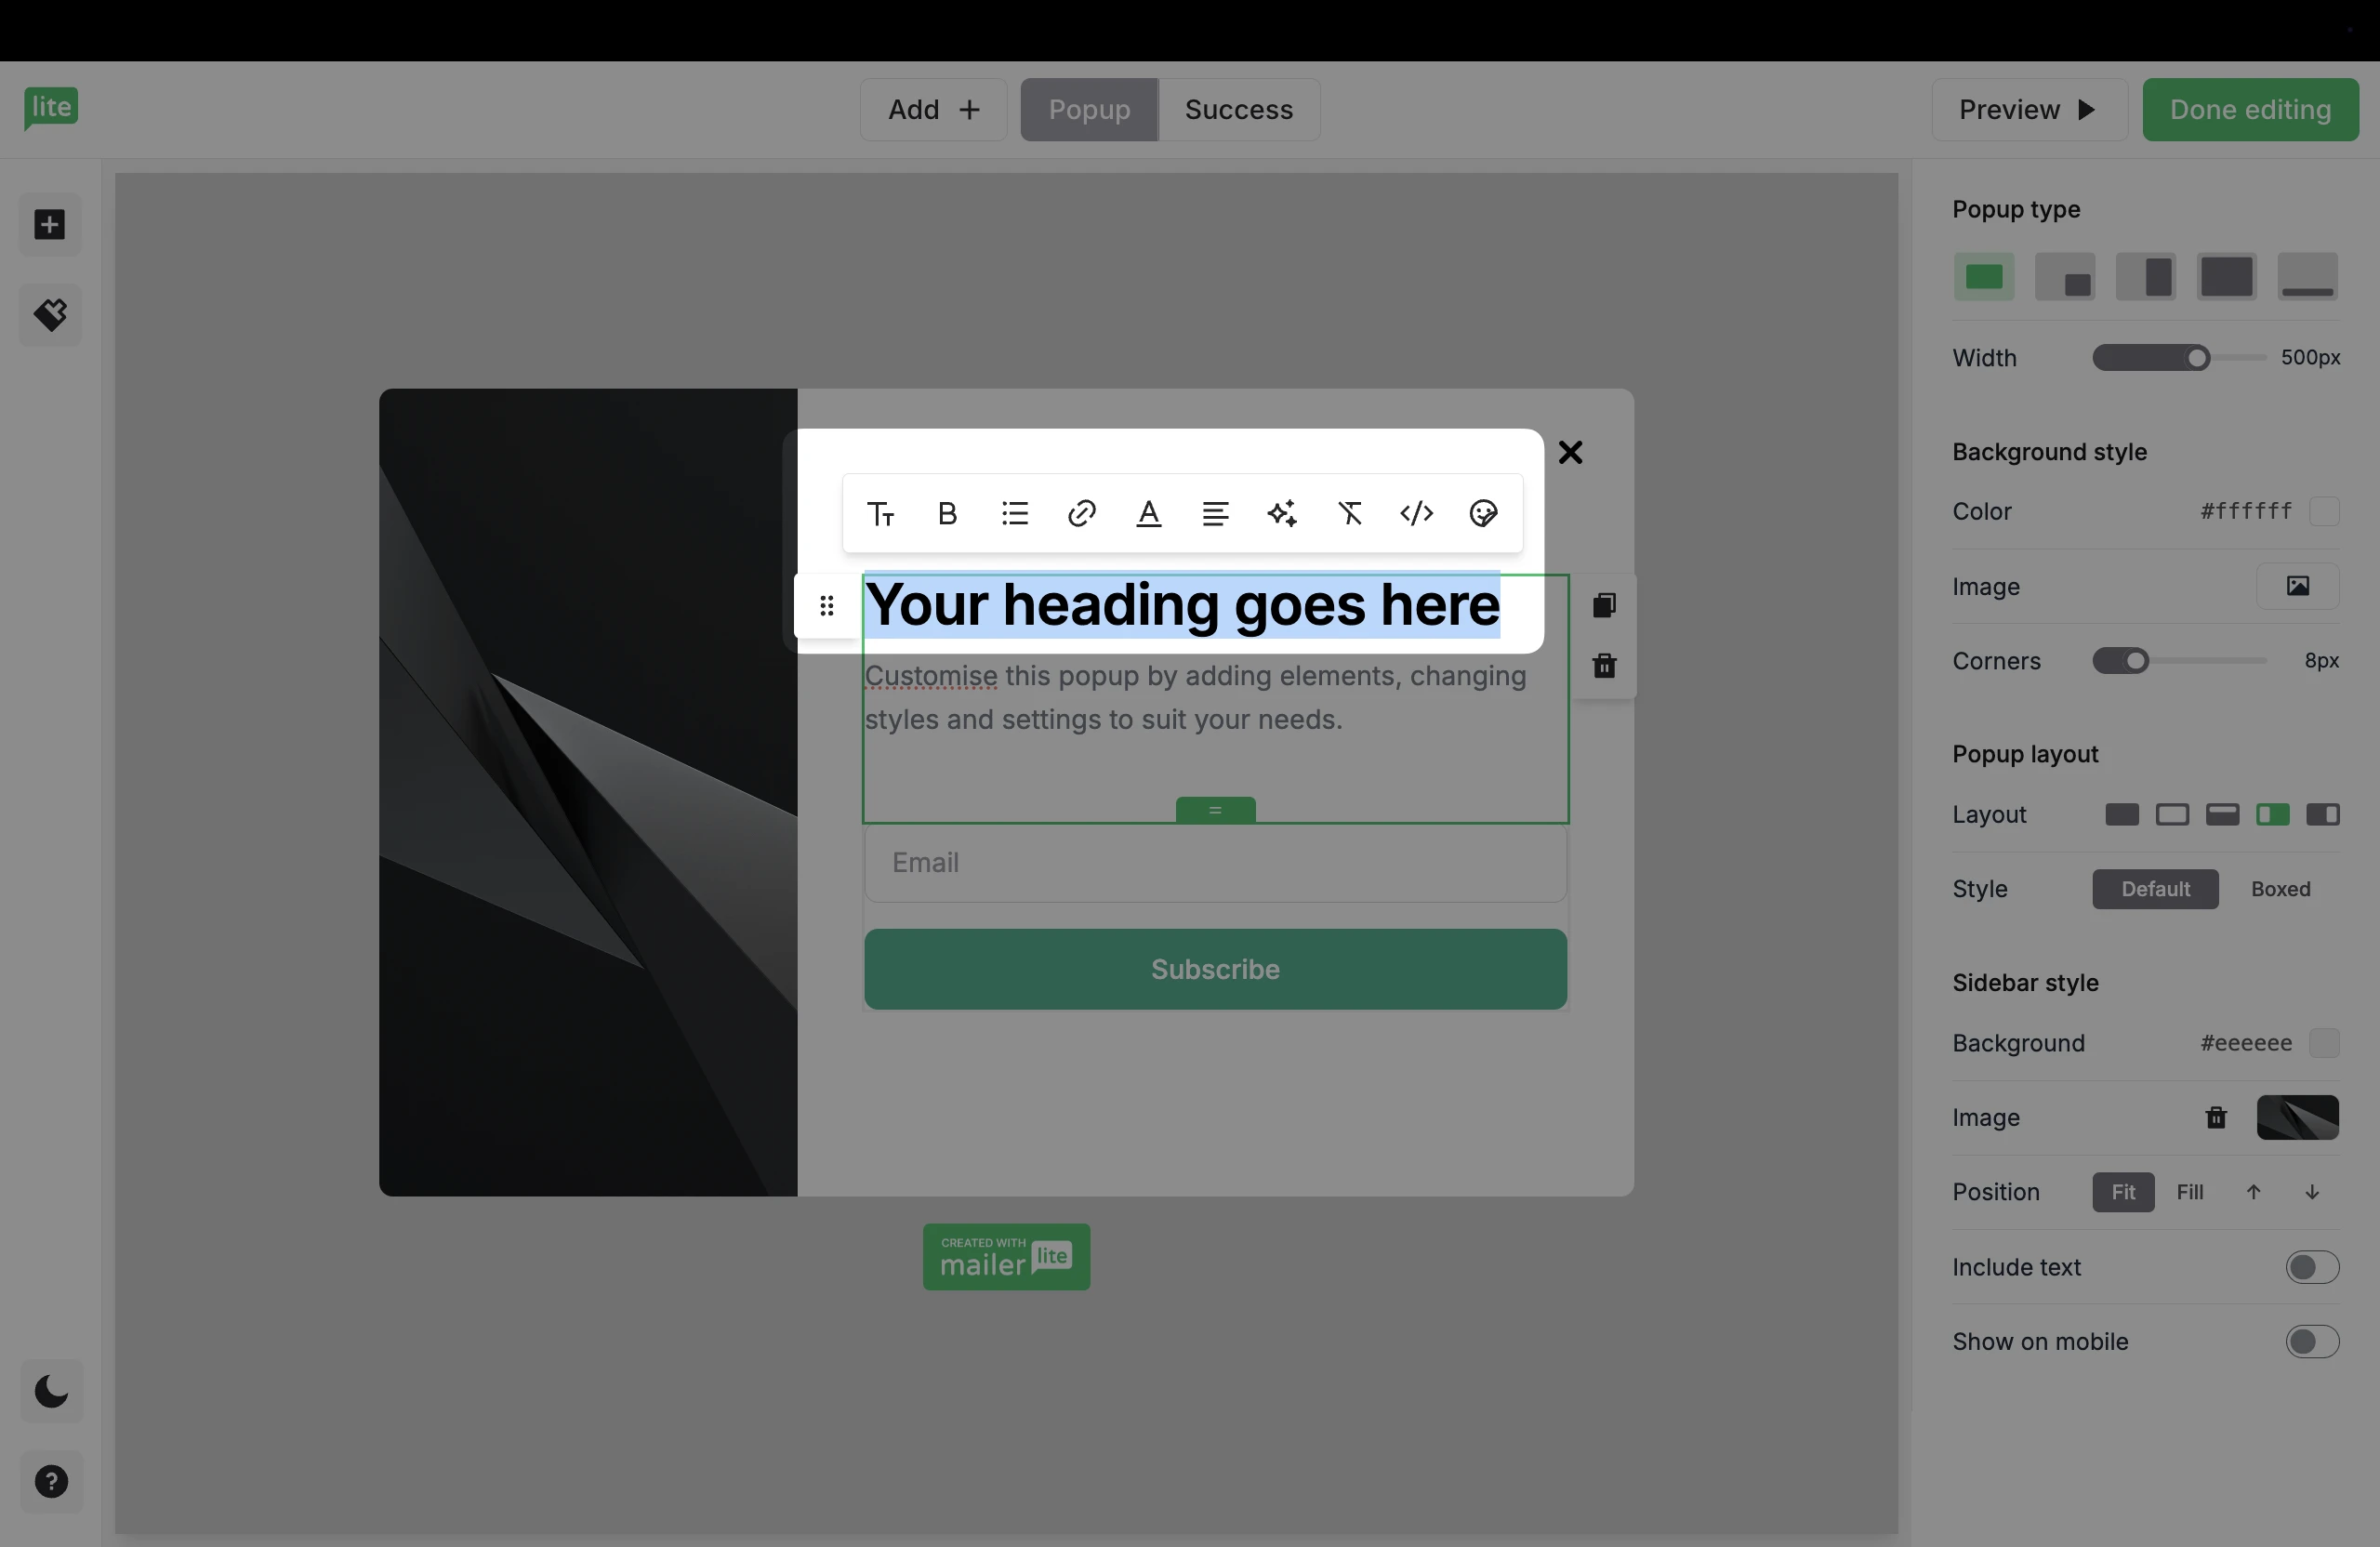
10. Change the image on your pop-up form by clicking on the Image settings in the right hand sidebar. You can then insert your image from the File manager, or upload a photo.
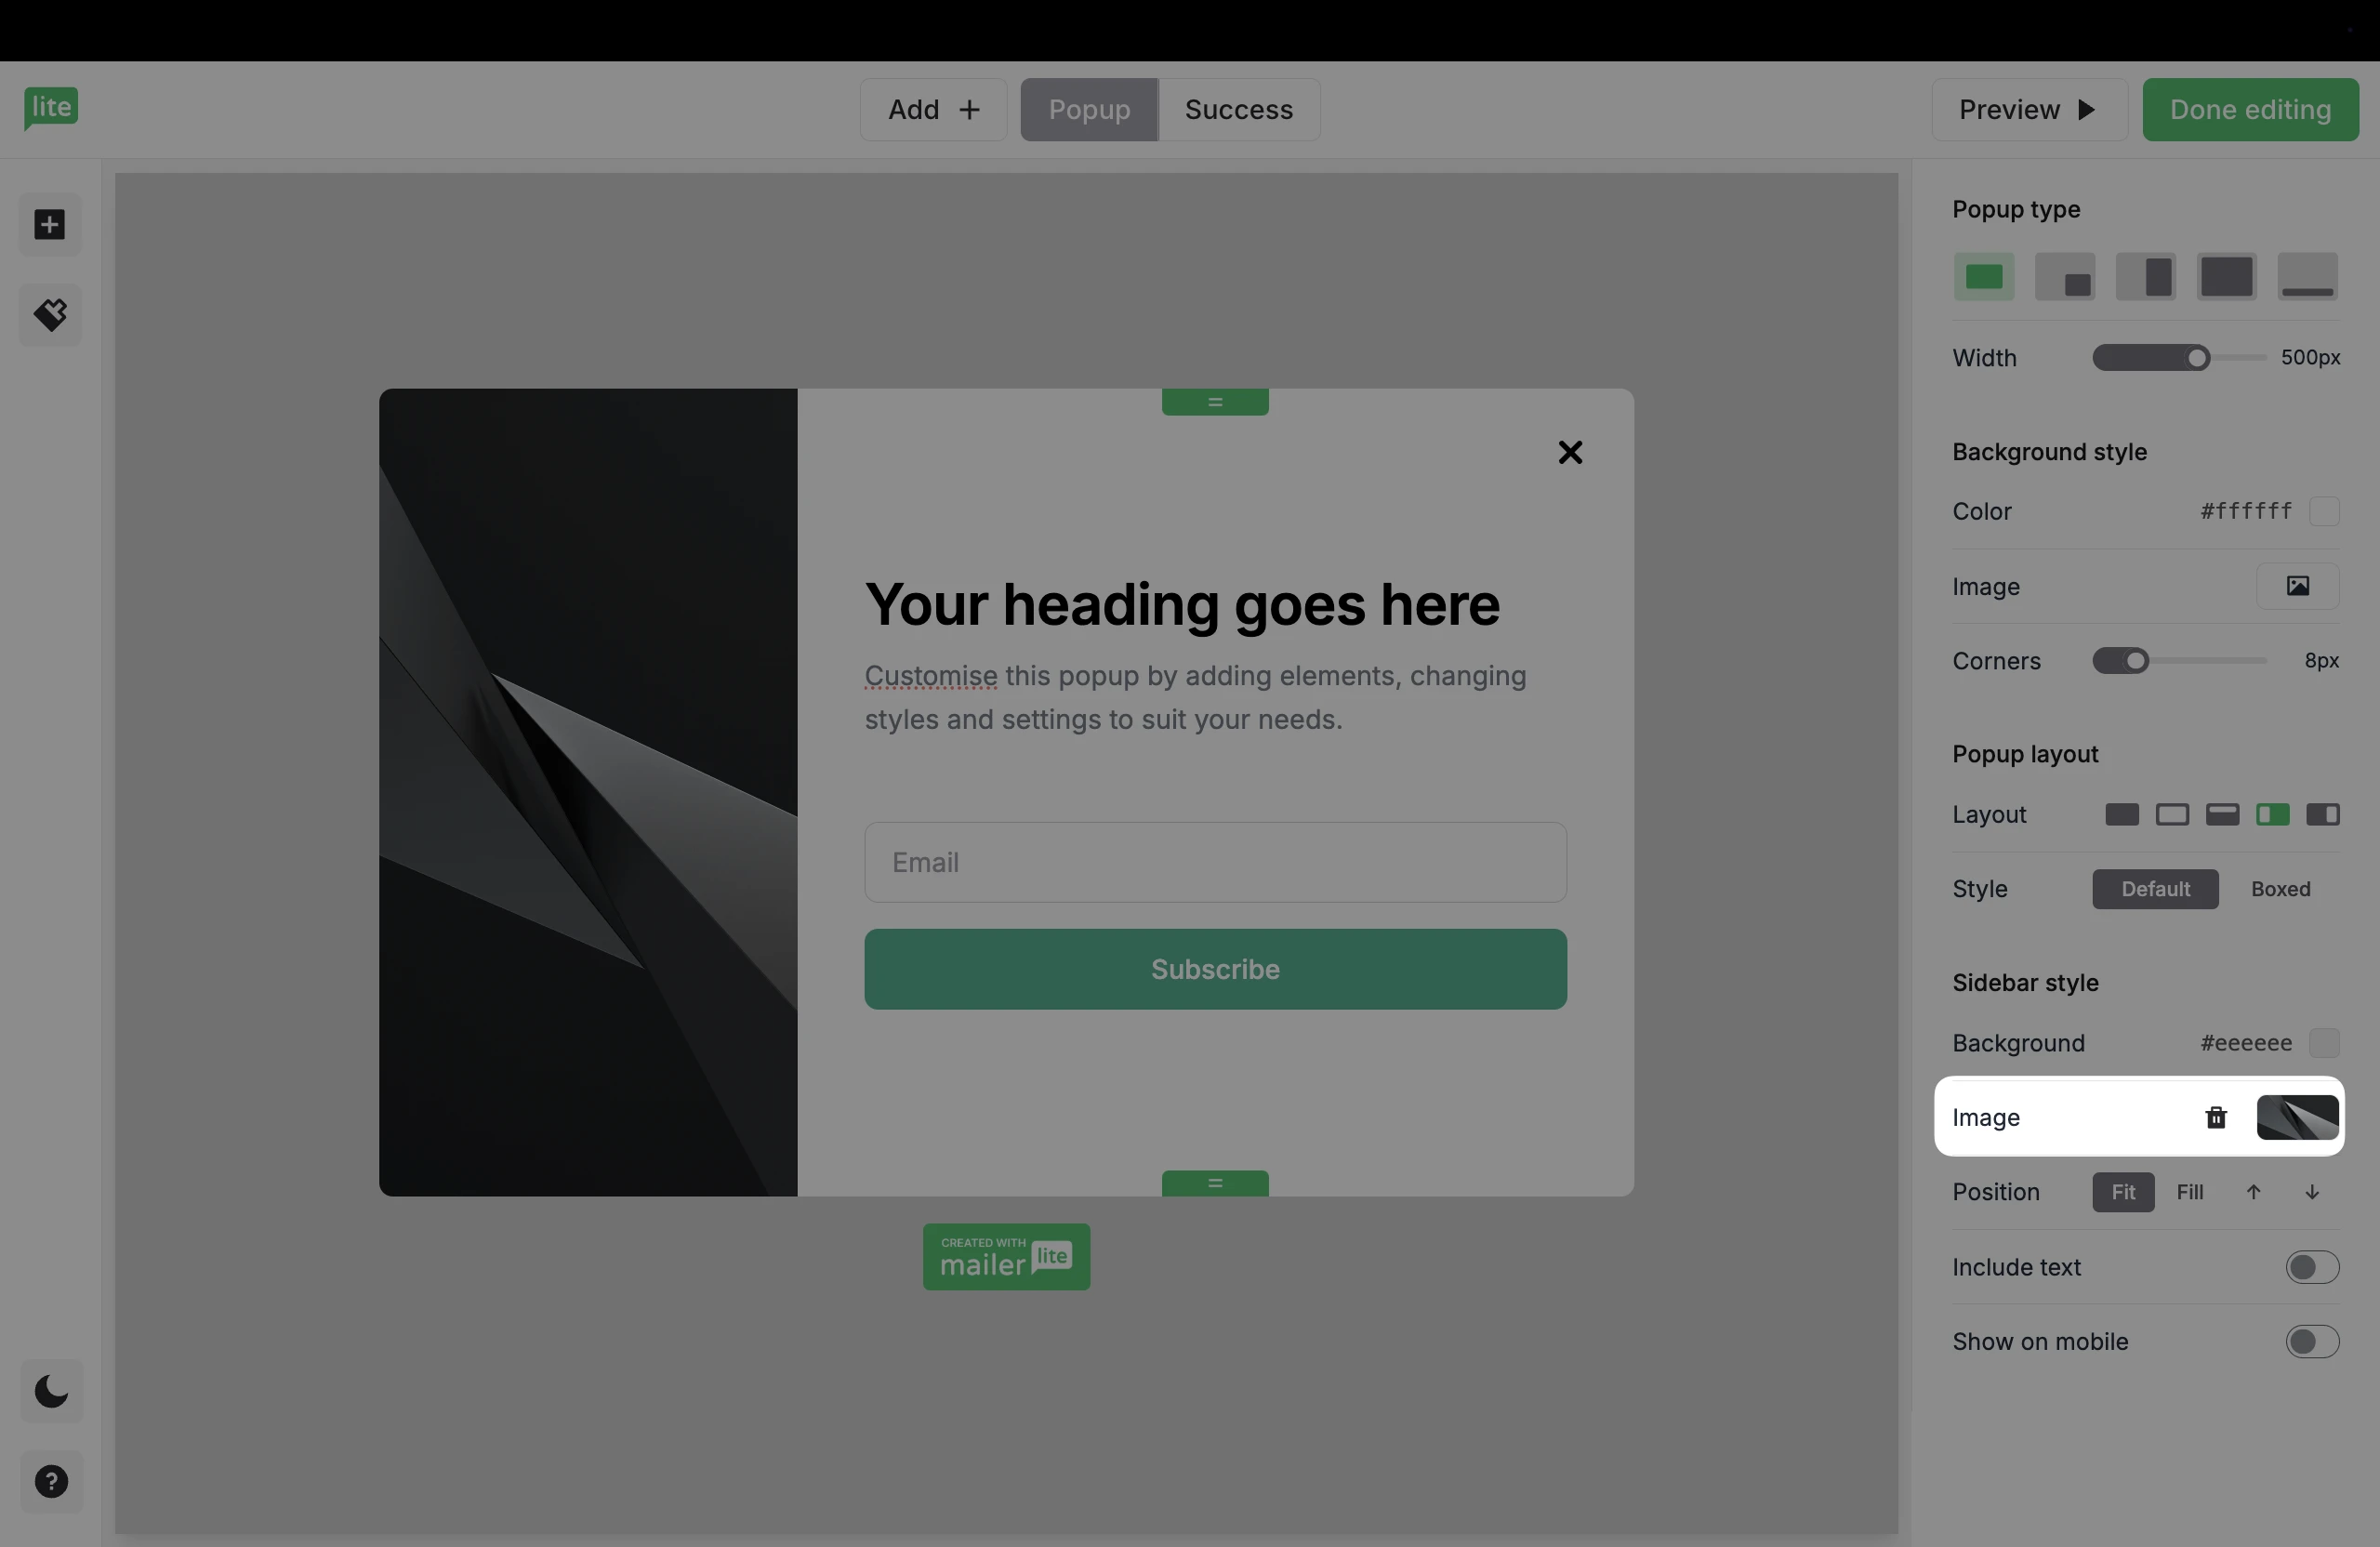
11. To edit the input fields, hover over the input fields and click the Settings icon. Click Add field to add another input field to your form.
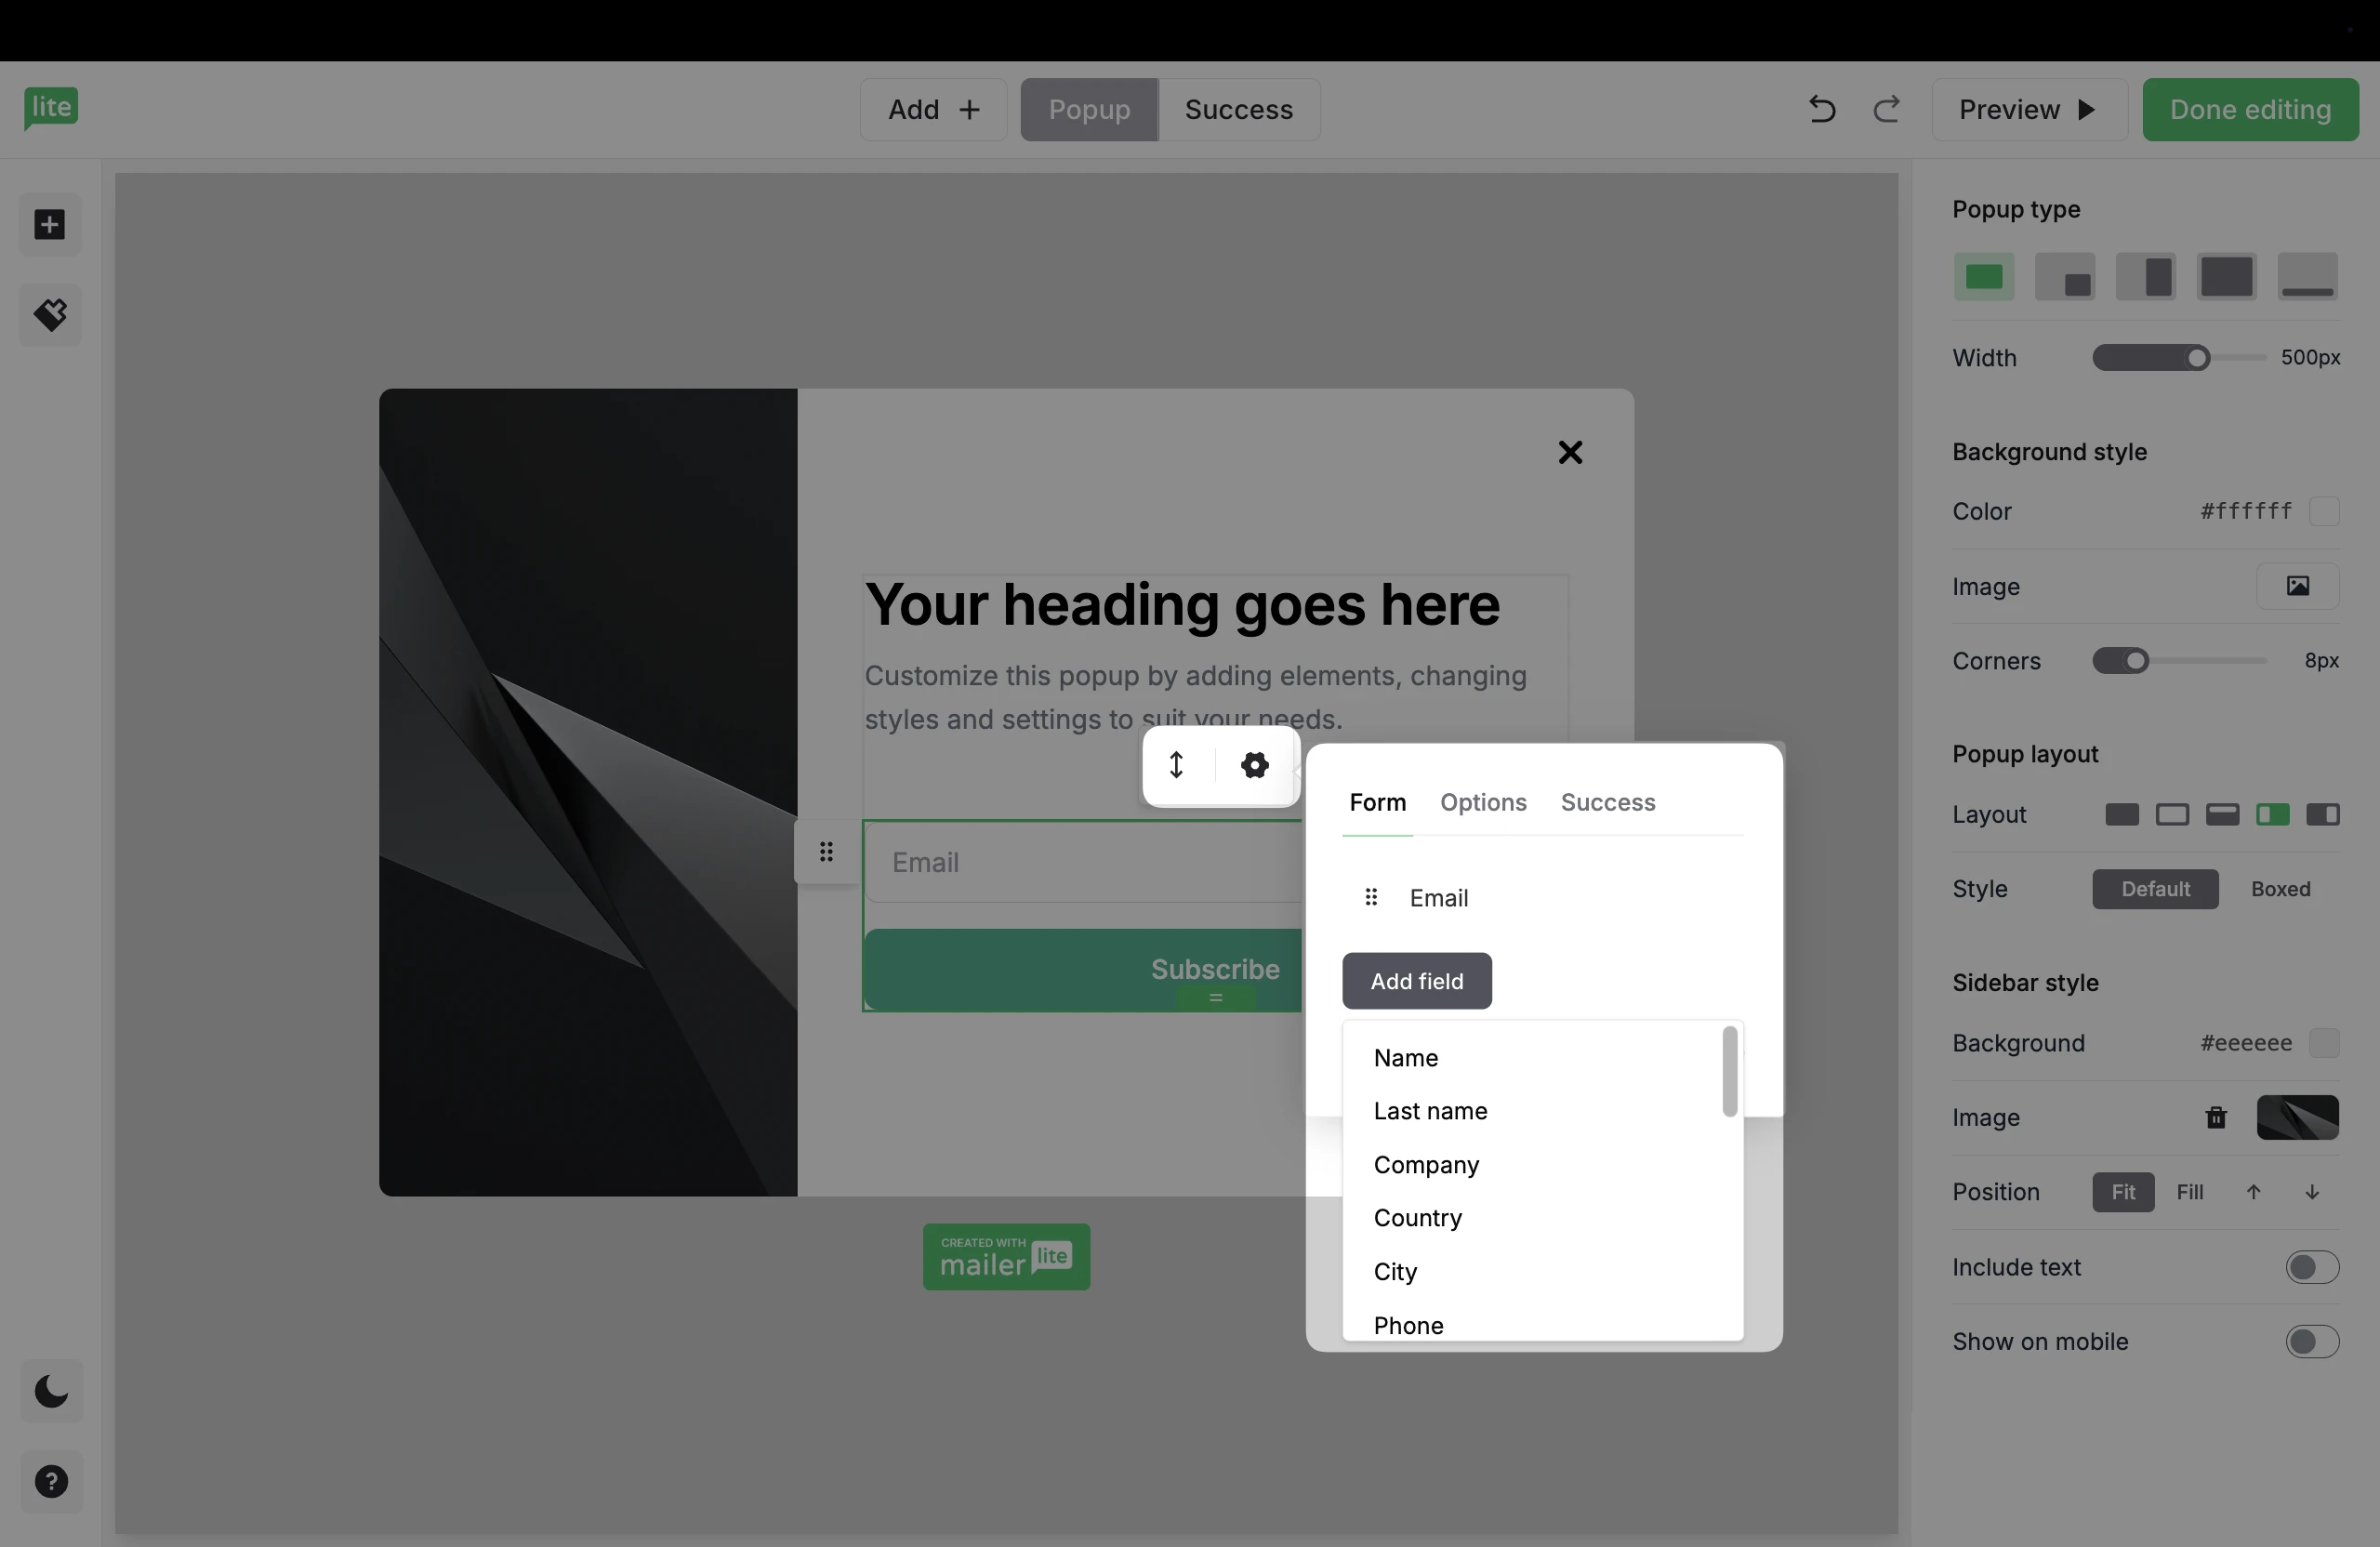
12. Edit your pop-up form’s success page by clicking the Success button along the top navigation bar.
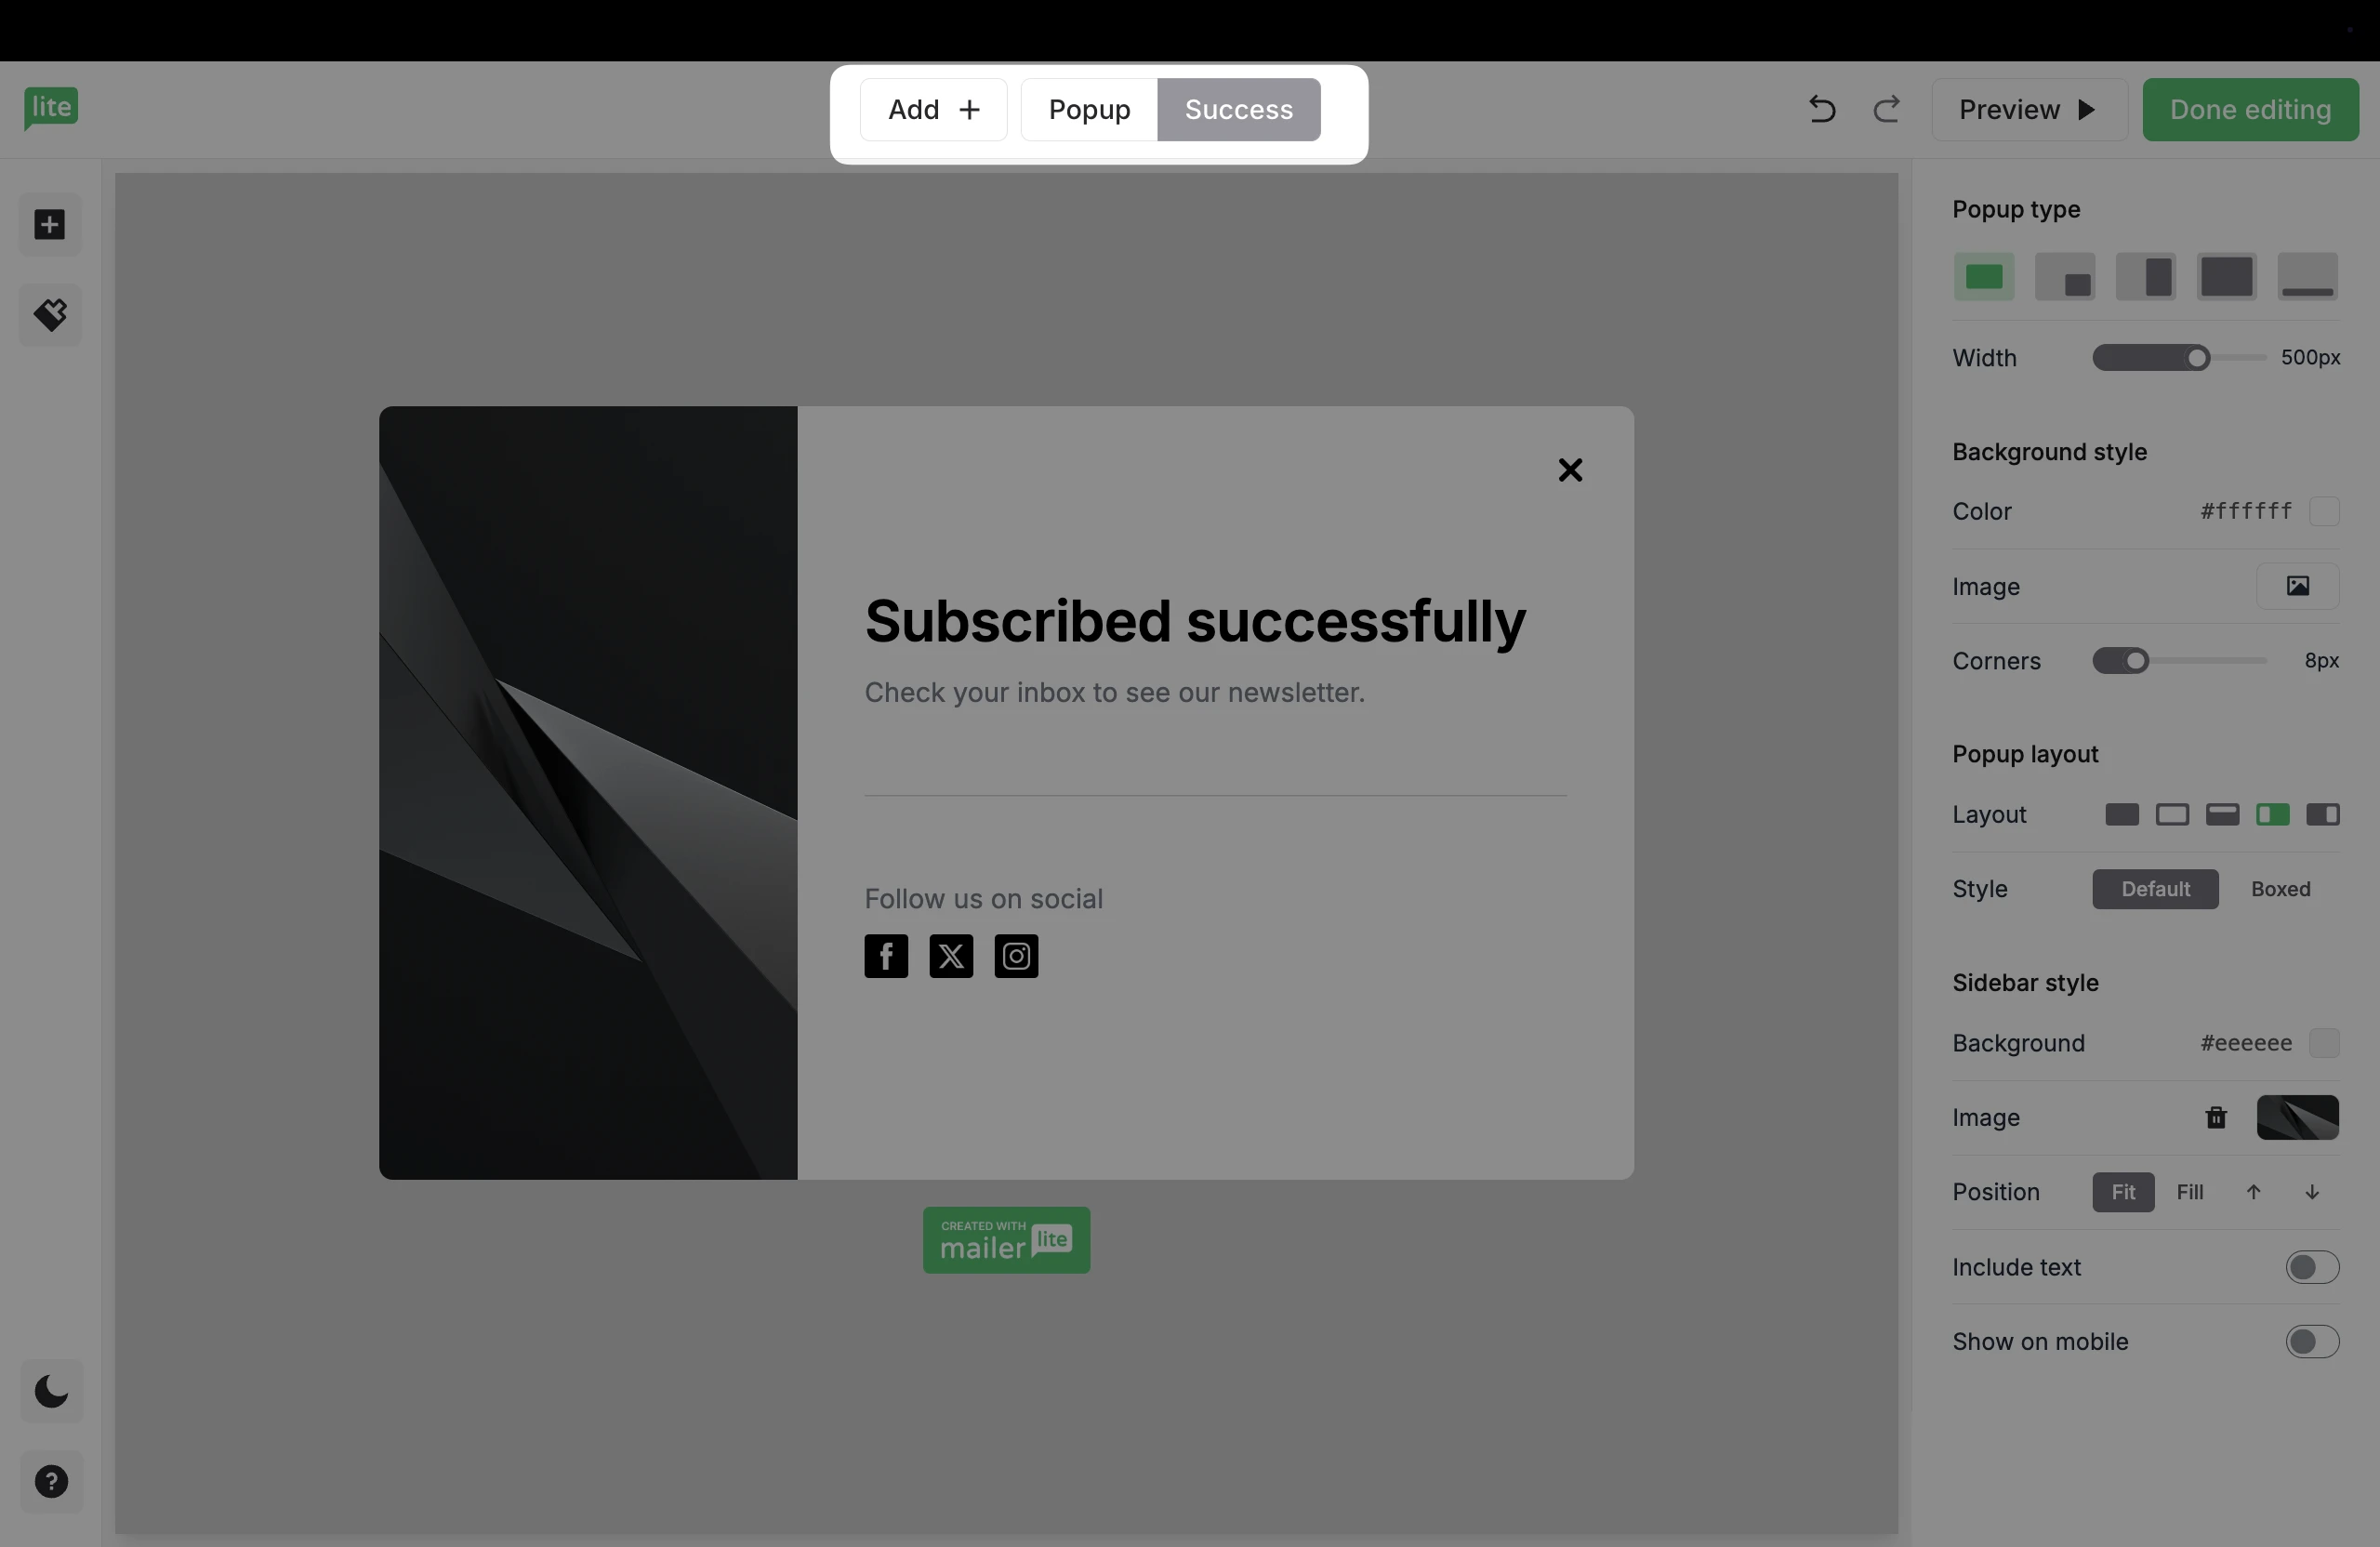
13. Once you’re finished editing your form, click Done editing to exit the form editor and apply some settings to your pop-up form.
How to use the pop-up form editor
The pop-up form editor is divided into two sections by three tabs found in the sidebar: the Elements and Style tabs on the left, and the Settings tab on the right.
Elements
Under the Elements tab, you can drag and drop additional content blocks in your pop-up form.
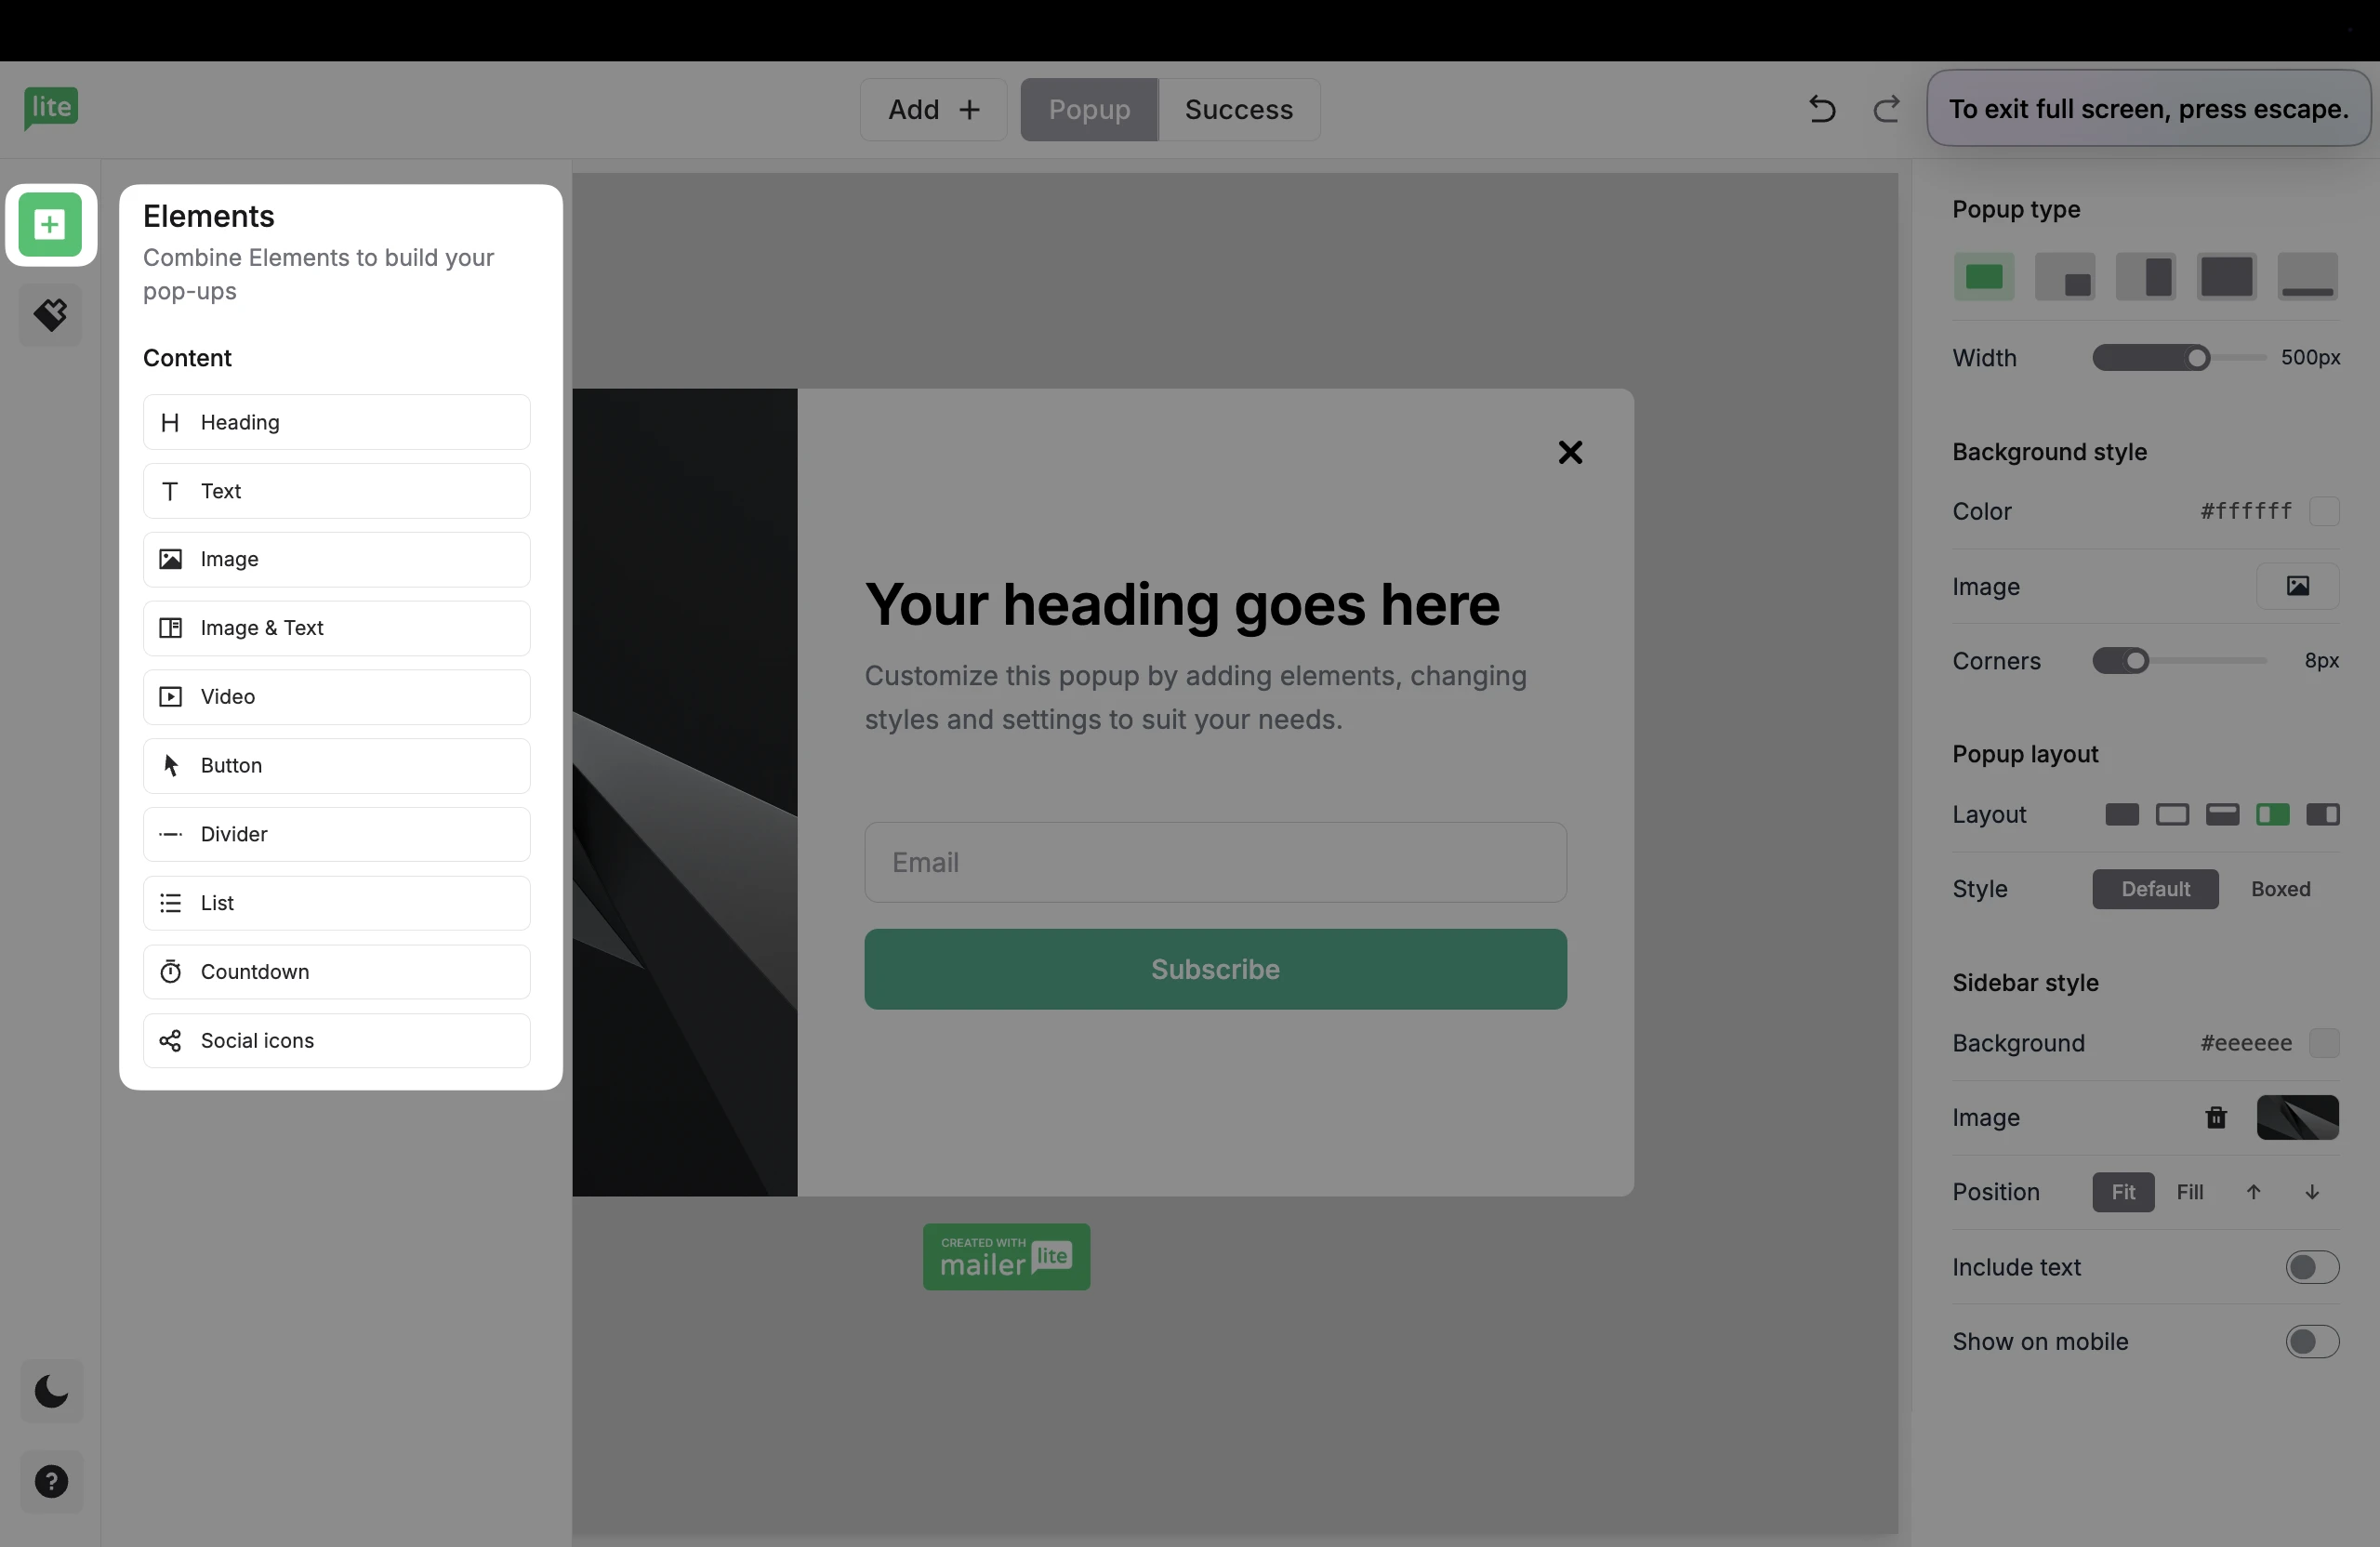
There are several blocks to choose from:
Heading - Add title text
Text - Use this block to add more text to your pop-up form
Image - Use this block to add an image or GIF to your pop-up form
Image & text - Use this block to add an image, GIF or video to your pop-up form with accompanying text next to it
Video - Insert a video into your pop-up form
Button - Add a CTA button
Divider - Use this block to break up the content in your pop-up form
List - Create a pre-structured list with optional URLs
Countdown - Use this block to create urgency by adding a countdown timer to your pop-up form
Social links - Use this block to add links to your social media pages to your pop-up form
Style tab
Consistent branding helps your popup blend seamlessly with the rest of your website and marketing materials. Instead of manually adjusting each design element, you can make changes here and have them apply instantly across your popup.
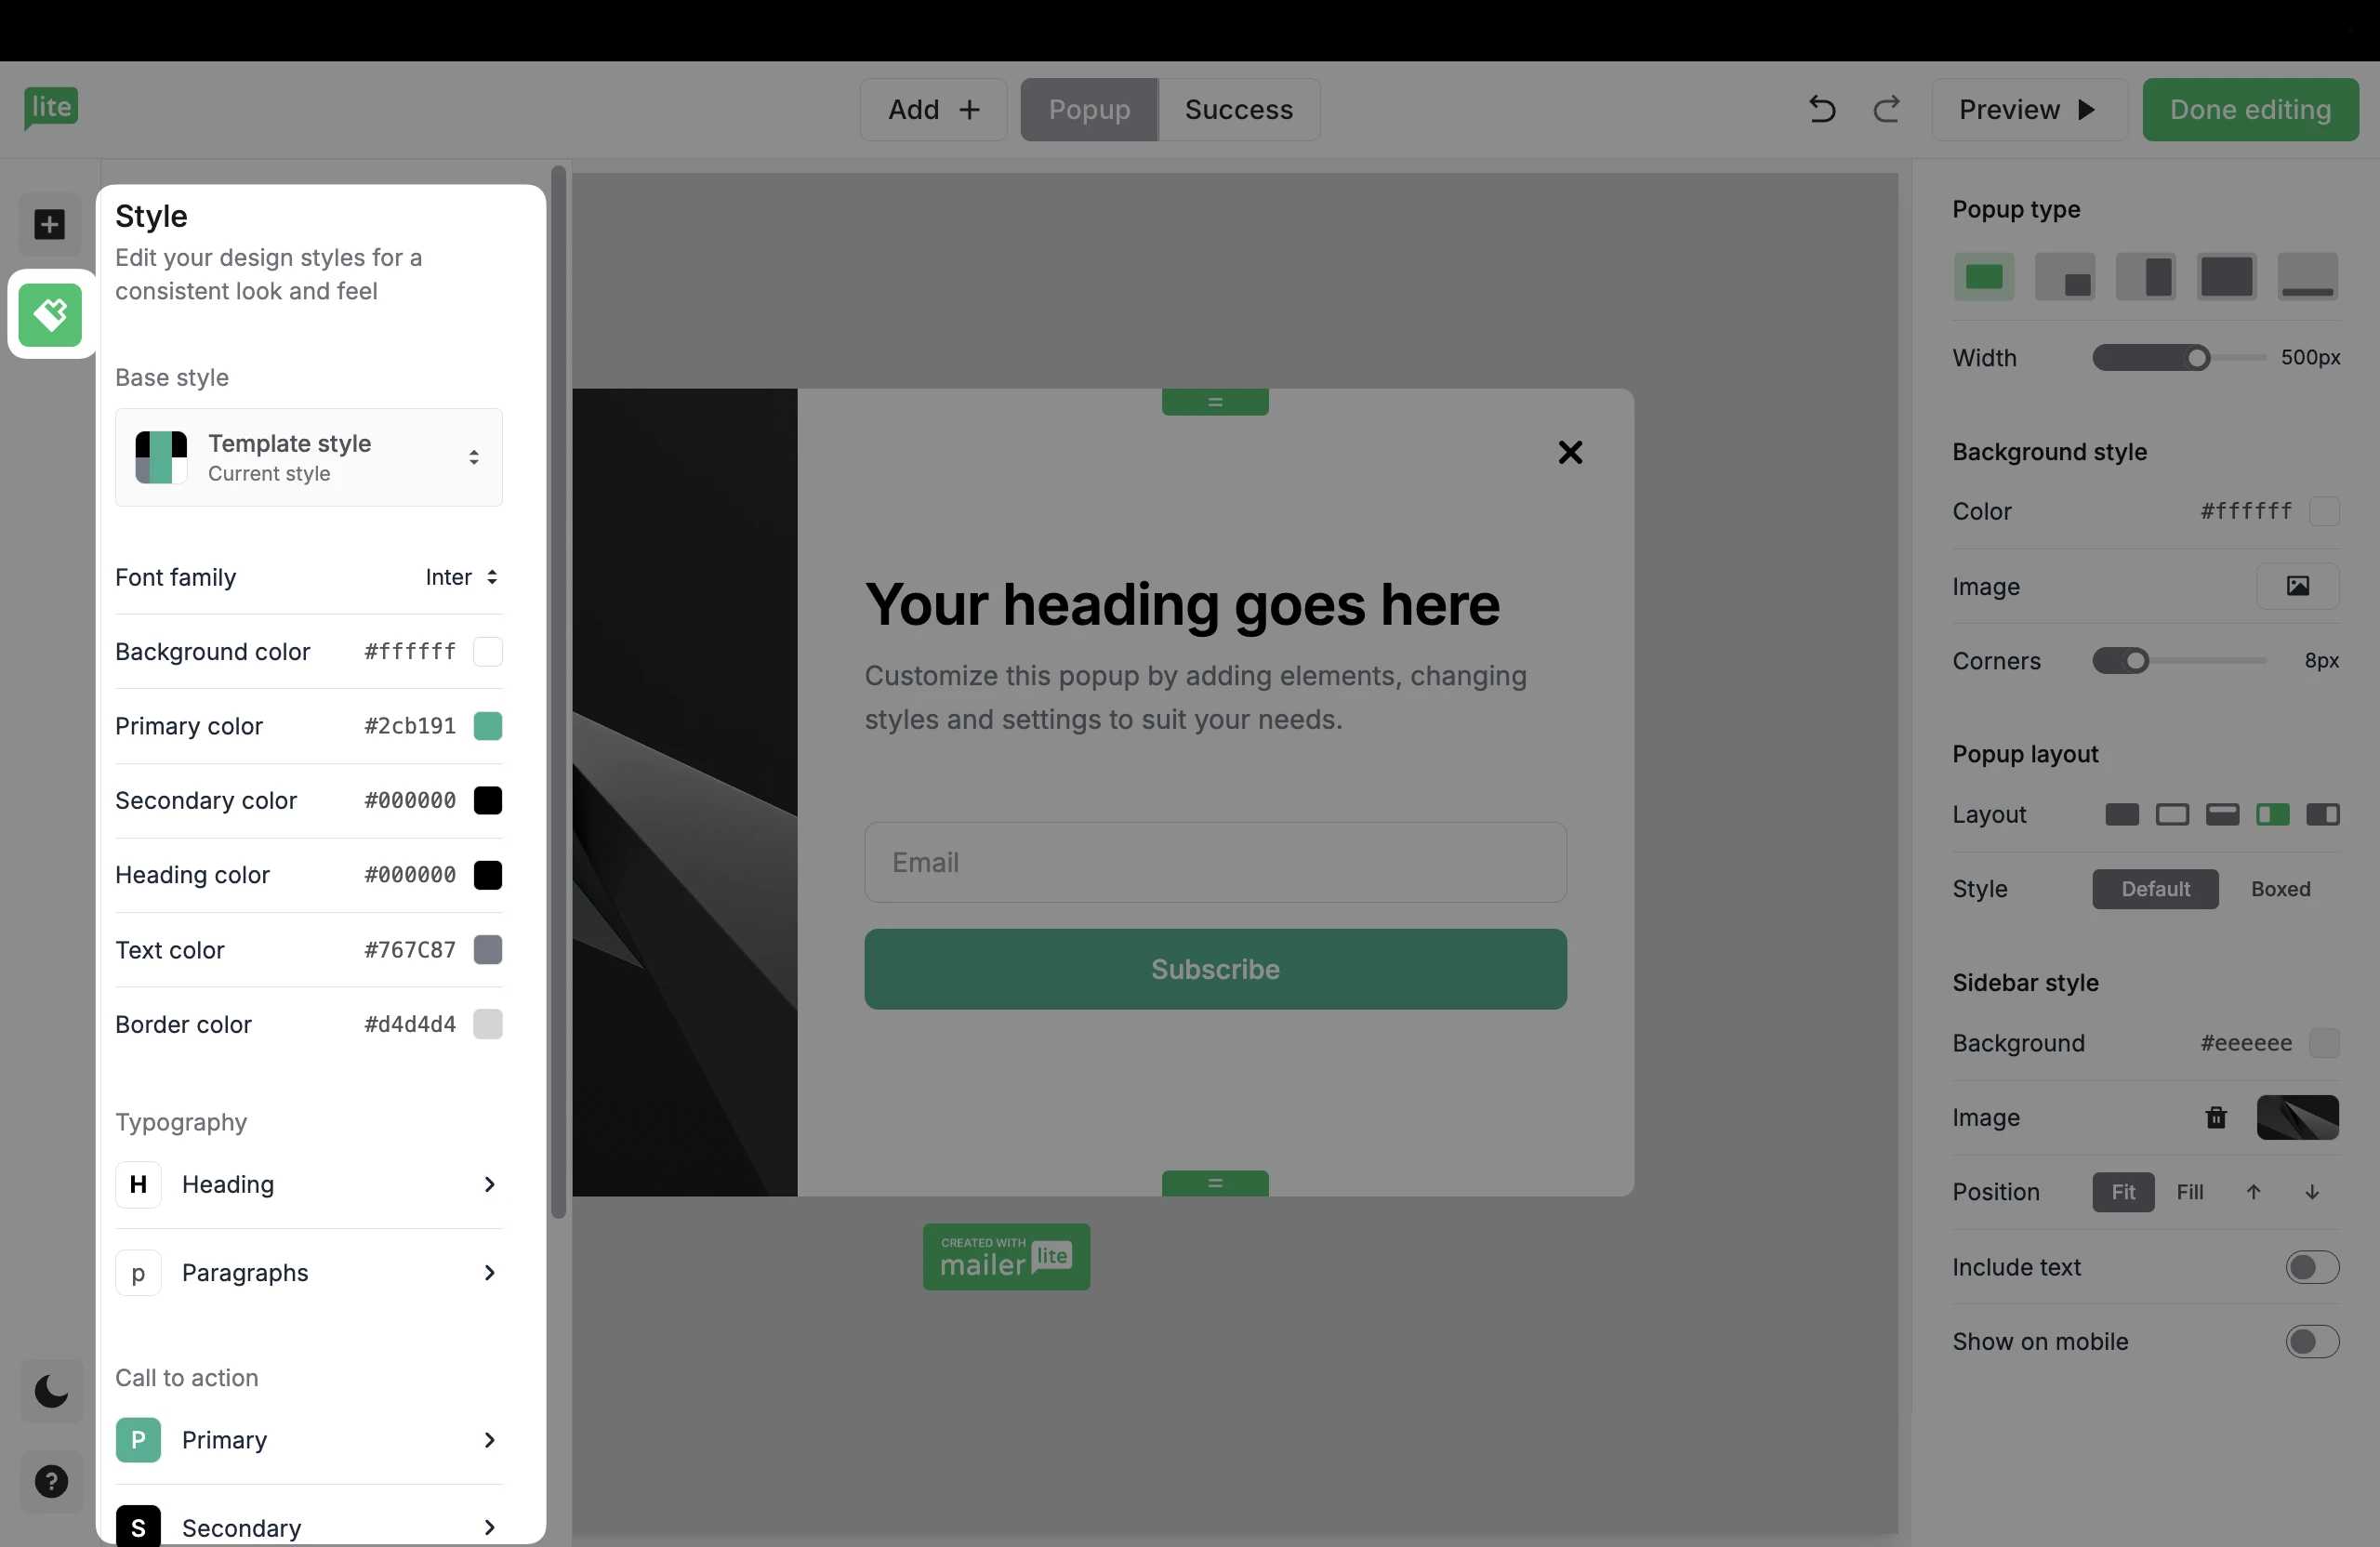
In the Base style section, you can adjust the font, background color, primary and secondary colors, text color, and border color of your popup.
💡 Pro tip
Trying to match your brand colors exactly? Look for your official color hex codes or use a color-picker tool on your website’s existing elements.
Typography
In the Headings and Paragraph tabs, you can adjust:
Font family: Inherits from the Base Style unless you pick a different one here.
Weight: Defines the “thickness” of the text
Line height
Letter spacing
H1 Color & size
H2 Color & size
Settings tab
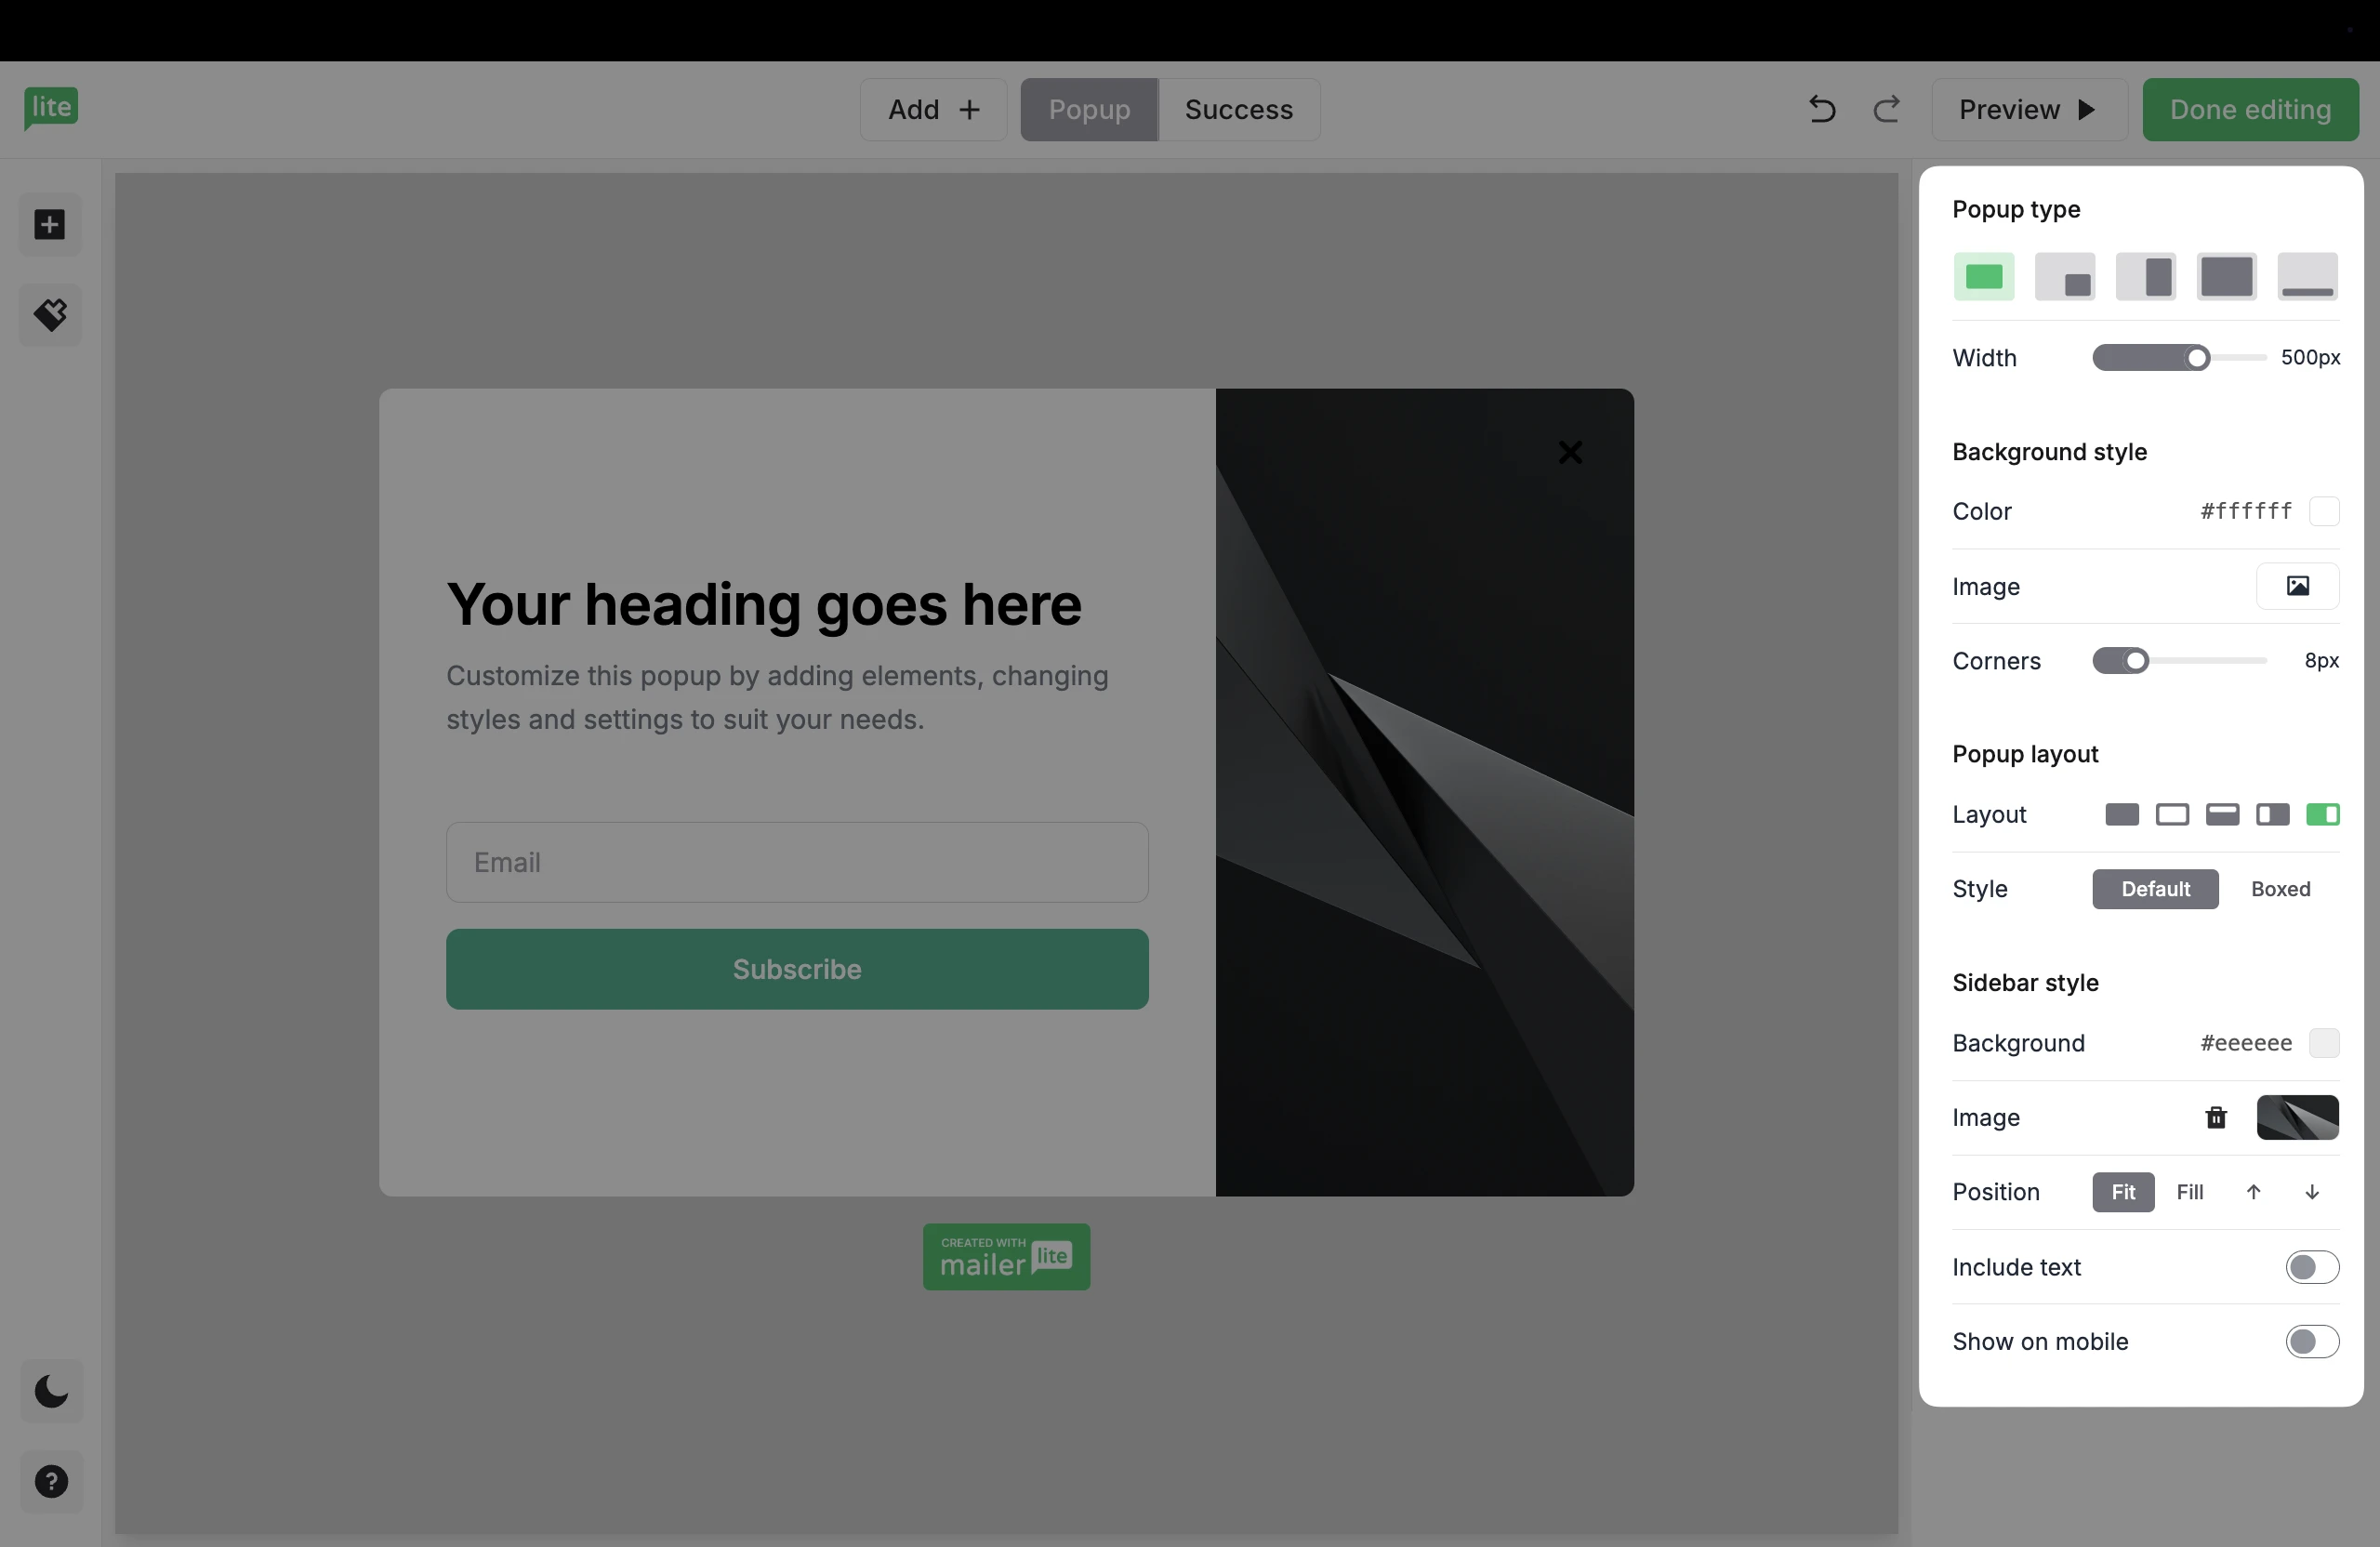
In the Settings tab, you can edit:
Pop-up type
Lightbox, Floating bar, Slide-in, Full screen, Big sidebar
Width
Width slider for light box, floating bar and slide-in layouts only.
Background style
Adjust the corner radius
Pop-up layout
Plain popup with no sidebar
Popup with a border
Border styles will be visible
The background color of the border can be edited or an image can be uploaded to the border
Popup with top sidebar
Sidebar style can be edited by selecting a background color or an image
Popup with left/right sidebar
Sidebar style can be edited by selecting a background color or an image
Boxed style
The boxed style contains the popup content inside of a box
Options
From the Settings icon, navigate to the Options tab.
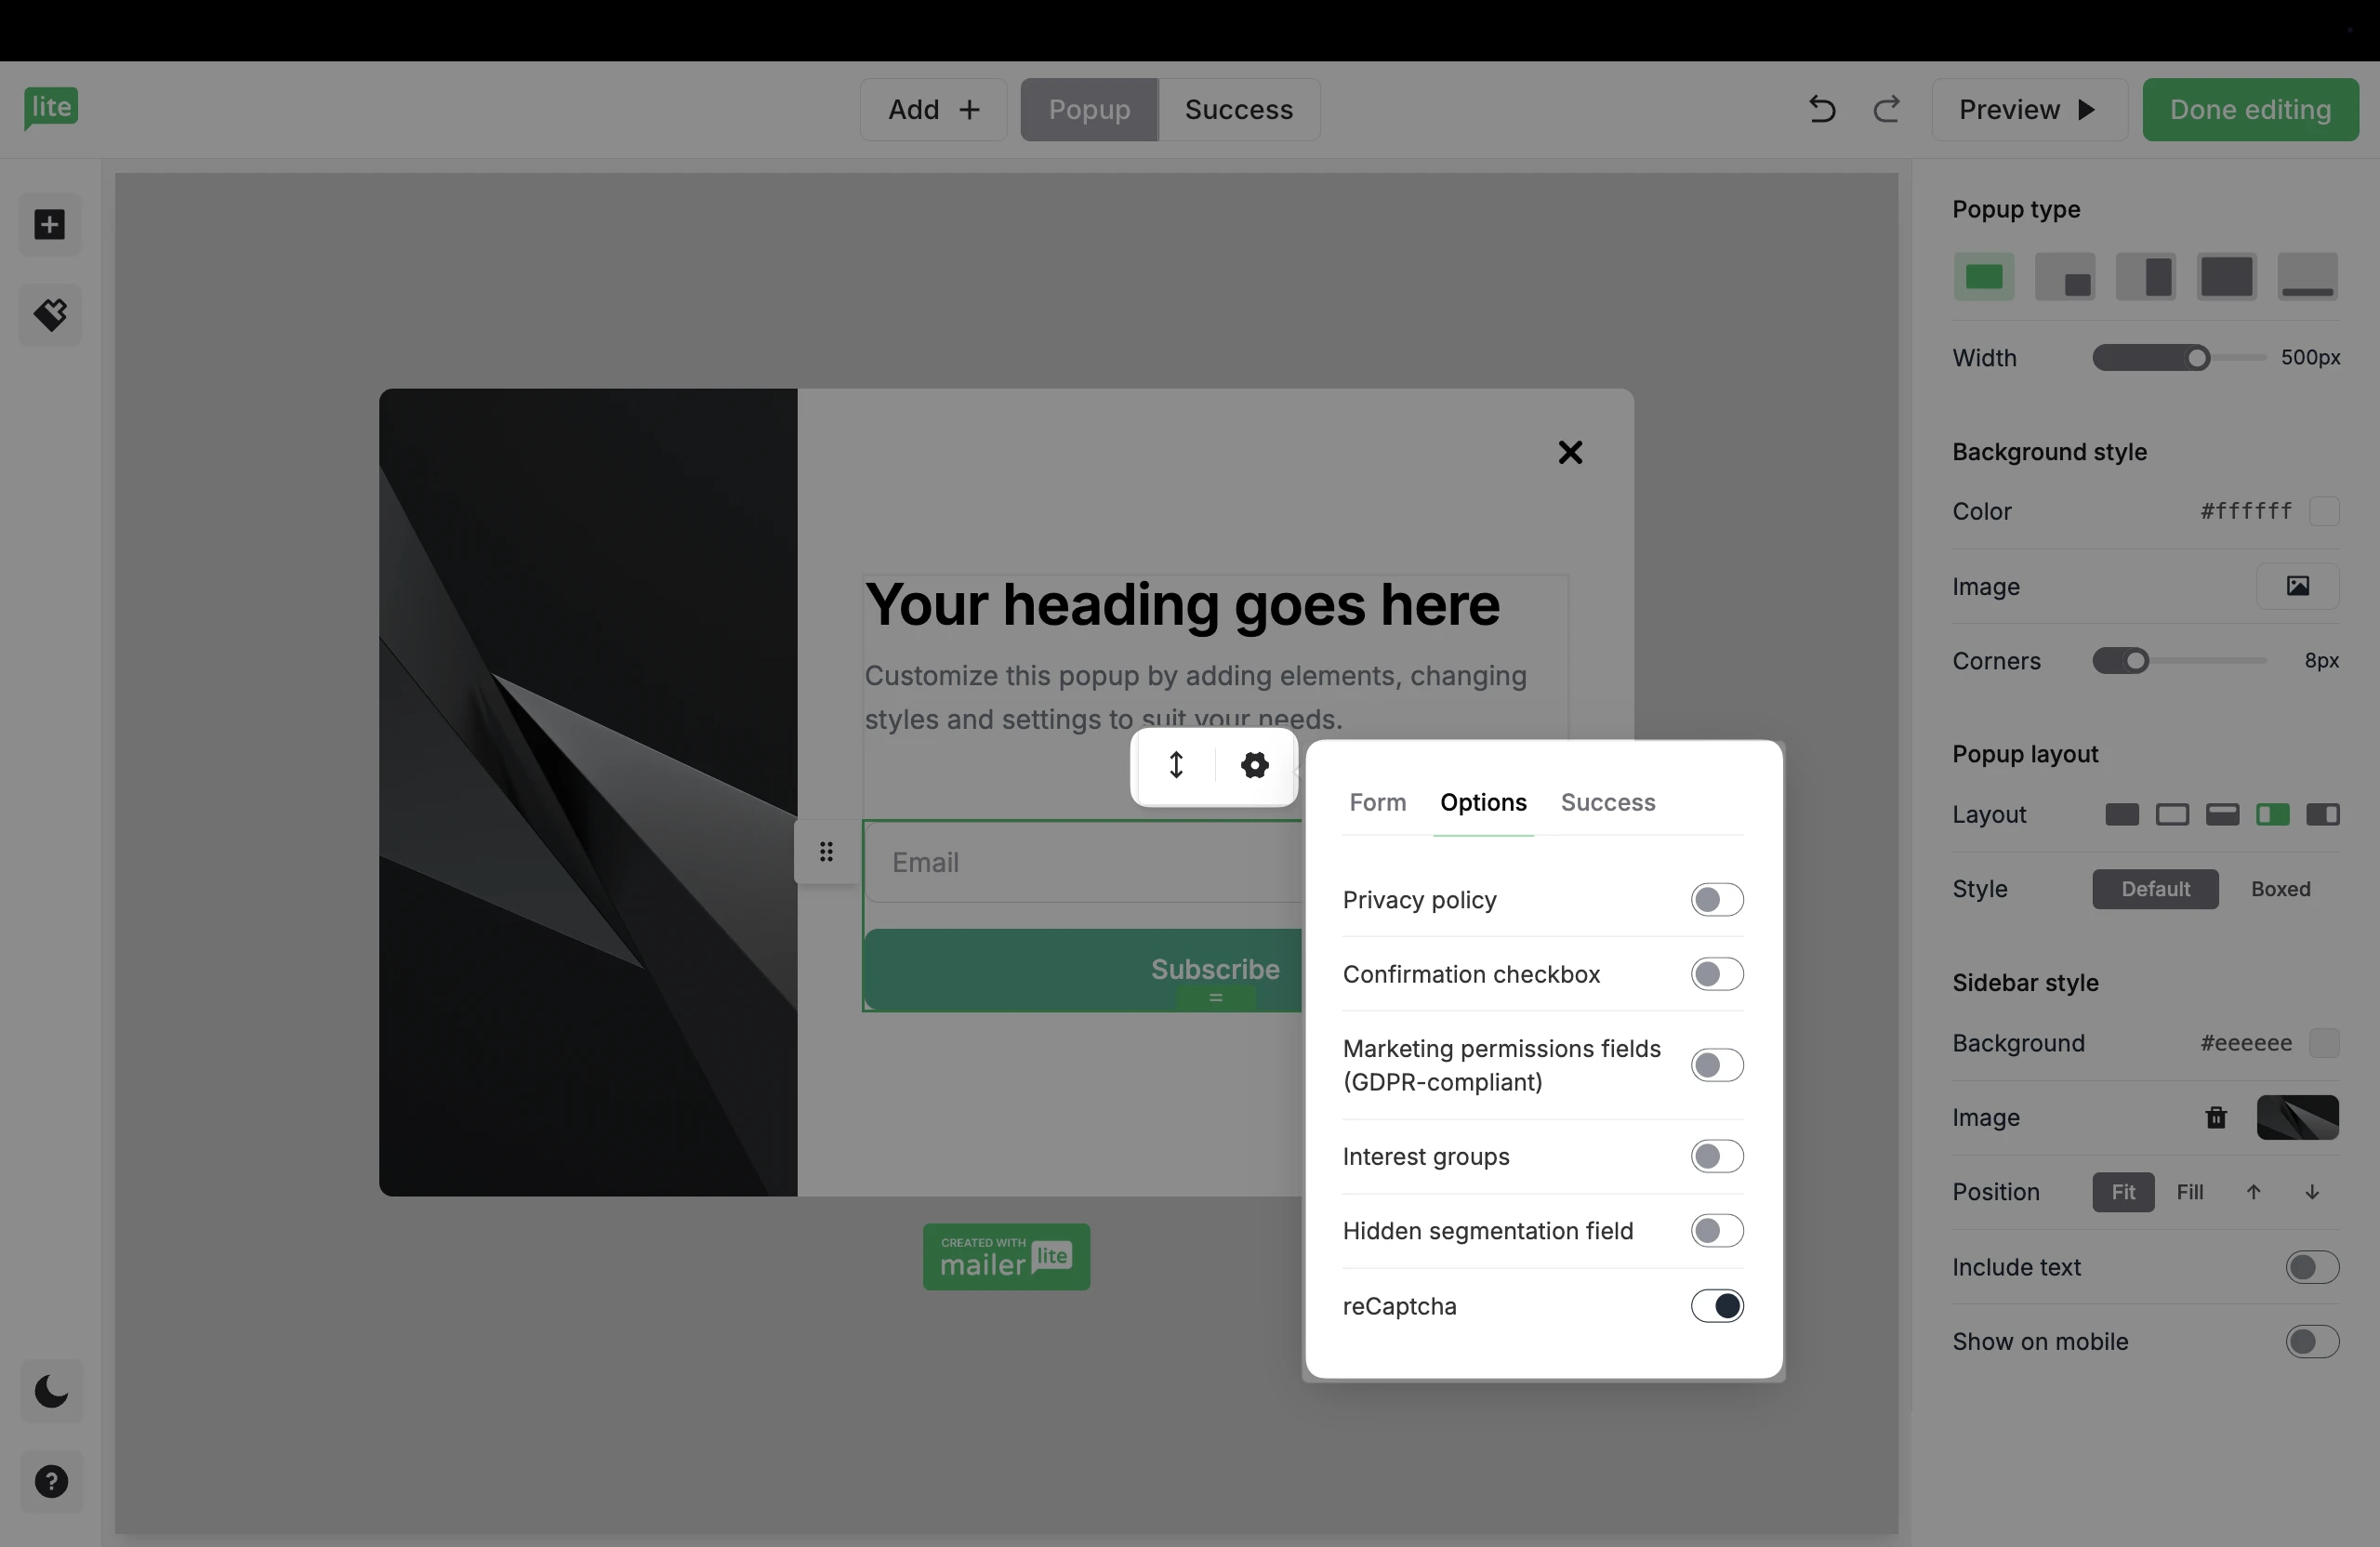
Here you can apply different settings to your form. These settings include:
Privacy policy - Add a privacy statement to your pop-up form.
Confirmation checkbox - Add a user-consent checkbox to your pop-up form.
Marketing permissions fields (GDPR-compliant) - Include GDPR compliant marketing permissions checkboxes to your pop-up form.
Interest groups - Give subscribers the option to choose their own subscriber group.
Hidden segmentation field - Add a hidden field to segment your subscriber list. You can select a field and a value so that all subscribers of this form have that value added to that field.
reCAPTCHA - When added to your pop-up form, form subscribers will see a reCAPTCHA badge in the bottom left corner, with verification happening seamlessly in the background. This helps prevent potentially harmful spam bots from joining your subscriber list.
Did you know?
You can add a teaser to your pop-up to attract more signups! Find out how 👈
Also, try out the spin-the-wheel pop-up to create a gamified experience for your subscribers 🤩
How to apply settings to a pop-up form
These settings are the rules you apply to your pop-up form that determine when and where the pop-up appears.
There are four factors in the behavior of your form to which you must apply settings:
Trigger - Choose when your pop-up form will appear. For example, five seconds after the page is opened, when the visitor scrolls to 50% of the web page, or when the visitor intends to exit the page
Frequency - Choose how often your pop-up appears for the same visitor if they don’t subscribe the first time they see the pop-up
Schedule - Have your pop-up go live immediately or set a start date and finish date for your pop-up form
Visibility - Choose whether you want to hide your pop-up on specific devices, or hide/show your pop-up on specific webpages
Once you’re satisfied with your pop-up’s behavior settings, click Save and continue to carry on to the next step: installing your pop-up form.
How to hide/show pop-up forms on specific pages
When you create a pop-up form it will show on every page of your website by default. However, in your Visibility settings you can decide whether to have that pop-up form show on every page of your website, some pages of your website; or you can choose to hide it on specific pages of your website.
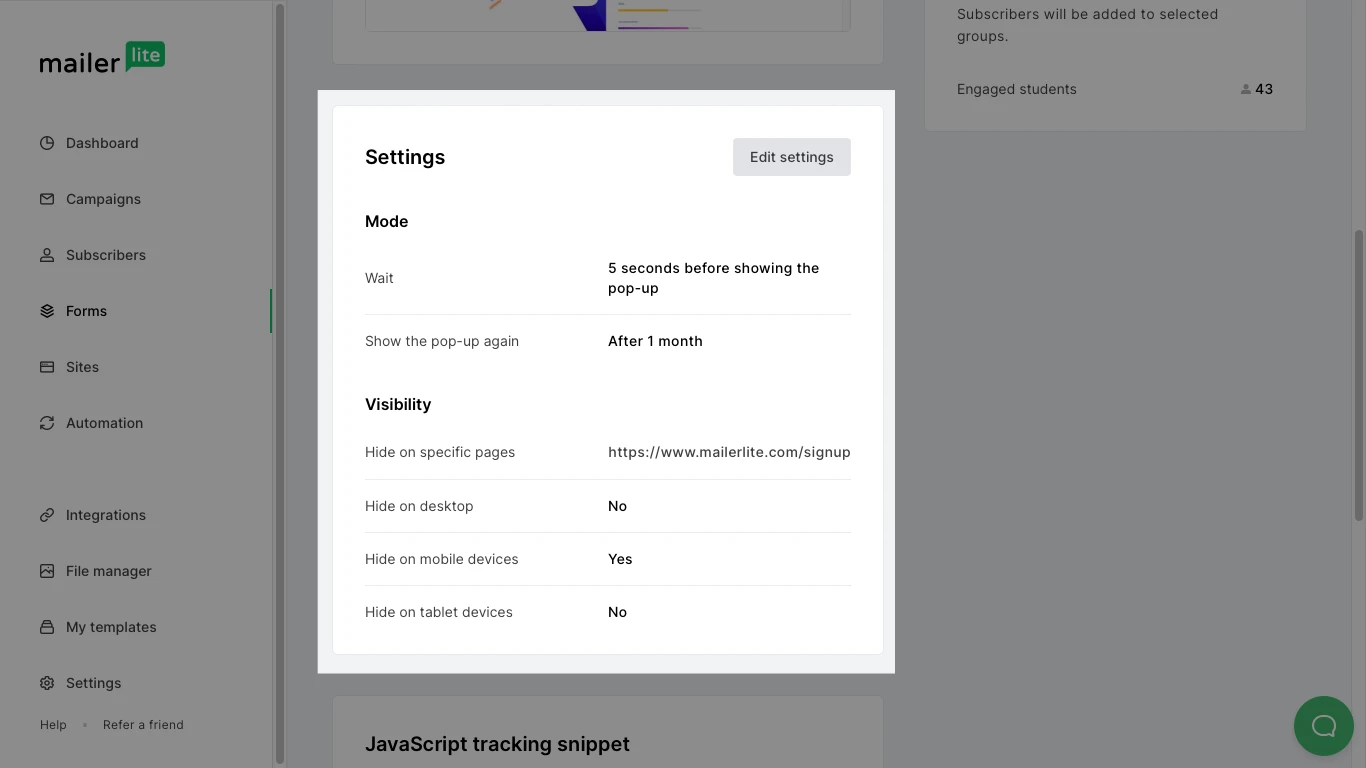
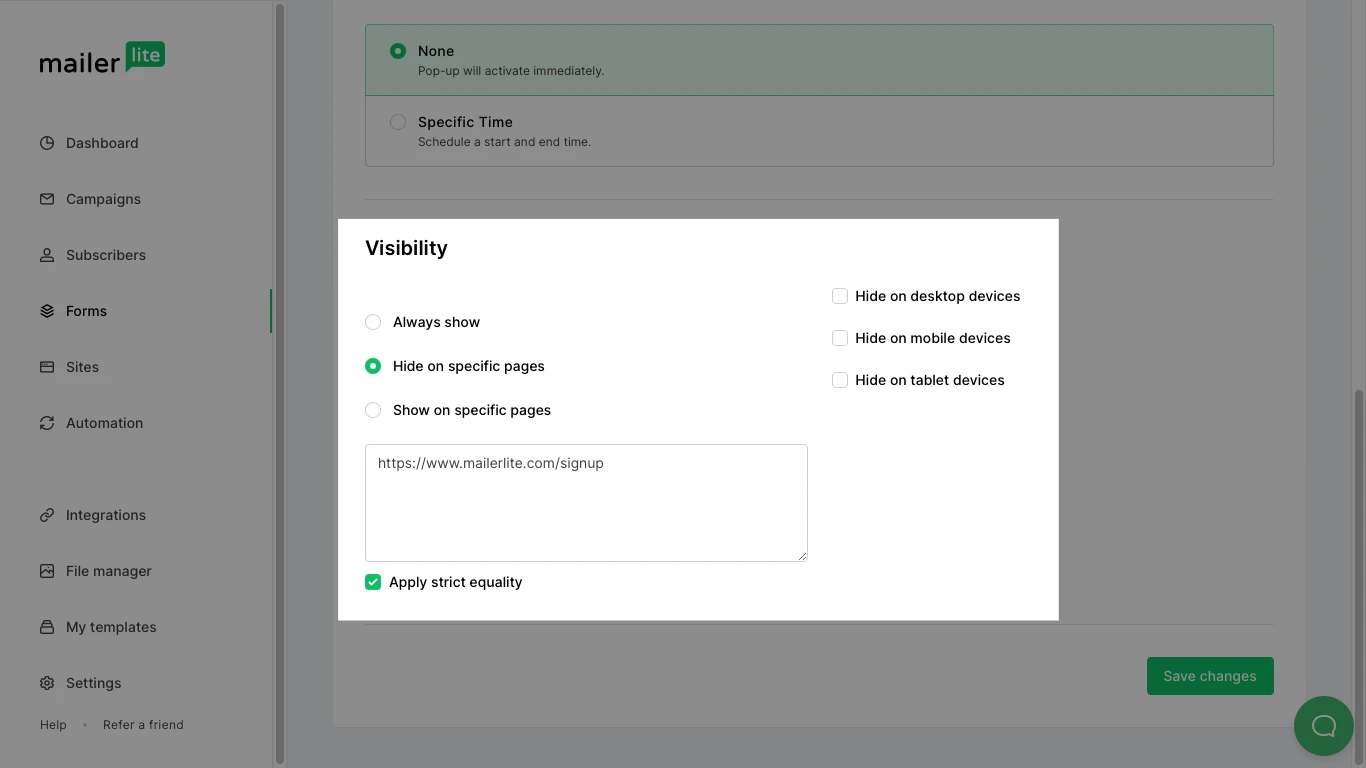
To hide your pop-up form on specific pages:
Select Hide on specific pages.
Copy and paste the webpage URL(s) of the pages you do not want your pop-up to appear on. Paste each URL onto its own line.
Checkmark the box labeled Apply strict equality to have your pop-up hidden only on pages that match the entered URLs exactly.
To show your pop-up form only specific pages:
Select Only show on specific pages.
Copy and paste the webpage URL(s) of the pages you want your pop-up to appear on. Paste each URL onto its own line.
Checkmark the box labeled Apply strict equality to have your pop-up show only on pages that match the entered URLs exactly.
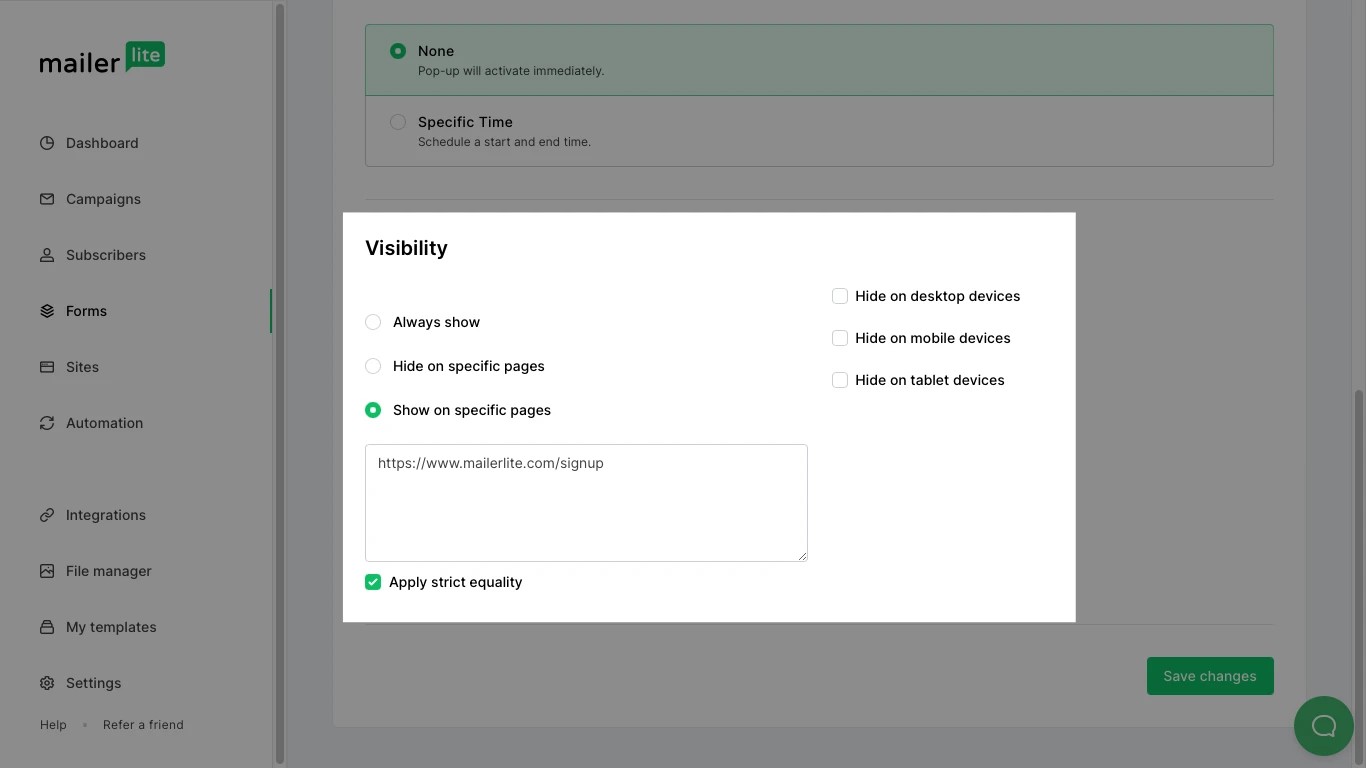
Note: If you do not check the box labeled Apply strict equality, then all URLs that contain the URL you entered will be included in your visibility settings.
For example, if you set your pop-up form to hide on www.mailerlite.com and you don’t check Apply strict equality, then your pop-up will be hidden on all web pages containing www.mailerlite.com, including www.mailerlite.com/blog and www.mailerlite.com/about, etc.
Pop-up on click event
Want to turn your text, images and buttons into clickable pop-ups?
To use the Pop-up on click event feature:
Go to the Forms tab.
You can use either the Pop-ups tab or the Embedded forms tab.
Locate a form that you have created and click Overview.
Scroll down to the JavaScript tracking snippet section. Here you will find the scripts you need, which should be inserted on each page of your site that you wish to add the pop-up too. Usually, the CMS has a special spot to implement this code and showcase it on every page.
Click Show on click event. Here you'll have access to all the click event Javascript codes. If you want the pop-up to show on a click event, then the Javascript code must be added.
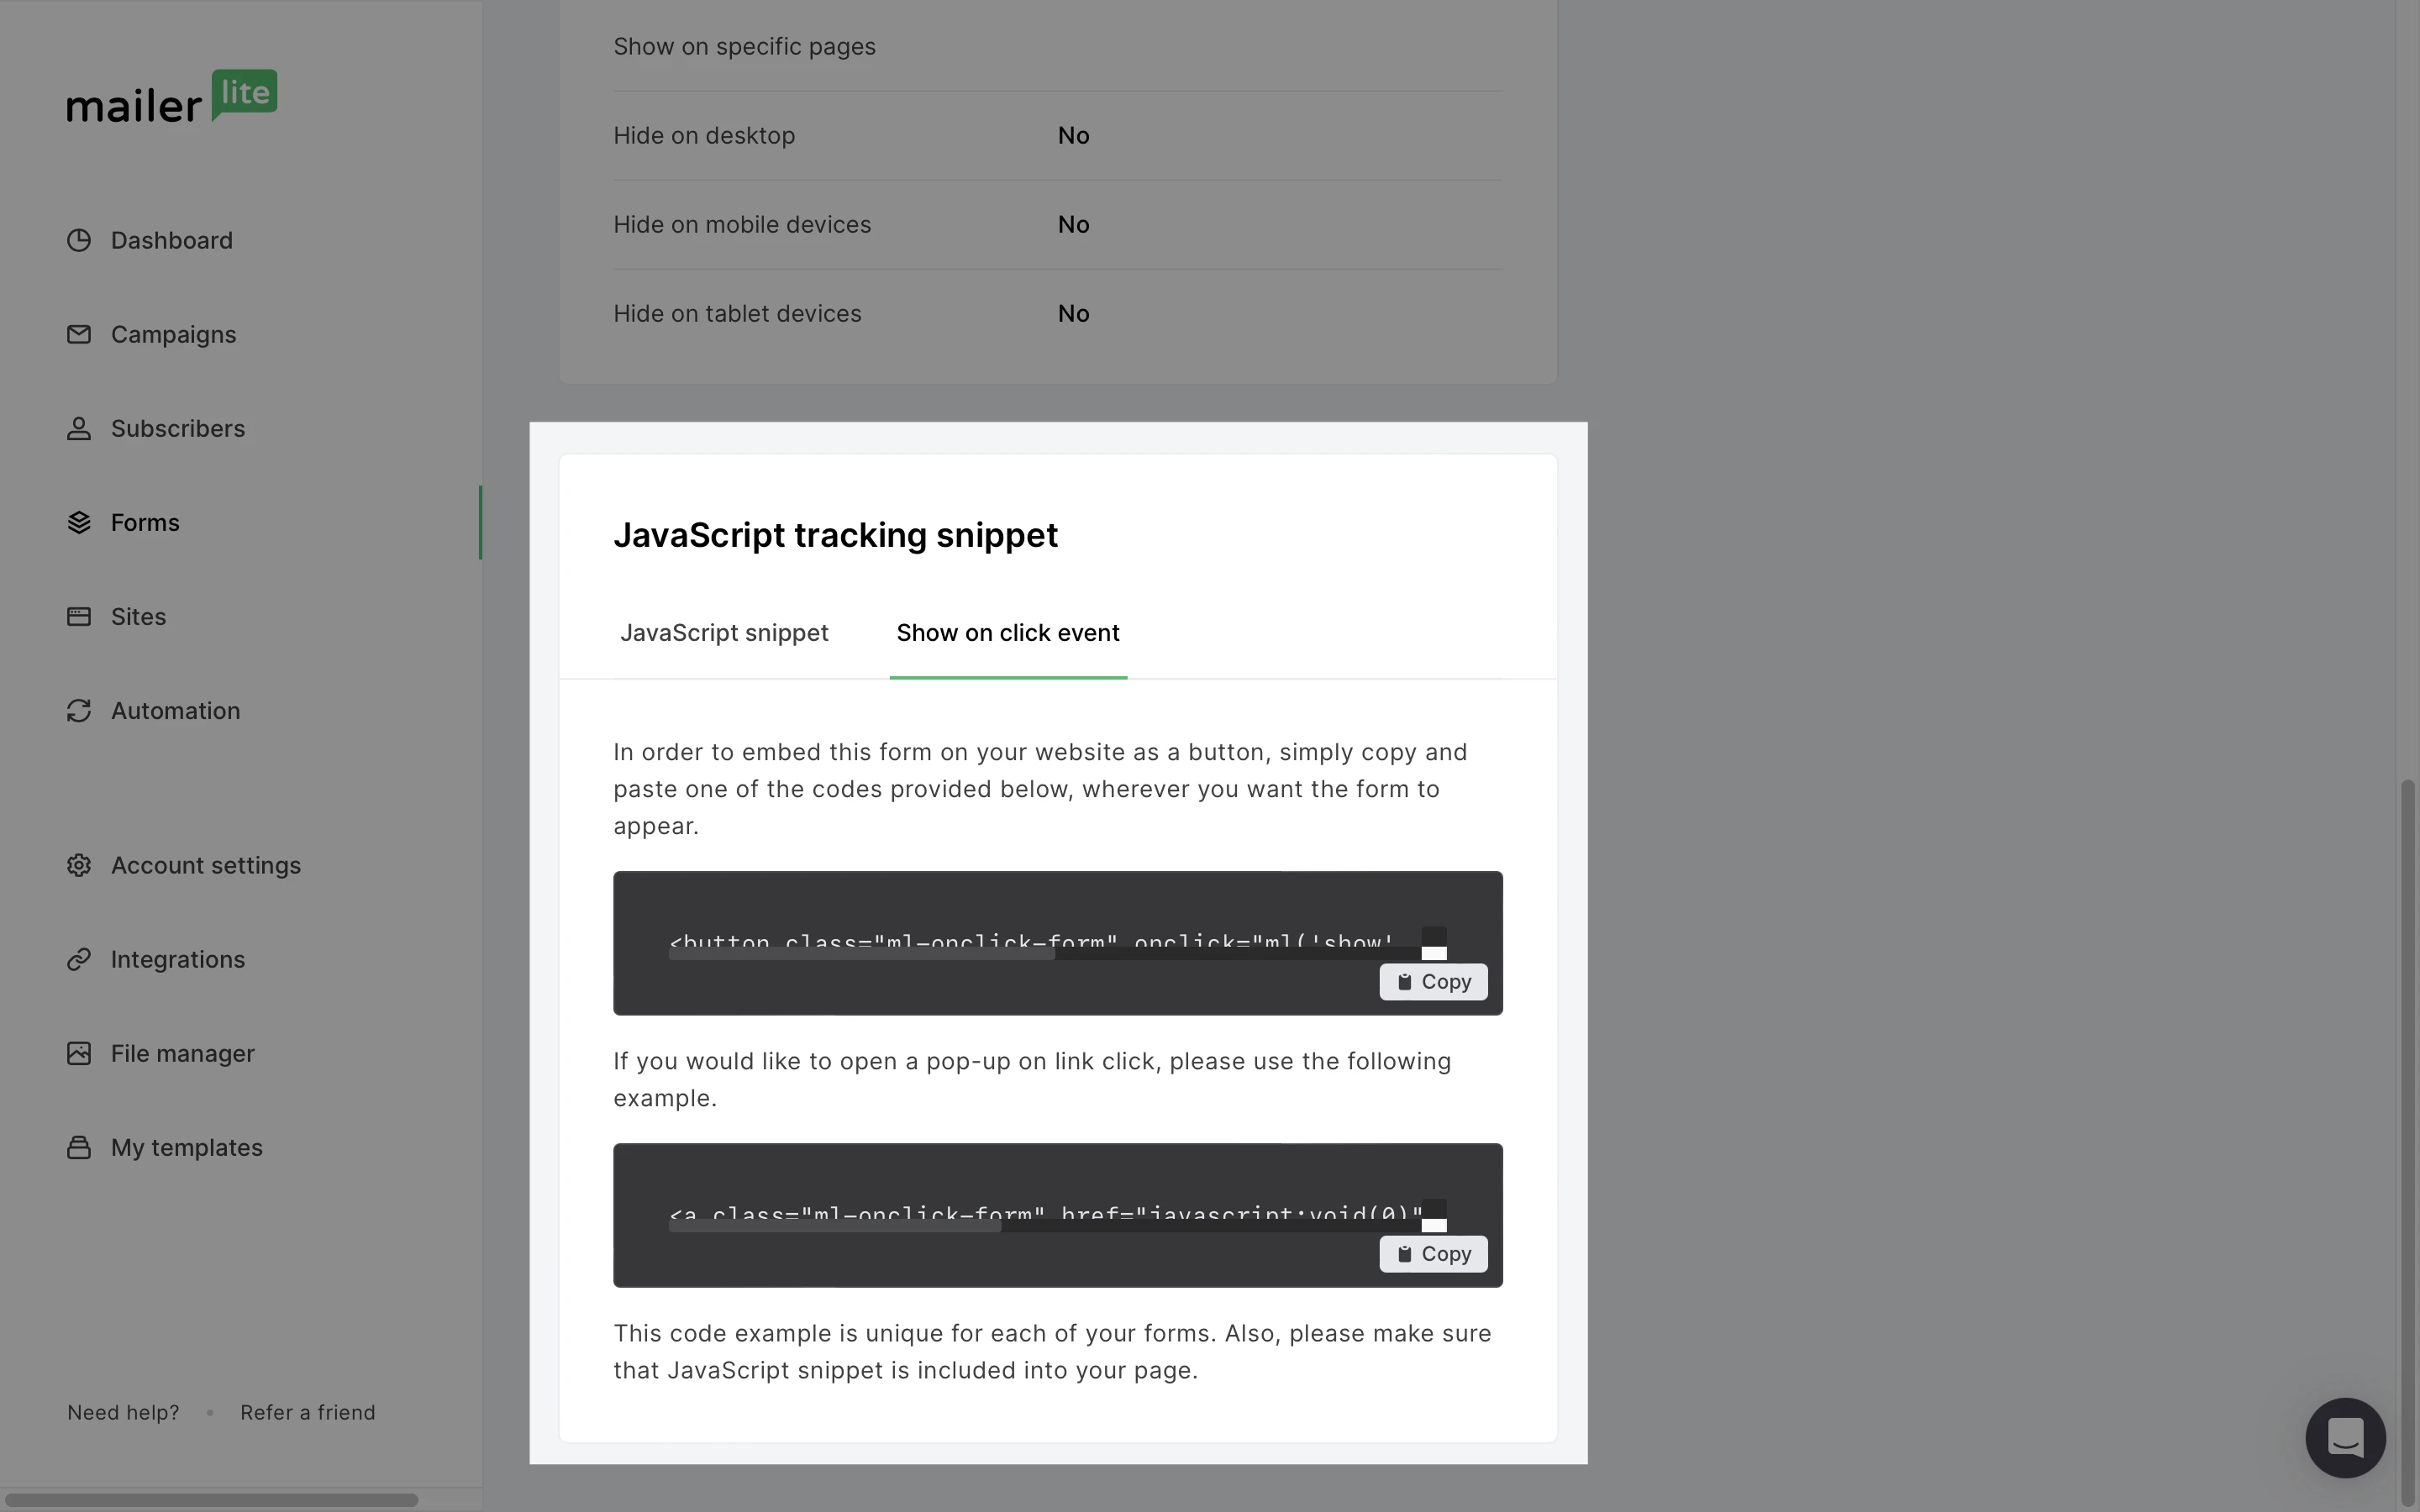
To create a button pop-up, copy the code in the second grey table. This will create a button in your post. The code under it is for when you want to show your pop-up whenever a link is clicked. You can use this code to display your form when someone clicks on text or an image.
For the button, copy and paste the code and replace the sentence Click here to show pop-up with your own button CTA. The button style is the same as you have set on your blog. If you want to change your button, you need to change the design settings on your blog.
For the link click pop-up, copy and paste the code and replace the sentence Click here to show pop-up with text or the image code.
Click Publish and view your new pop-up post.
Note: If you’re using WordPress, sometimes when you change between the visual and text editor tabs, the pop-up information in the source editor gets lost. Just refresh the page and your information will be back. Avoid pressing the Update button, then you’ll need to add the information again.