Note: If you're a Legacy (Classic) user, please log in to your account to access the dedicated Legacy (Classic) Help Center.
💡 The Preference Center is a paid feature available on the Comfort and Power plans.
What is the Preference center?
An email marketing Preference center is a landing page that lets your subscribers specify what kind of messages they want to receive from you.
When the subscriber opens the Preference center, they will also see what information they have already provided when first subscribing and have the opportunity to make any updates.
To set up the Preference center:
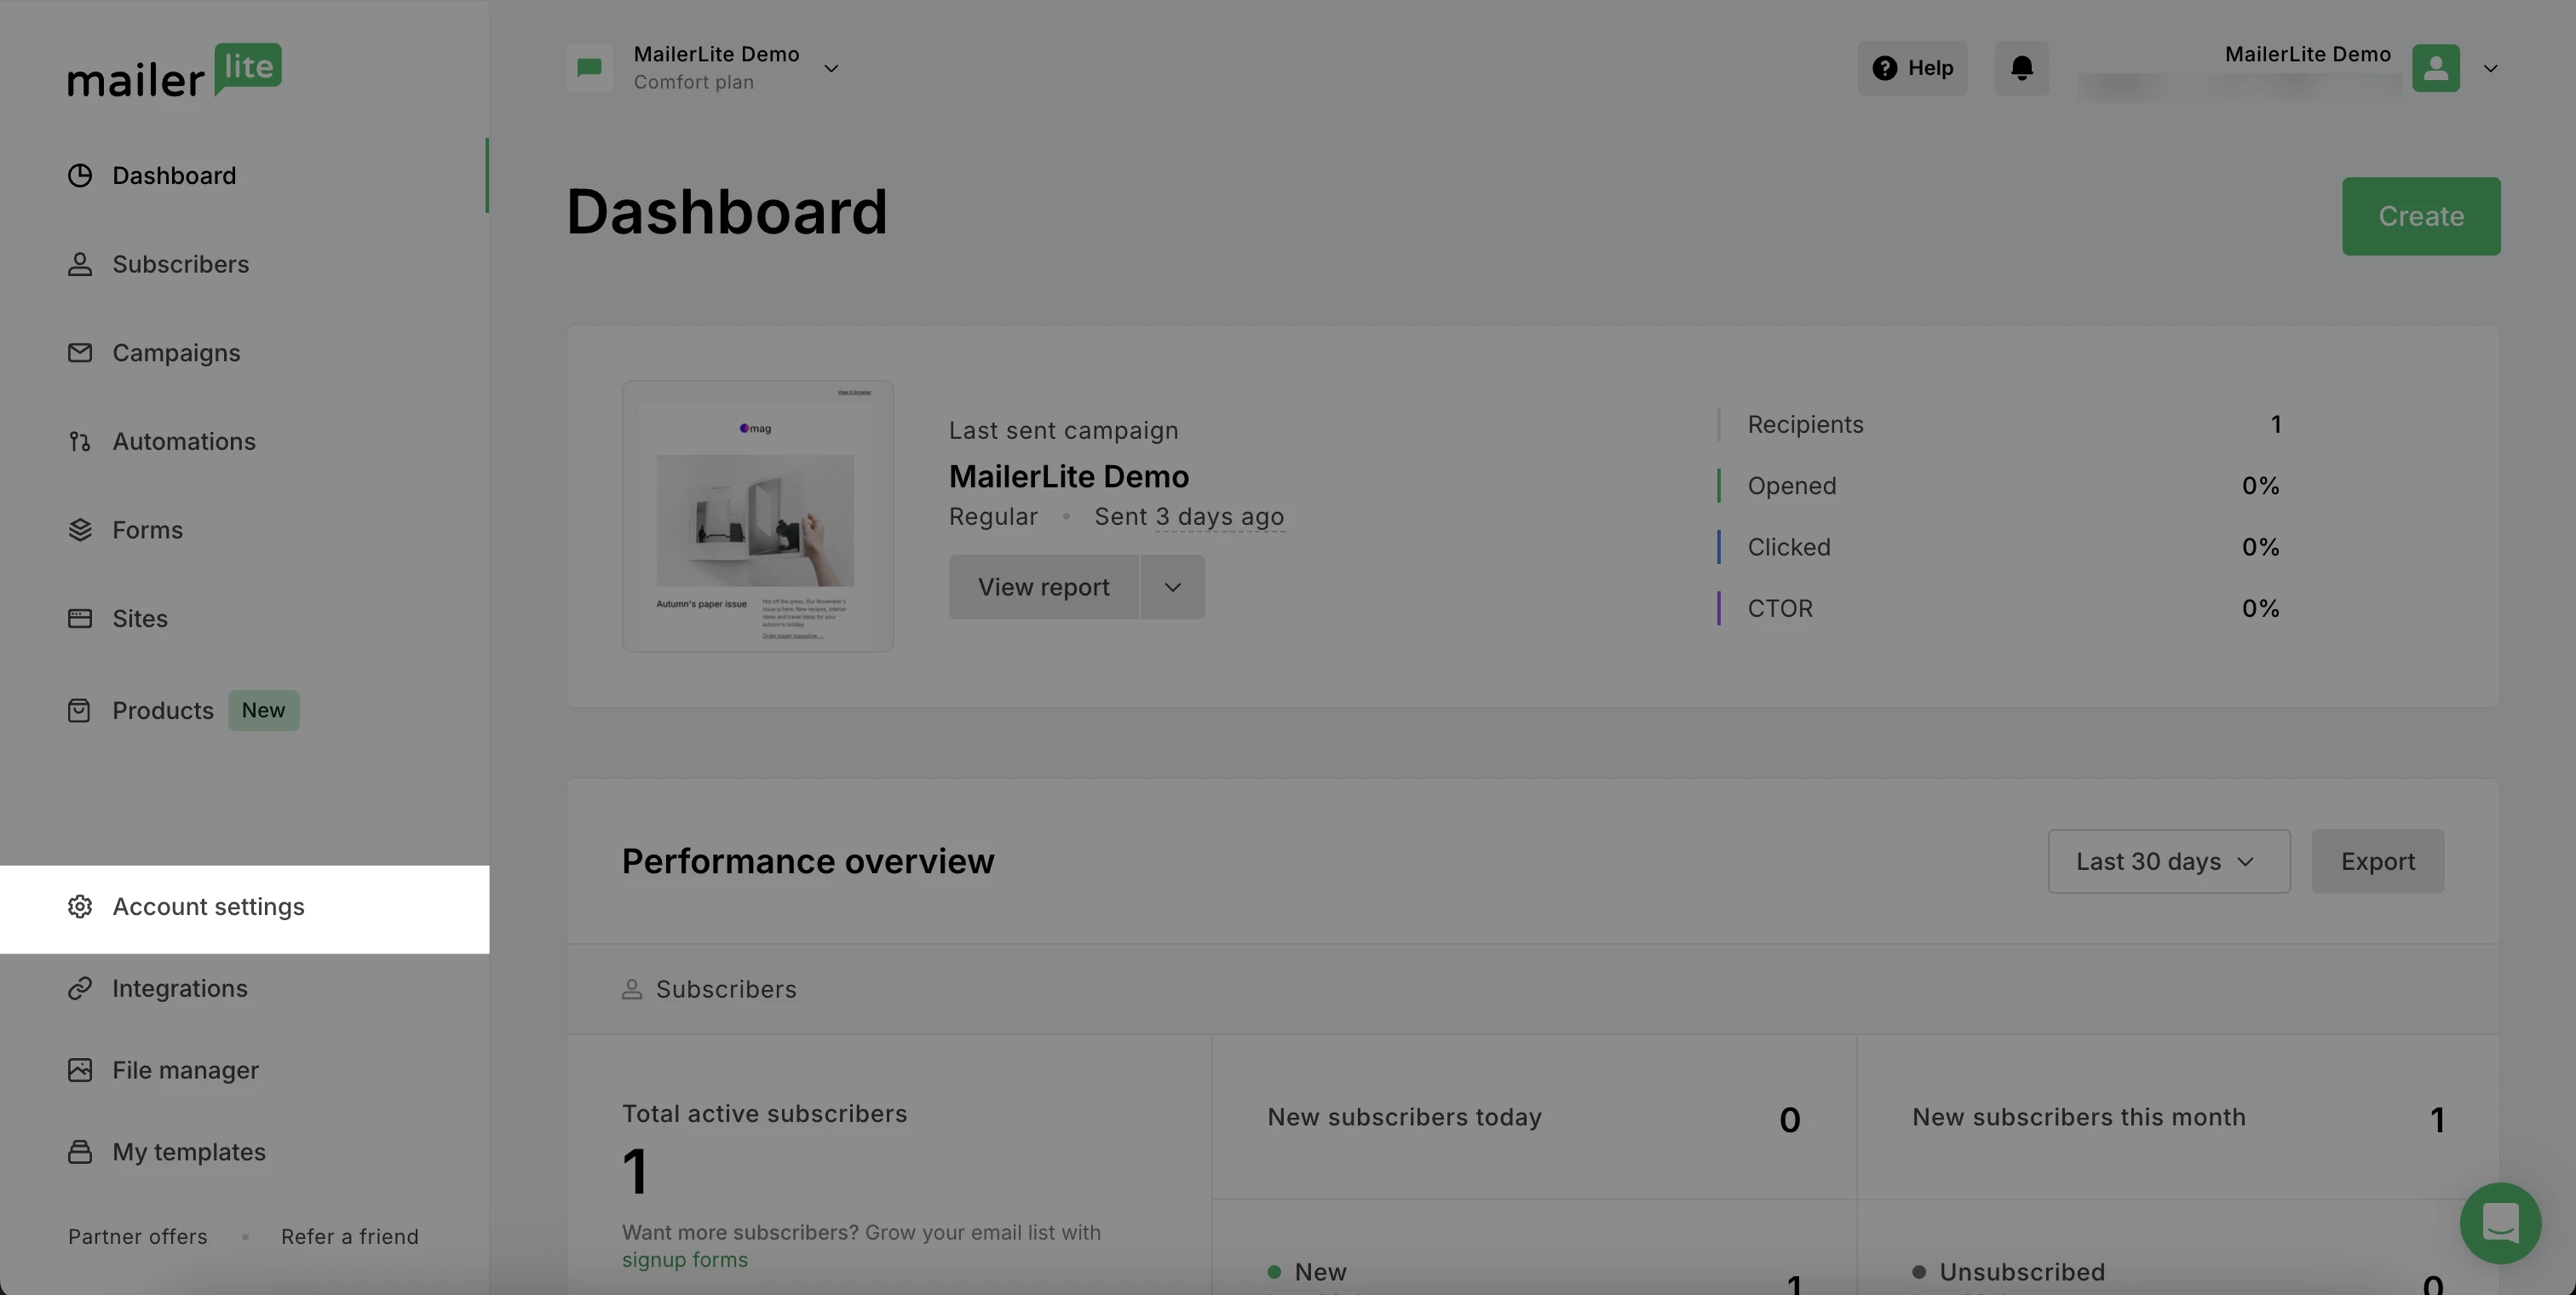
Navigate to Account settings from the sidebar menu.
2. Choose the Preference center page.
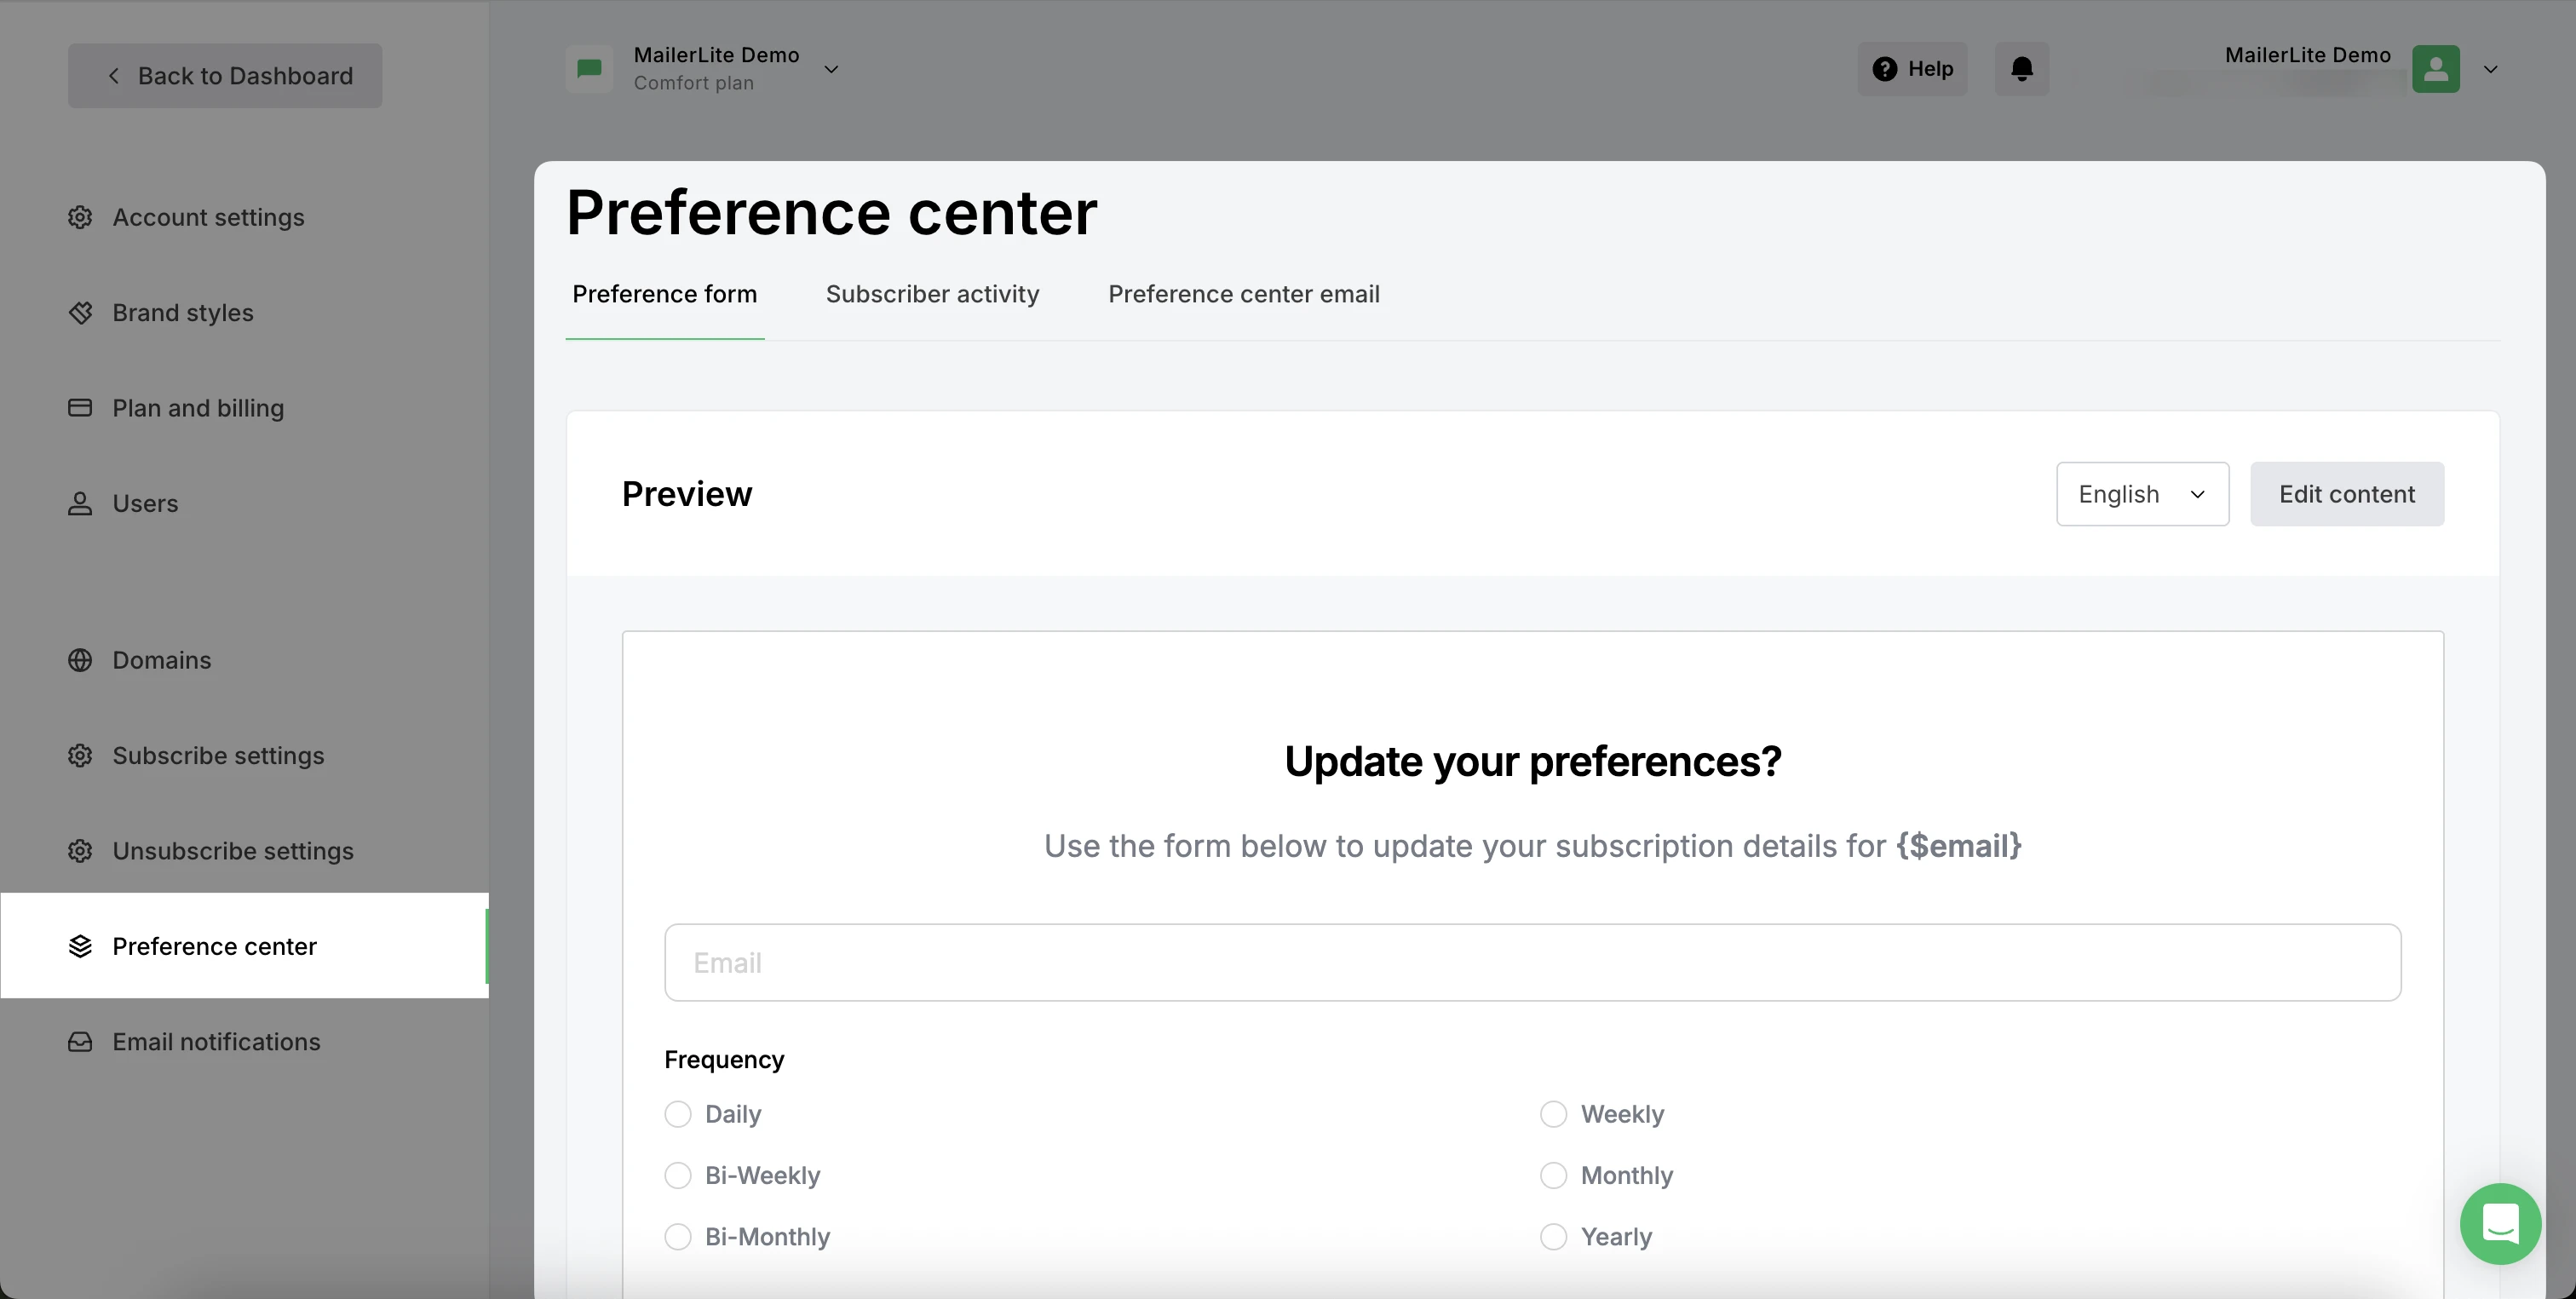
Here, you will see three tabs:
Preference form: Make edits and preview your current preference center.
Subscriber activity: See how your subscribers are interacting with your preference center.
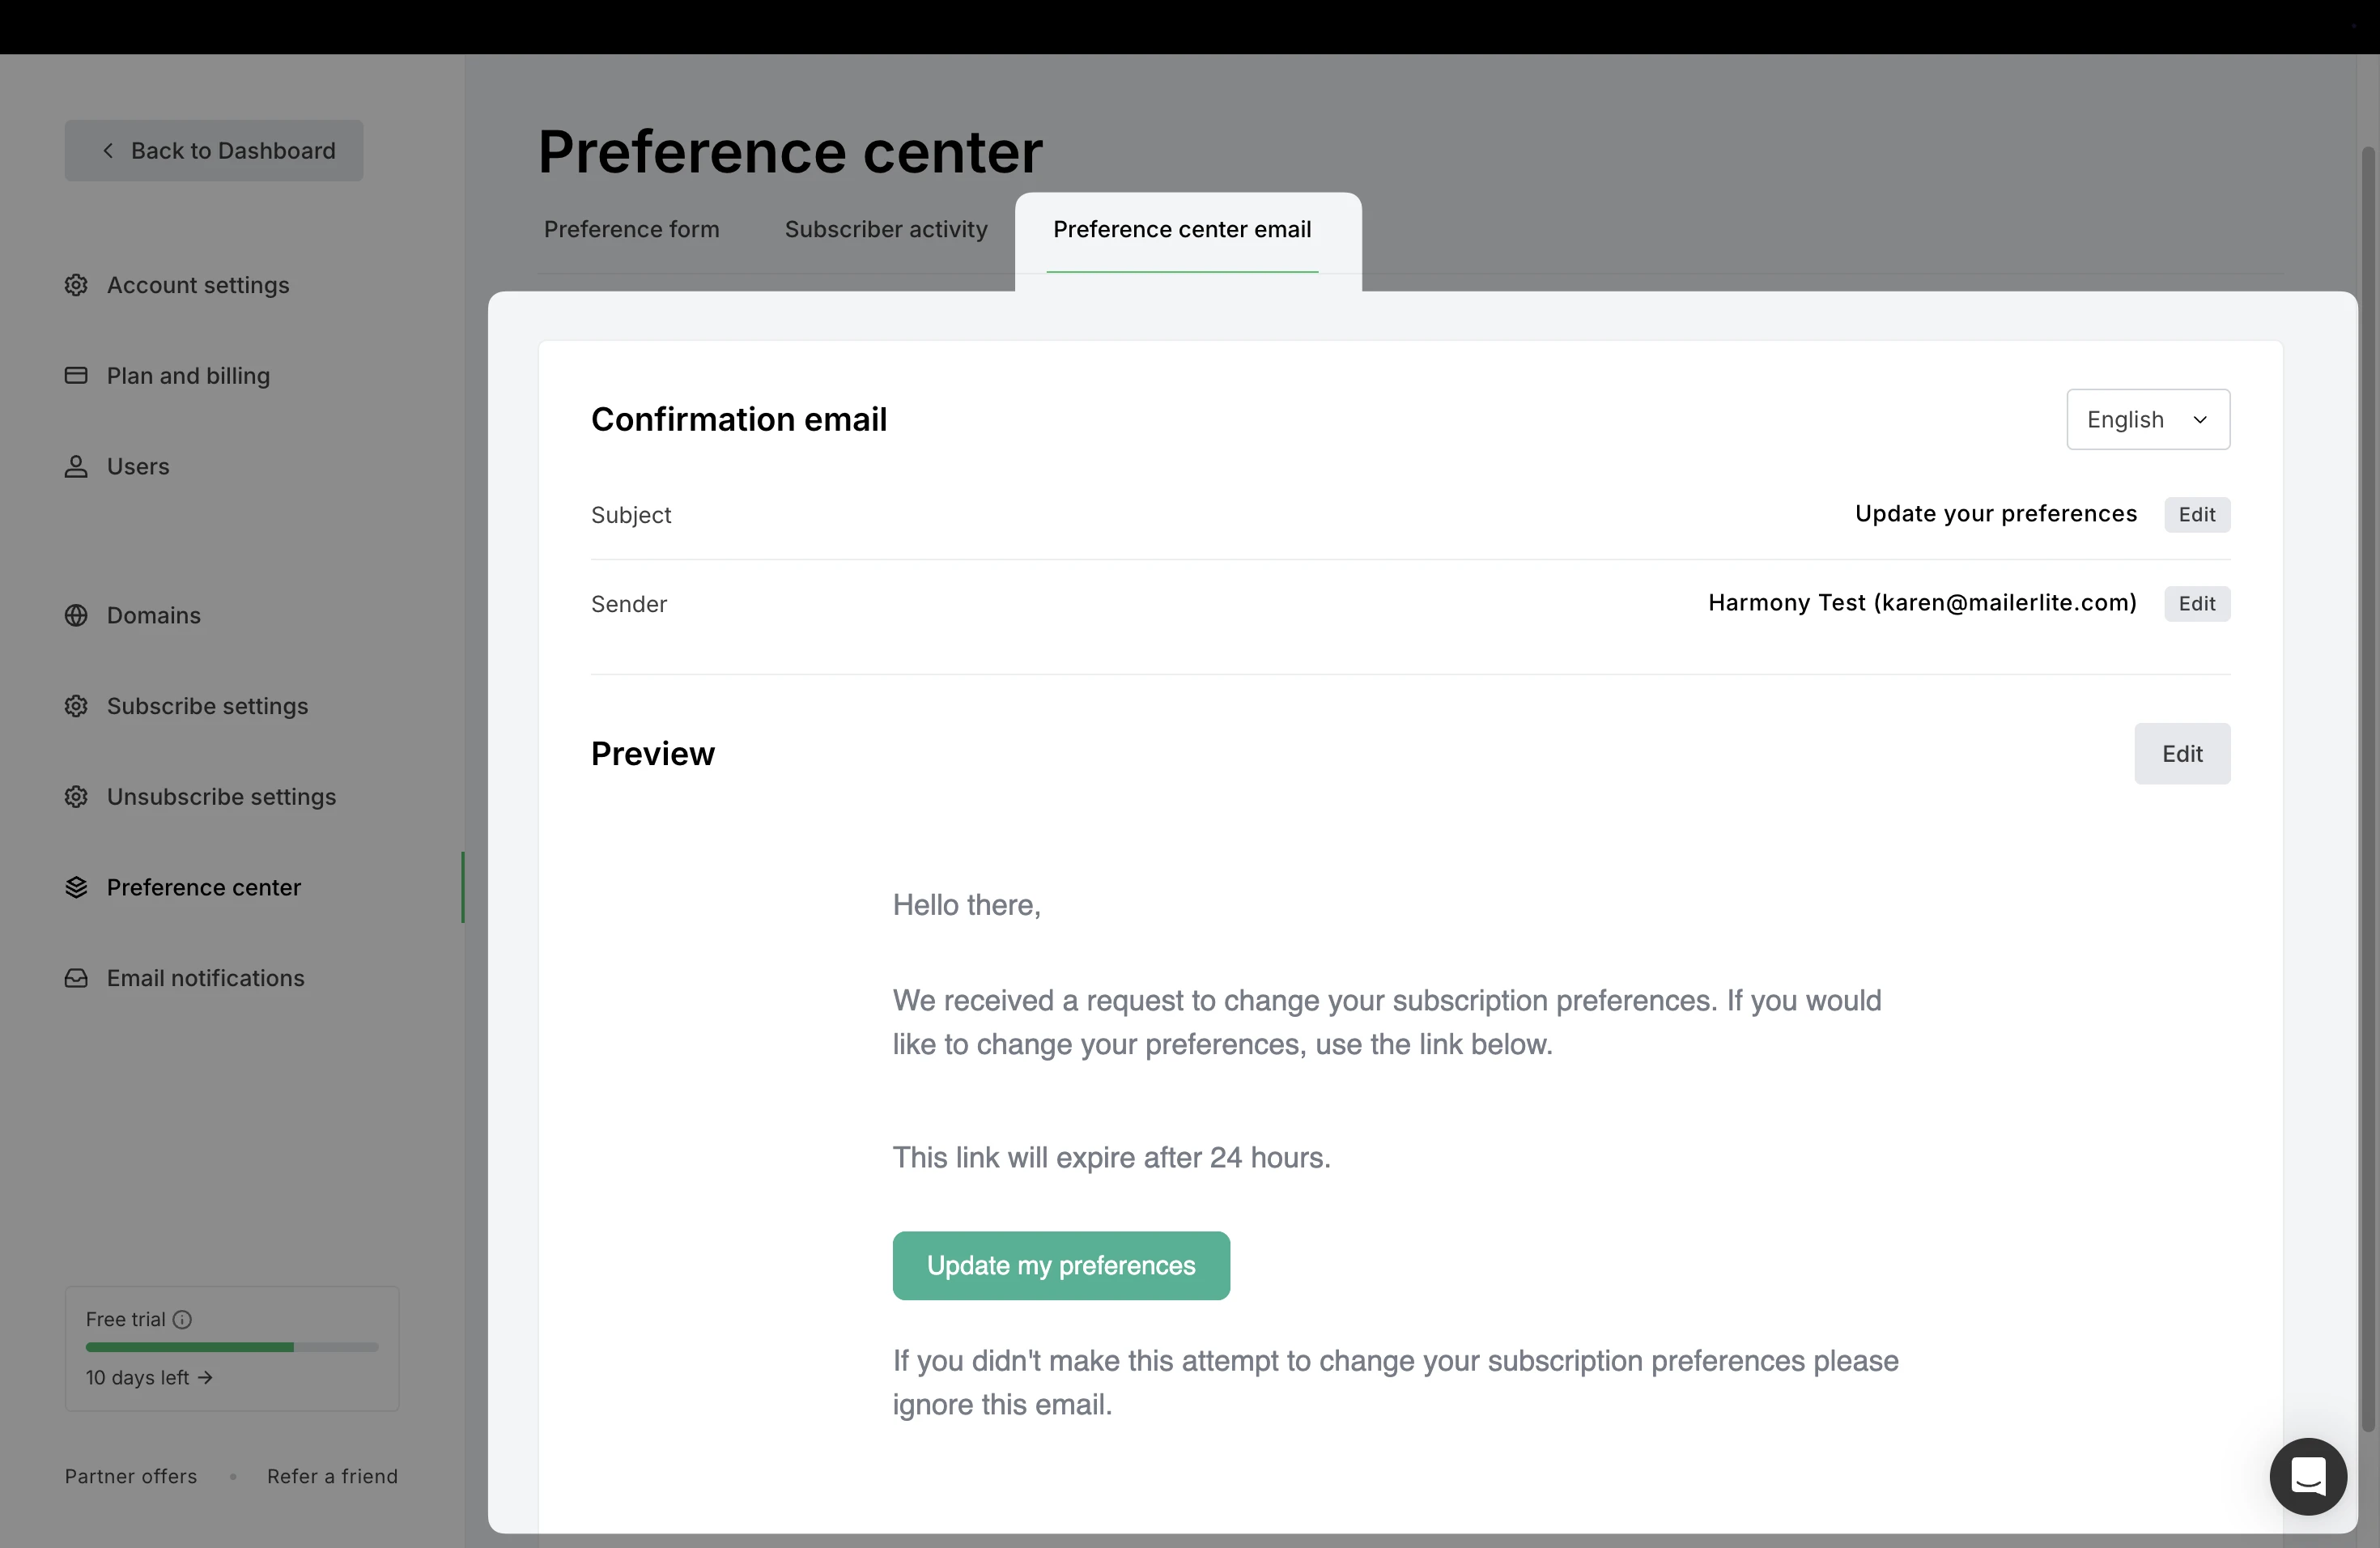
Preference center email: The email sent to subscribers when they request to update their subscription preferences.
Editing your preference center
From the Preference form tab, click the Edit content button.
There are four tabs in the Preference center editor: Confirmation page, Confirmation email, Update preferences, and Success page.
The Update preferences tab has the main form, the Success page appears after a successful form submission, the Confirmation email is the email the subscriber receives in their inbox, and the Confirmation page appears when subscribers first click the link in a newsletter to update their preferences.
You can edit and design these pages to match your email preference center and brand.
Once in the editor, each element can be edited by clicking on it individually.
Text
Click into any text area to change the default text.
Double click to open additional formatting and URL options.

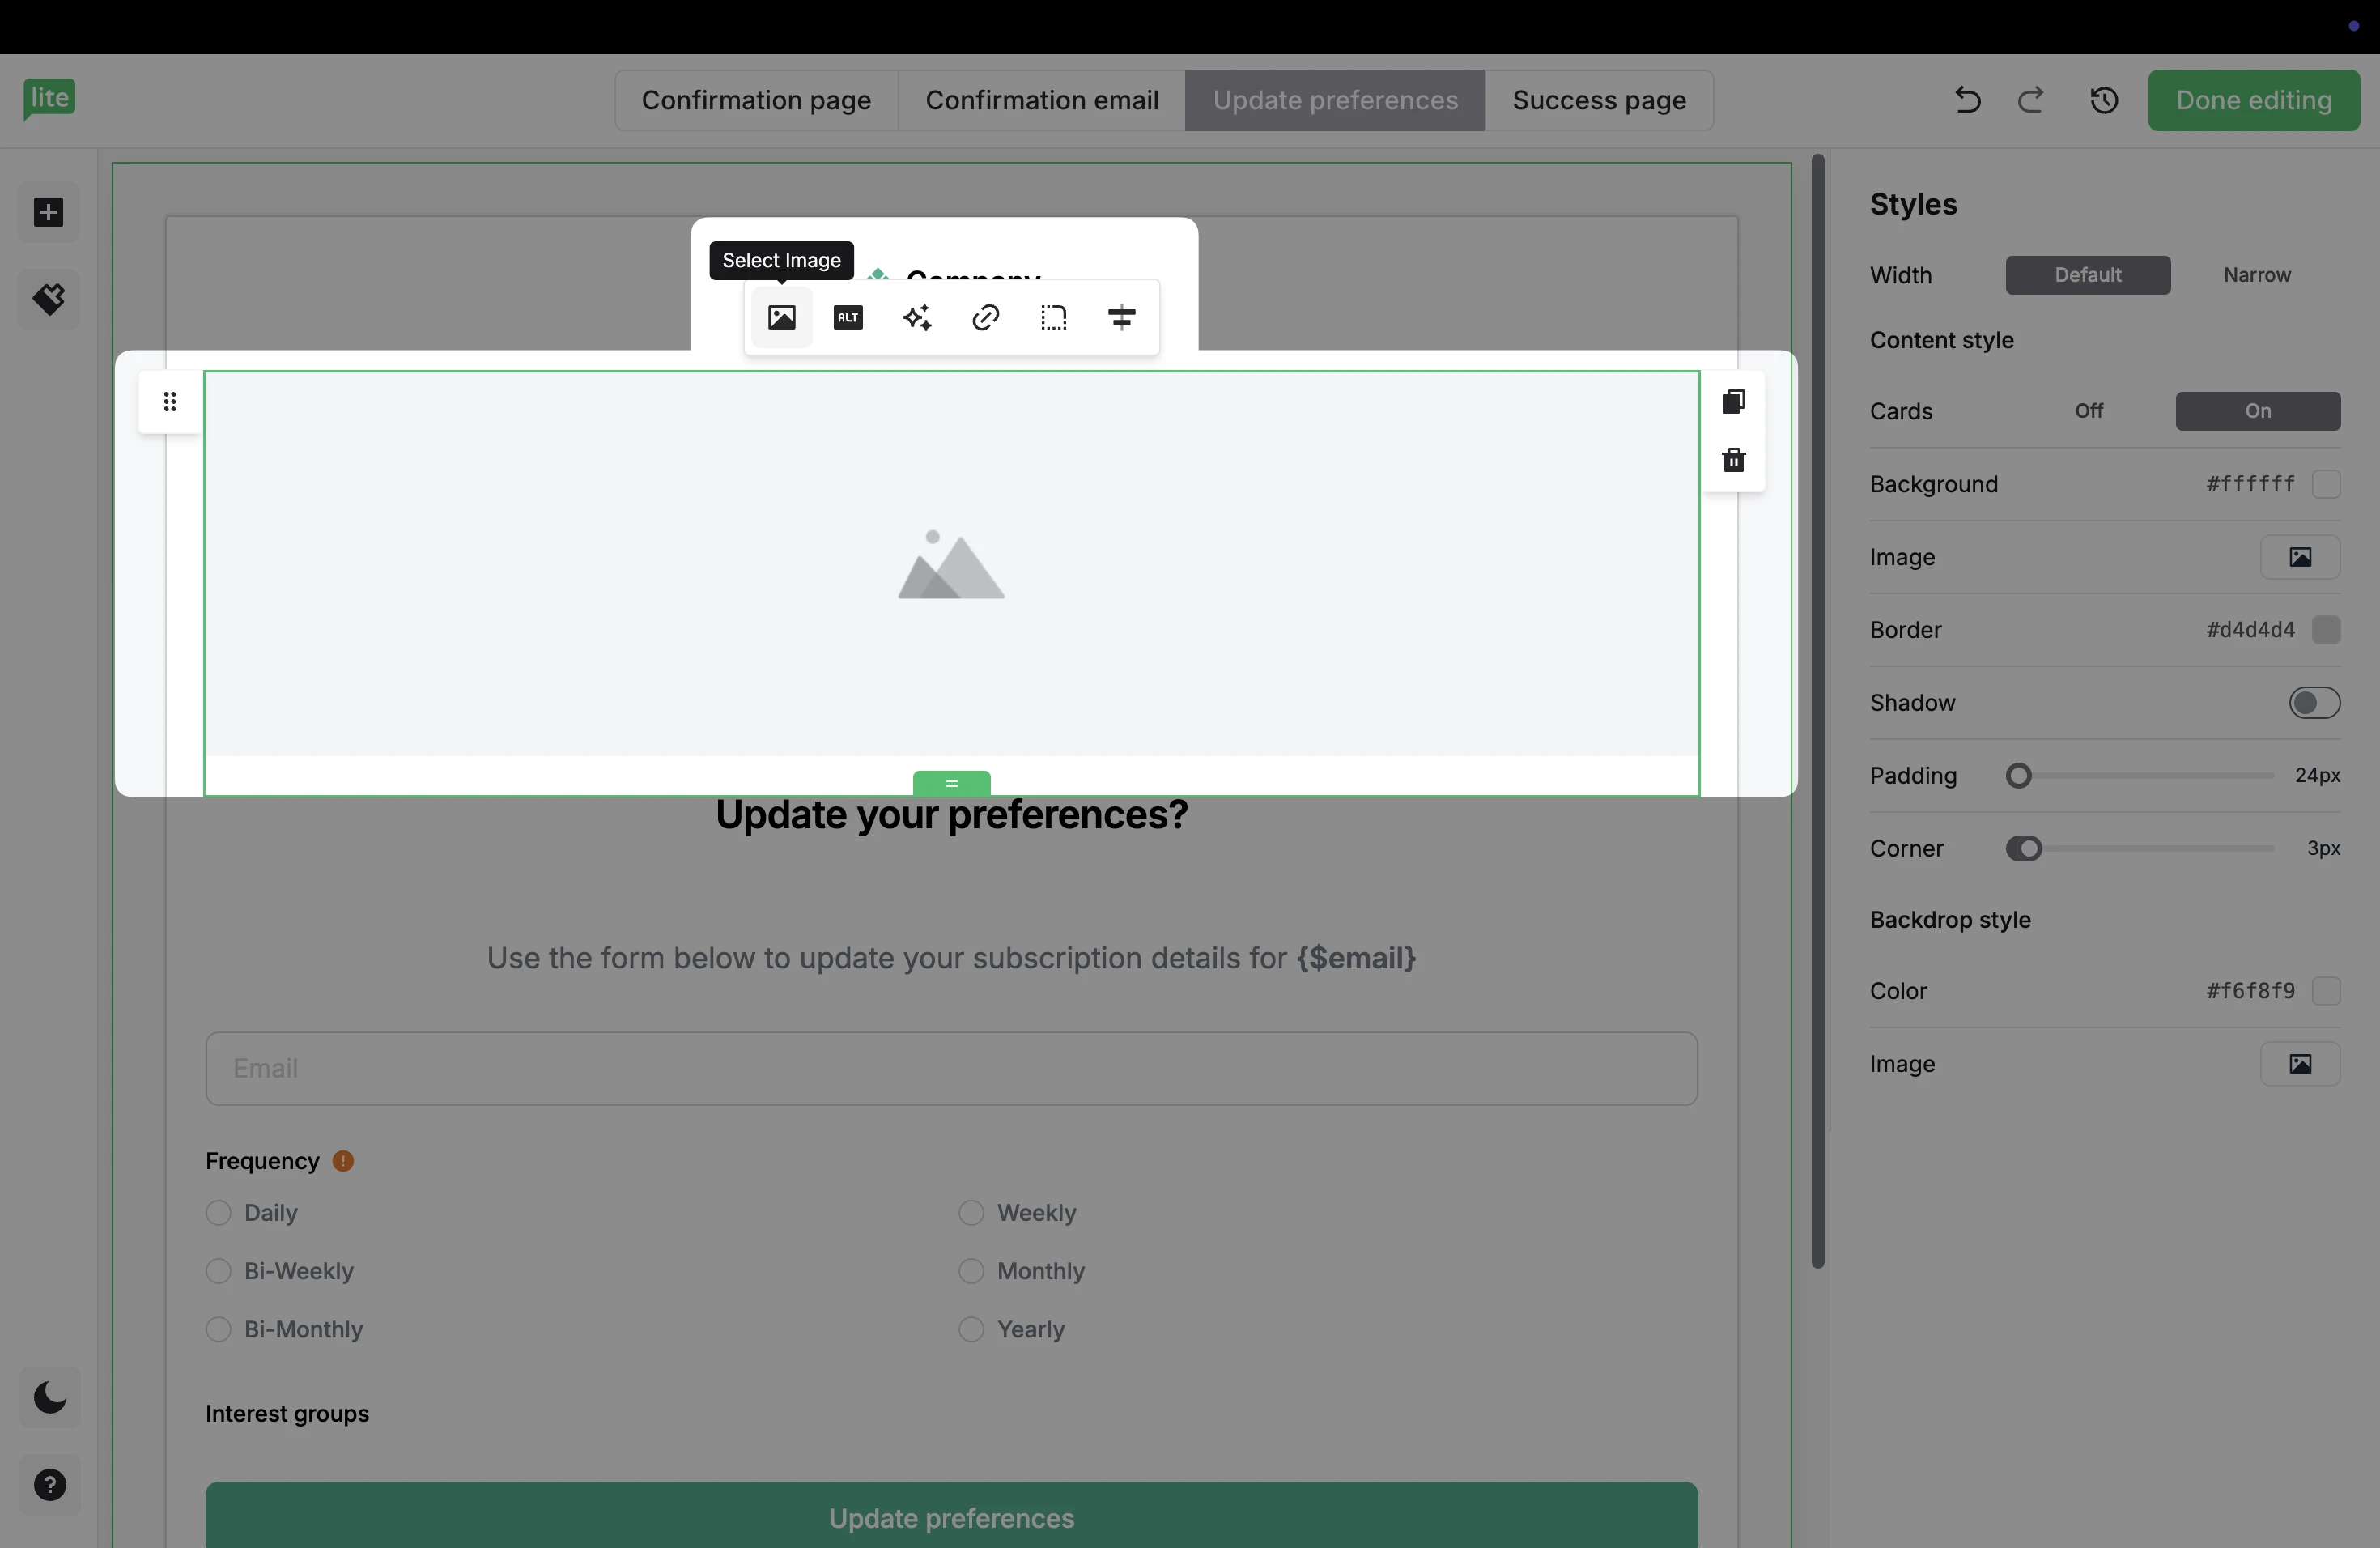
Images
Click on an existing image, or an empty image to replace.
Choose the Select image button.
This will take you into the File manager, where you can select an existing image or upload a new image file from your device.
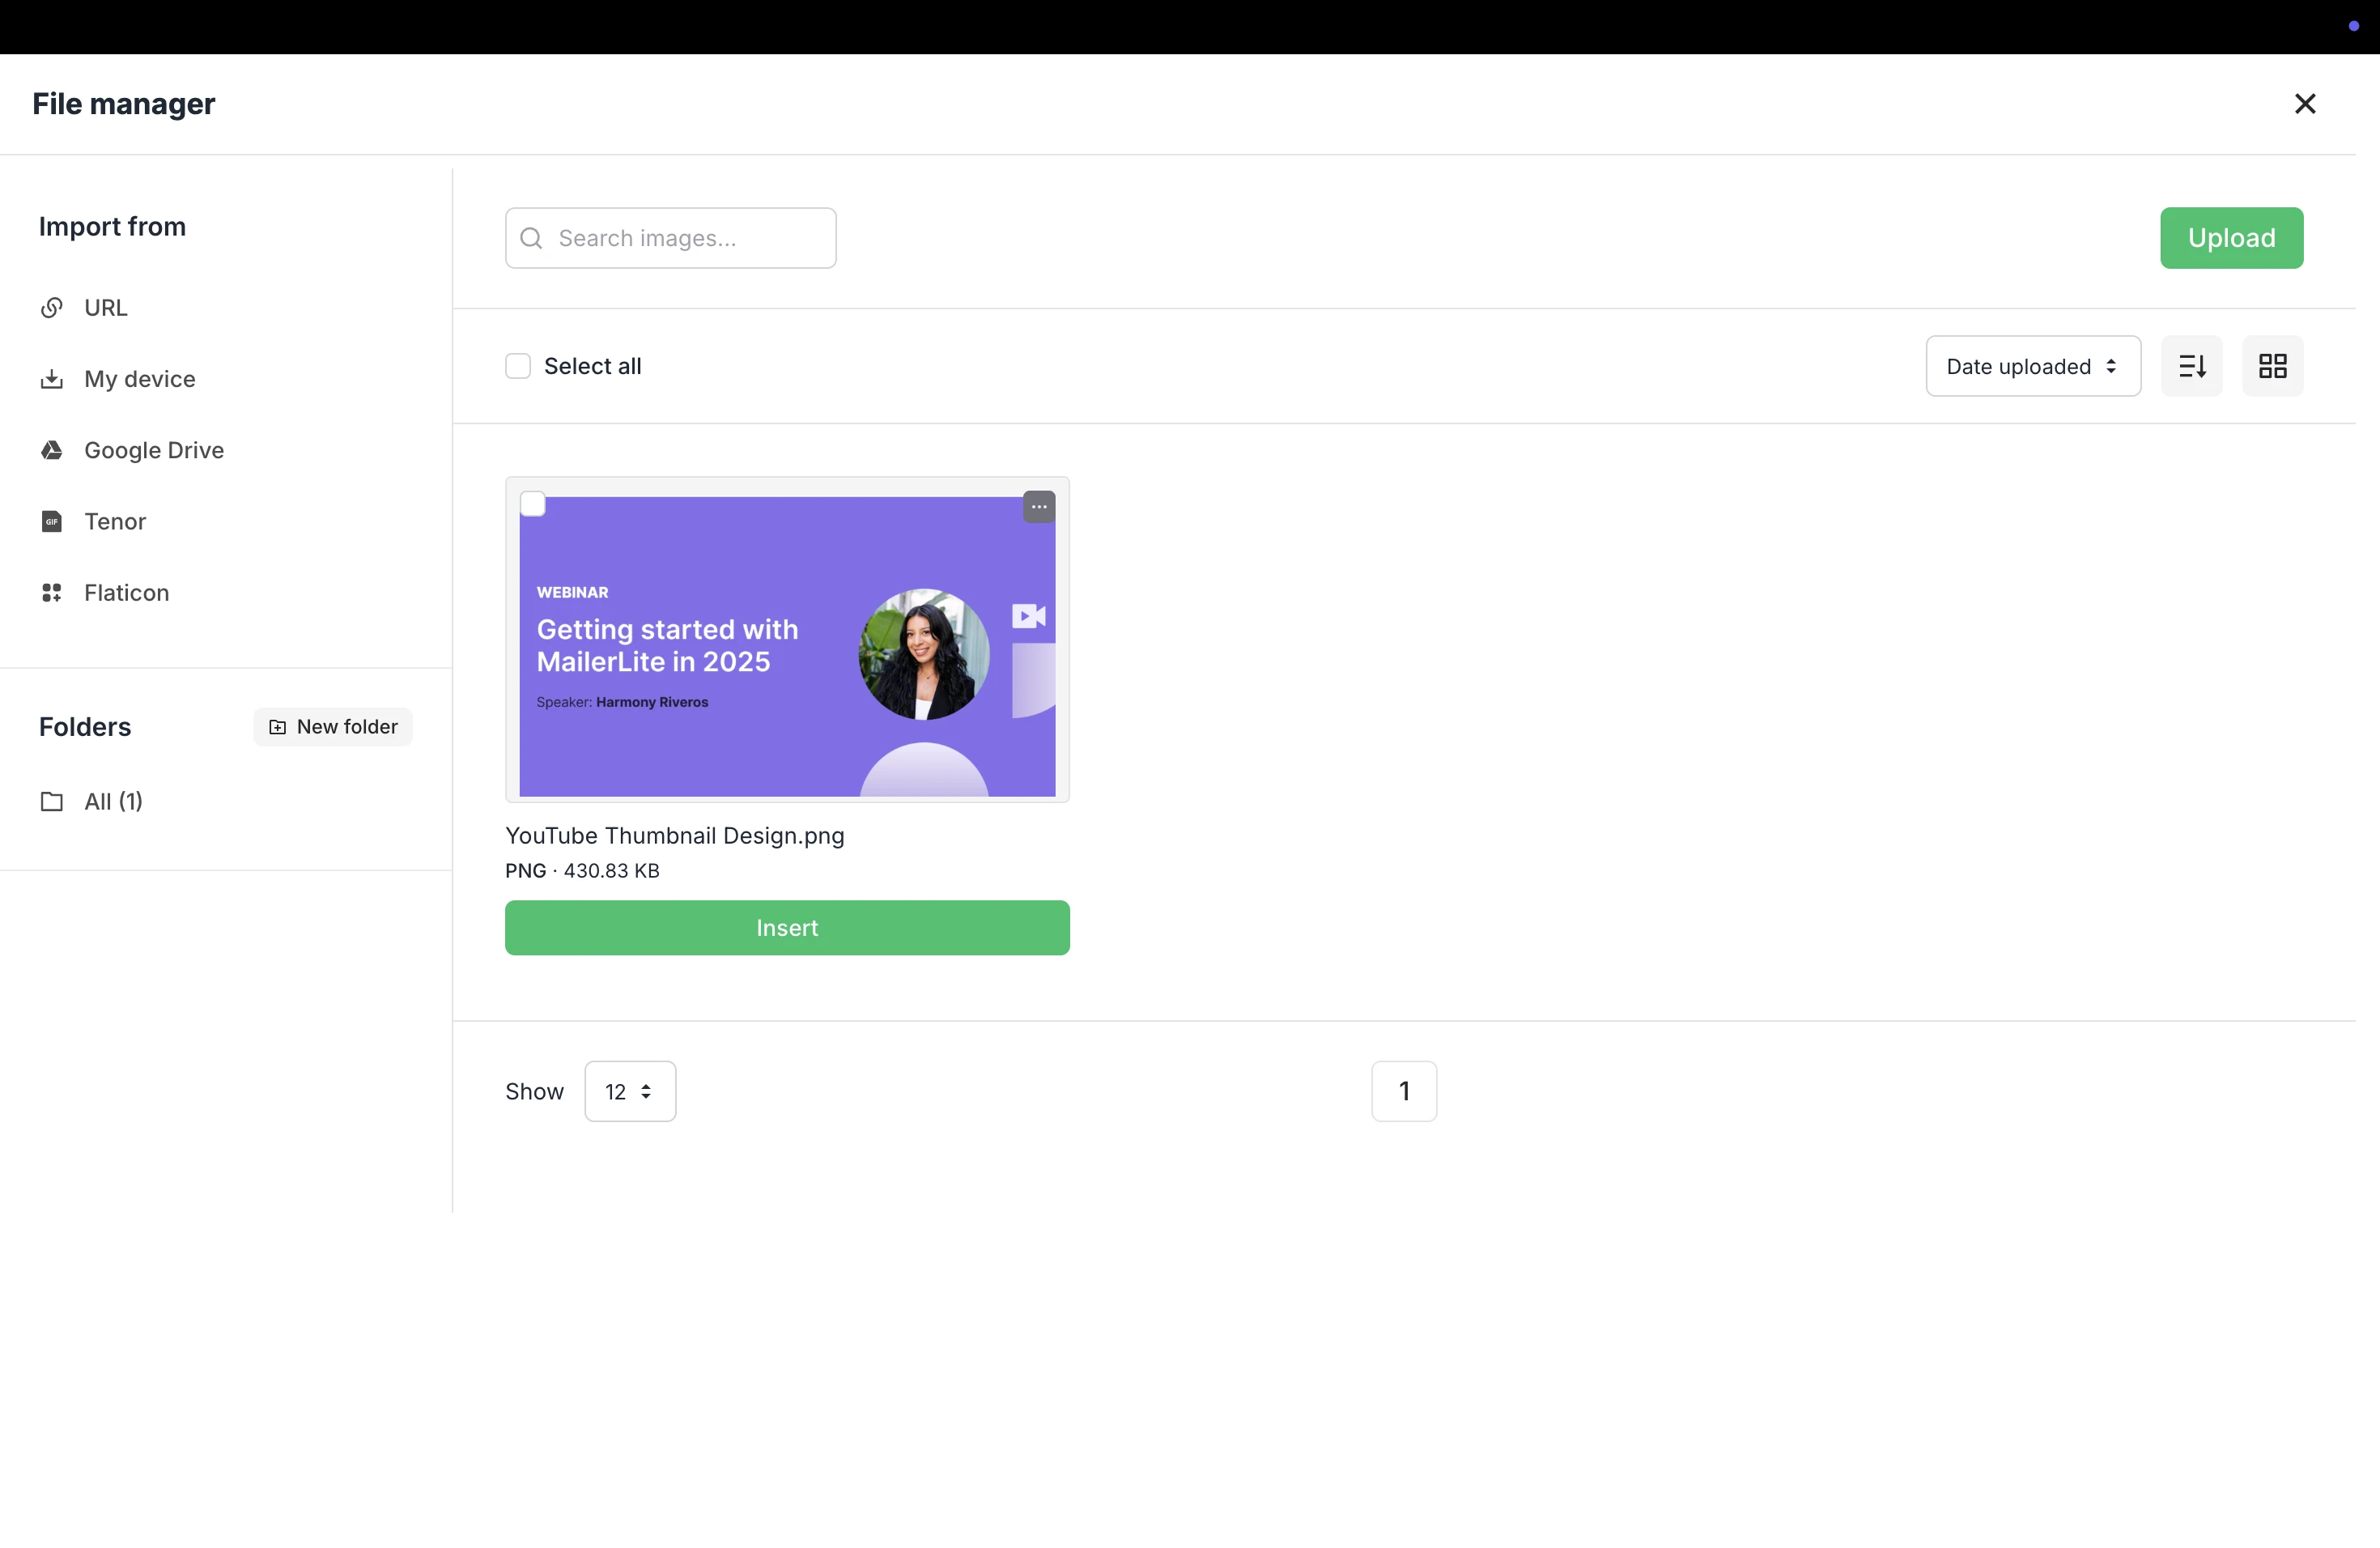
Click Insert to add the image.
Style settings
If no individual elements are selected, you will see Style settings on the right.
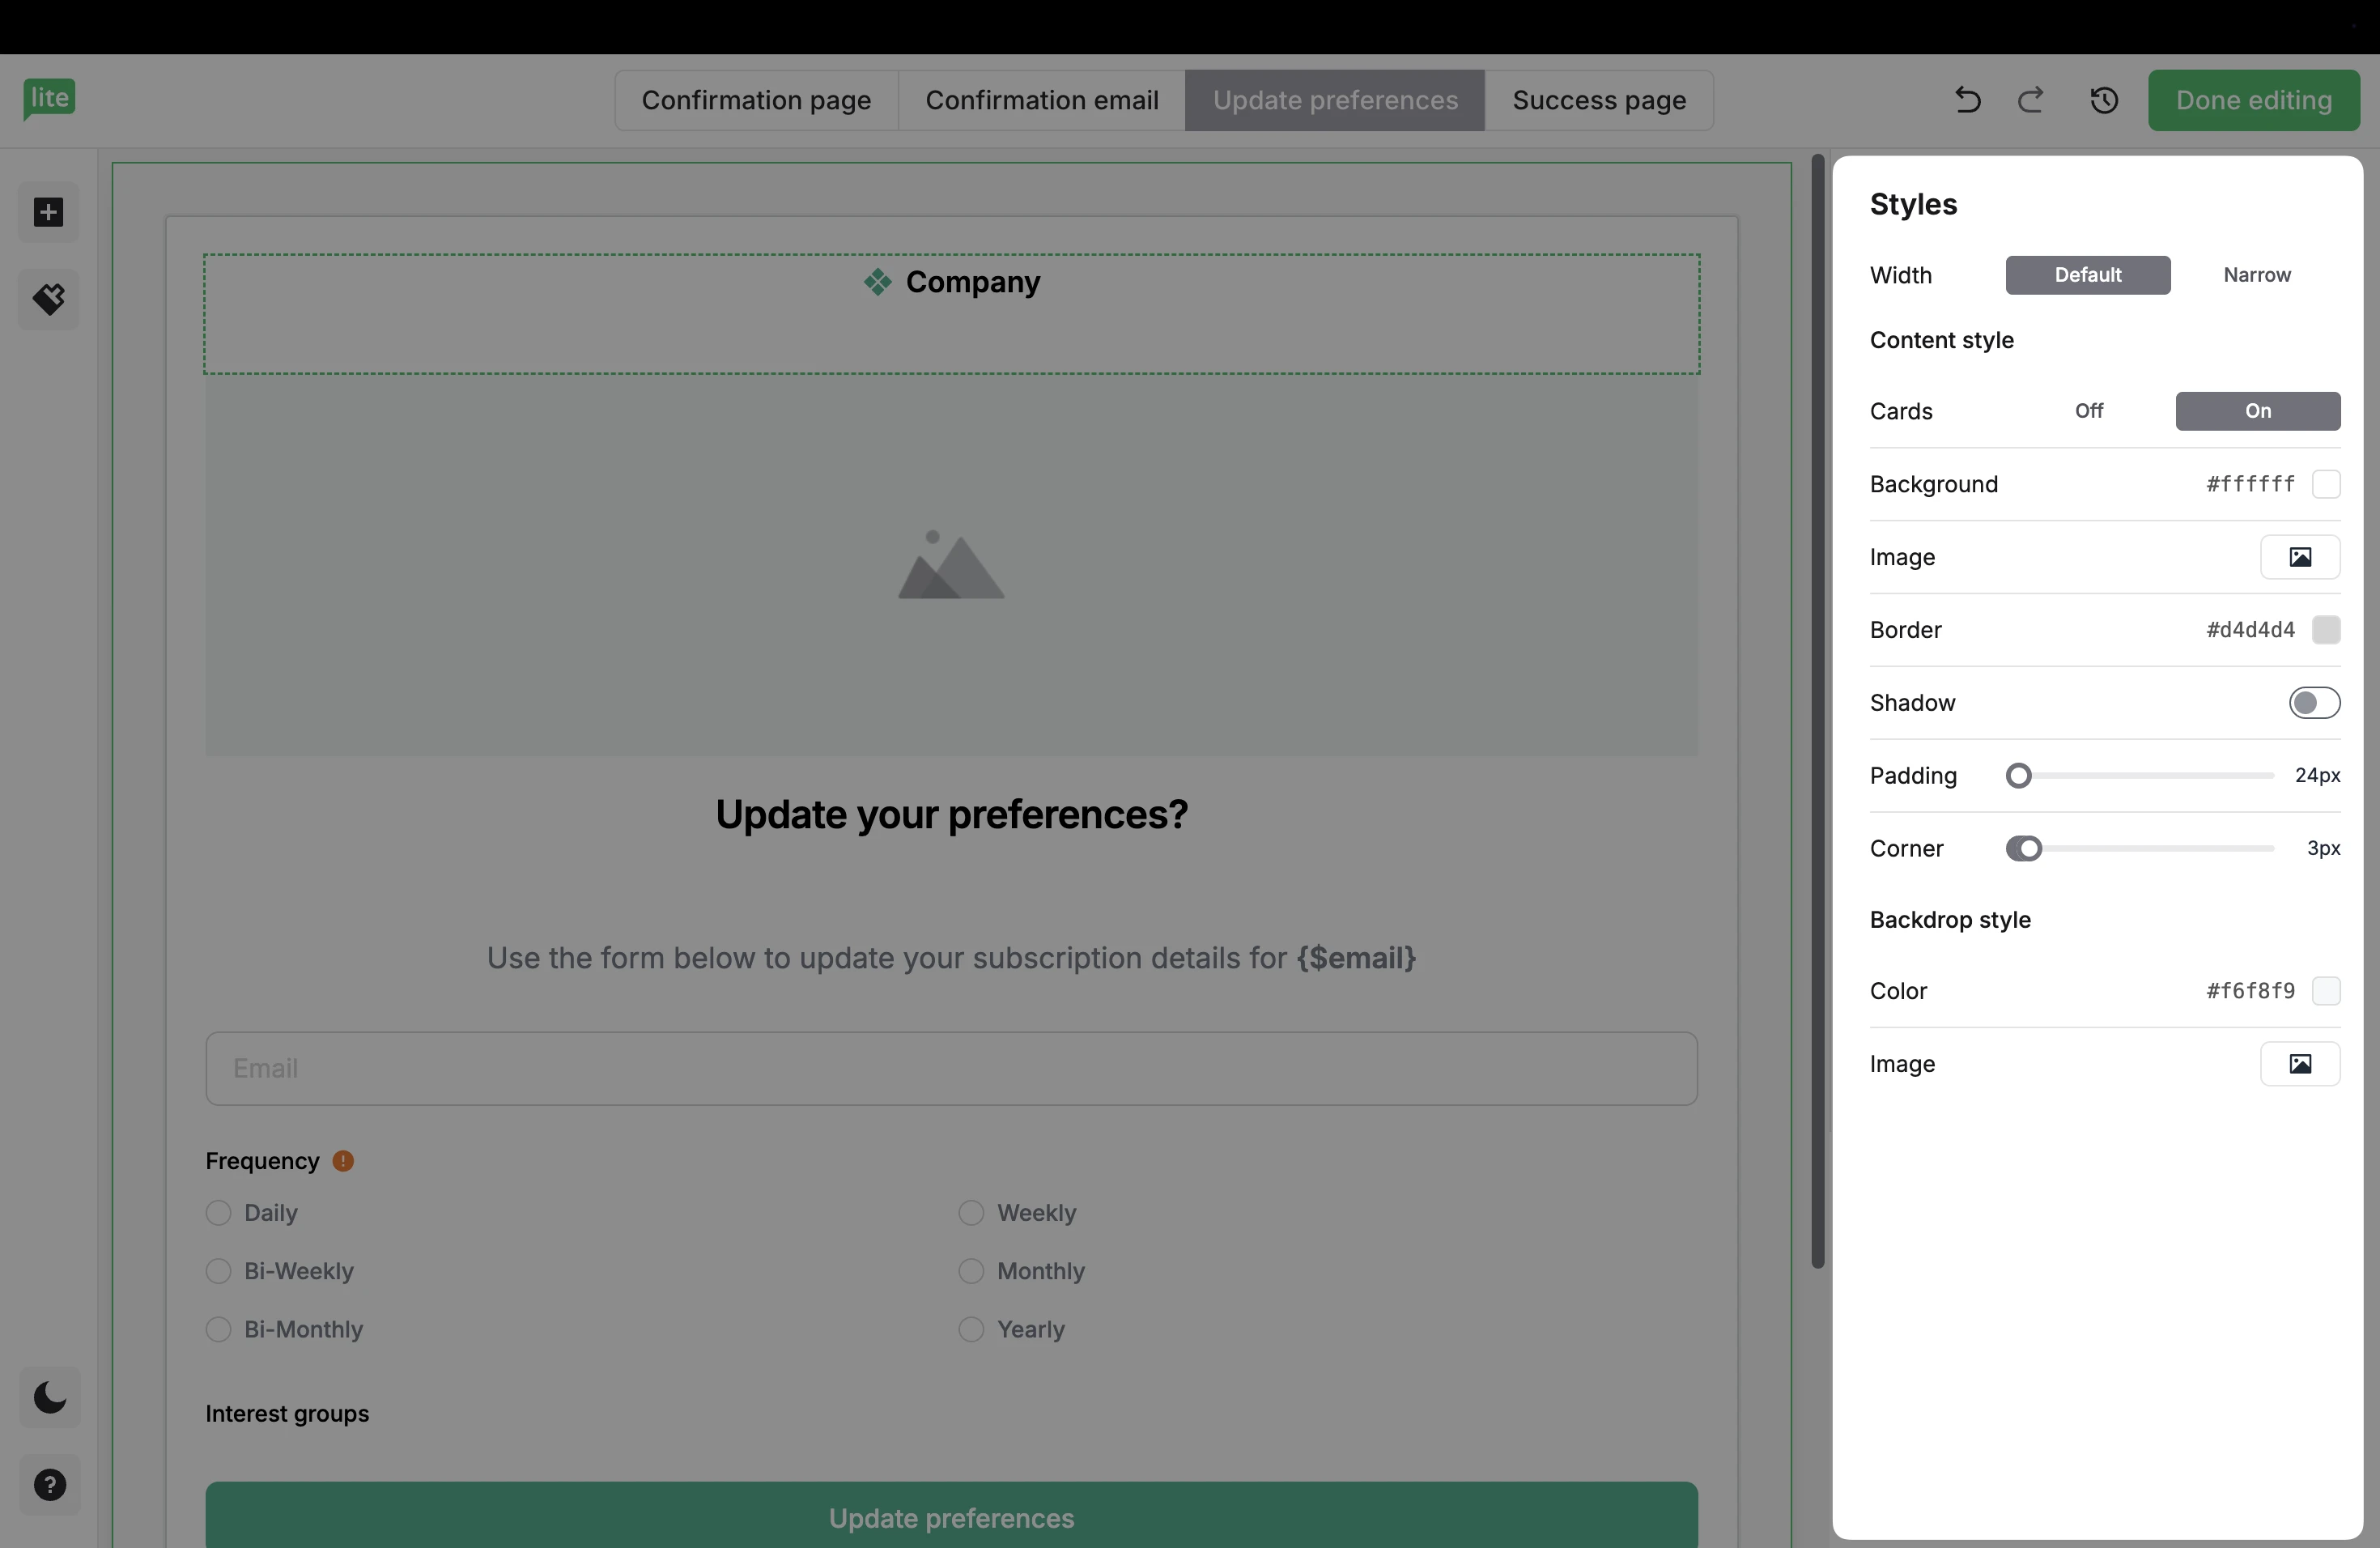
Here, you can set global style settings for your form, including background color, borders, shadows, corner rounding, and more.
On the left side of the editor, choose the Style icon to open more style settings.

Here, you can adjust Brand style settings such as font, brand colors, button colors, and more.
Adding additional elements
To add more to your Preference center:
Choose the Elements option on the left, shown by a plus symbol +.
Simply drag and drop any element into your form, including options for Headings, Text, Image, Video, Social icons, and more.

Preference form
To collect information from your subscribers, use the Preference form that is shown by default. This block is similar to our newsletter surveys, and includes options where subscribers can select from a range of choices.
Clicking the Settings tab for this form will open more settings on the right.
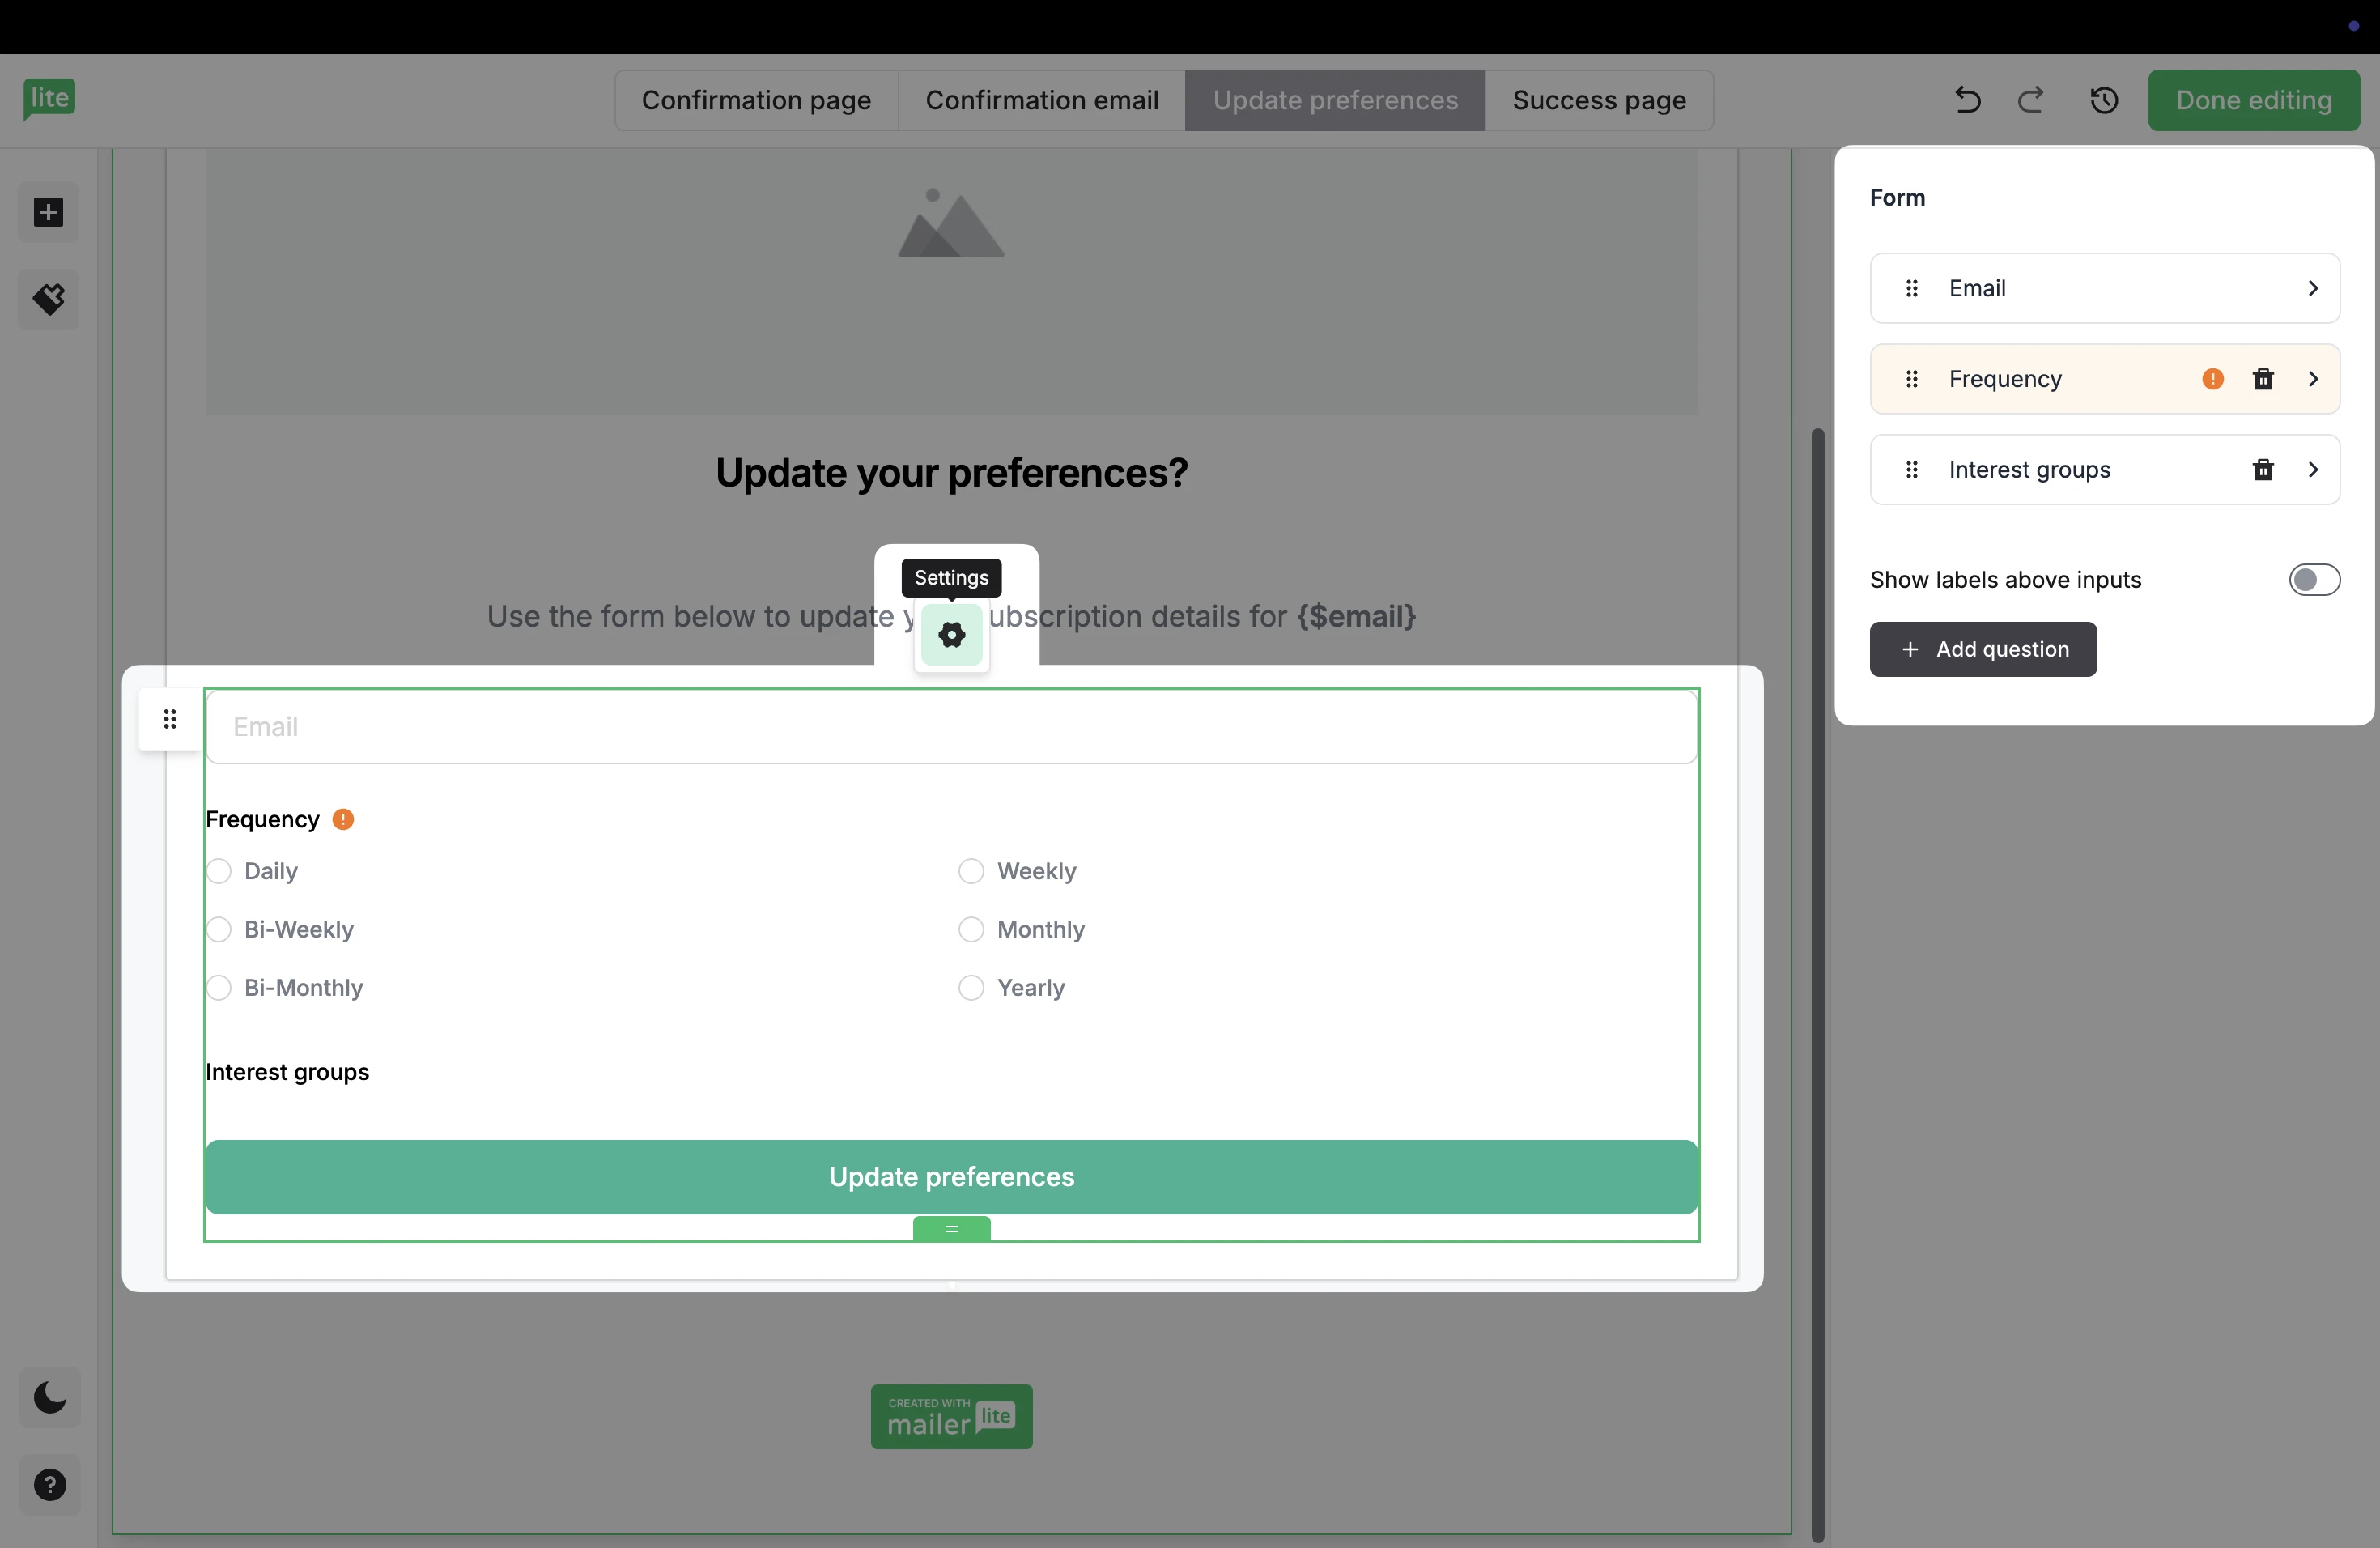
In the Email tab, you can edit the default label shown in the Email form field. The label is the name that your subscribers will see, and it can be different from the field name in your account. If your subscriber wishes to update their email address, they can enter the new one here.
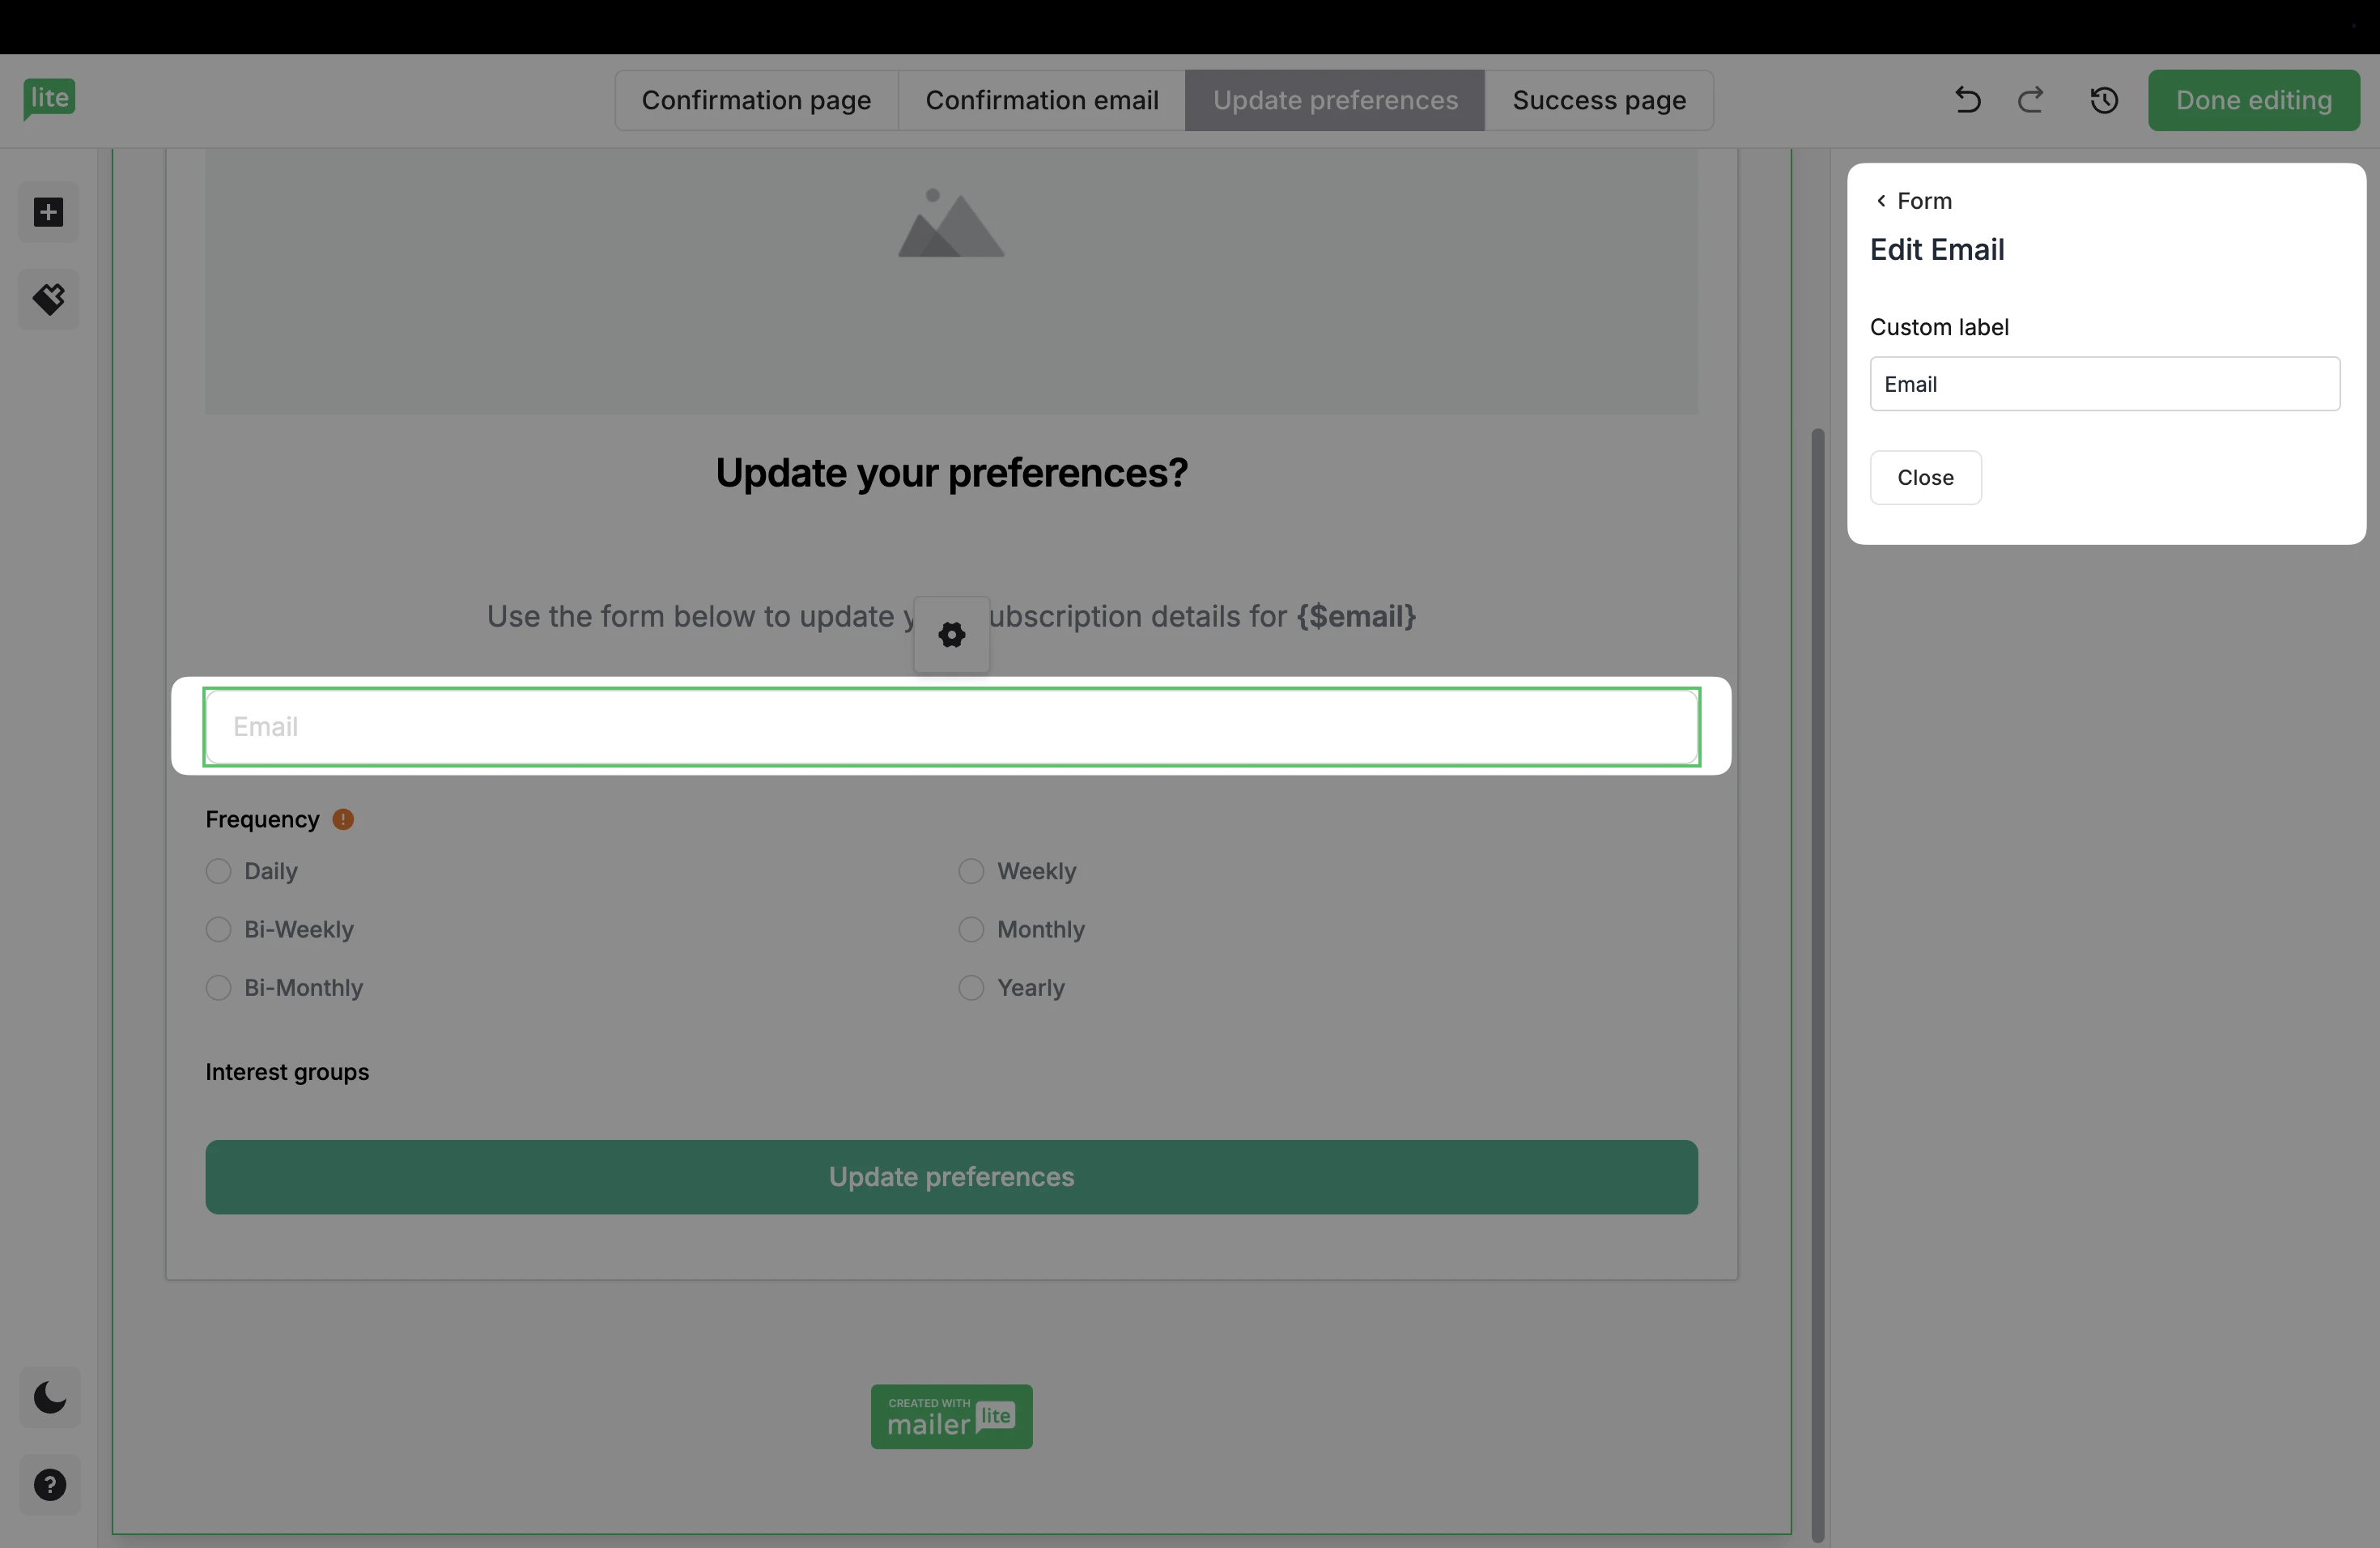
All of the previous statistics, such as open rate, that were connected to the old address will be kept under the updated email.
Add question
To allow your subscribers to update more than just their email address:
Choose + Add question.
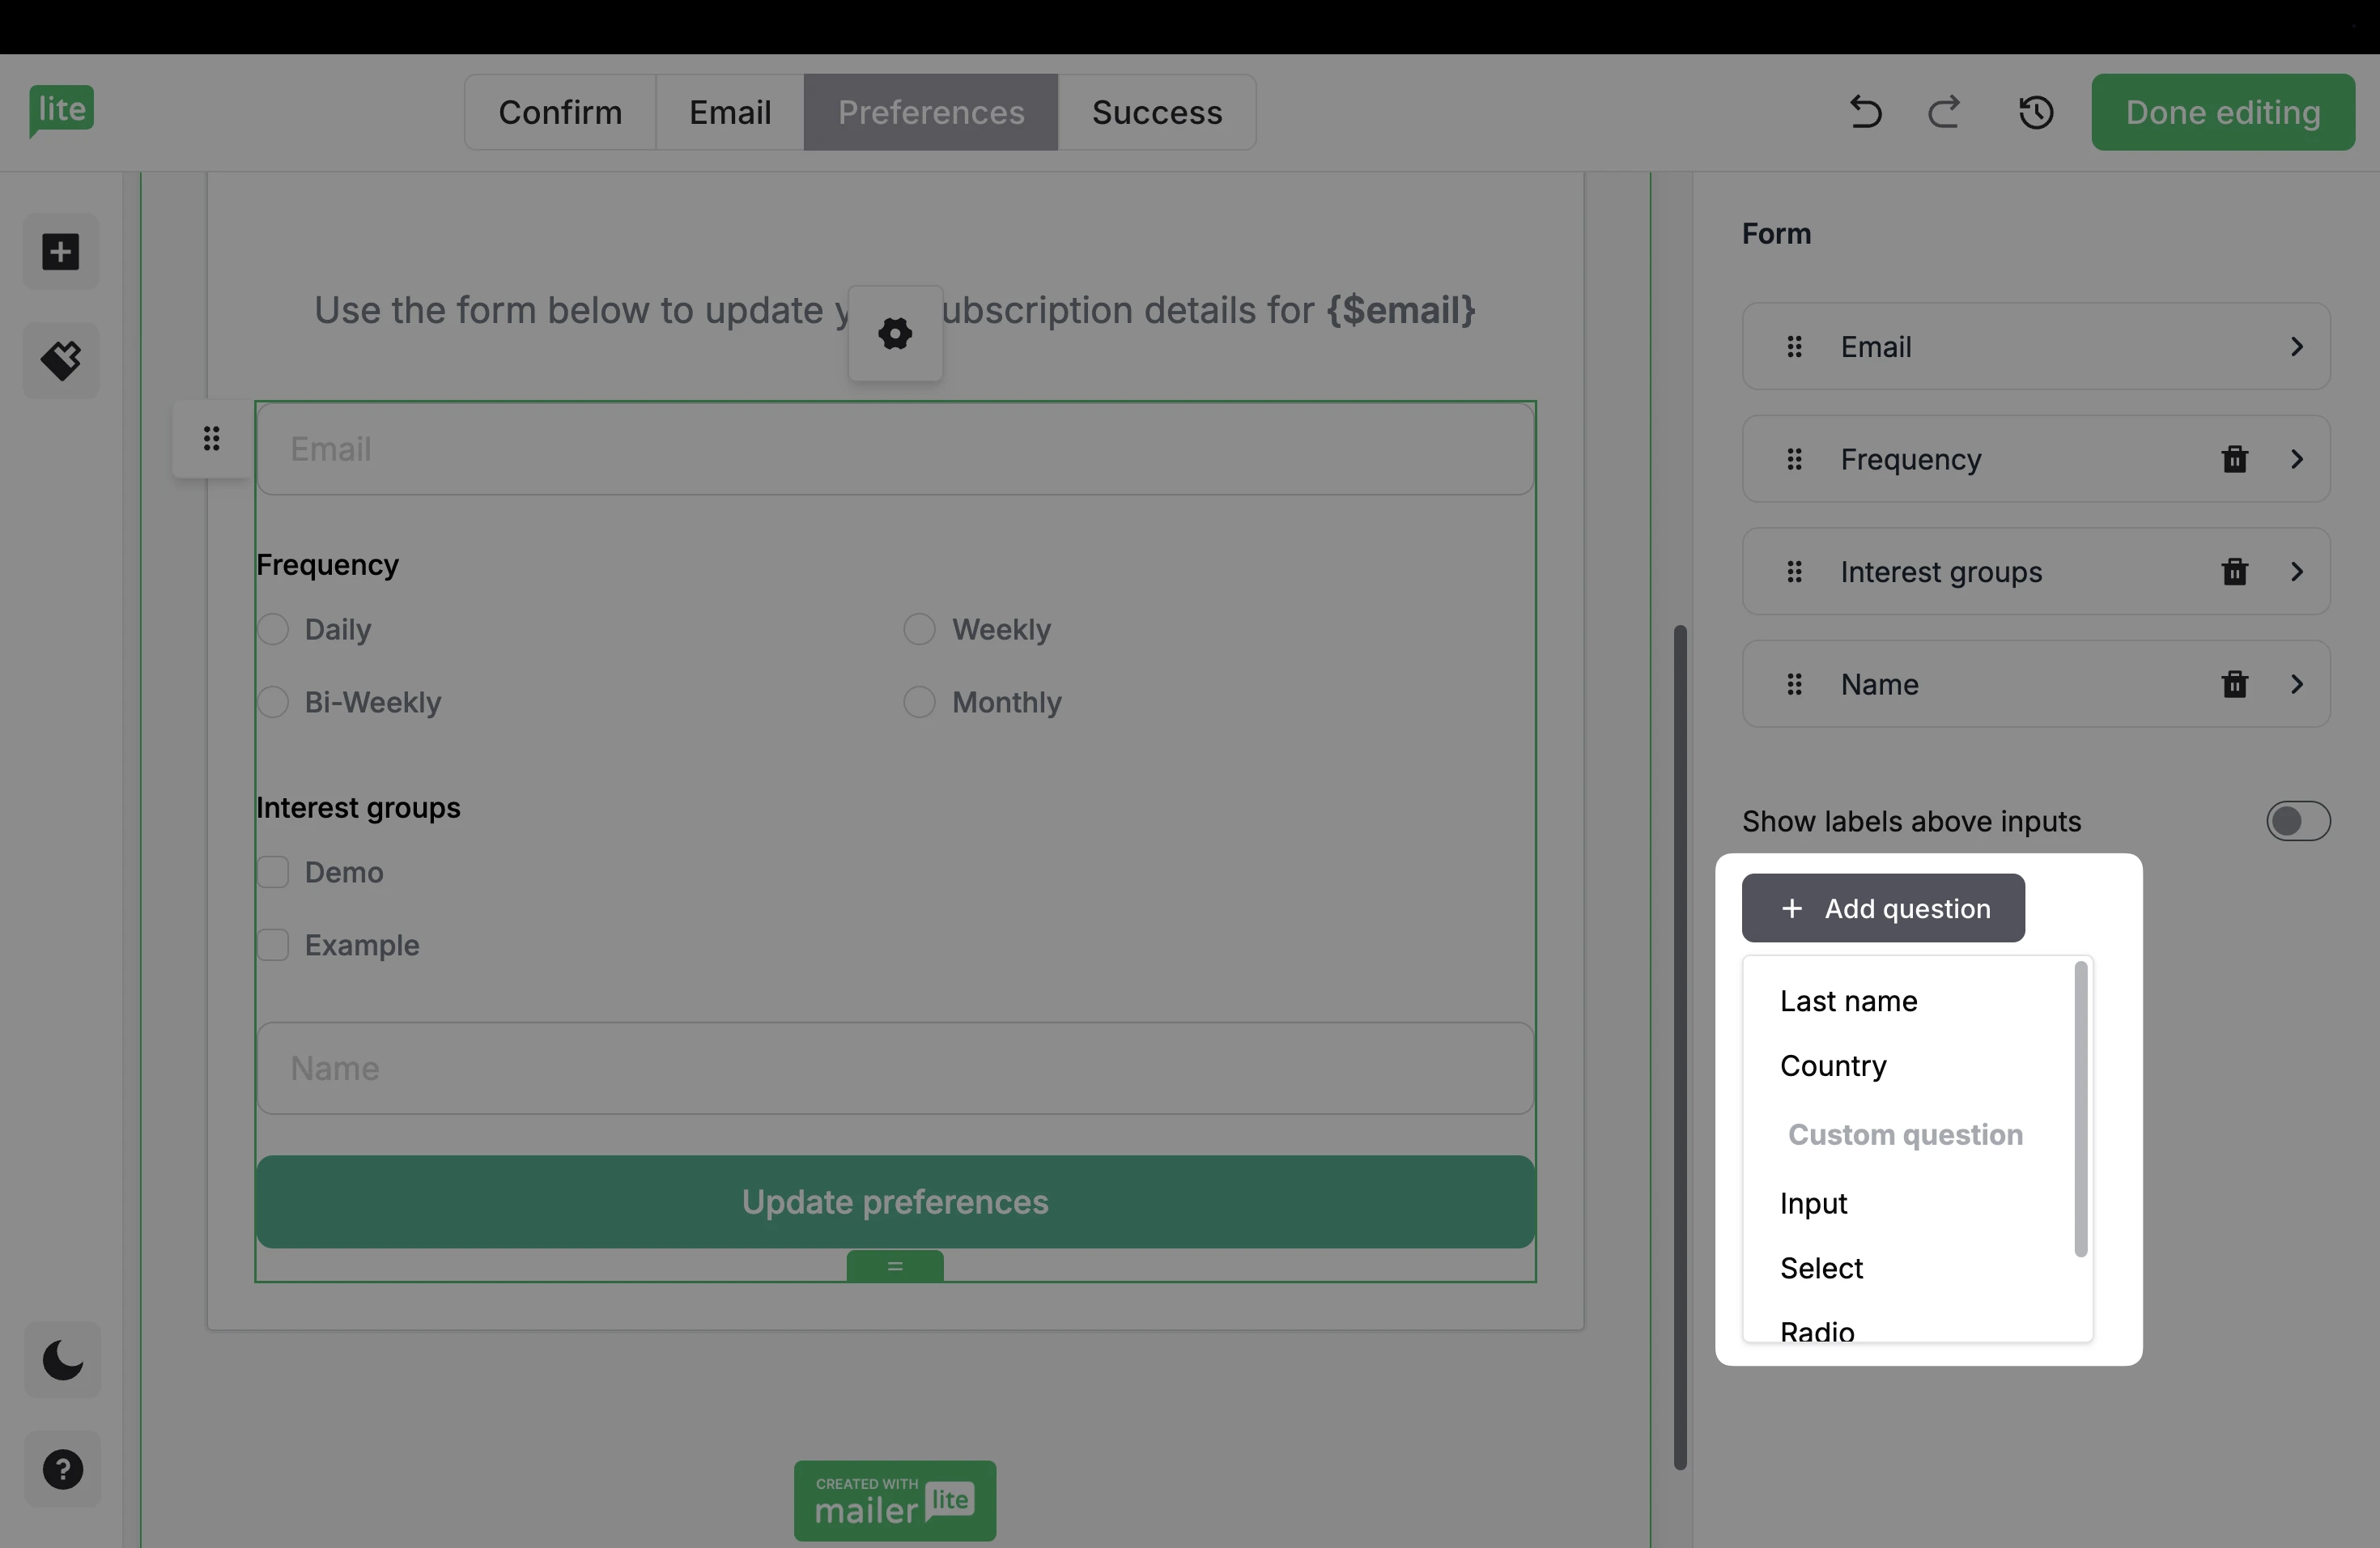
Select Name, Last name, Country, or create a Custom question.
If you choose Custom question, select whether the answers should be in the form of text input, choice selection, or radio buttons.
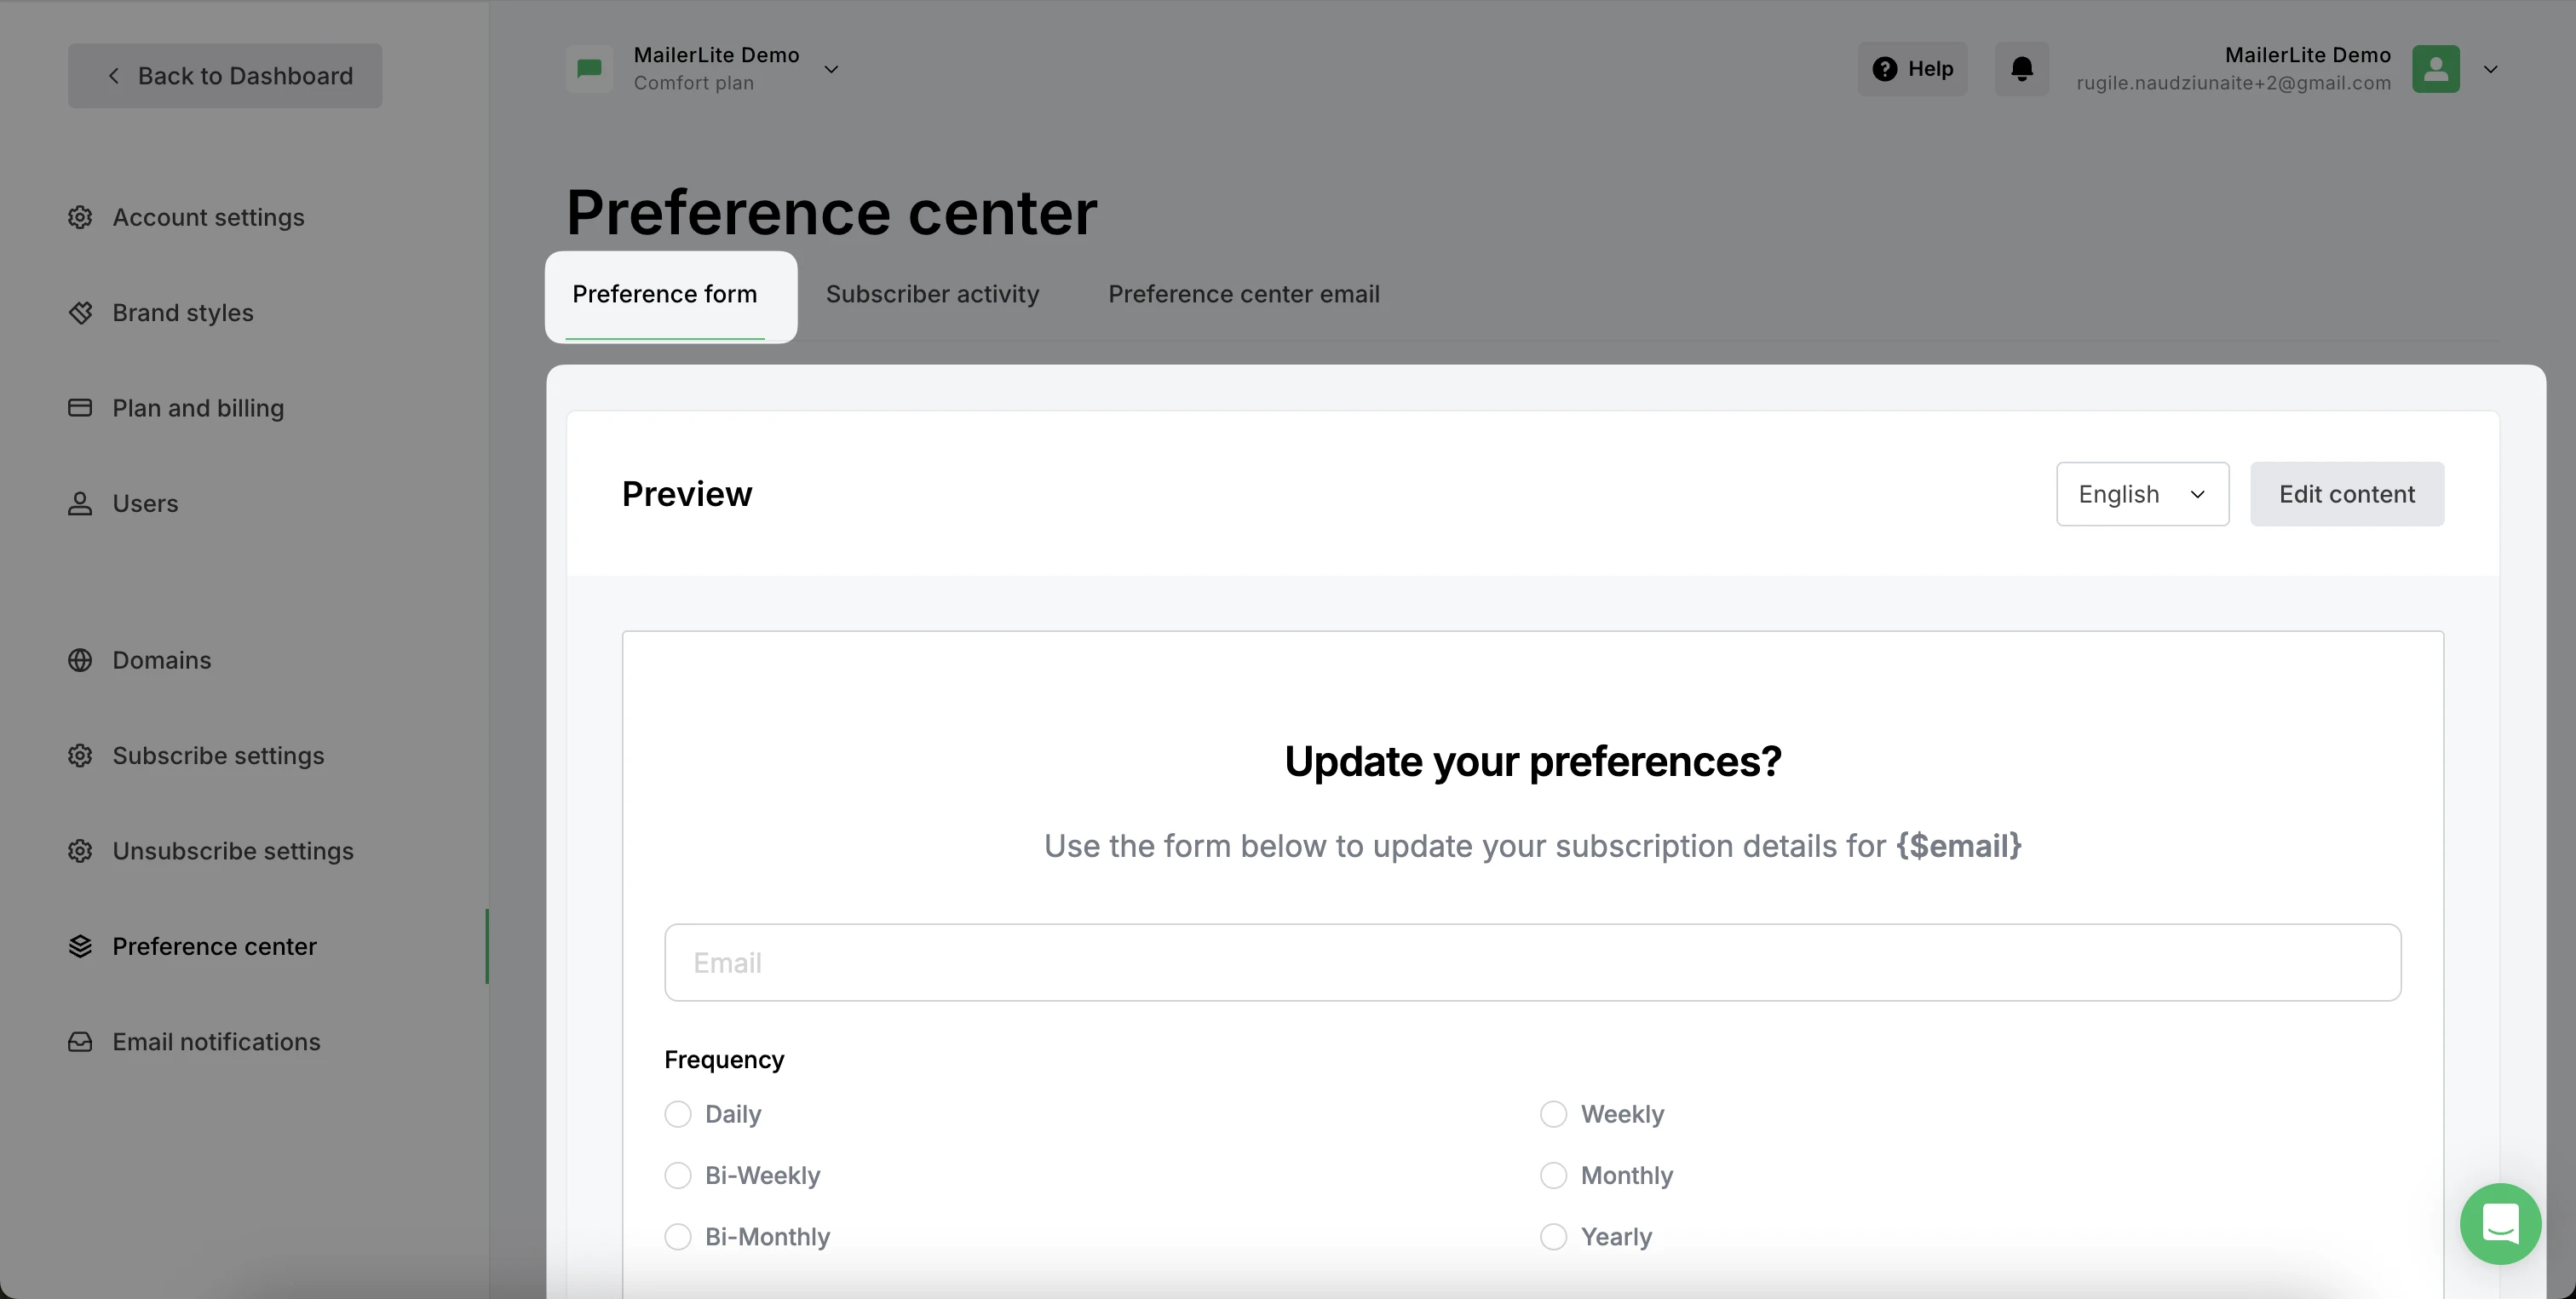
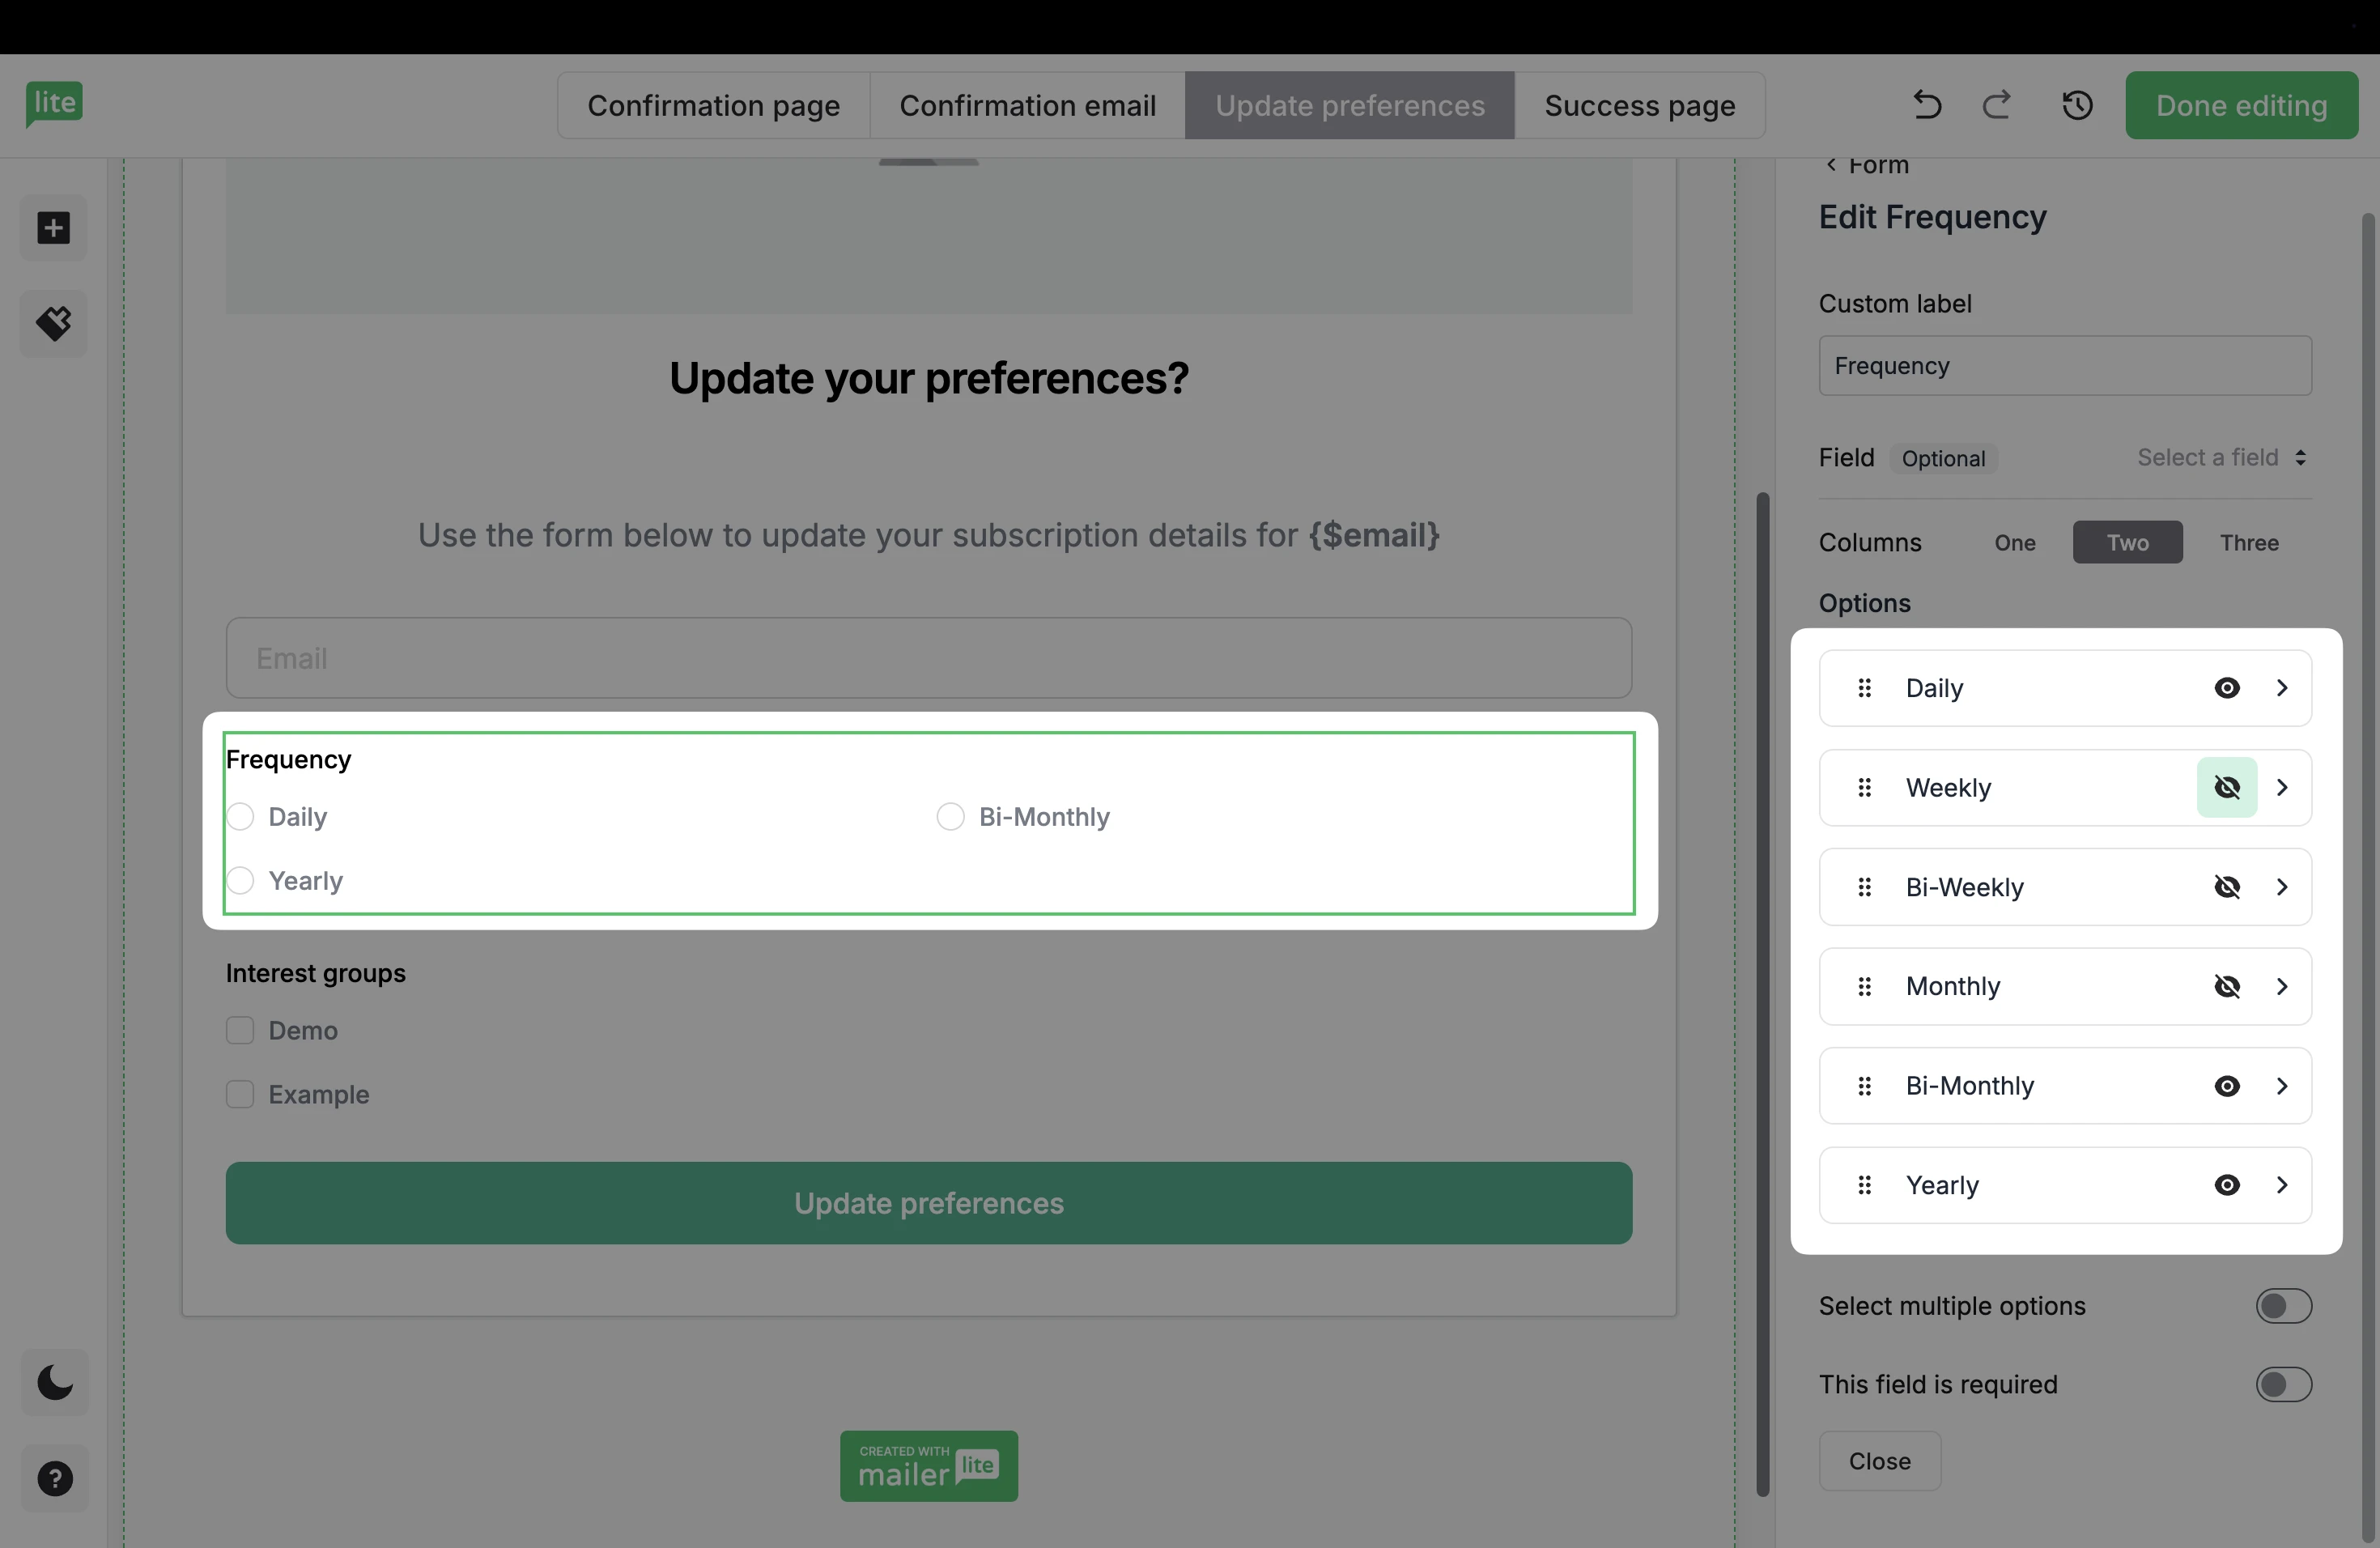
Frequency
Under Frequency, edit the options your subscribers can choose how often they wish to hear from you. By default, there are six options ranging from Daily to Yearly that can be customized.
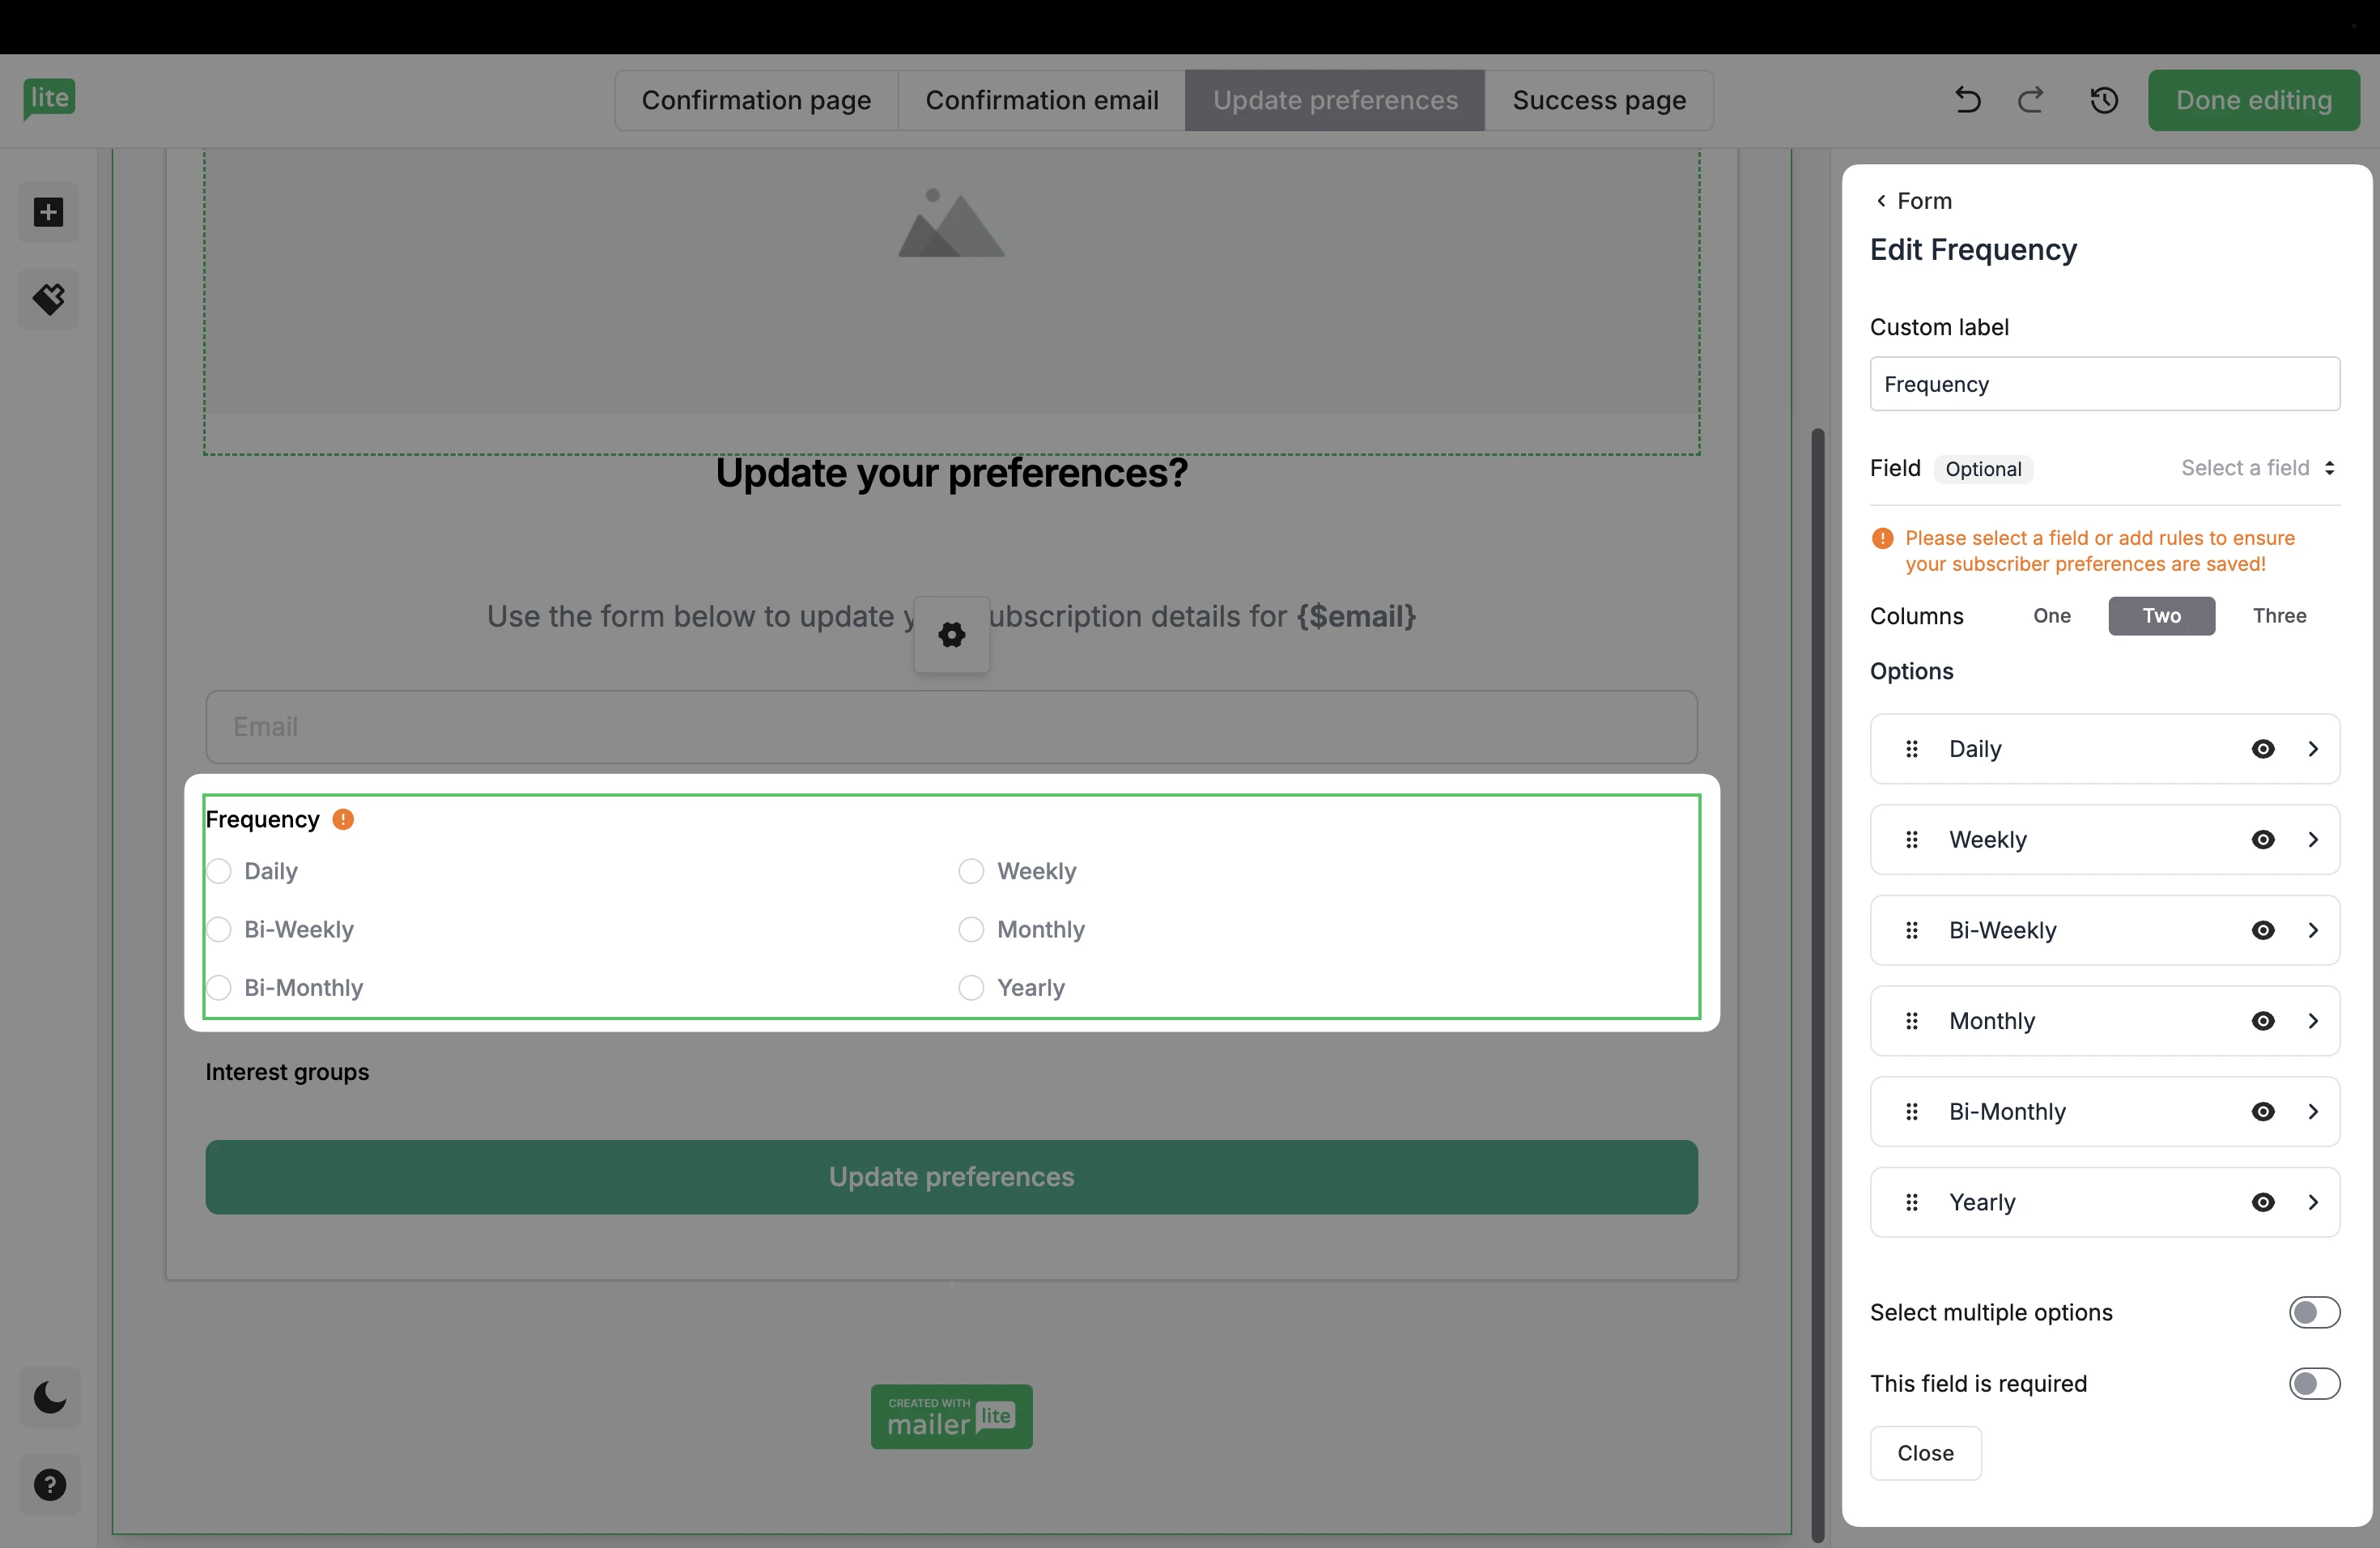
To hide one or more of the default options, click the Eye symbol next to the option you wish to remove. Multiple options can be hidden.
Here, you can also set how subscriber preferences are saved in your MailerLite account. Be sure to save information in a subscriber Field, or by creating Rules.
Field
If you select a Field, the answer(s) chosen by your subscribers will be saved as a text value in that field.
What is a subscriber field?
A subscriber field is a piece of information stored about each contact. For example, when someone joins your list, MailerLite saves their email and maybe their first name.
Information such as Email, Name, Country, ect are represented in your account by Fields. Learn more.
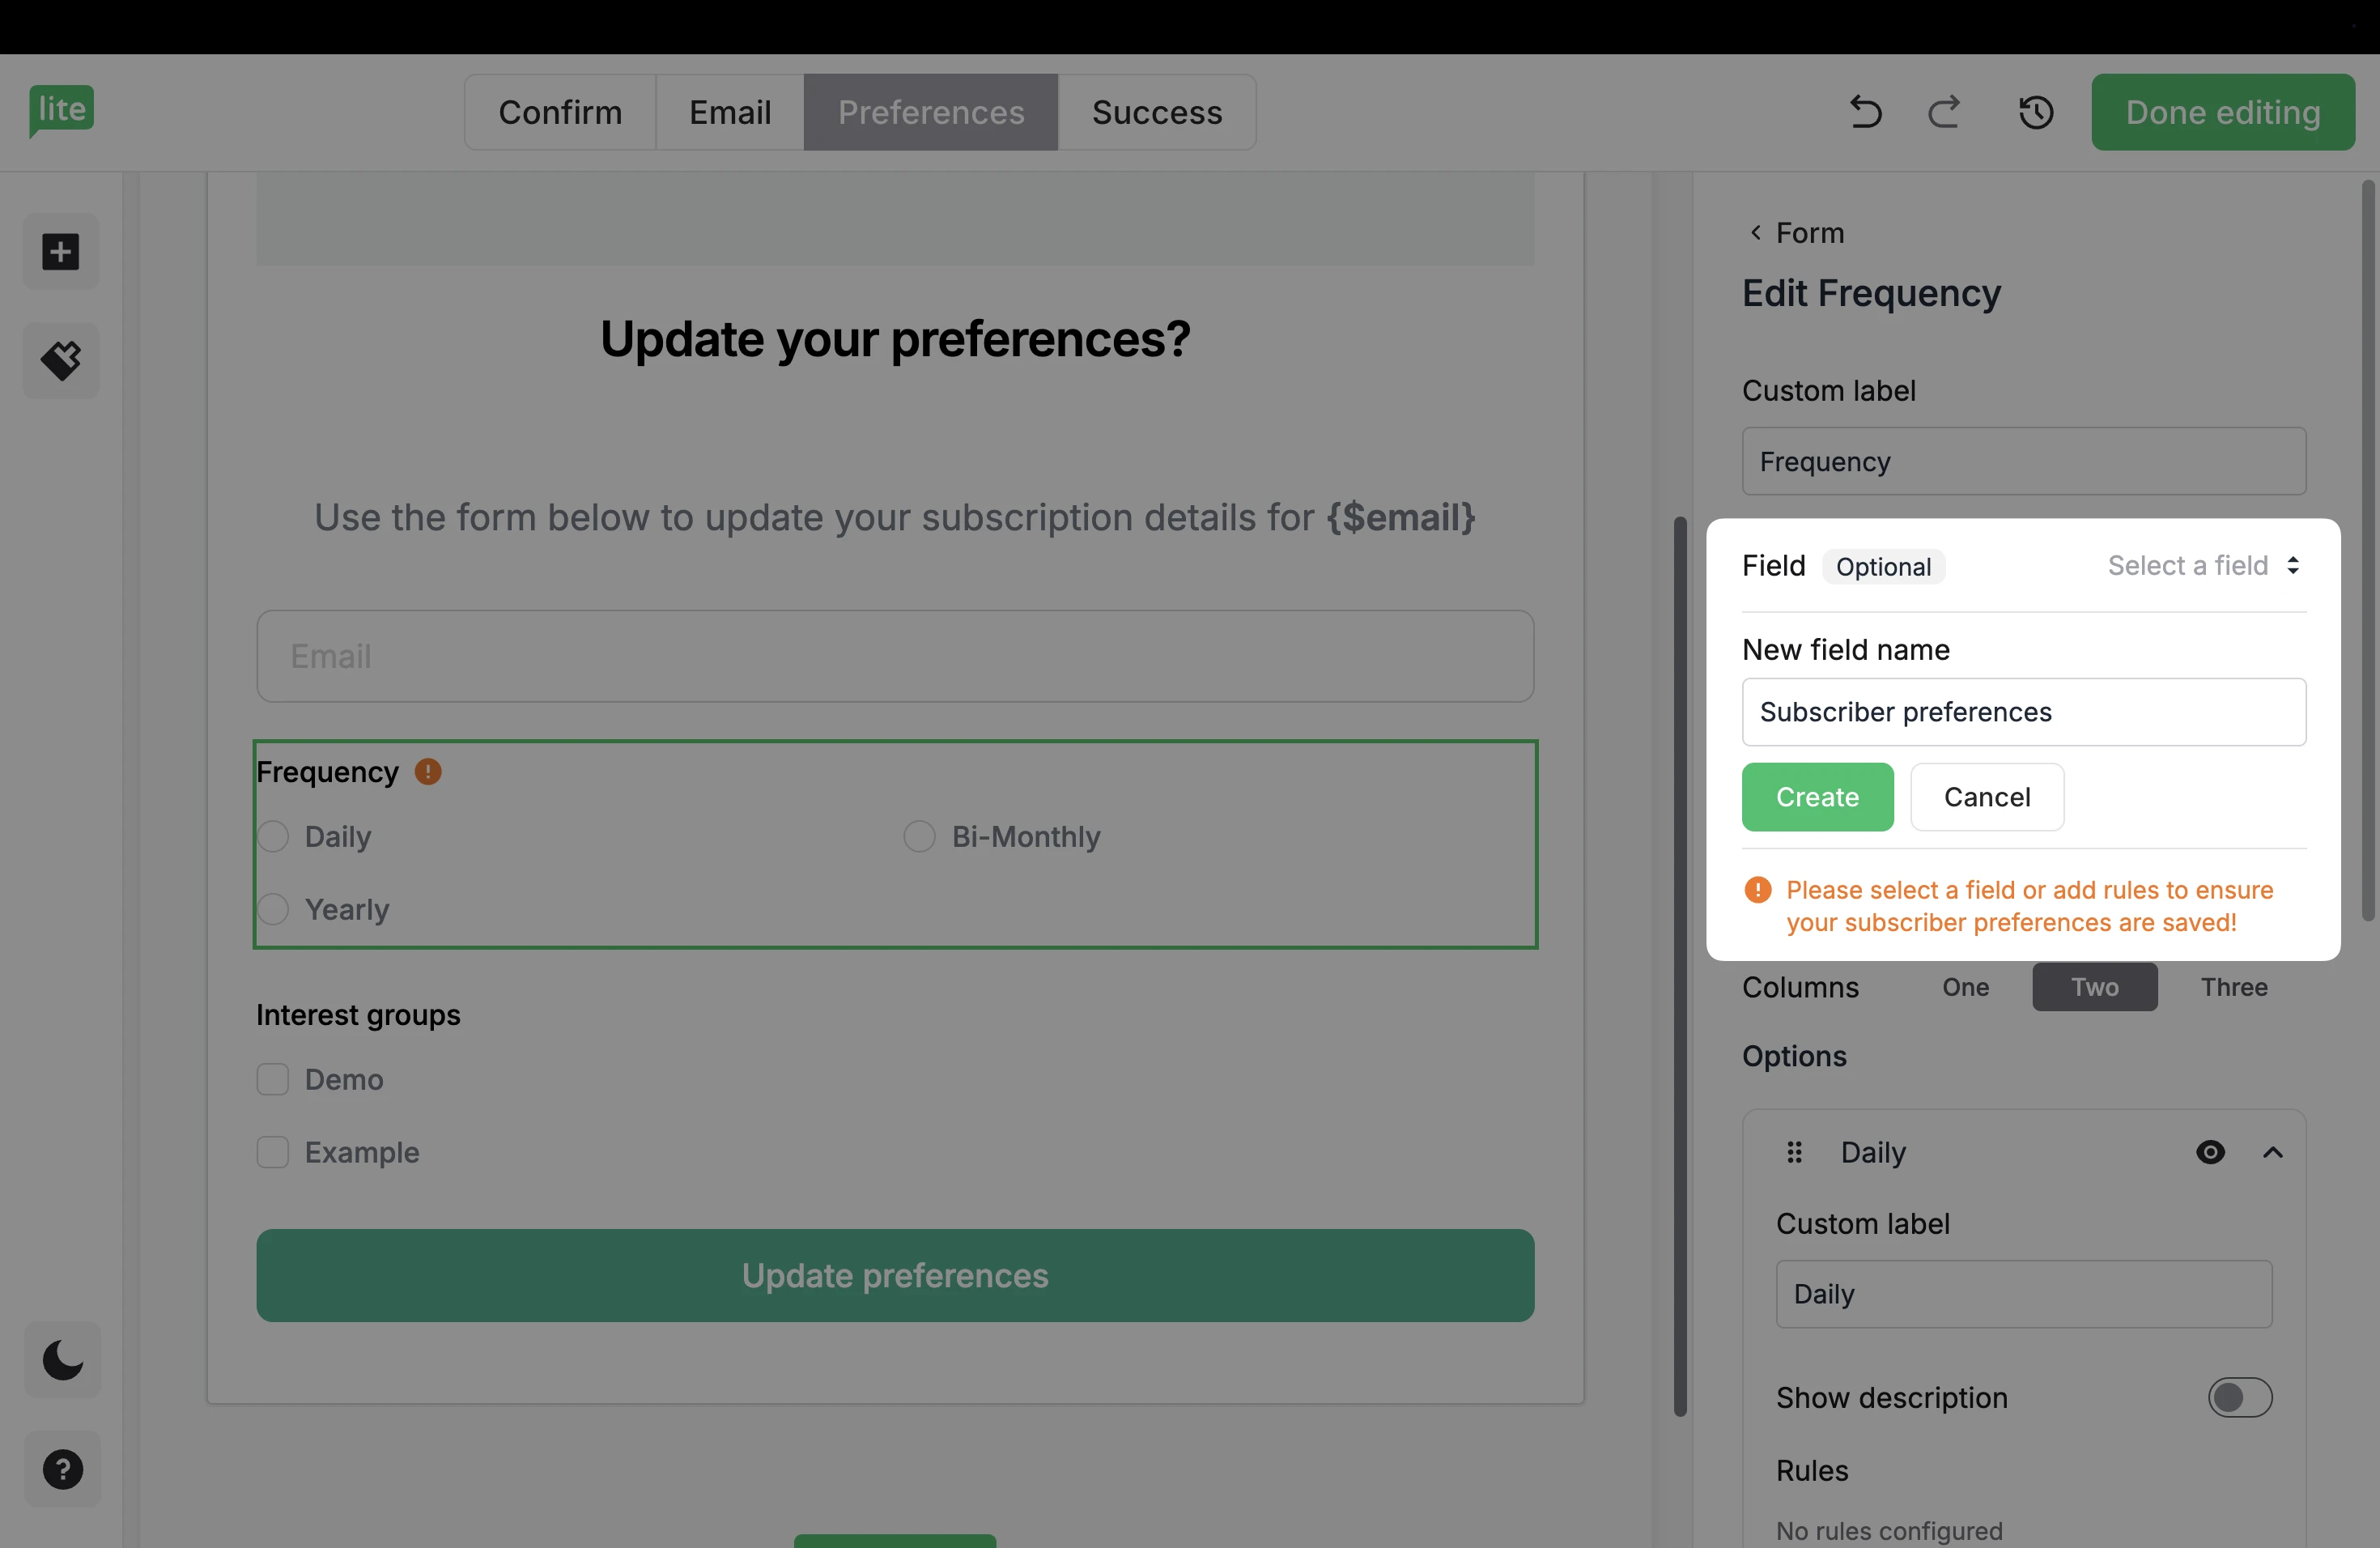
Use the Select a field dropdown to choose from a list of Fields within your MailerLite account.
To create a new custom field specifically for these responses, choose + Create custom field from the menu options.
Here, you can enter the name for the custom field, such as “Subscriber preferences.”
Click Create.
The answers your subscribers select will now be saved in the subscriber field that is set.
Rules
If you do not want to save subscriber responses in a custom field, you can set Rules instead.
Rules are a vital part of your preference center setup, as they're what allows subscribers to self-segment based on their preferences. Without rules, subscriber preferences can only be viewed in the subscriber's profile, and they will not be segmented automatically.
For example, when asking your subscribers to select which type of content they wish to receive, you can create a rule that adds a subscriber to a group based on their answer.
Under Options, click the arrow for any choice to open additional settings and add Rules.
Click + Add rule.
Under Action, you can predefine a certain action within your account that takes place if a question is answered in a certain way.
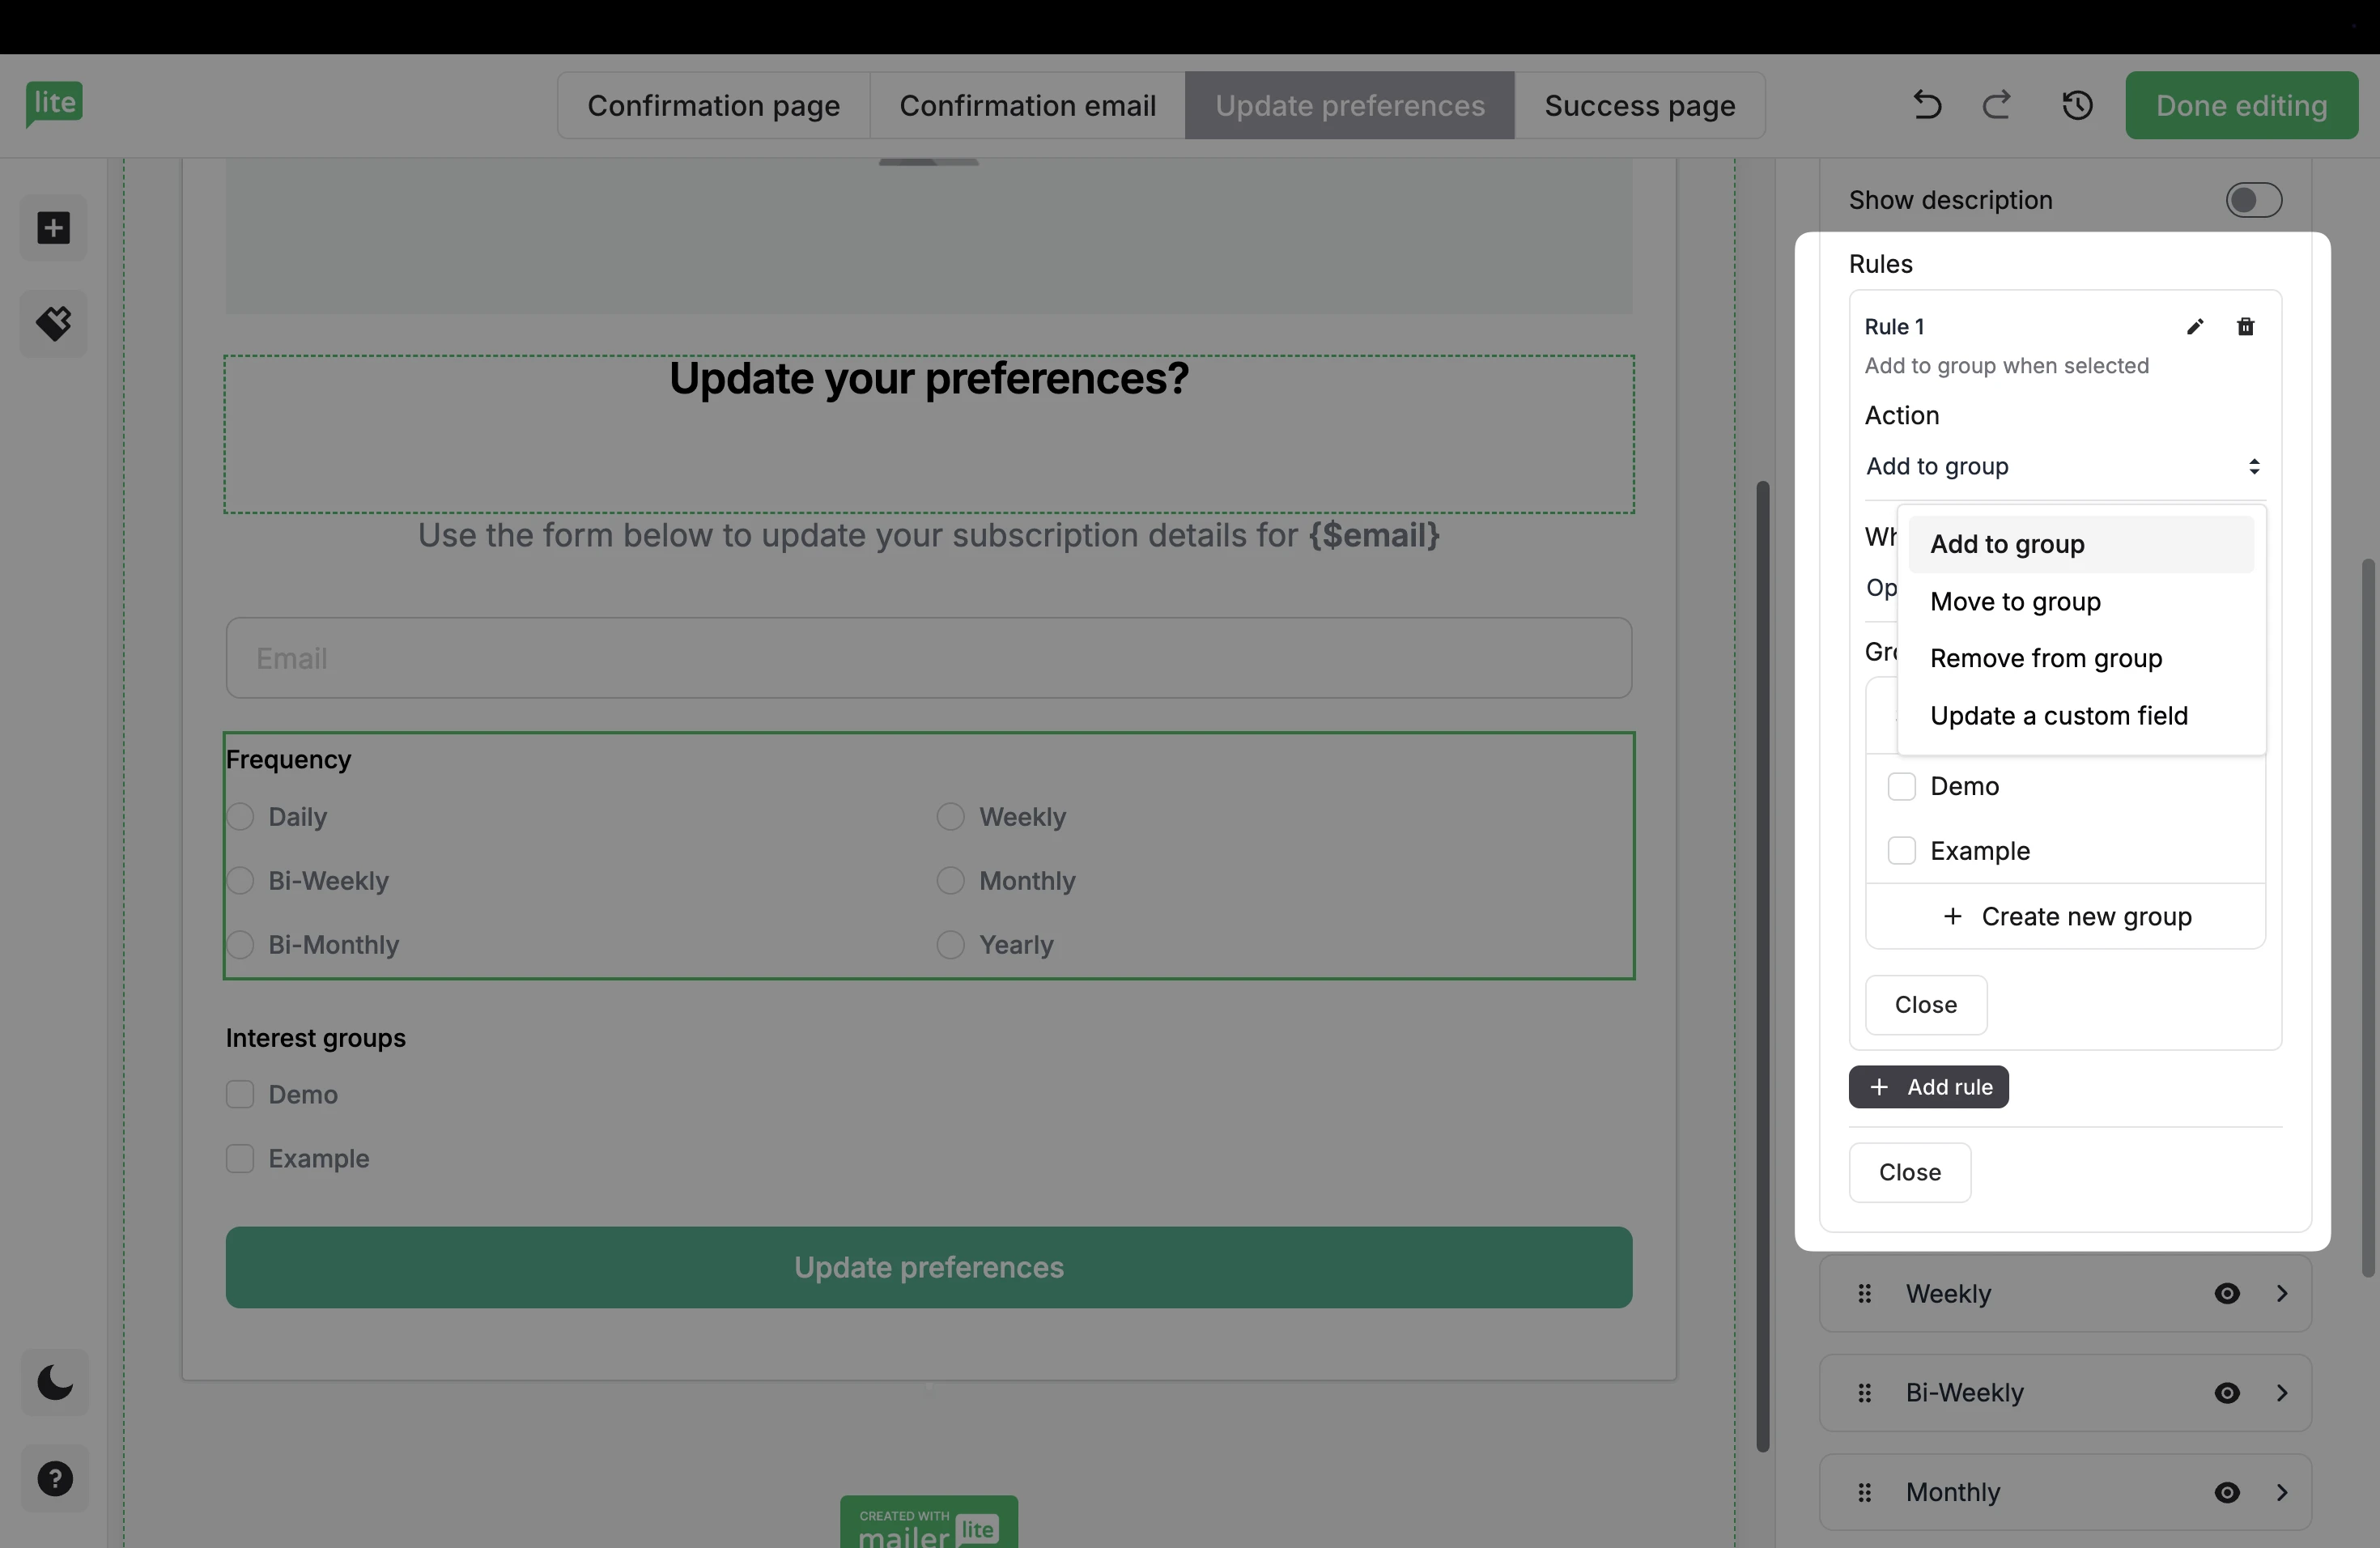
The options are:
Add to group: Puts a subscriber into a designated group without removing them from any other groups.
Move to group: Takes a subscriber out of one chosen group and places them into another.
Remove from group: Removes a subscriber from a specific group, but keeps them on your email list.
If you choose any of these options, select the group(s) that it applies to.
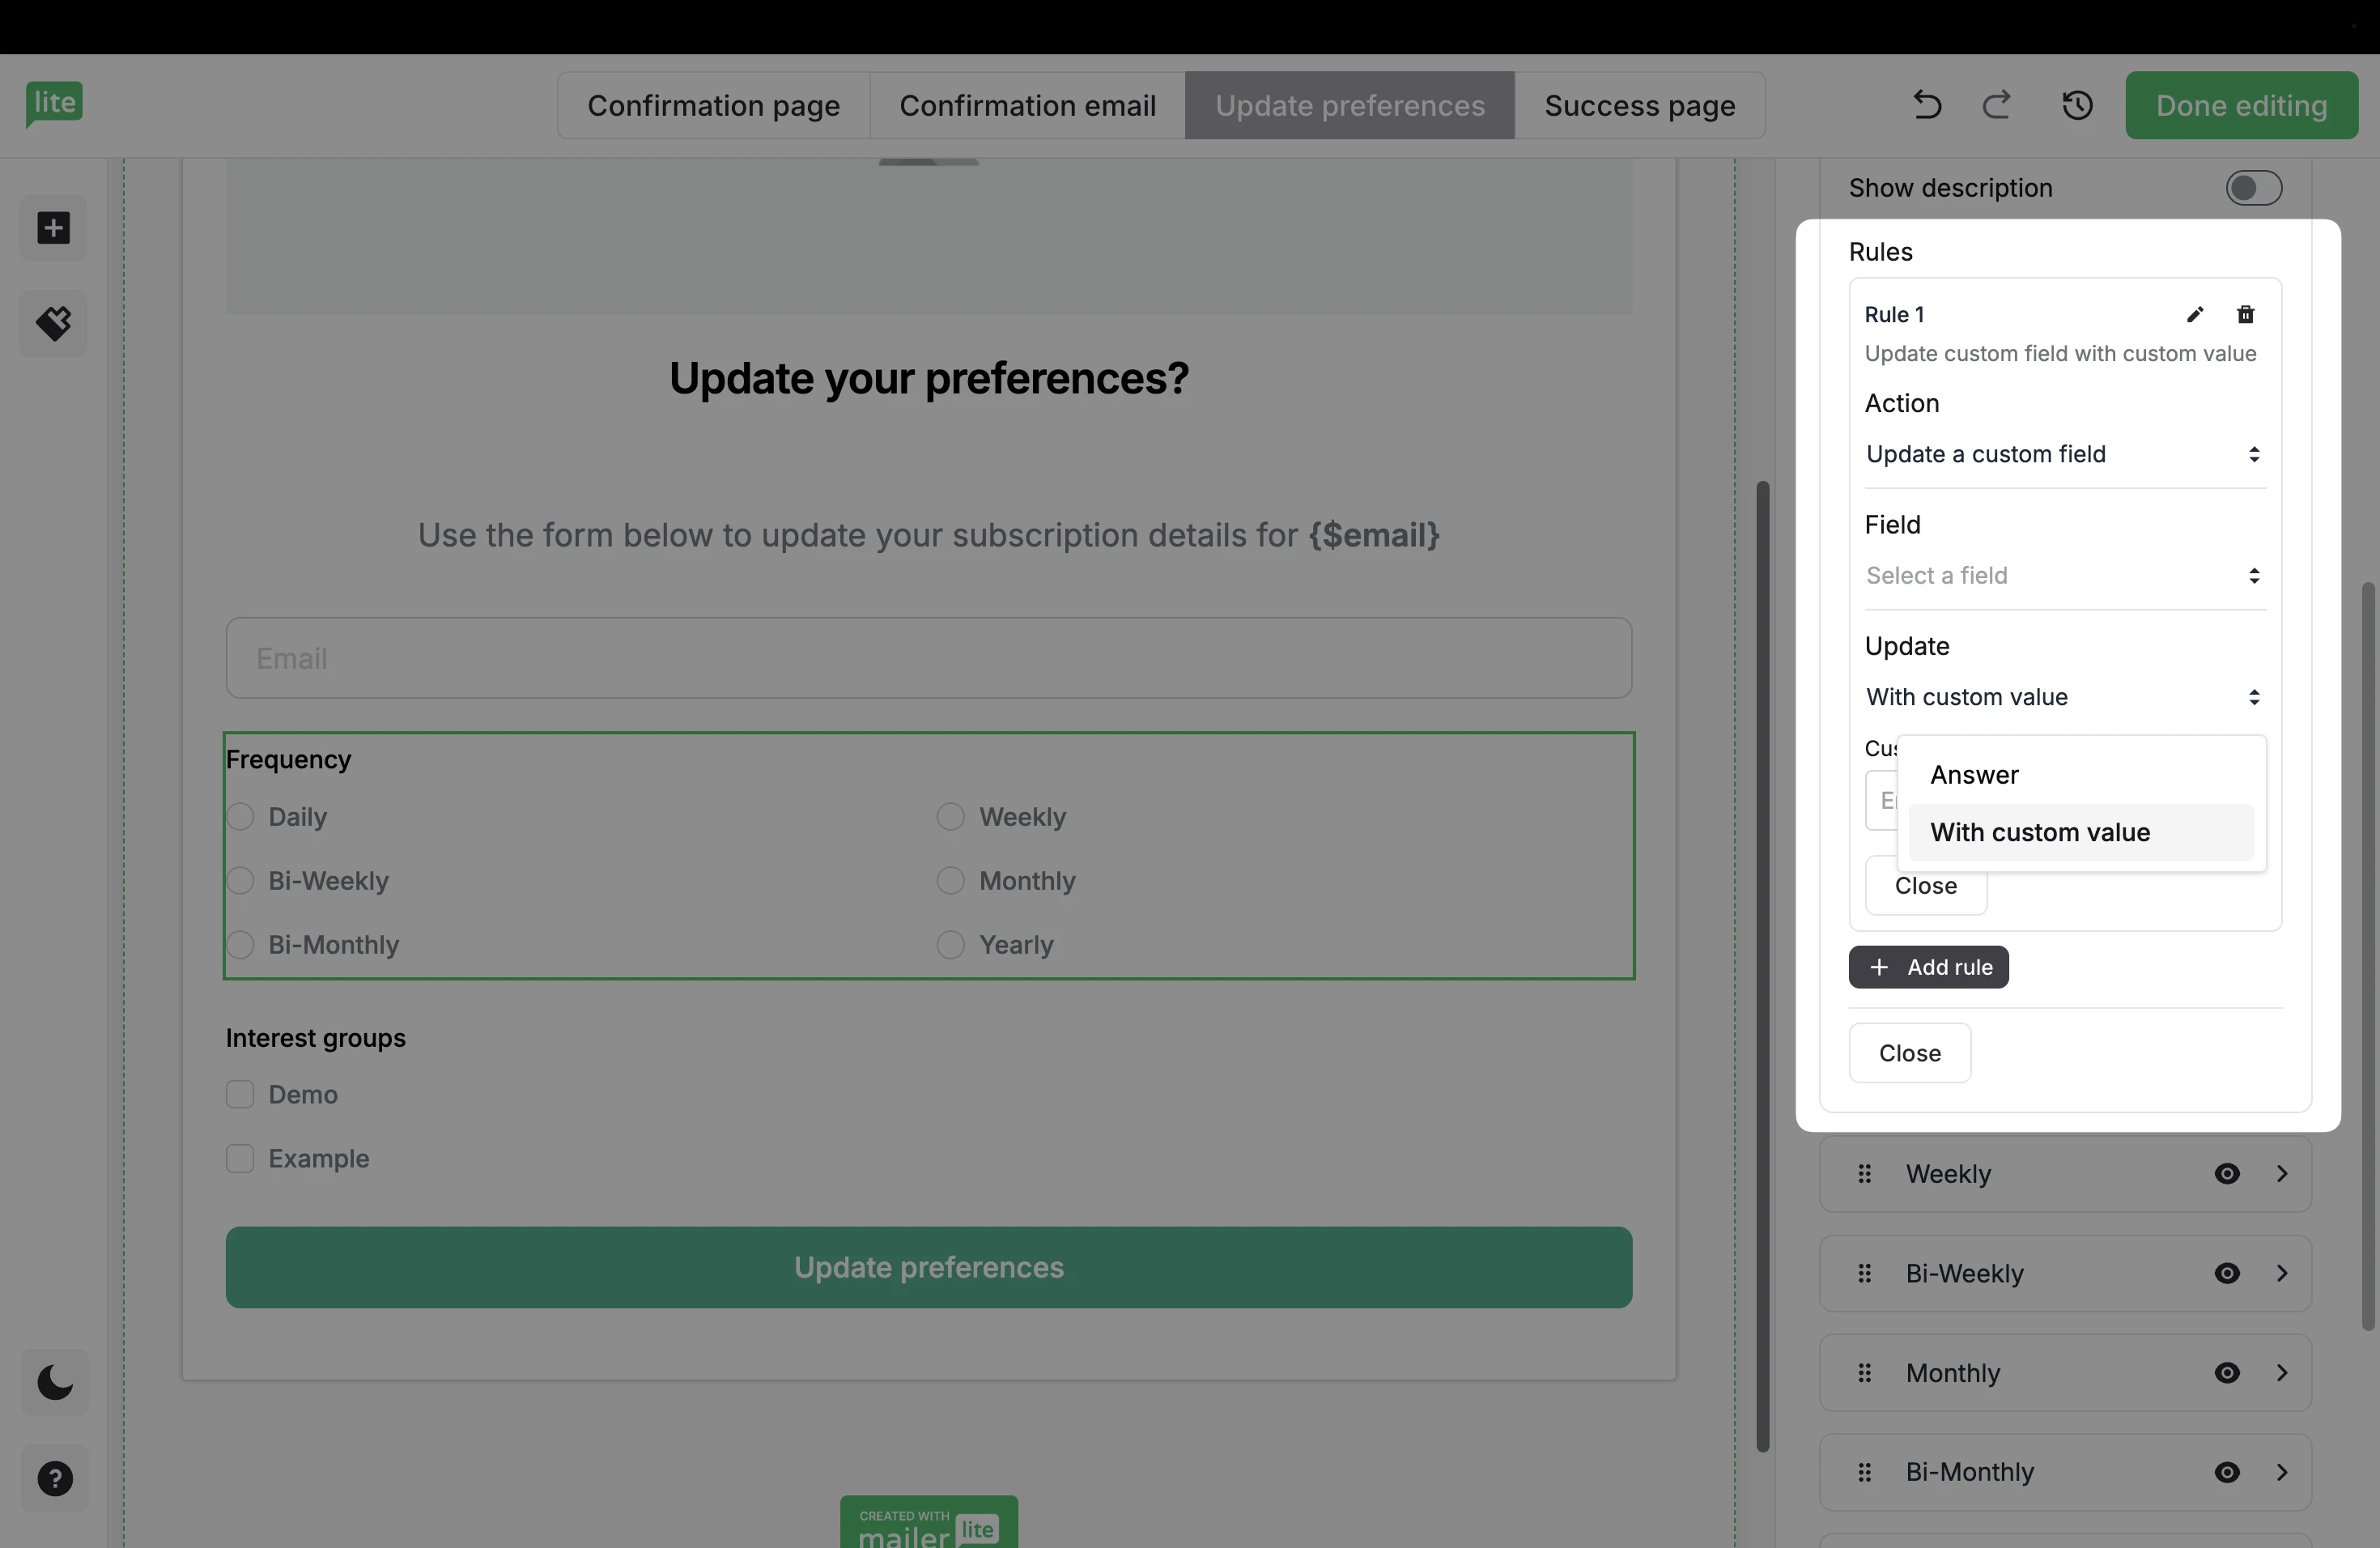
Update a custom field: Changes or sets specific information in a subscriber field.
If you choose this option, decide whether the value in the field should be updated with the exact Answer, or With a custom value.
Under When, choose whether the Action should take place if the Option is selected or Option is not selected.
To add more, click + Add rule.
Click Close.
Scroll down to locate the setting to let your subscribers Select multiple options.

Interest groups
Interest groups in the Preference center let subscribers add themselves directly to groups in your MailerLite account. When you enable groups in your preference center, subscribers can check or uncheck topics (like “News,” “Events,” or “Product Updates”) to control what emails they get.
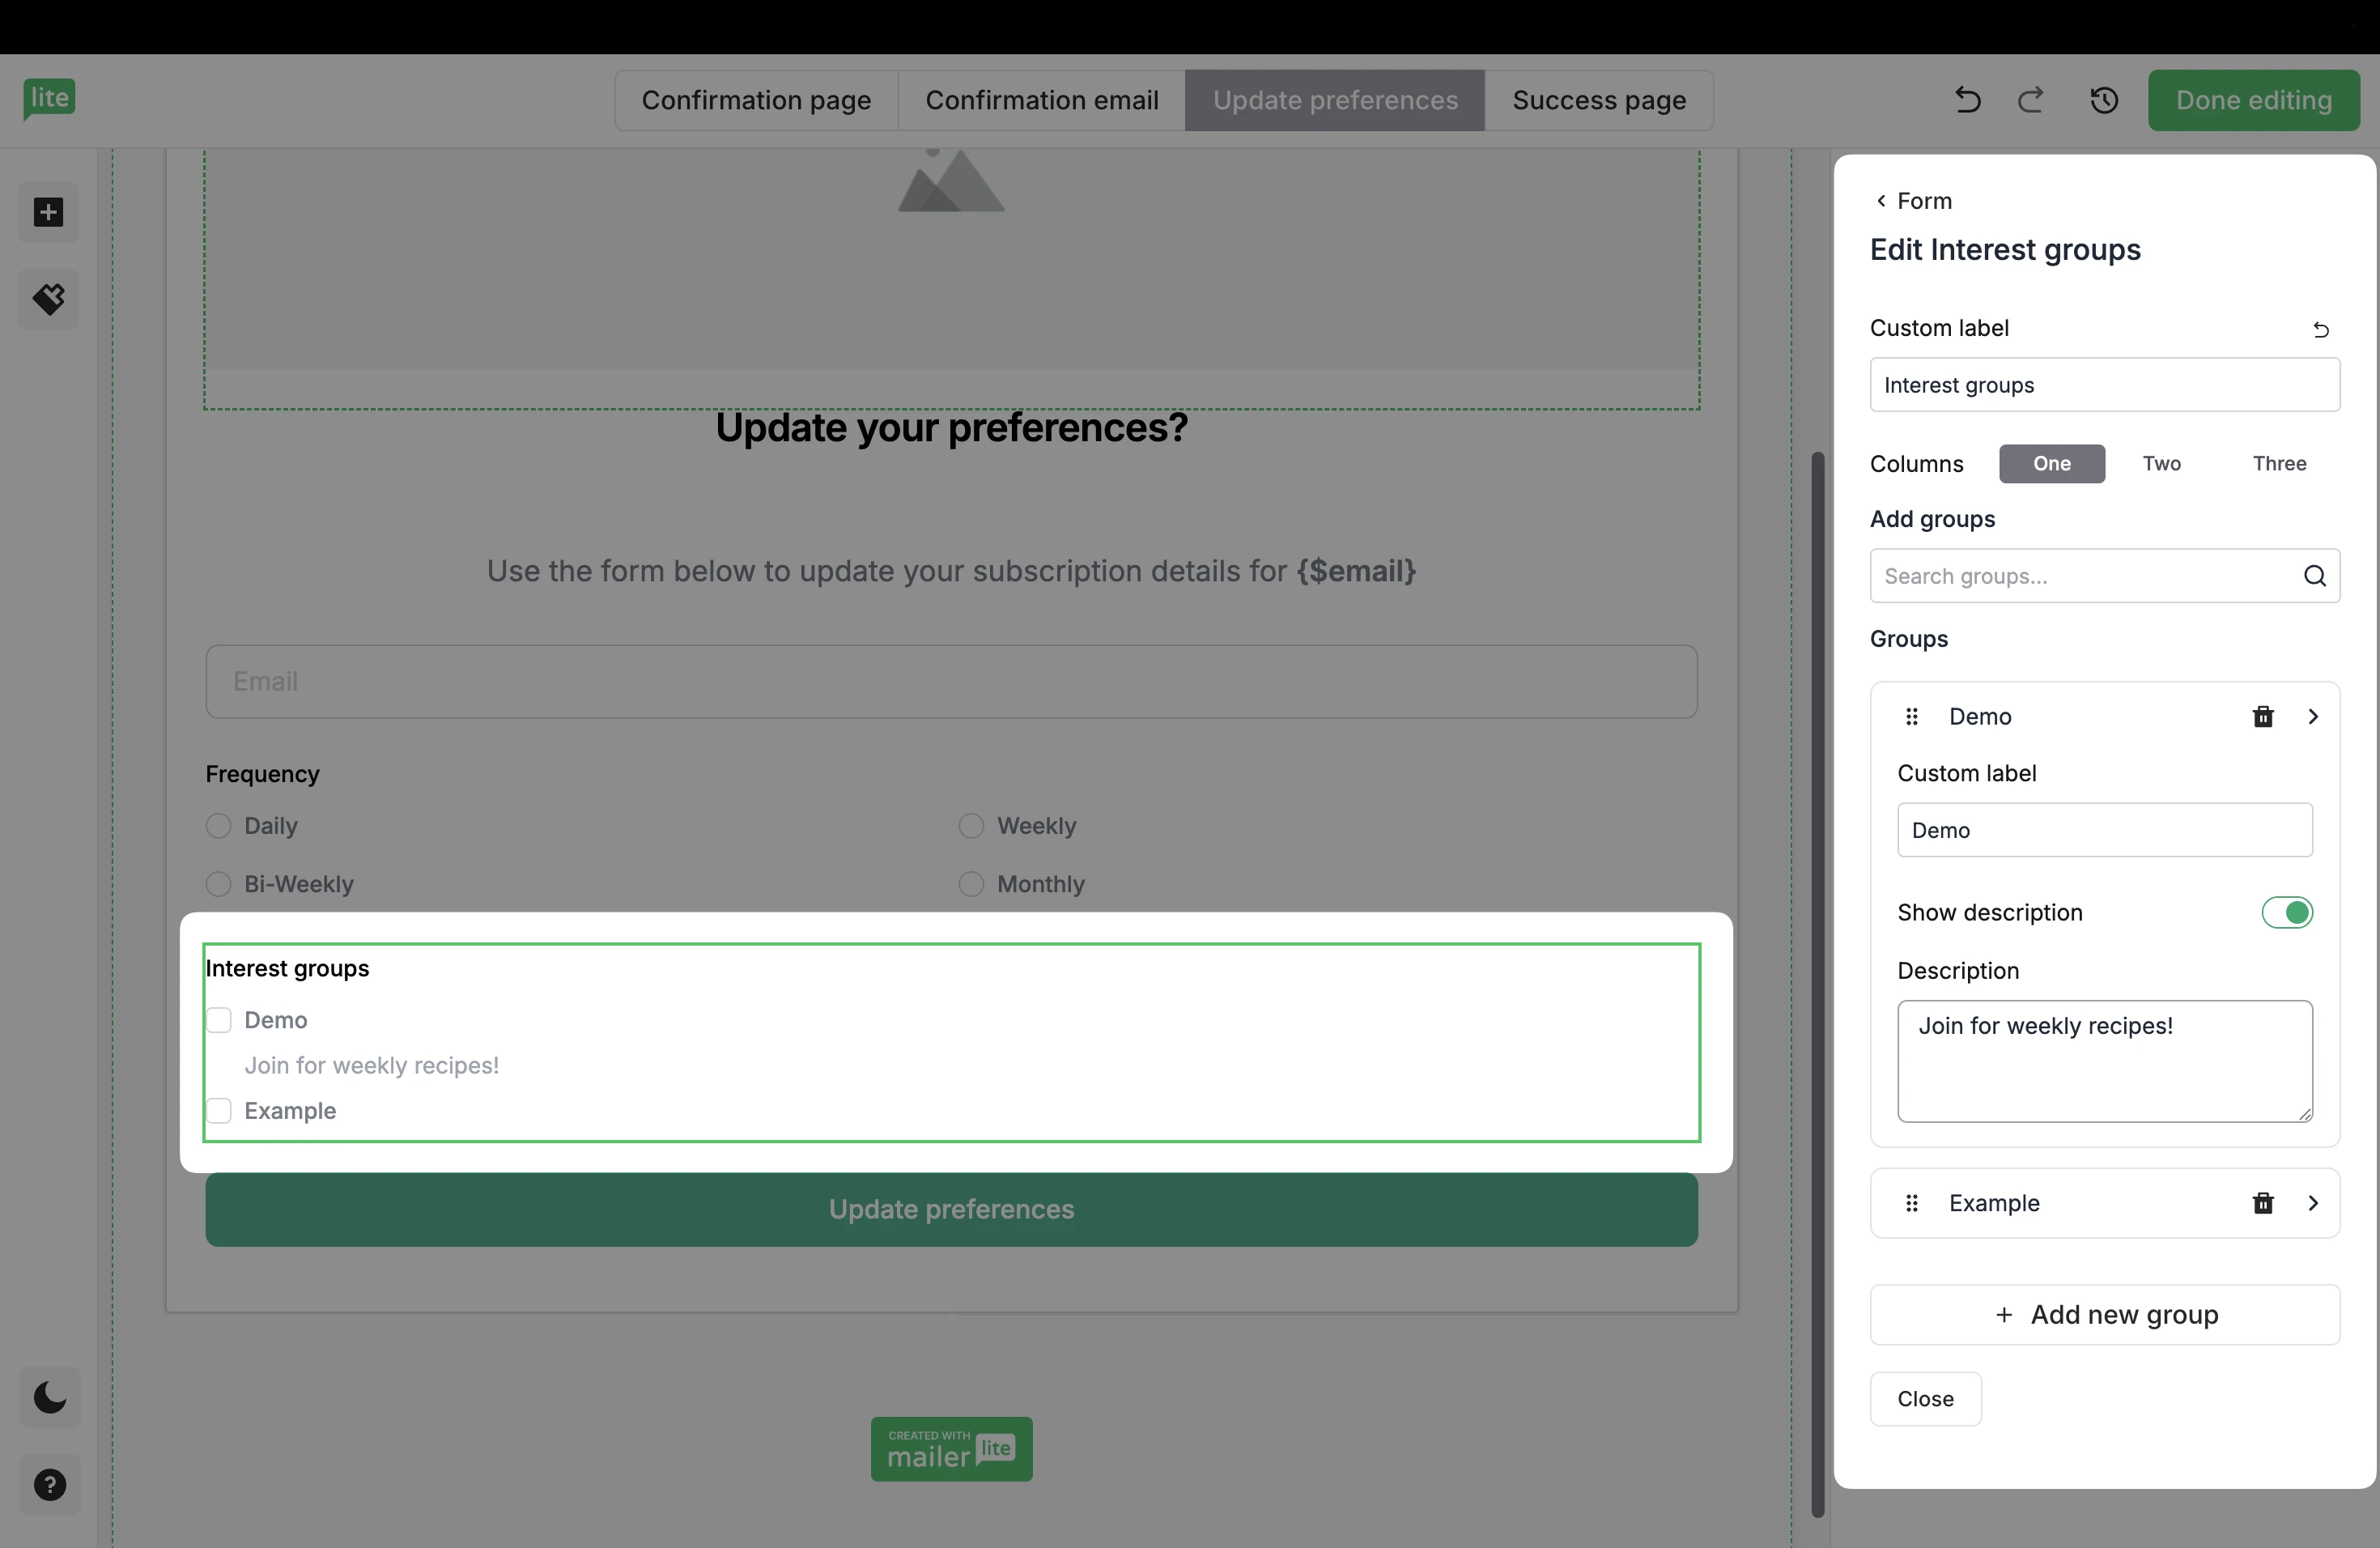
Add/remove group: To add a group from your account, use the Add groups search bar to locate the groups you wish to add to your form. To remove a group, click the Trash icon next to each group name.
Custom label: Subscribers don’t have to see your internal group names. Here, you can customize the default label so it’s clear and user-friendly, even if the actual group name in your account is more technical.
Description: You can also add a description to each group, which can help explain what kind of emails they’ll receive if they select that interest.
If you want to create a new group specifically for your preference center, click + Add new group.
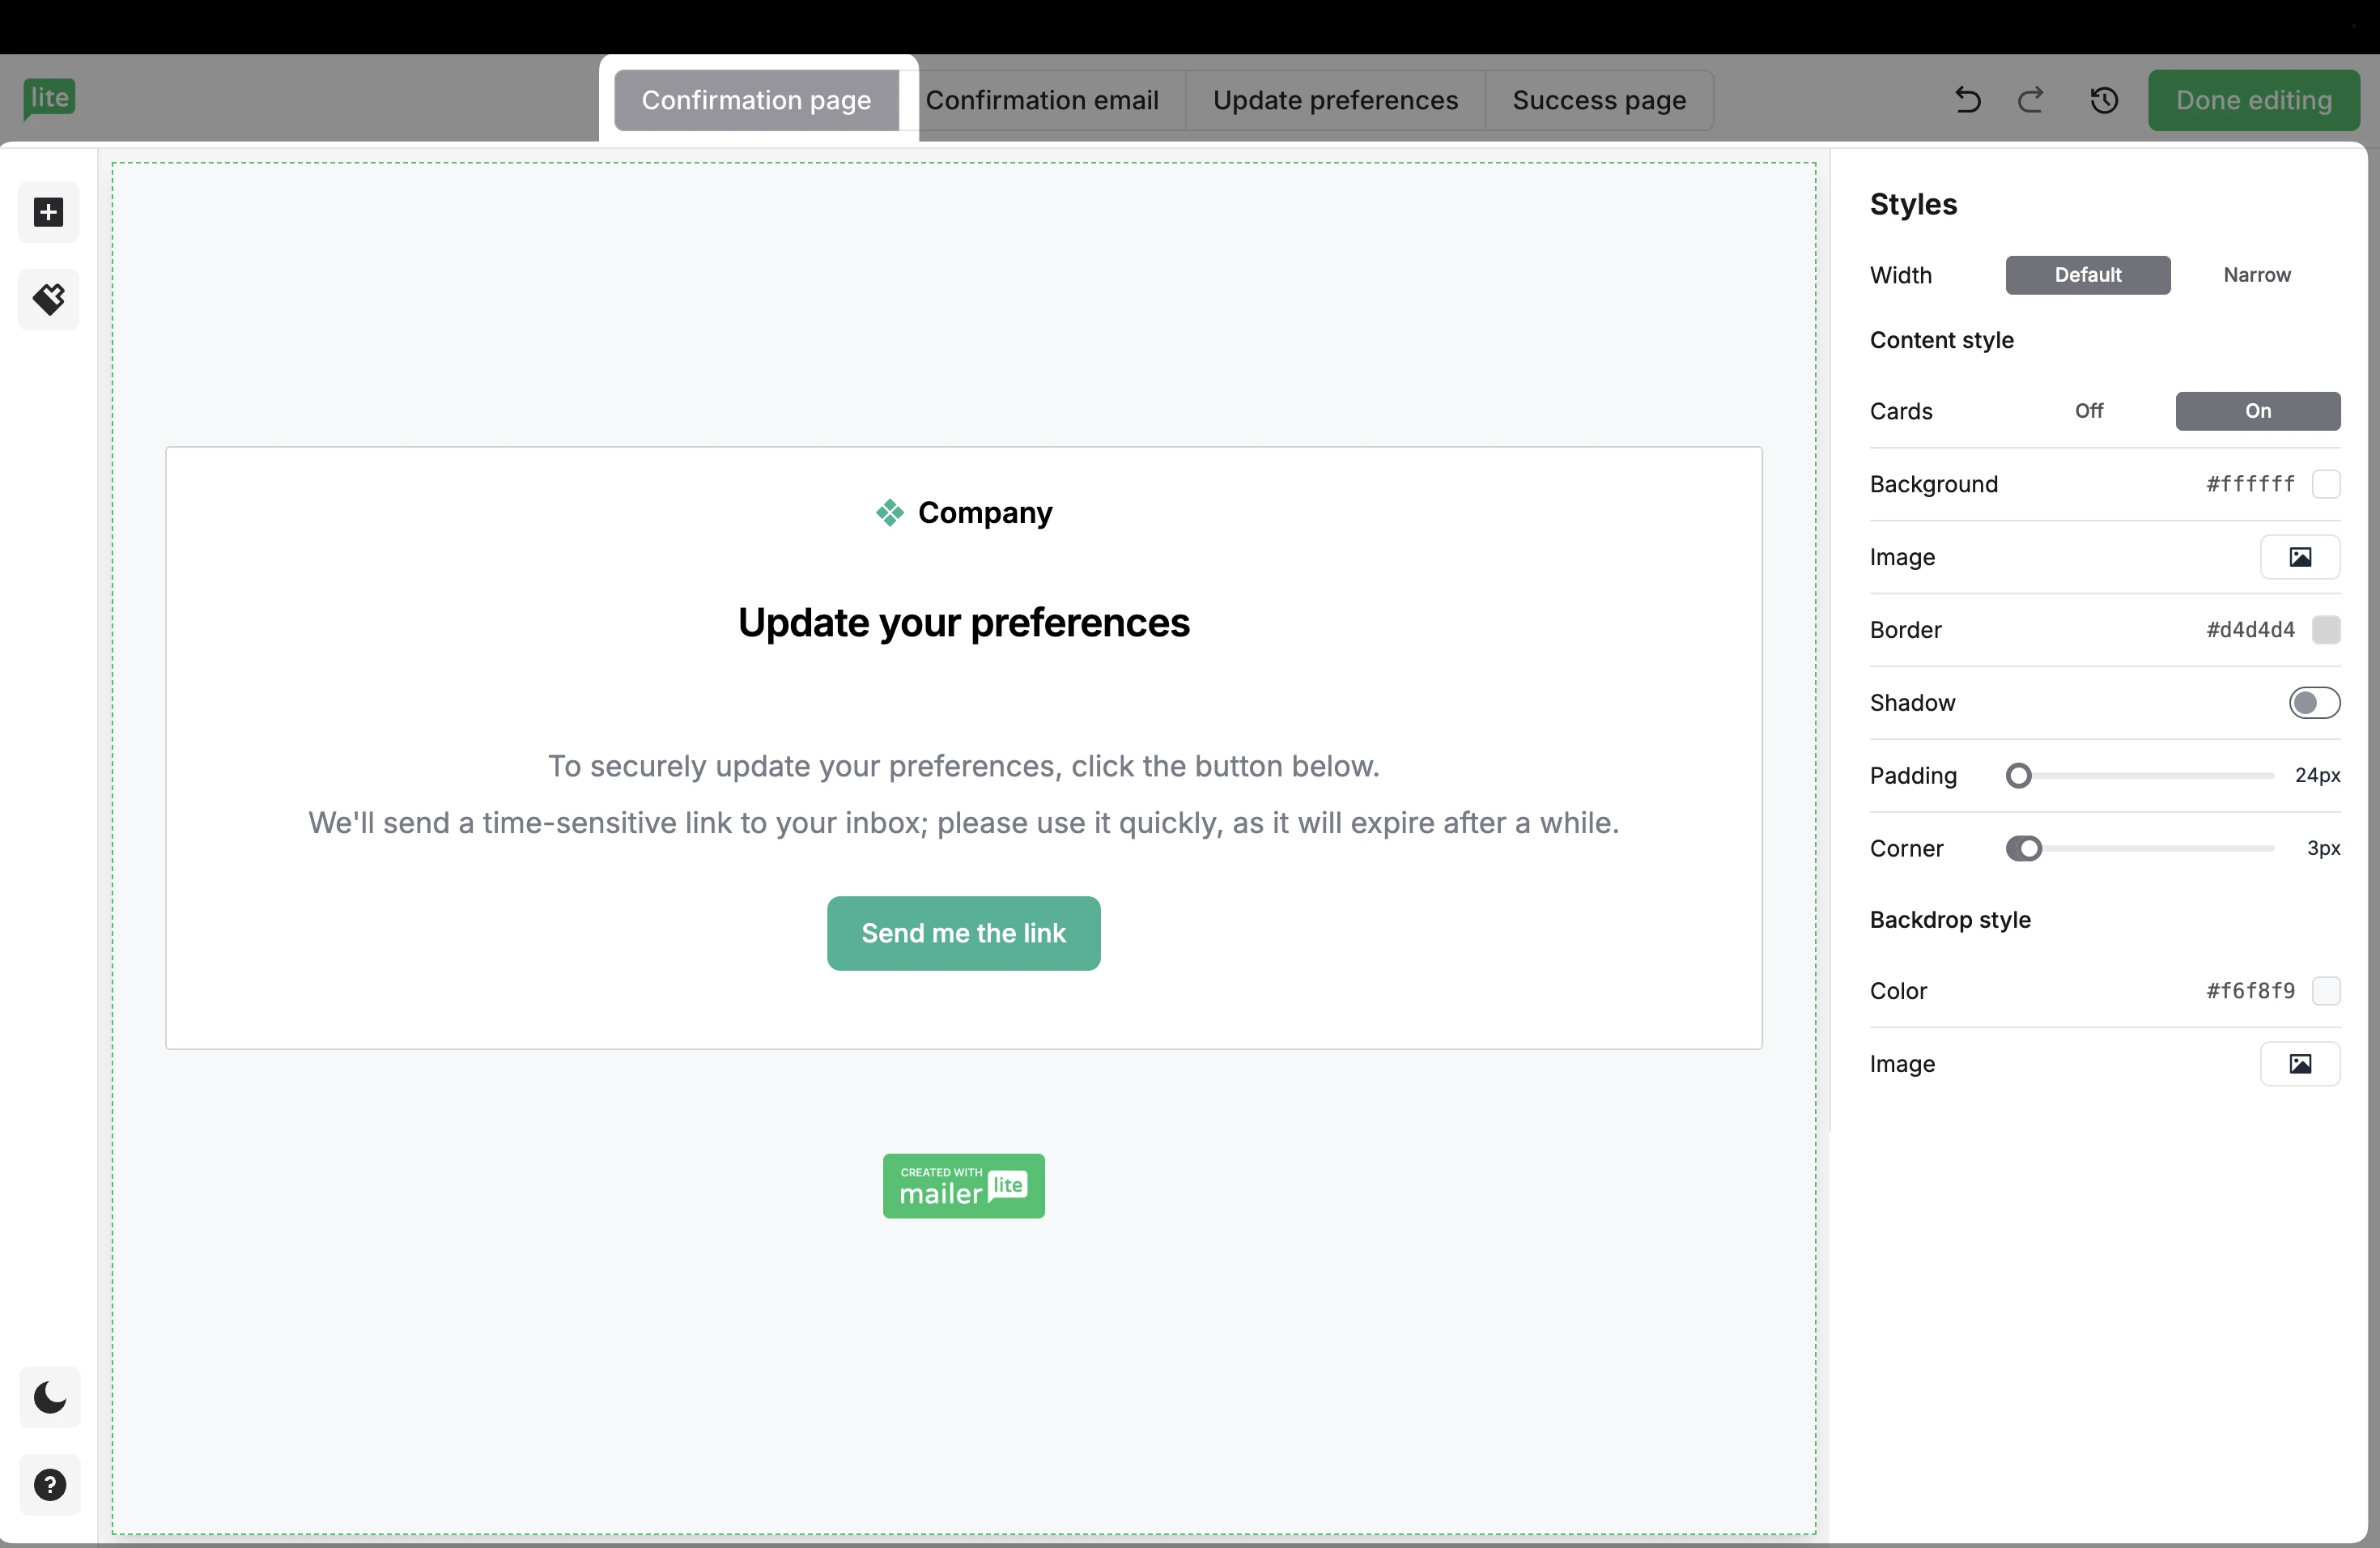
Confirmation page
Go to the Confirmation page tab to edit the page that appears after someone clicks “Update preferences.”
When they click “Send me the link,” they’ll receive an email to securely access and update their preferences.
This page can be edited in the same way as the main preferences form, with additional Elements on the left side.
Confirmation email
This page lets you design the email subscribers receive after clicking “Send me the link.”
The confirmation email contains the secure, time-sensitive link that allows them to access and update their preferences. You can customize the content, branding, and styling to match your company’s look and tone.
Subscribers must click the link in this email to securely open their preference center.
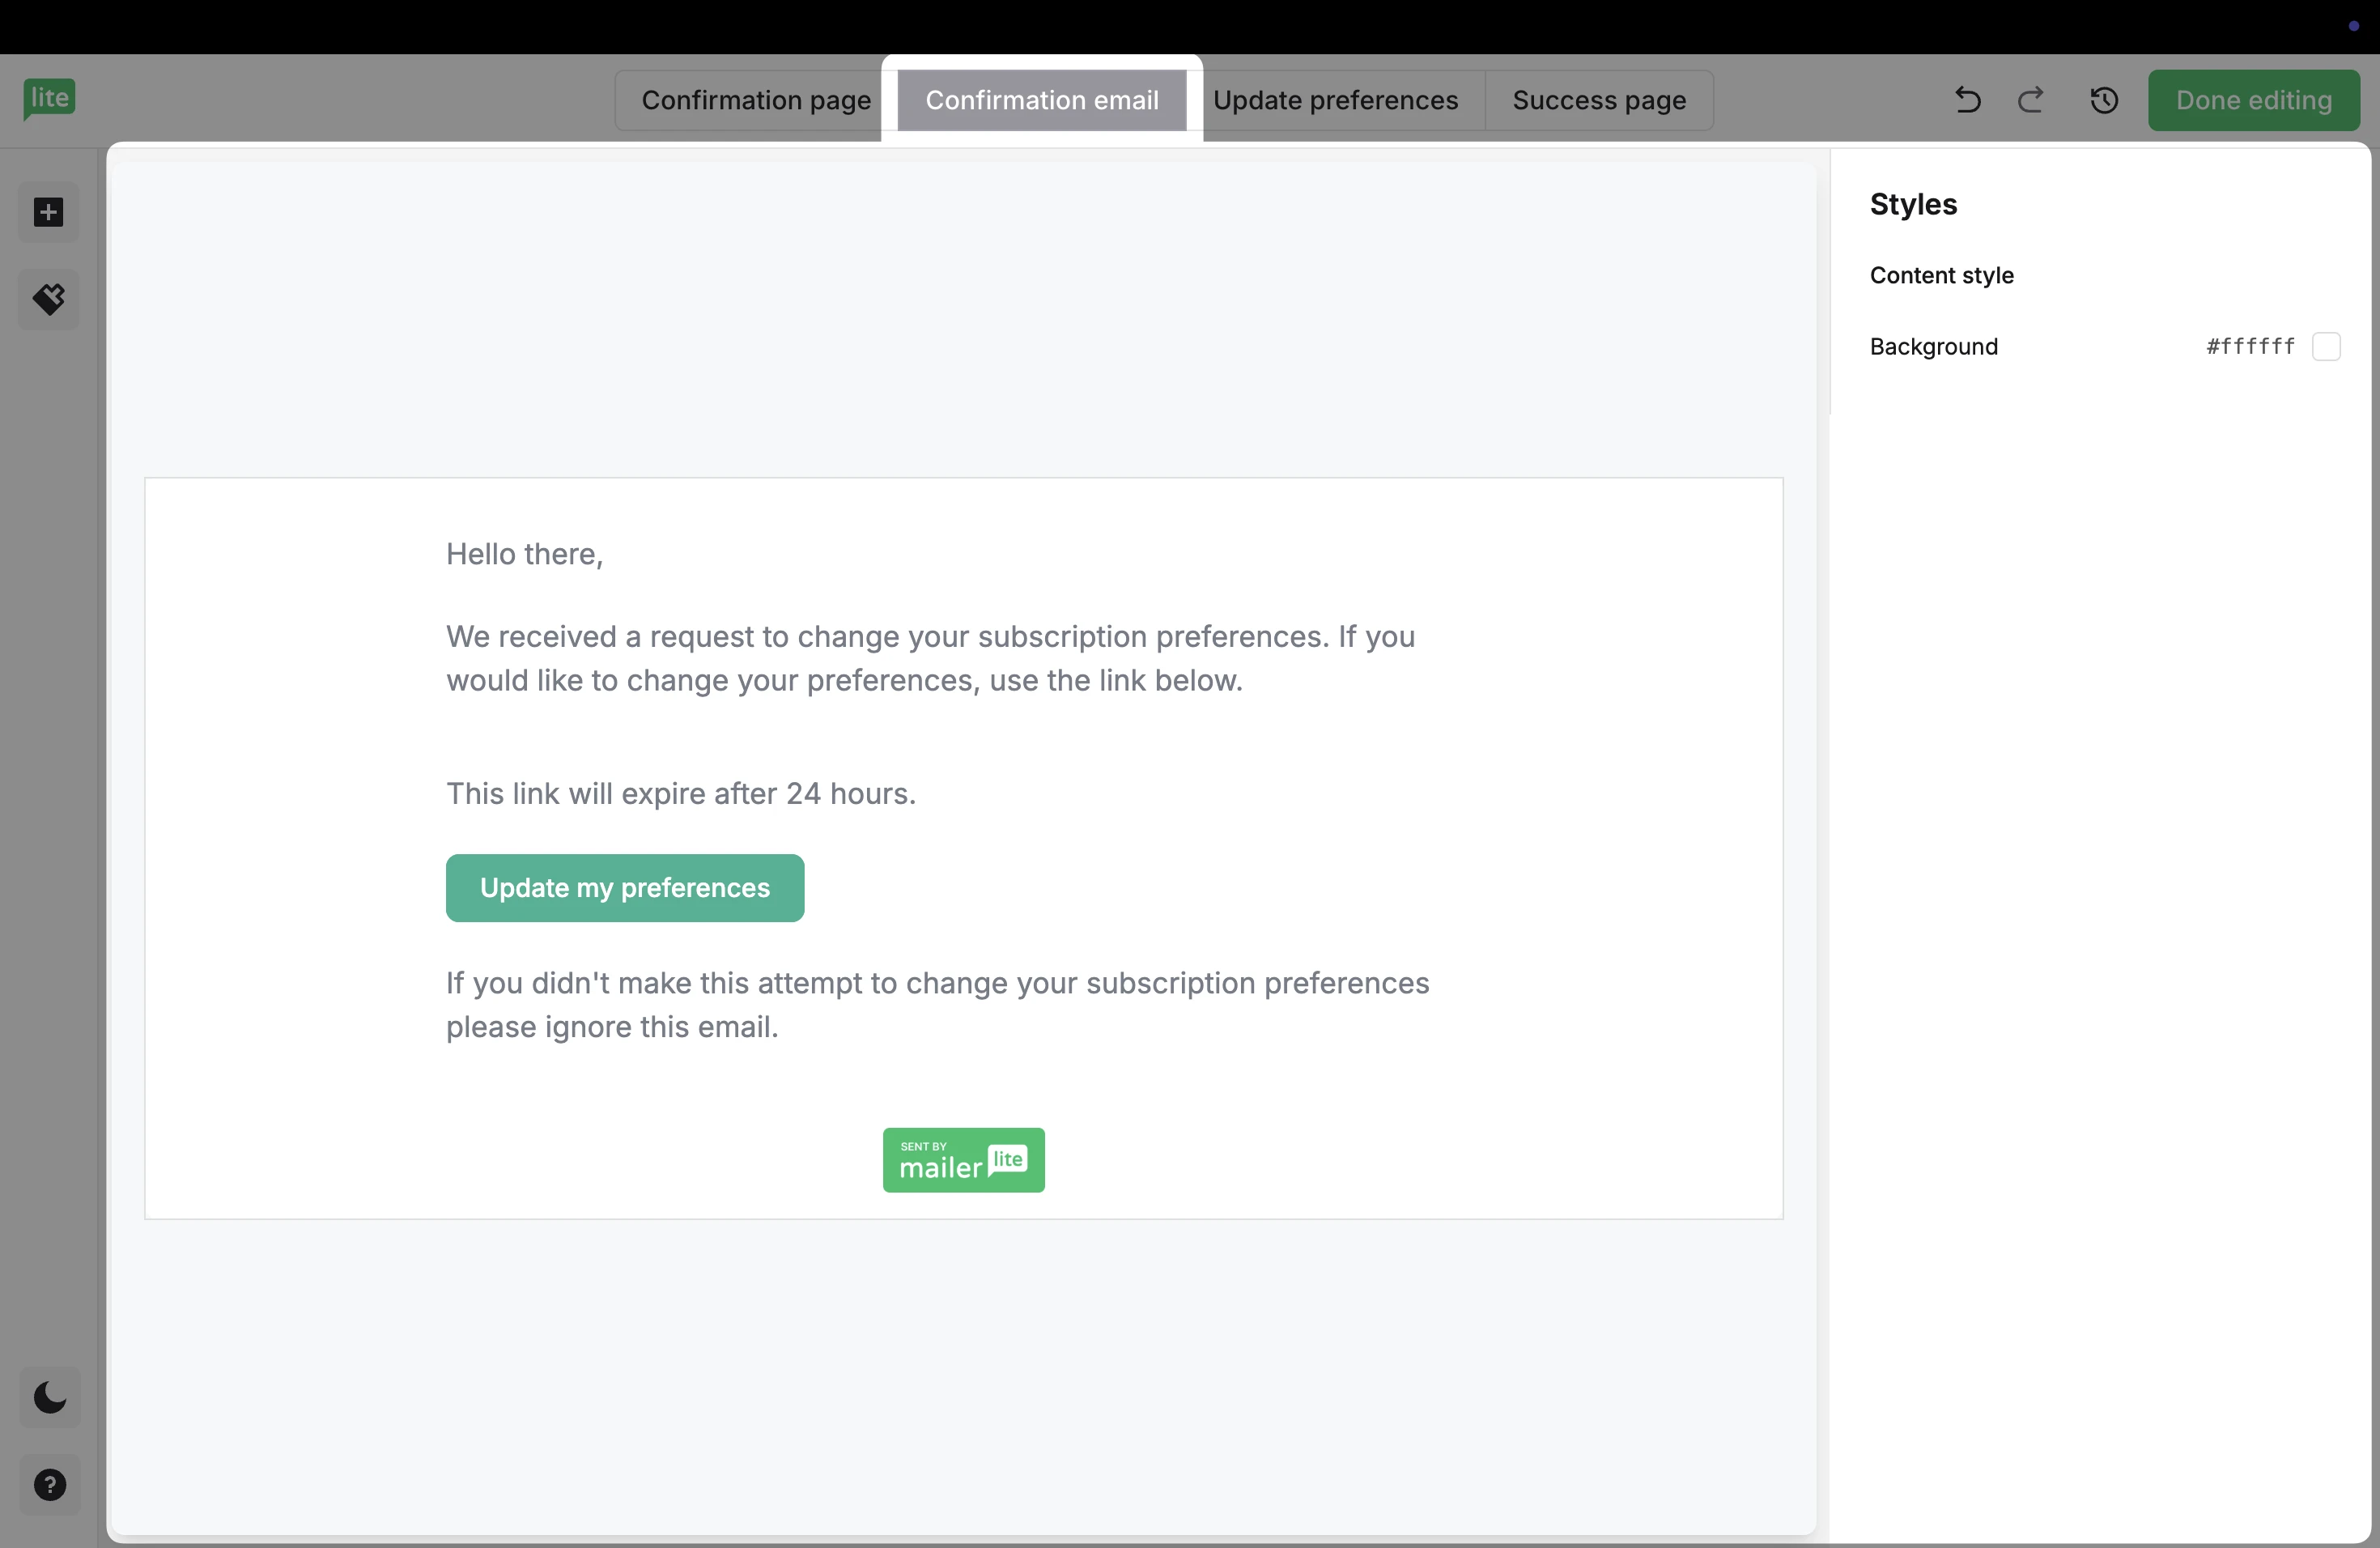
This email can also be viewed from outside of the editor.
Success page
This page appears after a subscriber successfully updates their preferences.
It confirms that their changes have been saved and reassures them that their subscription settings are now up to date. You can customize the message and design to match your brand and tone.

How to include your Preference center in campaigns and automation emails
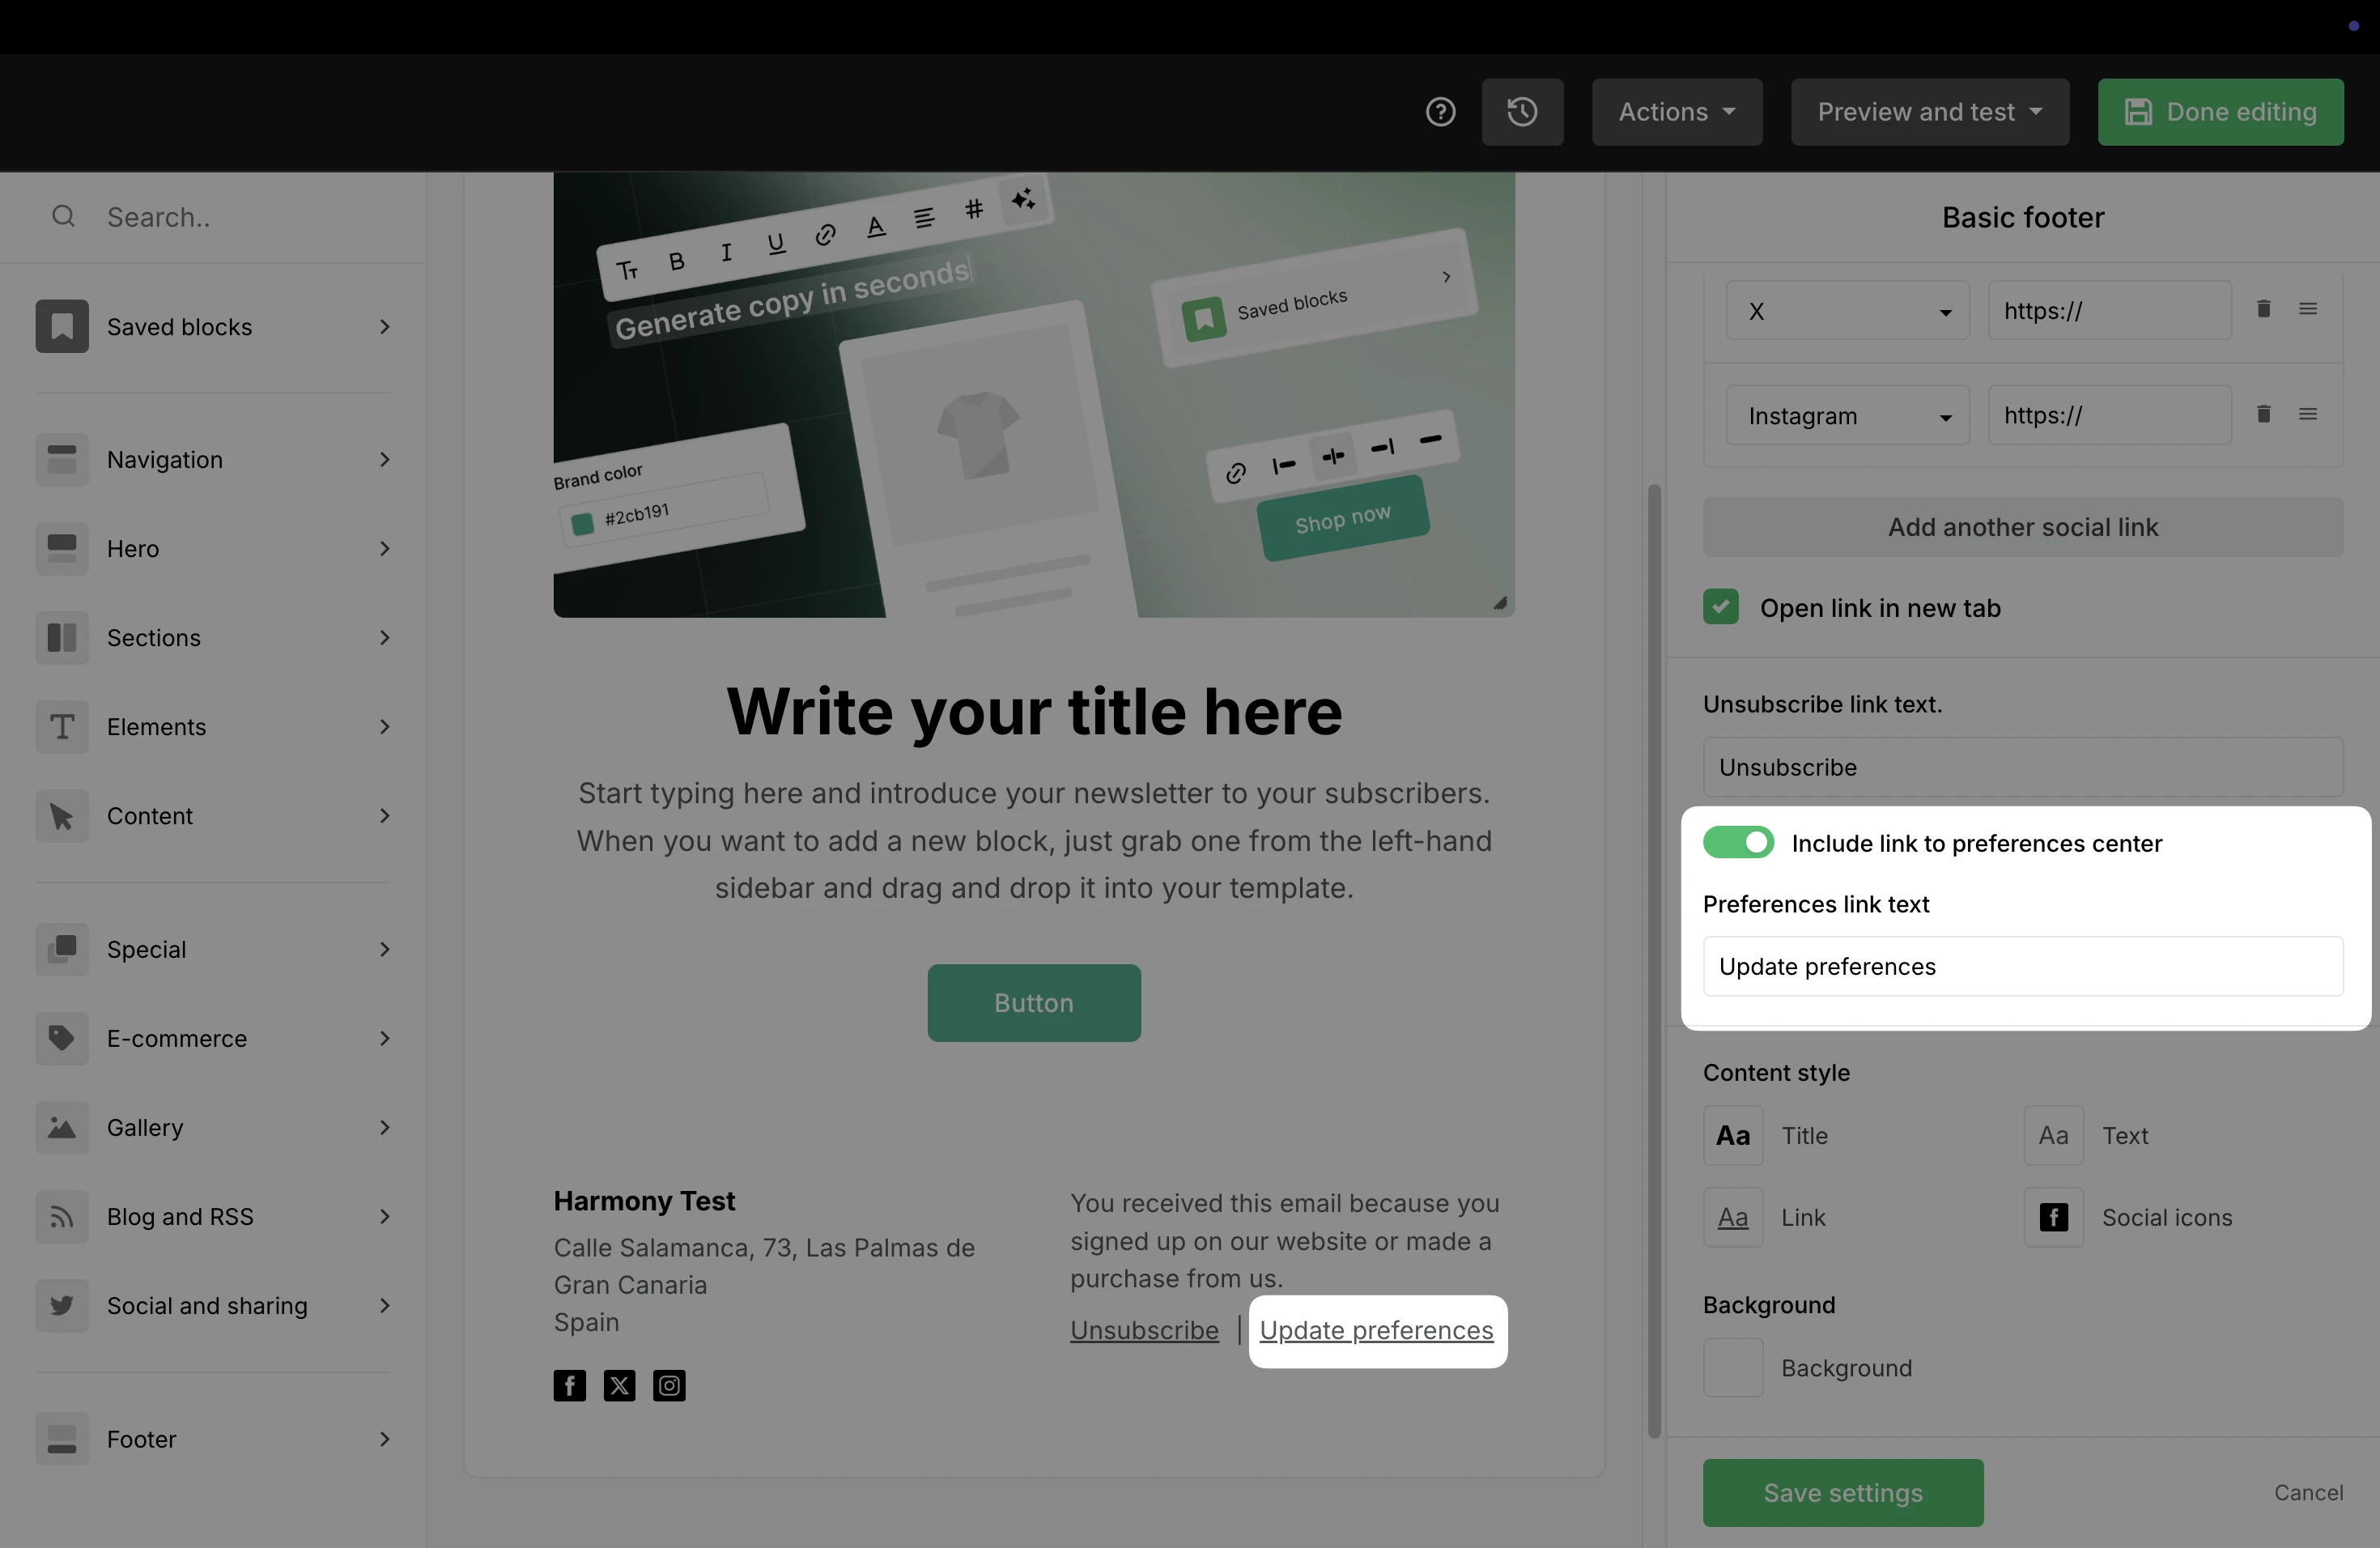
After you have edited your Preference center, the next important step is to include the Update preferences link in the footer of your campaigns.
To add the link to your campaigns and automation emails:
Open the campaign editor and choose any footer block to place at the bottom of your newsletter.
Click on the edit icon to open the sidebar settings.
Scroll down and toggle the option to include a link to the preferences page. This will create a link with text that can be changed, and subscribers who click this link will be taken to the Preferences center.
Another option is to simply use variable {$preferences}. You can add this variable to a button block. Subscribers will be taken to the Preference center when the button is clicked. Or, you can simply use the variable as a link in any part of your newsletter or other campaign builders.
How can I track updates made by subscribers?
To track what information a subscriber updates and the most recent subscriber activity
Navigate to Account settings from the sidebar menu.
Choose Preference center.
Select Subscriber activity.
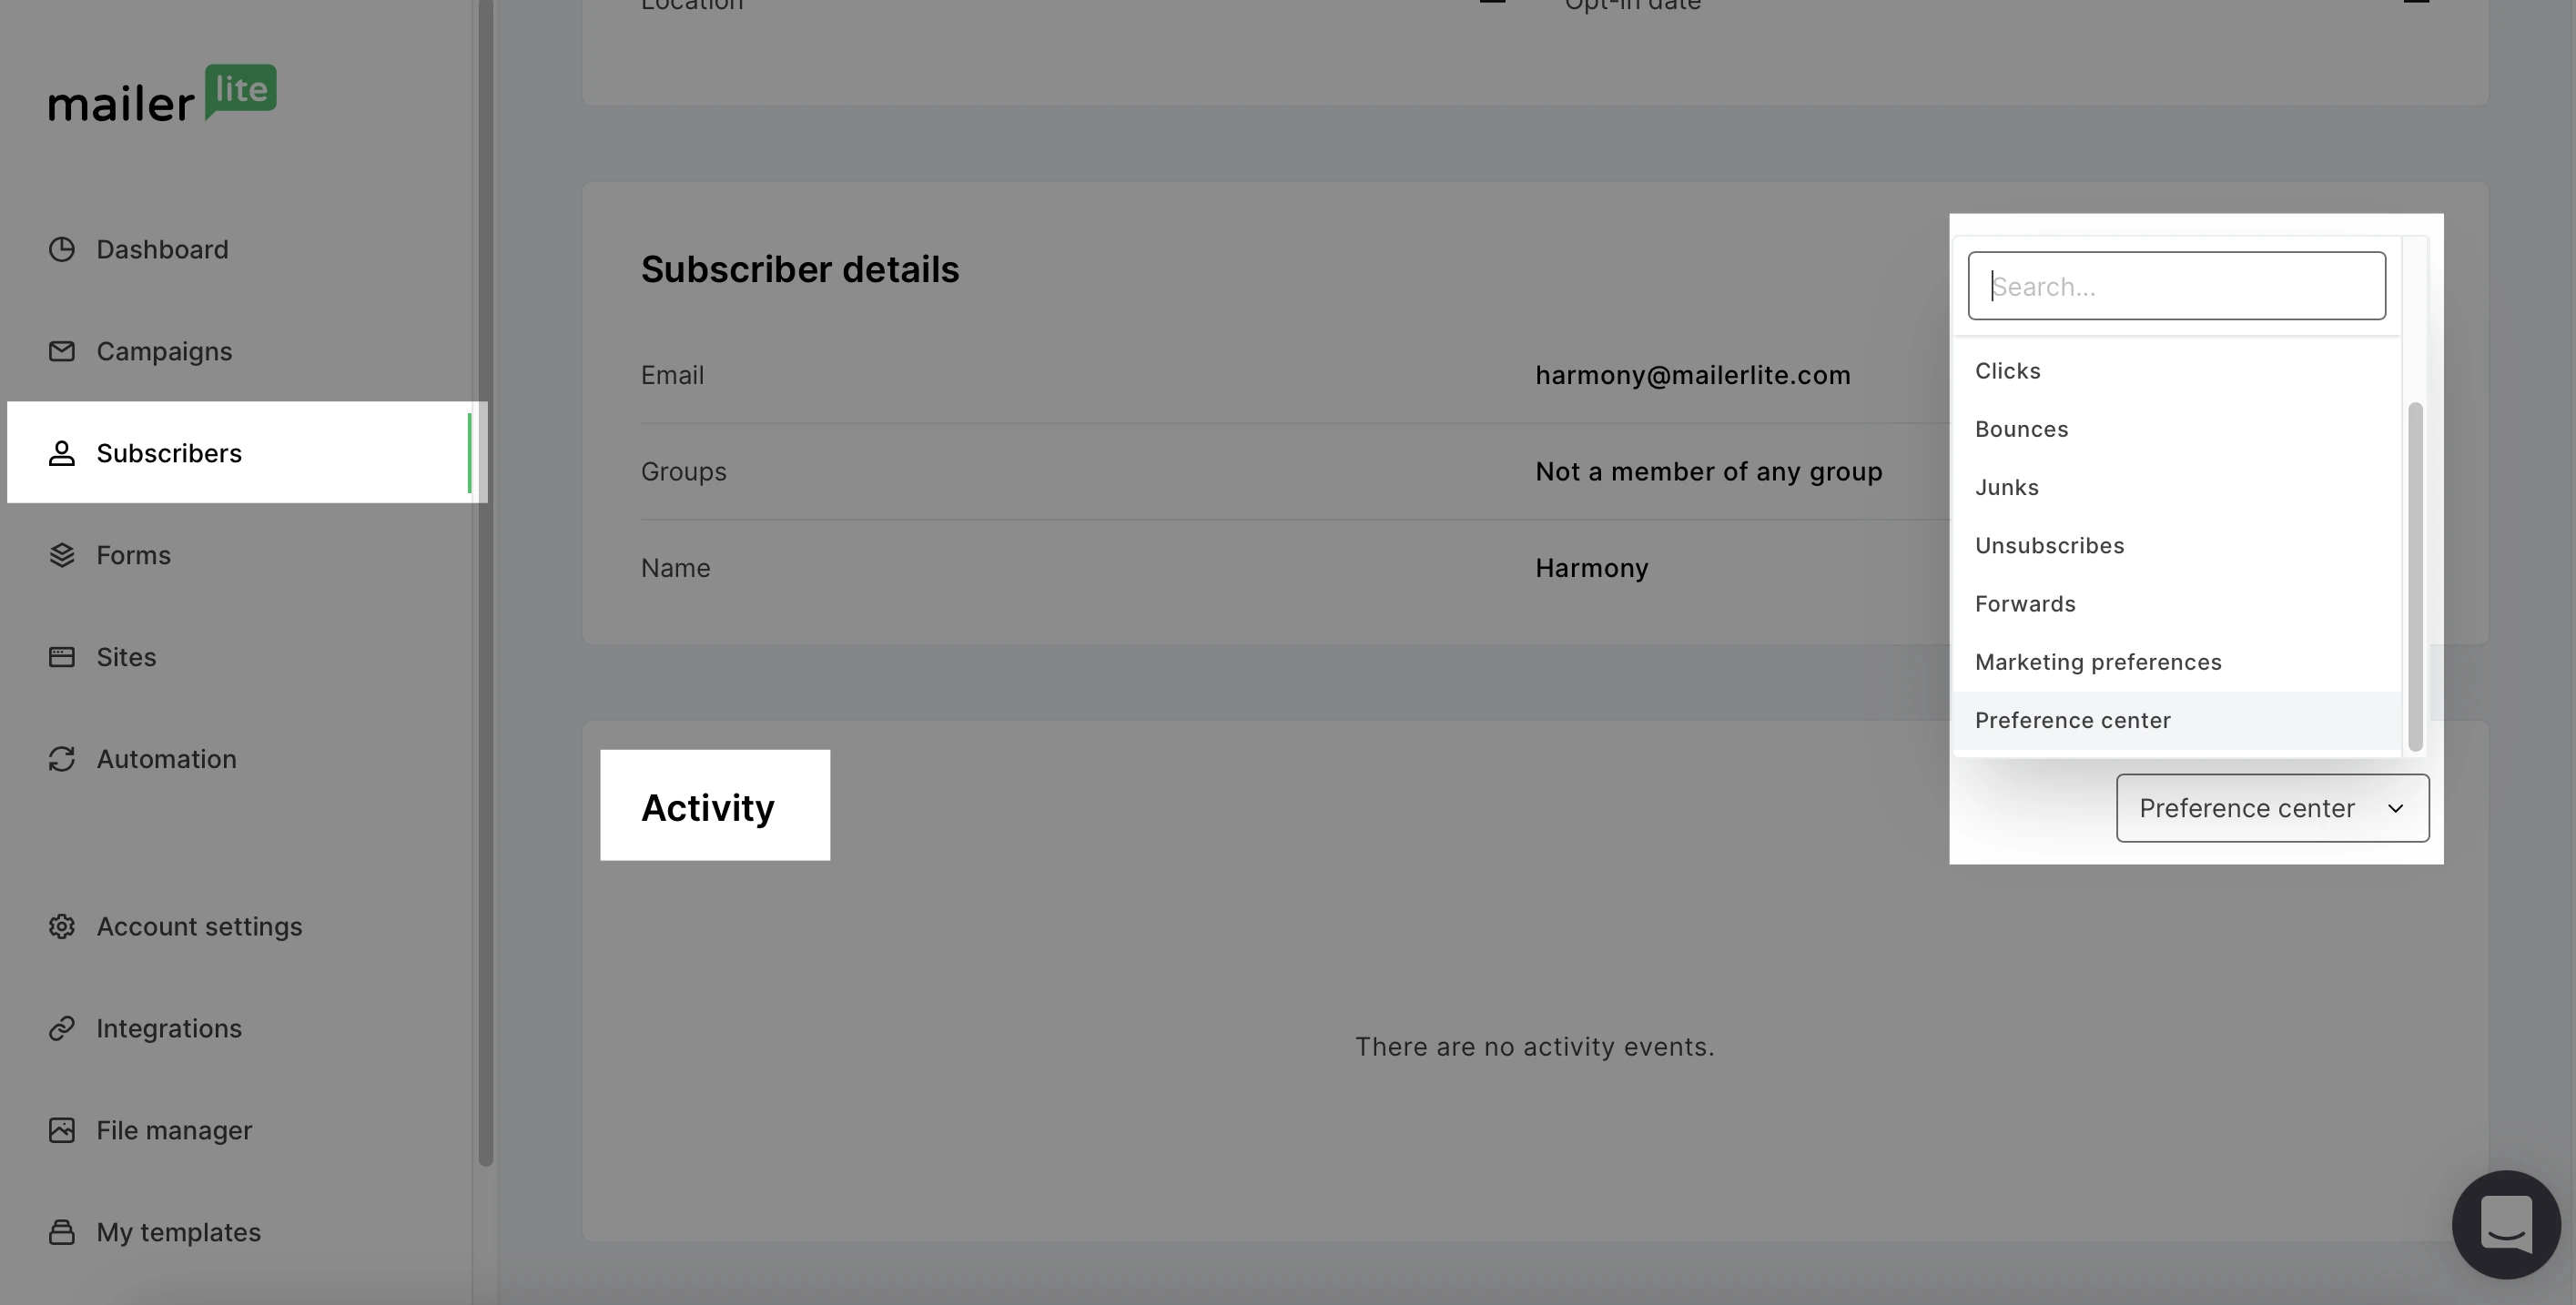
To check updated information from the Subscriber's profile:
Click on the email address of any subscriber to open their profile.
Scroll down to see the Activity section.
To find logs related to the Preference center, choose filter Preference Center from the menu.