Welcome email series example
Some signs are universal. People smile when they’re happy, cross their arms when annoyed, and sign up for email lists when they want to hear from you. Make the most of this by crafting a welcome email series that explains why you rock.
Why send a sequence rather than a single email? Simply because sending multiple emails to new subscribers is a better way to engage them over time. You get more opportunities to provide the information customers need to take the next steps with your business.
In this article, we’ll explore welcome email sequences in detail and explain how to create one for your business.
What types of emails to include in a welcome series?
Here are some of the most common types of emails used in welcome sequences. Just remember there’s no one-size-fits-all approach. The exact messages you send depend on your campaign goals and your target audience.
Welcome email
Welcome emails provide more information about your business or product. Use them to explain the benefits of your service, introduce your brand story, and provide next steps. Consider including a coupon if your welcome series is for an e-commerce store.
Get inspired: Adidas
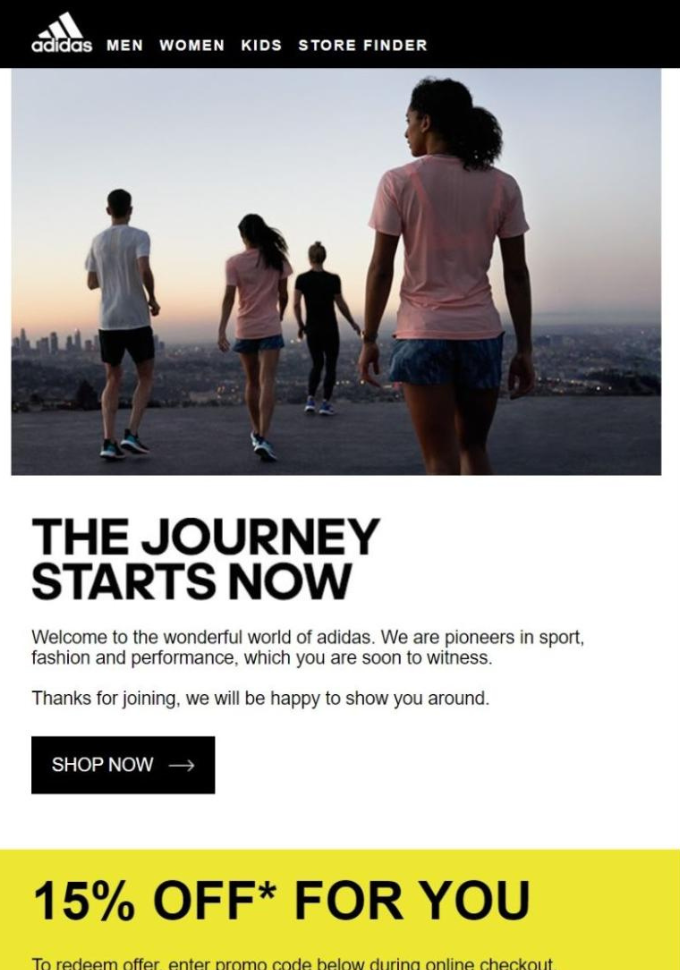
This Adidas email has all the elements of a great welcome email. It introduces the brand, highlights top products, includes shop now links, has a clear email subject line, and gives users a discount coupon.
Discovery email
Use a discovery email to find out what topics the recipient is interested in. Add a link to your preference center so subscribers can choose the types of content they like. This will automatically segment subscribers so you can send them relevant emails.
Get inspired: Bespoke Post
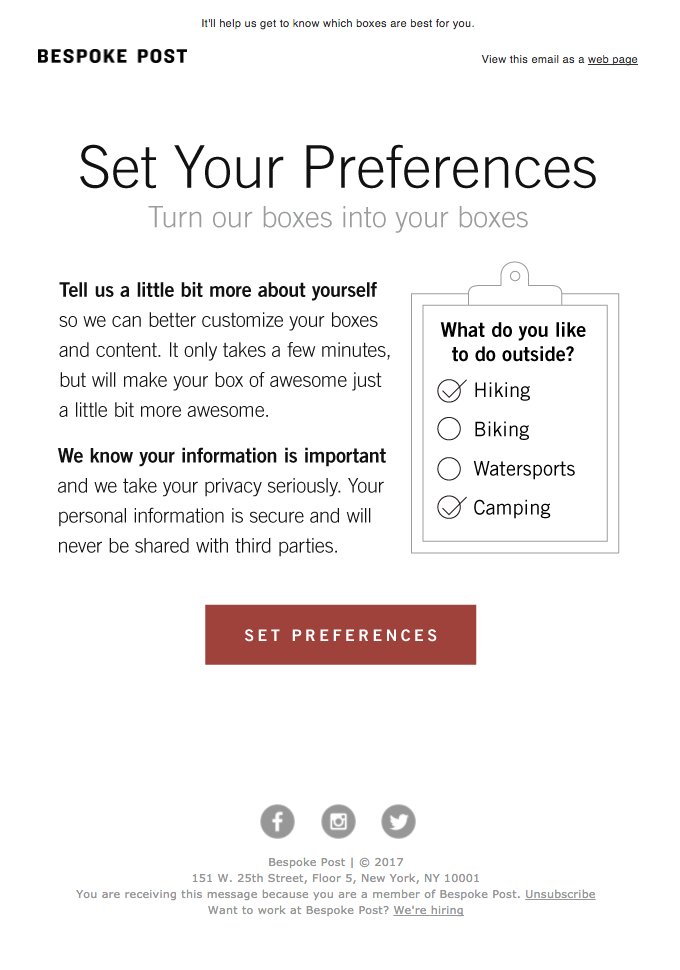
Bespoke Posts’ welcome email includes a link that lets subscribers choose topics they like. This ensures they only receive emails with content that matches their interests.
Next steps email
Next steps emails encourage users to interact with your business. Just choose the actions that deepen the customer relationship. A SaaS tool could include information about product features, while a course provider could encourage the recipient to get involved in a community.
Get inspired: Wordable
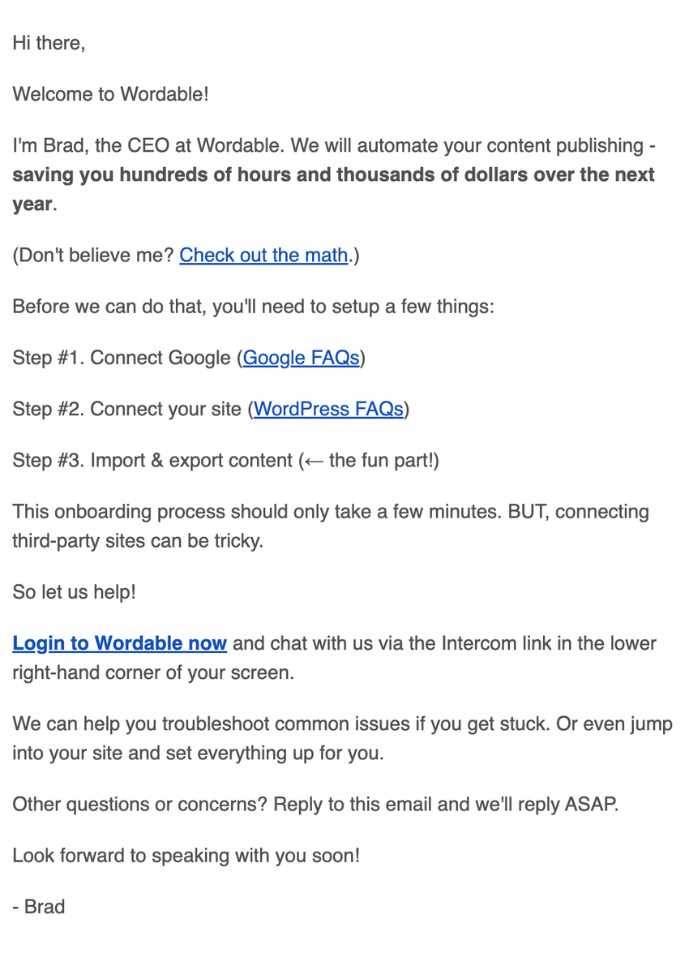
This email from Wordable encourages subscribers to get set up. The message highlights the three steps users need to take to connect their website to the tool.
Coupon or offer email
Send a coupon or offer email to increase your conversion rate. Send one early in the email series while the recipient’s interest is high, and later on to convert people who are still engaging but haven’t yet committed to buy.
Get inspired: Rytr
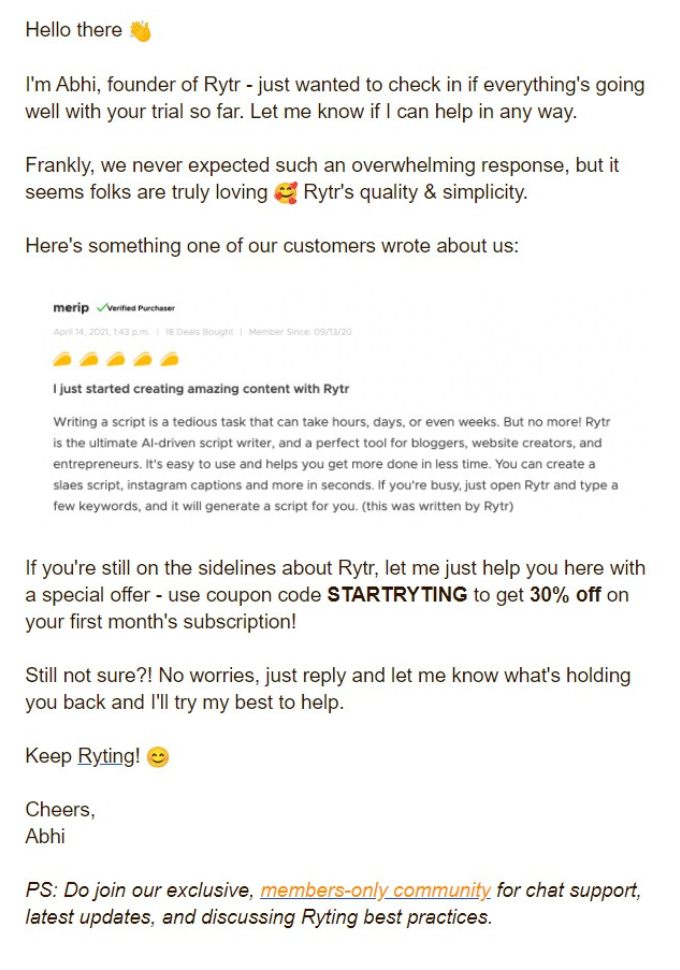
This welcome email from Rytr includes a glowing review that explains the product’s benefits in detail and provides a 30% off coupon code for new email subscribers.
End of trial reminder
Send a reminder if your welcome sequence was part of a free trial or limited-time offer. Let your recipients know the trial is about to end, tell them what to expect going forward, and provide an opportunity to buy before it’s too late.
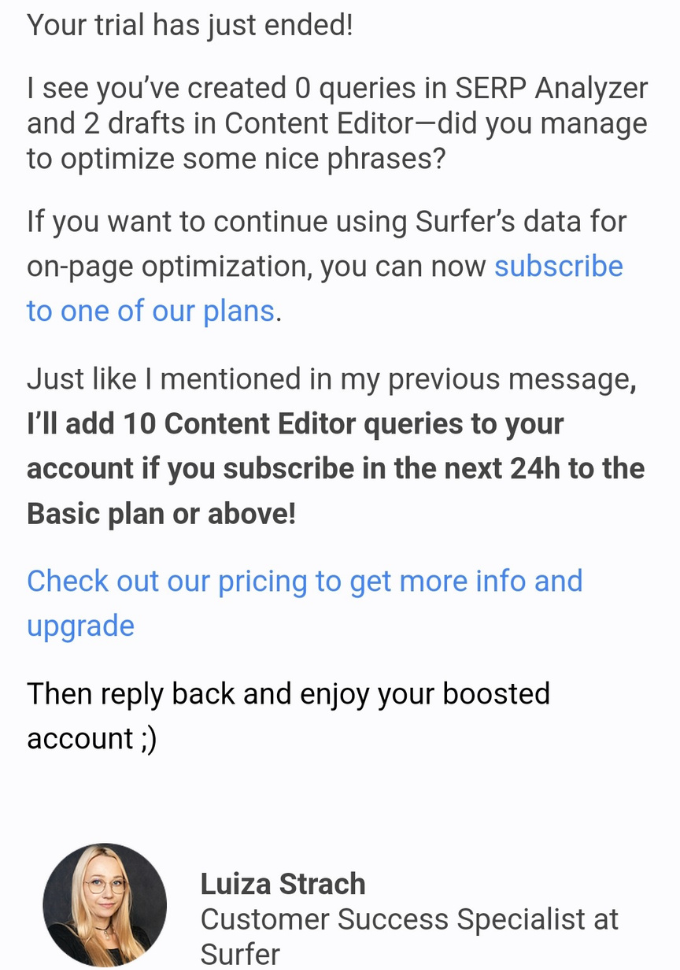
Get inspired: Surfer
This email from Surfer includes information about the recipient's tool usage during the free trial. It reminds customers to upgrade and includes a discount as an extra incentive.
Automated welcome email sequence example
You now know the types of emails to include in your welcome sequence, the only question is: how should you put them together? This section will help by guiding you through the process of creating an automated welcome email workflow using MailerLite.
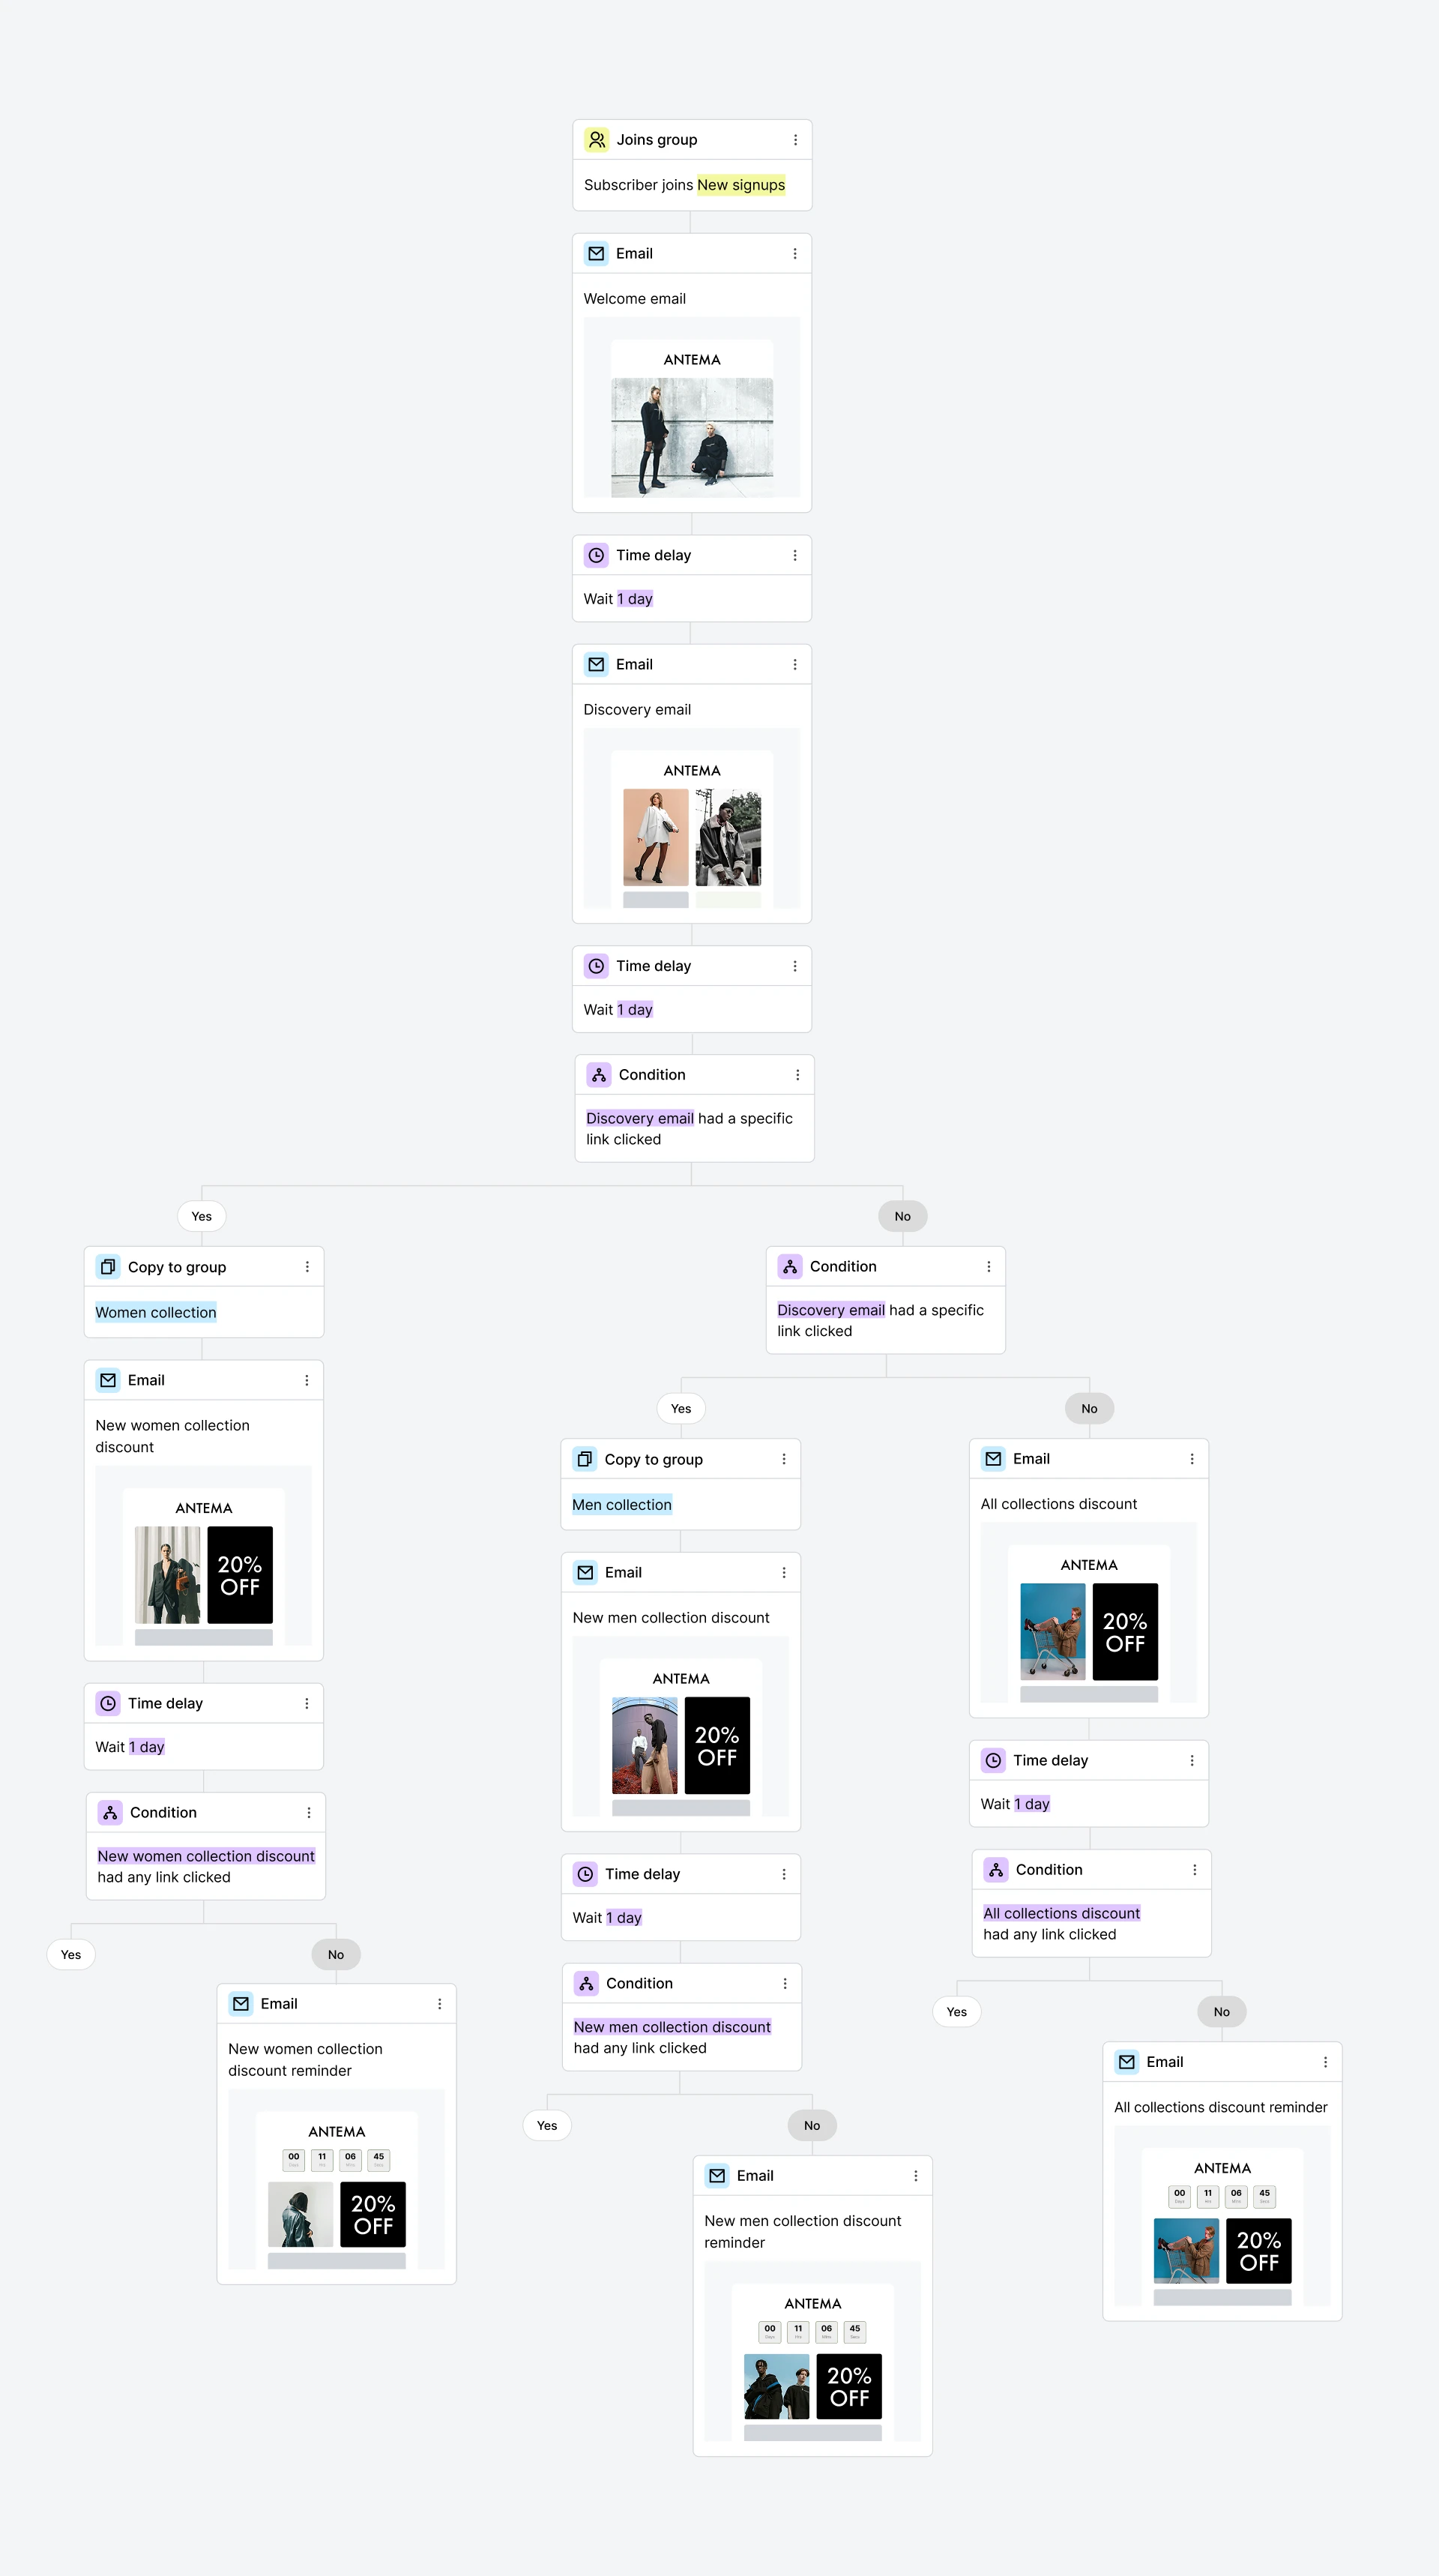
You can see an overview of the workflow in the image below. The aim of the series example is to get people who subscribe to the brand’s newsletter to make a purchase. We’ve explained each step in detail, and you can easily follow along by signing up for a free MailerLite account.
Step one: Set up your email marketing automation
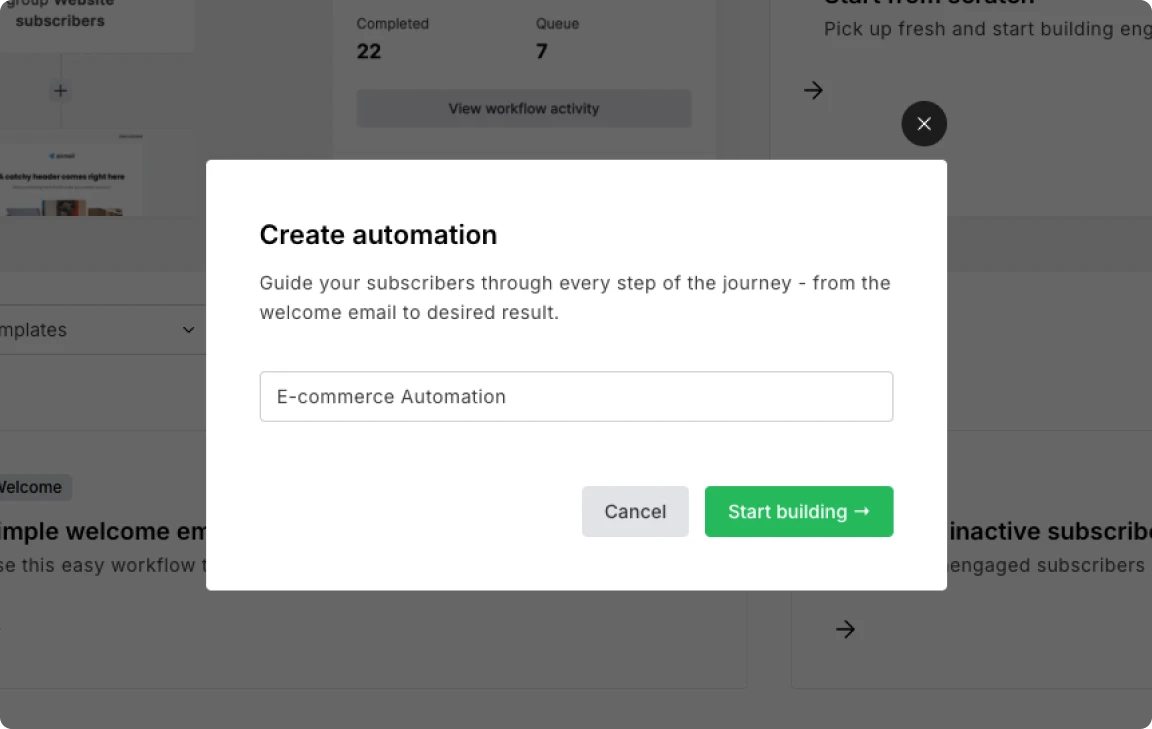
Log in to MailerLite and head to the Automation section of the dashboard. Click New automation, give your welcome series a name and click Start building.
Step two: Set up your workflow trigger
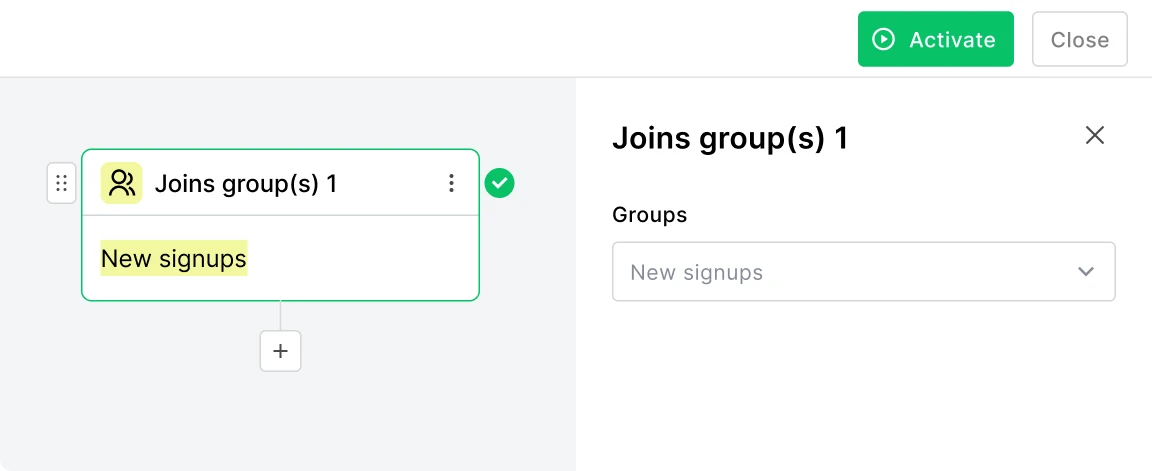
Set up the action that will trigger the automated email workflow. In this case, we’ll choose Joins group(s). We’ll then create a group called New signups and hit Save. Later, you’ll need to create an email sign-up form that adds people to the New Signups group.
Step three: Create a welcome email
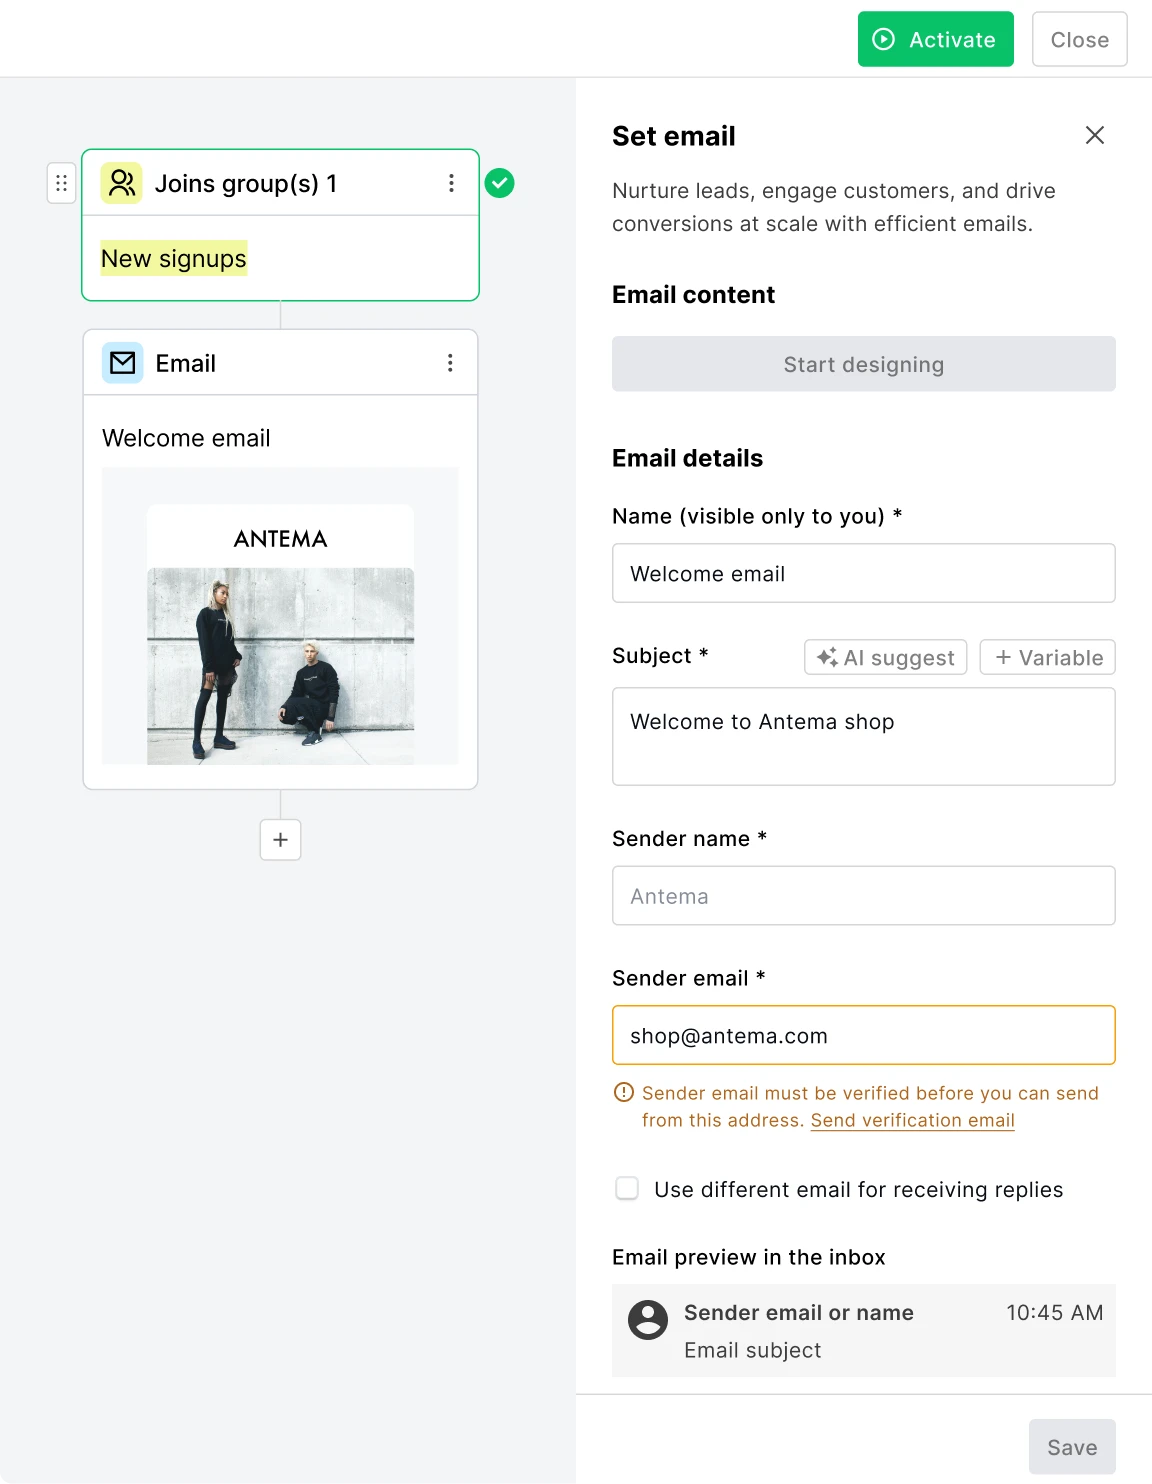
Add your first email to the welcome series by hitting the + icon and selecting Send email from the list of options. This will cause the email to go out as soon as anyone joins the group New signups. Fill in the required information and hit Design email to create your welcome message.
Choose a design from our premade email template library to start quickly while still making a great first impression. Or play with our email editor until you settle on an email design you like. Read this article to get up to speed with the drag-and-drop editor.
Step four: Add your second email
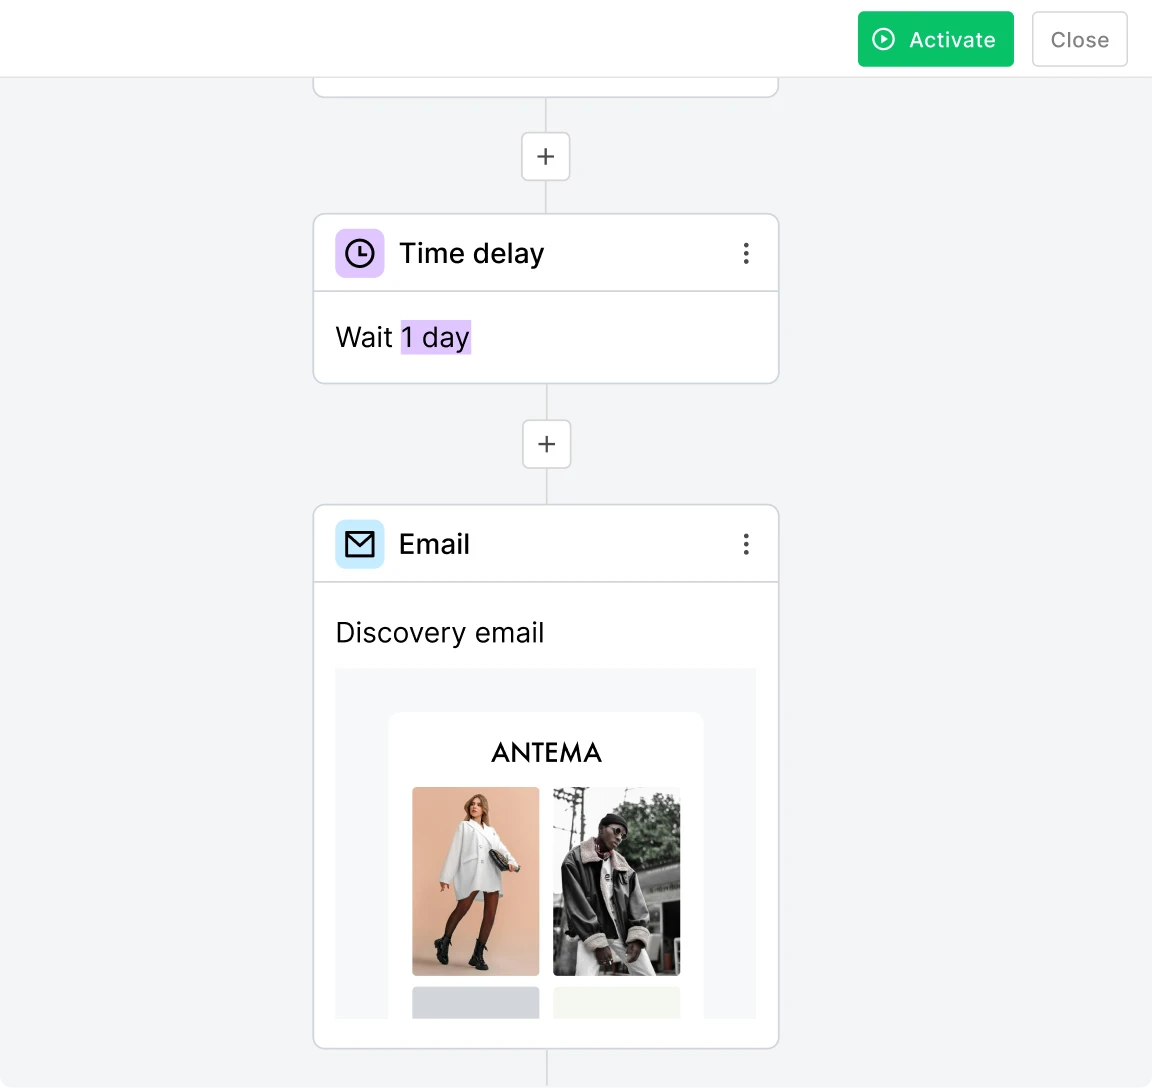
The second email in our workflow is a discovery email that finds out whether the potential customer is interested in men’s or women’s clothing based on the links they click. Once you have this information, you can tailor the rest of the email campaign to these interests.
First, hit the + sign, choose the Delay block, and set the wait time to 1 day. This will cause the second email to go out 24 hours after the first one. Then hit the + sign again and add an email to the workflow.
Design your email and add links to the men’s and women’s collections. You’ll use these links to segment users in the next step.
Finally, add a delay block and set the time to 1 day, so there is a break after the previous email.
Link clicks aren't the only way to group users. You can also use the email survey block and then segment customers based on your answers. Or you can add a link to your preference center and let recipients tell you what they are interested in. Read this article for more on email subscriber segmentation.
Step five: Add a condition
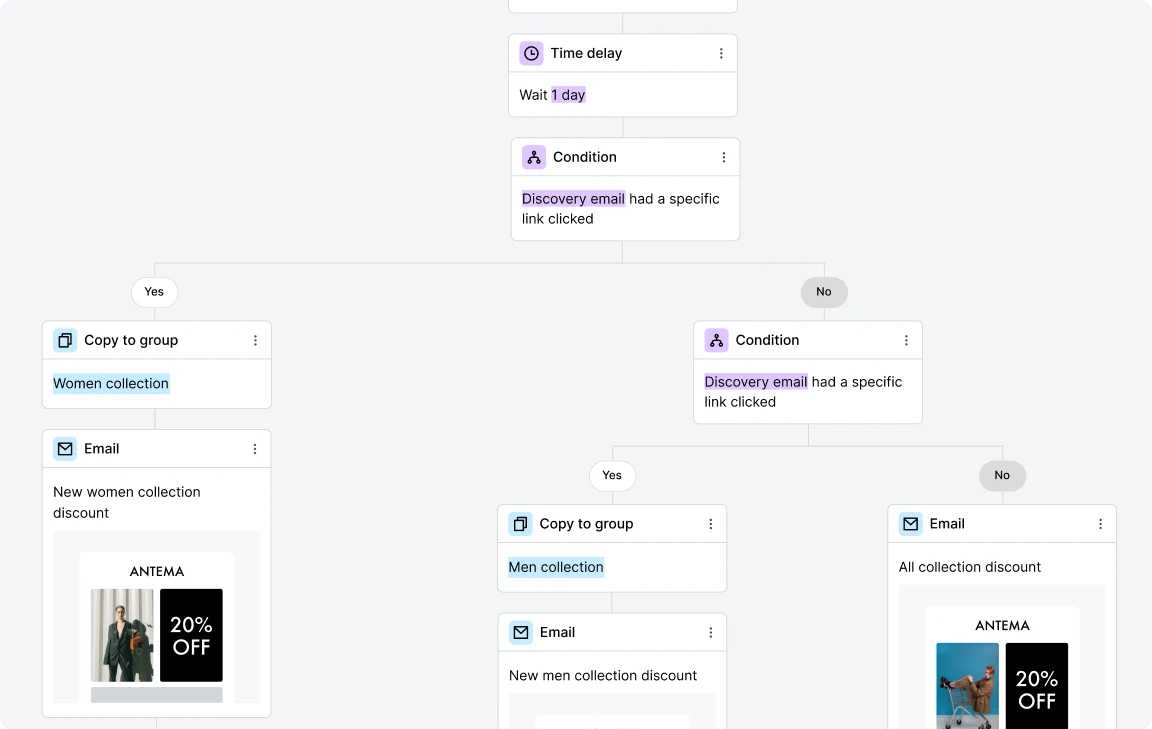
In this step, we will segment email subscribers into three groups: those who clicked on the link to the women’s collection, those who clicked on the link to the men’s collection, and those who didn’t click on a link.
To segment the user base you have to add a condition step. This splits the workflow into two groups based on your chosen condition.
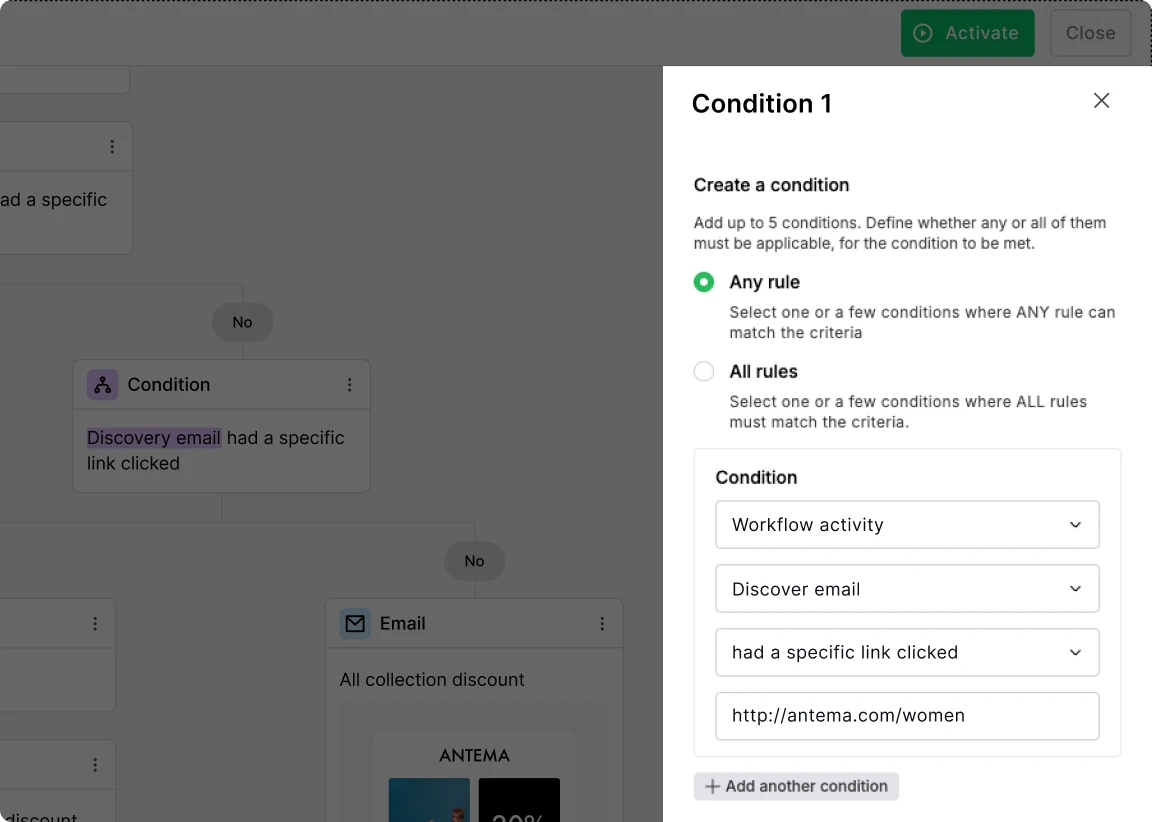
The first condition will split the workflow based on whether people clicked the link to the women’s collection.
Follow these steps to set it up:
Hit the + sign
Add a Condition block
Choose Workflow activity from the drop-down list
Select the Discover email
Choose had a specific link clicked
Choose the link to the women’s clothing collection.
See how it should look in the image below.
Now we need to define what happens if the condition is met. The first thing we’ll do is copy the subscriber into a group for people who are interested in women’s clothes. This allows us to send future emails targeting people in this group.
Here’s how to add someone to a group:
Hit the + sign under Yes in the workflow
From the Action block
Choose Copy to groups
Create a group called Women collection.
Now we can define what happens if the recipient did not click on the link to the women’s collection—which is that they go to another step to assess whether they clicked on the link to the men’s collection.
To do this, hit the + sign under No in the workflow and then repeat the steps above. Just choose the link to the men’s clothing collection and create a new group for people interested in men’s clothes.
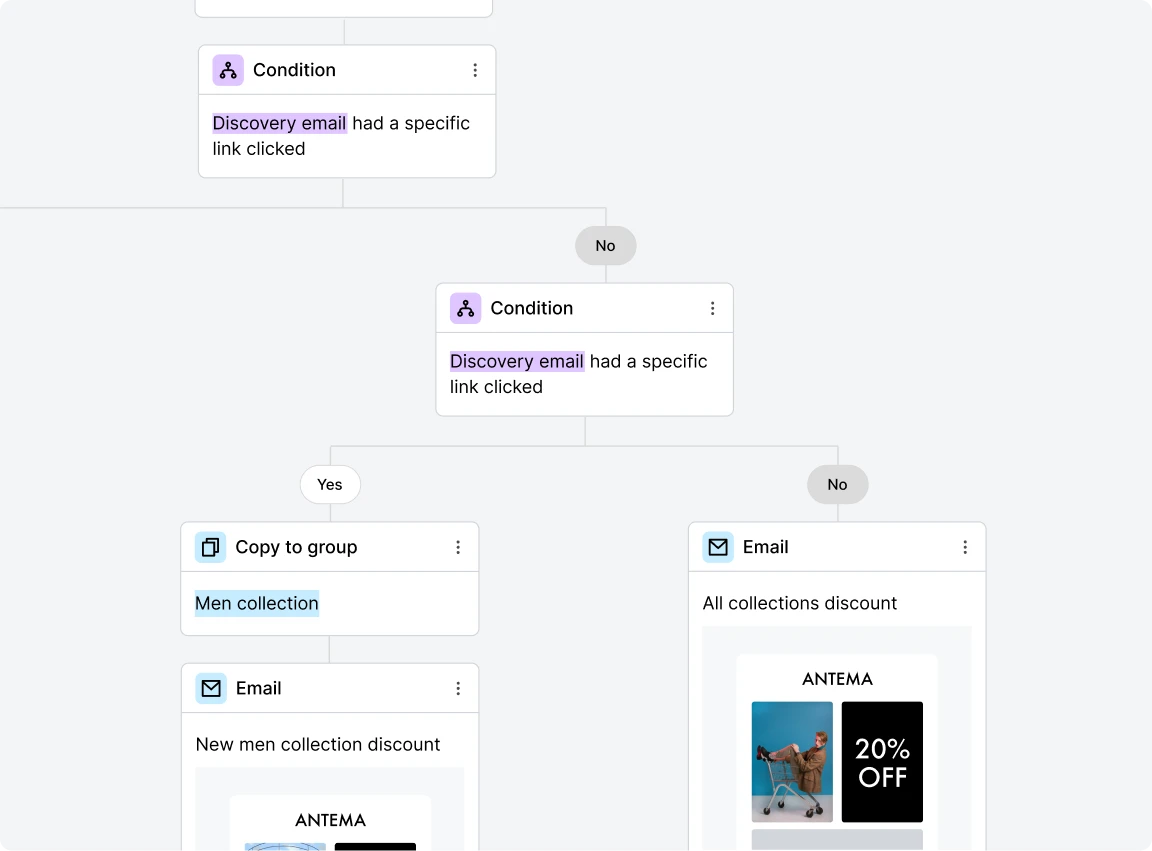
Anyone who didn’t click on either link will end up in the third track. These people will receive information about both the men’s and women’s collections.
Step six: Send relevant content
Now you can create relevant emails for each group—one targeting people who clicked on the link to women’s clothes, one for people who clicked the link to men’s clothes, and one for people who didn’t click on either link.
In our example workflow, the email includes a link to the relevant collection and a time-sensitive discount.
Create the email by hitting the + sign after the workflow split, choosing the Send email block, and then designing your emails.
Step seven: Send a reminder
The final step is to send a reminder email to anyone who didn’t click on a link in the previous email.
This reminder email contains a countdown timer letting people know their chance to use the discount code is running out.
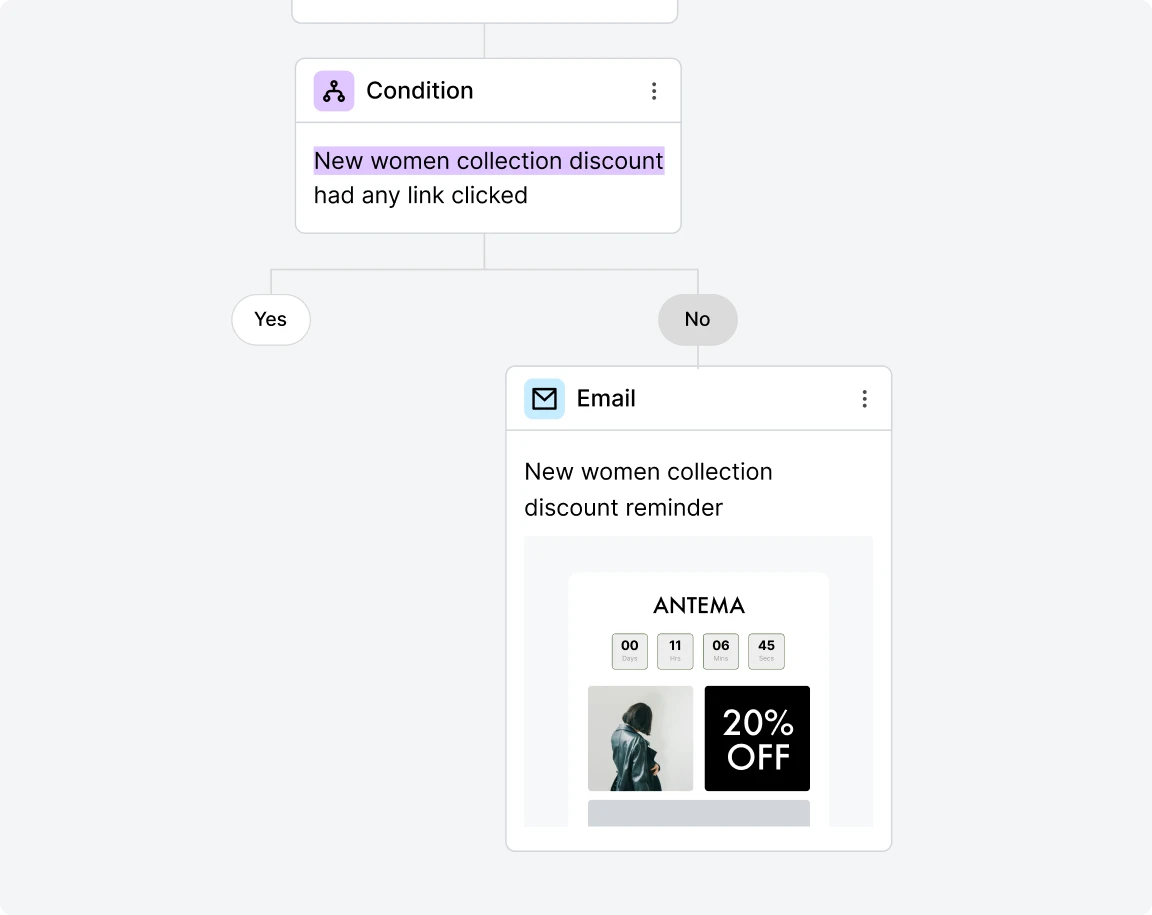
To do this, we need to add a Condition block to each step with the condition Had any link clicked.
Then under No, which is people who didn’t click on any link in the email, hit the + sign, choose the Send email block, and then create an email promoting the collection with a countdown timer.
Your welcome email sequence is just the start 🚀
Your welcome series emails are when you introduce your product or blog to a new customer. But it’s just the start. Don’t stop your email marketing efforts when the series ends.
Instead, continue to send regular emails to build your relationship with the reader. Do this well, and you’ll get many more opportunities to convert them into customers.
Convert more subscribers
Our no-code workflow builder makes it easy for anyone to create an effective email welcome series. Send up to 12,000 emails for free every month.
