Net Promoter Score survey email automation example

You want your customers to enjoy interacting with your brand, but does the experience you provide actually result in this feeling? The only way to find out is to ask! Our in-email Net Promoter Score survey is an easy way to quickly discover how your existing subscribers feel about your company.
Net Promoter Score measures customer loyalty by asking subscribers how likely they are to recommend your brand to friends or colleagues. The scale goes from 1-10. People scoring up to 6 are detractors, meaning unhappy customers. People who give a rating of 7 or 8 are passives and feel indifferent to your brand. The people giving out a 9 or 10 are called promoters and will cheer for your business!
The NPS score ranges from -100 to +100. Your overall NPS is calculated by subtracting the percentage of respondents who are detractors from the percentage who are promoters. Tracking the score over time allows you to see how the changes you make in your business impact the customer experience.
Create an automated NPS survey for free
Sign up for MailerLite to create an NPS survey automation. Learn how your customers feel about your business and use this insight to create better experiences.
About this Net Promoter Score automation example
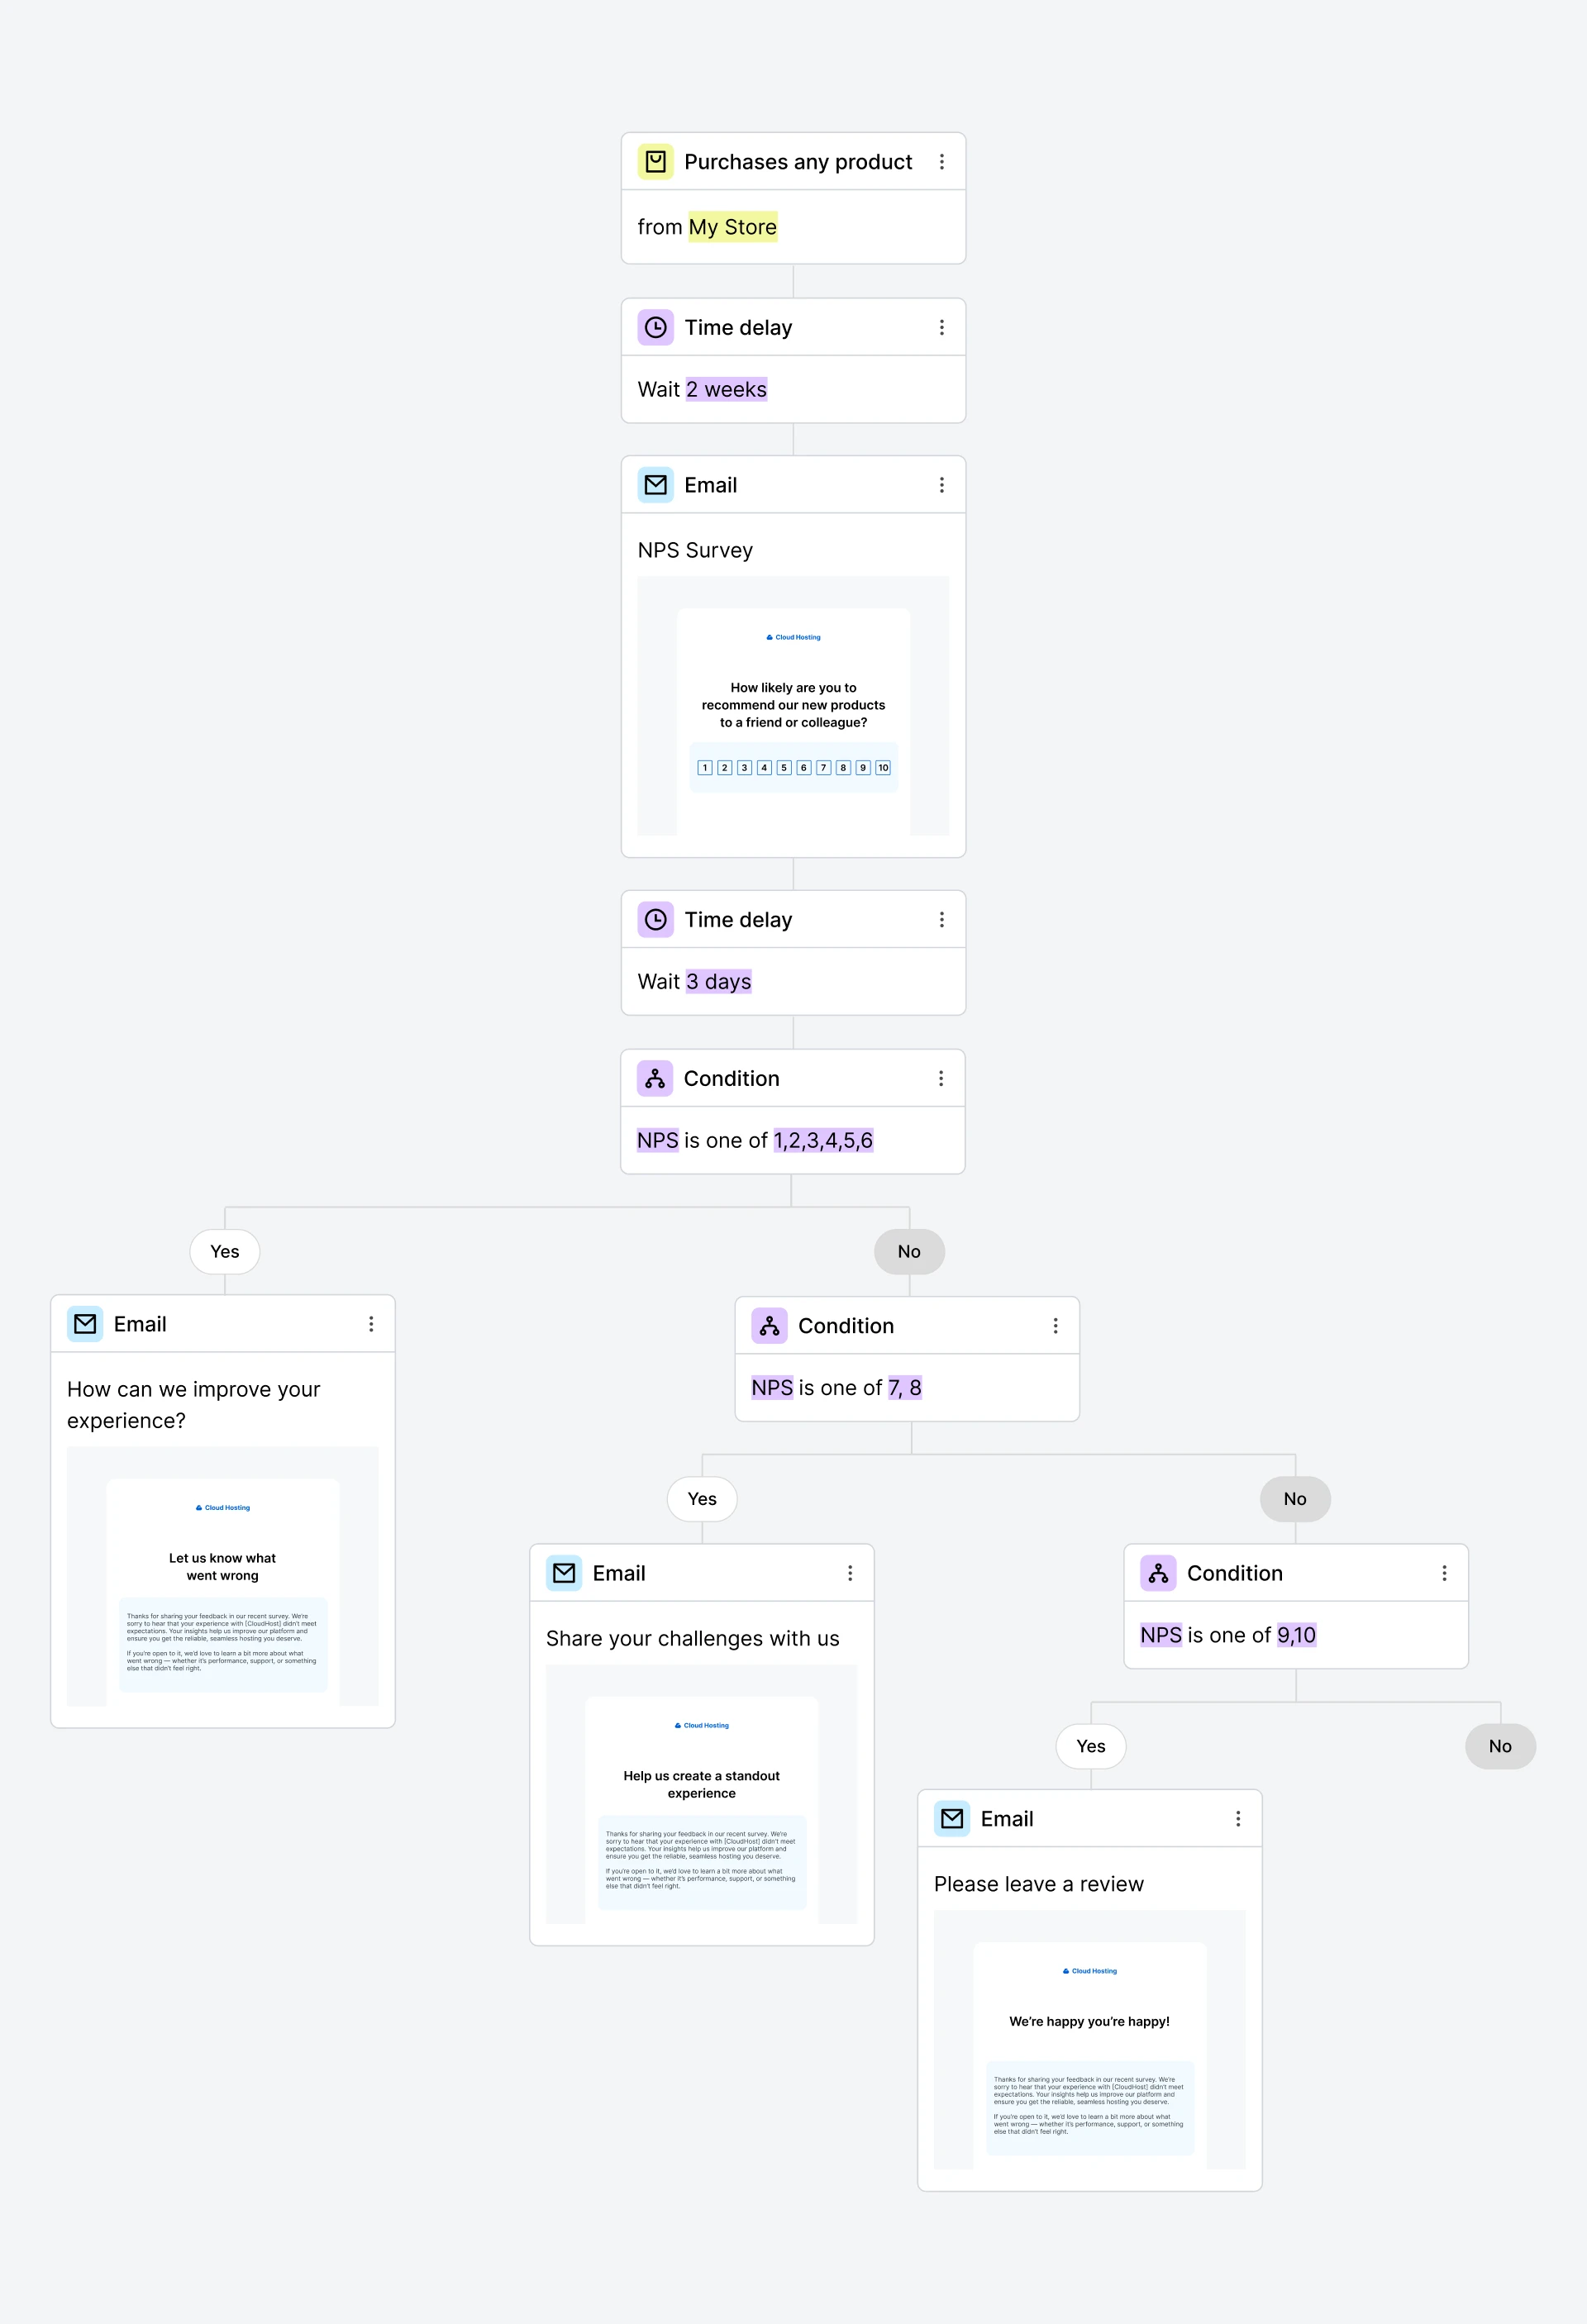
The net promoter score automation example above starts with a trigger that automatically sends the NPS email. When the subscriber completes the survey, a field in their profile is updated with their answer.
The automation uses a delay step to give subscribers time to complete the survey. It then checks the subscriber’s profile field to see how they answered, and sends a relevant email depending on whether they are a promoter, passive, or detractor.
In our example, we use the following emails:
Promoters receive a follow-up email asking them to leave an online review
Passives are encouraged to share their email marketing challenges
Detractors receive an email asking why they aren’t happy and how we can improve the experience
The instructions below explain exactly how you can build this automation with MailerLite.
How do I build this NPS workflow?
Step 1: Set the trigger
1. Head to the Automation section of your MailerLite dashboard, click New automation, choose Start from scratch, then give your automation a name.
2. Choose a trigger that will start the automation. In this example, we used the e-commerce trigger Buys any product.
3. Add the Delay block to define when you send the survey to the subscriber. Consider how long it will take for the person to receive the product and get value from it. We decided to send the email after 2 weeks.
Step 2: Add the NPS survey email
4. Add an email to the automation after the delay block. Use your own template, start from scratch, or choose our pre-built NPS survey email templates.
5. Add the survey block to your email if you didn’t use our template. You can find it in the Special menu of our drag & drop editor.
6. Click Add a question template in the survey’s edit menu. Choose the option for Net Promoter Score. Click the question’s edit symbol to customize the survey’s text and design.
Step 3: Define the NPS survey rules
7. Now we’ll create the rules that add the recipient’s survey answer to a custom field in their profile. Later, we’ll use this field to automatically send a relevant follow-up email.
8. Open the Rules tab in the survey block, choose your NPS survey question, the condition Is answered, and the option for Update a custom field with the answer. Create a new field called NPS and hit Save. This will save the survey taker’s answer in their profile.
9. Design the rest of your email and then hit Done editing.
Step 4: Split the workflow based on NPS answers
10. Now that your survey is set up, we can add conditions that tailor the rest of the workflow depending on the customer's answer.
11. Add a Delay block to the workflow to give recipients time to complete the survey. In our example, we chose to wait for 3 days.
12. First, let's create a branch for detractors. Add a Condition block, choose the condition Custom fields, NPS, is one of, and then write 1, 2, 3, 4, 5, 6—all the survey answers that show the person is a detractor.
13. Under the green check pathway, add the email that you will send to your detractors.
14. Now create the automation for passives. Under the red x pathway add another Condition block. Add the email as in step 12, but use the answers 7 and 8.
15. Add the email you will send to passives under the green check pathway.
16. Finally, create the automation for promoters under the red x pathway. Repeat the steps in step 12 but use the answers 9 and 10. Create the email you want to send to promoters under the green pathway.
17. Congratulations, your workflow is now finished! Set it live to start collecting customer responses whenever someone triggers the workflow.