Get more responses to your event with a newsletter RSVP button
 Ernesta, Legal Team Lead & Bob, SRE Lead
An email RSVP button lets people respond to your invitation with a single click. But the benefits go way beyond event signup streamlining. They also enable you to create a more effective event marketing strategy.
When an email recipient clicks the RSVP button, they’re added to a subscriber group for event attendees.
This lets you make high-impact, targeted communications such as:
Event confirmation emails
Event reminder sequences
Targeted email marketing campaigns
Personalized follow-up and future event promotion
Dynamic content insertion in your regular newsletters
Read on for step-by-step instructions on how to add an RSVP button to an email. Plus, we’ve got a rundown of the event email marketing strategies that the button enables.
How to add an RSVP button to an email
MailerLite has a premade event block that includes an RSVP button. Adding this to your email just involves choosing the relevant block, dragging it into place and then adjusting the settings.
Here’s how to do it:
1. Create a campaign and open the Drag & drop editor.
2. Search for “event” in the sidebar. This will show you our 2 event blocks.
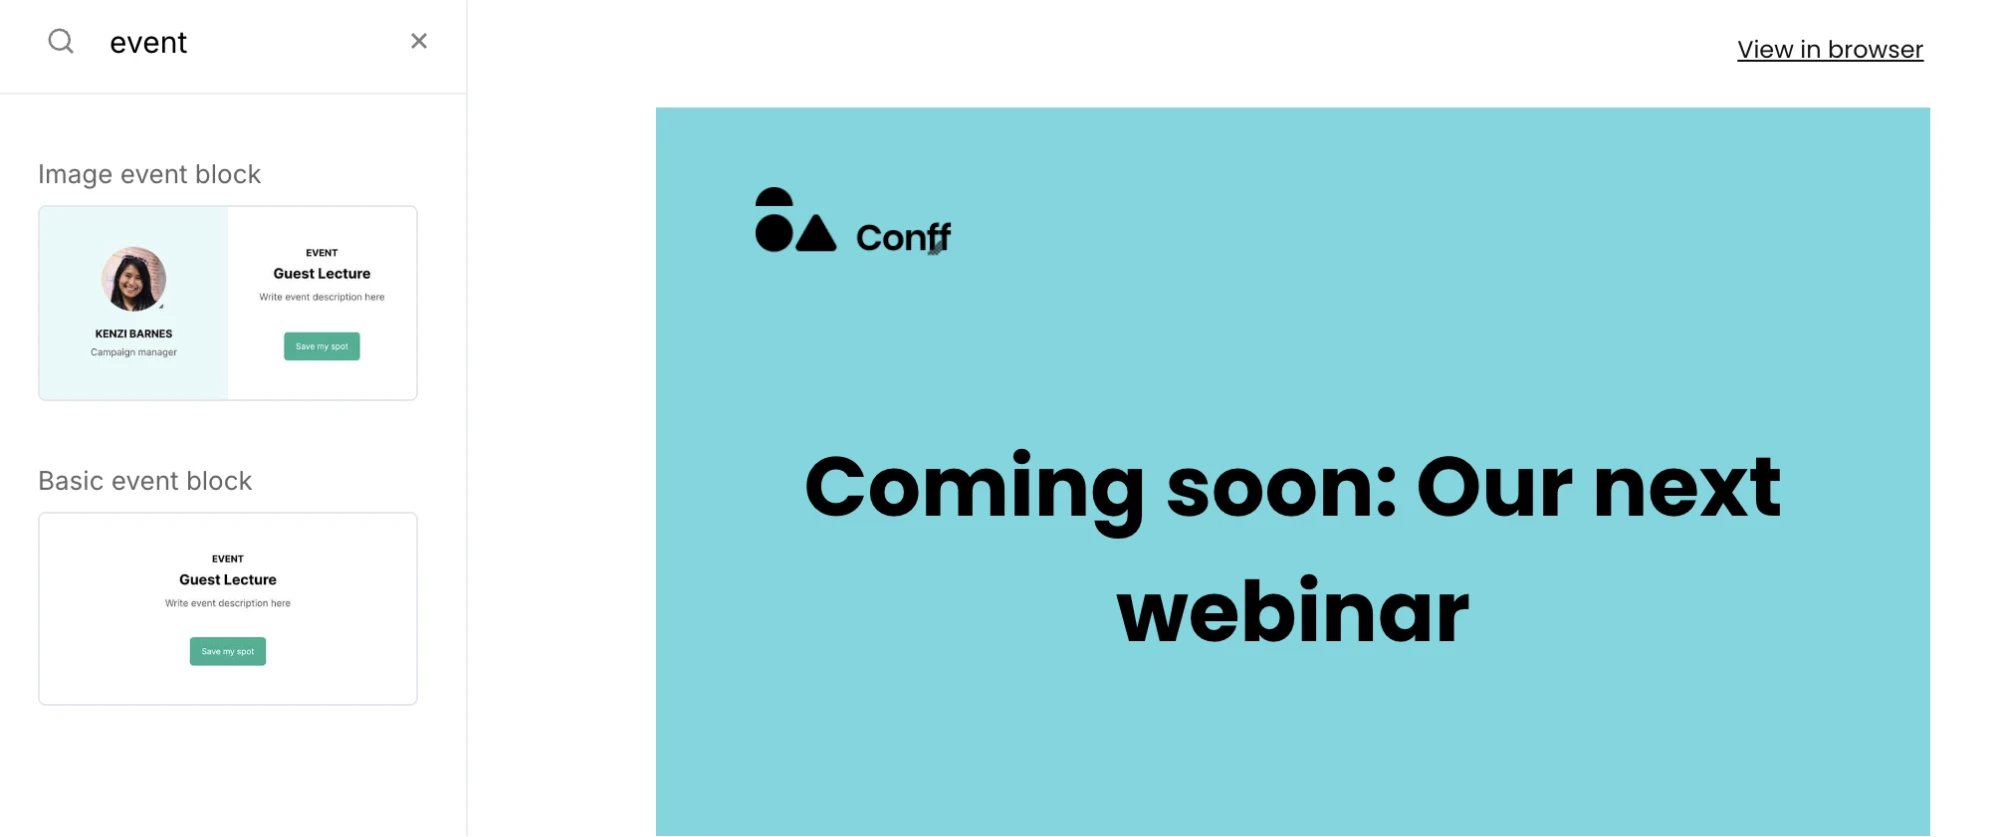
3. Drag your chosen block into the email content.
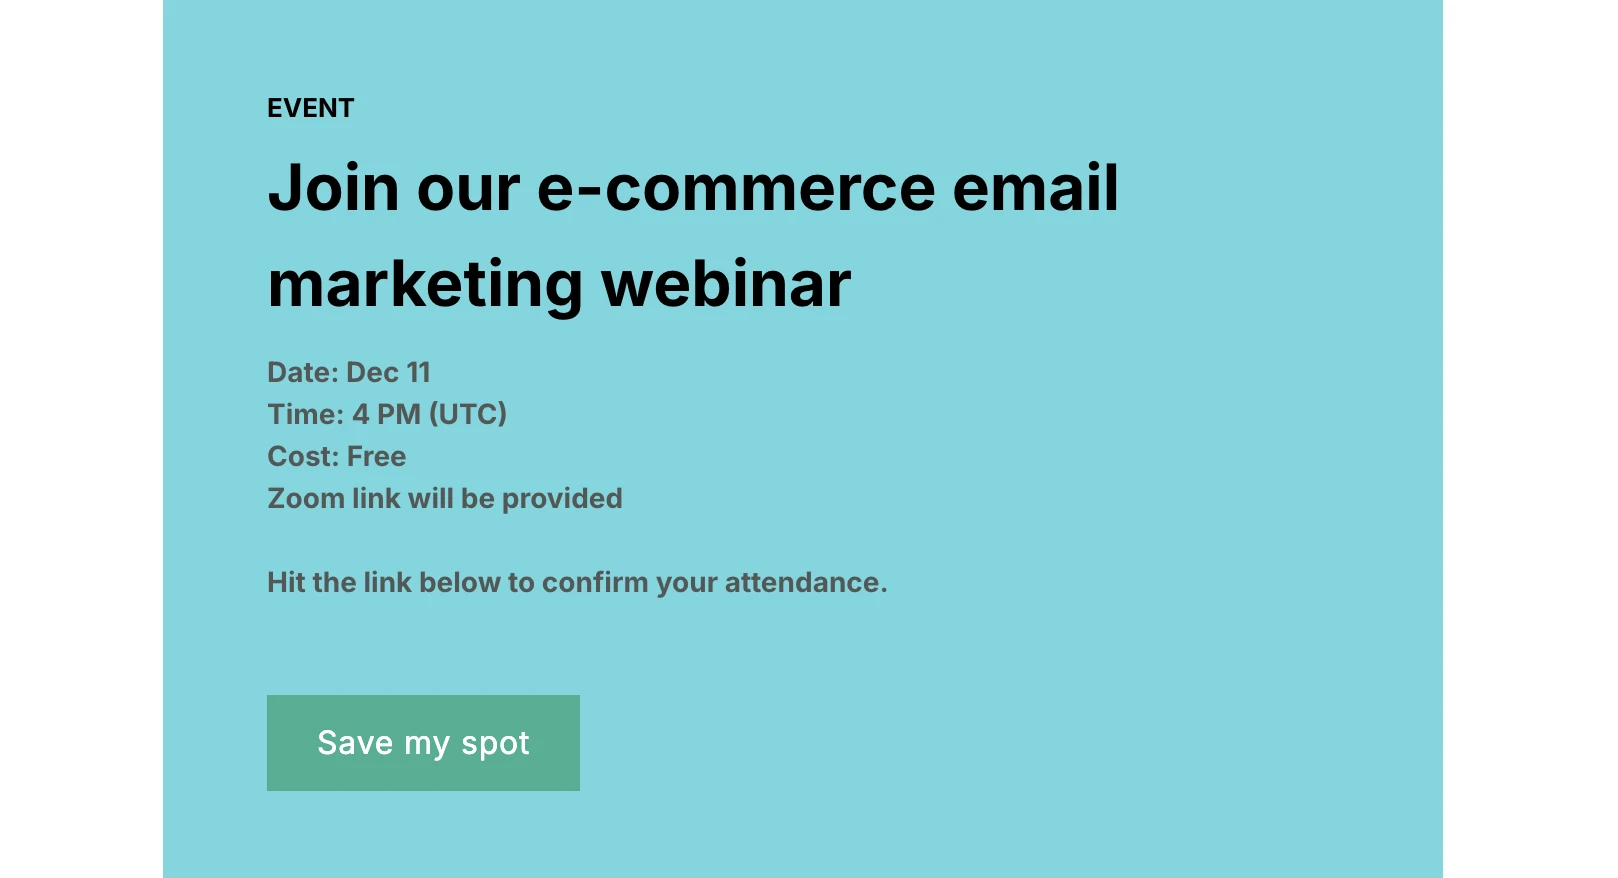
4. Edit the content by adding event information and changing the design to fit your brand. We have options you can use to add the date and time or you can add the content manually. You can also customize the text on the RSVP button.
5. Now to set up the one-click RSVP. First, check that the Show RSVP button is toggled on. This will bring up all the relevant RSVP options.
6. The Button action setting defines what happens when someone clicks the button. Choose to either show a success message within the email or redirect the subscriber to a different page.
7. If you choose to show a success message, click the Success message tab under the Form view settings to add the content people will see when they click the button. Use this to confirm they have signed up for your event and provide any essential details. For example, ask them to check their inbox for the confirmation email.

8. If you choose to redirect people who click on the button to a landing page, add the link to the event page under the Redirect to settings. Don’t have a landing page? Then use our editor to create one! Our landing page generator can help you create a page in minutes.
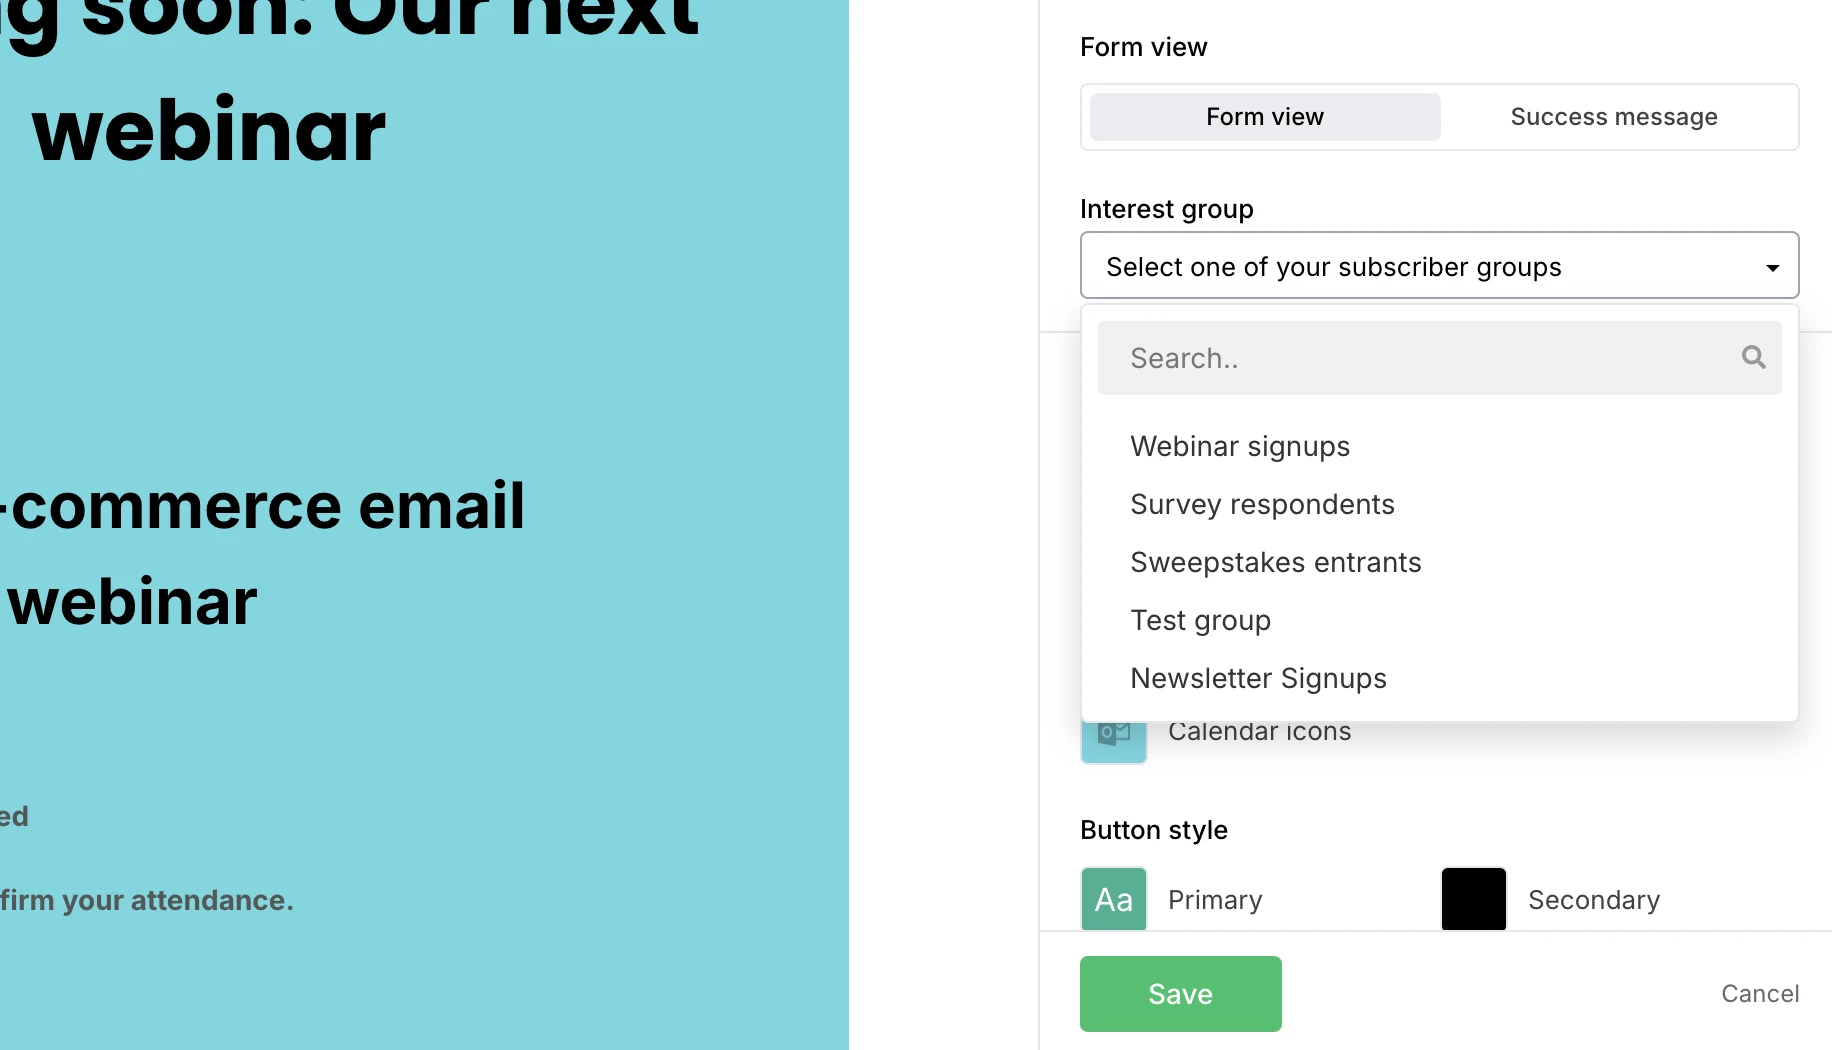
9. Finally, choose which subscriber group you will add event attendees to. We recommend creating a group just for your event so you know who has said they will attend. You can create a group in the Groups tab in the Subscriber section of your dashboard.
The RSVP button won't work when previewing the email in the editor preview or when sending a test email.
If you want to test the block, consider sending the campaign to yourself, checking it works as expected, then duplicating the sent campaign and sending it to your audience.
We built the RSVP buttons to make it as easy as possible for people to respond to your invites. But you can easily hack the button to work for any use case where you need to add someone to a group when they hit a button.
An event-related example is letting people click to register interest in an event. You can then send these people information in the lead-up to ticket sales opening.
You could also use the button to let people enter a giveaway or competition, register interest in an upcoming product or collection, receive more information about a product or offer, or automatically deliver a content resource.
Discover more useful MailerLite hacks in this article.
7 ways to promote your event with email
Now you have all the information you need to add your RSVP block to your email. But, don’t stop there. Here’s how to get more responses and boost attendance at your event with email marketing.
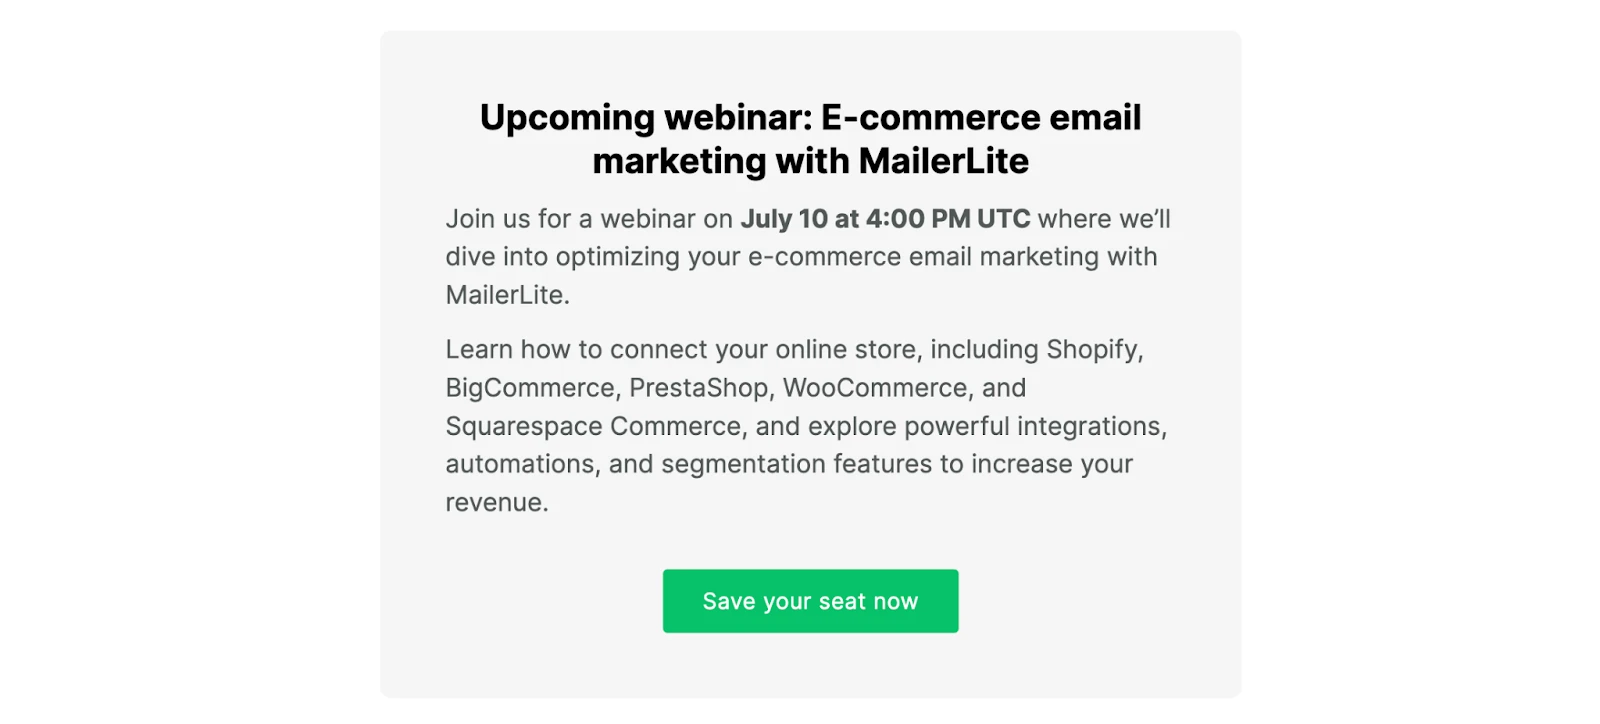
1. Create your event announcement email
Create an email to announce your event. Include the essential details that people need to know, plus interesting snippets to attract their attention.
Consider including:
The event’s time, date and timezone
The venue or hosting platform
An introduction to the topic
Information about speakers
Creating a dedicated email to announce your event can be extremely effective. MailerLite customer Rachael Higgins from Because of Marketing promoted her first-ever event with an email and got over 800 clicks to the event landing page from a single send.
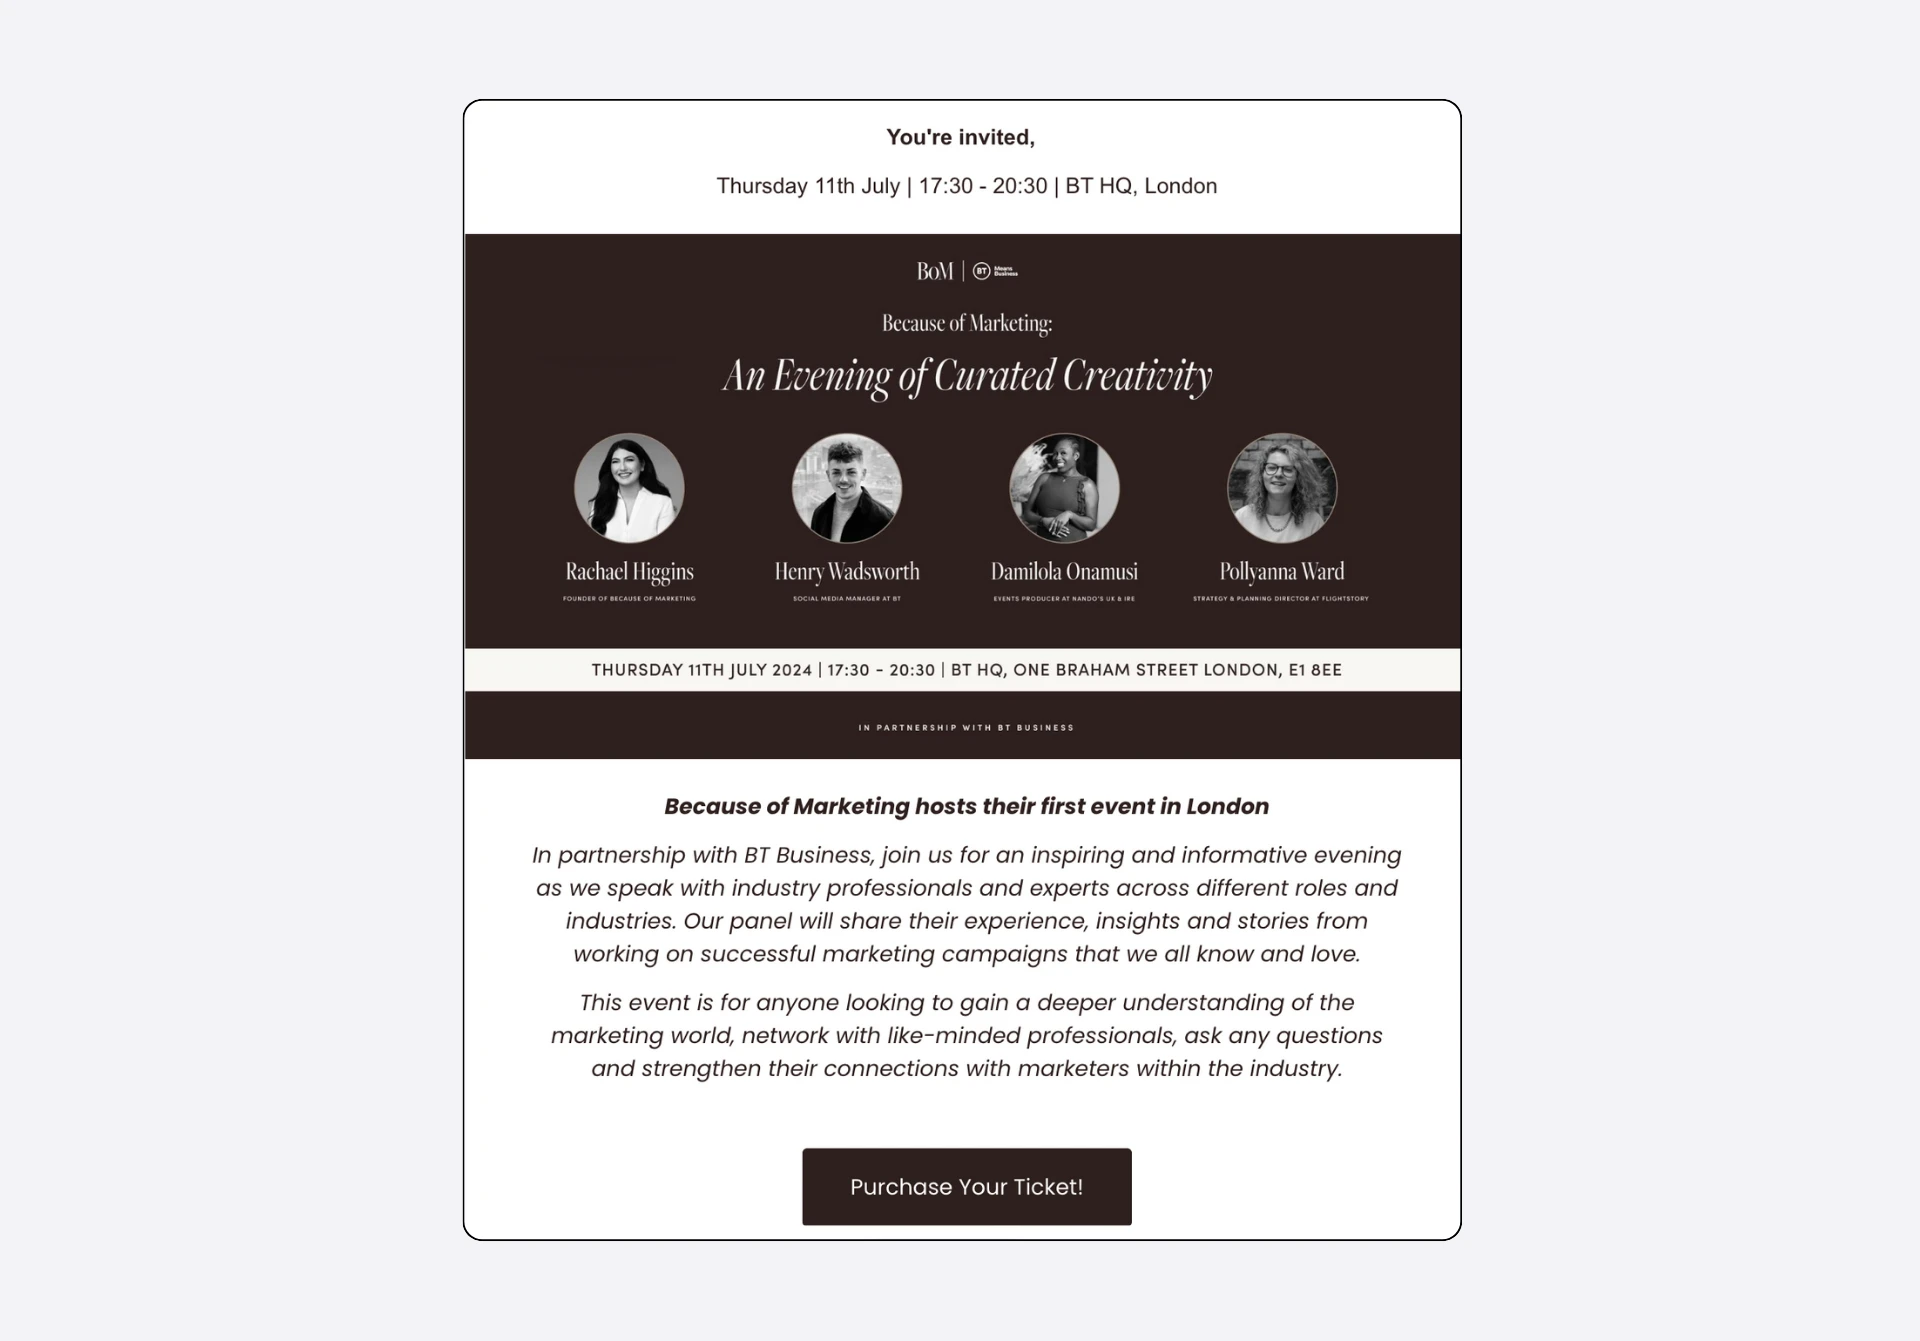
“I included the time, place, and information about the speakers. Within the first hour after sending, we had sold 20 tickets just through that email.”
2. Add RSVP blocks to multiple emails
It’s unlikely that everyone on your list will open your event announcement email. Give people more chances to respond by including the block in multiple emails.
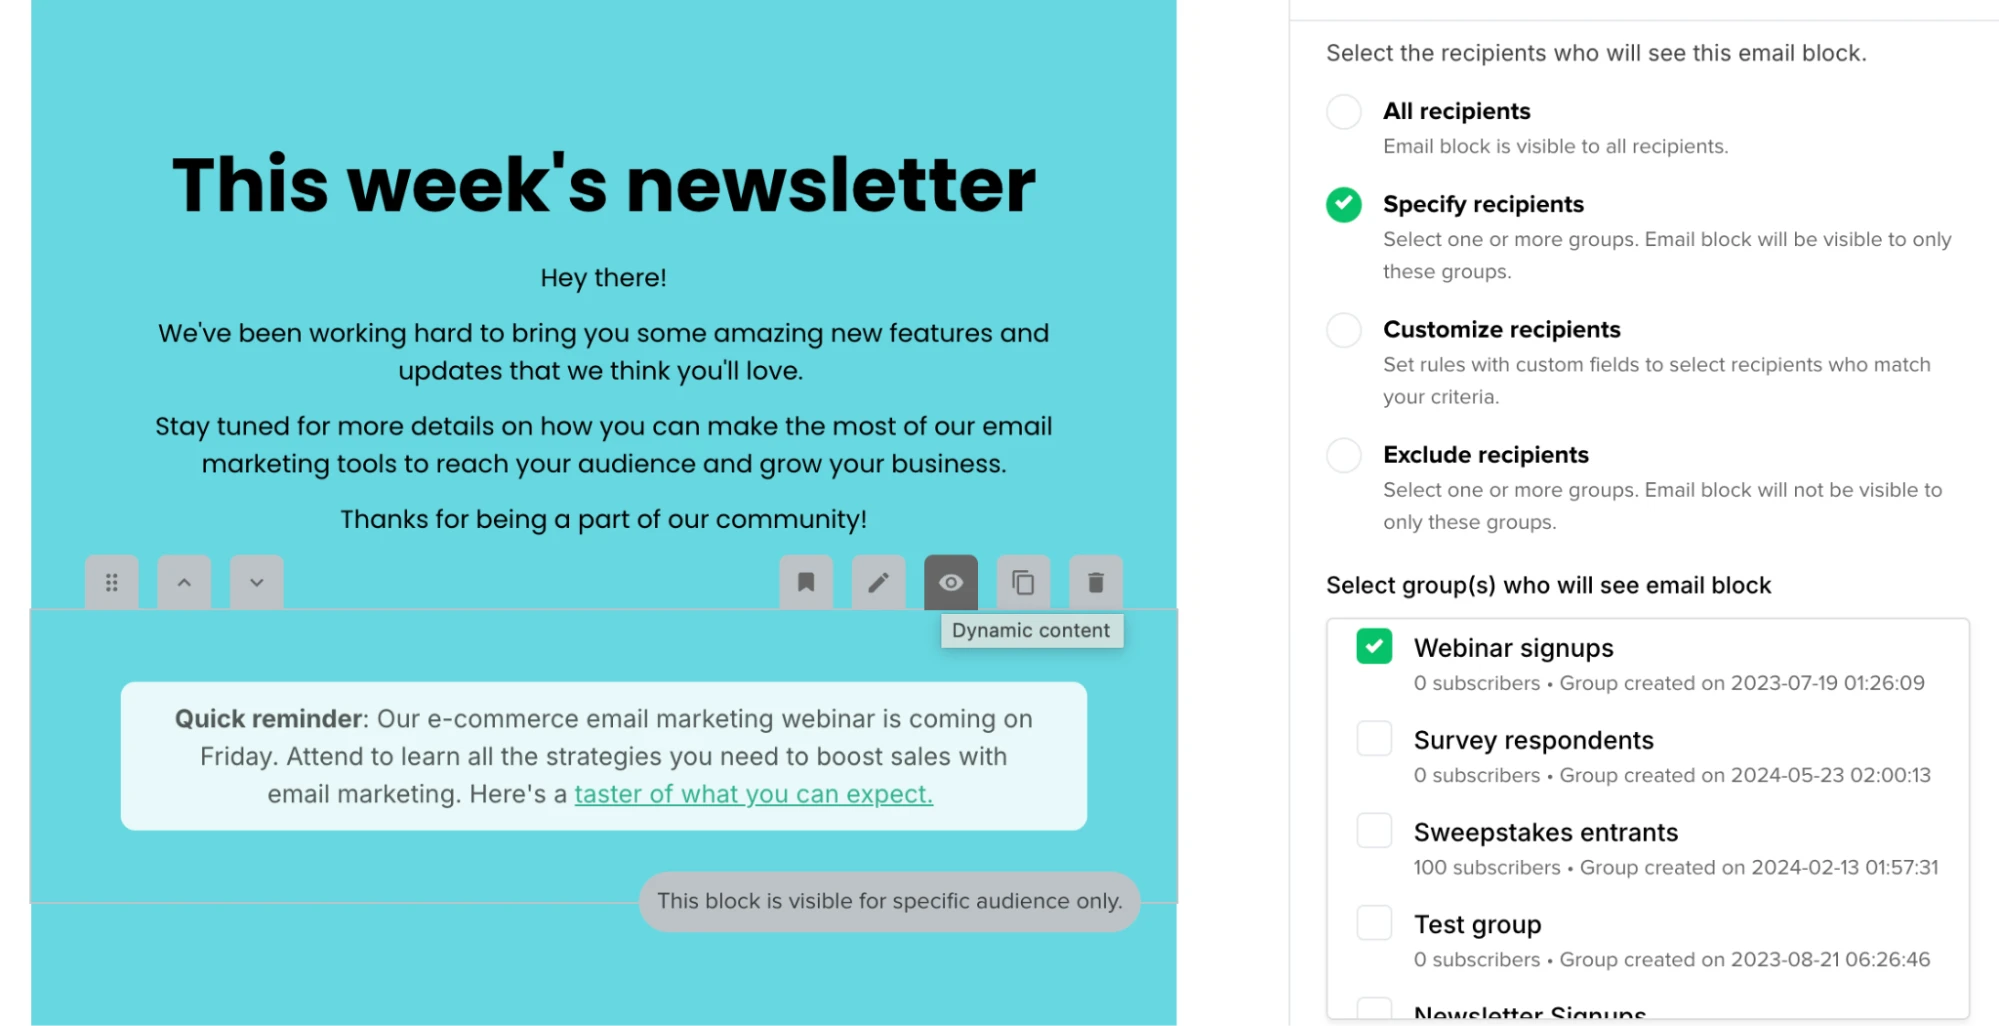
Consider adding an event block to all your email newsletters in the run-up to the event. You can even use our dynamic content settings so the block isn't shown to people who have already signed up for the event.
When promoting webinars at MailerLite, we’ll typically create a dedicated event invite email and then add a promotion block to our regular newsletter.
If you’re worried that adding this block to all your emails will take too long, don’t! You can easily reuse a single block by saving it as a template and then dragging it into any future newsletters.
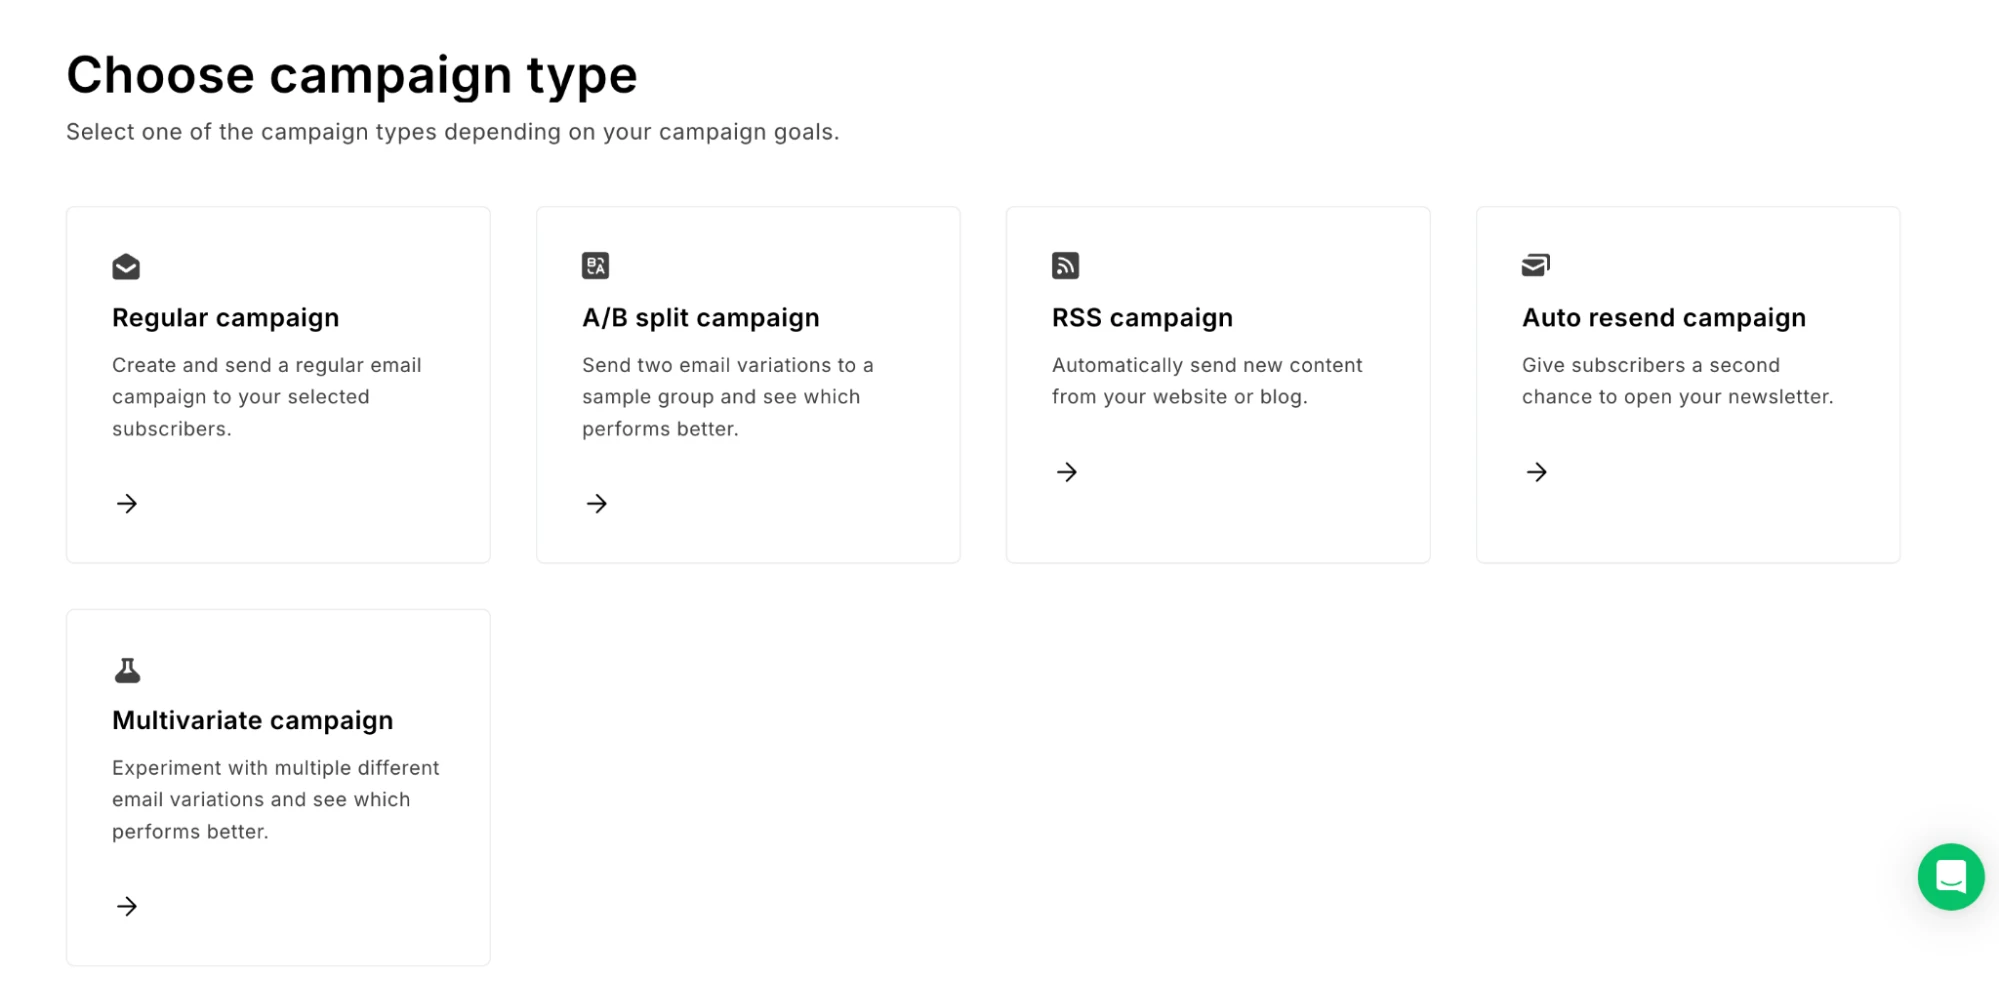
Another way to increase visibility is to resend your initial invitation to people who didn’t open the first message. Do this automatically by choosing Auto resend campaign when creating your campaign.
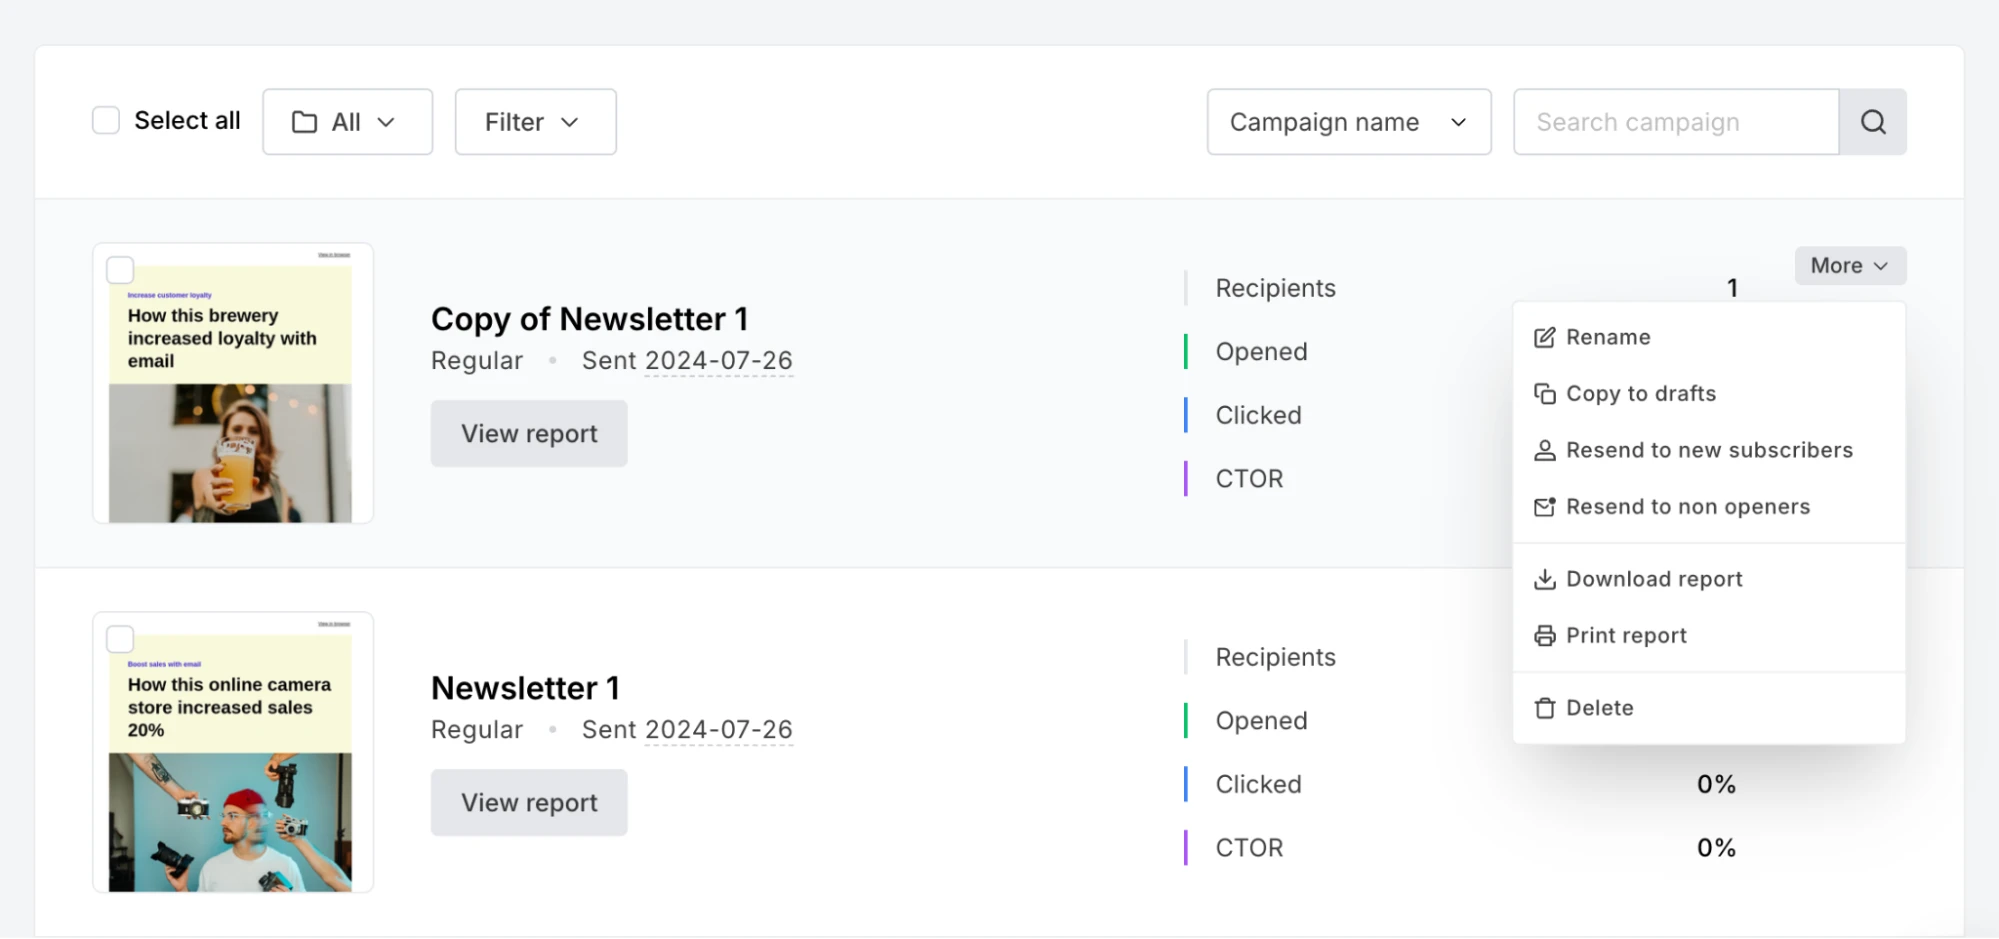
If you sent your announcement email with the regular campaign feature, you can simply head to the More tab in your sent campaign and choose the option Resend to unopened.
3. Send a confirmation email
Give subscribers peace of mind that they’ve joined your event by sending a confirmation email as soon as they sign up.
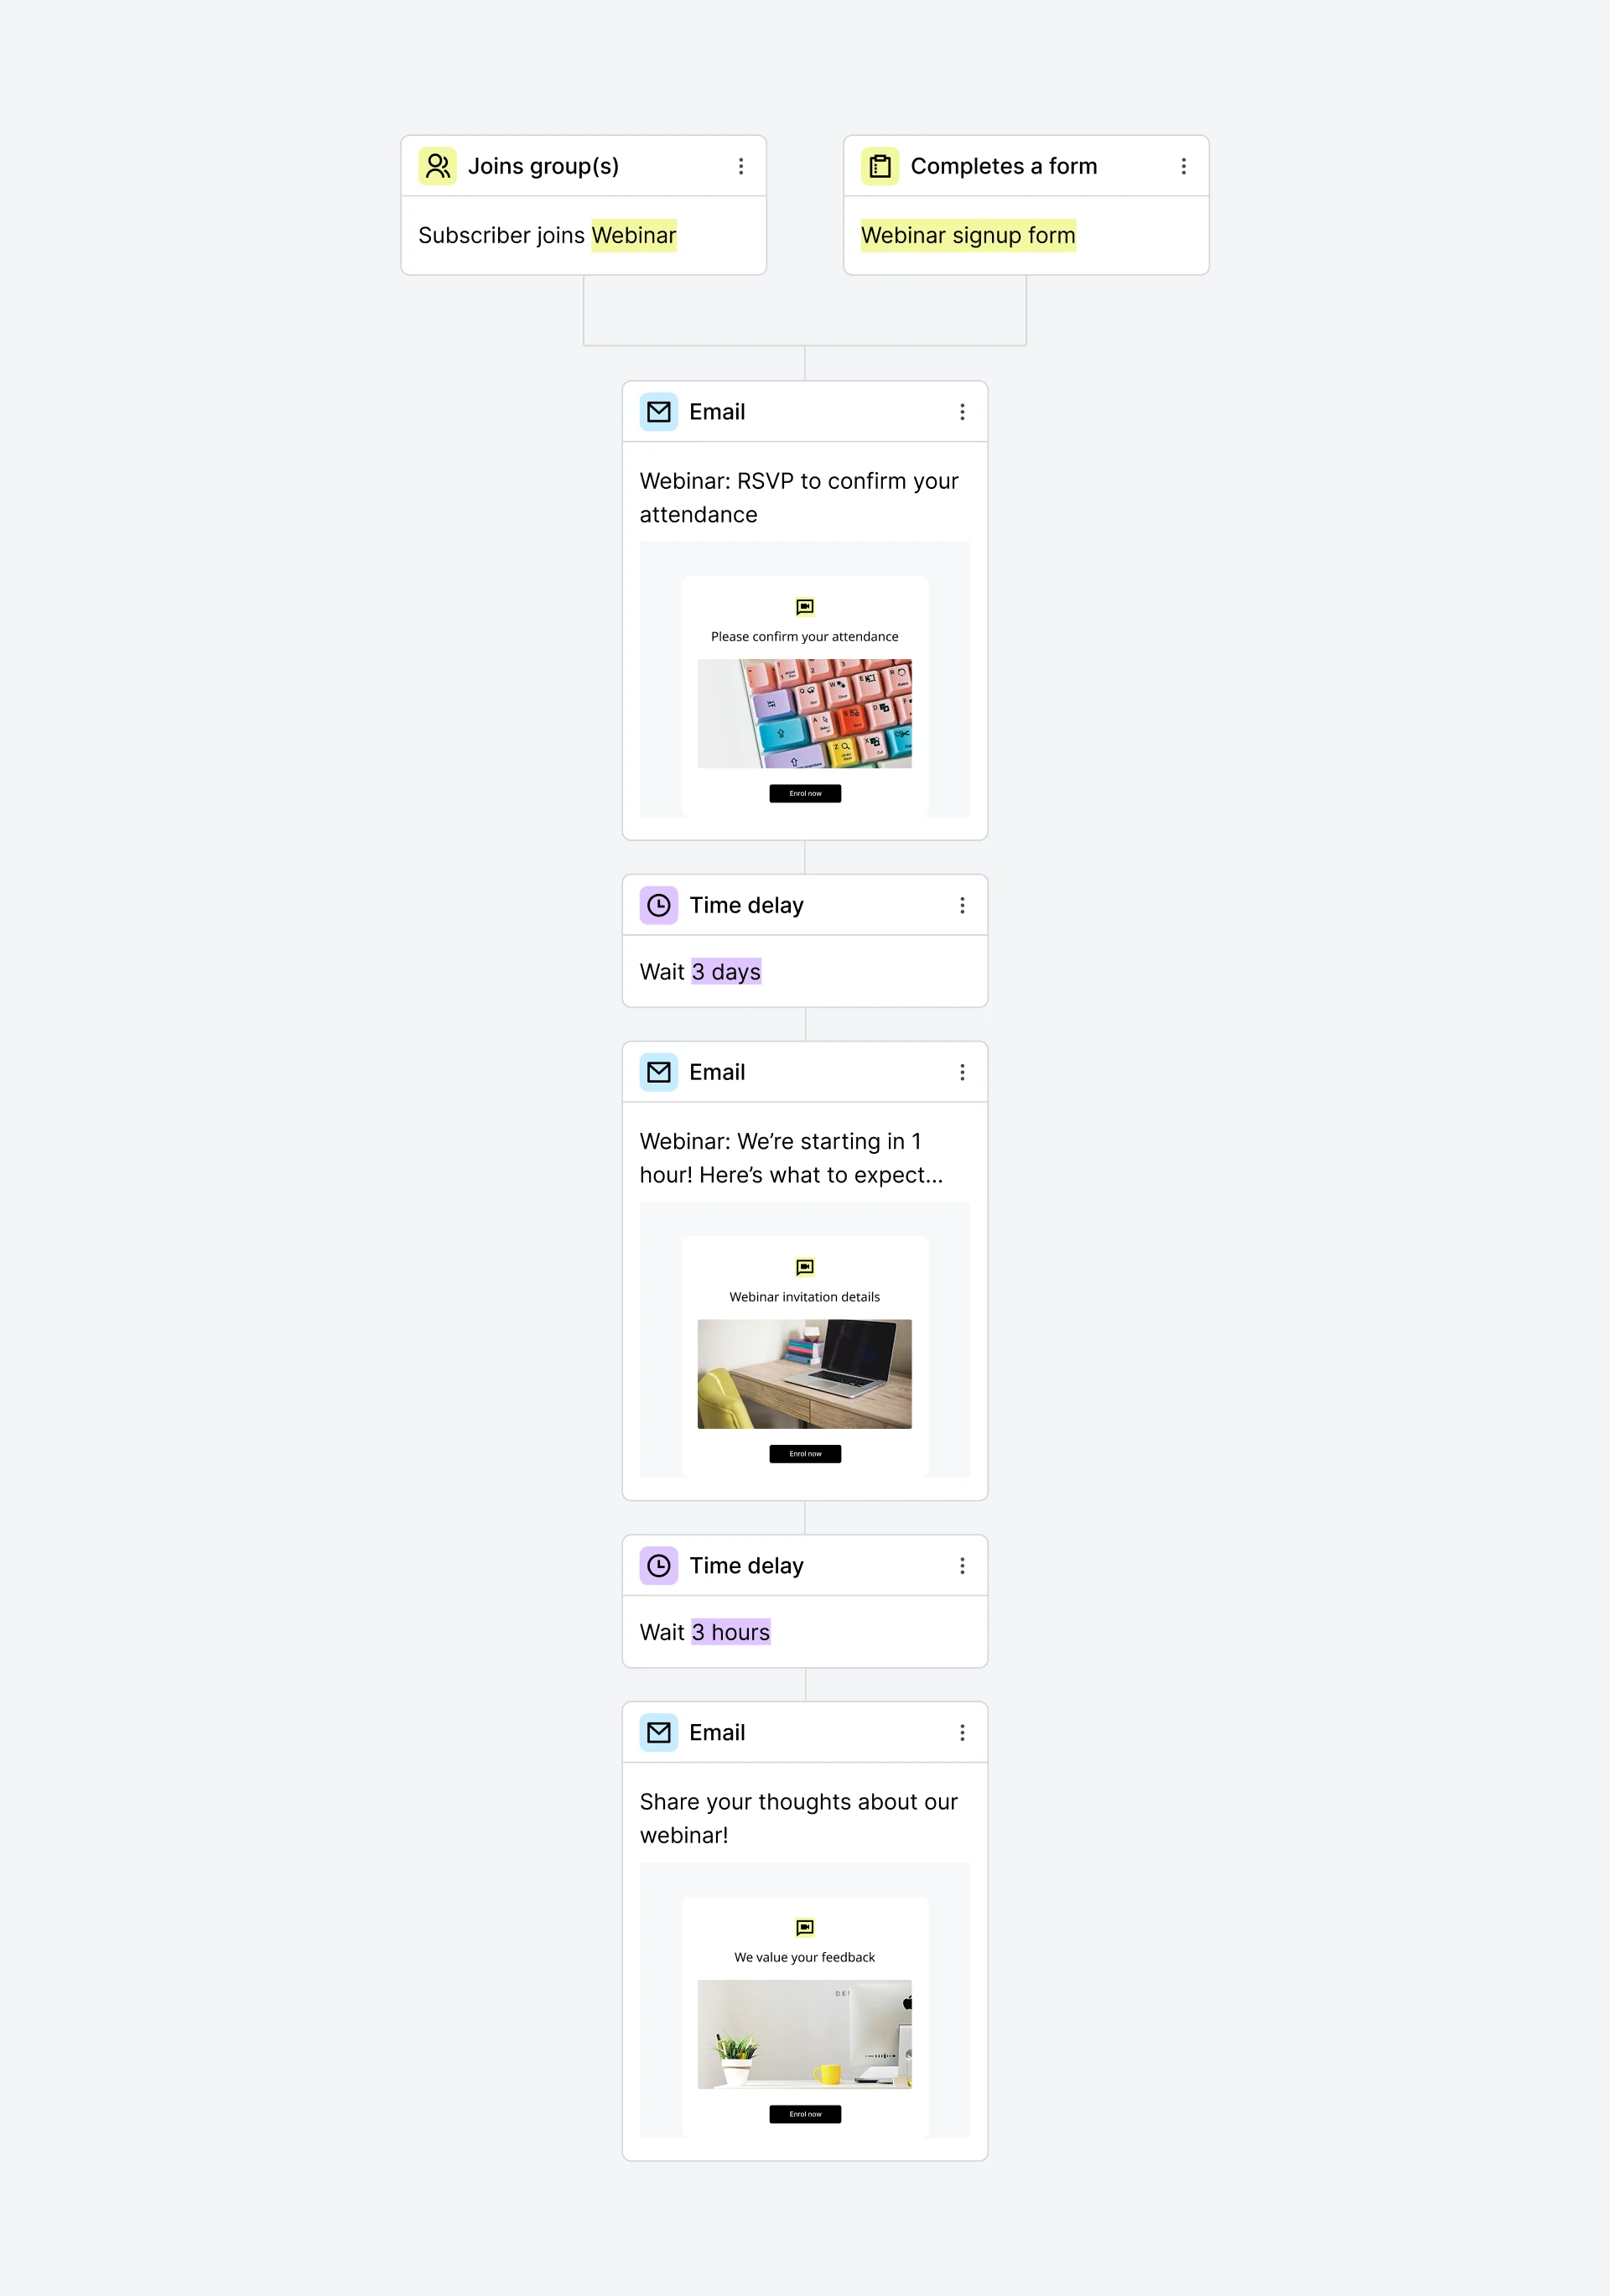
Do this by creating an automation triggered when someone joins the group you use for event attendees.
Add details like the date and time of the event, information about speakers, and a link that people can use to join the livestream if the event is virtual.
4. Automate follow-up emails
Many of us sign up for virtual events and then forget about it. aAn automated email sequence is a great way to keep your event top-of-mind.
Create an email automation triggered by people joining your webinar group. Or, if you created a confirmation email automation, you can simply add follow-up emails to the same workflow.
When creating the emails, add a Delay block and then specify the exact time that the email will go out.
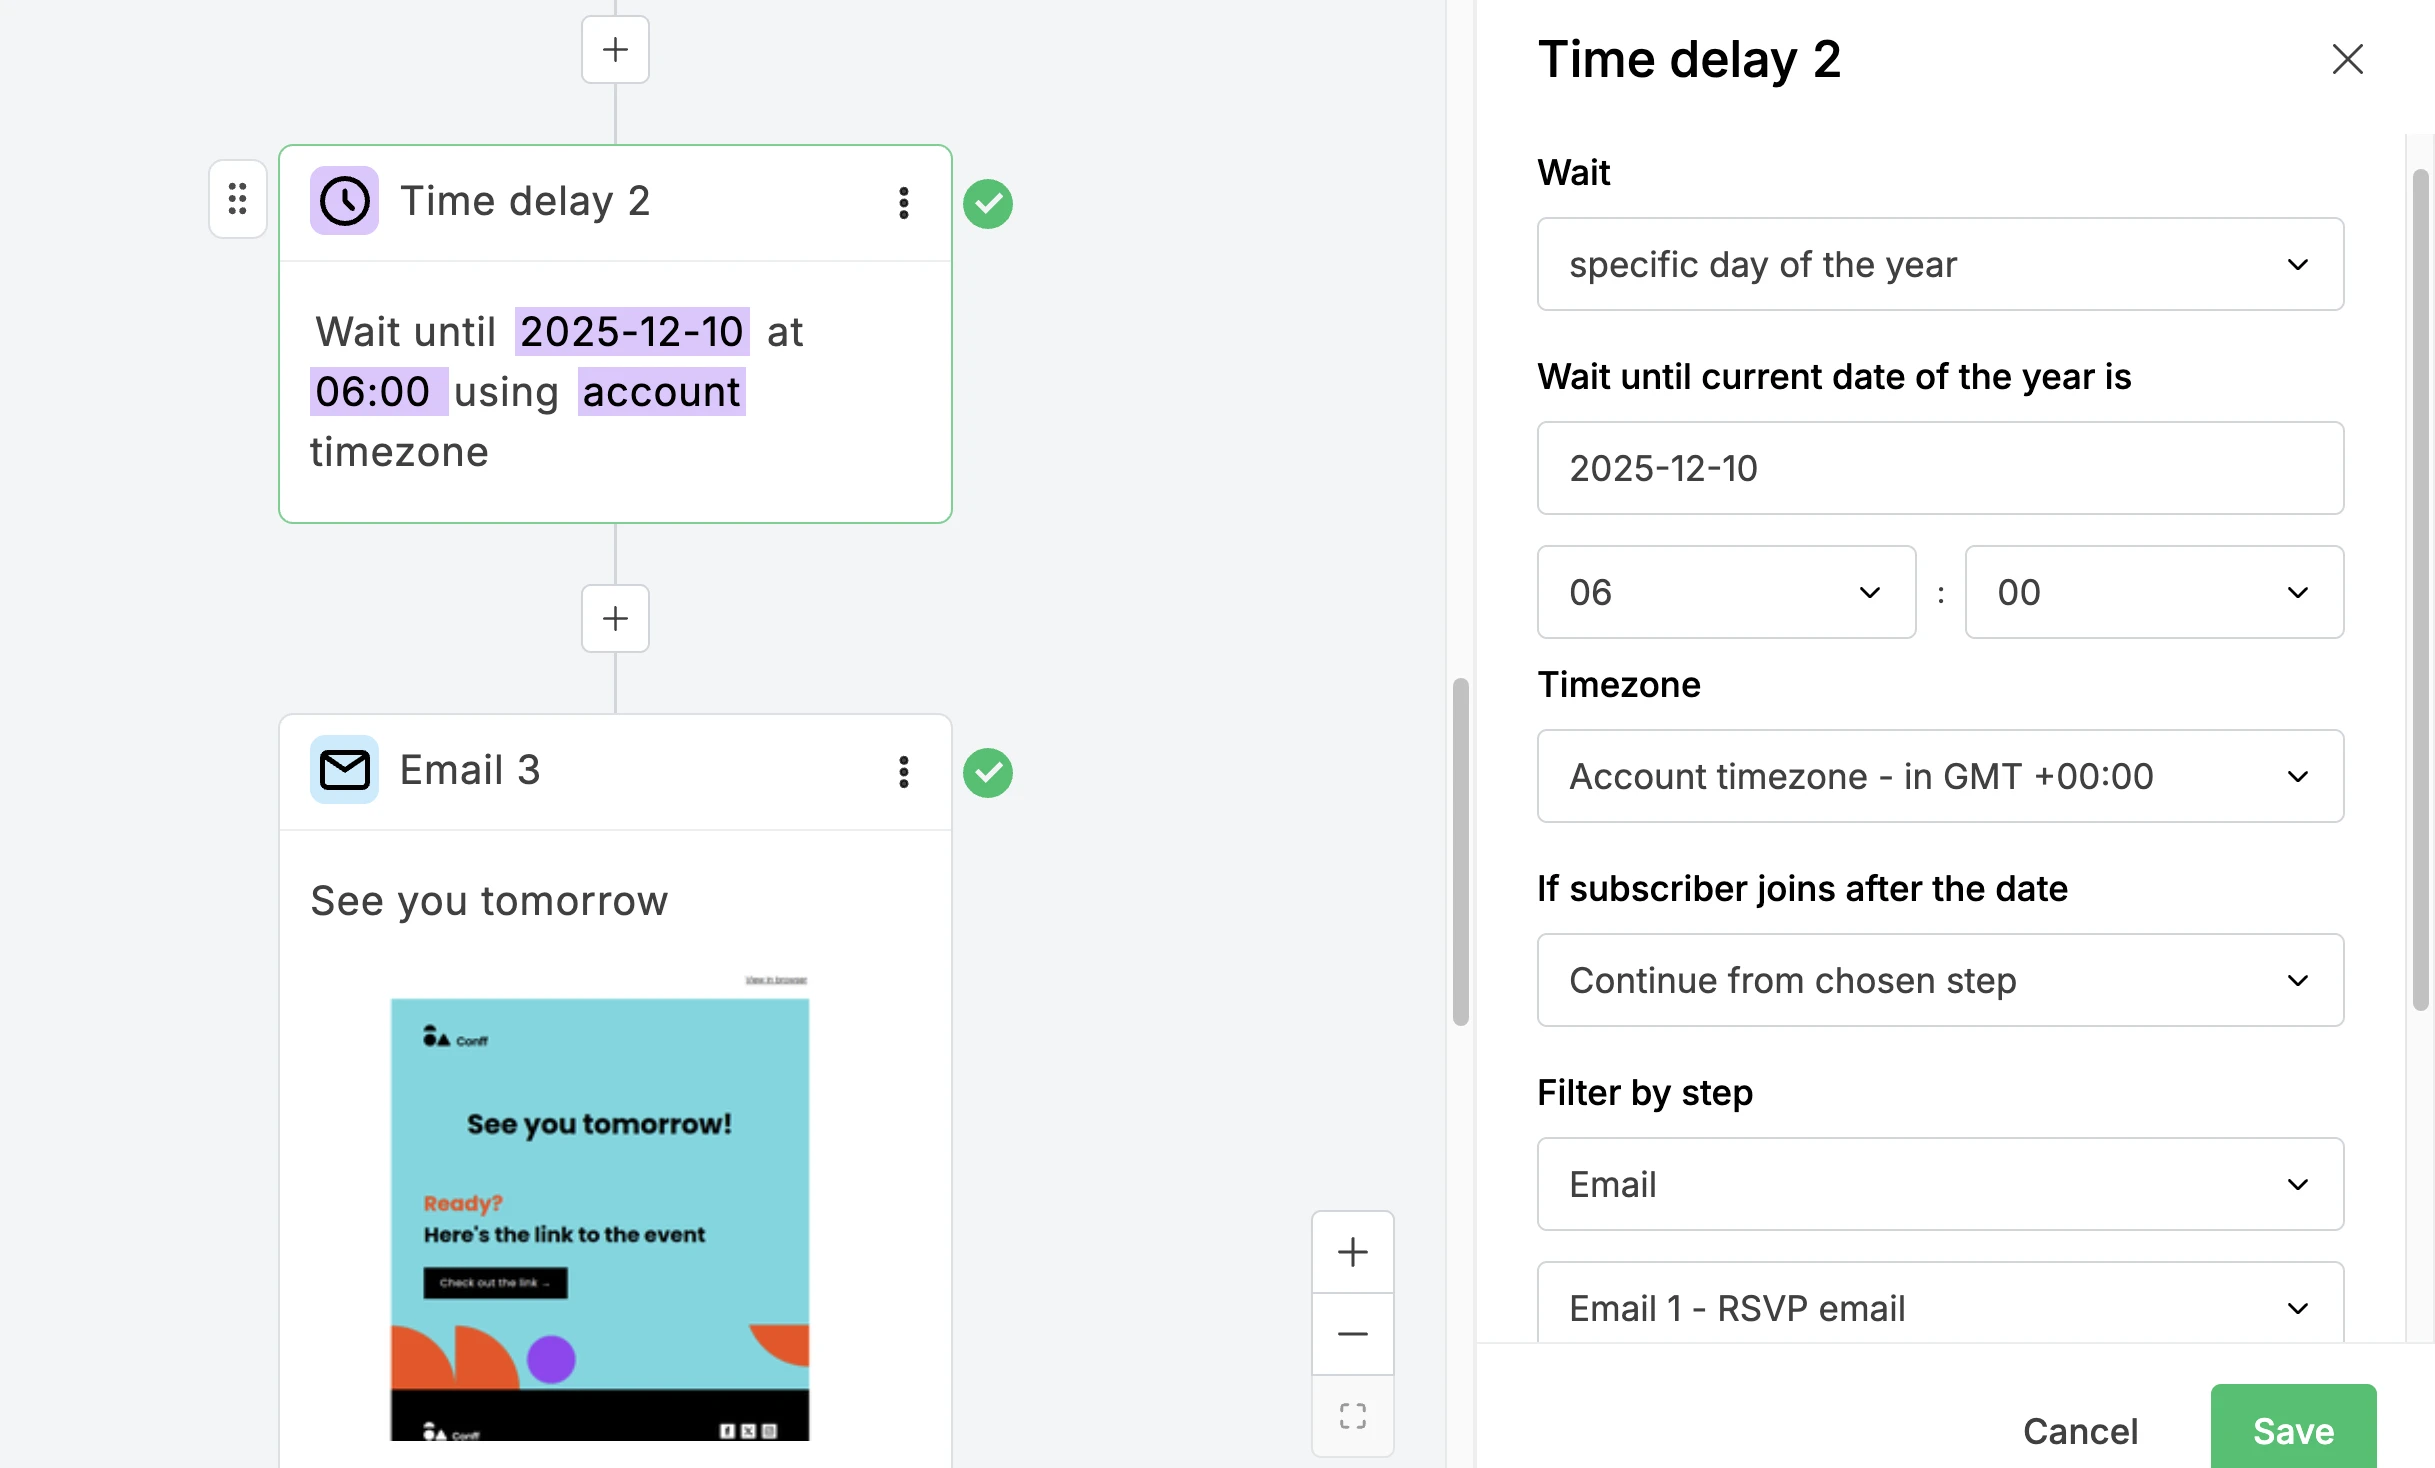
For smaller events like webinars, you can send a reminder notification by email a day or two before the event and a further reminder a few hours before.
For larger events you can send more information in the time leading up to the date. Consider sending information about:
The speakers, sessions or performances
The venue and how to travel to it
Extra services that may interest attendees (hotels, airport transfer, etc.)
Think about everything event attendees need to have a smooth experience and include this in your automation emails. A large international conference or meetup may require a whole series of messages.
For inspiration, check out the content in this webinar invitation sequence example.
5. Send information in campaigns
If you don’t want to create an automation, you can send your promotional content manually with campaigns. Just create your message and then send it to the group you use for event attendees.
You’ll find the Recipients option in the Campaign details section after you’re done editing your email.

You could also send the information as dynamic content in your regular newsletter. Add a block to your newsletter with the information you want to include and then click the block’s Dynamic content icon.
You can then choose the group you want to show the content to under the Specify recipients tab. This will show the block to people in the group, and hide it from everyone else.
6. Send a post-event follow-up email
After the event, keep building the relationship by following up with your subscribers. Here are some ideas for content you could send:
Send a thank you message: This shows your guests how much you appreciate them, and it’s a nice personal touch to finish off the event
Collect feedback with an email survey block: This is your best opportunity to find out what worked, and what could be even better for your next professional event
Share a link to your product or service: This can follow on from any promotions that you mentioned during the event
Promote your next event: This is the perfect moment to get people excited about your next event, especially since they are already engaged and interested in your content
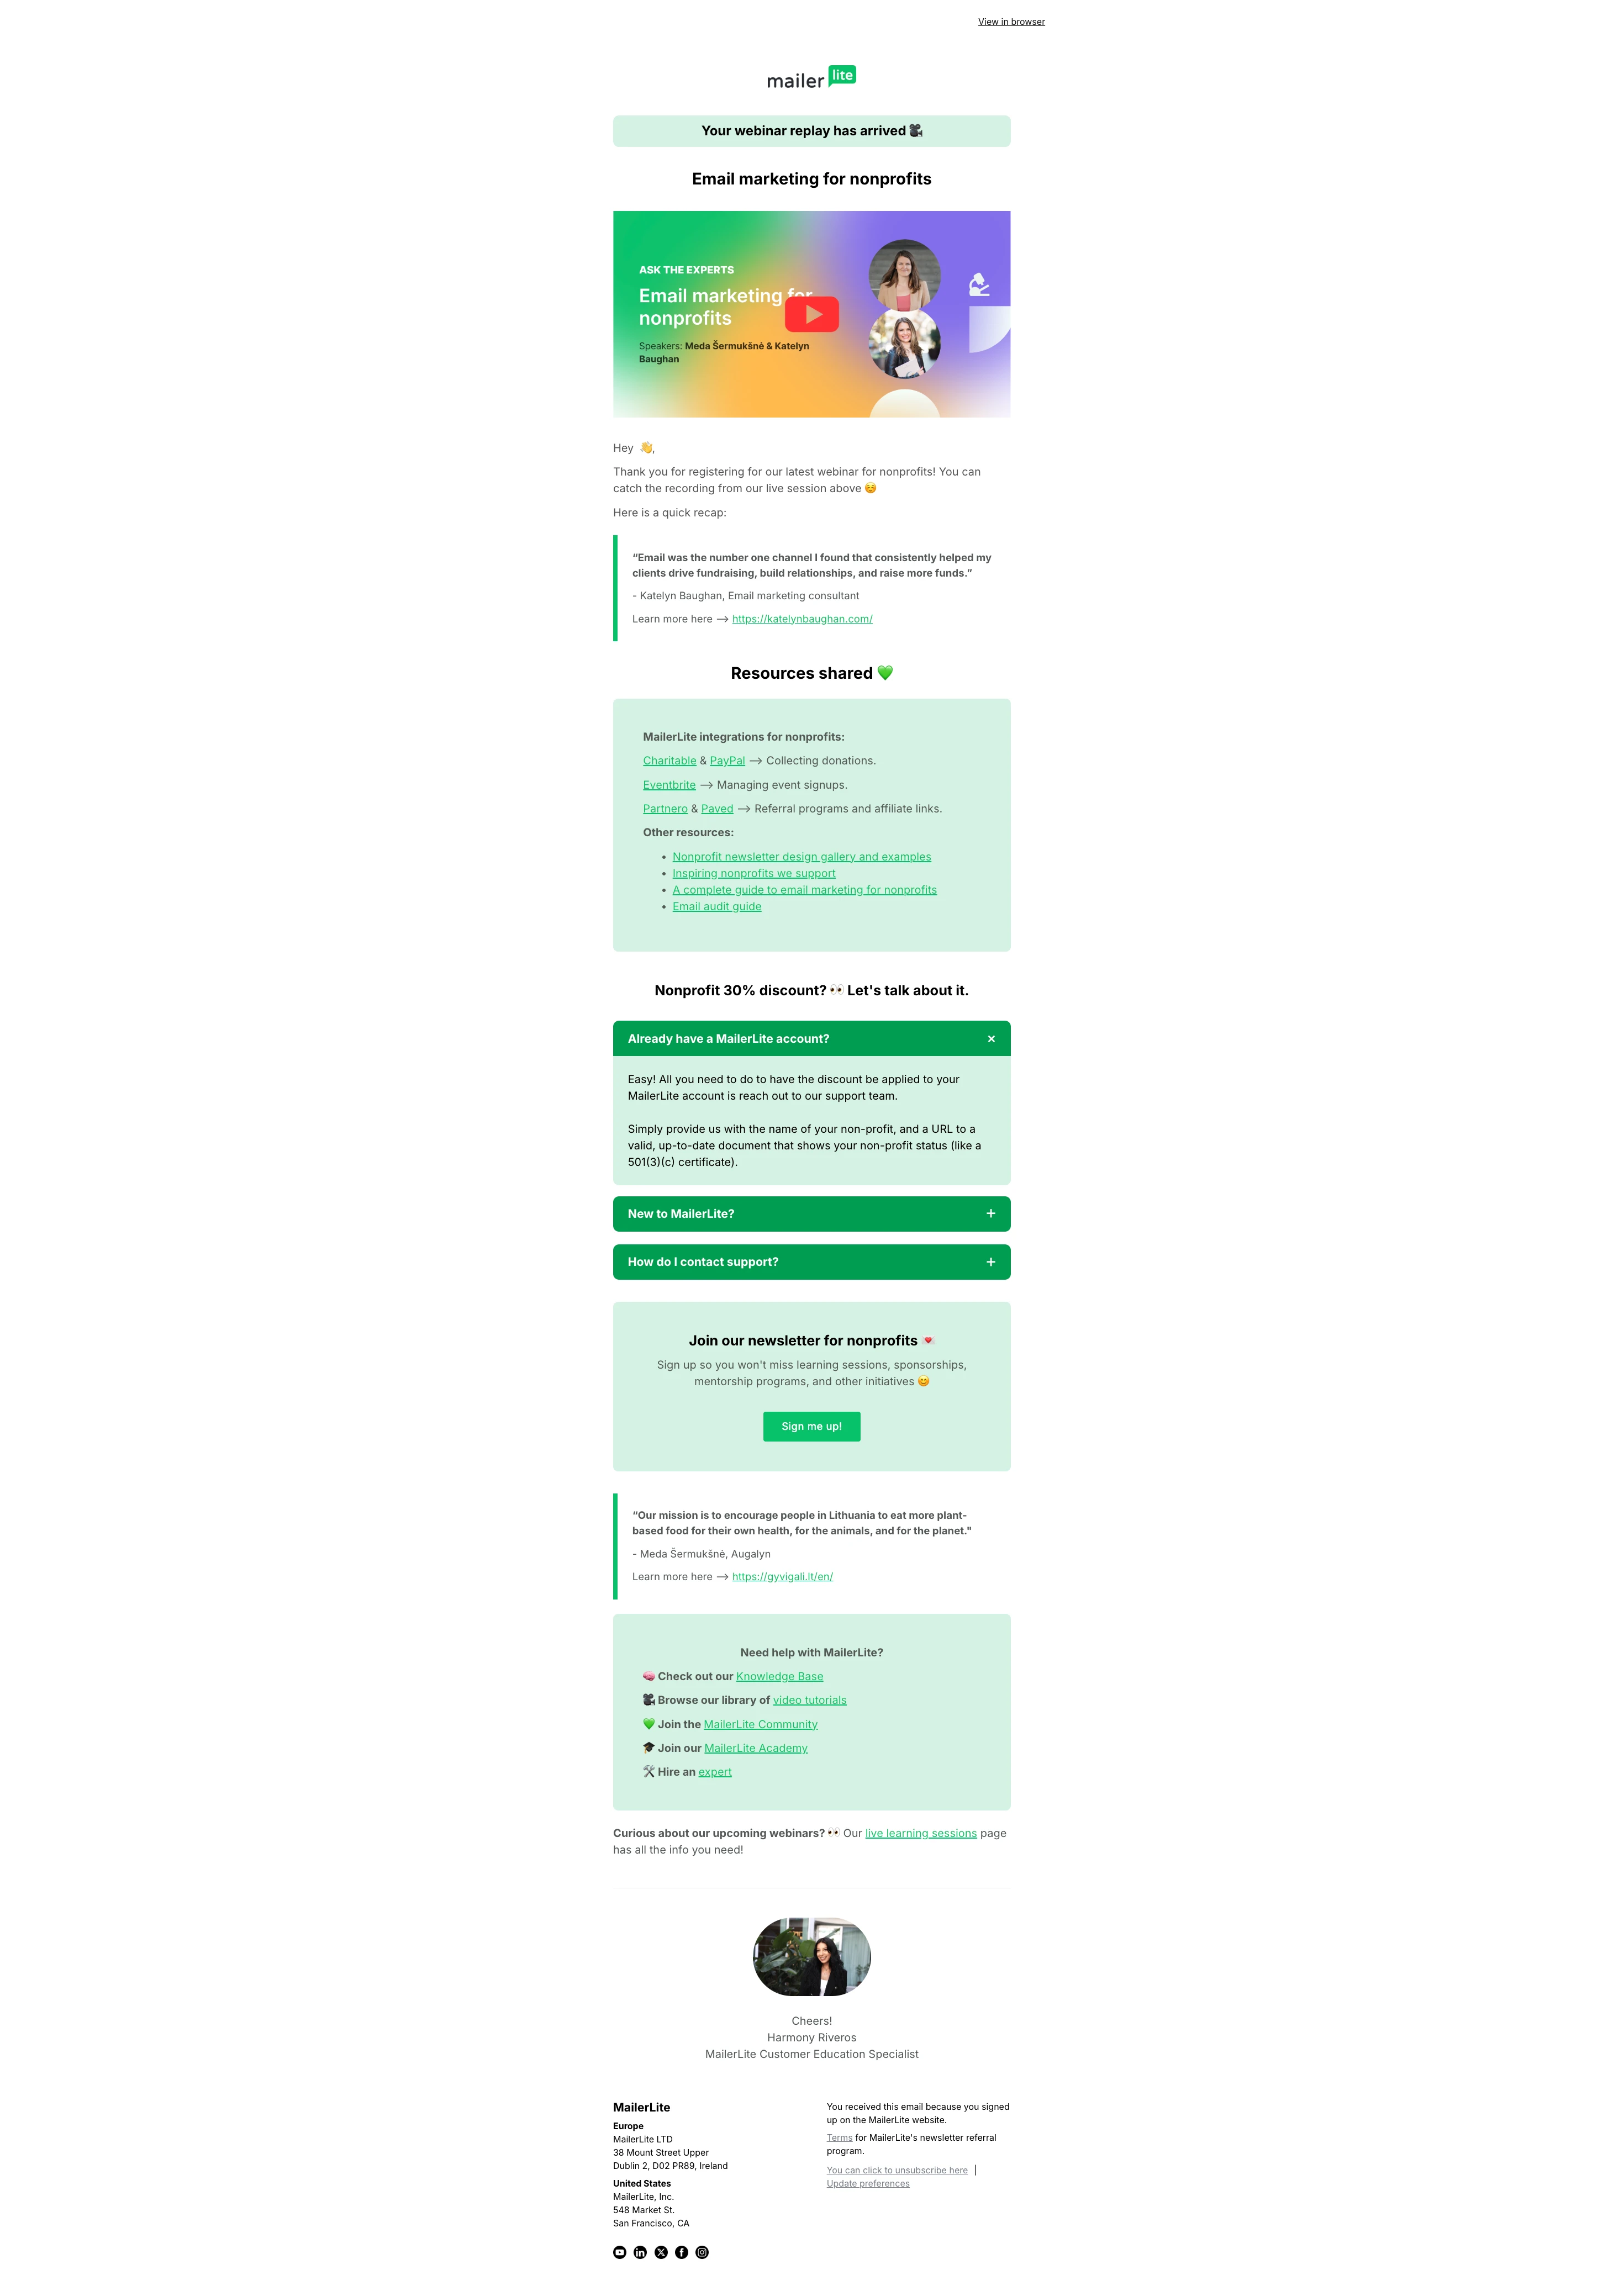
Share a replay of the event: This allows you to share a recording of your live or virtual event, so that people can go back over it and relive all the best parts, and even share it on social media.
At MailerLite, our post-webinar follow-up focuses on maximizing value and encouraging deeper engagement, such as:
Including a recording of the webinar and all discussed resources
Providing a clear call-to-action for new users on how to sign up for MailerLite
Inviting attendees to subscribe to our newsletters if they haven't already
Sharing a repository of learning links (e.g., Knowledge Base, video tutorials, MailerLite Academy) so they can explore and learn how to use the tool effectively
If you plan to send a recording after the webinar, our webinar host Harmony has some advice to ensure people still show up for the live event.
It’s a good idea to create incentives for joining live. Emphasize that it is a great opportunity for participants to get their questions answered and interact with the expert. You can also offer freebies or make the webinar interactive so there’s significant value in attending live.
7. Promote future events
Since everyone who clicked on your RSVP button was added to your event group, you now have a list of people who you know are interested in attending your events. Use this knowledge to send them special promotions for your other upcoming events.
Consider offering these people the opportunity to sign up before anyone else, get a discount on future tickets, or receive special event privileges.
As you hold more events, this list will grow and you’ll start to build a group of people who you know have a good chance of attending.
Check out our article with 17 ways you can promote your webinar. The article contains real insight from Chiara and Harmony who have helped grow our webinar program over the last few years. And while the tips are designed for webinars, many will work for any kind of event.
Now it's your turn to promote an event
RSVP email responses are a quick and easy way to get attendees for your event. Inviting your subscribers to a webinar or live event is now as easy as a drag and drop.
Just remember:
Create a group for people who click on the button
Promote your event in a dedicated email and within your other messages
Send reminder emails via automation or regular campaigns to boost attendance
Use interest groups and dynamic blocks to add targeted event content to your newsletter
Send a follow-up email after the event
Of course, you need to first plan an event that your subscribers will love. That’s the hard part! But once you’re ready, promoting the event in your email will be a little easier with RSVP blocks.