Thinking of upgrading to the new MailerLite? You’re not alone - and we’re here to make the process smooth and stress-free. Before diving into the migration steps, here’s what you need to know to feel confident about the switch.
What you need to know about upgrading to the new MailerLite
Why upgrade to the new MailerLite?
The new MailerLite offers a refreshed experience with more powerful features, improved design tools, faster performance, and better customization options. It’s built to help you grow your audience with less effort and more flexibility.
To learn more, check our comparison page 👈
Will I lose anything from MailerLite Legacy (Classic)?
Not at all! All of your assets and information in MailerLite Legacy (Classic) will stay exactly as they are. Even after you migrate, your Legacy (Classic) account remains active as long as it’s on a paid plan - and you can continue to access and use it at any time.
In fact, both platforms can be used at the same time 😊 We recommend keeping your Legacy (Classic) account running while you set up the new one, especially for automations, forms, and live campaigns.
Will my MailerLite Legacy (Classic) plan transfer to the new MailerLite?
No, your paid plan in MailerLite Legacy (Classic) will not automatically apply to your new account. You will need to make sure to manually cancel your paid plan in MailerLite Legacy (Classic).
However, you can request to have your remaining credits transferred to your new MailerLite account. Just head to the Contact us page and choose Plan and billing to let our support team know before you upgrade.
🔁 Please note: Credit transfers are one-time and cannot be reversed once completed.
What should I prepare before migrating?
Here’s a quick checklist to help you get ready:
✅ Make sure your MailerLite Legacy (Classic) account is active.
✅ Keep automations, forms, and campaigns running in Legacy (Classic) while you set up the new account.
✅ Save any sent campaigns as templates if you want to migrate those designs.
✅ Review your integrations - these will need to be reconnected manually in the new platform.
💡 Keeping both accounts active during the transition is the best way to avoid interruptions.
What can and can’t be migrated?
Some things migrate over seamlessly, while others require a fresh setup. Here’s a quick comparison:
| ✅ Migrates | ❌ Does not migrate |
| Subscribers & groups | Integrations |
| Draft campaigns | Subscriber data and sent campaigns older than 12 months |
| Templates | Outbox campaigns |
| File manager assets | Multiple users (only 2 on Free plan) |
| Automations and queued subscribers | Automation history and activity logs |
| Landing pages | Custom domains |
| Websites | DNS records |
| Forms | Assets made with an outdated editor |
| Company details & default settings | Subscription plans |
| Subscriber data and sent campaigns |
Step 1: Where to start
You can begin your migration directly from MailerLite Legacy (Classic).
1. First, navigate to the Integrations page.
2. Under Developer API, click Use.
3. Copy the API key to your clipboard (you'll need it a bit later).
To create an account on the new MailerLite:
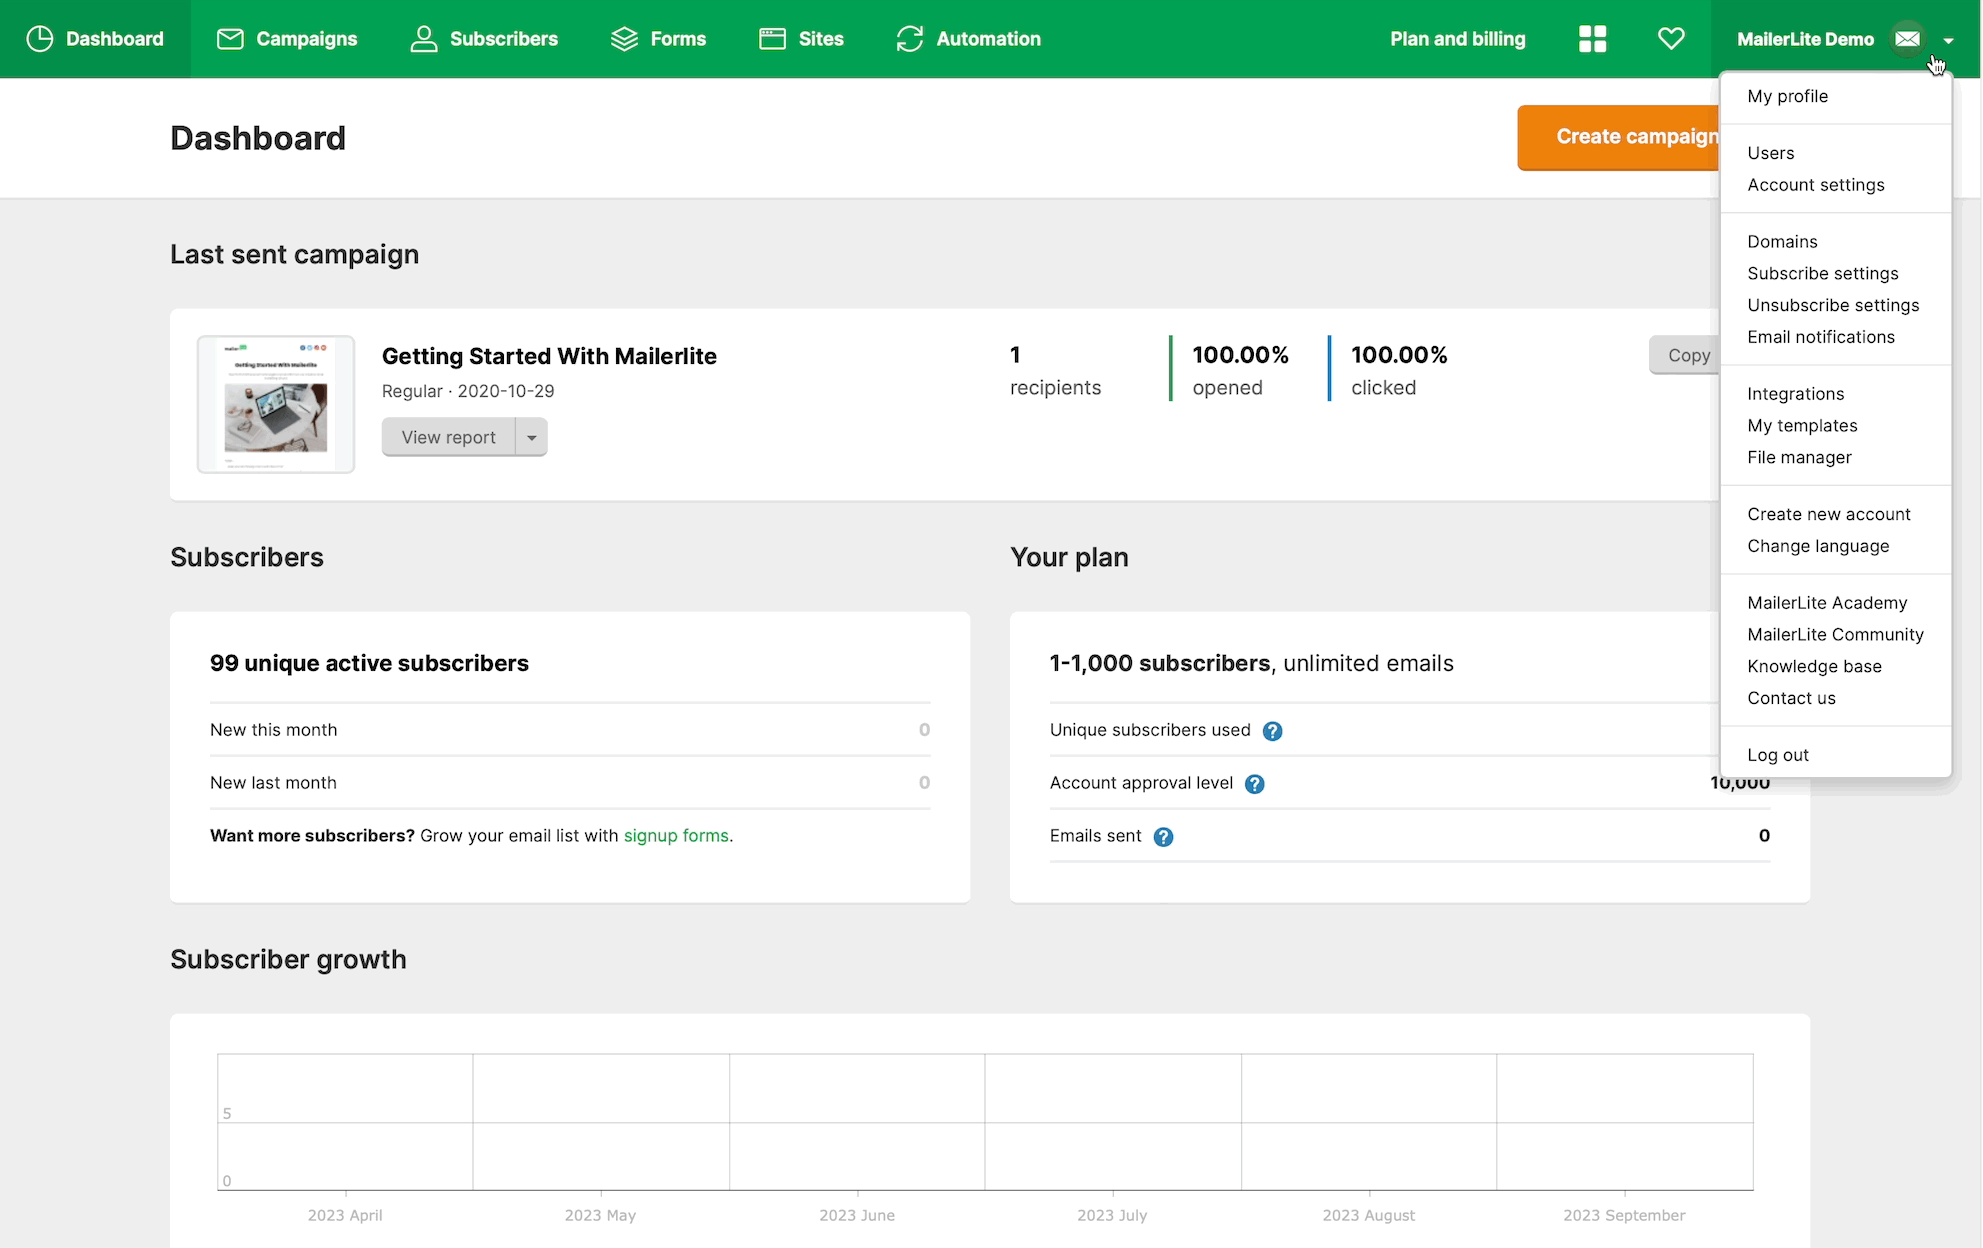
Click your Account name in the upper right corner, and select Try new MailerLite.
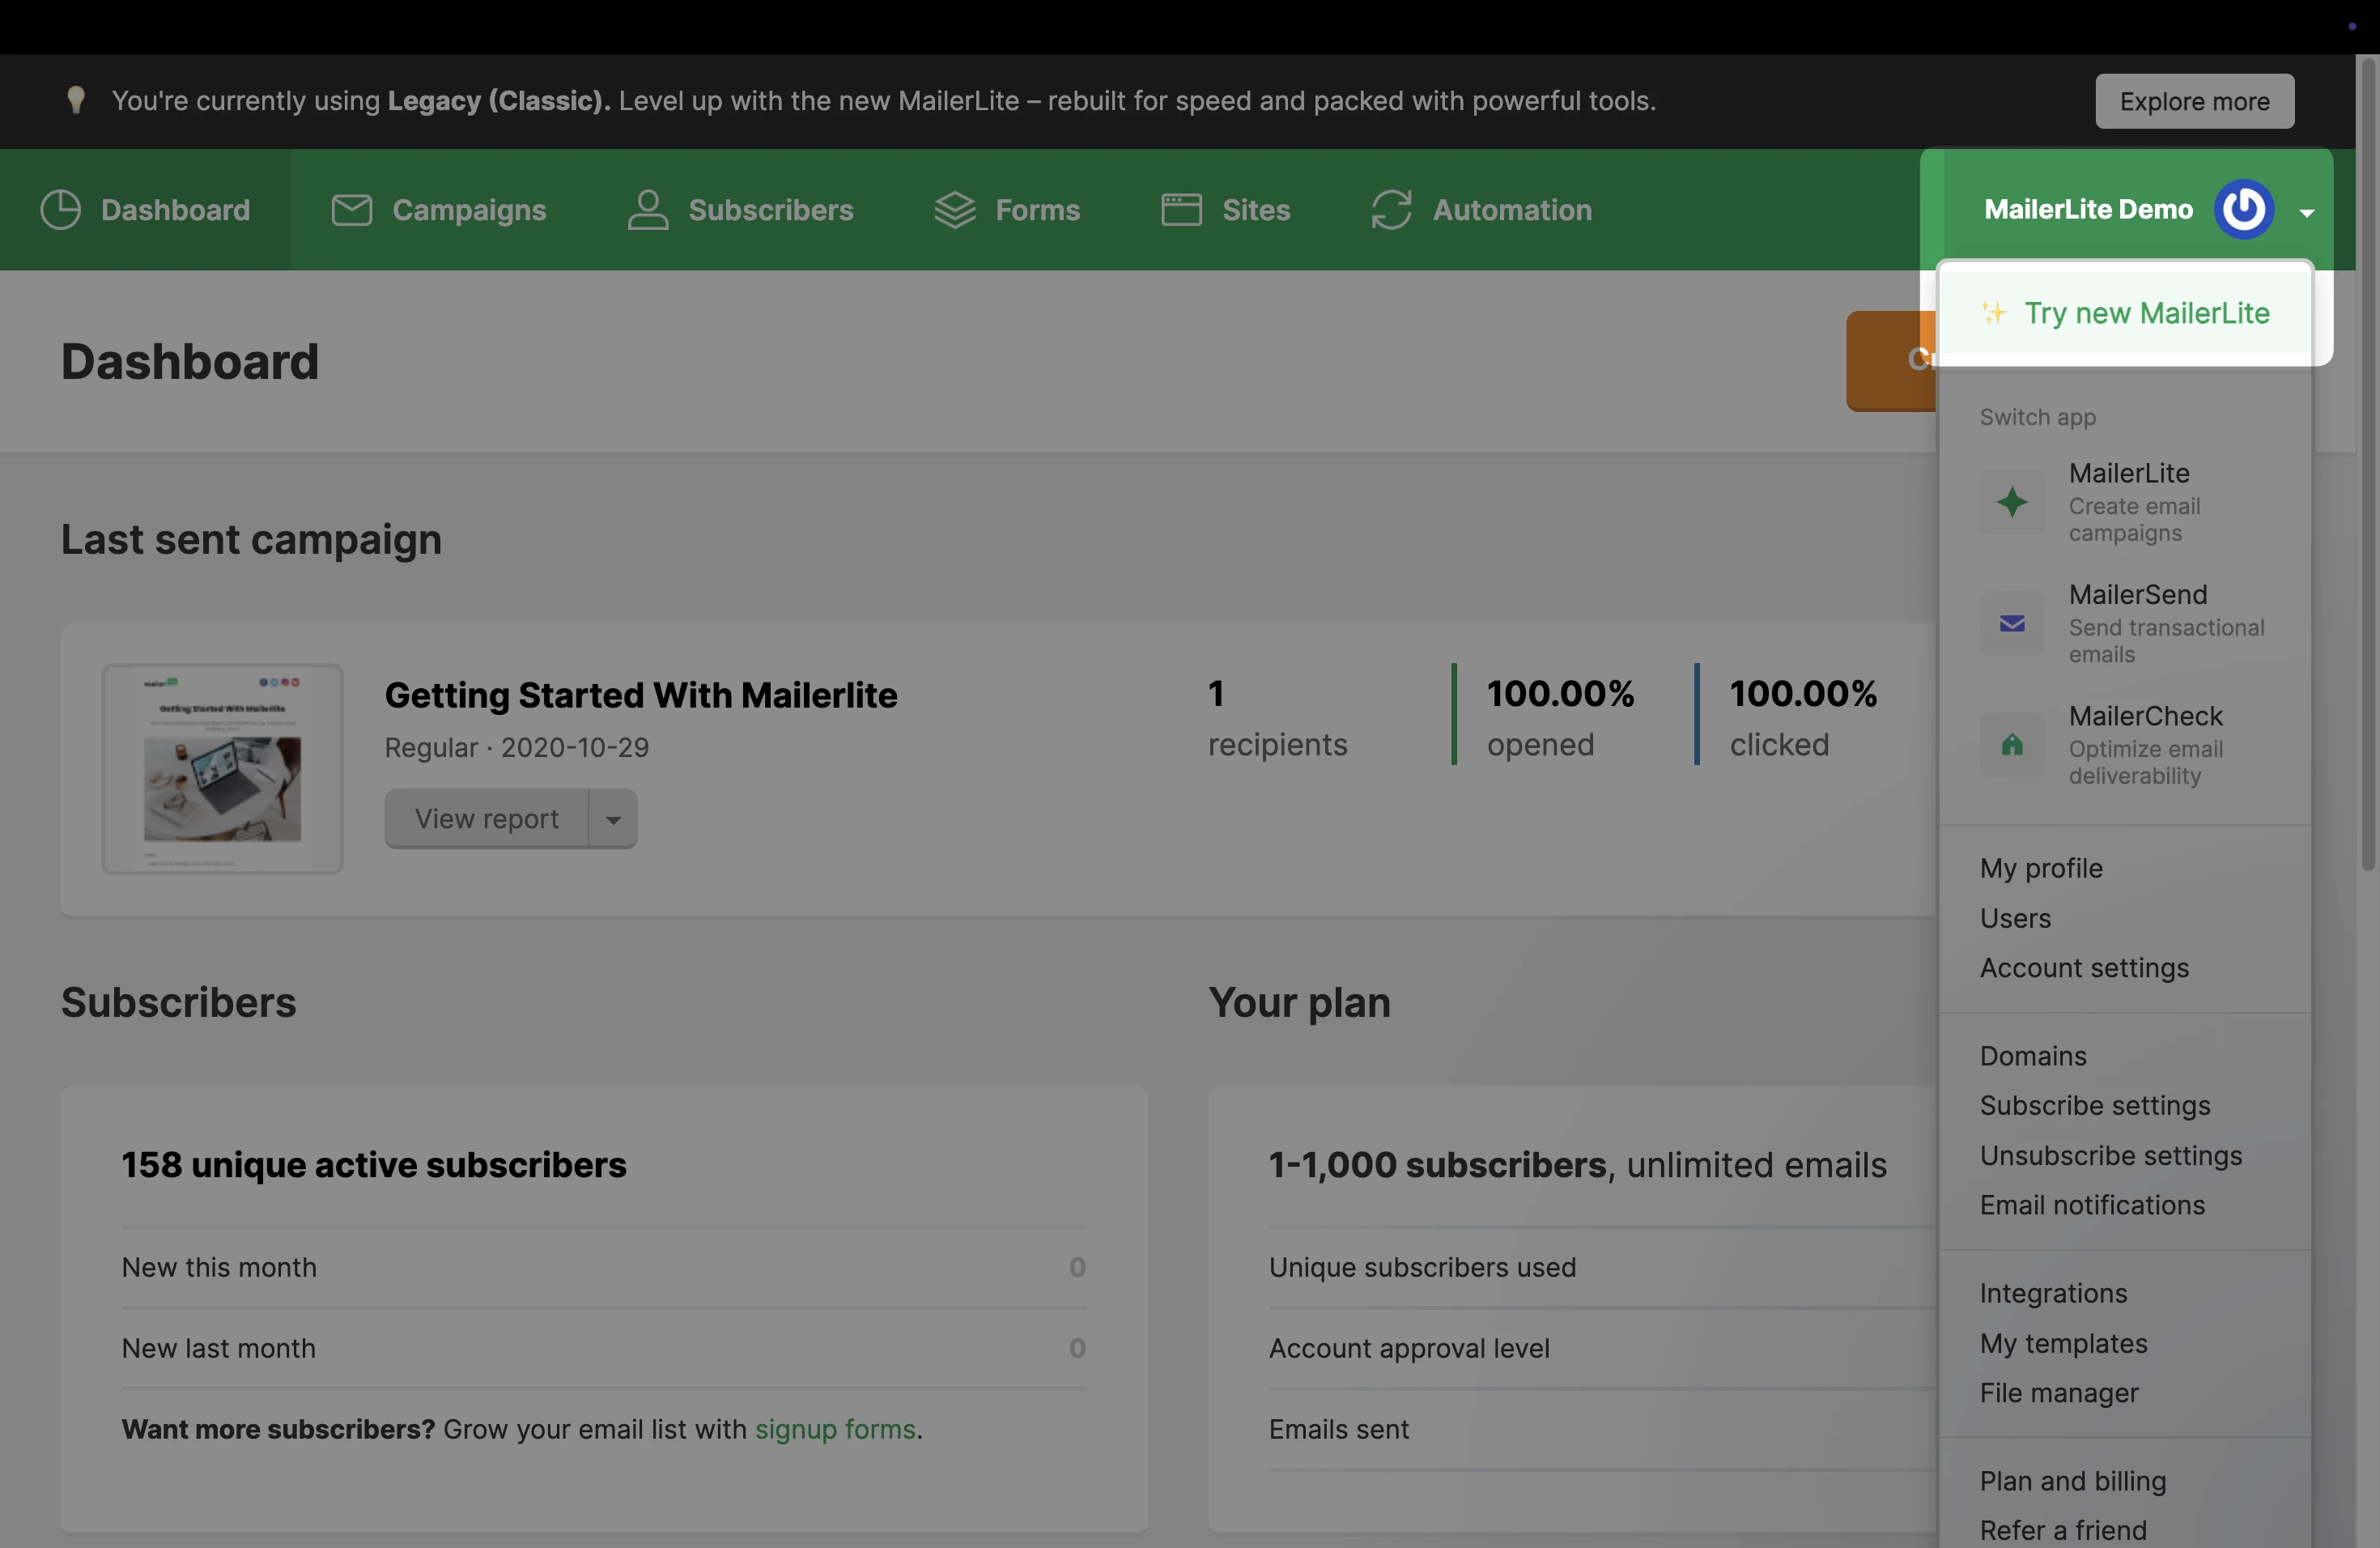
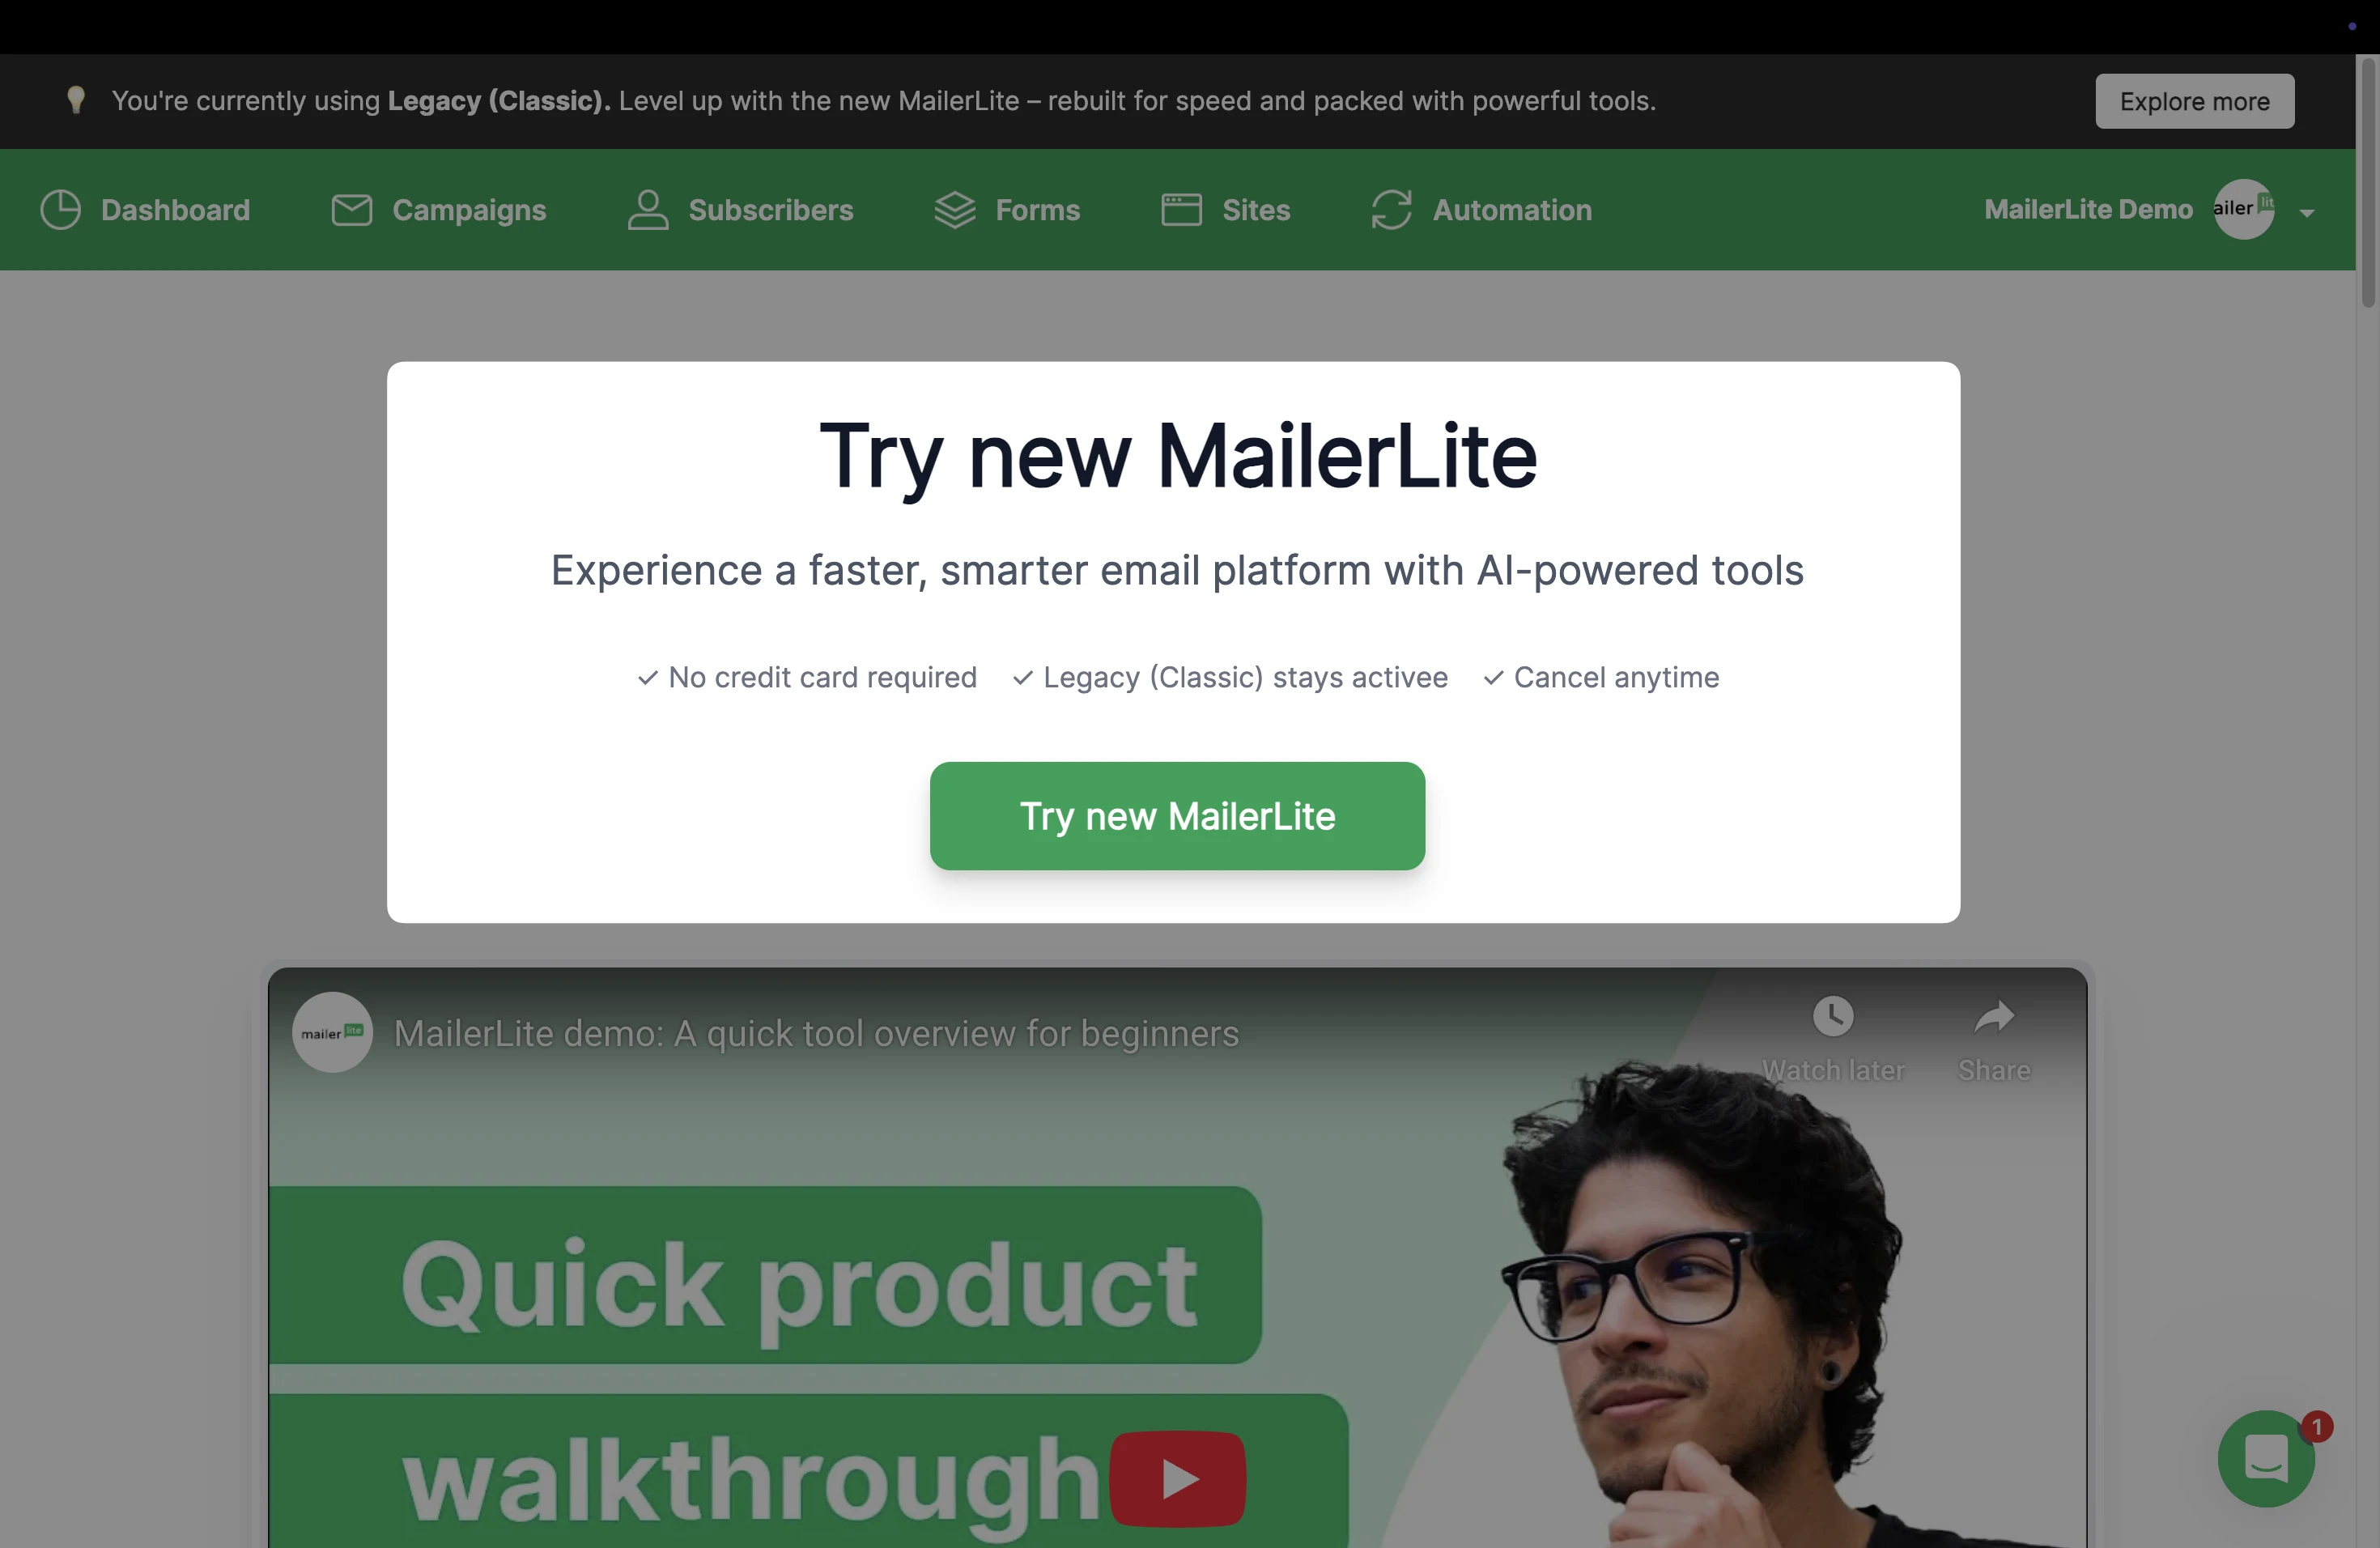
2. On the next page, review any info about the new platform that you may be curious about, and click Try new MailerLite when you are ready to create your new account.
3. You will be redirected to the login page, where you can click New account.
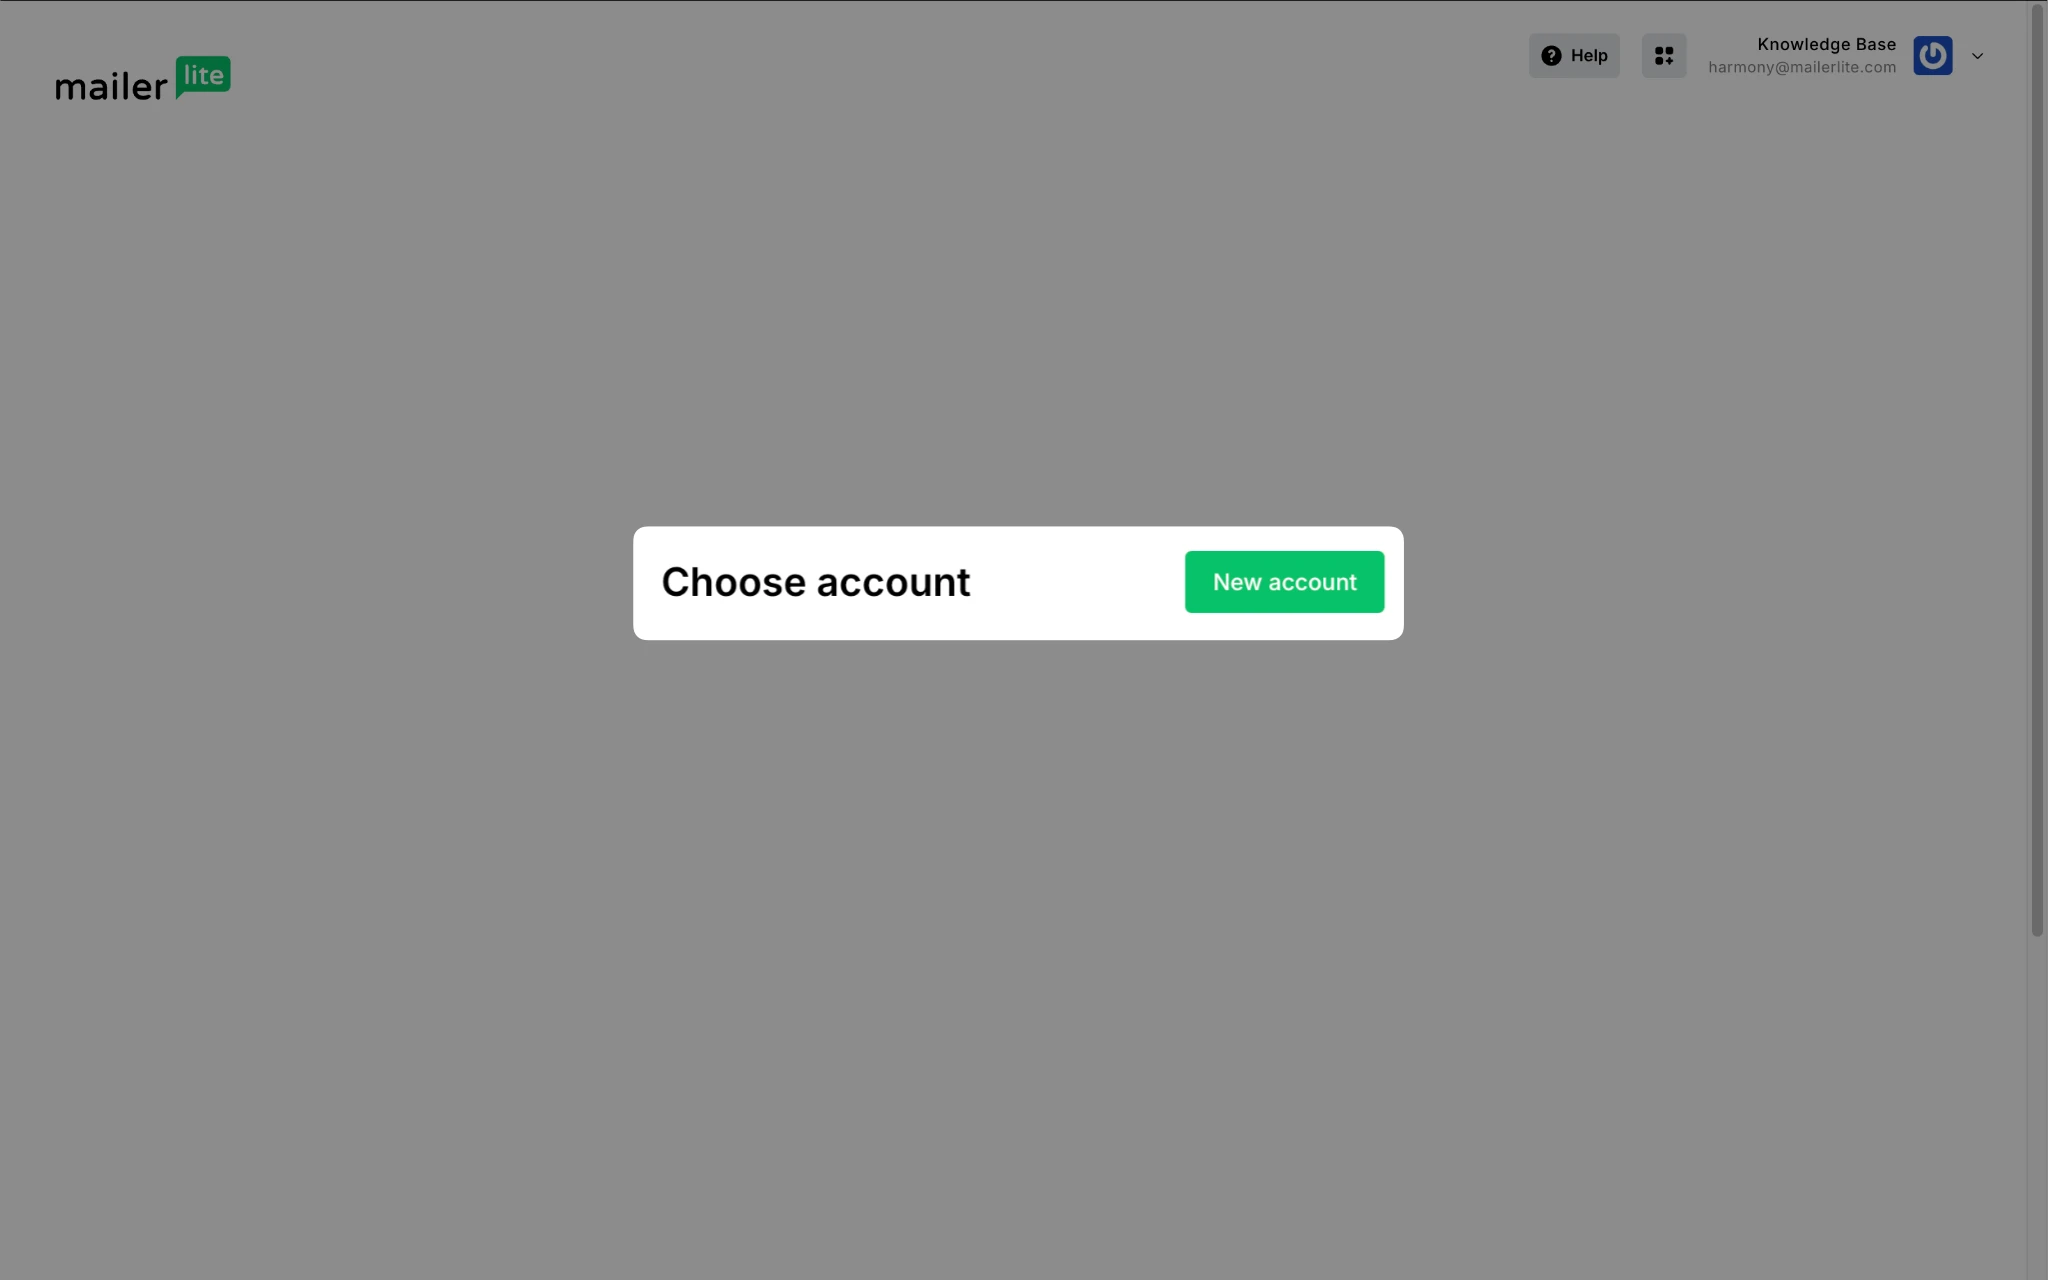
4. Give the account a name and click Save.
From here, you will go through a few steps to answer questions and fill in information to create your new account.
Step 2: Migrate your info
Once you've arrived at the new MailerLite dashboard, you'll notice the option to transfer your MailerLite Legacy (Classic) account data. Here's what to do:
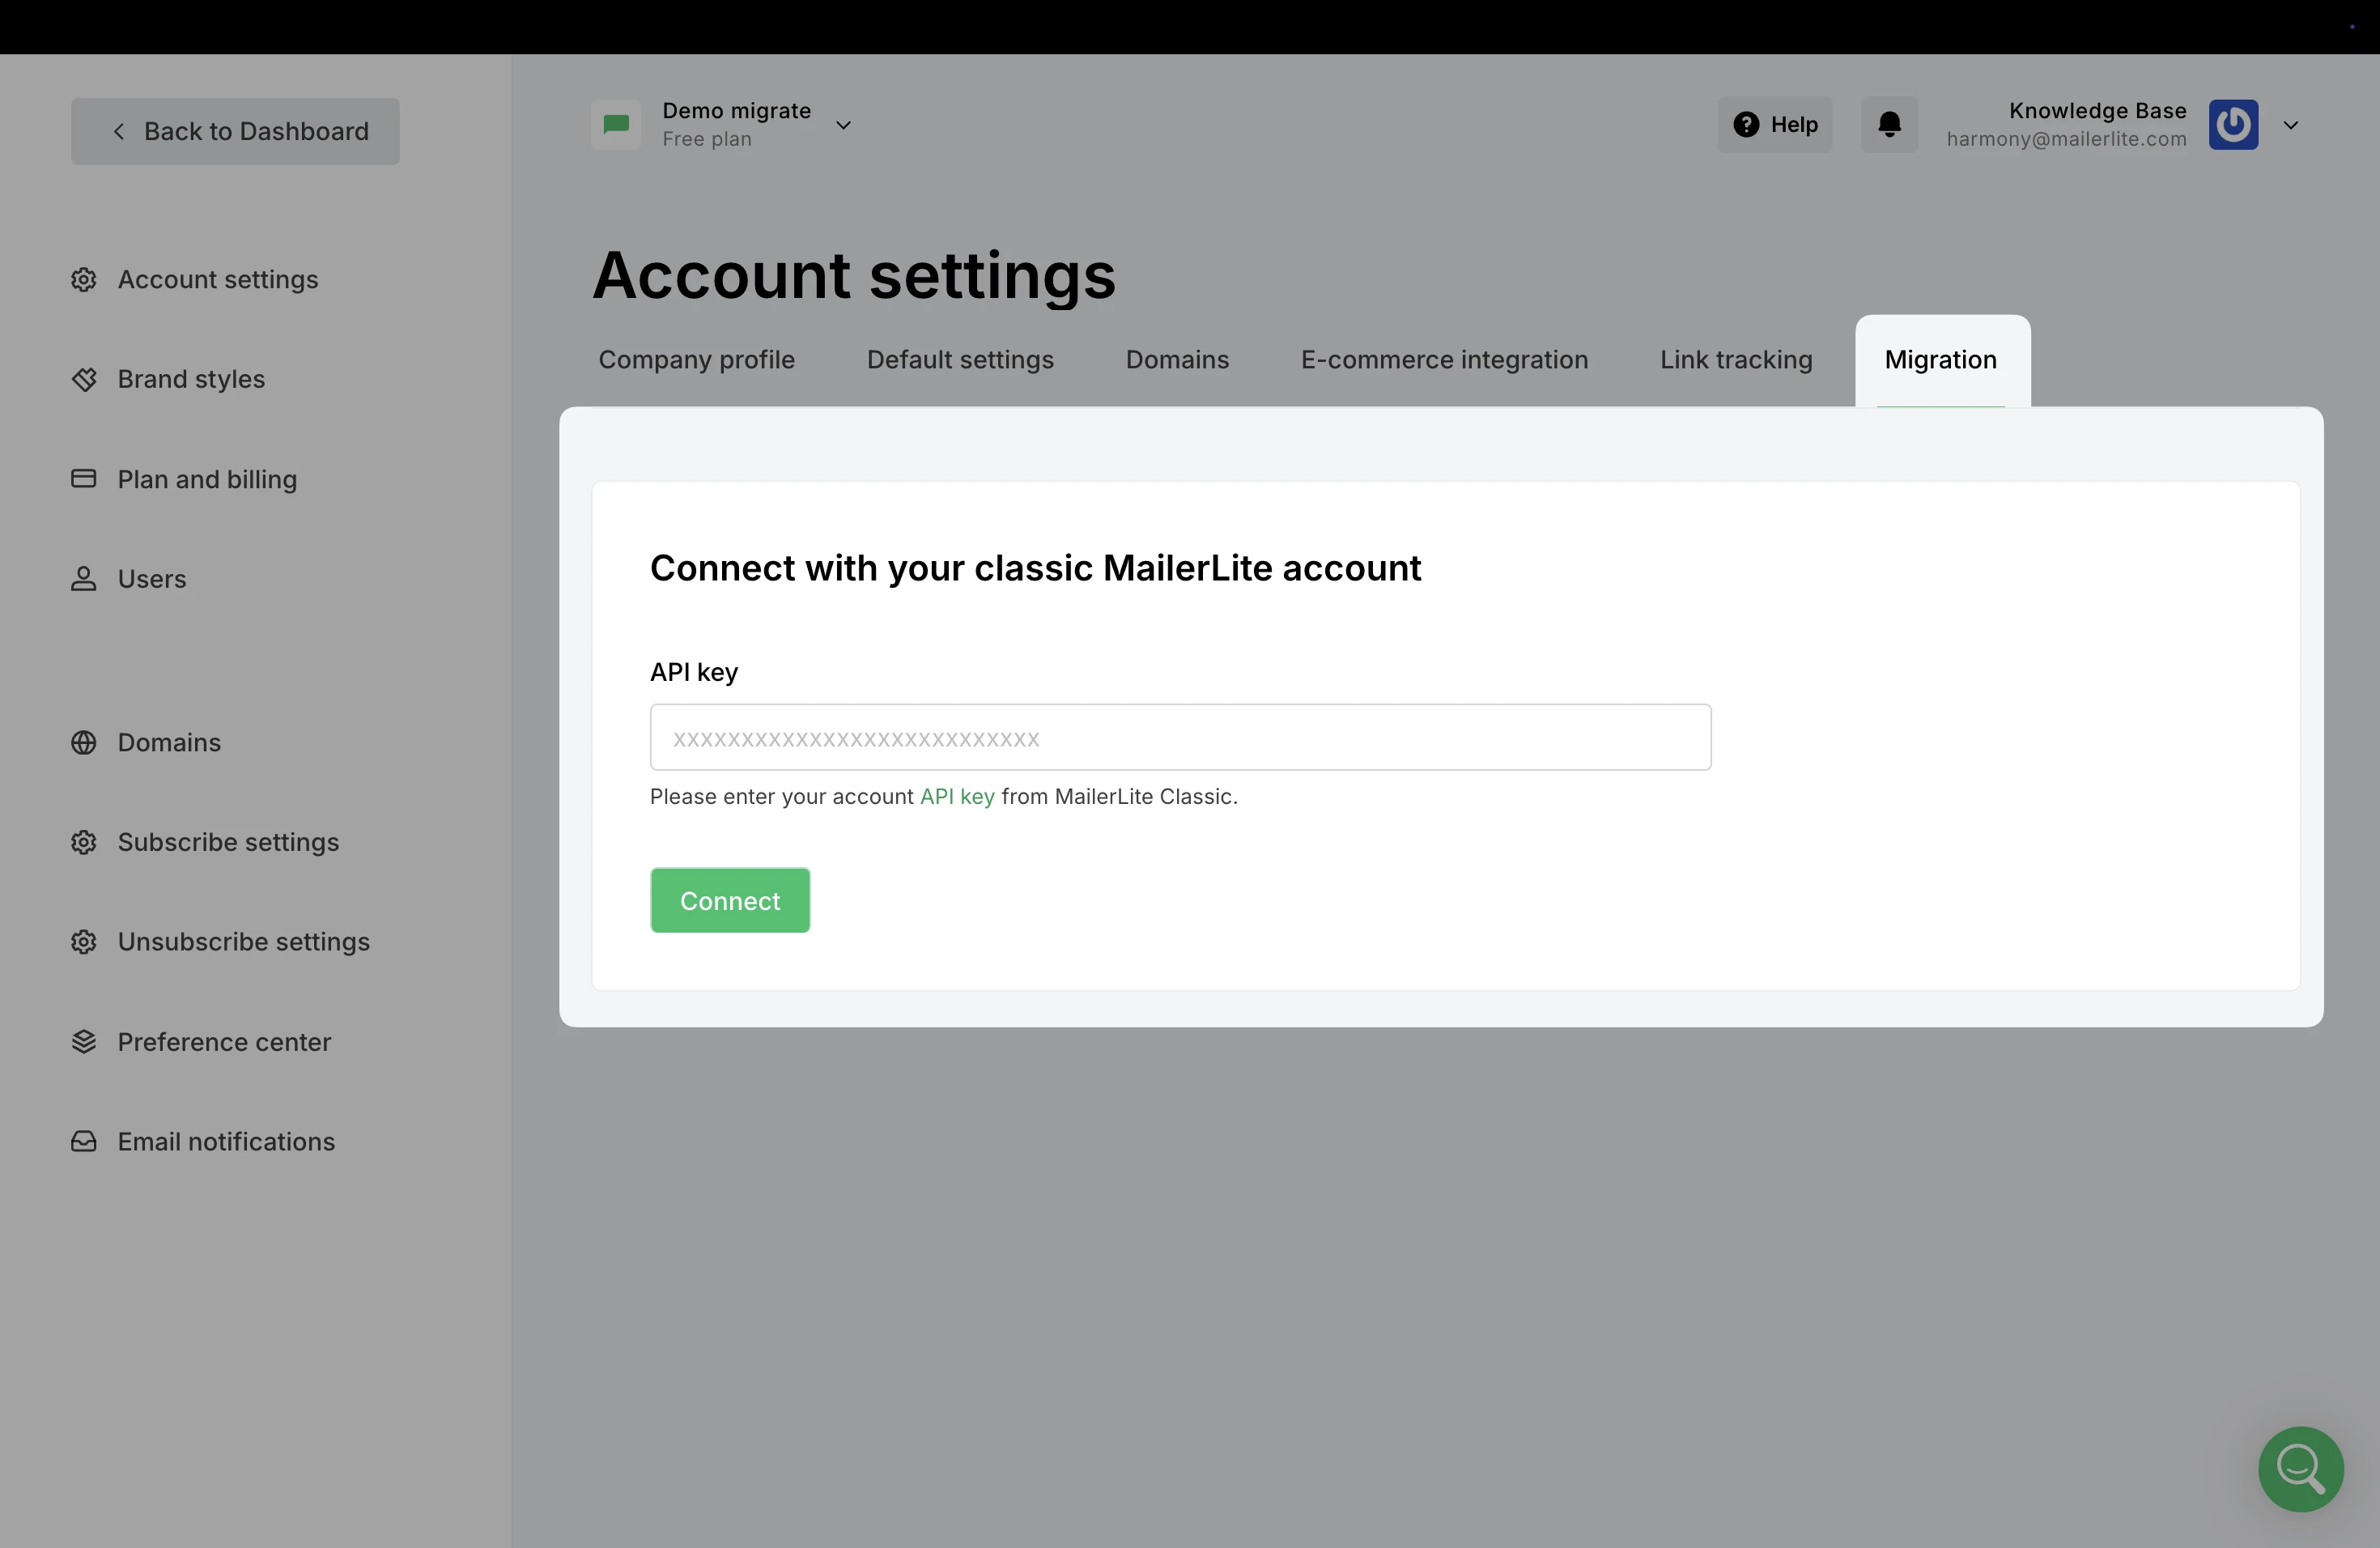
Go to Account settings.
Navigate to the Migration tab.
Paste your API key from your MailerLite Legacy (Classic) account into the designated field.
Hit Connect.
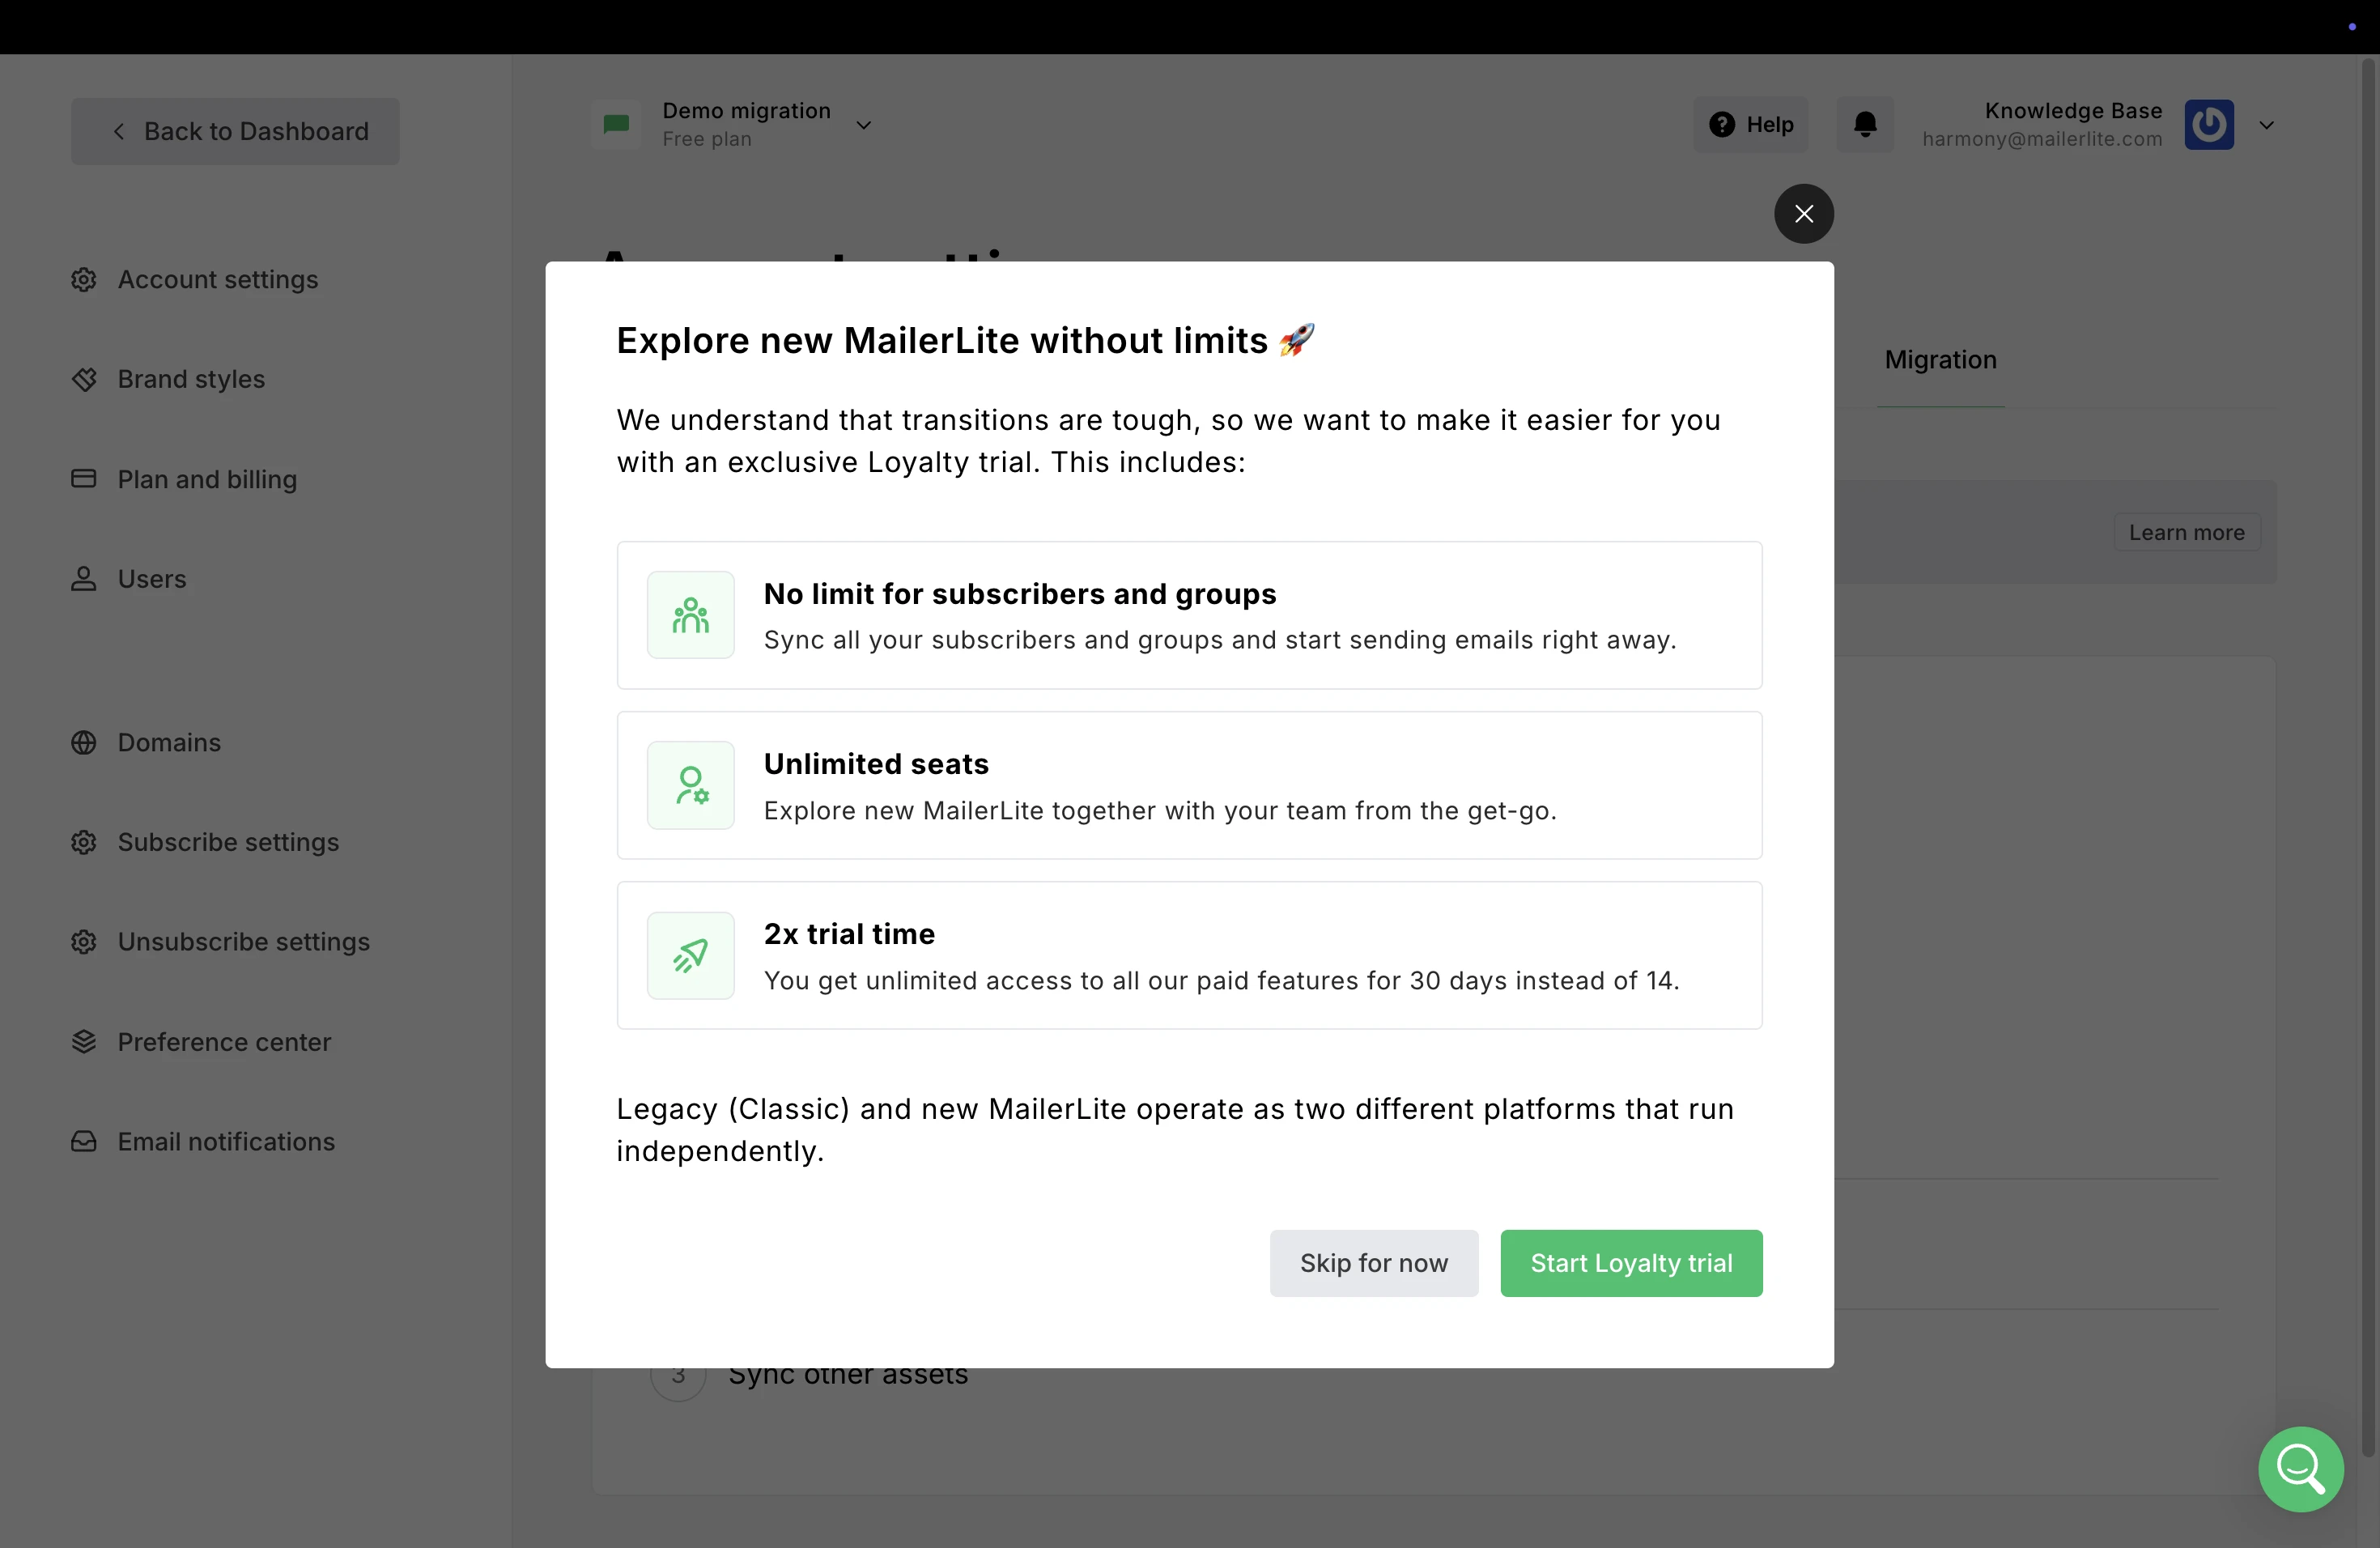
Loyalty Trial: What’s included
The new MailerLite has some limitations for the free plan. However, this limit does not apply for those migrating from Legacy (Classic). When migrating, you can take advantage of a unique 30-day Loyalty trial to test the new app fully, including your full subscriber list.
During the trial, it’s possible to:
Bring over all subscribers from Legacy (Classic)
Send campaigns to up to 2,500 emails throughout the trial period
Assign multiple account users
Access all features included in the standard 14-day MailerLite premium trial
Once the 30-day Loyalty Trial expires, the account moves to the Free plan limits. This means that all subscribers will still remain in the account, but email sending will be paused for more than 250 subscribers.
To continue sending campaigns to a larger list, upgrading to a paid plan is required.
To start the Loyalty trial:
Activate it during the migration process when prompted by clicking Learn more.
2. Next, click Start Loyalty trial.
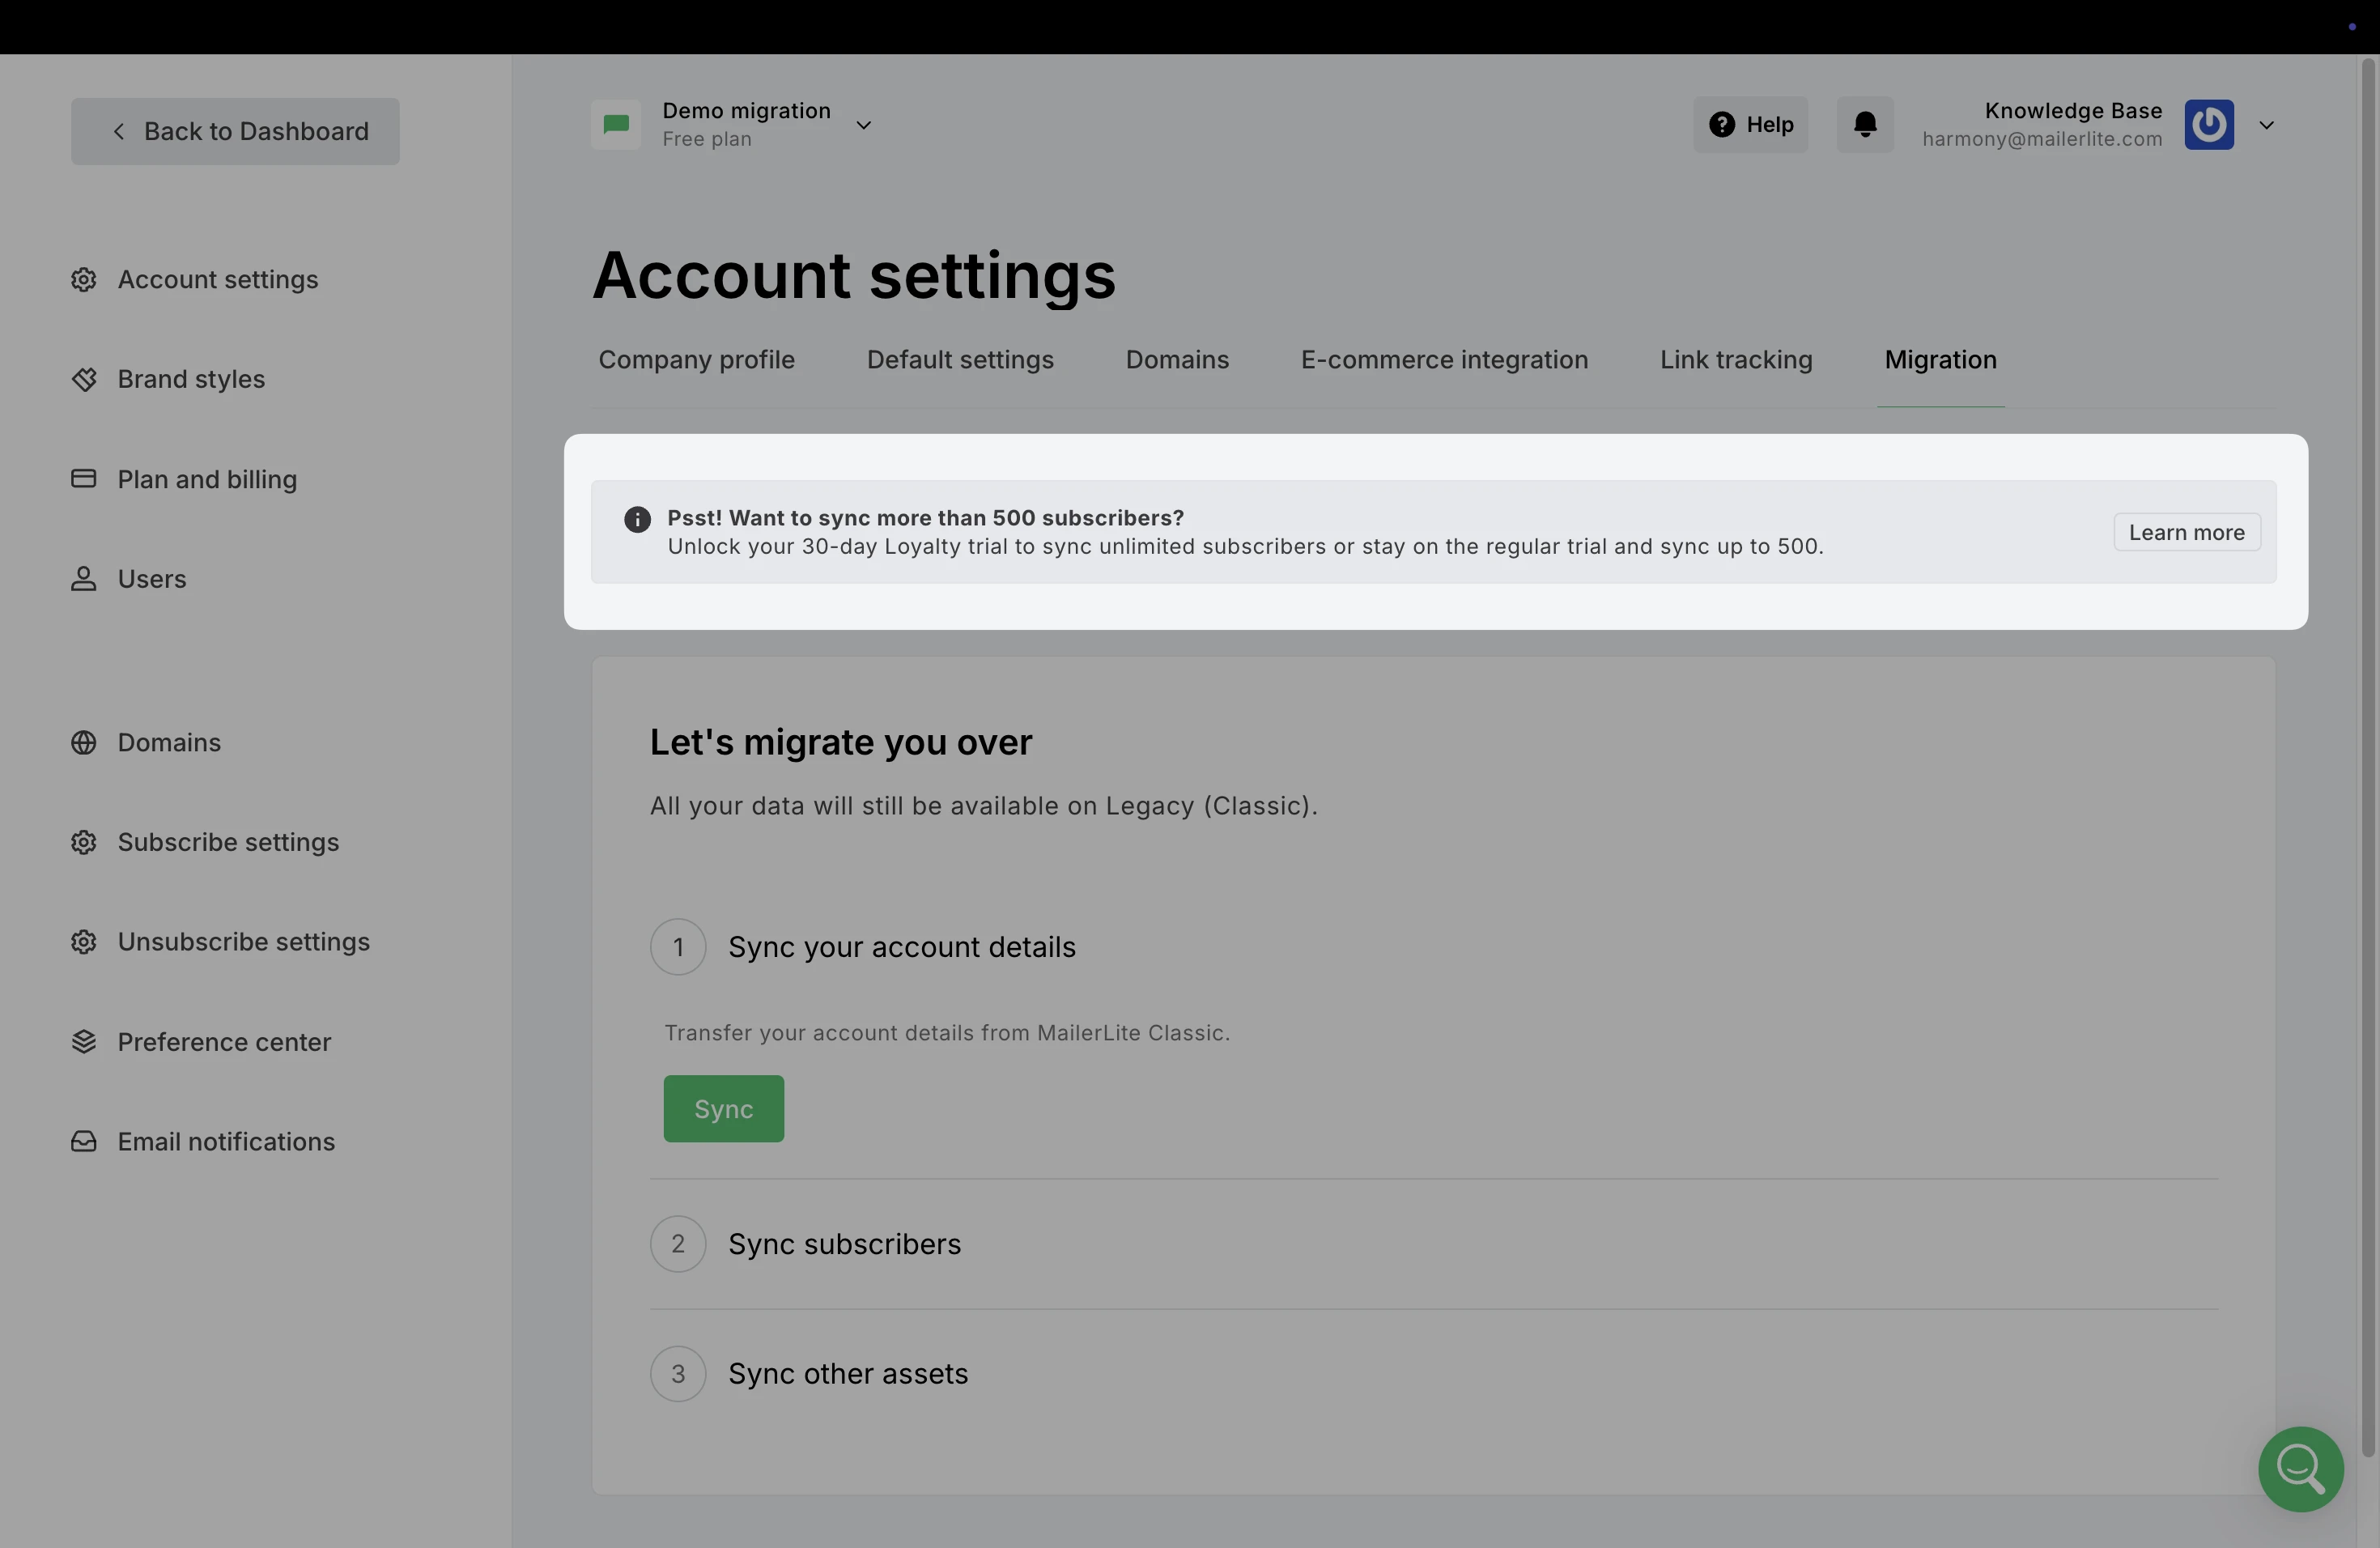
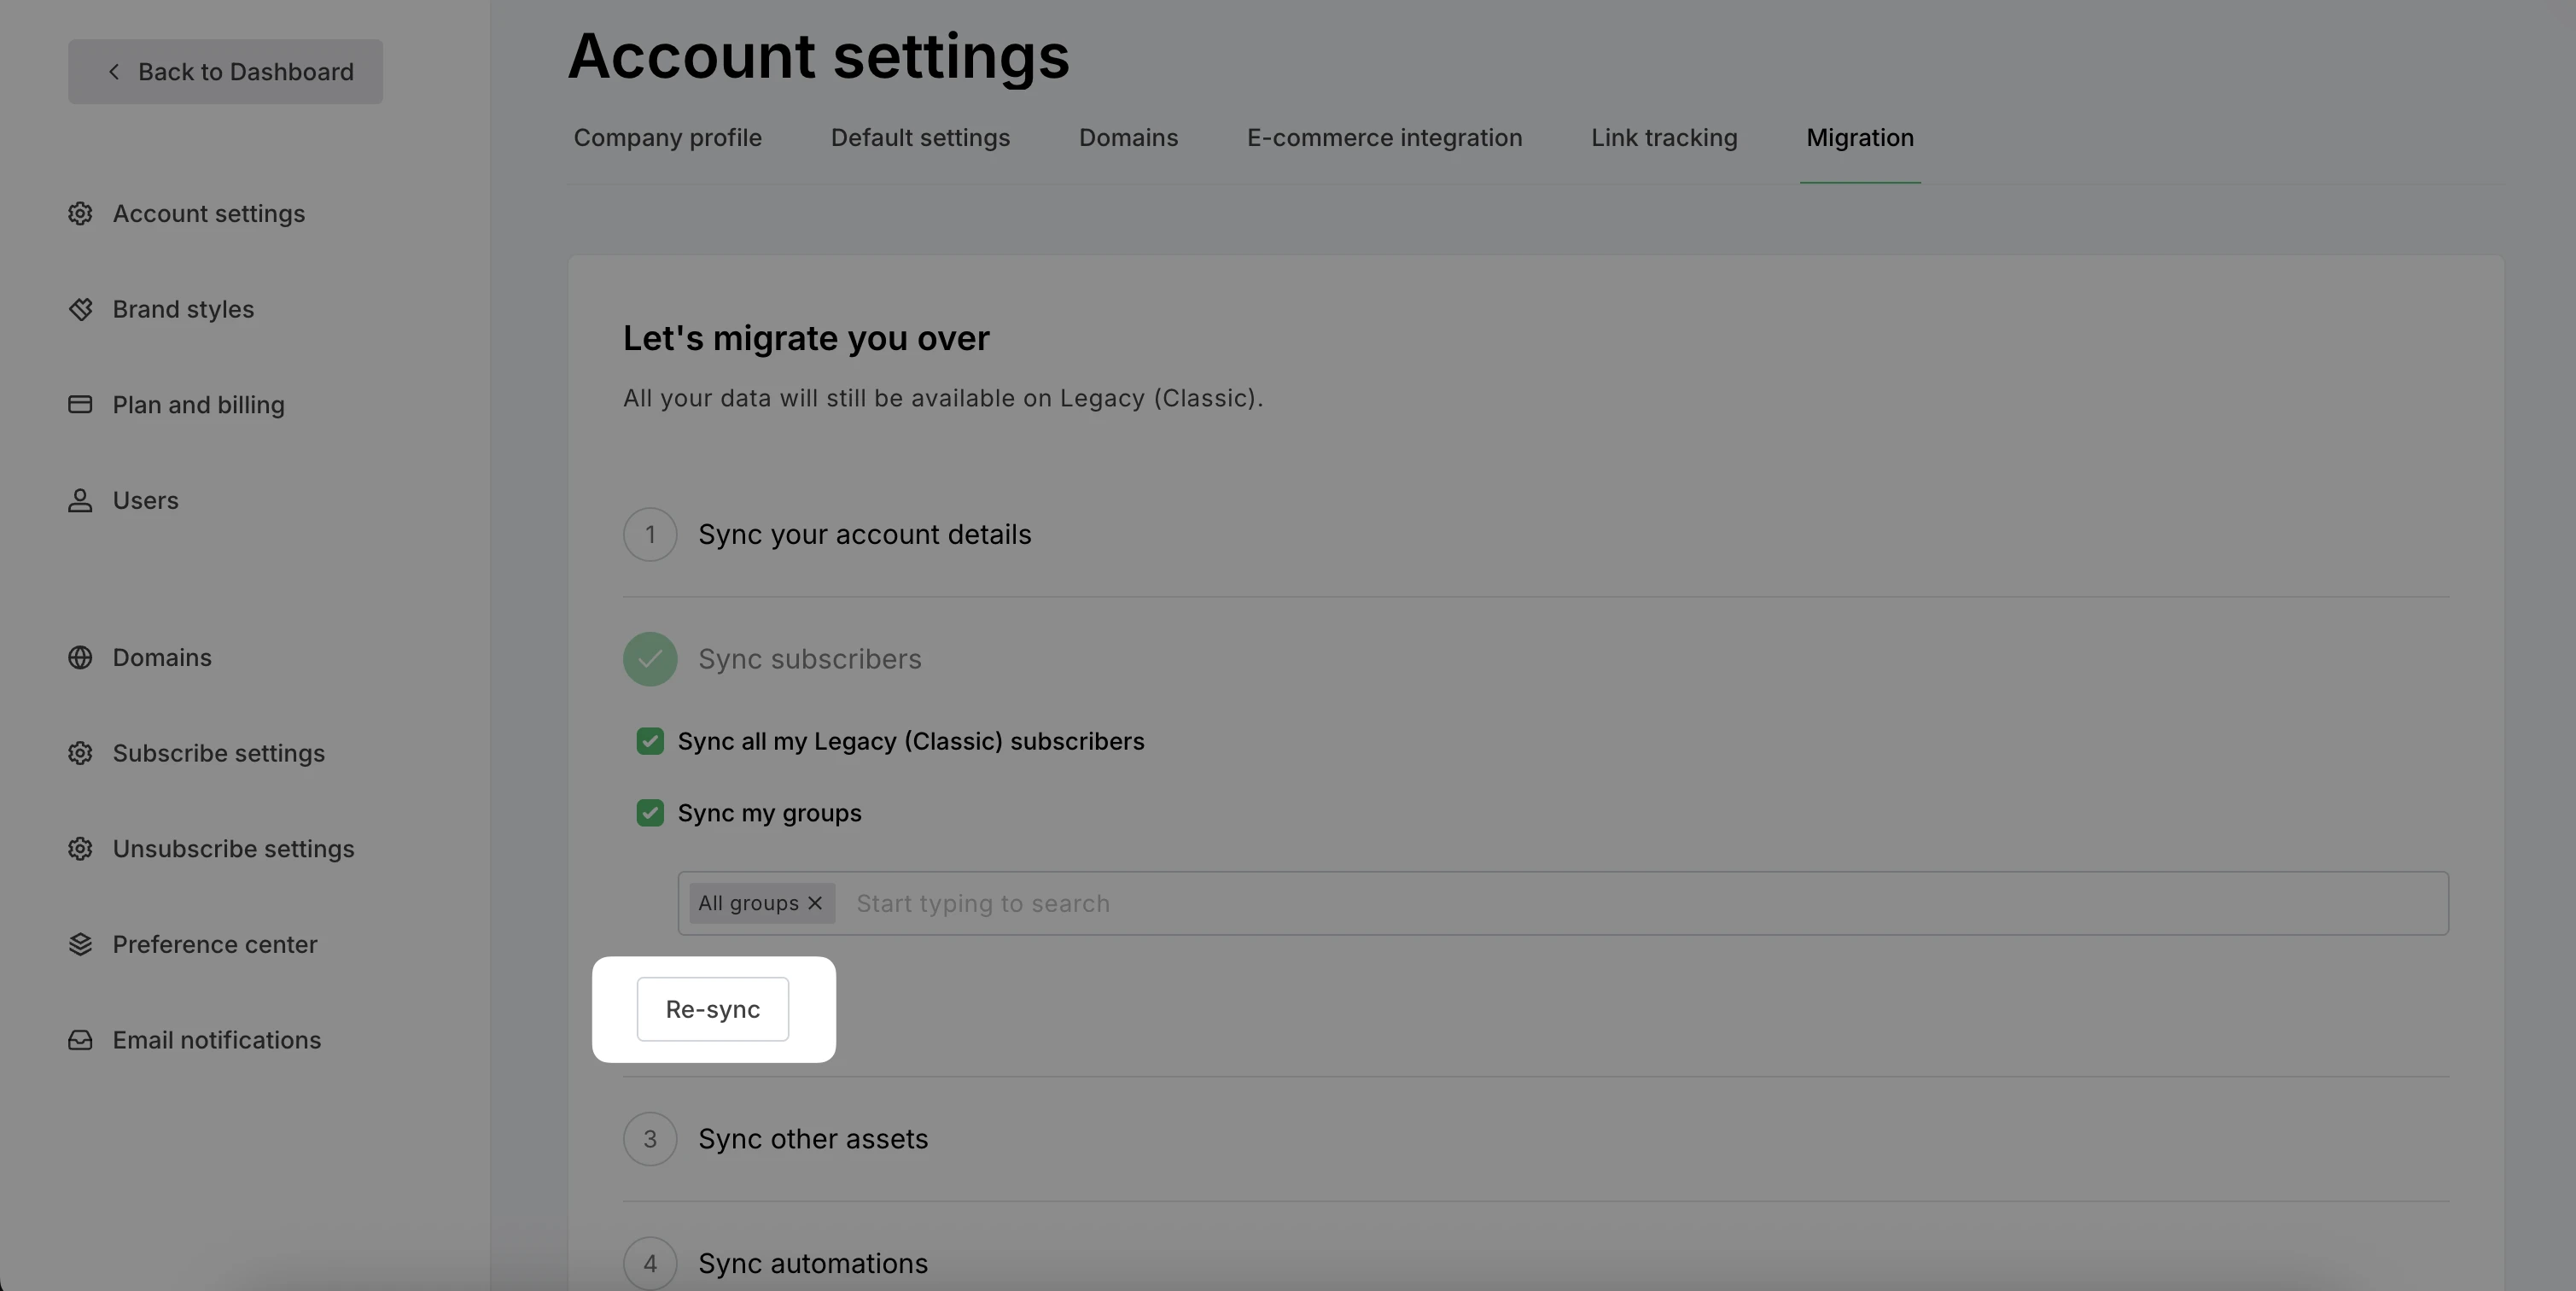
Account details
First, you will see the option to sync Account details.
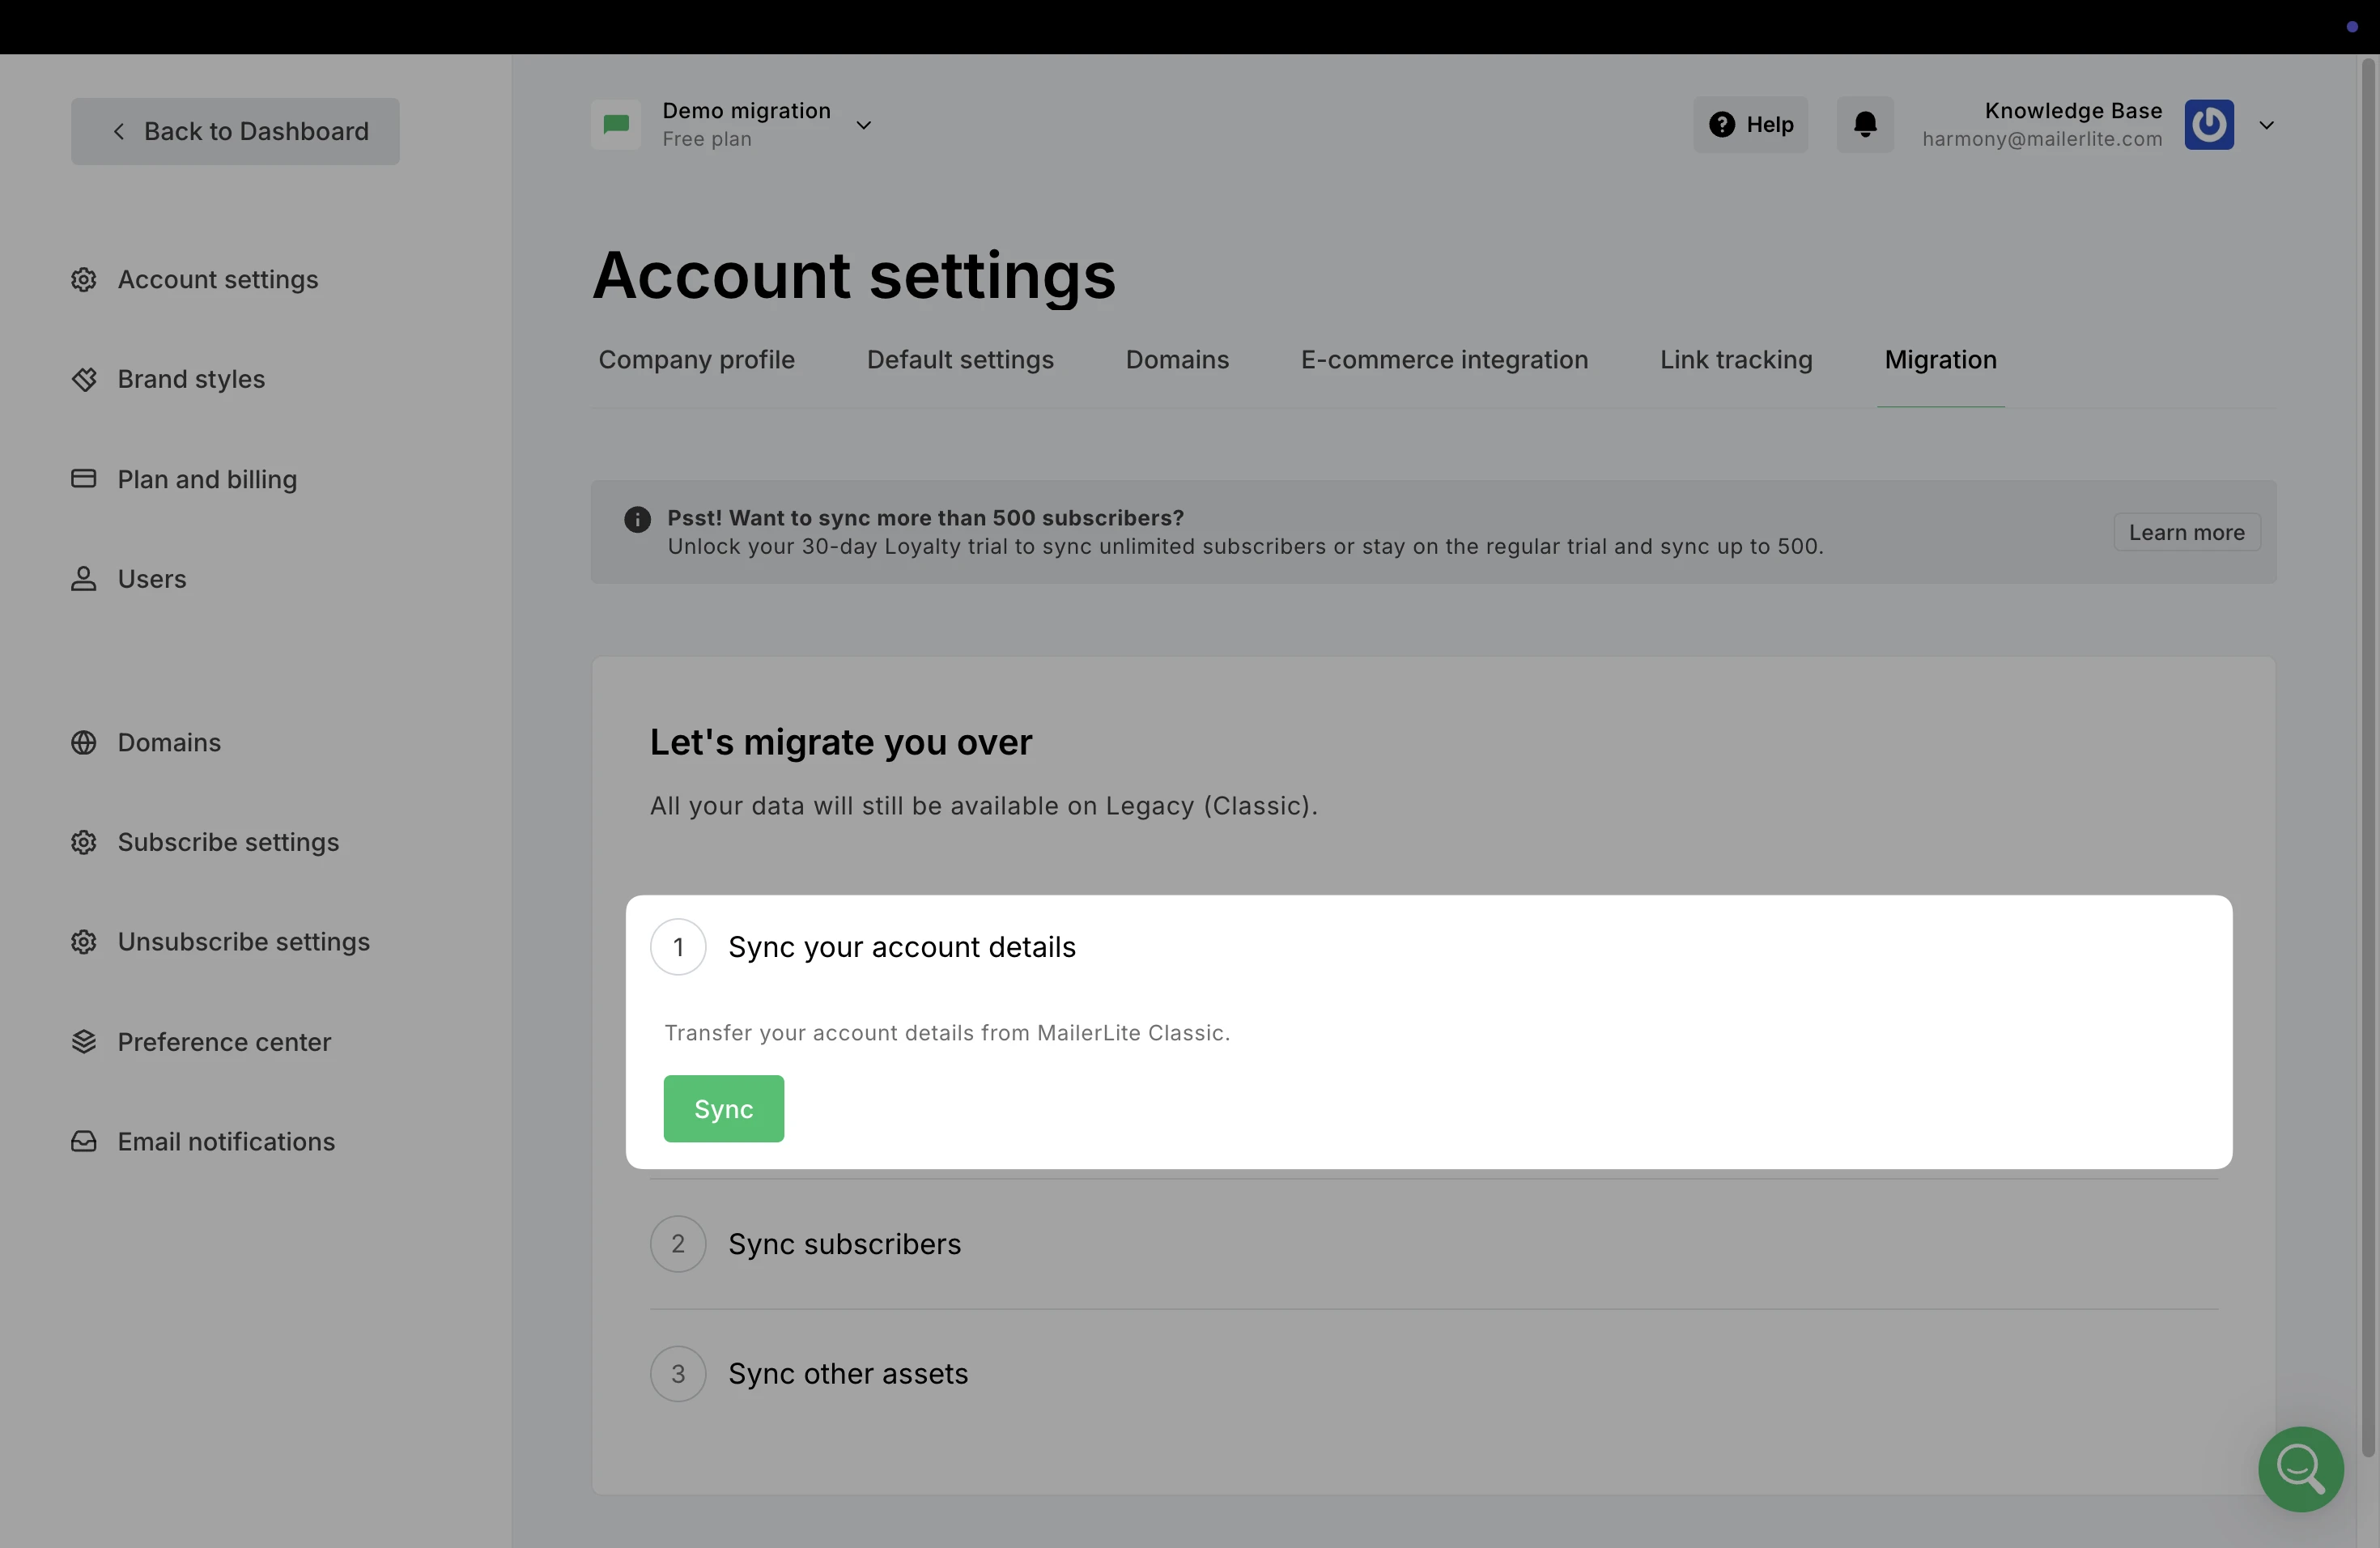
Click Sync to begin.
Subscribers
Keep in mind that billing in the new MailerLite is based on Active subscribers, rather than unique used subscribers as in MailerLite Legacy (Classic). For more details on billing, see Everything about plan and billing.
New MailerLite: Pricing is based on the total number of active subscribers in your account, regardless of how many you actually send newsletters to. All active subscribers count toward your billing tier.
🎓 Learn more about subscriber statuses
Legacy (Classic) MailerLite: Pricing is based on the number of subscribers you send to (used subscribers) within a 30-day period. The total number of subscribers stored in your account does not affect your tier.
During the subscriber migration, you also have the option to sync all subscribers or choose specific groups from MailerLite Legacy (Classic) to sync to your new account.

What is transferred?
| Active subscribers | |
| Unsubscribed | |
| Spam complaints | |
| Unconfirmed | |
| Bounced | |
| Groups | |
| Group statistics | Synced via Subscribers data |
| Subscriber history | Synced via Subscribers data |
Note: Group statistics and Subscriber history can be synced later using the Sync subscribers data and sent campaigns option.
Re-syncing subscribers
Migration tools work one way. Any updates to account details or subscribers in your MailerLite Legacy (Classic) account won't automatically update in your new MailerLite account.
If you're still collecting and managing subscribers in MailerLite Legacy (Classic), you can always come back to the Migration tab in your Account Settings to re-sync subscribers whenever you need to.
Sync other assets
Next, you will have the option to sync other data from MailerLite Legacy (Classic).
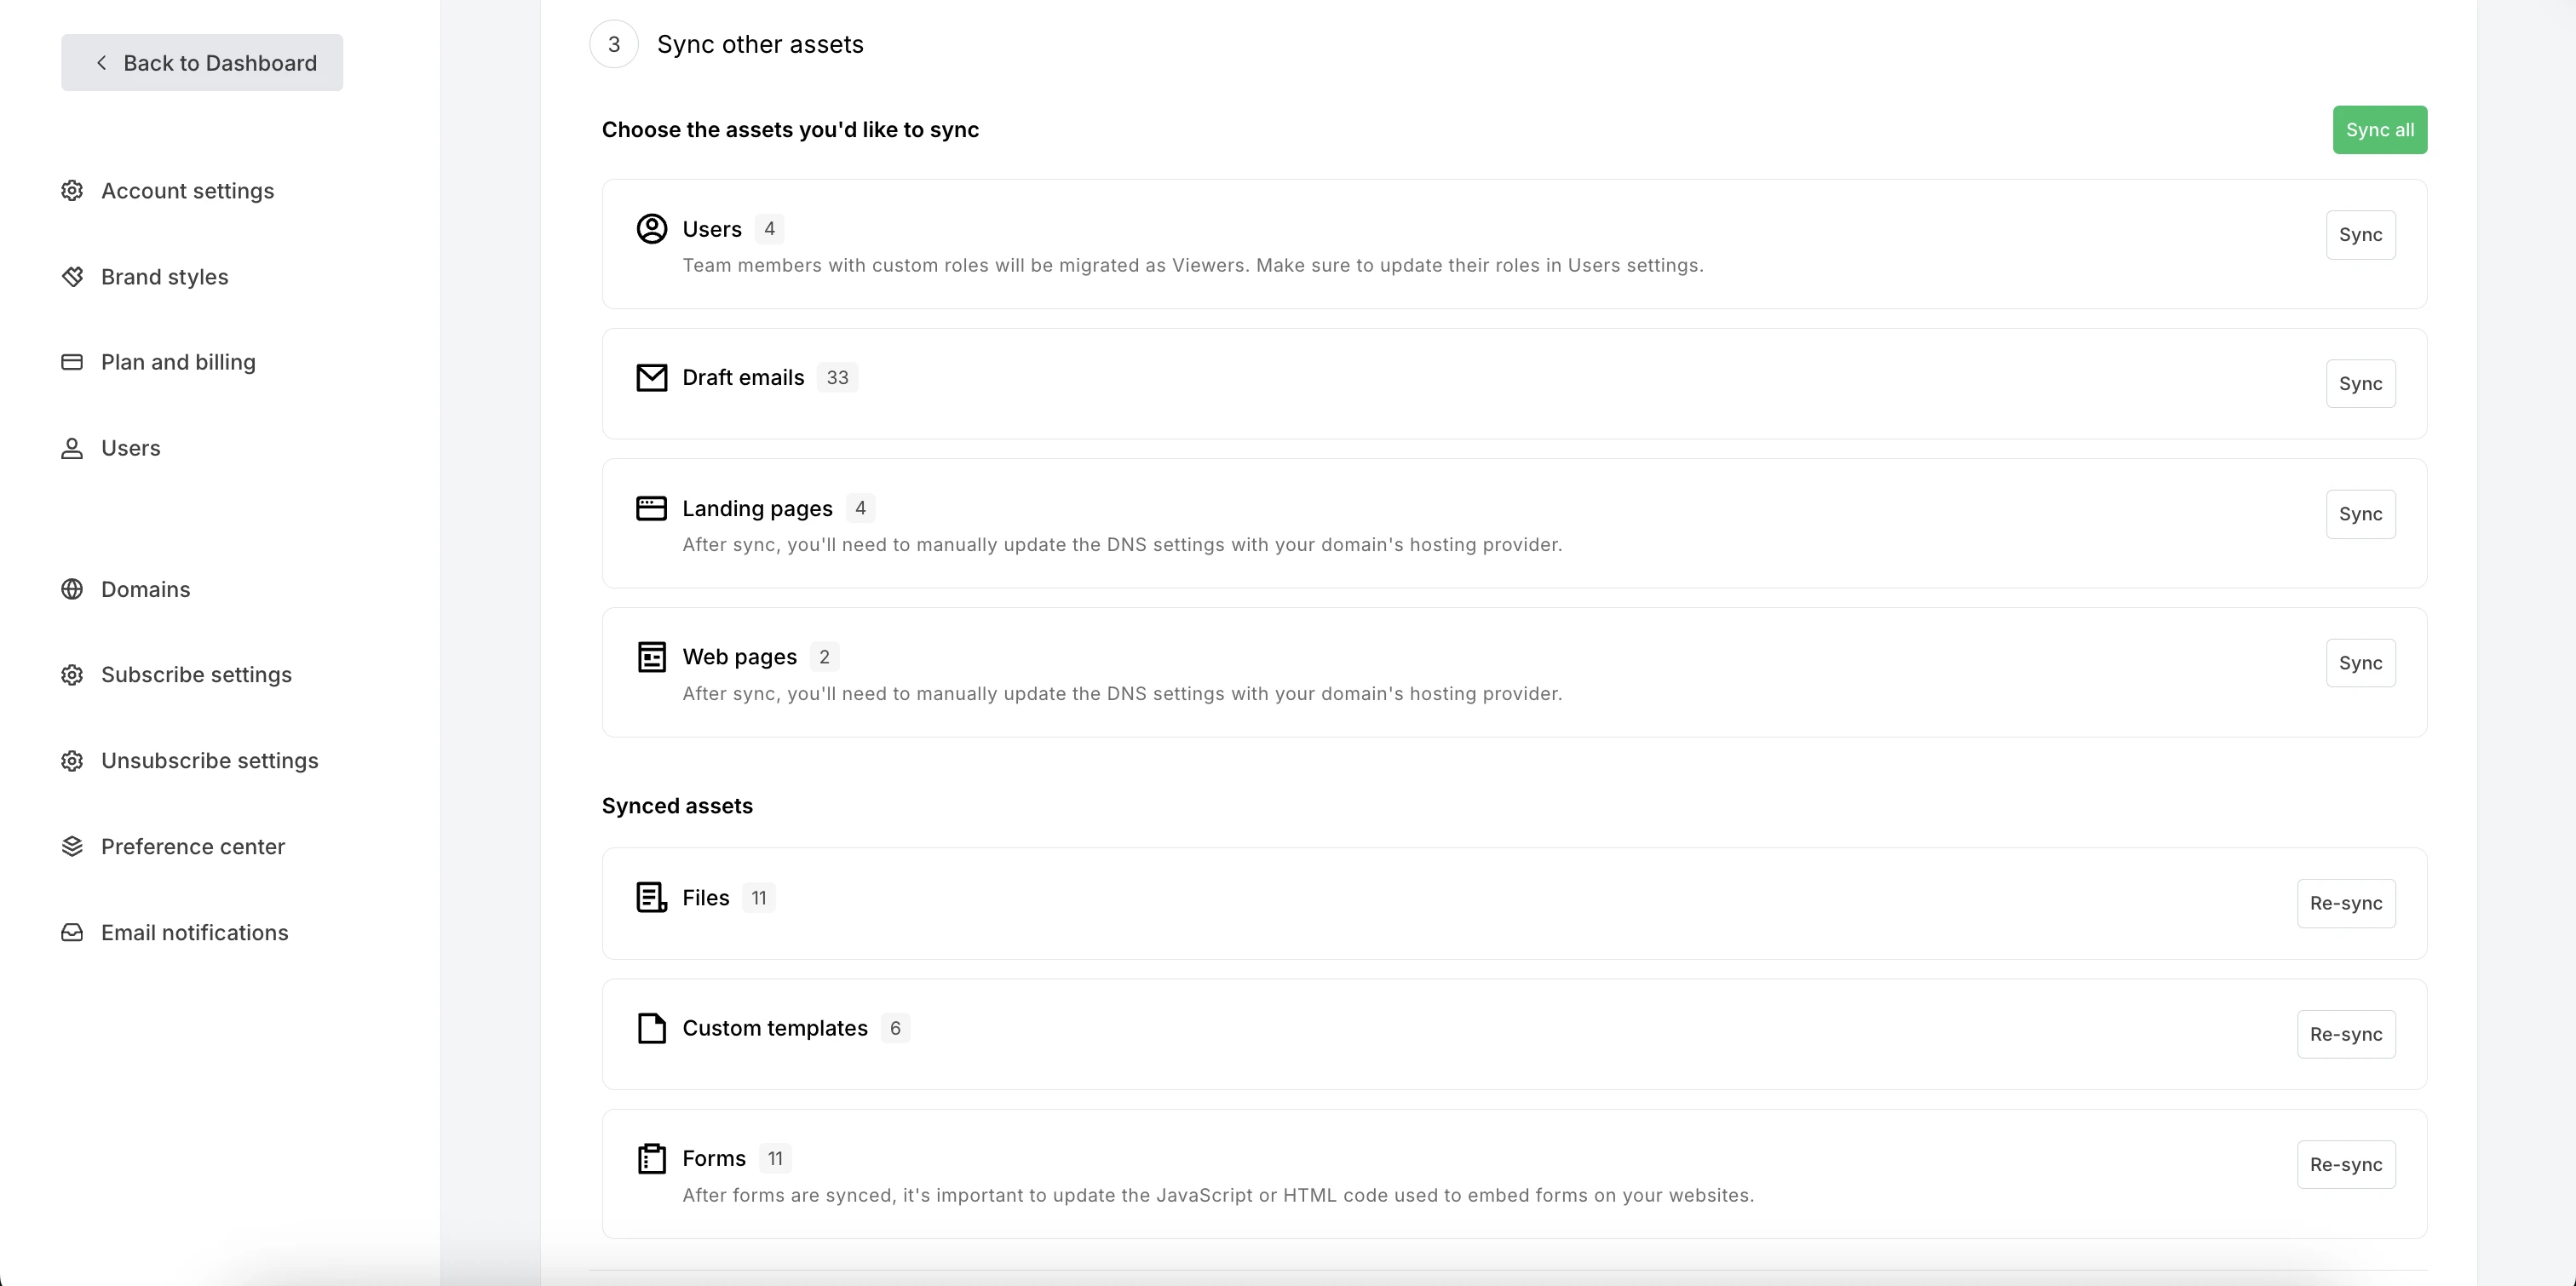
This includes:
Account users
Files: All the contents of your File manager
Custom templates
Draft emails
Forms
Landing pages
Web pages
You can sync each area individually, or choose to Sync all to migrate all data from MailerLite Legacy (Classic).
Assets that have completed the sync will be shown at the bottom of the migration page.
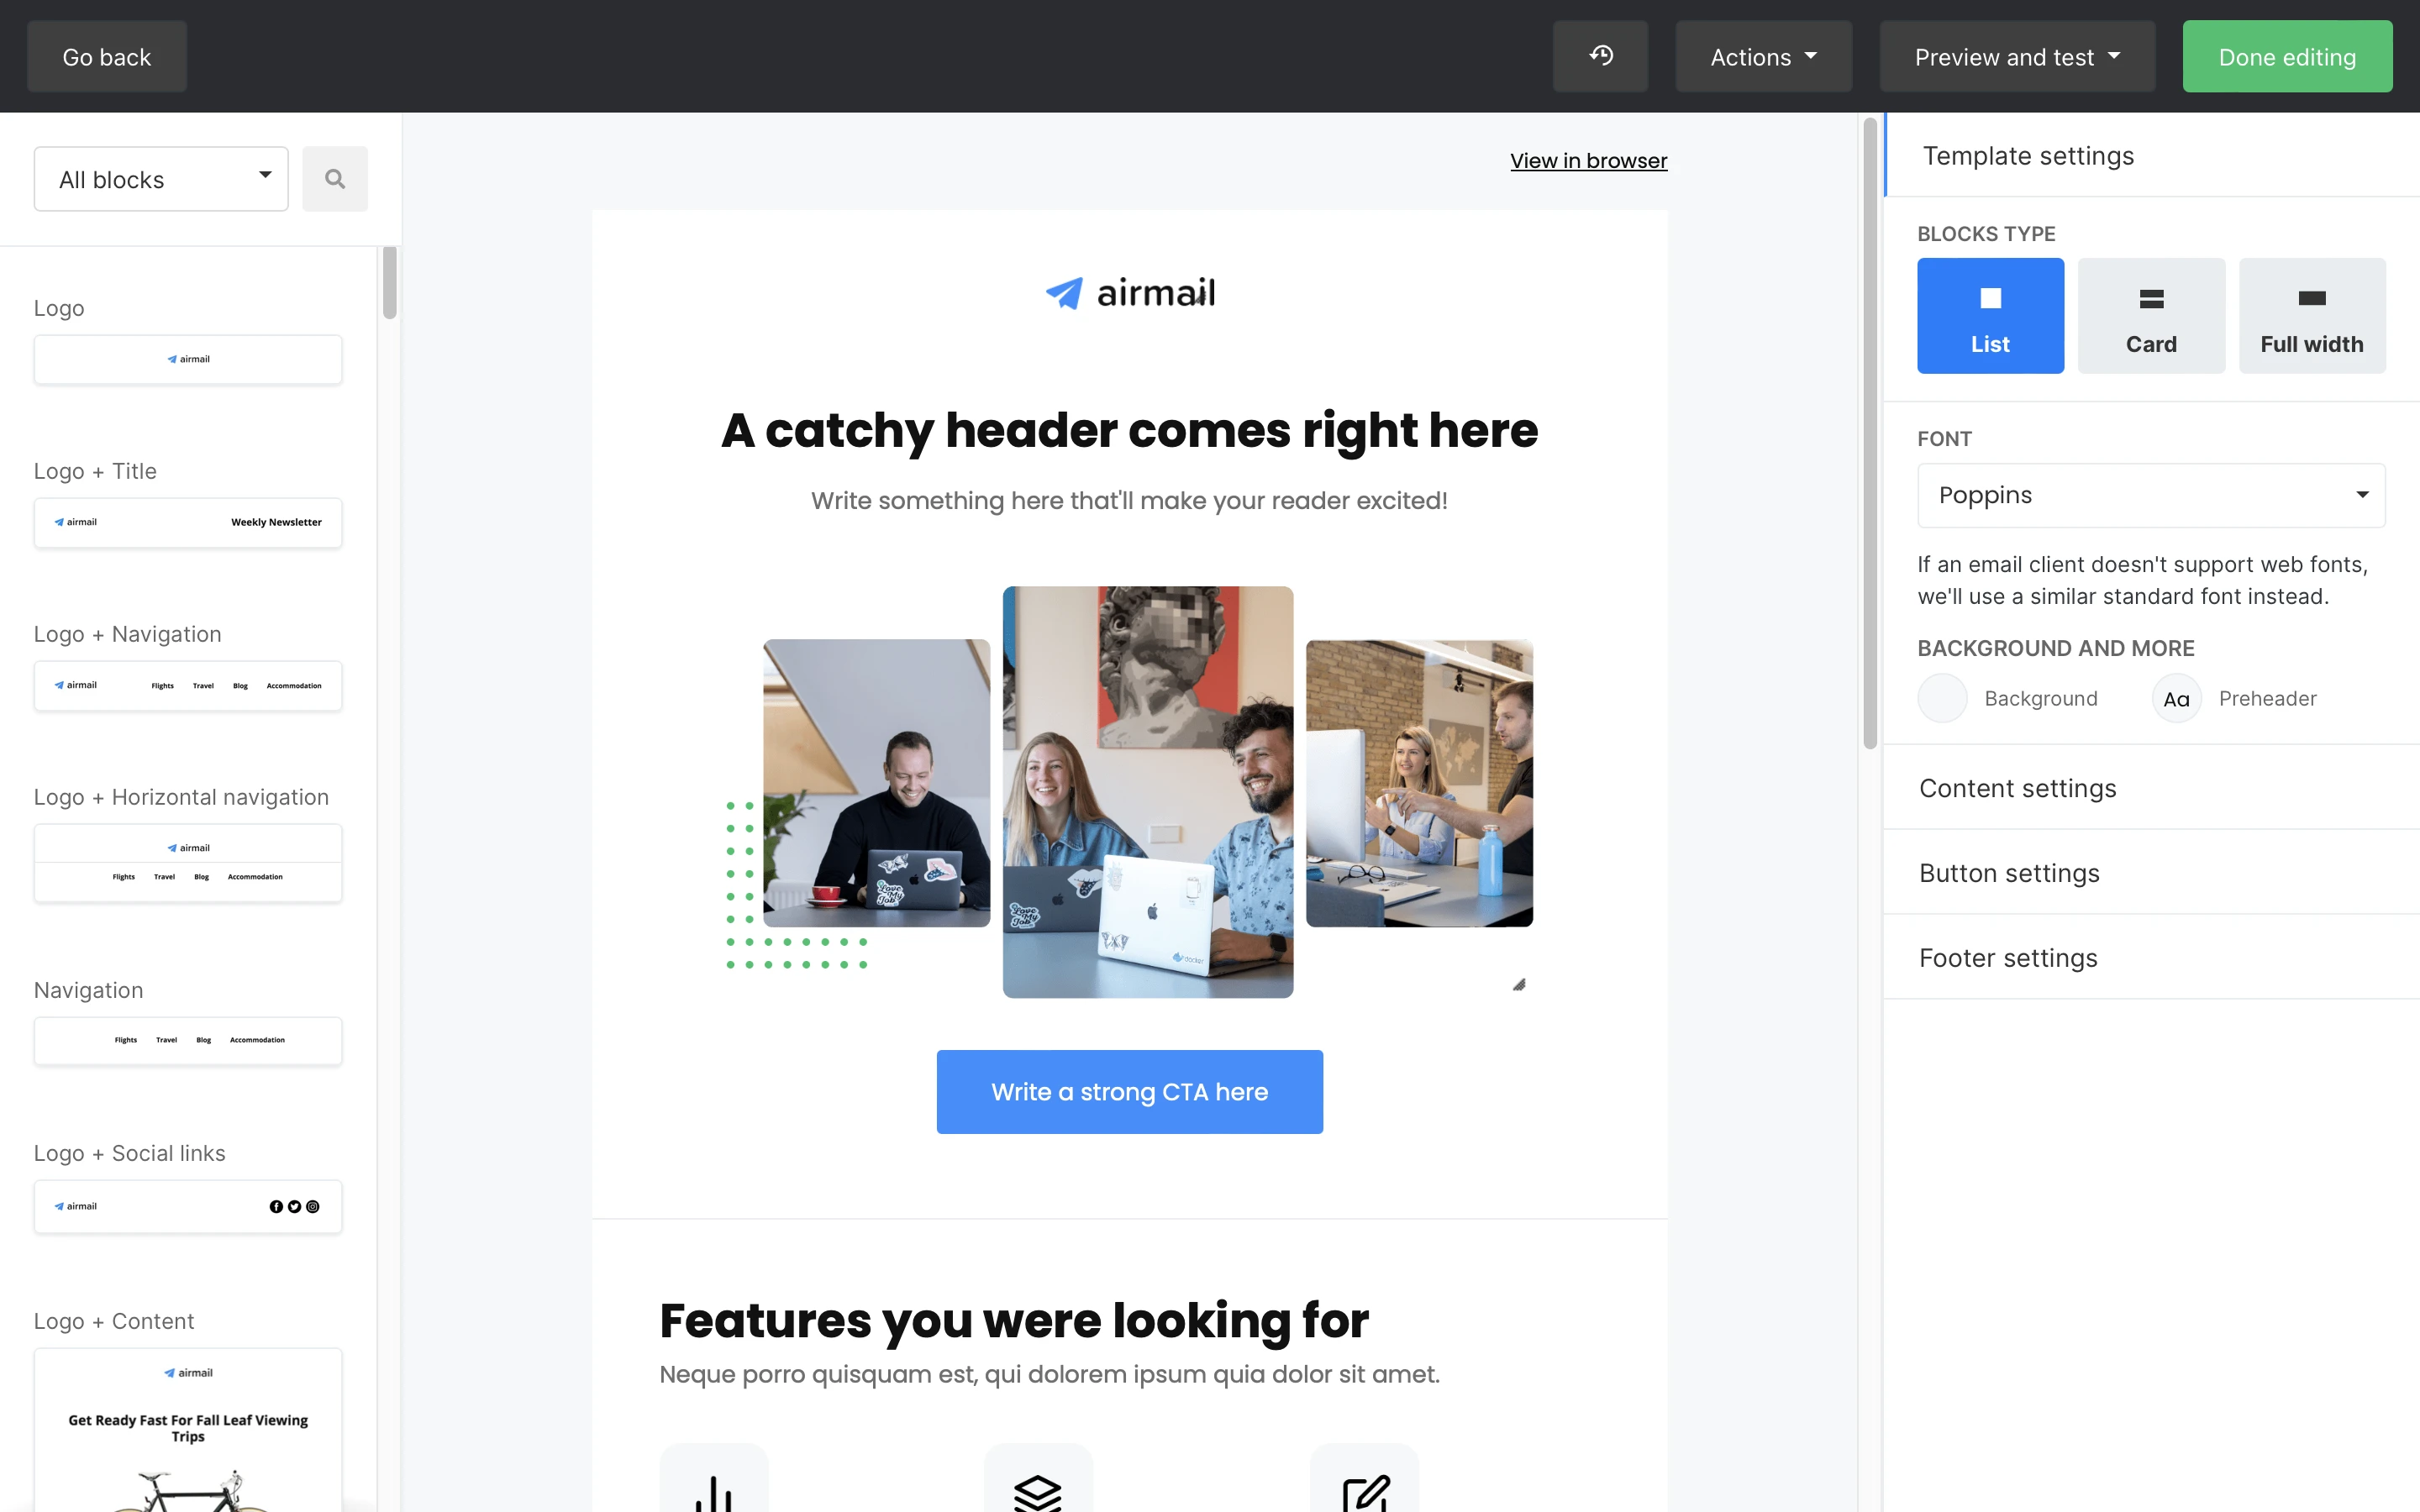
Outdated MailerLite editors
If you are using an older version of MailerLite's Drag & Drop editor, certain assets created with this editor will not migrate to the new platform. For example, here you can see the difference between an older and outdated version of a MailerLite Legacy (Classic) Drag & Drop editor, compared with the newest Legacy (Classic) editor:
Outdated
Current
Migrating forms
👉 Keep in mind:
Most forms can be migrated, but those created using an outdated version of MailerLite Drag & drop builder cannot be moved.
If you've been using URLs in your form's visibility settings, we'll bring up to 30 of them along.
Important 🚨
After your forms are migrated, it's important to update the JavaScript or HTML code used to embed them on your websites. This ensures that new subscribers are added to your new MailerLite account. If you don't make this update, subscribers who submit these forms will still be added to your MailerLite Legacy (Classic) account.
Here's how to find and replace the code:
Go to Forms in your new MailerLite account.
Click on the Overview button for the specific form.
Scroll down to find the JavaScript tracking snippet.
Simply copy this code and replace the old one on your website.

Migrating landing pages
Important 🚨
Custom domains will make the move, but you'll need to manually update the DNS settings with your domain's hosting provider.
Migrating websites
Remember 🚨 Custom domains will make the move, but you'll need to manually update the DNS settings with your domain's hosting provider.
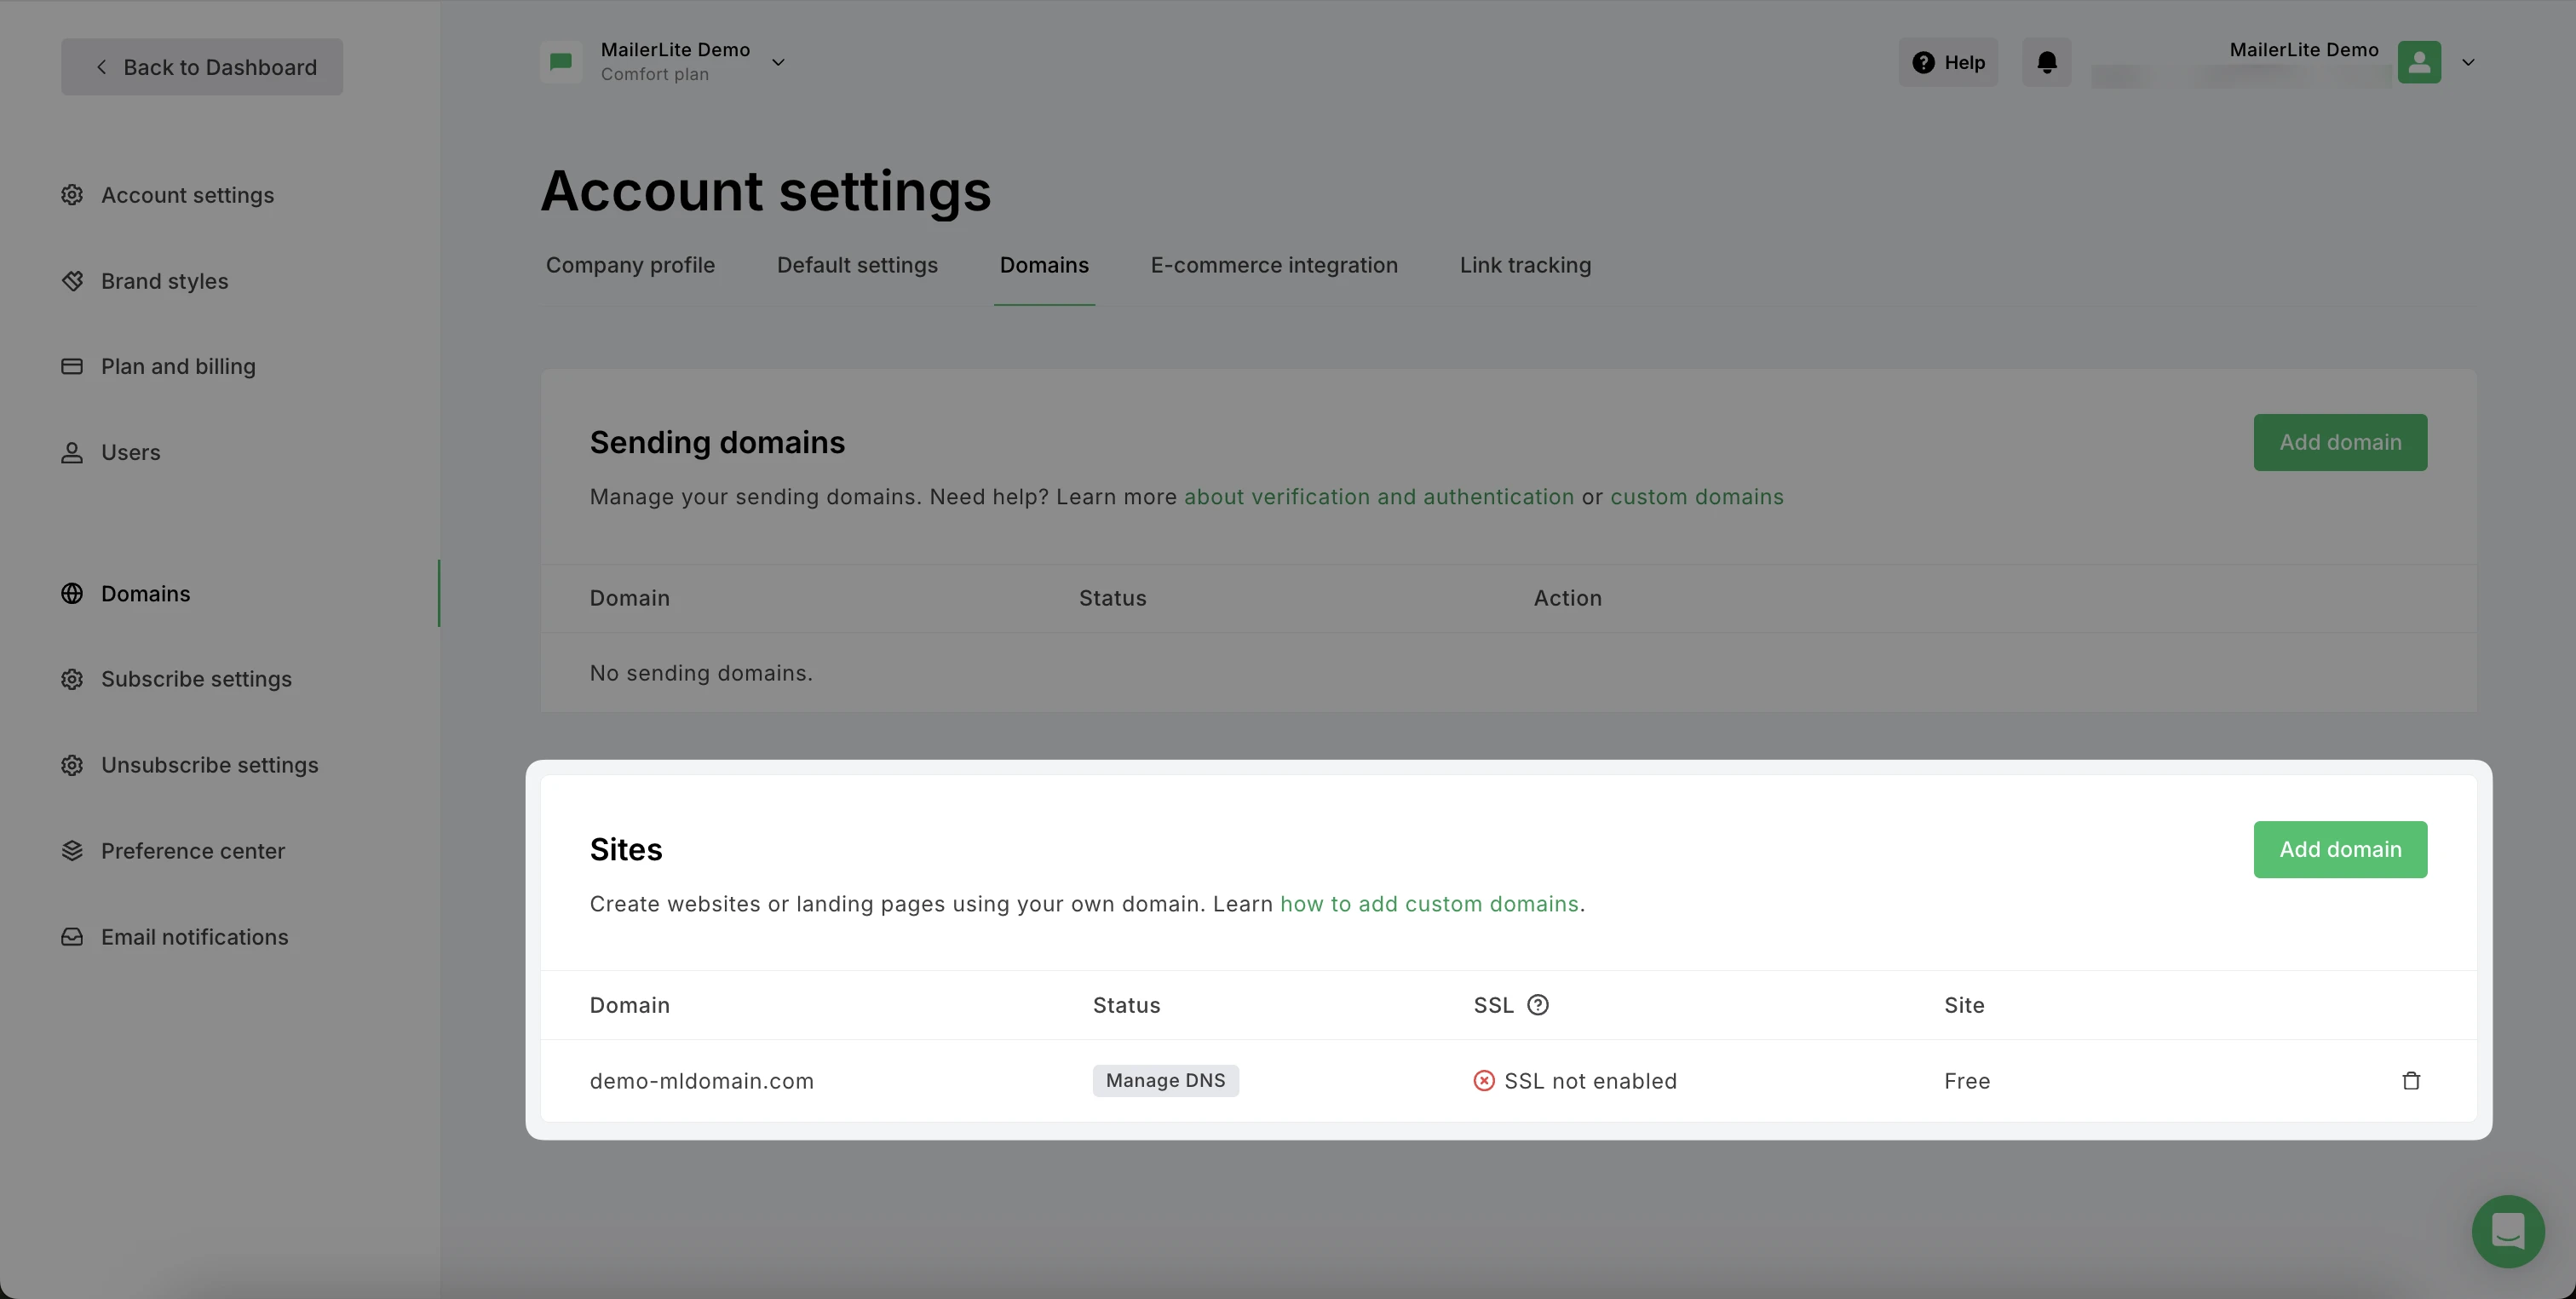
Updating domains and DNS settings
In the new MailerLite, we've made some improvements in how we authenticate your sending domains using DNS records. If you've already authenticated domains in MailerLite Legacy (Classic), here's how to update the records in your DNS settings
Go to Account Settings.
Click on the Domains tab.
Under Sending domains, you'll find the domains transferred from your MailerLite Legacy (Classic) account. To set up authentication, simply click the Authenticate button to access the DKIM, SPF and Domain verification records.
You'll need to copy and paste the information from MailerLite into your domain's records. Here's how:
In another browser window or tab, visit your domain provider's website and locate the records for your domain.
Replace the previous MailerLite DKIM and SPF records with the updated ones. Add a Domain verification record.
The DKIM record should be of the CNAME type.
The SPF record should be of TXT type.
The Domain verification record should be of TXT type.
Follow these instructions for creating CNAME & TXT records. Here are some instructions for editing DNS records with popular domain providers.
Custom Domains
To make sure your custom domains for websites and landing pages work smoothly with your new MailerLite account, you'll need to update some settings at your hosting provider. Here's how:
Once your website or landing page has been successfully migrated (see instructions above), go to the Sites section to find your custom domains or subdomains that have made the move.
Click on Manage DNS to access the updated records.
In another browser window or tab, visit your domain provider's website and locate the records for your domain.
Find the DNS settings for your domain. You can find instructions on how to do this by searching “DNS settings” + the name of your hosting provider on any search engine (such as Google).
Update the DNS record with CNAME type or A type, depending on how you chose to link your domain to our servers, by updating the Name and Value fields that are given to you on your MailerLite account.
Automations
👉 Here are a few things to know:
Most automation emails can move to the new MailerLite. However, any created using an outdated version of MailerLite Drag & drop builder cannot be moved.
Make sure you've already migrated your subscribers, files, and templates before moving on to automations.
Automation history and activity can't be migrated.
Queued subscribers can be synced for each automation separately; however, completed/canceled/failed subscribers can’t be synced.
Automations will need to be checked and enabled manually in the new MailerLite.
Migrating an automation doesn’t change its status in Legacy (Classic); activating it in the new MailerLite disables it in Legacy (Classic).
Automation migration allows you to sync automation steps. Once this is done, you can sync all queued subscribers for each automation separately and activate them individually.
🔔 Before you activate a migrated automation, we recommend reviewing every step and the content of each email.
To enable your automation:
Navigate back to your Dashboard and click Automations on the left-side panel.
Find the desired automation and click Edit.
In the editor, click the Sync subscribers button.
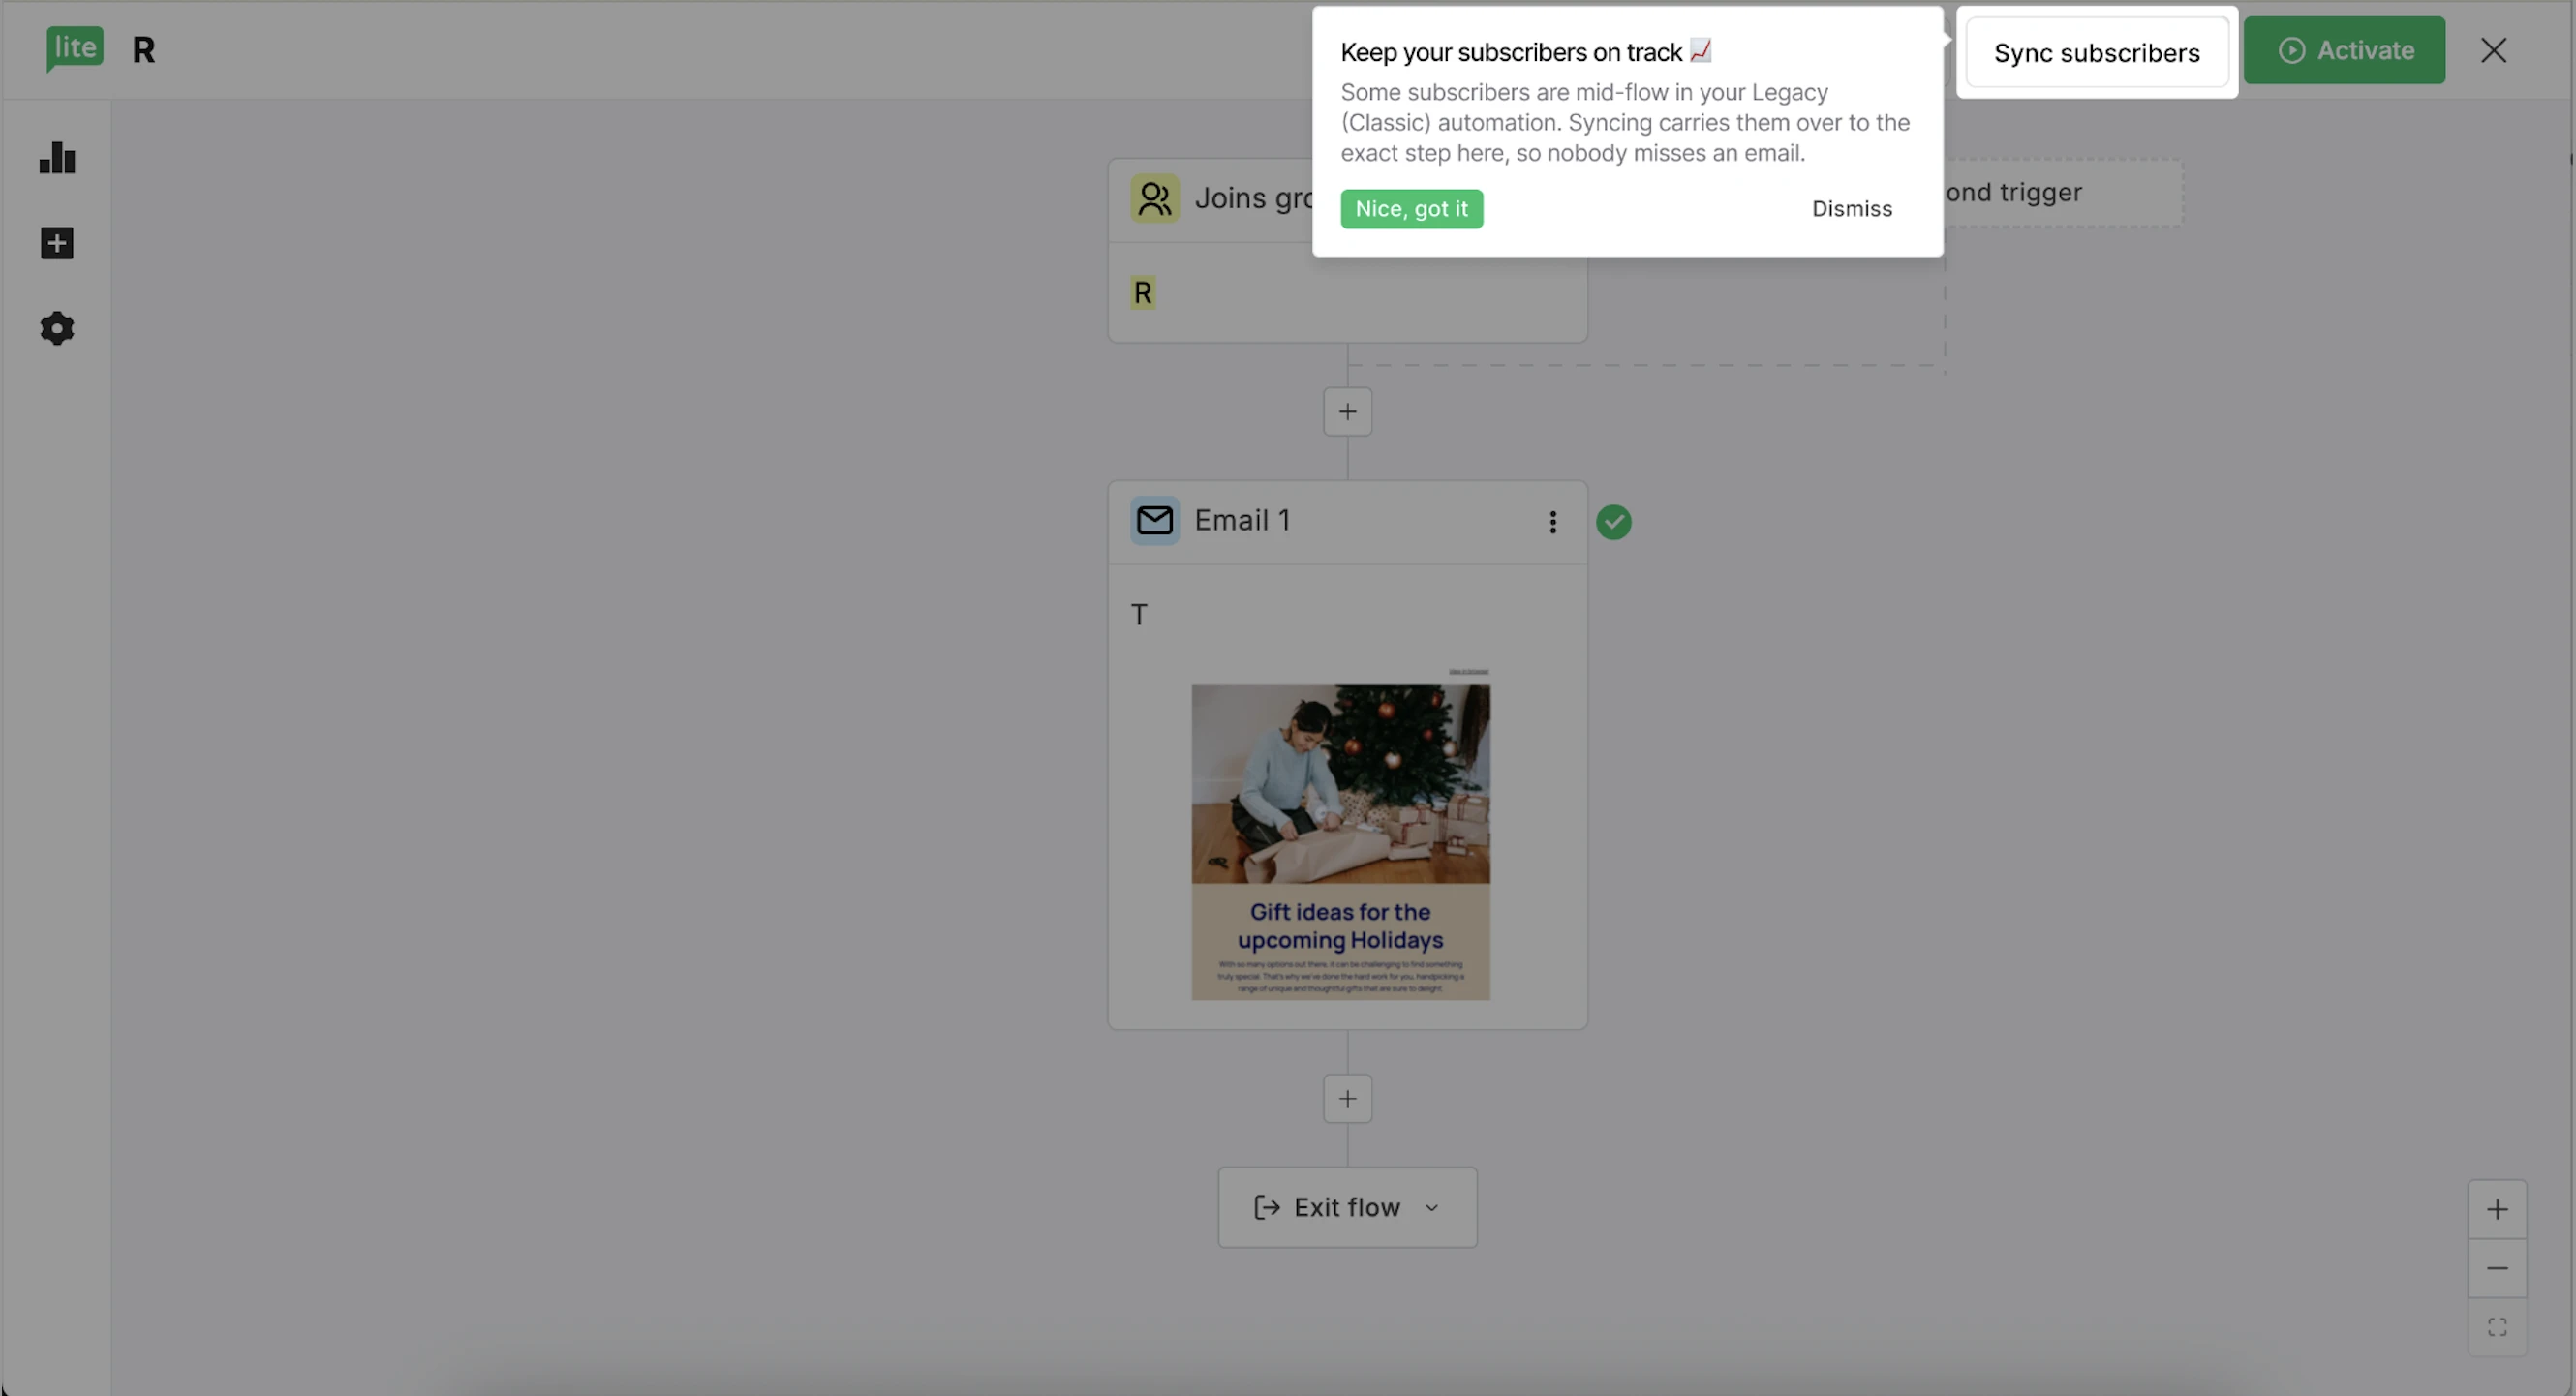
Review the number of subscribers available for synchronization.
If you’re ready to enable the automation, check the Activate automation after syncing box and click Sync and activate.
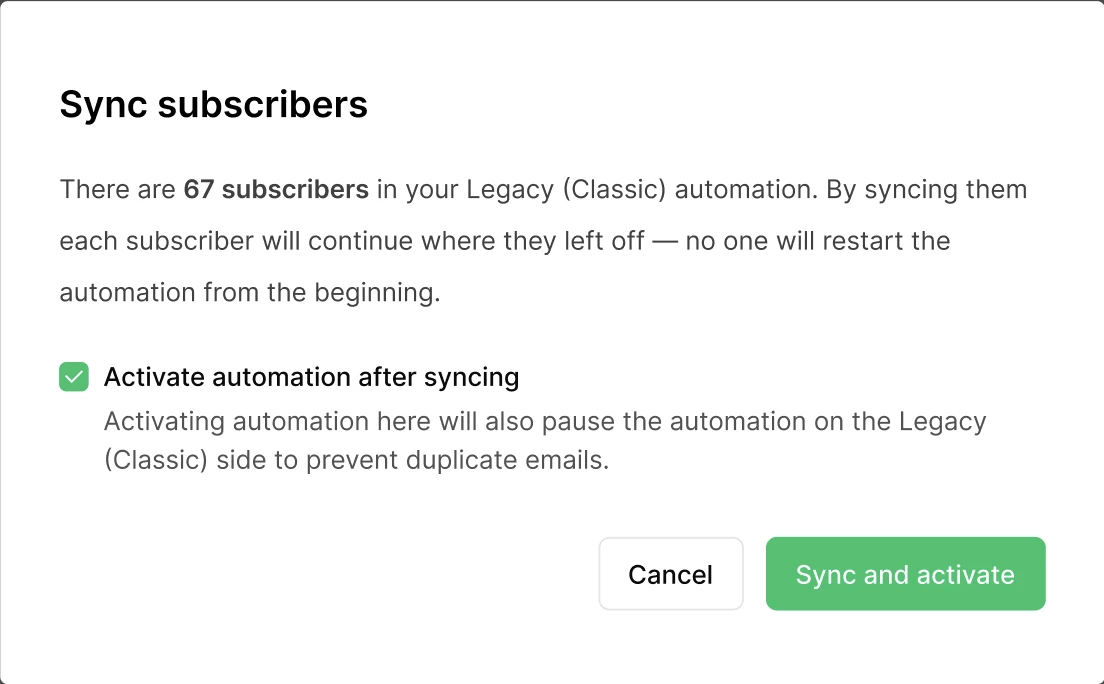
Note: If you’d like to start the automation without syncing subscribers first, skip this step and proceed to Activate directly.
Subscribers data and sent campaigns
👉 Keep in mind: Subscribers data and sent campaigns older than 12 months can’t be migrated.
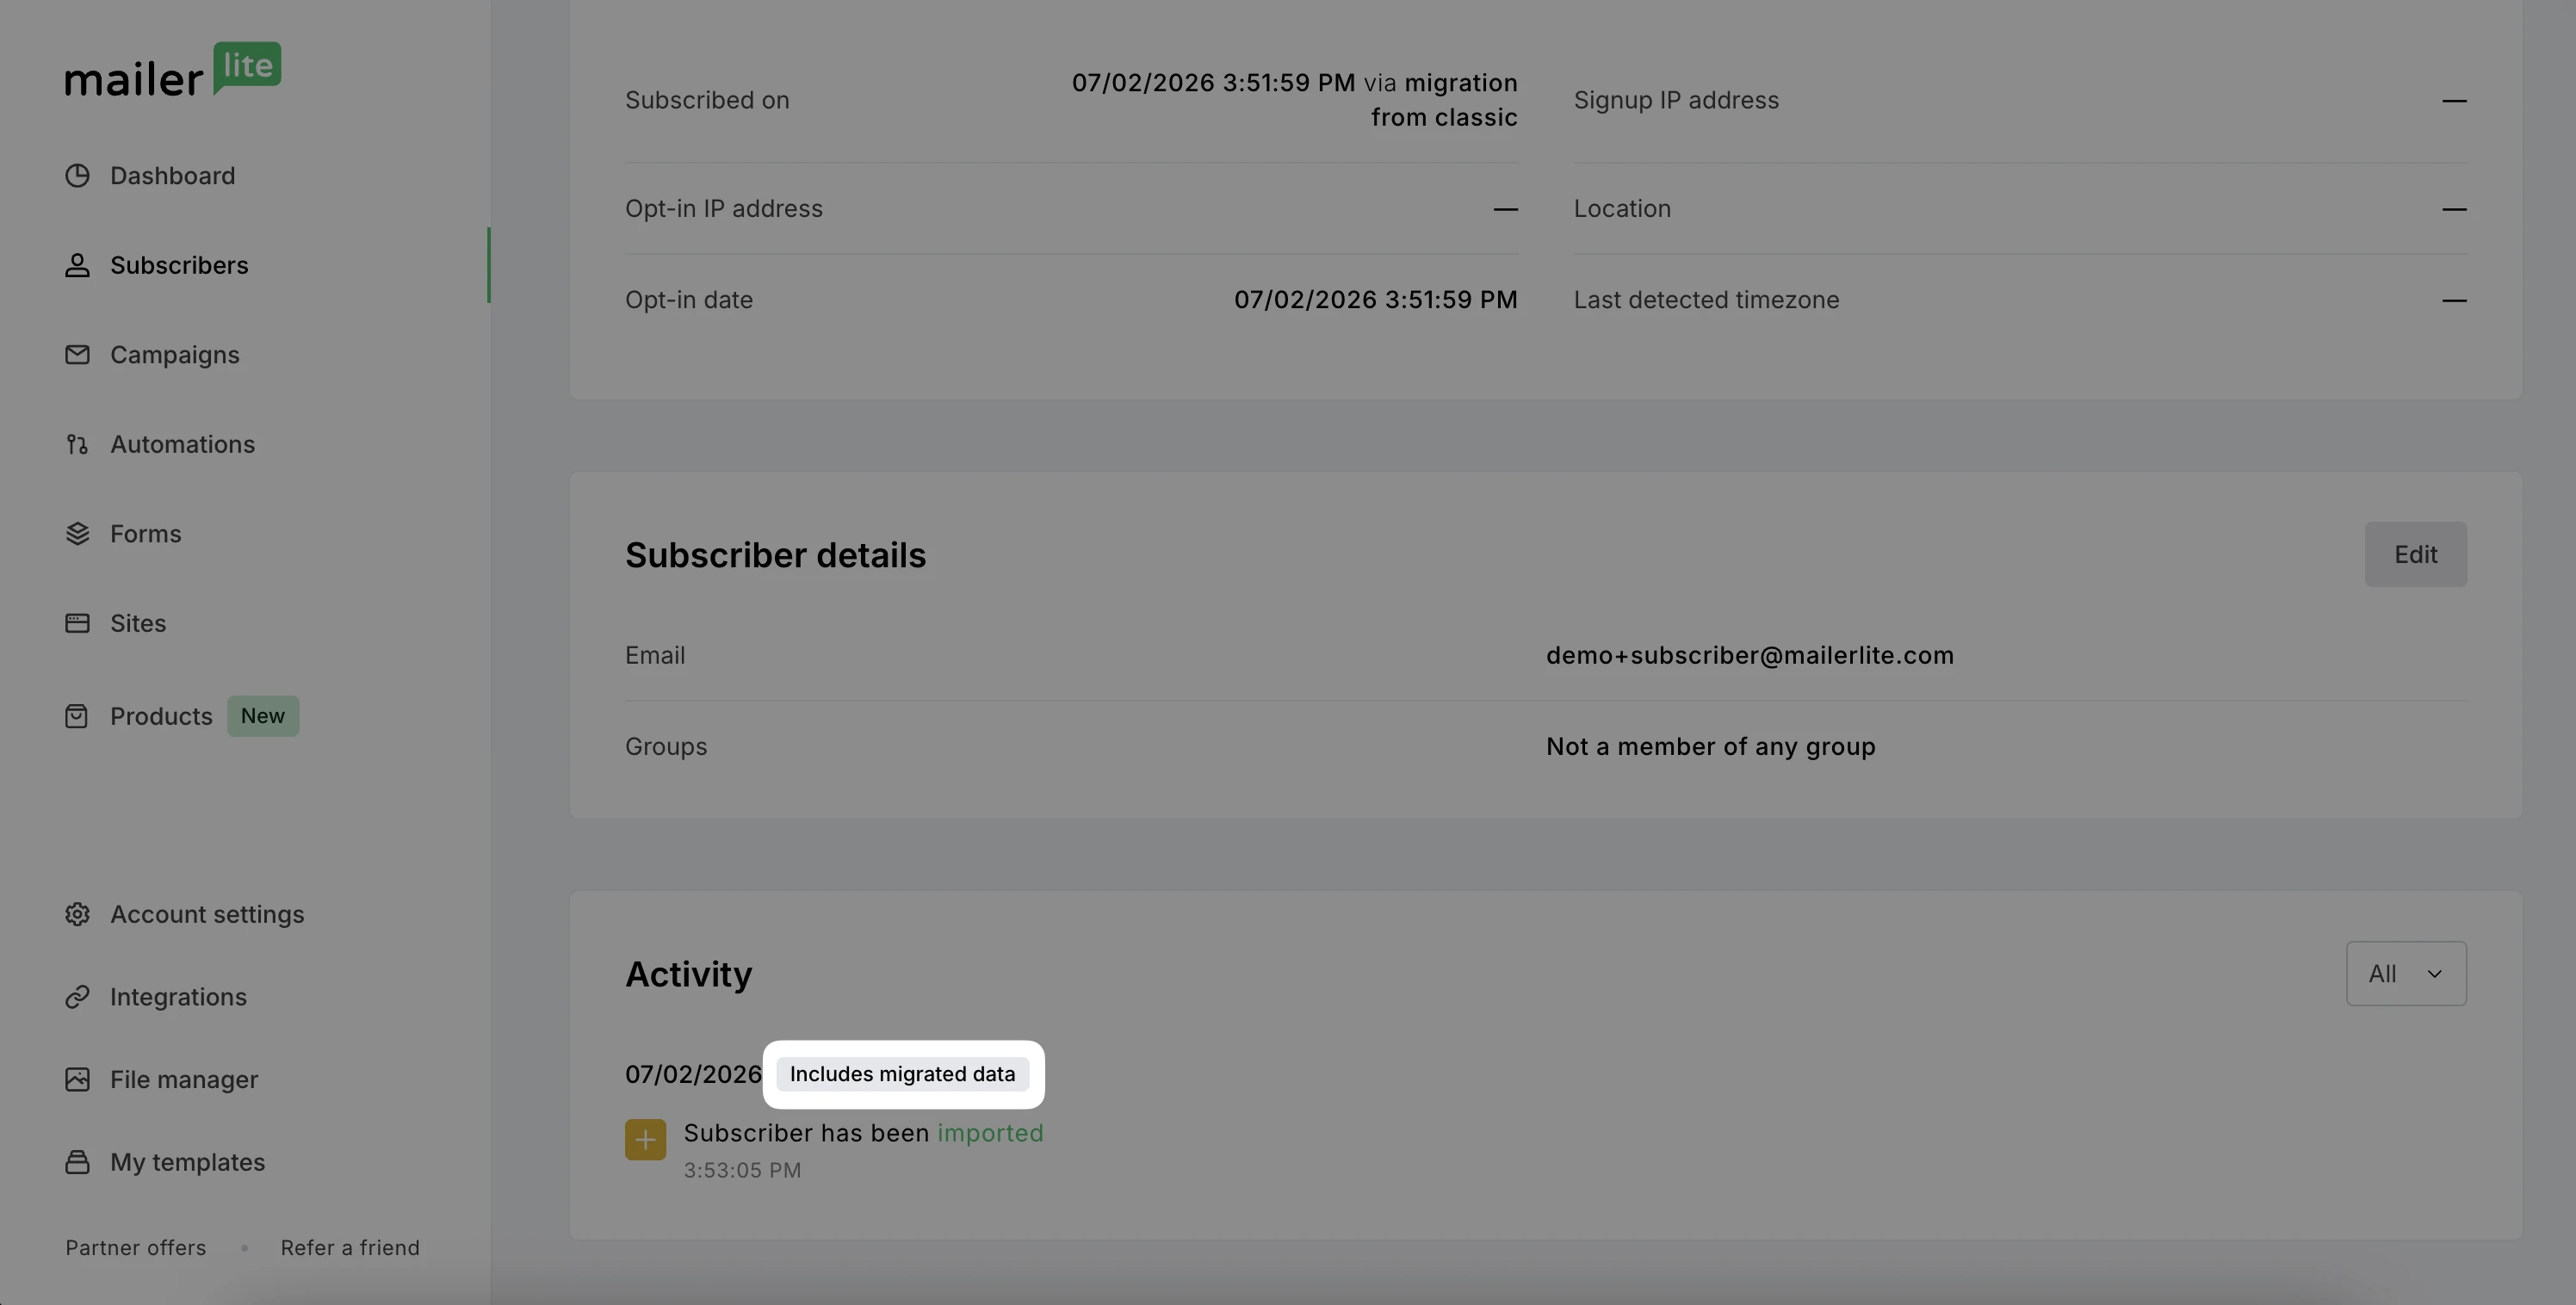
You can migrate your subscriber data, such as past activity and sent/opens/clicks statistics. In your individual subscriber profile, you’ll be able to identify migrated data by the following badge:
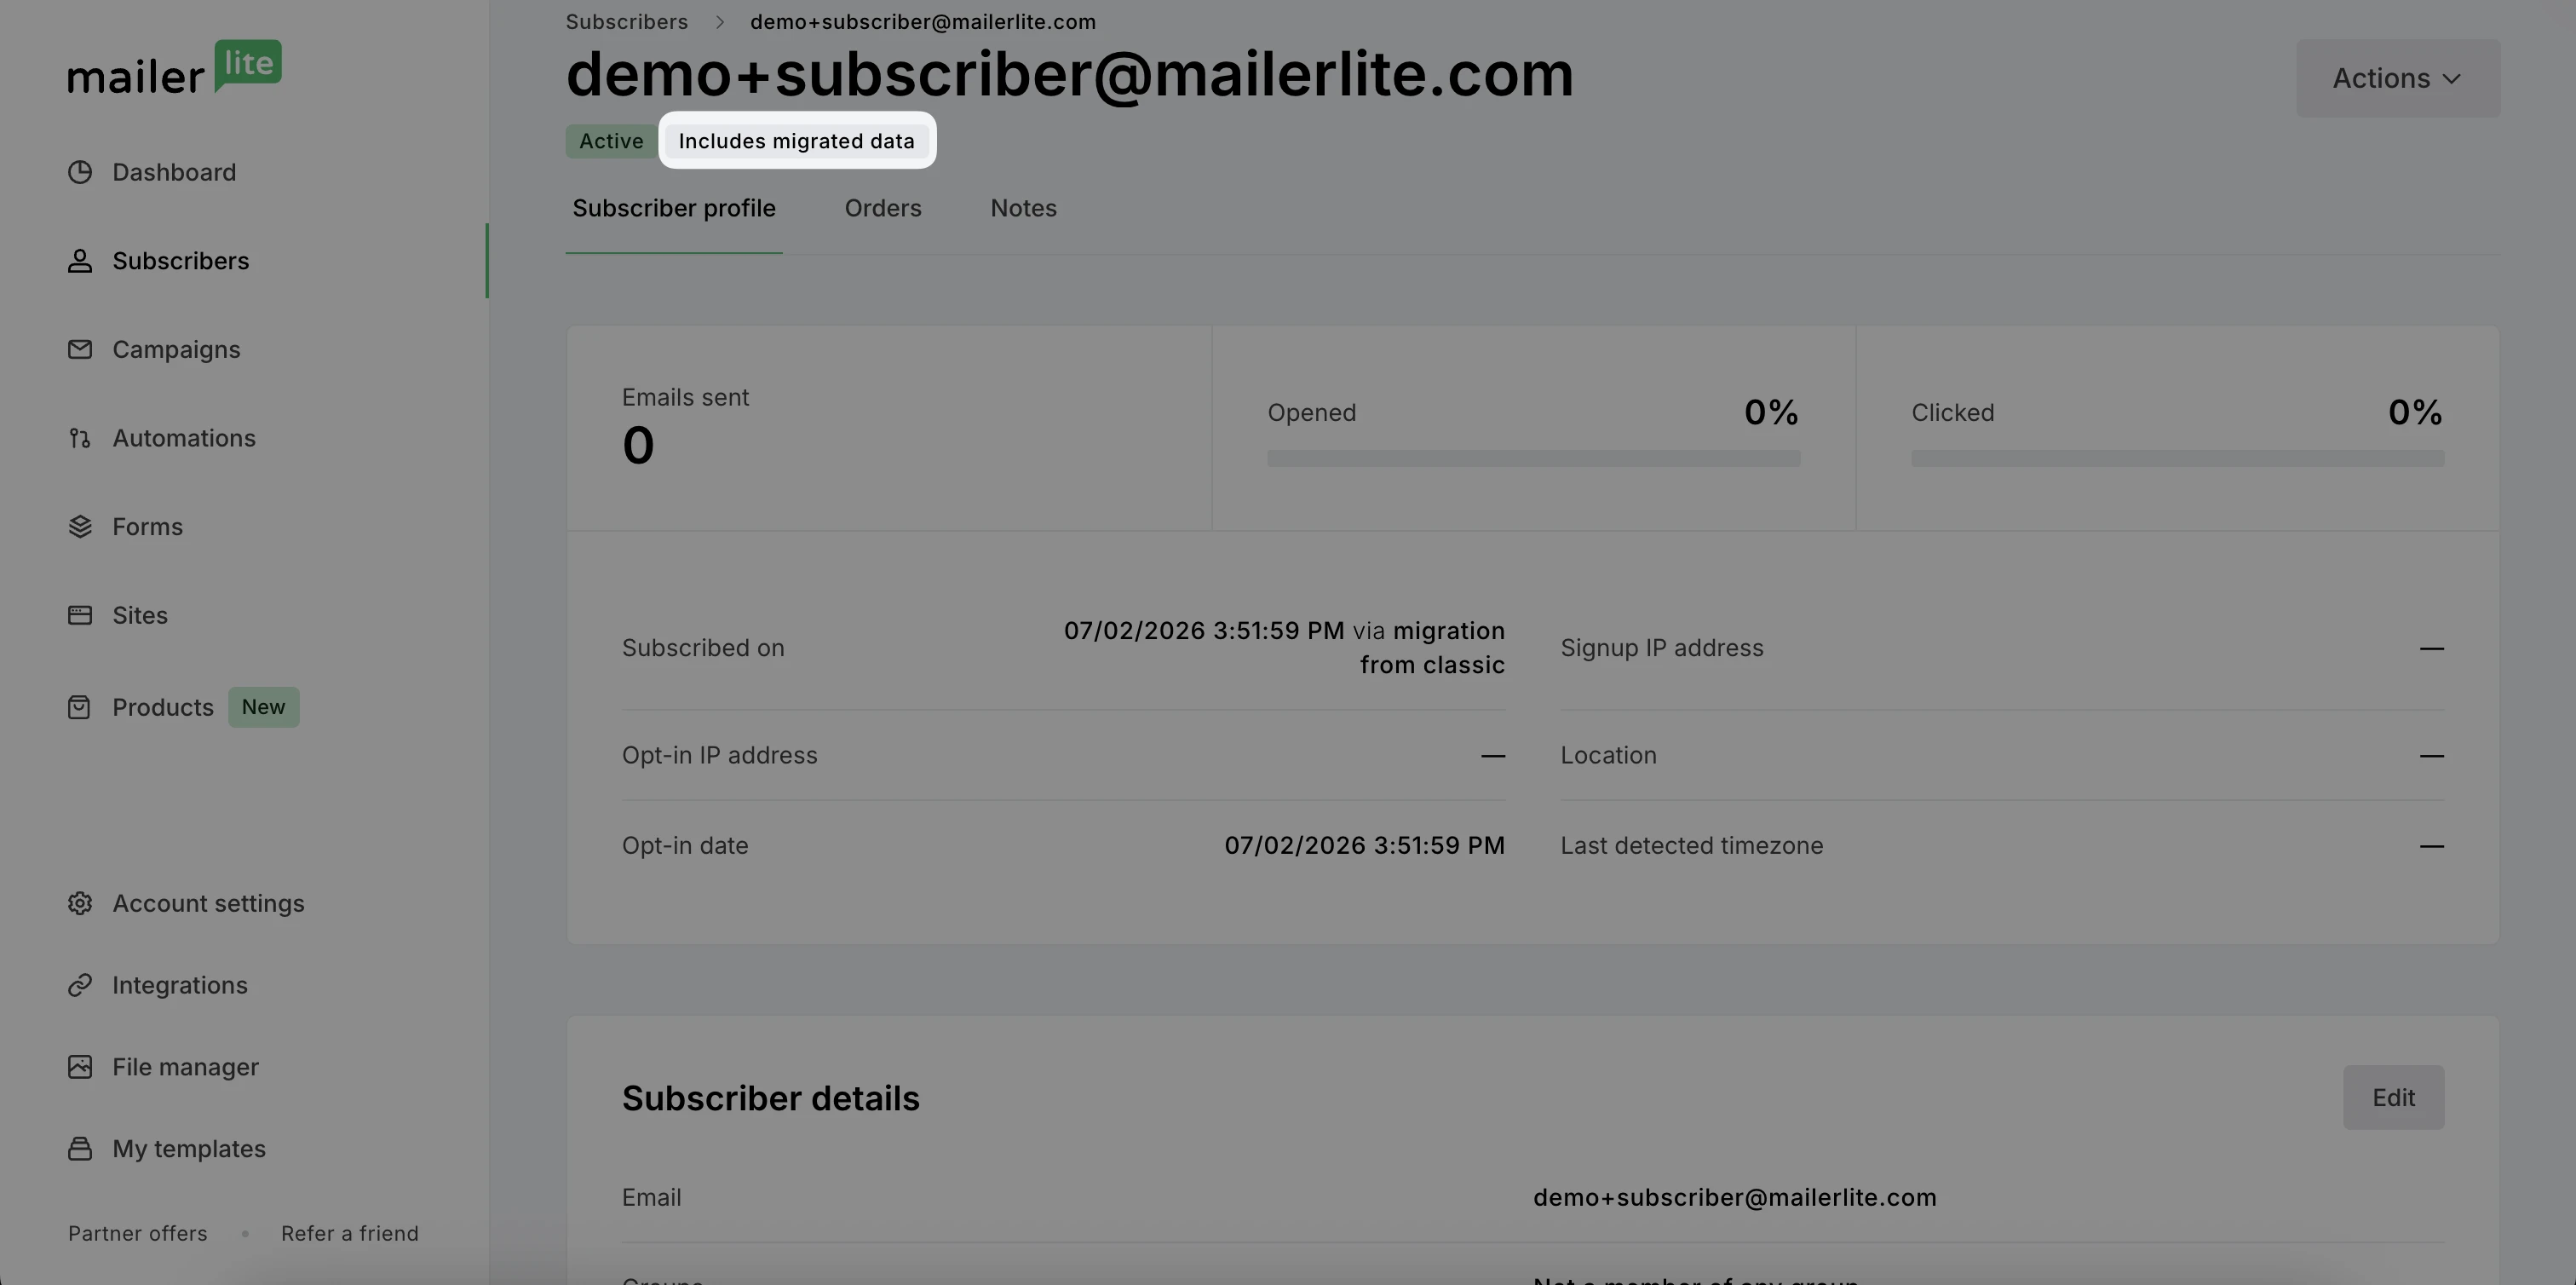
A badge in the activity tab will also mark the date of your latest migrated data.
Similarly, you can migrate your sent campaigns, including their reports and statistics. You will be able to identify migrated campaigns by a similar badge:

Integrations
Integrations linked to your MailerLite Legacy (Classic) account will not migrate automatically.
Here's why: The new MailerLite uses different API information for seamless integration with other applications. So, any integrations you had with your MailerLite Legacy (Classic) account need to be set up again using the right integration for the new MailerLite.
For example, if you previously used the MailerLite Classic > Zapier integration, you should replace it with the new MailerLite > Zapier integration.
Likewise, for common integrations like Shopify, make sure you switch from Shopify for MailerLite Classic to Shopify for New MailerLite. And for WooCommerce, transition from WooCommerce for MailerLite Classic to WooCommerce for New MailerLite.