How to sell coaching, consultations, webinars, and more with your new bookings tool
 Nikola, CTO
Your brand new bookings tool is here, and it's packed with features to make getting signups for your free and paid live sessions a whole lot easier.
Whether you sell one-on-one coaching, run paid webinars, or offer free discovery calls to attract leads, you can now create, manage and sell your sessions directly in MailerLite. No messy integrations required.
Once your product is live, you can use our powerful marketing features to promote it to your audience and start generating sales. And because we take 0% commission, you keep more of your hard-earned cash. Here’s all you need to know about the tool.
New bookings feature: Key points
Monetize your list by selling paid coaching, consultations, webinars, or online events
Offer and schedule free nurture calls
Earn maximum revenue thanks to 0% MailerLite commission
Automate the entire booking process with Google Calendar and Microsoft Outlook integration
Automatically stop people from booking at times when your calendar is full
Promote your offer with product blocks for campaigns, automations and landing pages
Automate post-purchase emails to provide essential information, generate repeat bookings, or cross-sell other products
Create 1 product on free plans, 5 on Comfort plans, or unlimited on Power plans
What can you do with the new bookings feature
Our new bookings feature lets you schedule and sell any kind of 1:1 or group product that requires bookings via a synced calendar.
This was the number one update that was requested after we released our digital products selling tools last year. We can’t wait to see what you do with it!
Sell paid coaching and consultation
Stop bouncing between tools to manage your paid coaching or consultation sessions. With the new bookings feature, you can create a product, connect your calendar, set your availability, and promote it with email marketing and landing pages, all from within MailerLite.
Sell access to webinars and online events
Want to run a paid webinar, group coaching call, or online workshop? Create a one-time group event, set a ticket limit, and sell access to your audience.
You can even show the remaining spots at checkout to create a sense of urgency and drive more sign-ups.
Nurture leads with free discovery calls
Sometimes the best way to sell is to start with a conversation. Free discovery calls, demo sessions, and live webinars are powerful lead generation tools.
Use the bookings feature to create a free product, collect sign-ups, and then automatically follow up with a paid offer using our automation tools.
How to sell coaching, consultations, online event tickets, and more with MailerLite
Creating a product and connecting your calendar just takes a couple of clicks. And once you're done, you can build entire email marketing funnels around your products.
Here's the 7-step process to get set up today.
Step 1: Create a new product
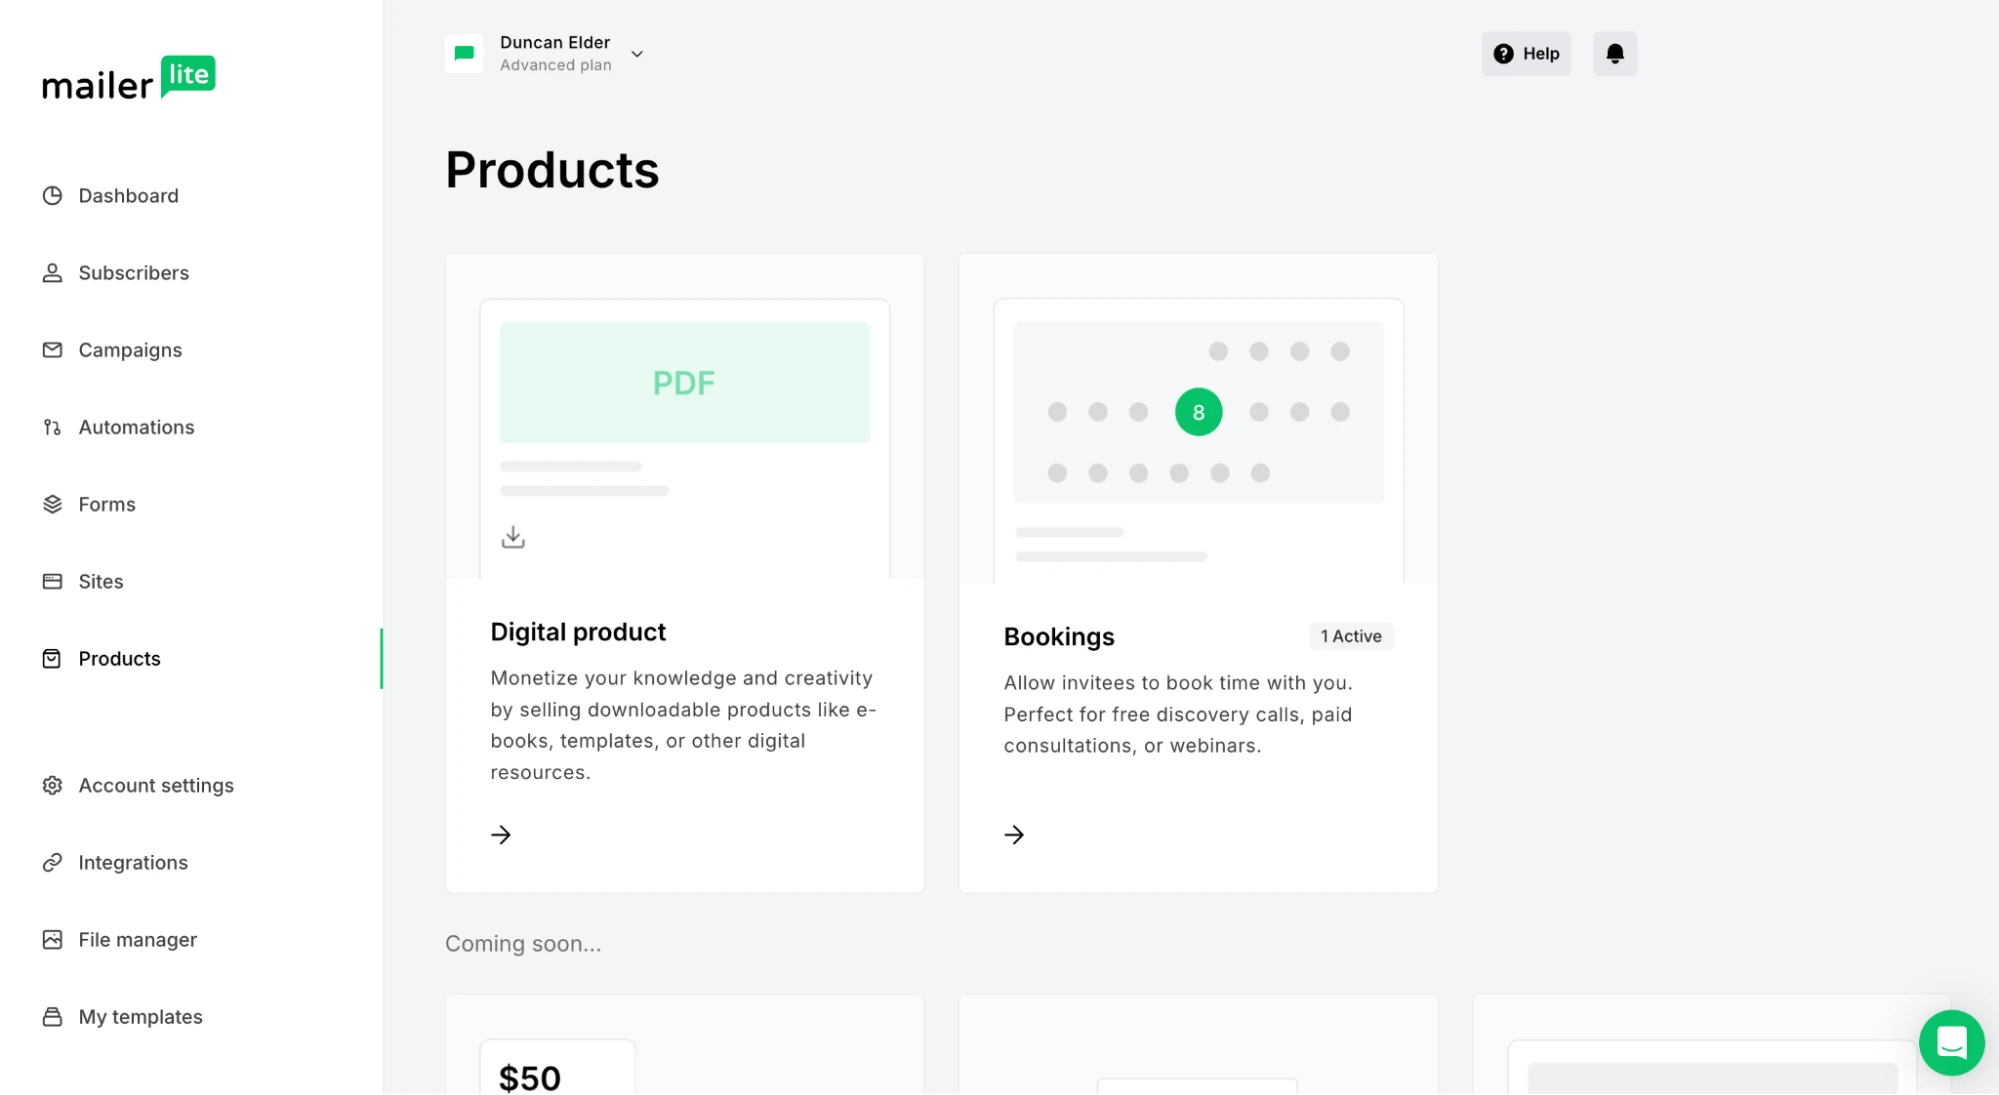
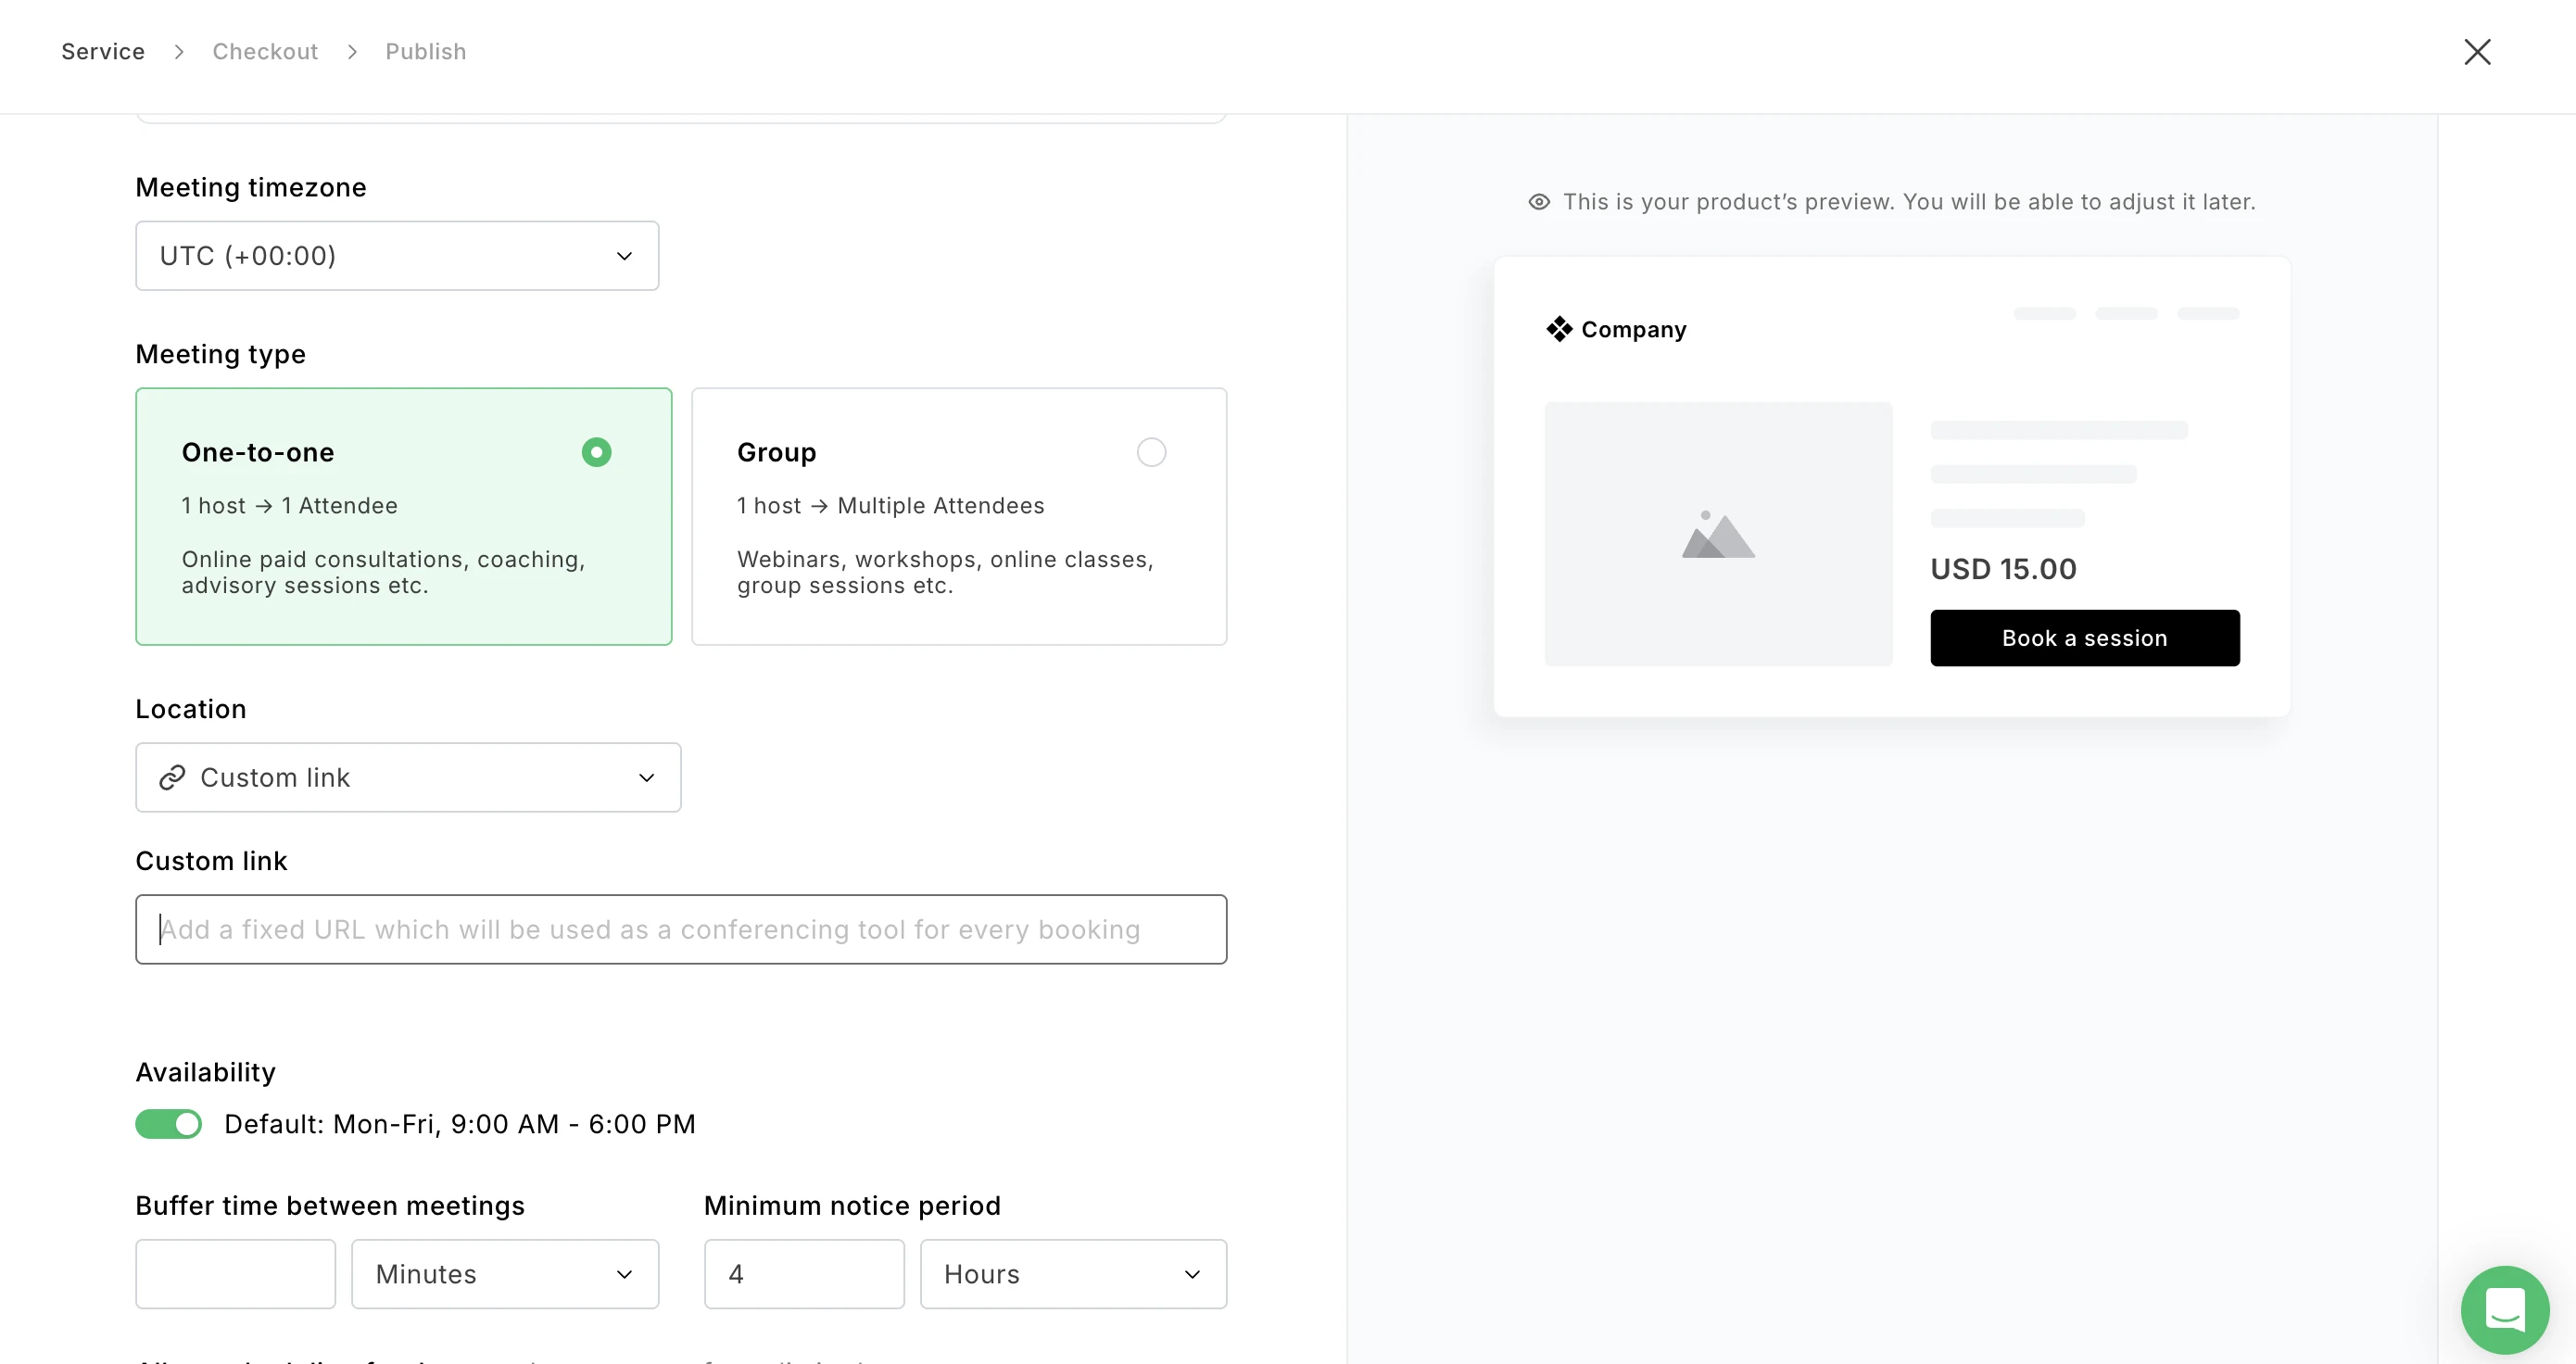
Head to the Products section of your dashboard and select the Bookings option. If you haven't connected a Stripe account yet, you'll be prompted to do that here. Then it's time to fill out your product details and connect your calendar.
You can access plenty of options to make the product your own:
Add the name, description, image, price and discount
Set the length of time the call will last
Connect your Google or Outlook calendar to automatically create an event when someone books
Choose whether the session is one-on-one or a group call
Select a location for the call. This can be Google Meet, in-person, phone call, or a custom link, for a service such as Zoom.
Set the availability, call length, lead time, and buffer time for individual calls
Choose the date and time for group events
If relevant, limit the number of participants. Remaining spots will be shown on the checkout
Decide what happens when someone buys, such as adding them to a group or updating a profile field
As you create your product, the product preview will automatically update so you know exactly how it will look.

How to use Zoom to host the meetings
If you want to host your meetings on Zoom, simply choose Custom link from the Location settings drop-down menu. Then paste the link to your personal Zoom meeting room into the text box. This link will be included in your order confirmation email.
Step 2: Optimize the checkout
Make your checkout feel like a natural extension of your brand by choosing your colors or importing your existing styles with a click. You can also edit the title and button text.
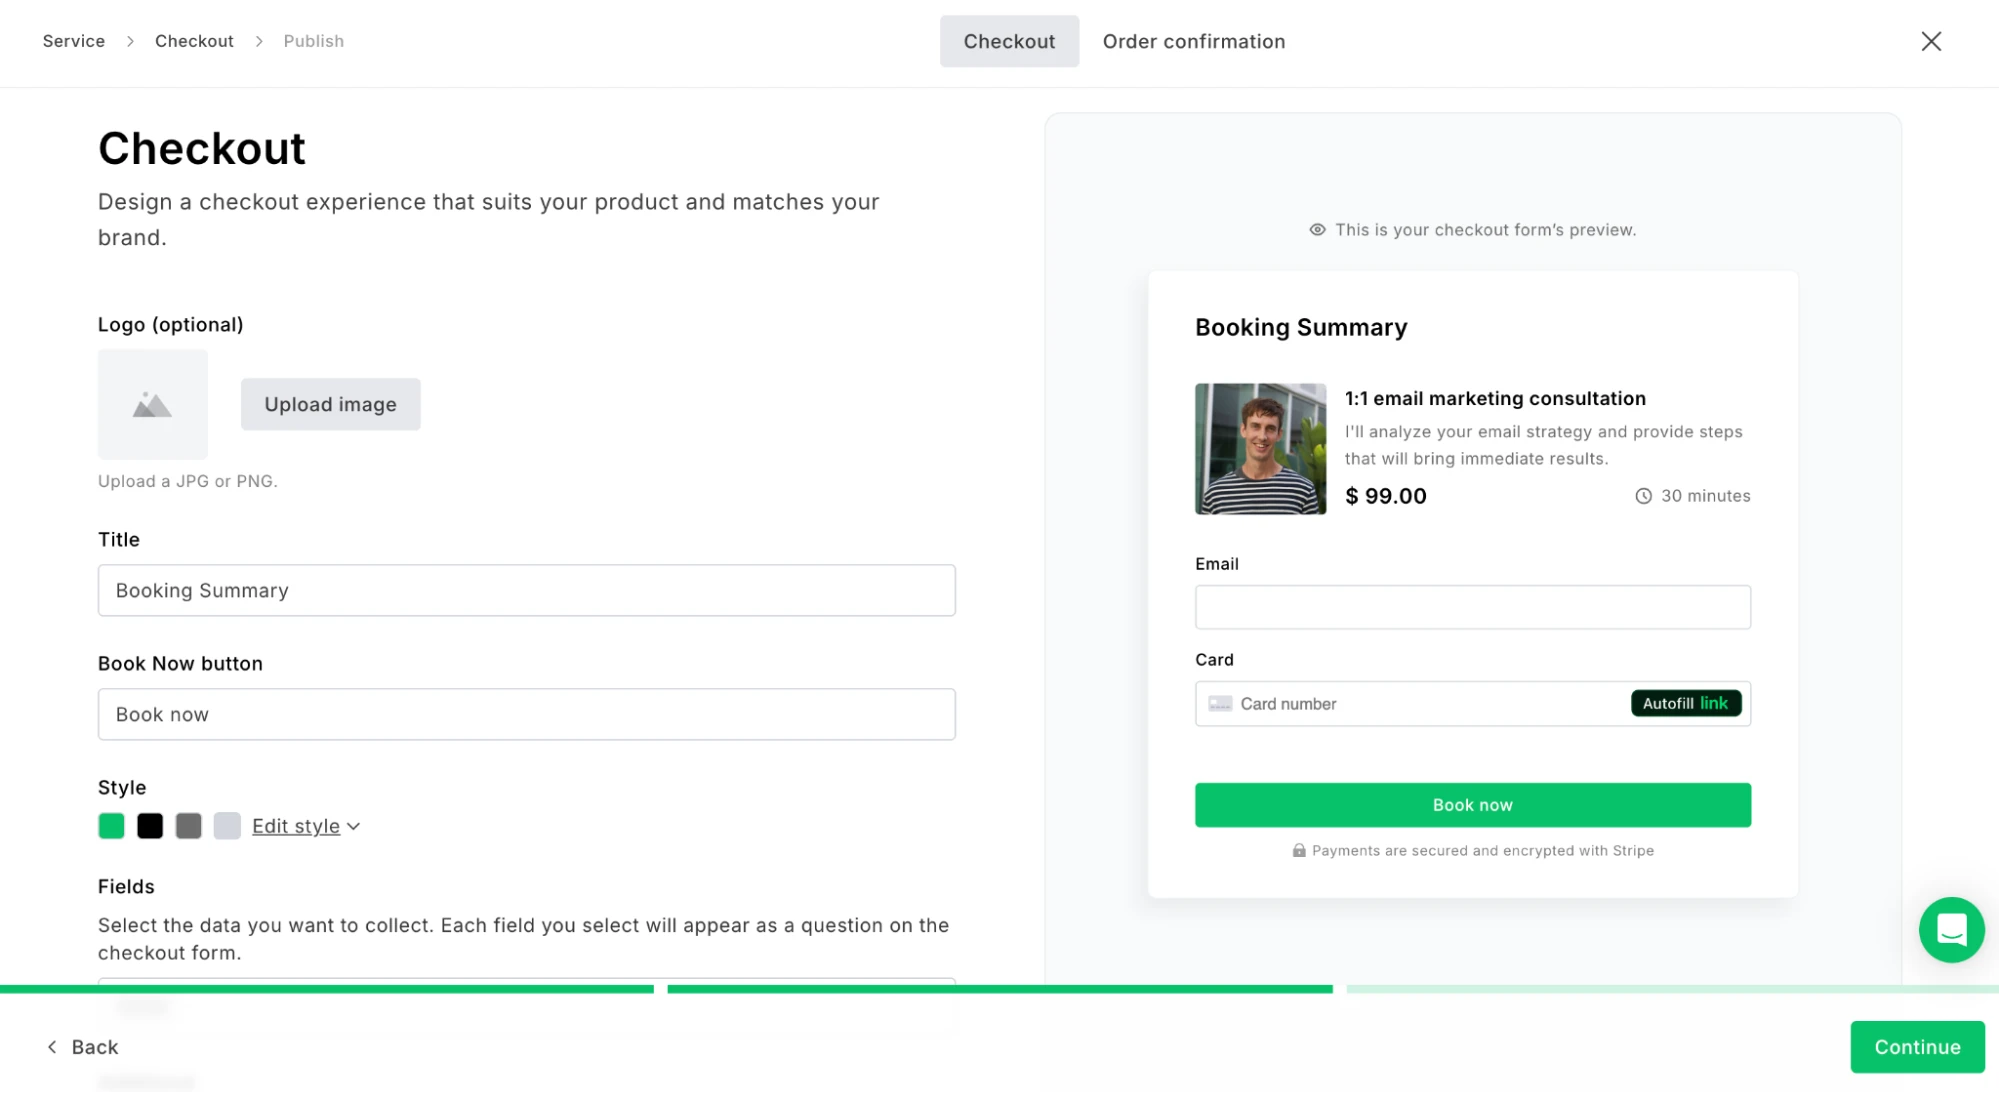
When your page is live, your subscribers will always see the most relevant payment options to them, since these are pulled in automatically from Stripe based on the buyer's location.
You can also customize the confirmation page that buyers see after they pay. Write your confirmation message and decide whether to display details like the amount paid, scheduled date, order date, and payment method.

Step 3: Edit the confirmation email
Once your product is saved, you can edit the confirmation email that goes out when someone makes a booking.
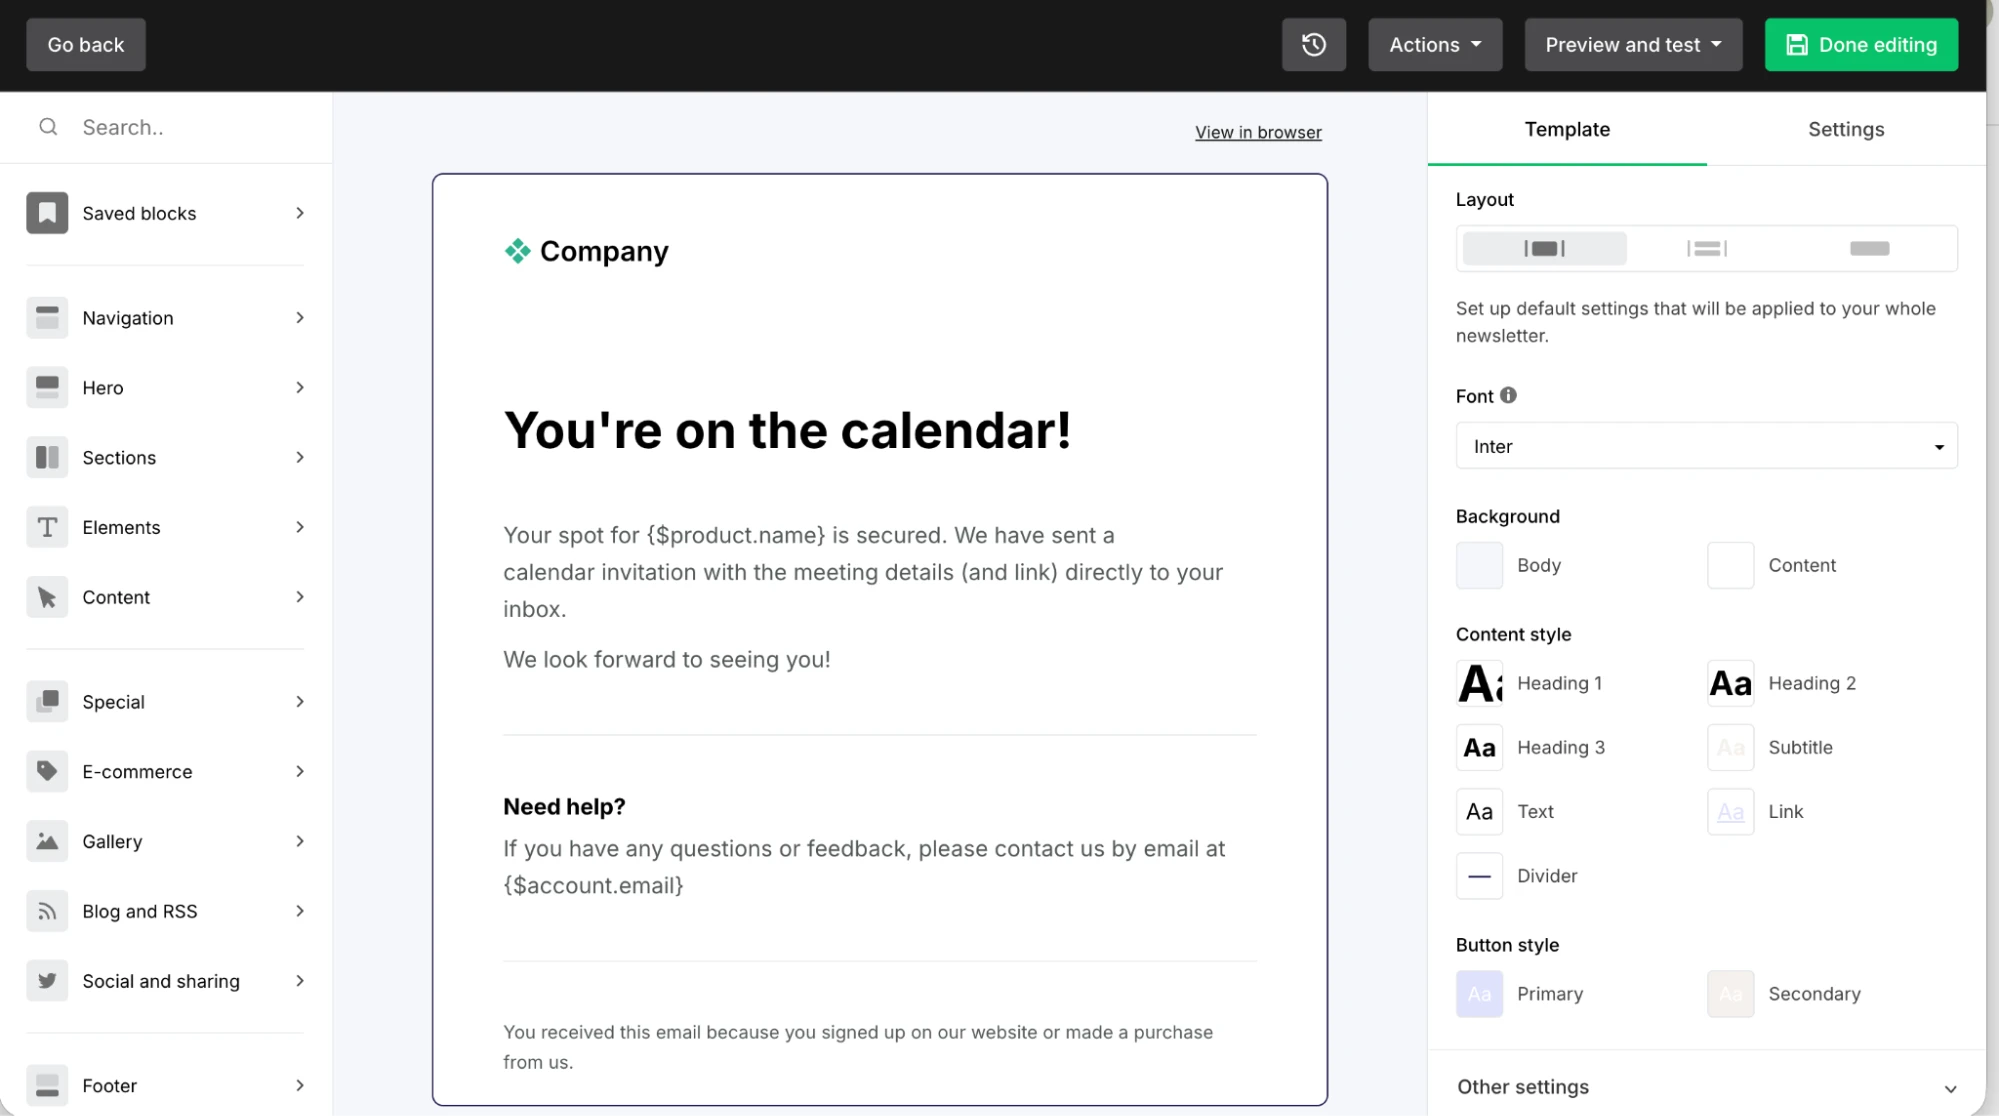
By default, it confirms the booking and includes your email address for further contact. But you're not limited to that: Use the drag-and-drop editor to add any other content you like, such as a welcome message, intro video, or next steps.
You can also edit the subject line and sender email address for maximum opens. See all our subject line best practices here.
Buyers will also receive a separate email from your connected calendar with the booking link and details.
Step 4: Create an automated post-purchase sequence
Stay in touch after someone makes a booking by sending a series of follow-up emails triggered by a purchase. Use our automation builder to drag and drop in the relevant steps, conditions, actions and emails.
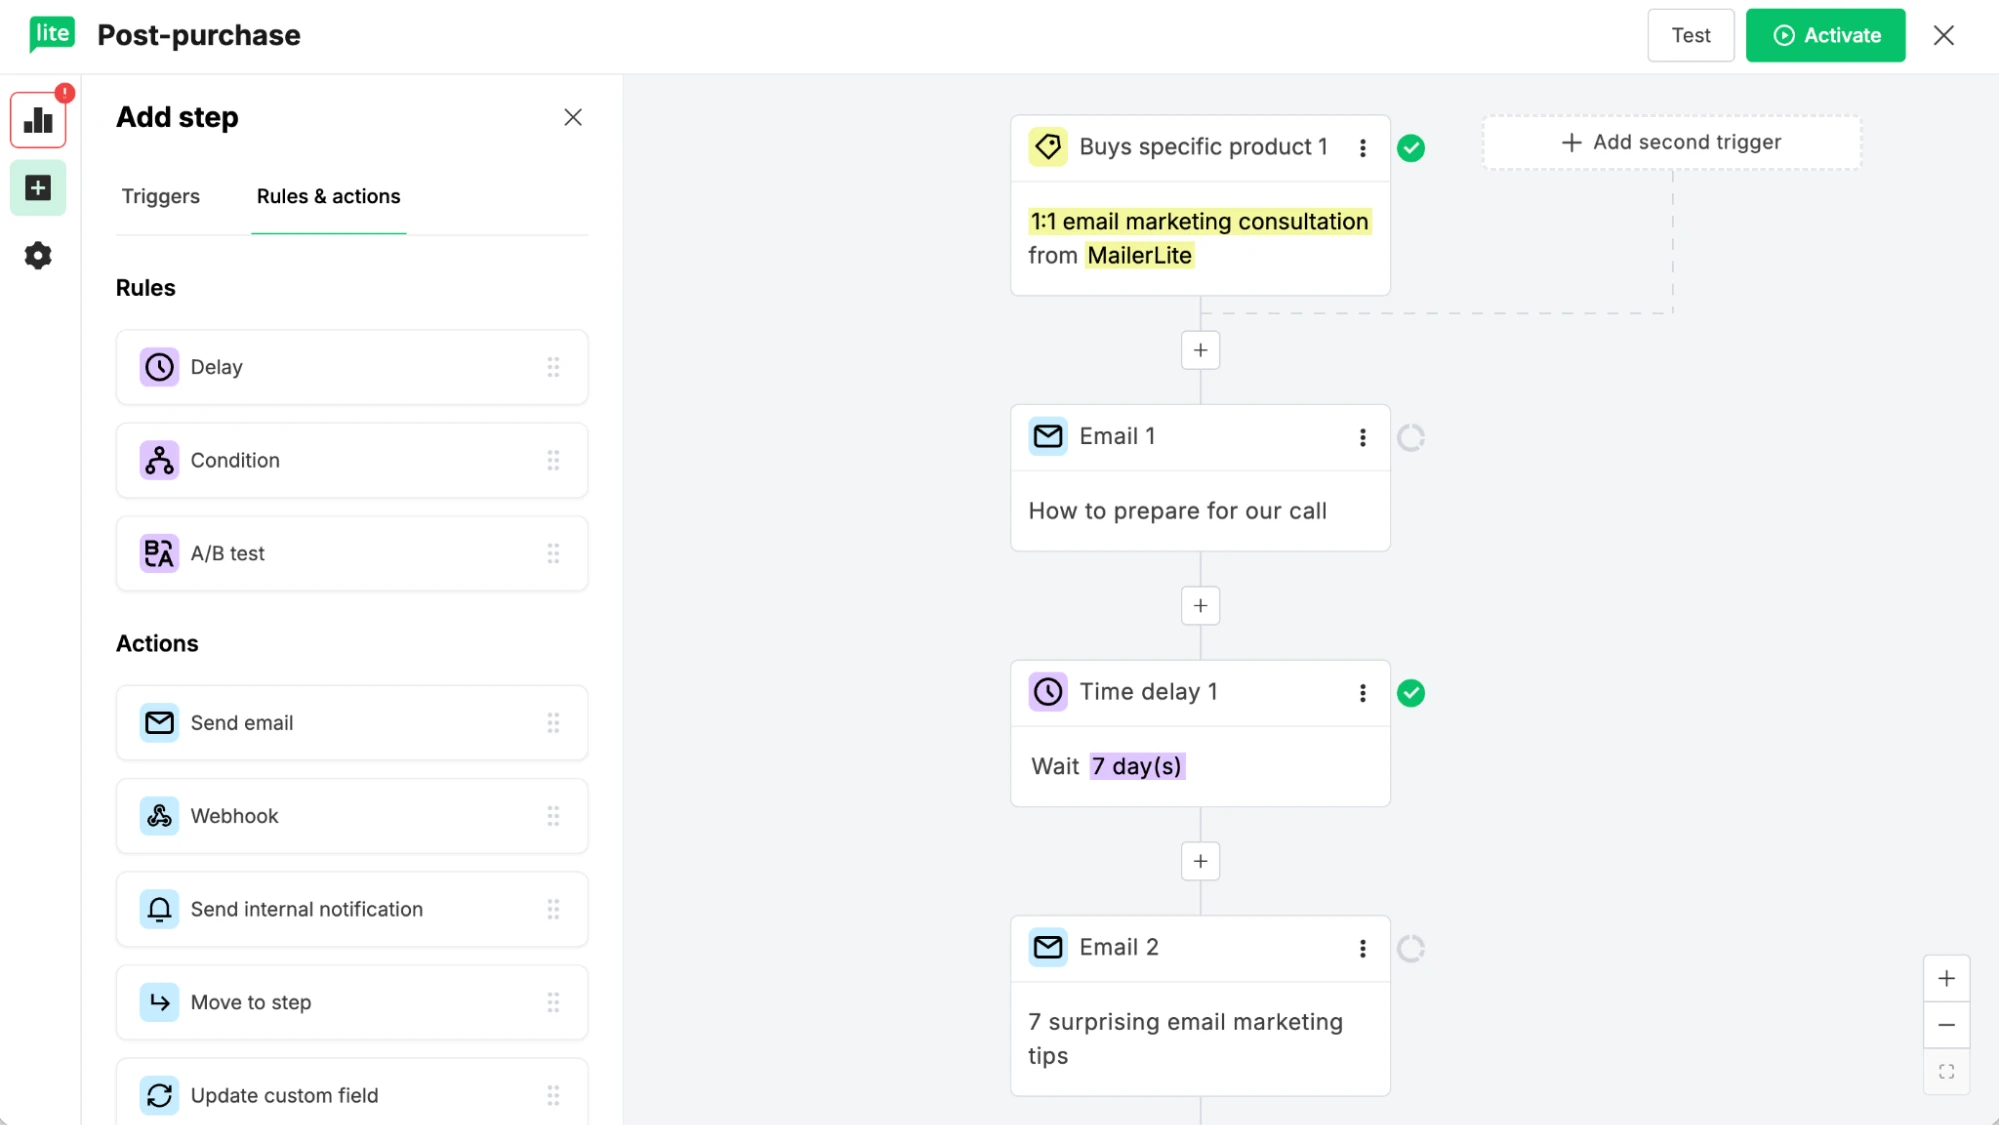
A great place to start is an email with essential details to help the person get the most out of the session.
After the call, you could follow up with a review request, cross-sell to another product, or prompt to book again.
Step 5: Promote the product in your emails
Your email list is one of your most valuable assets for selling your session. And you can promote new booking products by adding them to a campaign in just a couple of clicks with the Products block.
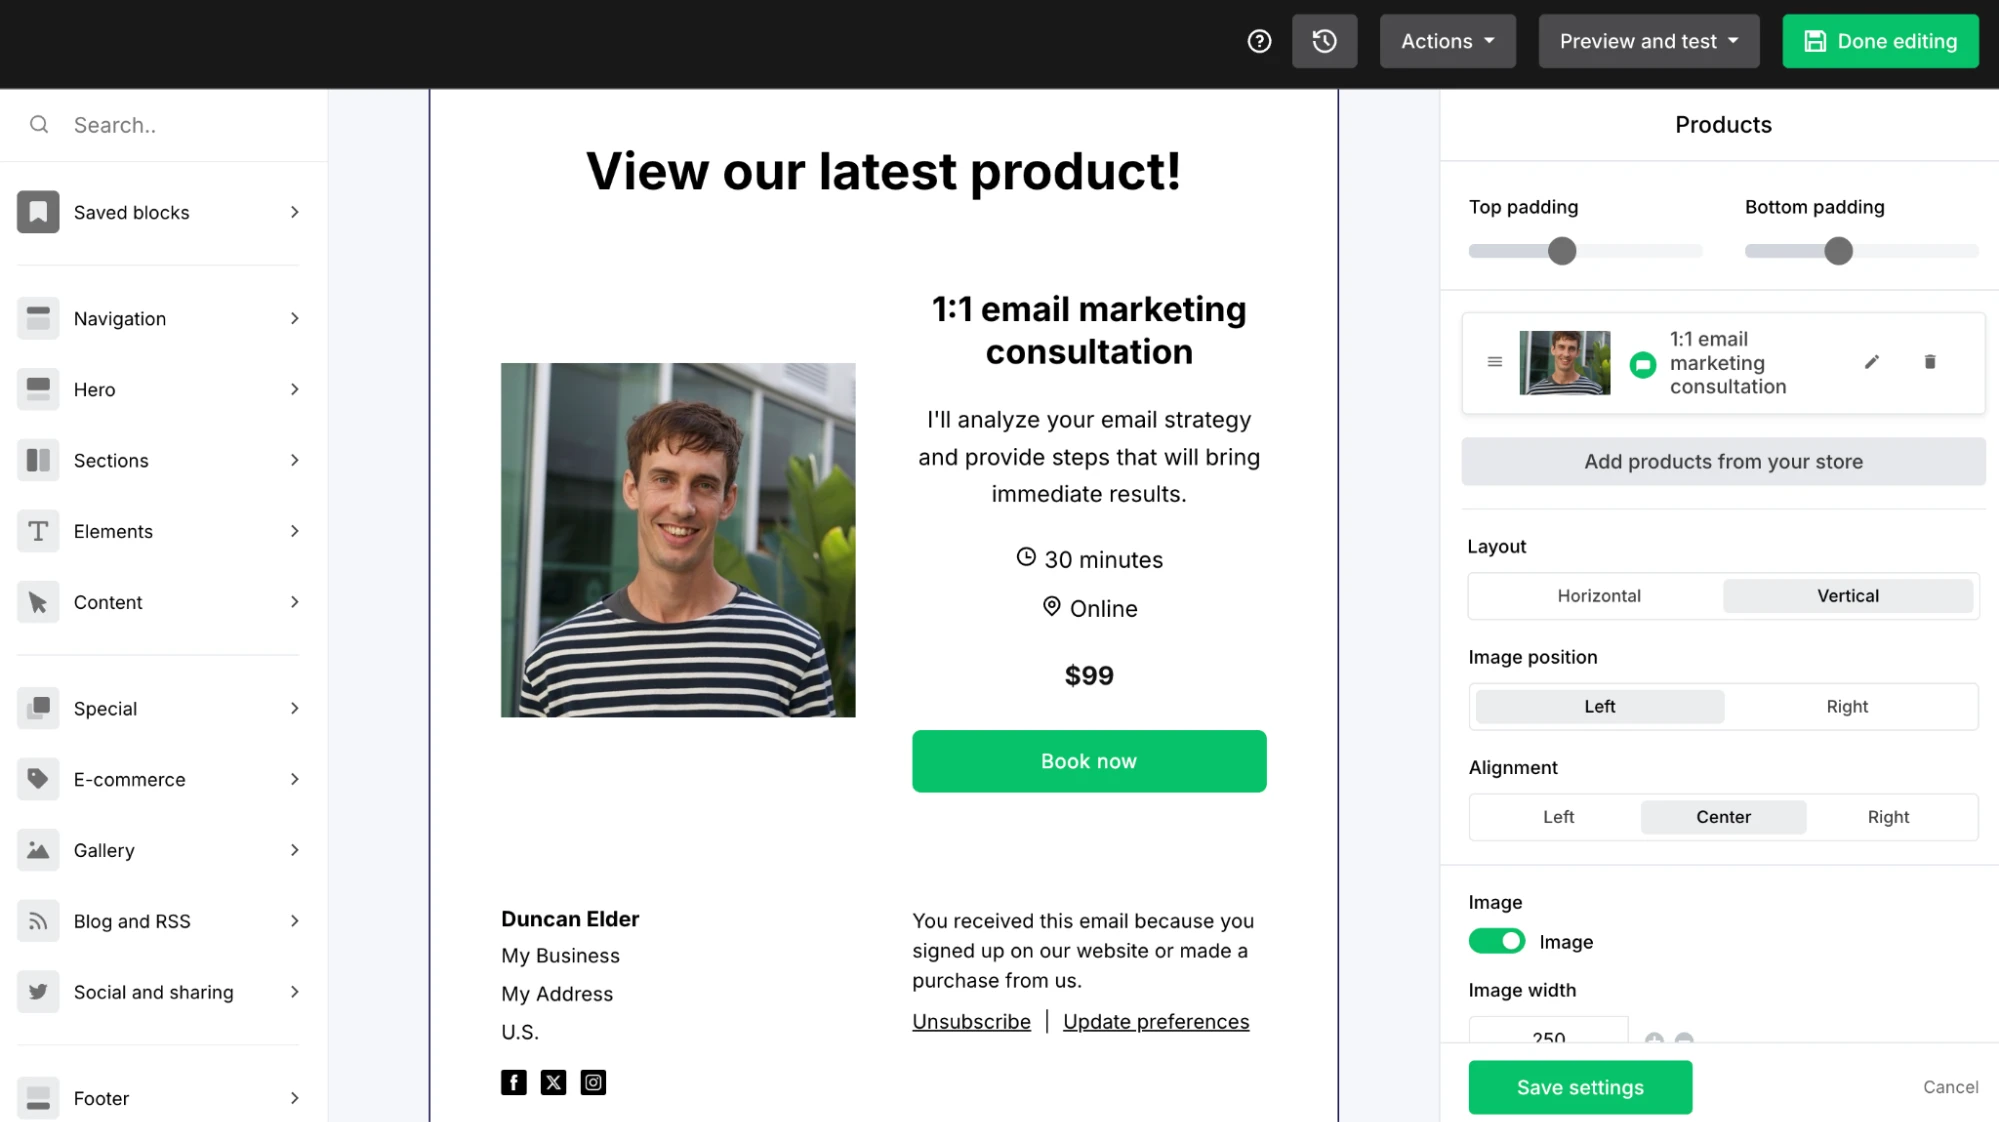
Alternatively, link directly to the checkout by copying the URL from the product overview and adding it to any button or linkable element.
You can also share this link anywhere online. Send it via a DM, upload it to your stories, share it in communities, add it to your link in bio, use it to create a QR code for an event, or add it to your email signature.

Step 6: Create a landing page
If you think people will need a bit more context before they're ready to buy, create a landing page to promote your product.
A landing page gives you more room than a checkout page to sell the value of your product, which can help build trust and showcase your product’s benefits.
Create a landing page in the MailerLite builder and add your booking product with the products block. Just drag it into place, select the relevant product, and we'll automatically pull in all the details. Or, grab the product link and add it to buttons or another linkable text.
We have tons of landing page templates you can use to create your page in a flash. Each of them is fully customizable using our drag-and-drop editor. See some of our favorites below.
Step 7: Create an automated nurture sequence
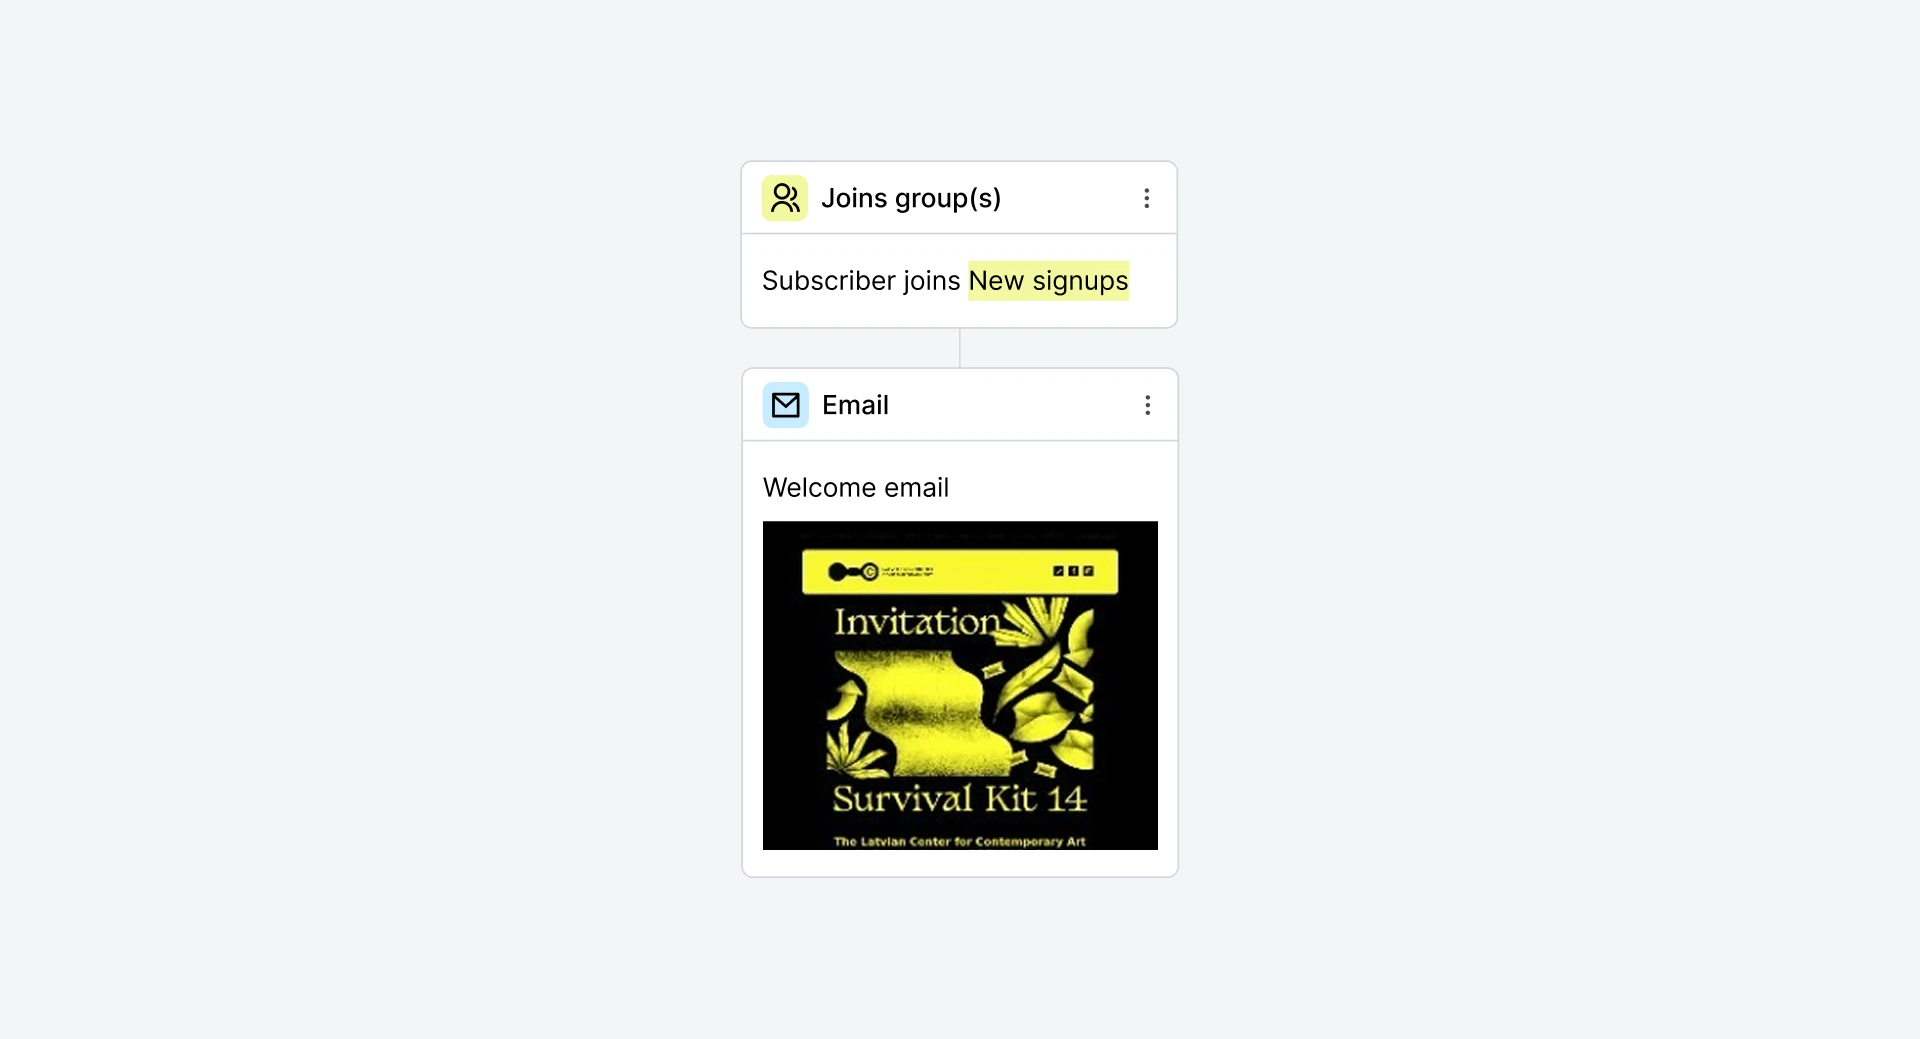
Don't just wait for people to stumble onto your booking page. Set up an automated nurture sequence that promotes your product to everyone who joins your list.
For example, if you're using a lead magnet to attract signups, add follow-up emails to your welcome sequence that introduce your paid sessions.
You can also set up other automations to promote the product. For example, if someone clicks your booking link but doesn't complete the purchase, send them a follow-up reminder the next day. A little nudge at the right moment can make all the difference.
Our welcome email automation template can help you start sending emails as soon as someone joins your list.
Sell your sessions today
The new bookings feature gives you everything you need to turn your expertise into income without the hassle of stitching together multiple tools. You can have your first product live, calendar connected, and first promotional email out the door in a single afternoon.
And because we take 0% commission, every booking goes straight to your bottom line.
Ready to get started? Head to the Products section of your dashboard and create your first booking today.
Better bookings are here!
Create an online session and get your first signups today with your brand-new bookings tools. Not a MailerLite customer? Then access everything you need to start selling with a free trial.