Note: If you're a Legacy (Classic) user, please log in to your account to access the dedicated Legacy (Classic) Help Center.
You can create and sell digital products directly through MailerLite, offering a seamless experience for both you and your customers. This guide explains how to set up your digital products and manage sales.
Plan limits
Digital products count toward your MailerLite account’s total product limit along with any bookings in your account.
Depending on your plan, the number of products you can create varies:
| Plan | Product limit |
| Free | 1 total |
| Comfort | 3 total |
| Power | Unlimited products |
Products can be any combination of product types, including bookings and digital products.
If you already have the maximum number of products allowed on your plan, you’ll need to delete an existing product or upgrade your plan before creating a new booking.
Note: In August, 2026, new digital product limits will begin to apply. Free plan users will be able to have 1 product; Comfort plan users - up to 5 products; Power plan users - unlimited products.
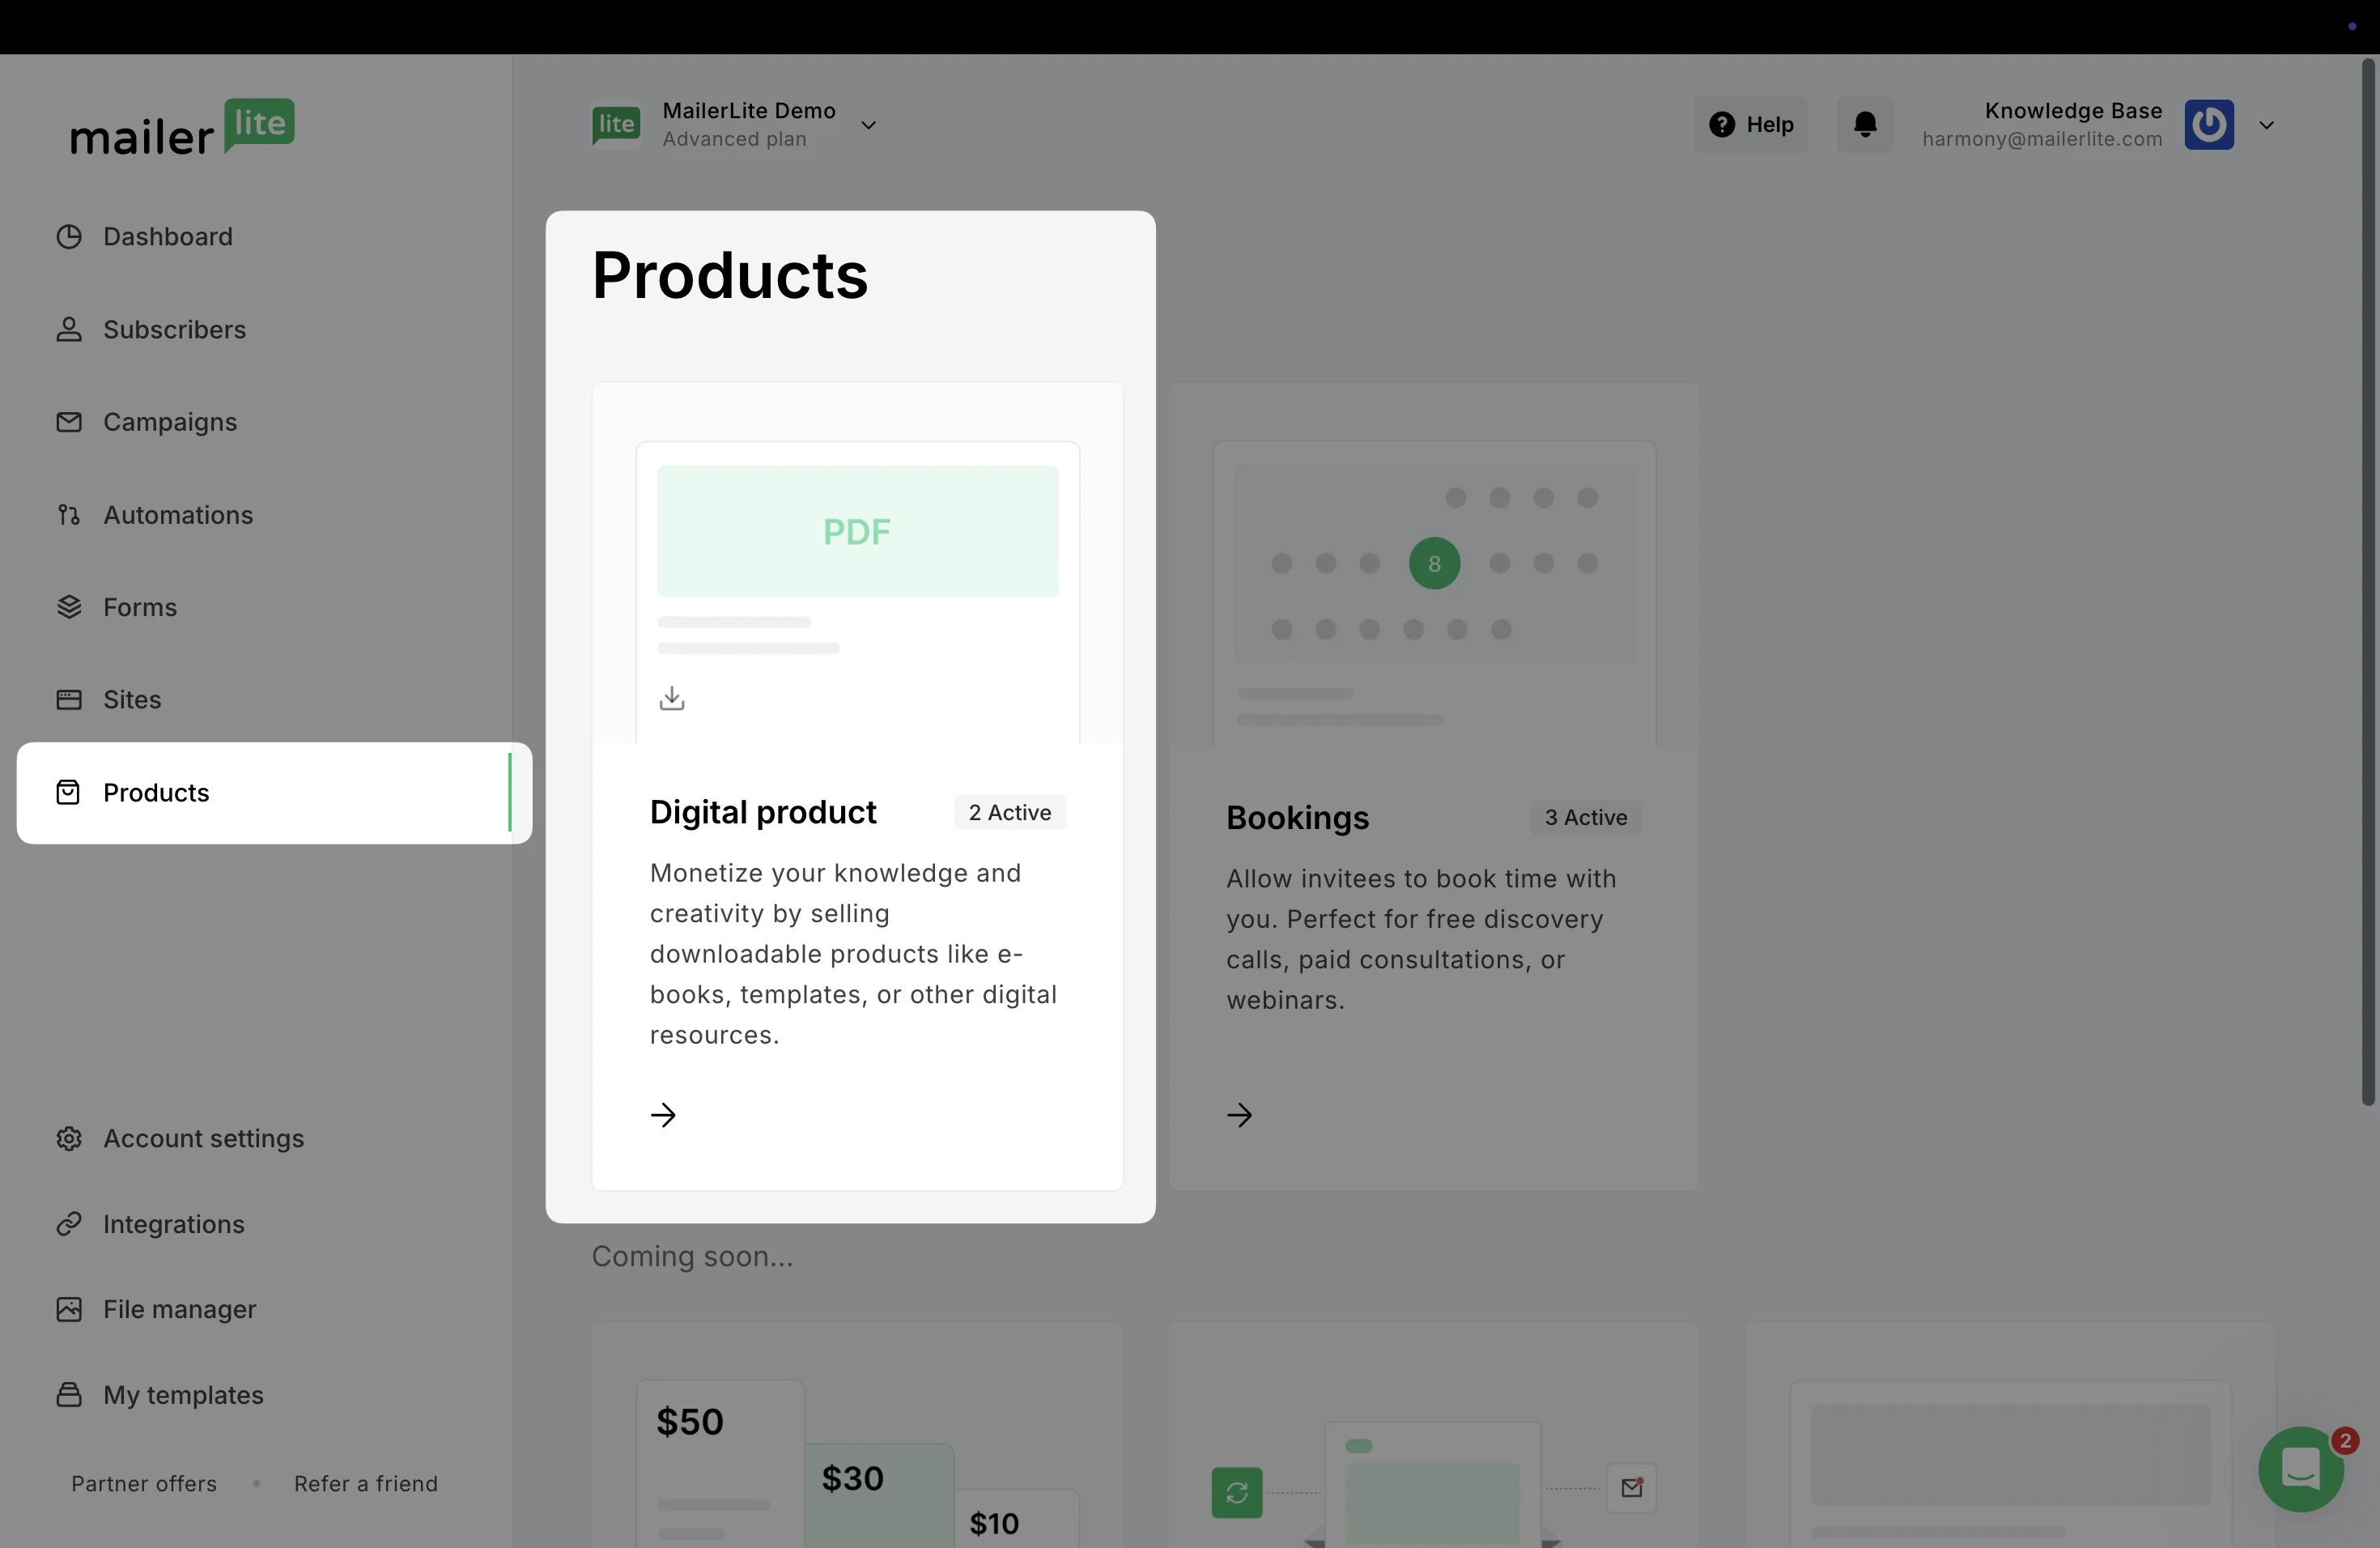
Creating a digital product
To create a digital product:
Navigate to the Products tab.
Click Digital products.
Note: Currently, it is only possible to create one-time downloadable digital products within MailerLite. Other options such as Subscriptions and Memberships will be added in the future.
However, Subscriptions are still available when using MailerLite’s Stripe integration.
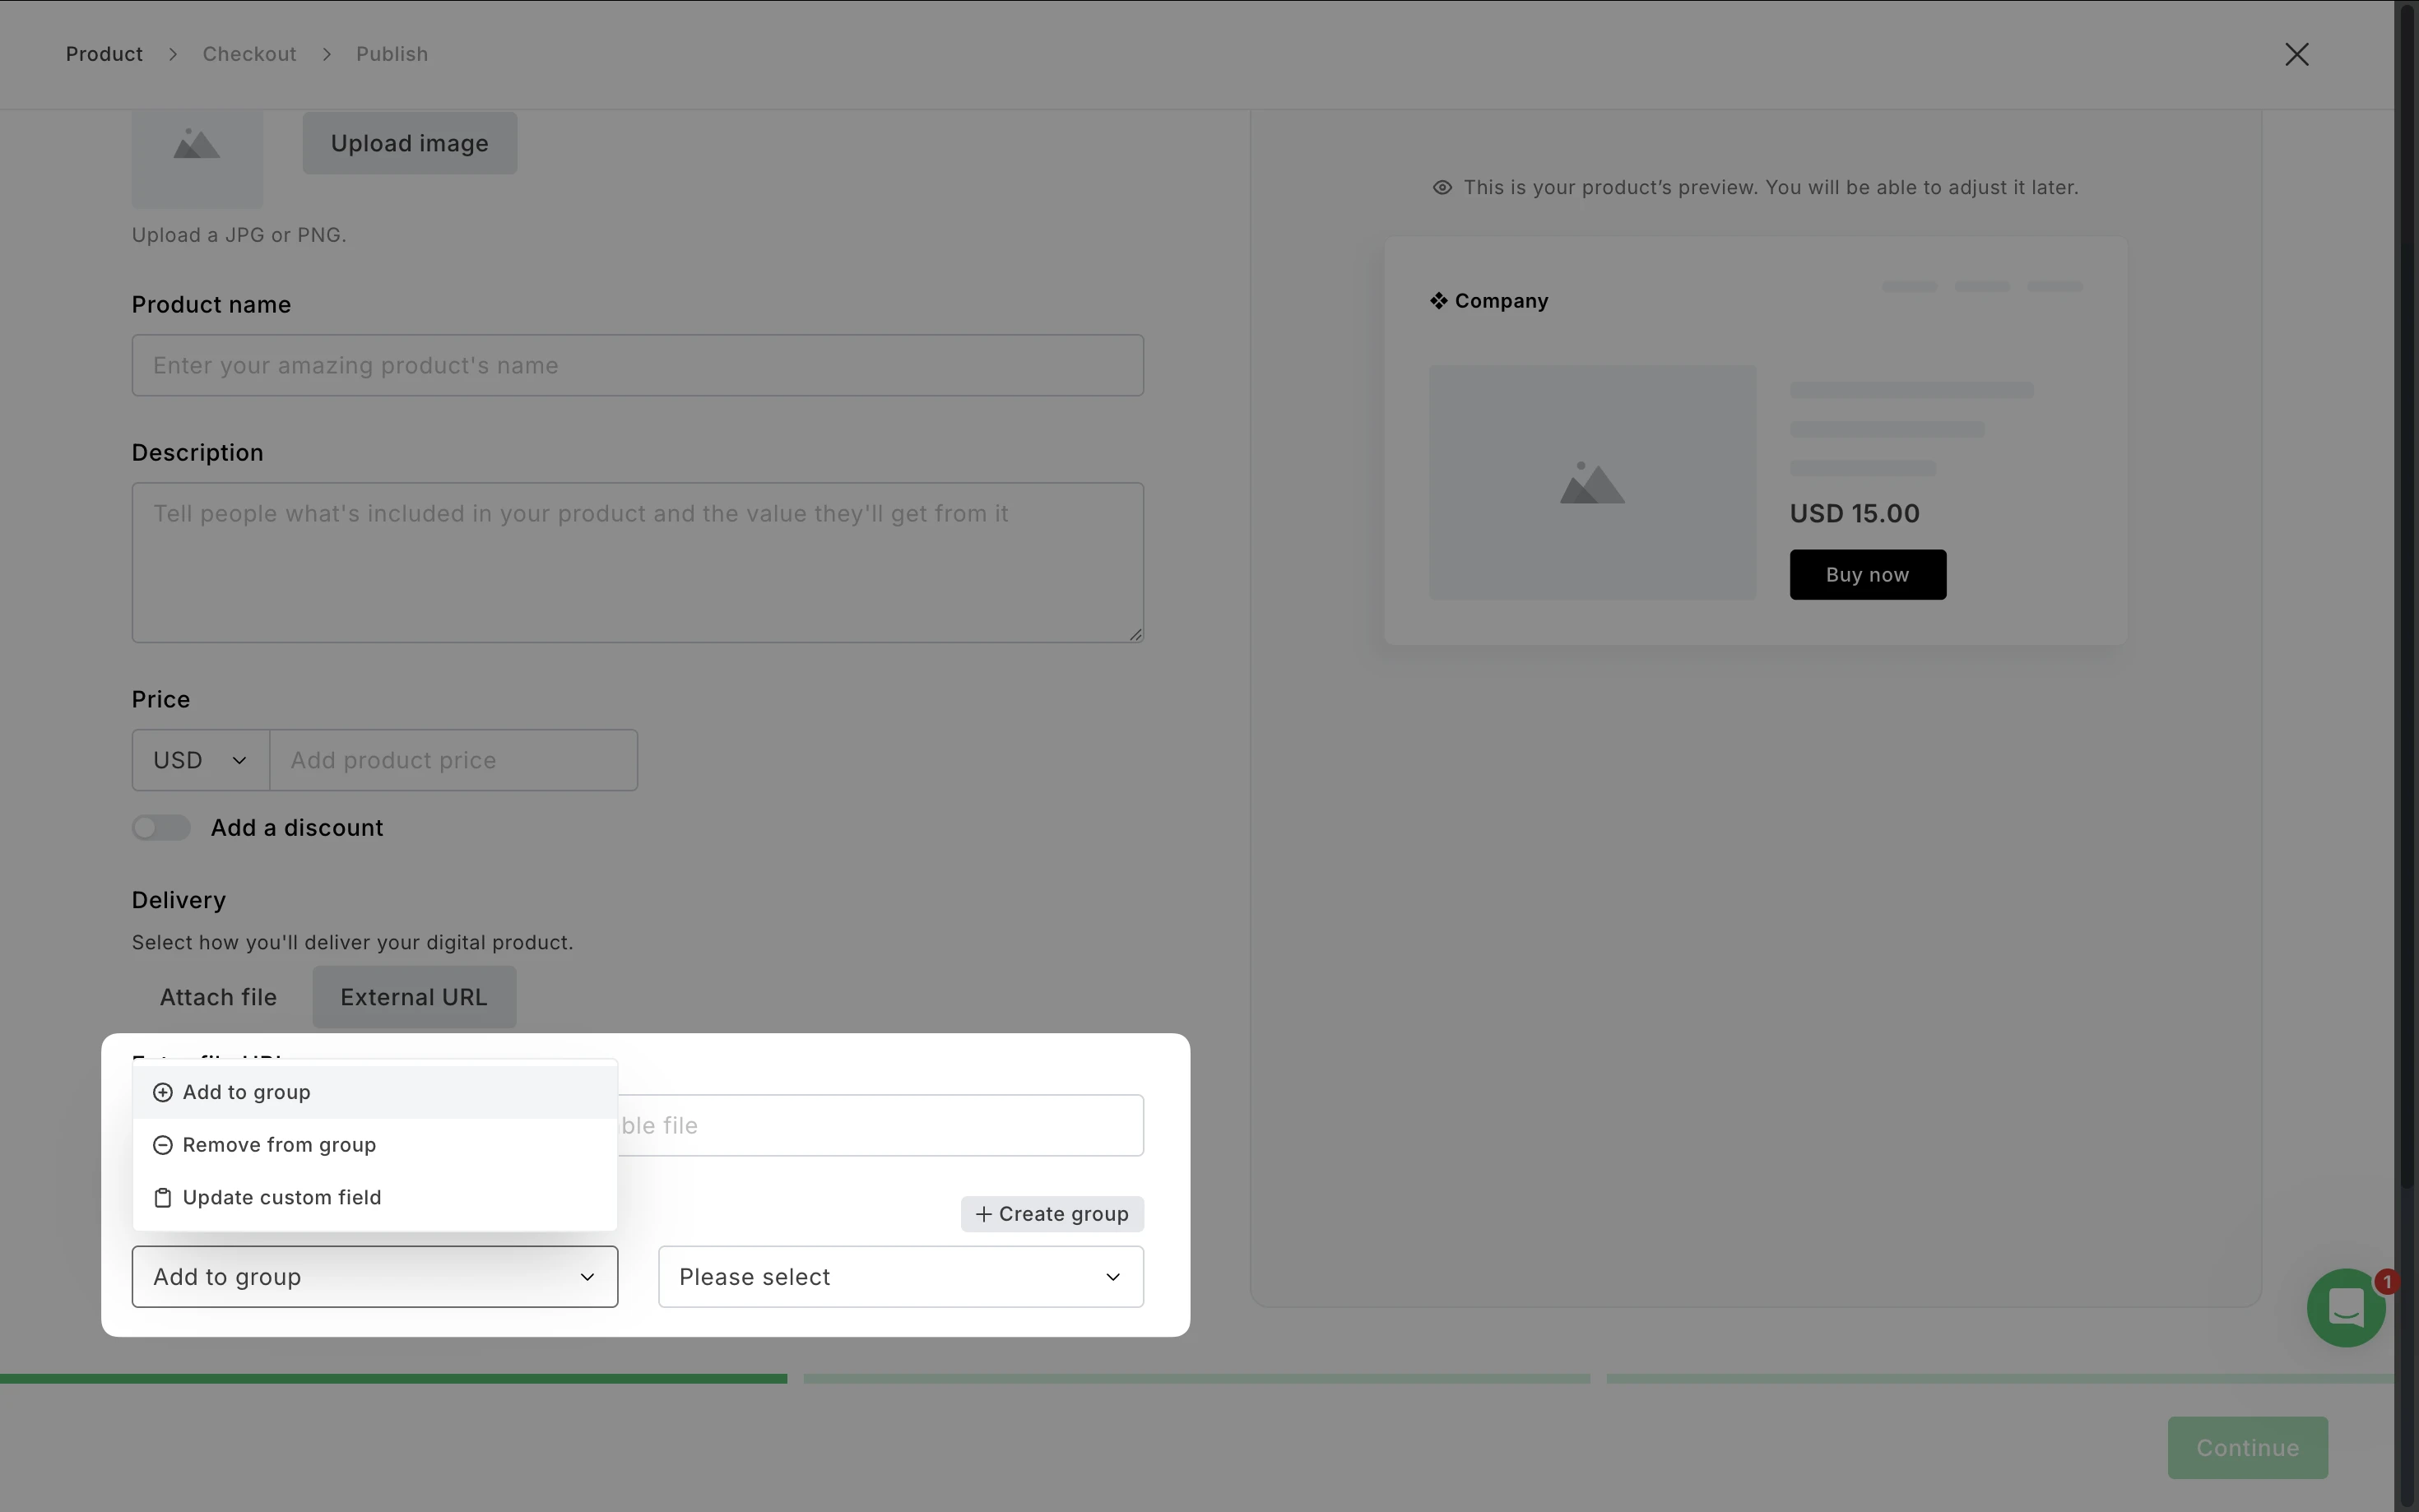
3. Fill in the required information about your product such as Product name and Description.
4. Enter the product price and select the currency.
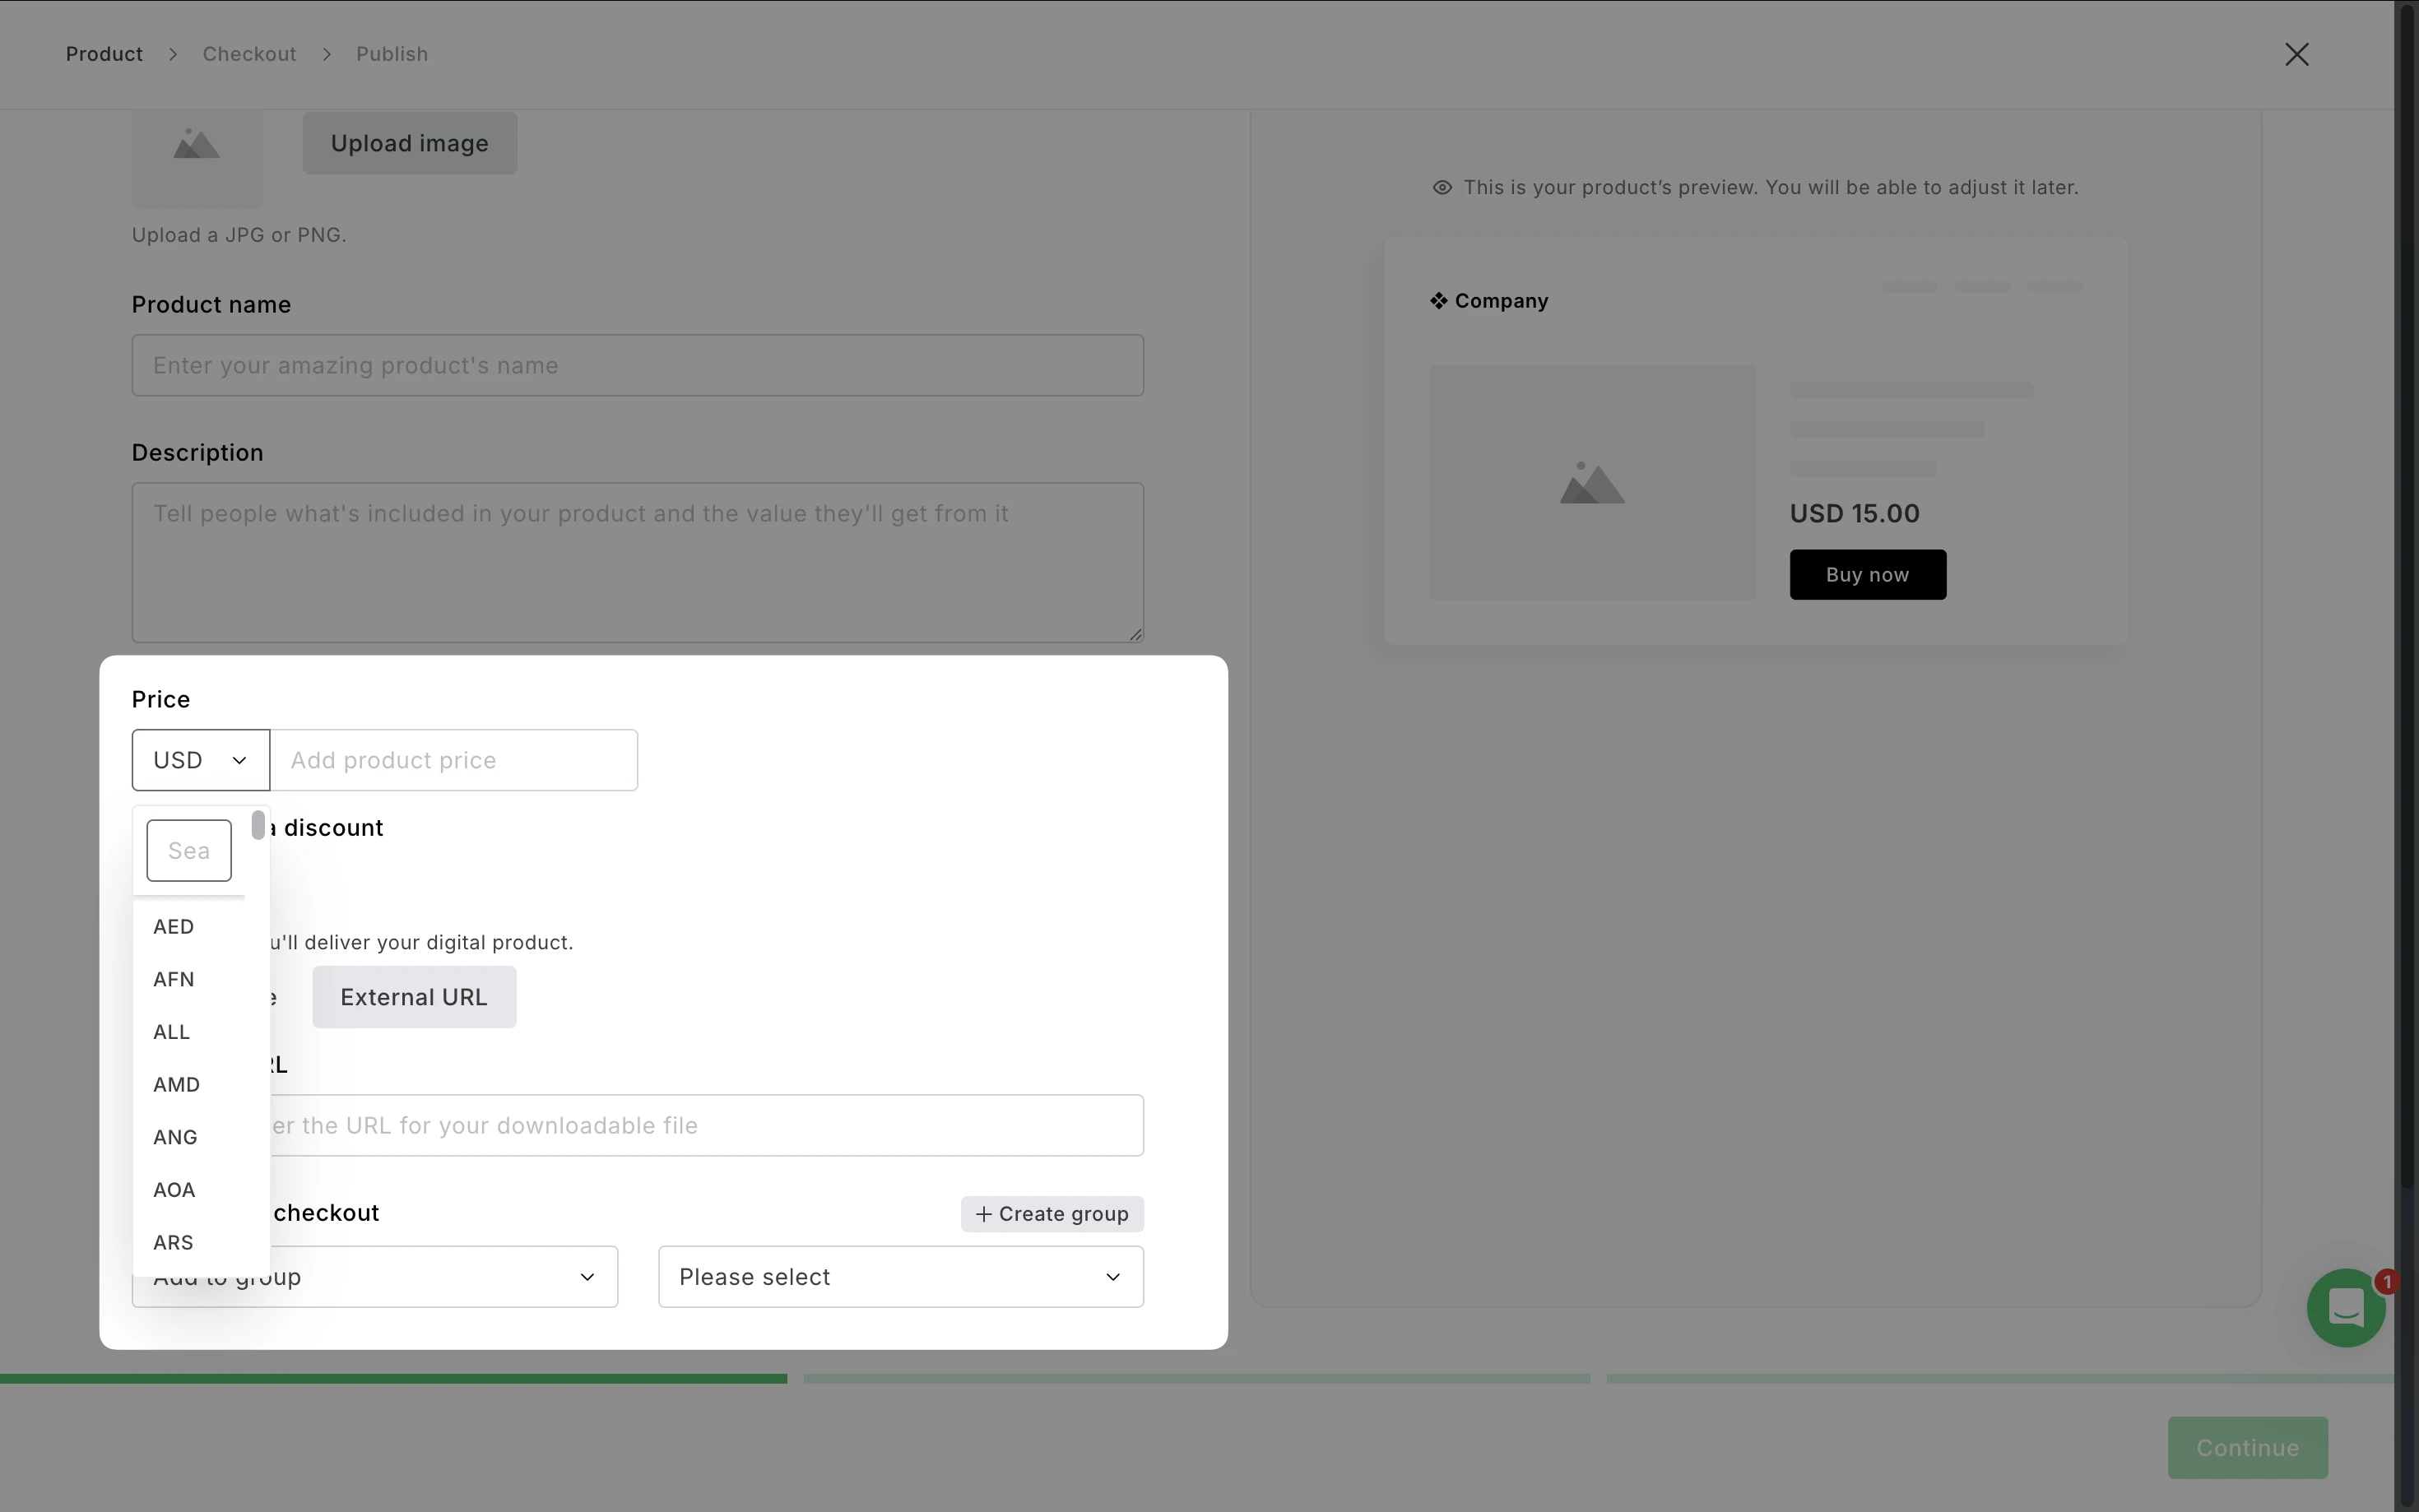
5. For Delivery, you can upload images, ePUB, or PDF files, or redirect purchasers to an external URL.
6. Choose the Action after checkout, which allows you to decide what happens once someone successfully purchases your product. You can choose between adding the subscriber to a group, removing the subscriber from a group, or updating a custom field.
7. Click Continue.
Checkout
You have two options for your product checkout: MailerLite's default checkout or Stripe checkout.
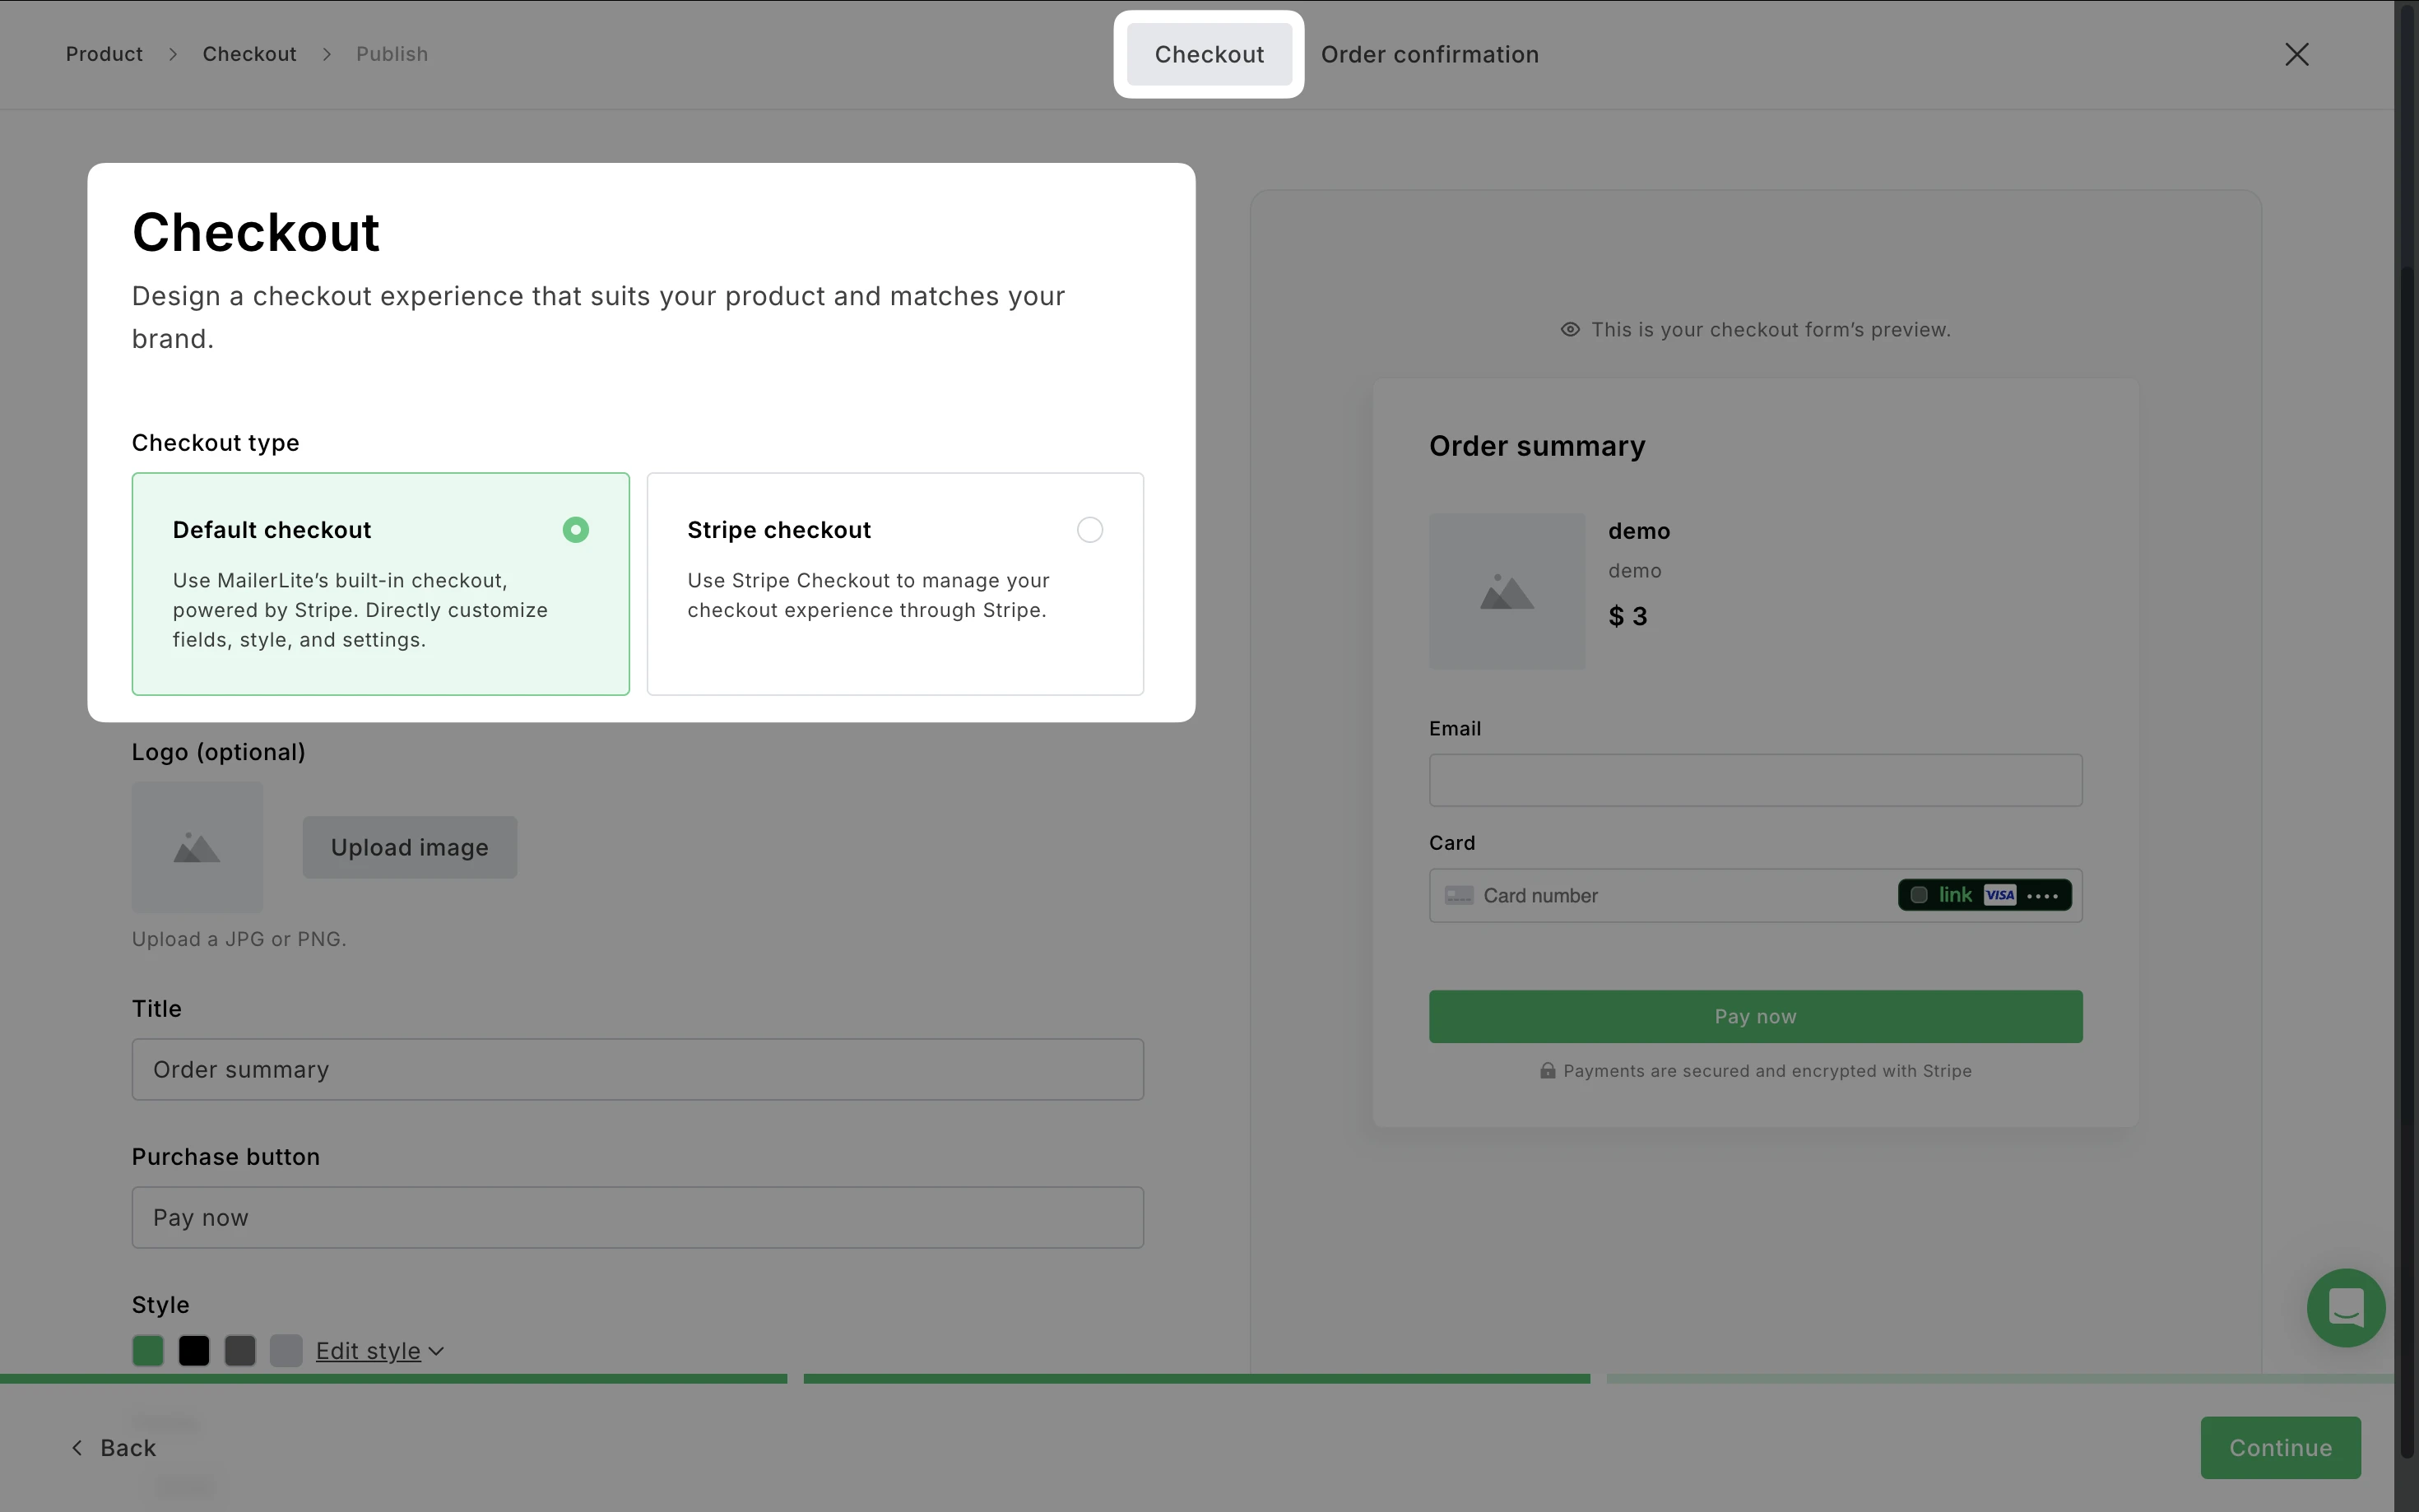
MailerLite's default checkout
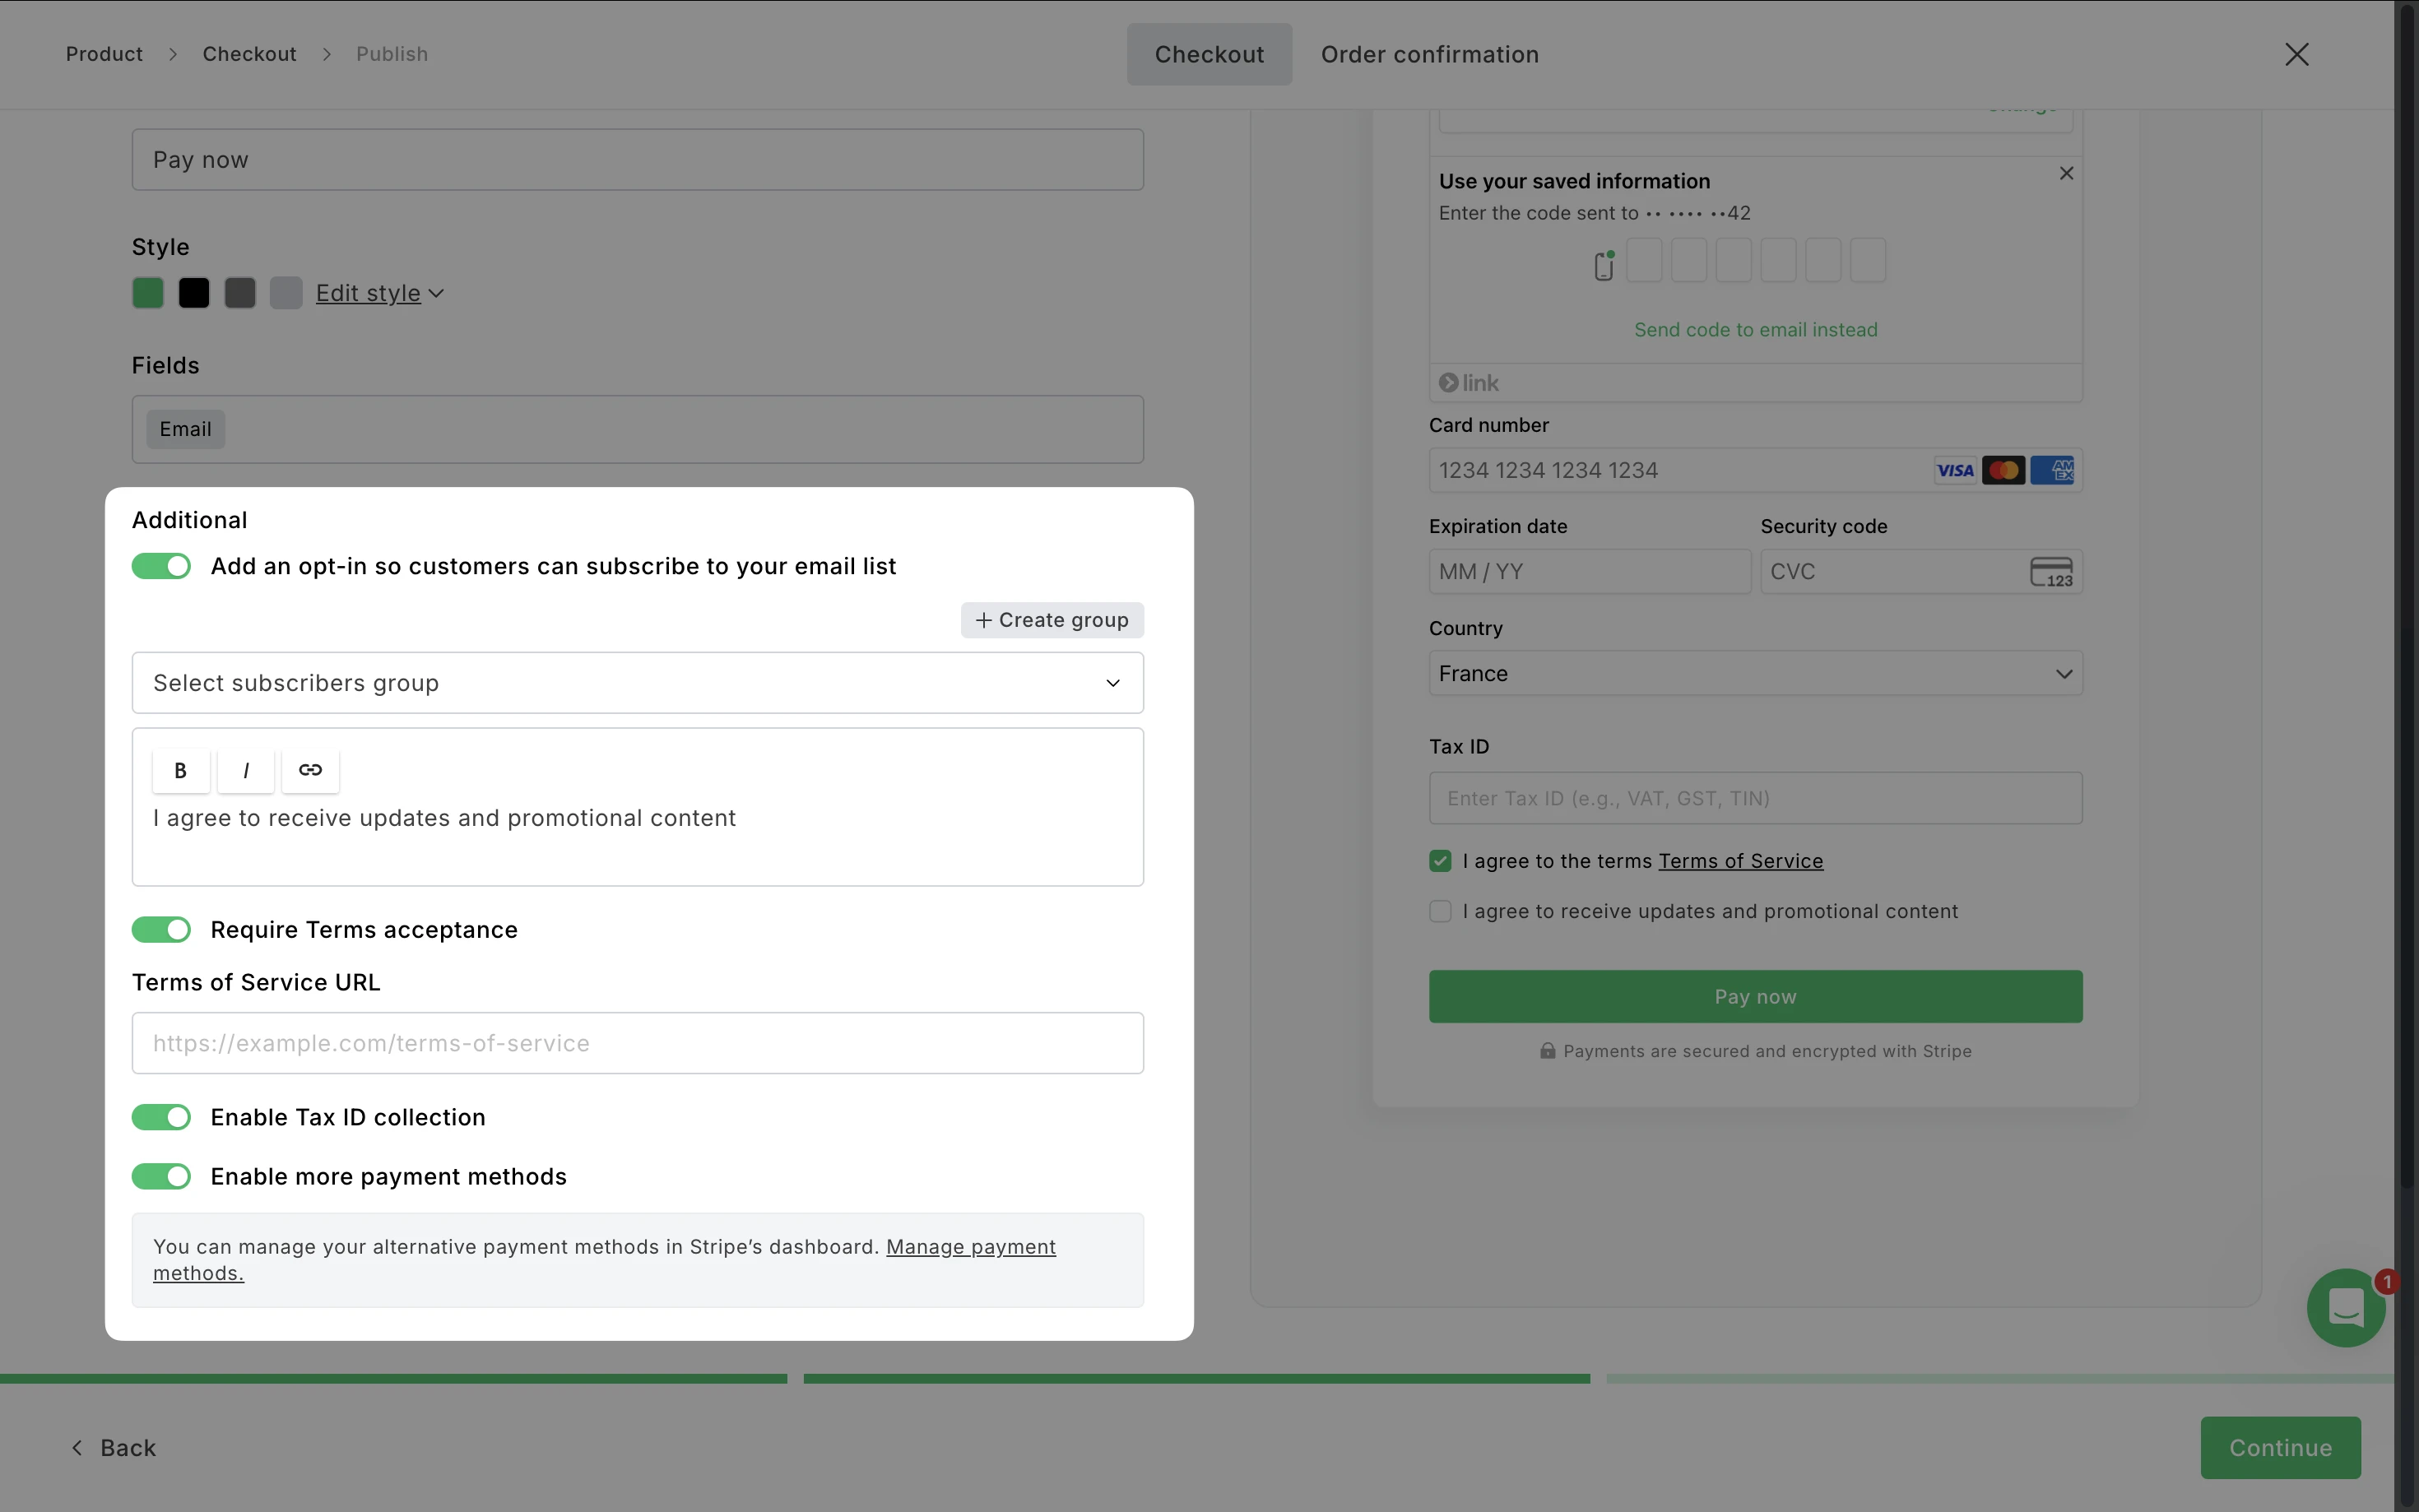
The MailerLite Default checkout offers a streamlined experience, allowing you to configure your checkout directly within MailerLite, automatically apply your logo, customize the styling of buttons and fields, and collect additional buyer information with more flexibility than Stripe. You can also easily copy and share your MailerLite Checkout URL for promotion.
Under Additional settings, you also have the option to:
Add an opt-on to add customers to your email list: A great way to prompt purchasers to sign up for your newsletter
Require Terms Acceptance: Add a checkbox for customers to accept your terms
Enable Tax ID collection: Collect tax identification numbers from buyers
Enable more payment methods: If you have additional payment options enabled in Stripe (e.g., Klarna, BLIK), toggle this on to display them on your MailerLite Default checkout
Stripe checkout
Choose Stripe checkout if you prefer to use your existing Stripe setup.
Note: If you select Stripe checkout, the customer will be directed to the Stripe checkout page when they click the button to buy your product. This also means that all checkout configurations should be made directly in your Stripe account.
Order confirmation
Switch to the Order confirmation tab to edit the page that will be displayed to the buyer once they have made their purchase. Here, you can choose to display the product details, such as the Amount paid and Order date.
Or, simply toggle the options OFF to hide these details.

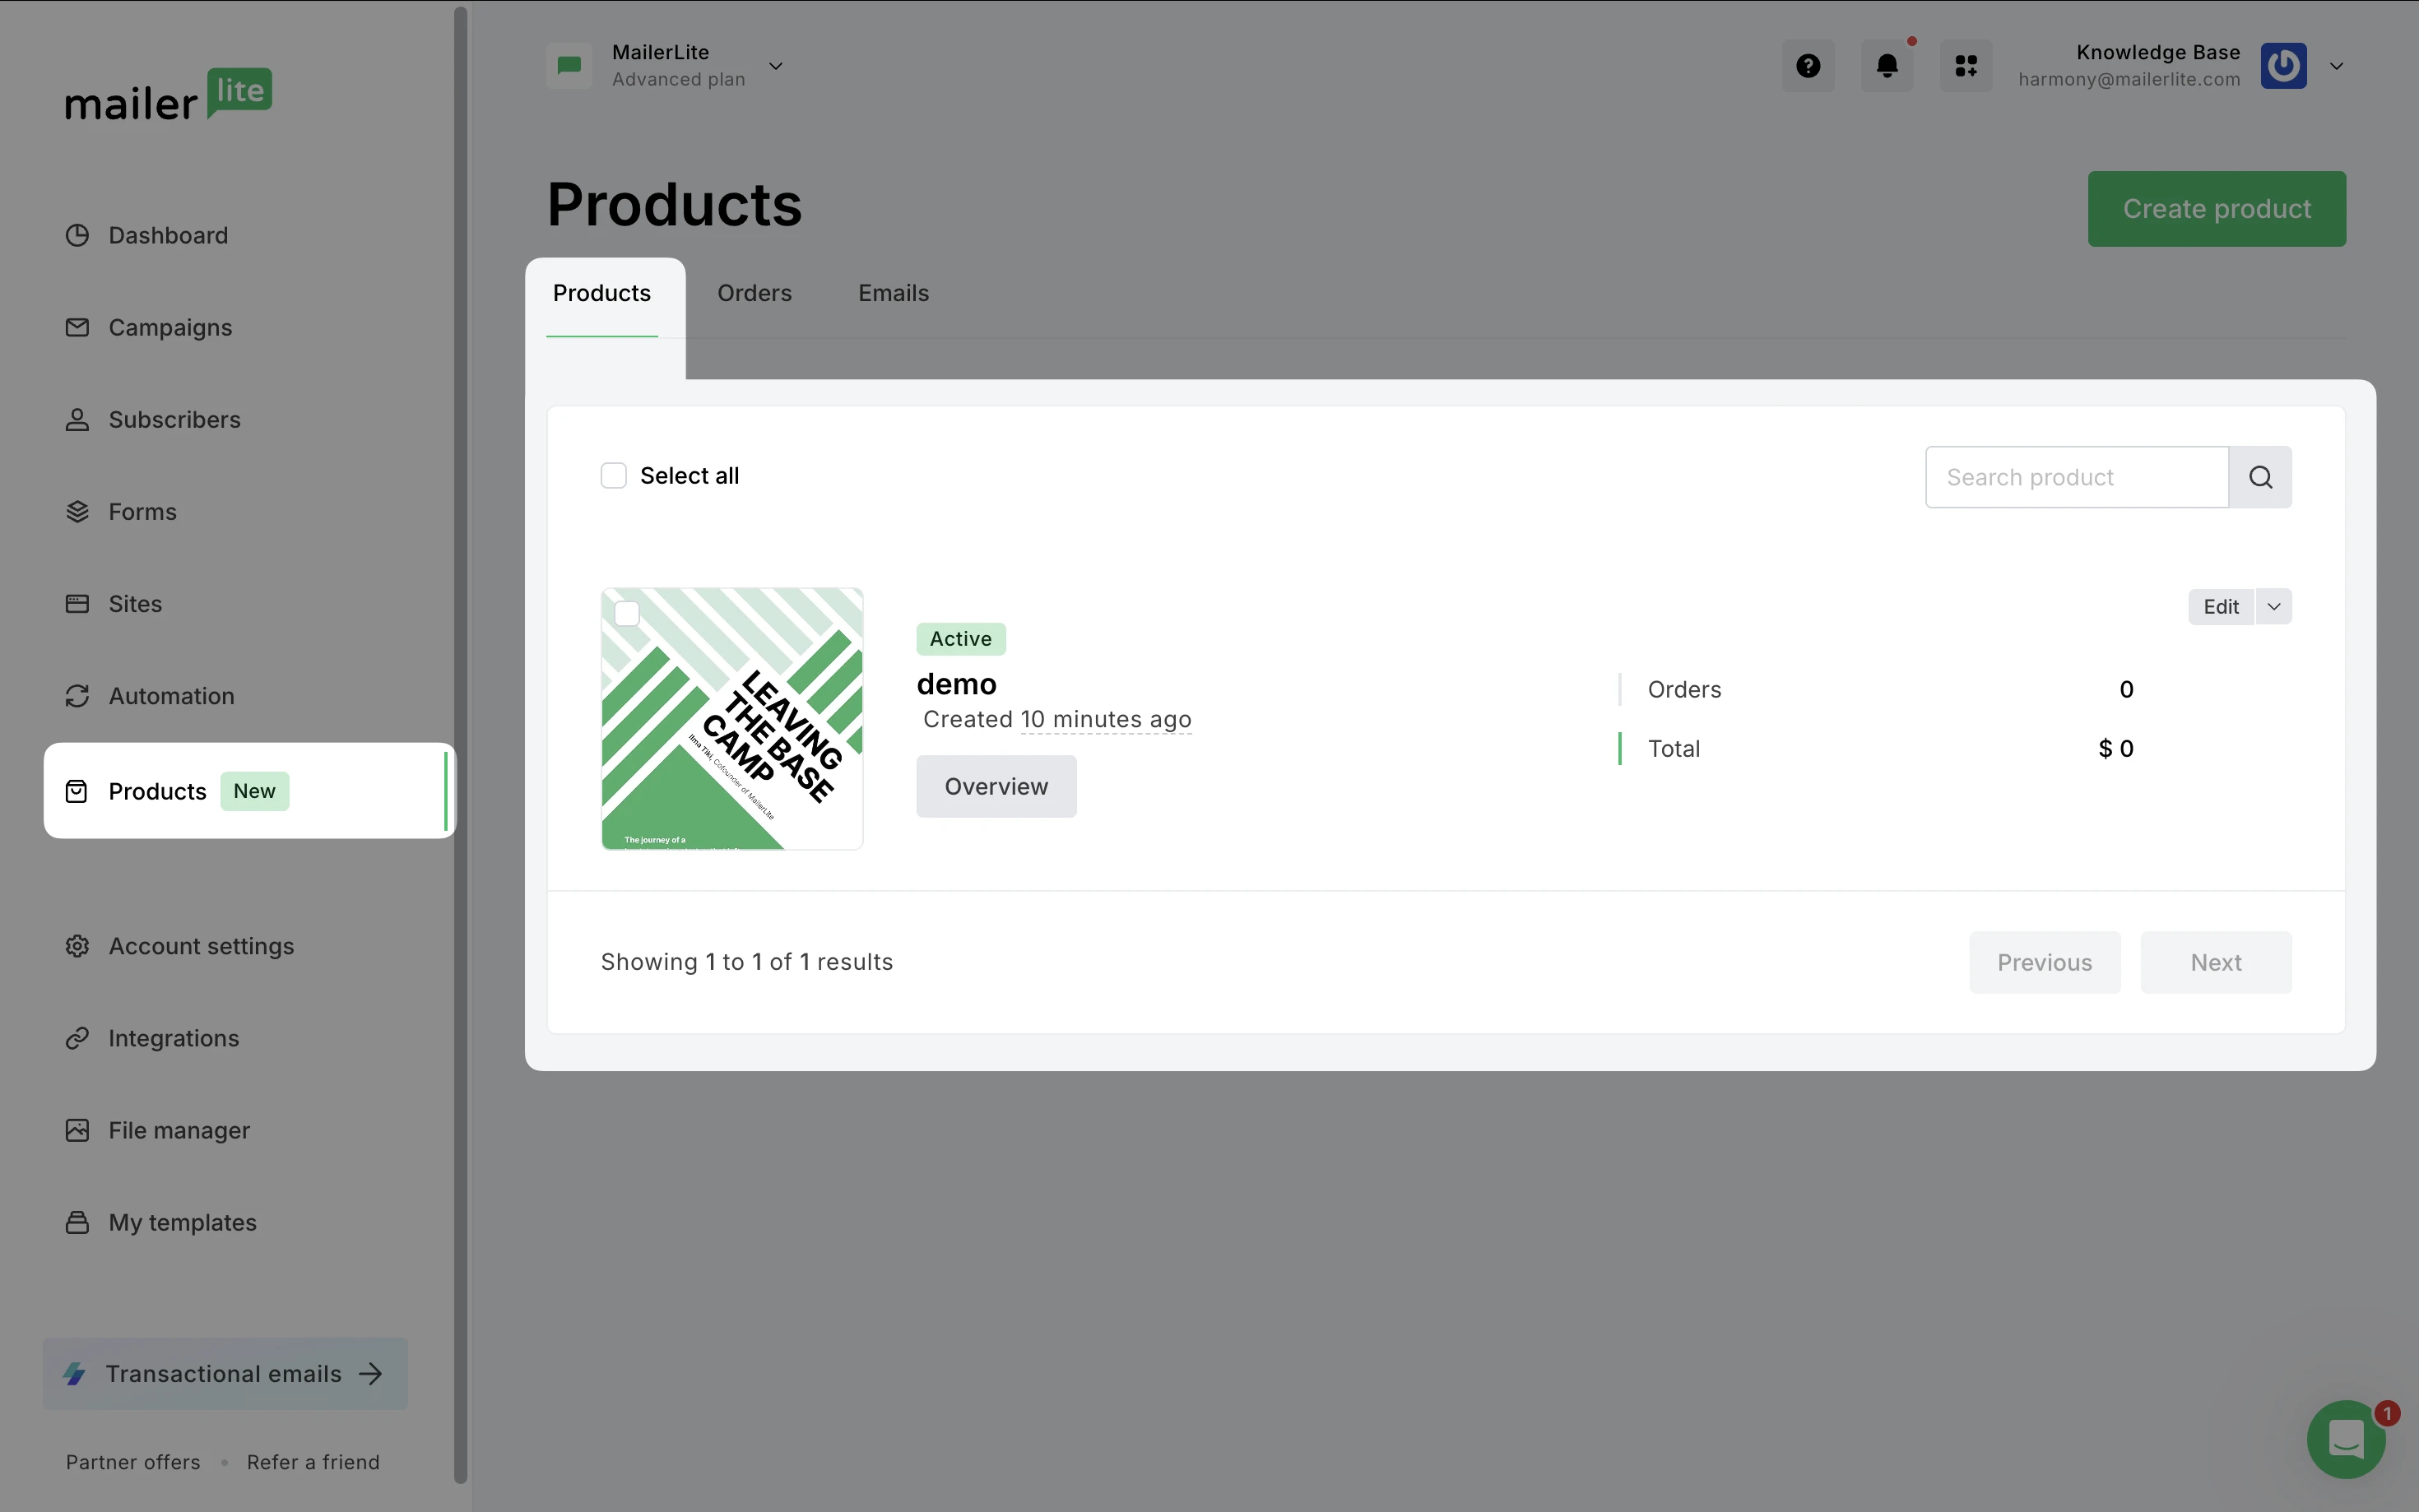
That’s it! Your digital product has been created and can be viewed from the main Products page.
Checkout confirmation
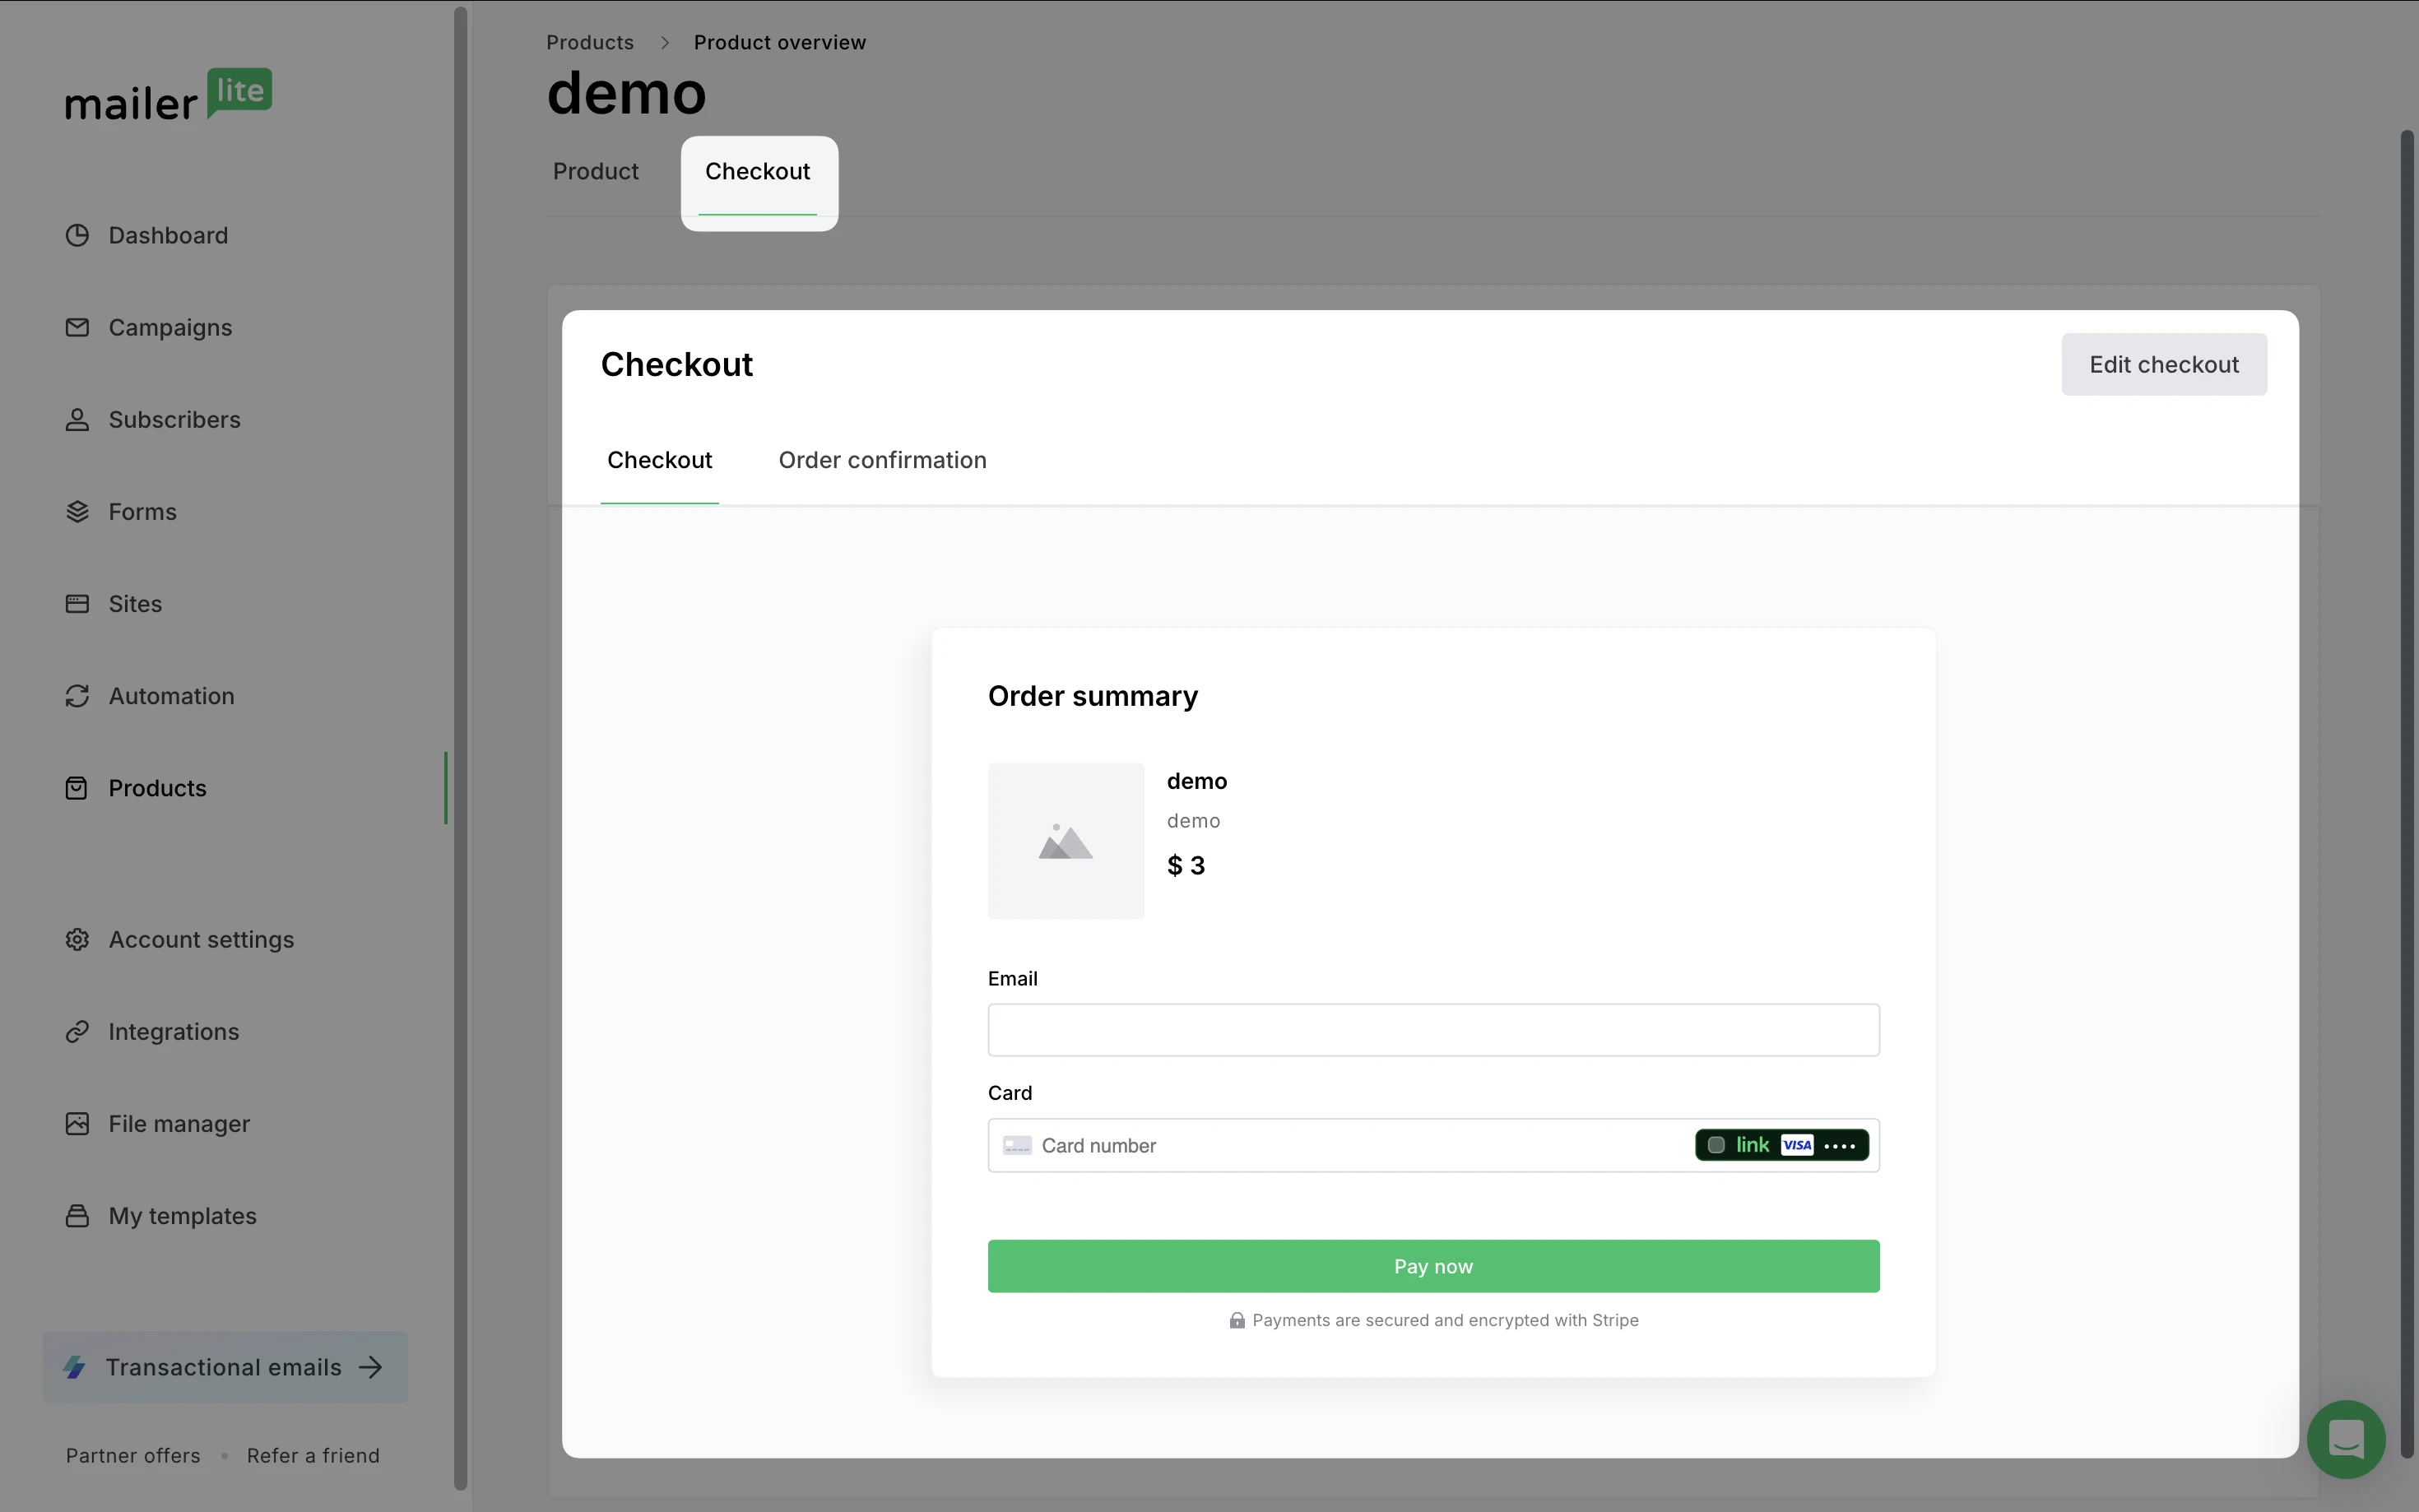
After a successful purchase, customers will see an order confirmation page where they can download their product. To edit this page:
Click the Overview button for the product.
Navigate to the Checkout tab.
Here, you can view and edit both the Checkout page and the Checkout confirmation.
Confirmation email
The order confirmation email will be sent to those who successfully complete checkout and make a purchase. The same order confirmation email format will be used for each product, with the fulfillment details updated based on the specific product purchased.
To edit this email:
Go to the Emails tab.
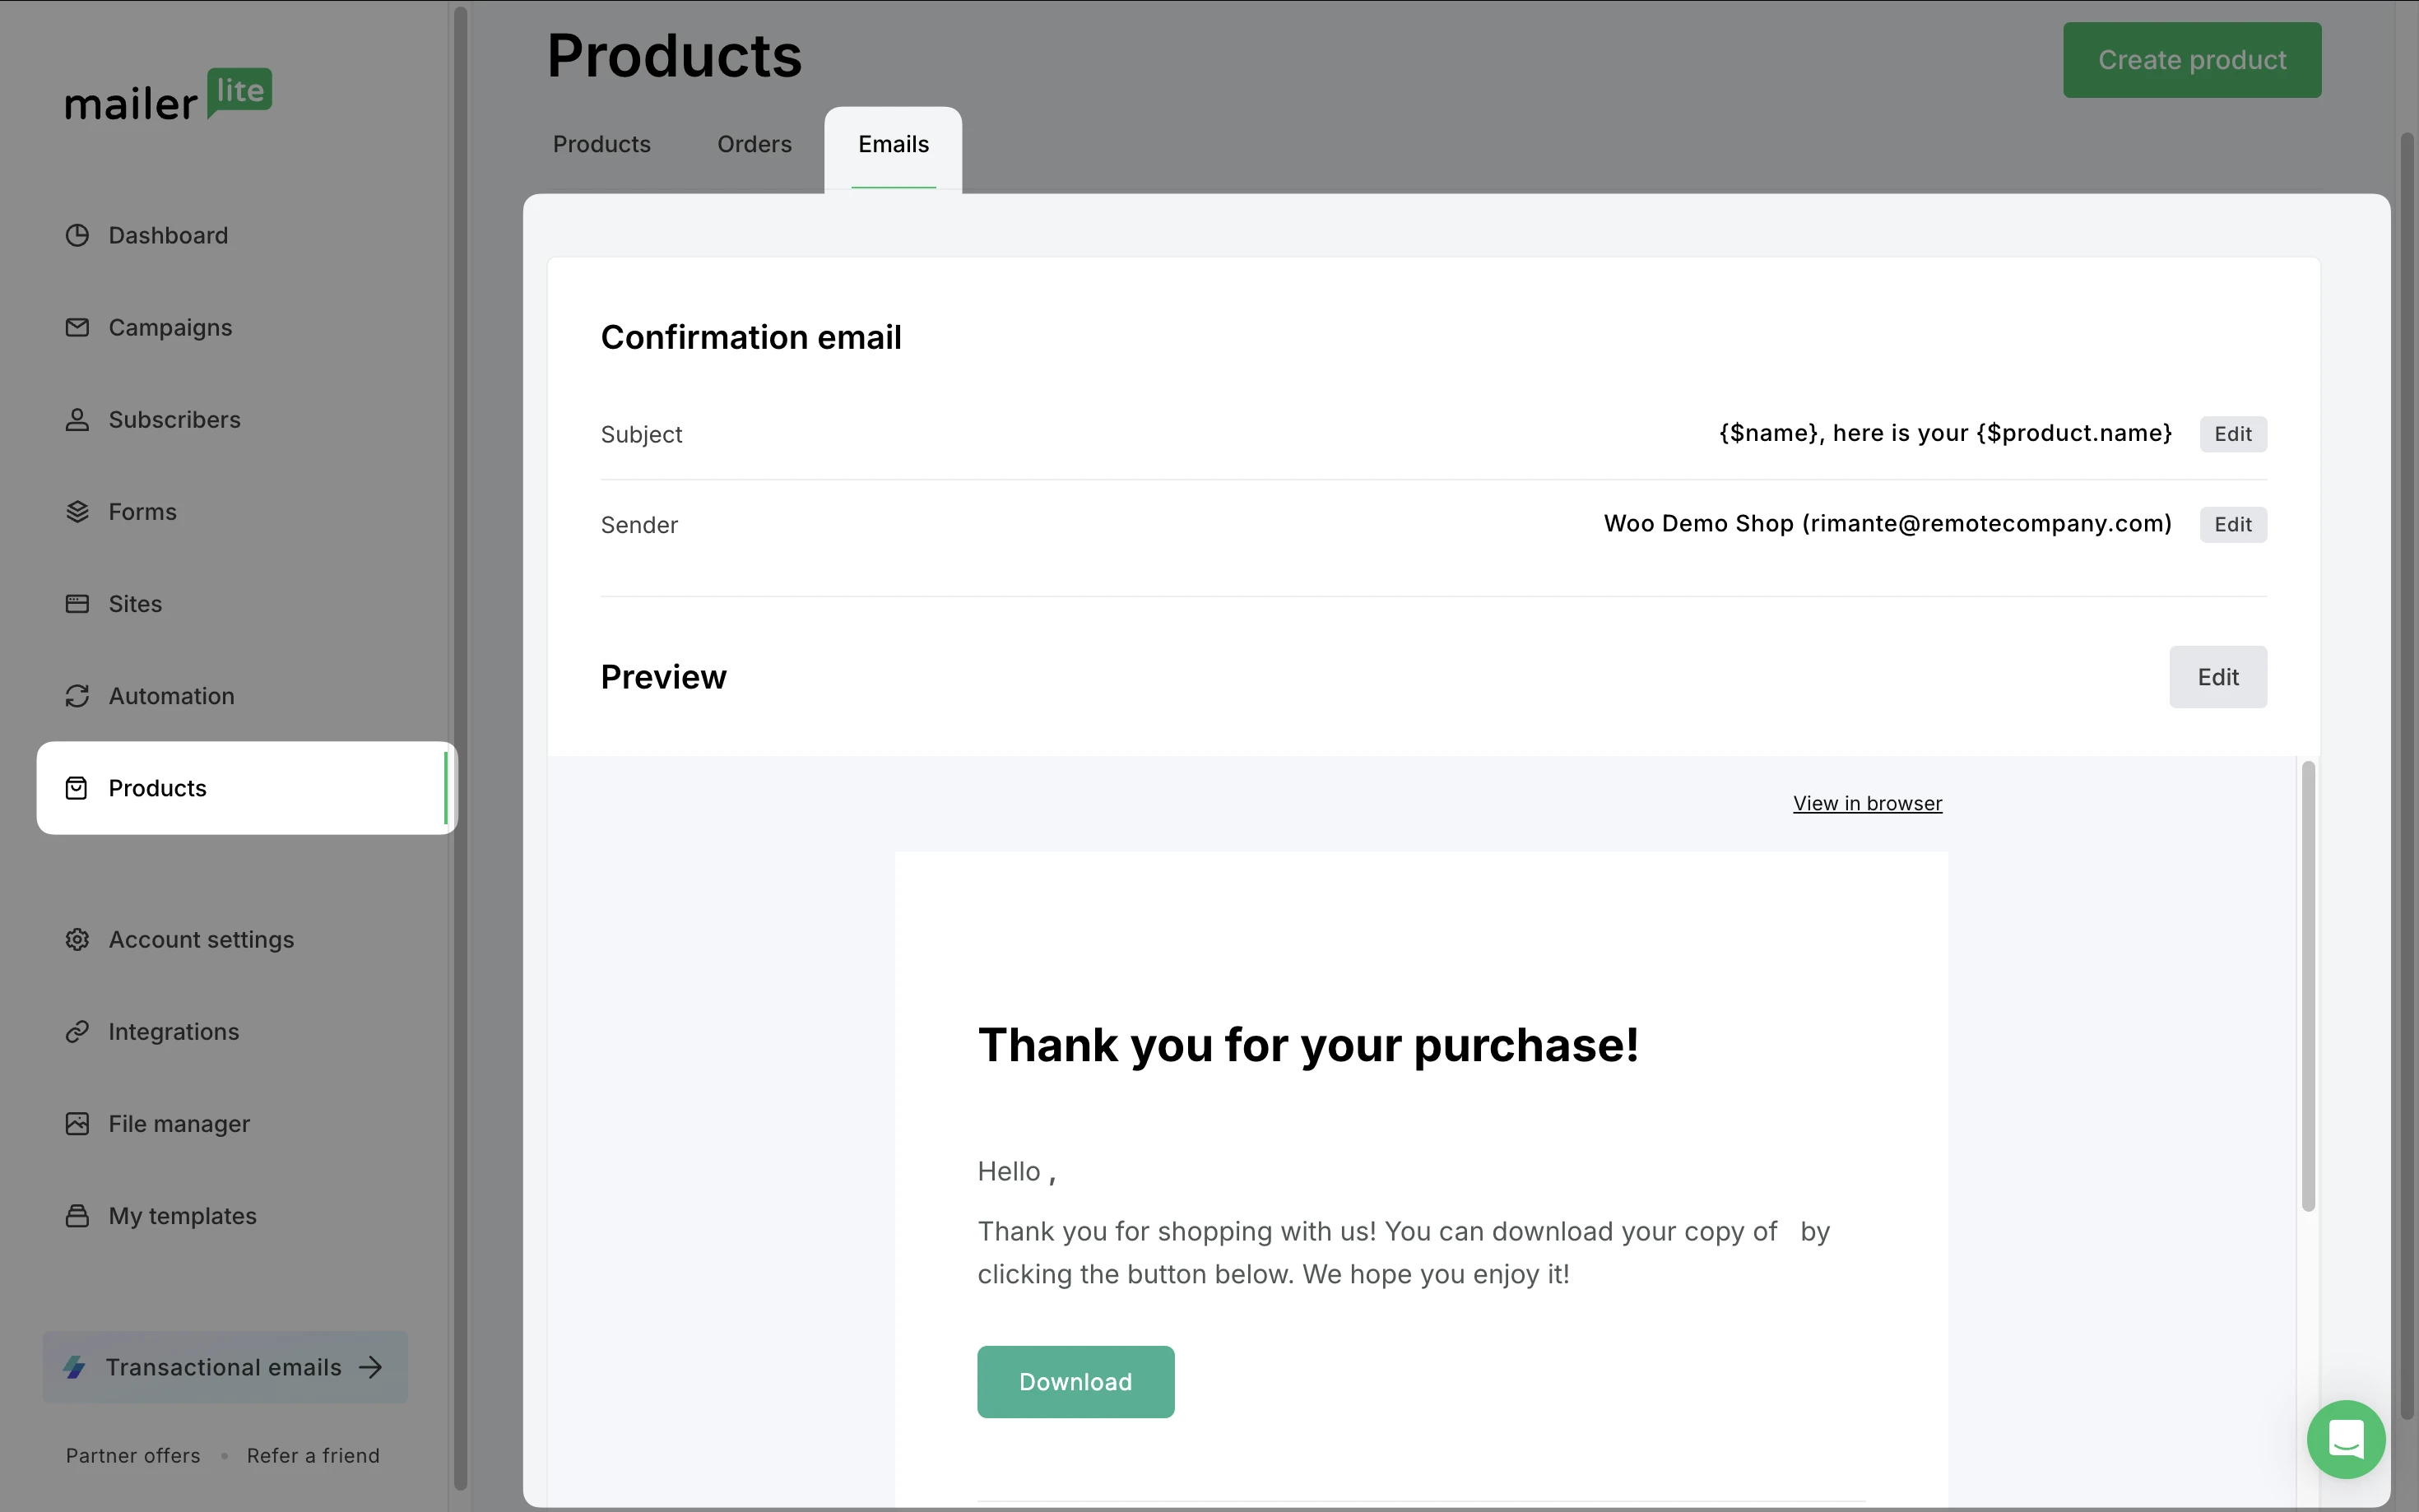
2. Click Edit to change the Subject line, Sender, or the email content.
Selling
You have several ways to sell your digital product:
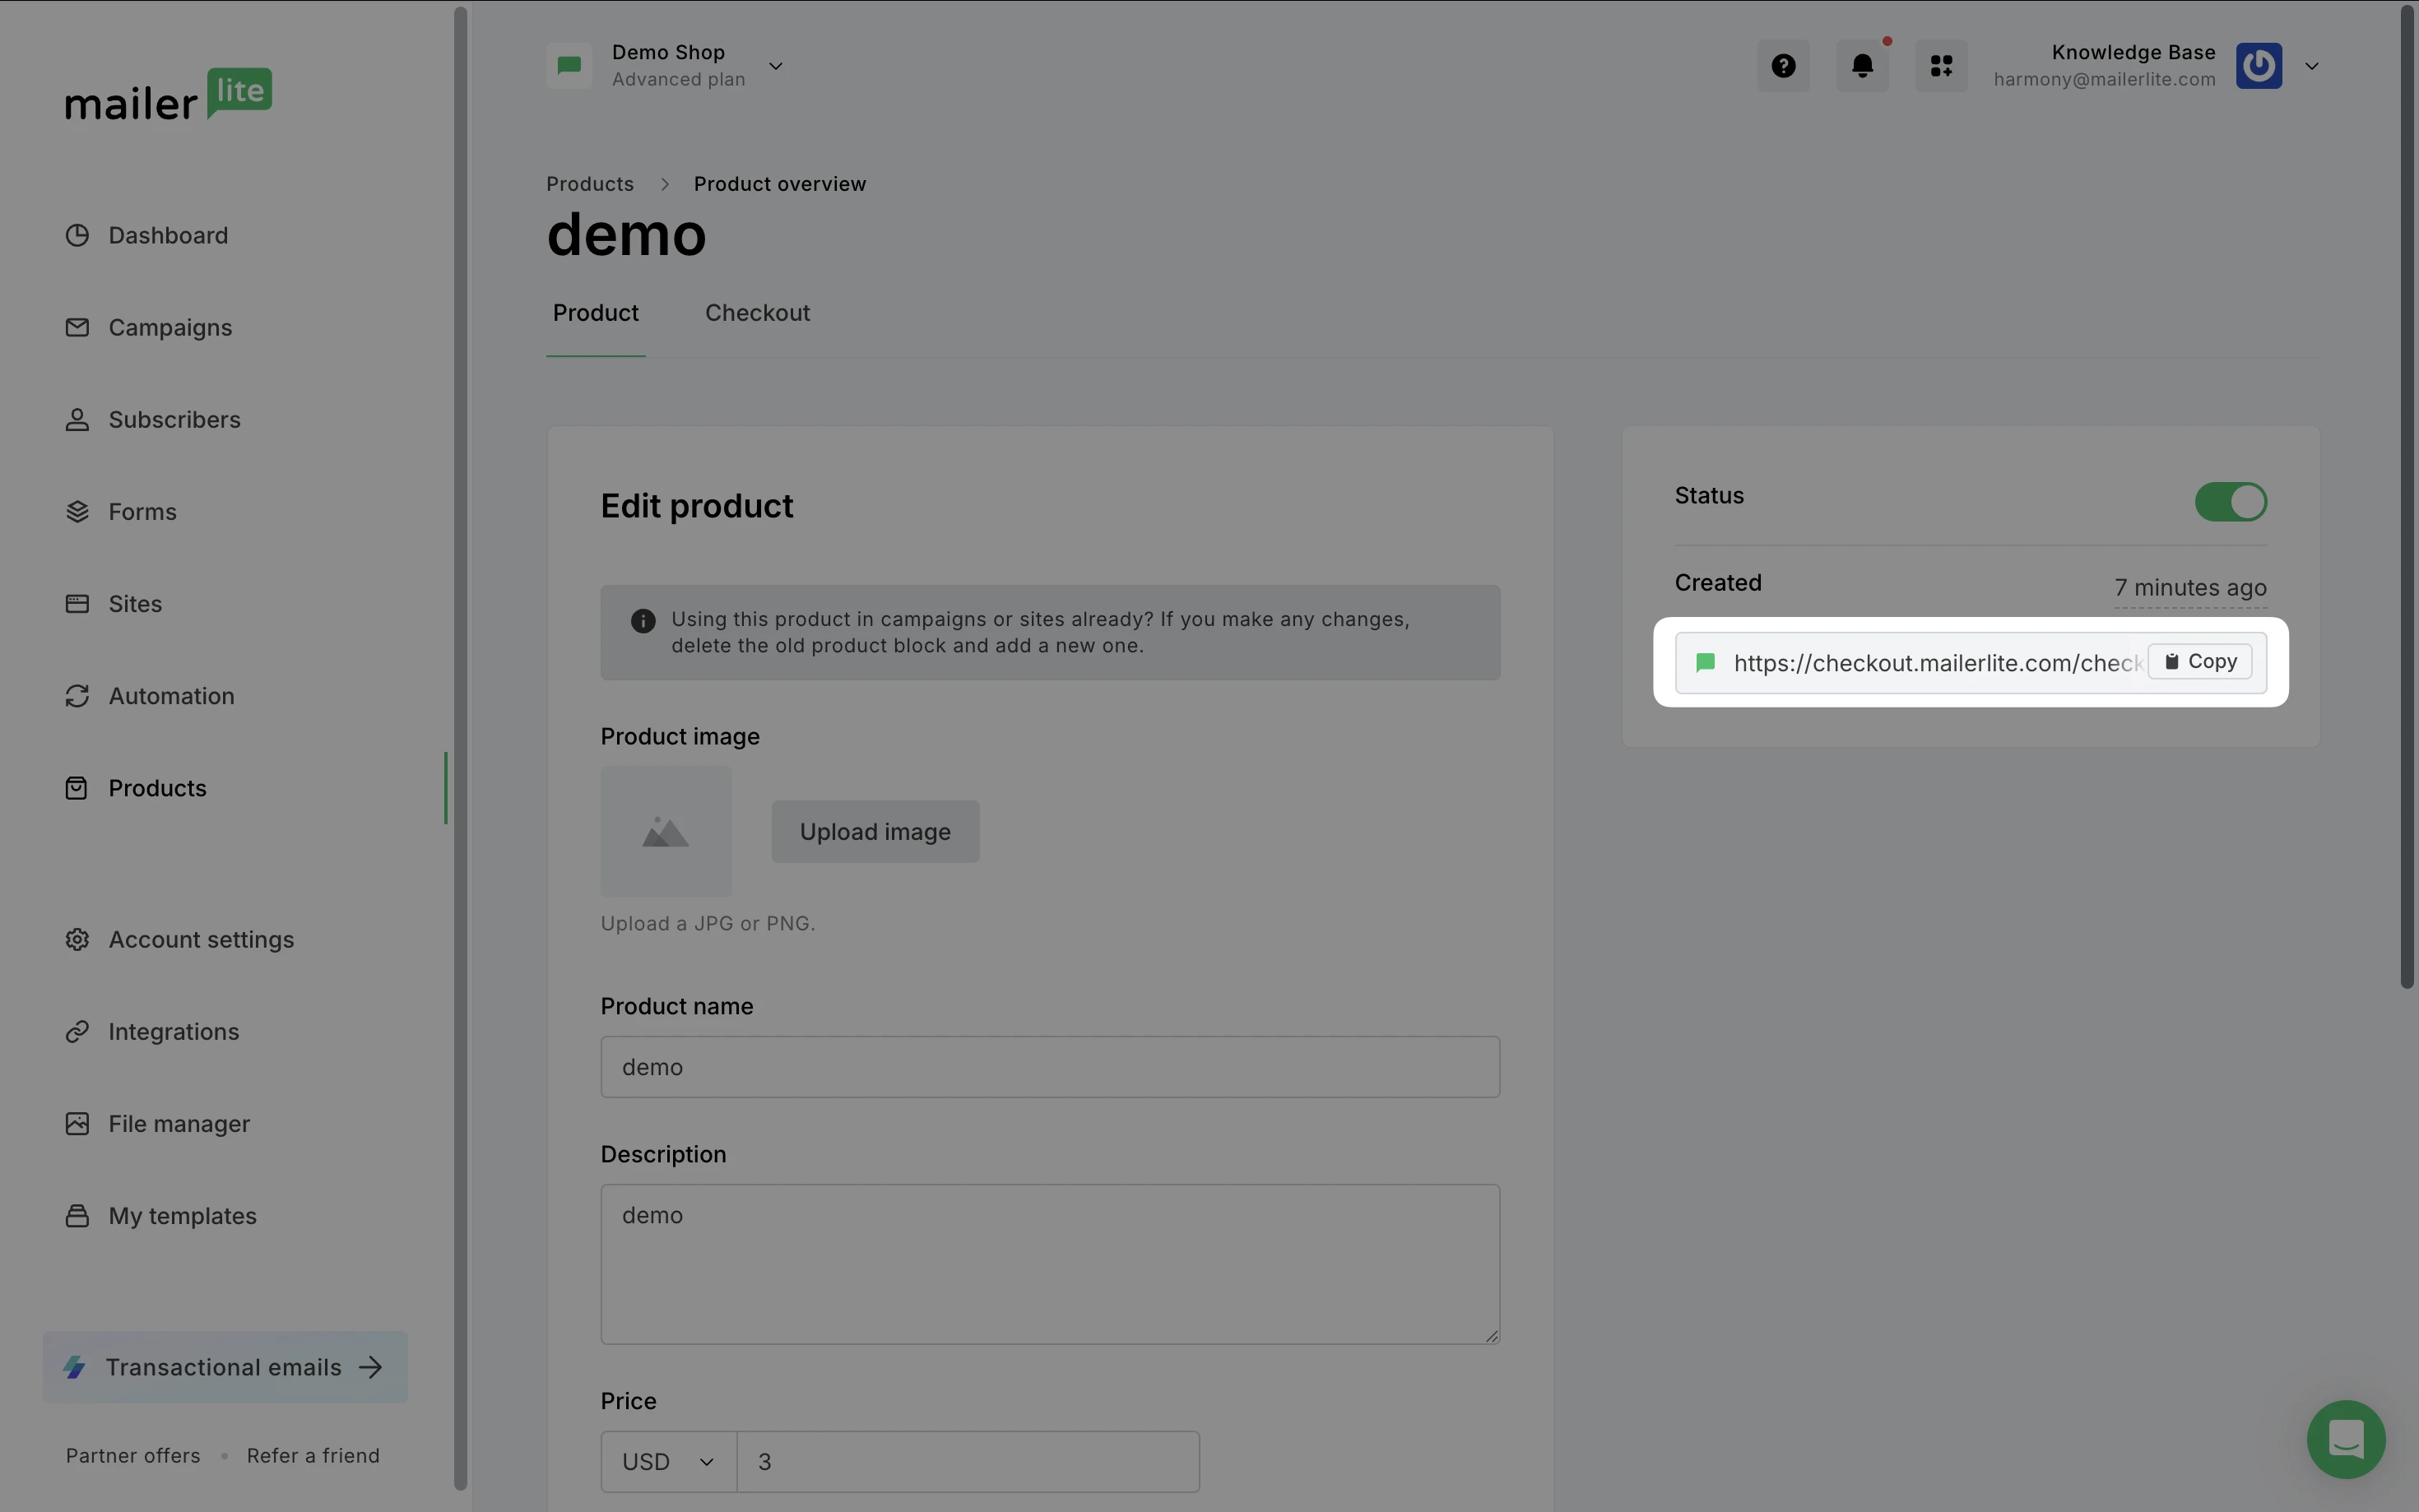
Copy checkout URL
To quickly share your product on social media, copy its checkout link as a URL. When a buyer clicks this link, the checkout page will open and the rest of the purchase flow remains the same.
Place your product in a newsletter
Need help creating a newsletter? Learn more here ➡️ How to create and schedule a campaign
Our Products block in the Drag & drop editor allows you to add your Booking product directly into your MailerLite campaigns.
To do this:
Choose the Drag & drop editor when creating your email campaign.
Under the Products section, you will find Import from stores. Simply drag & drop the block into your email to add a product created in MailerLite or an external shop.
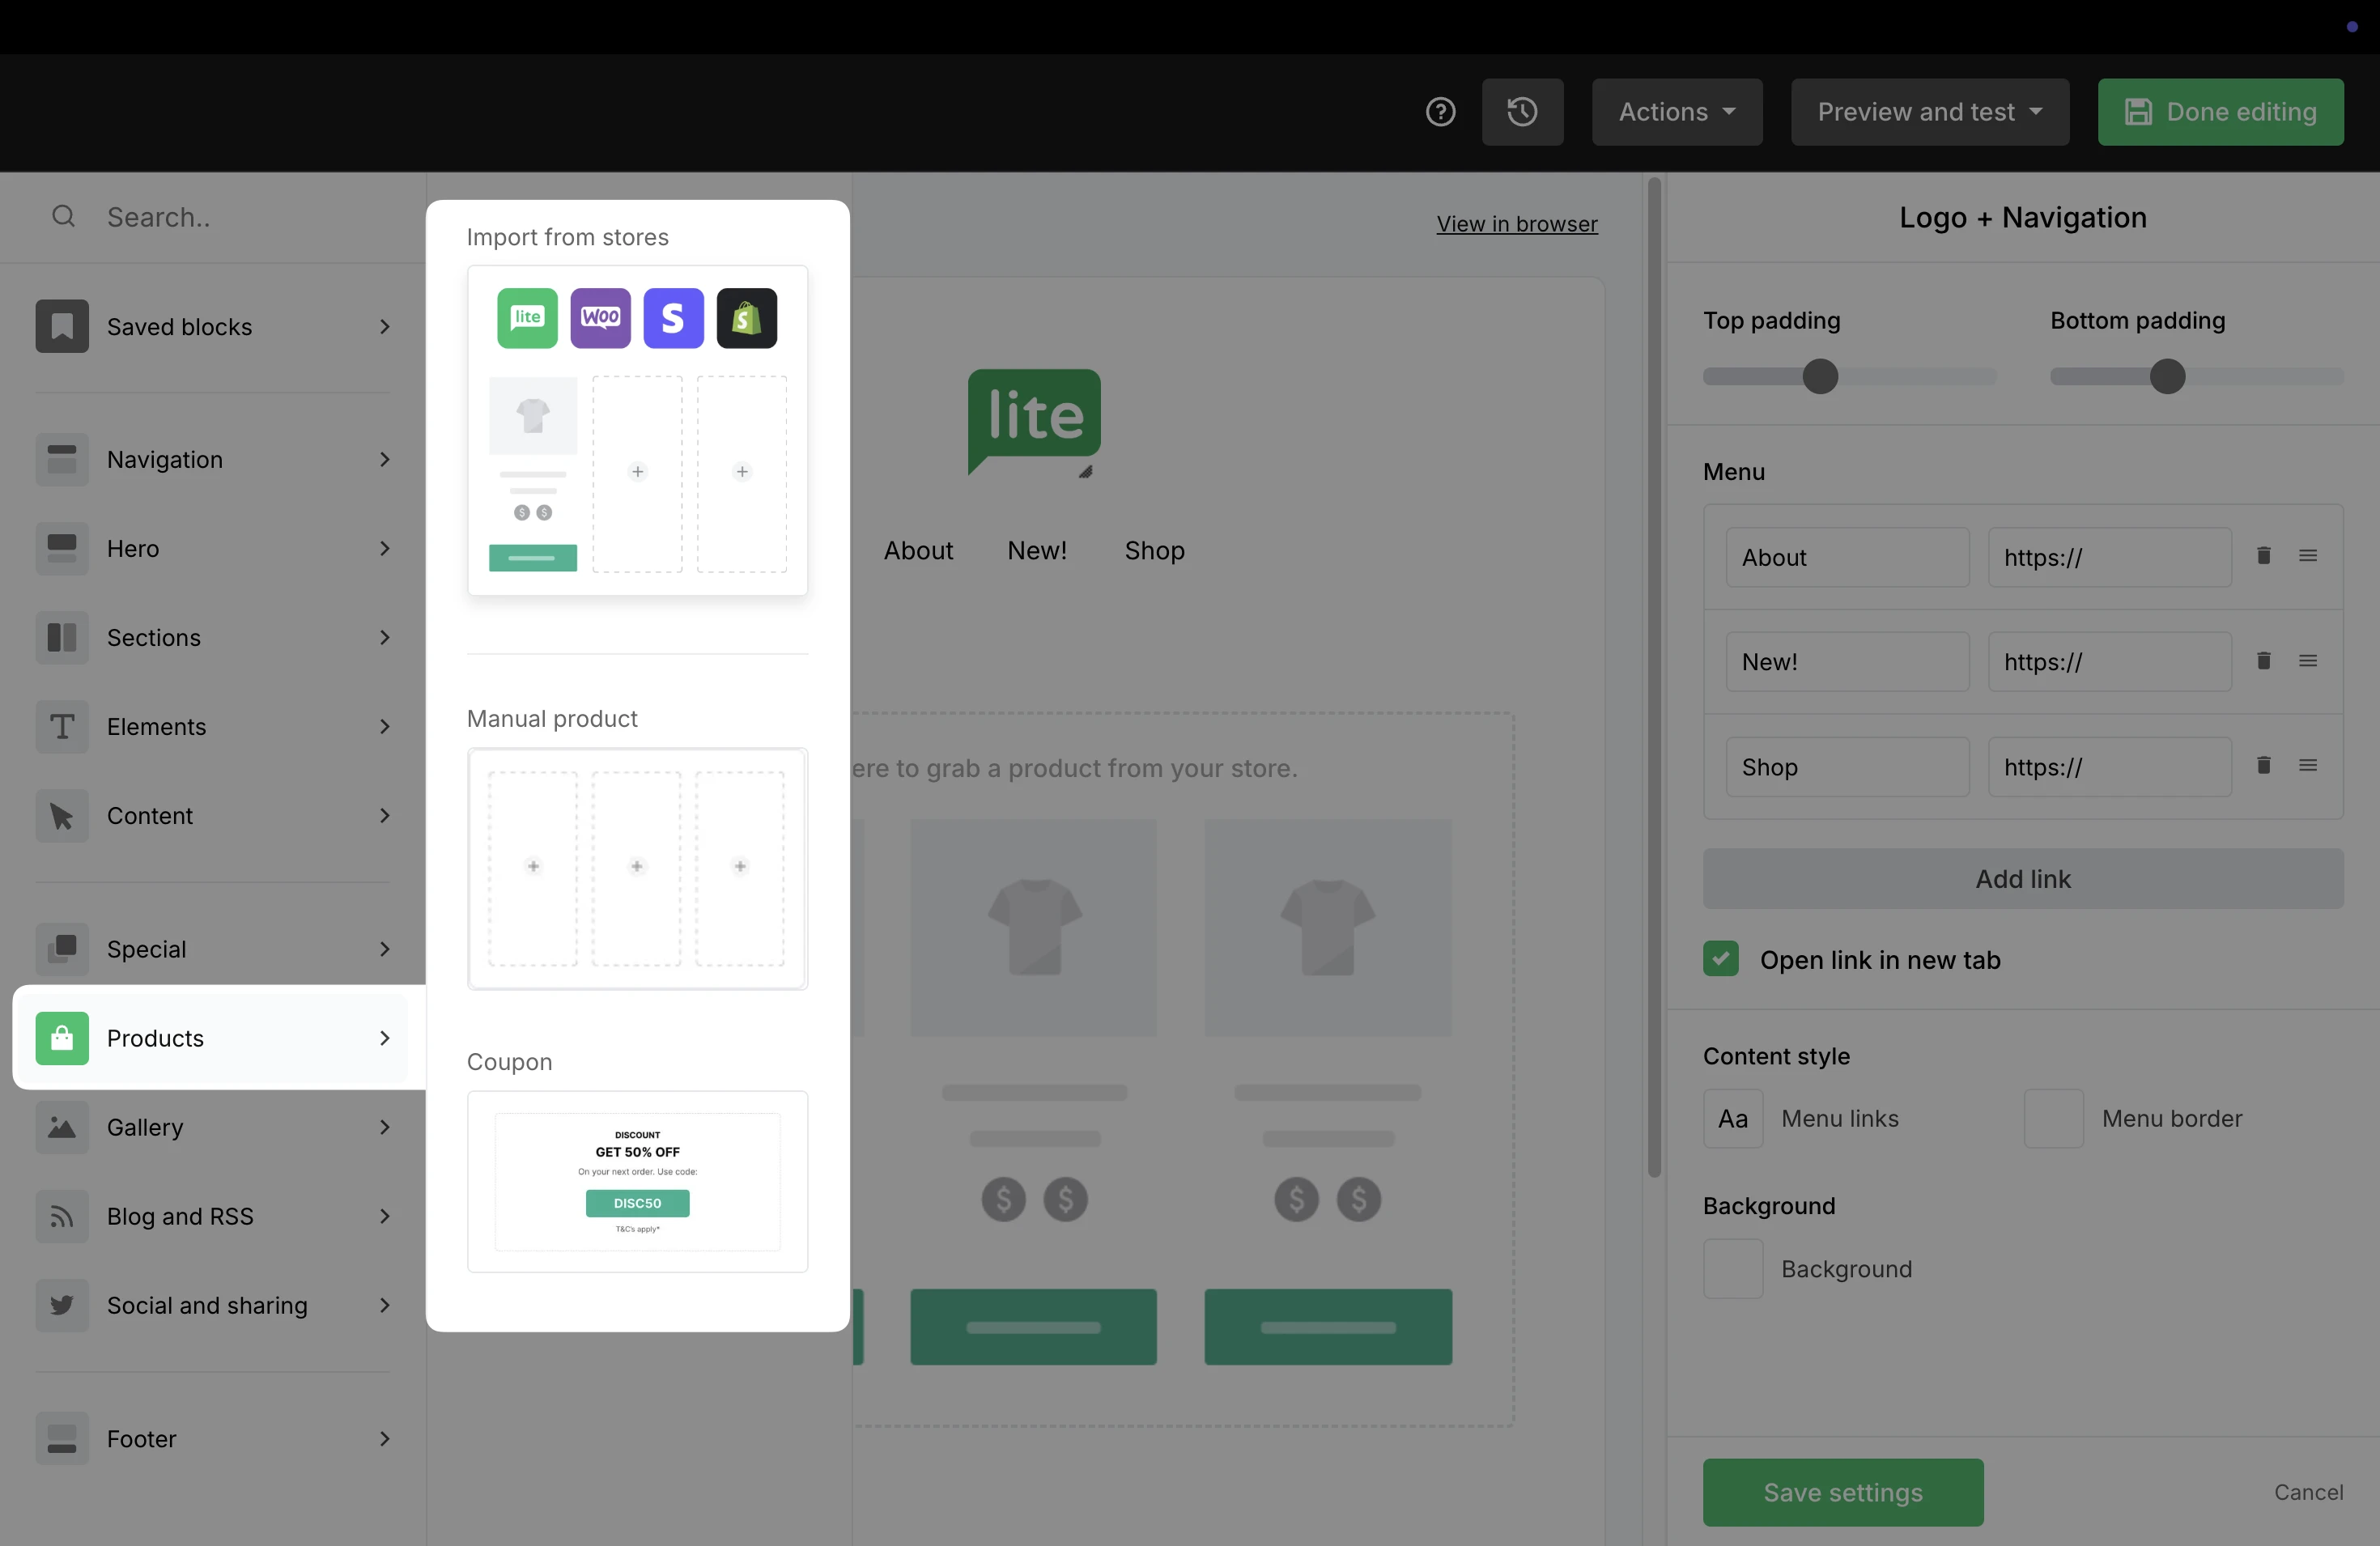
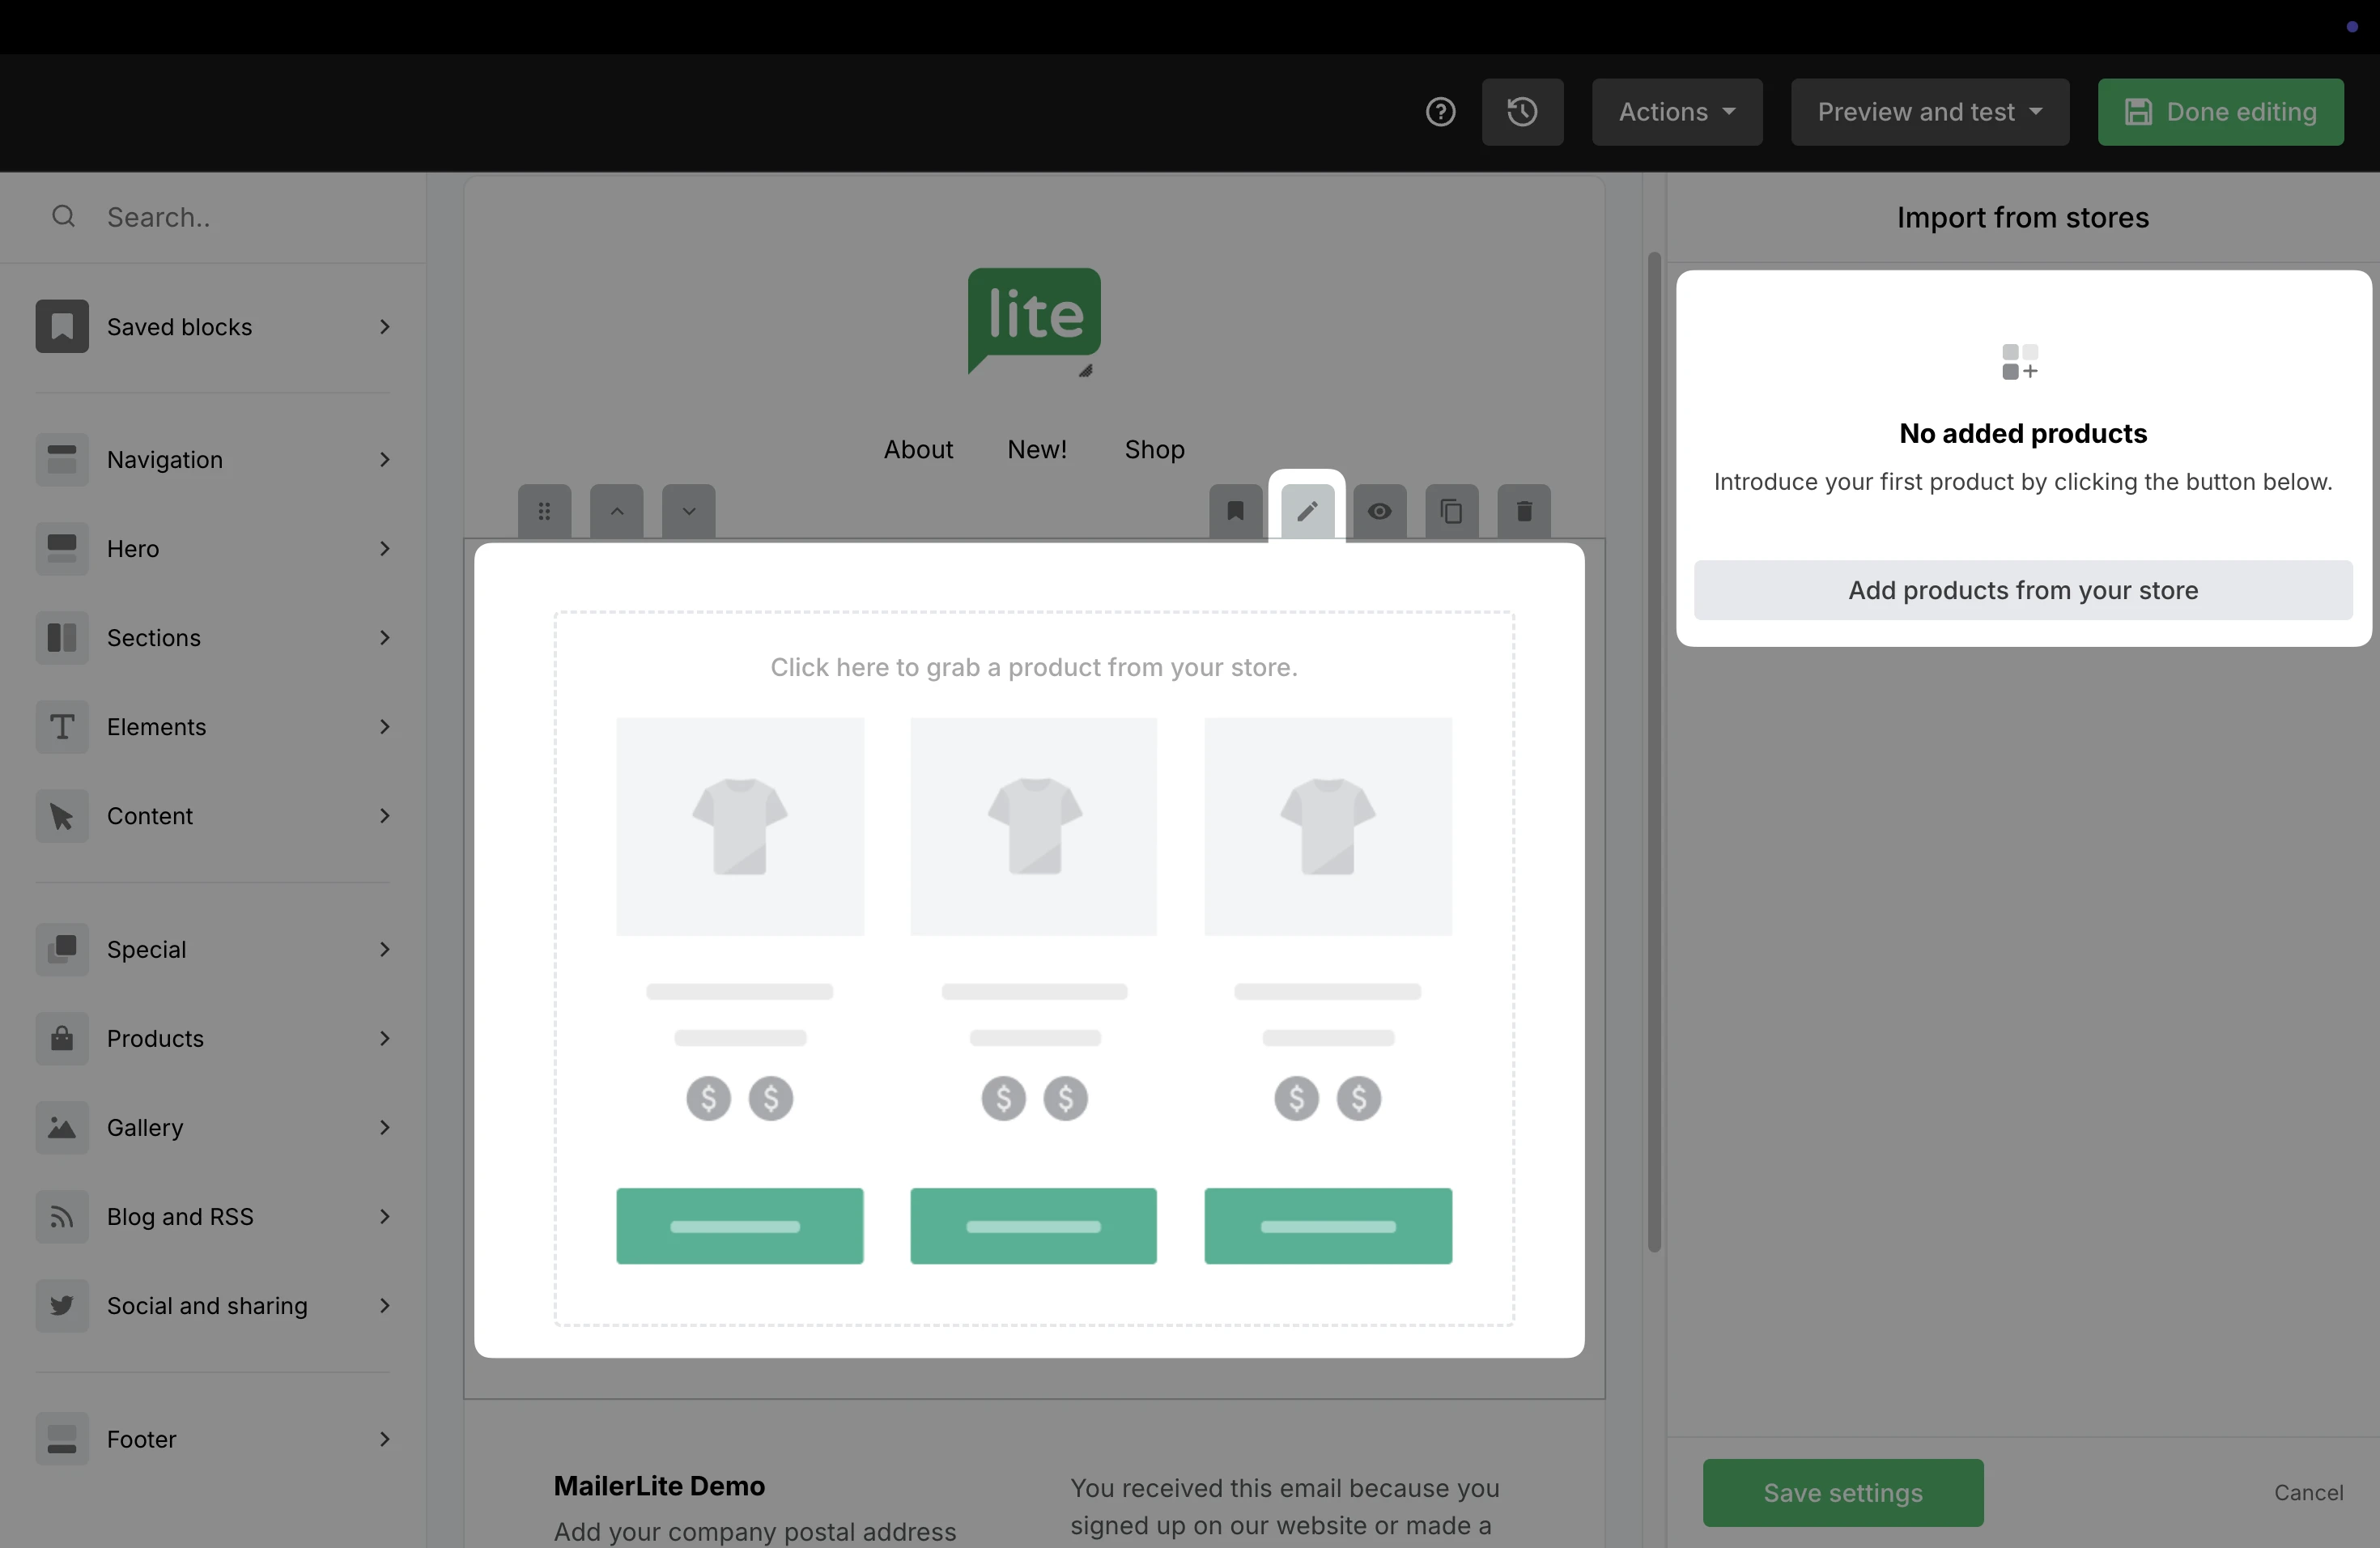
3. Click into the block to open the settings on the right. Use the Add products from your store button to add products from existing stores and/or from the MailerLite store.
4. If your account has multiple stores connected, be sure to select MailerLite from the drop-down list to add your digital product.
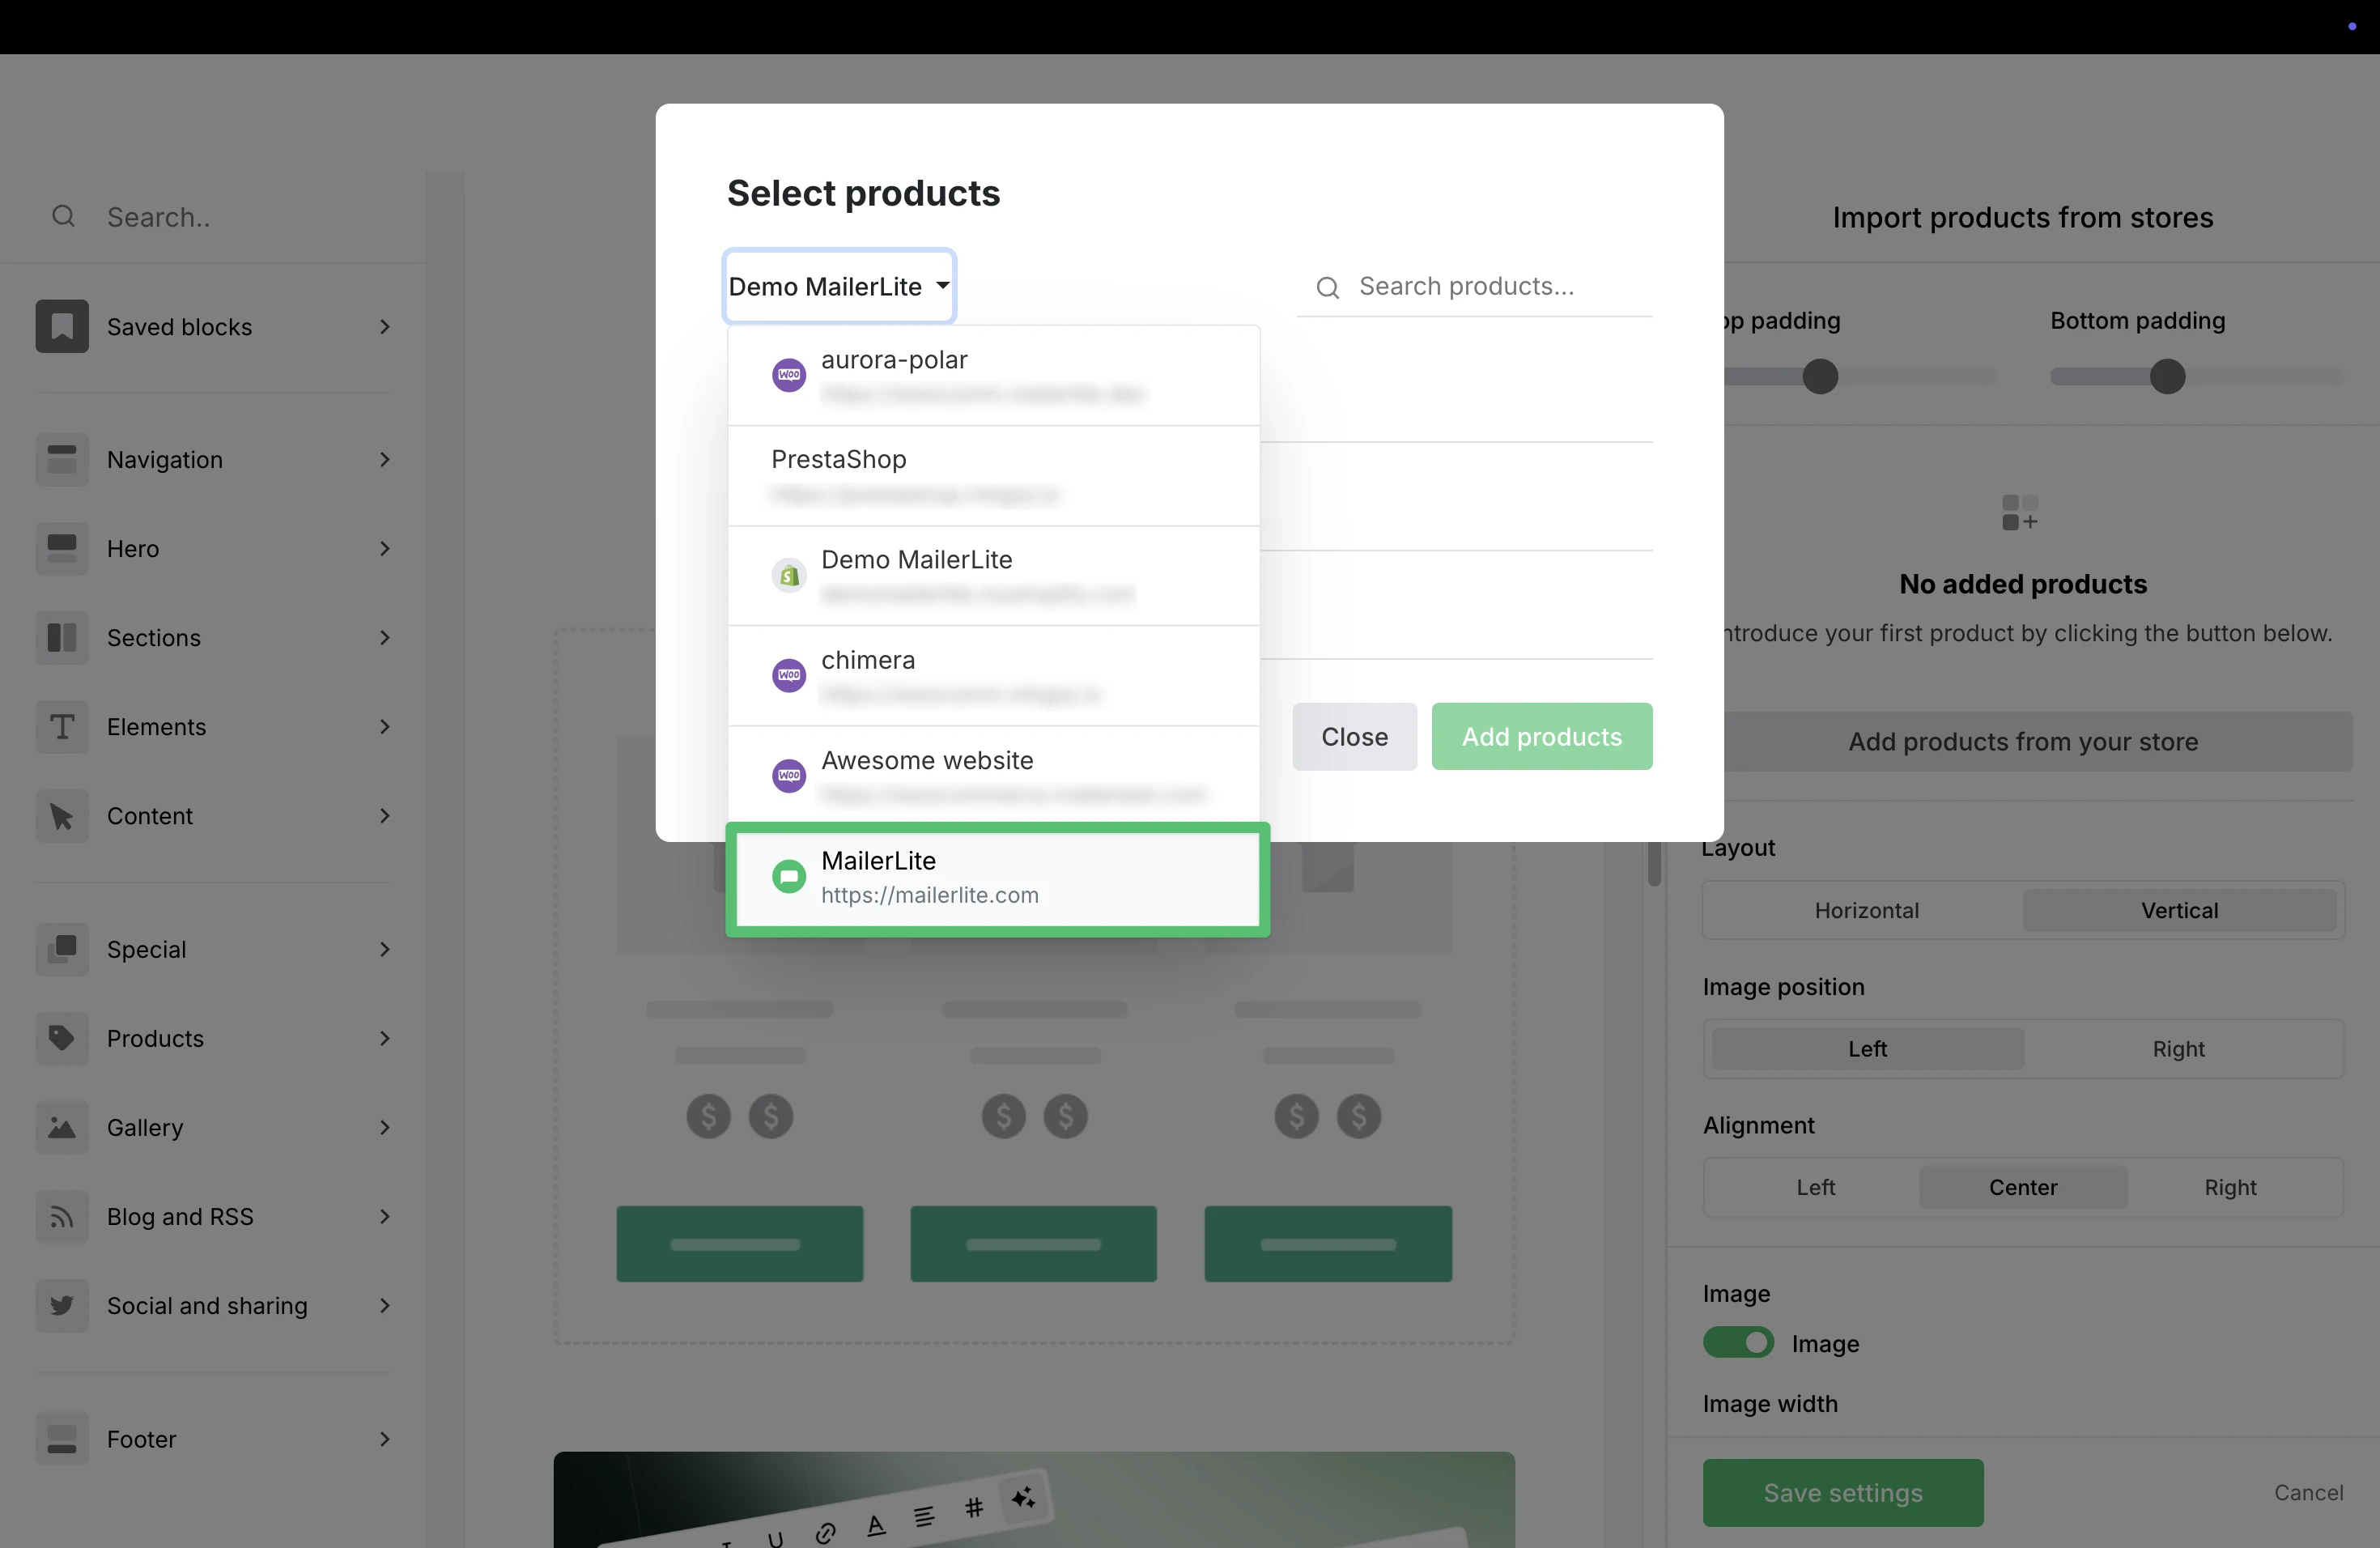
5. You can choose to display one product or multiple. Once the product is selected, click Add products to add it into your campaign.
6. Click Save settings to save your edits to the product.
7. When you are done editing your campaign, click Done editing.
8. On the Campaign details page, fill out the Subject line, Preheader, and choose the Recipients to send your campaign.
⚠️ Important: To make sure that any services booked through your campaign are tracked in MailerLite, toggle ON the option to Track links.

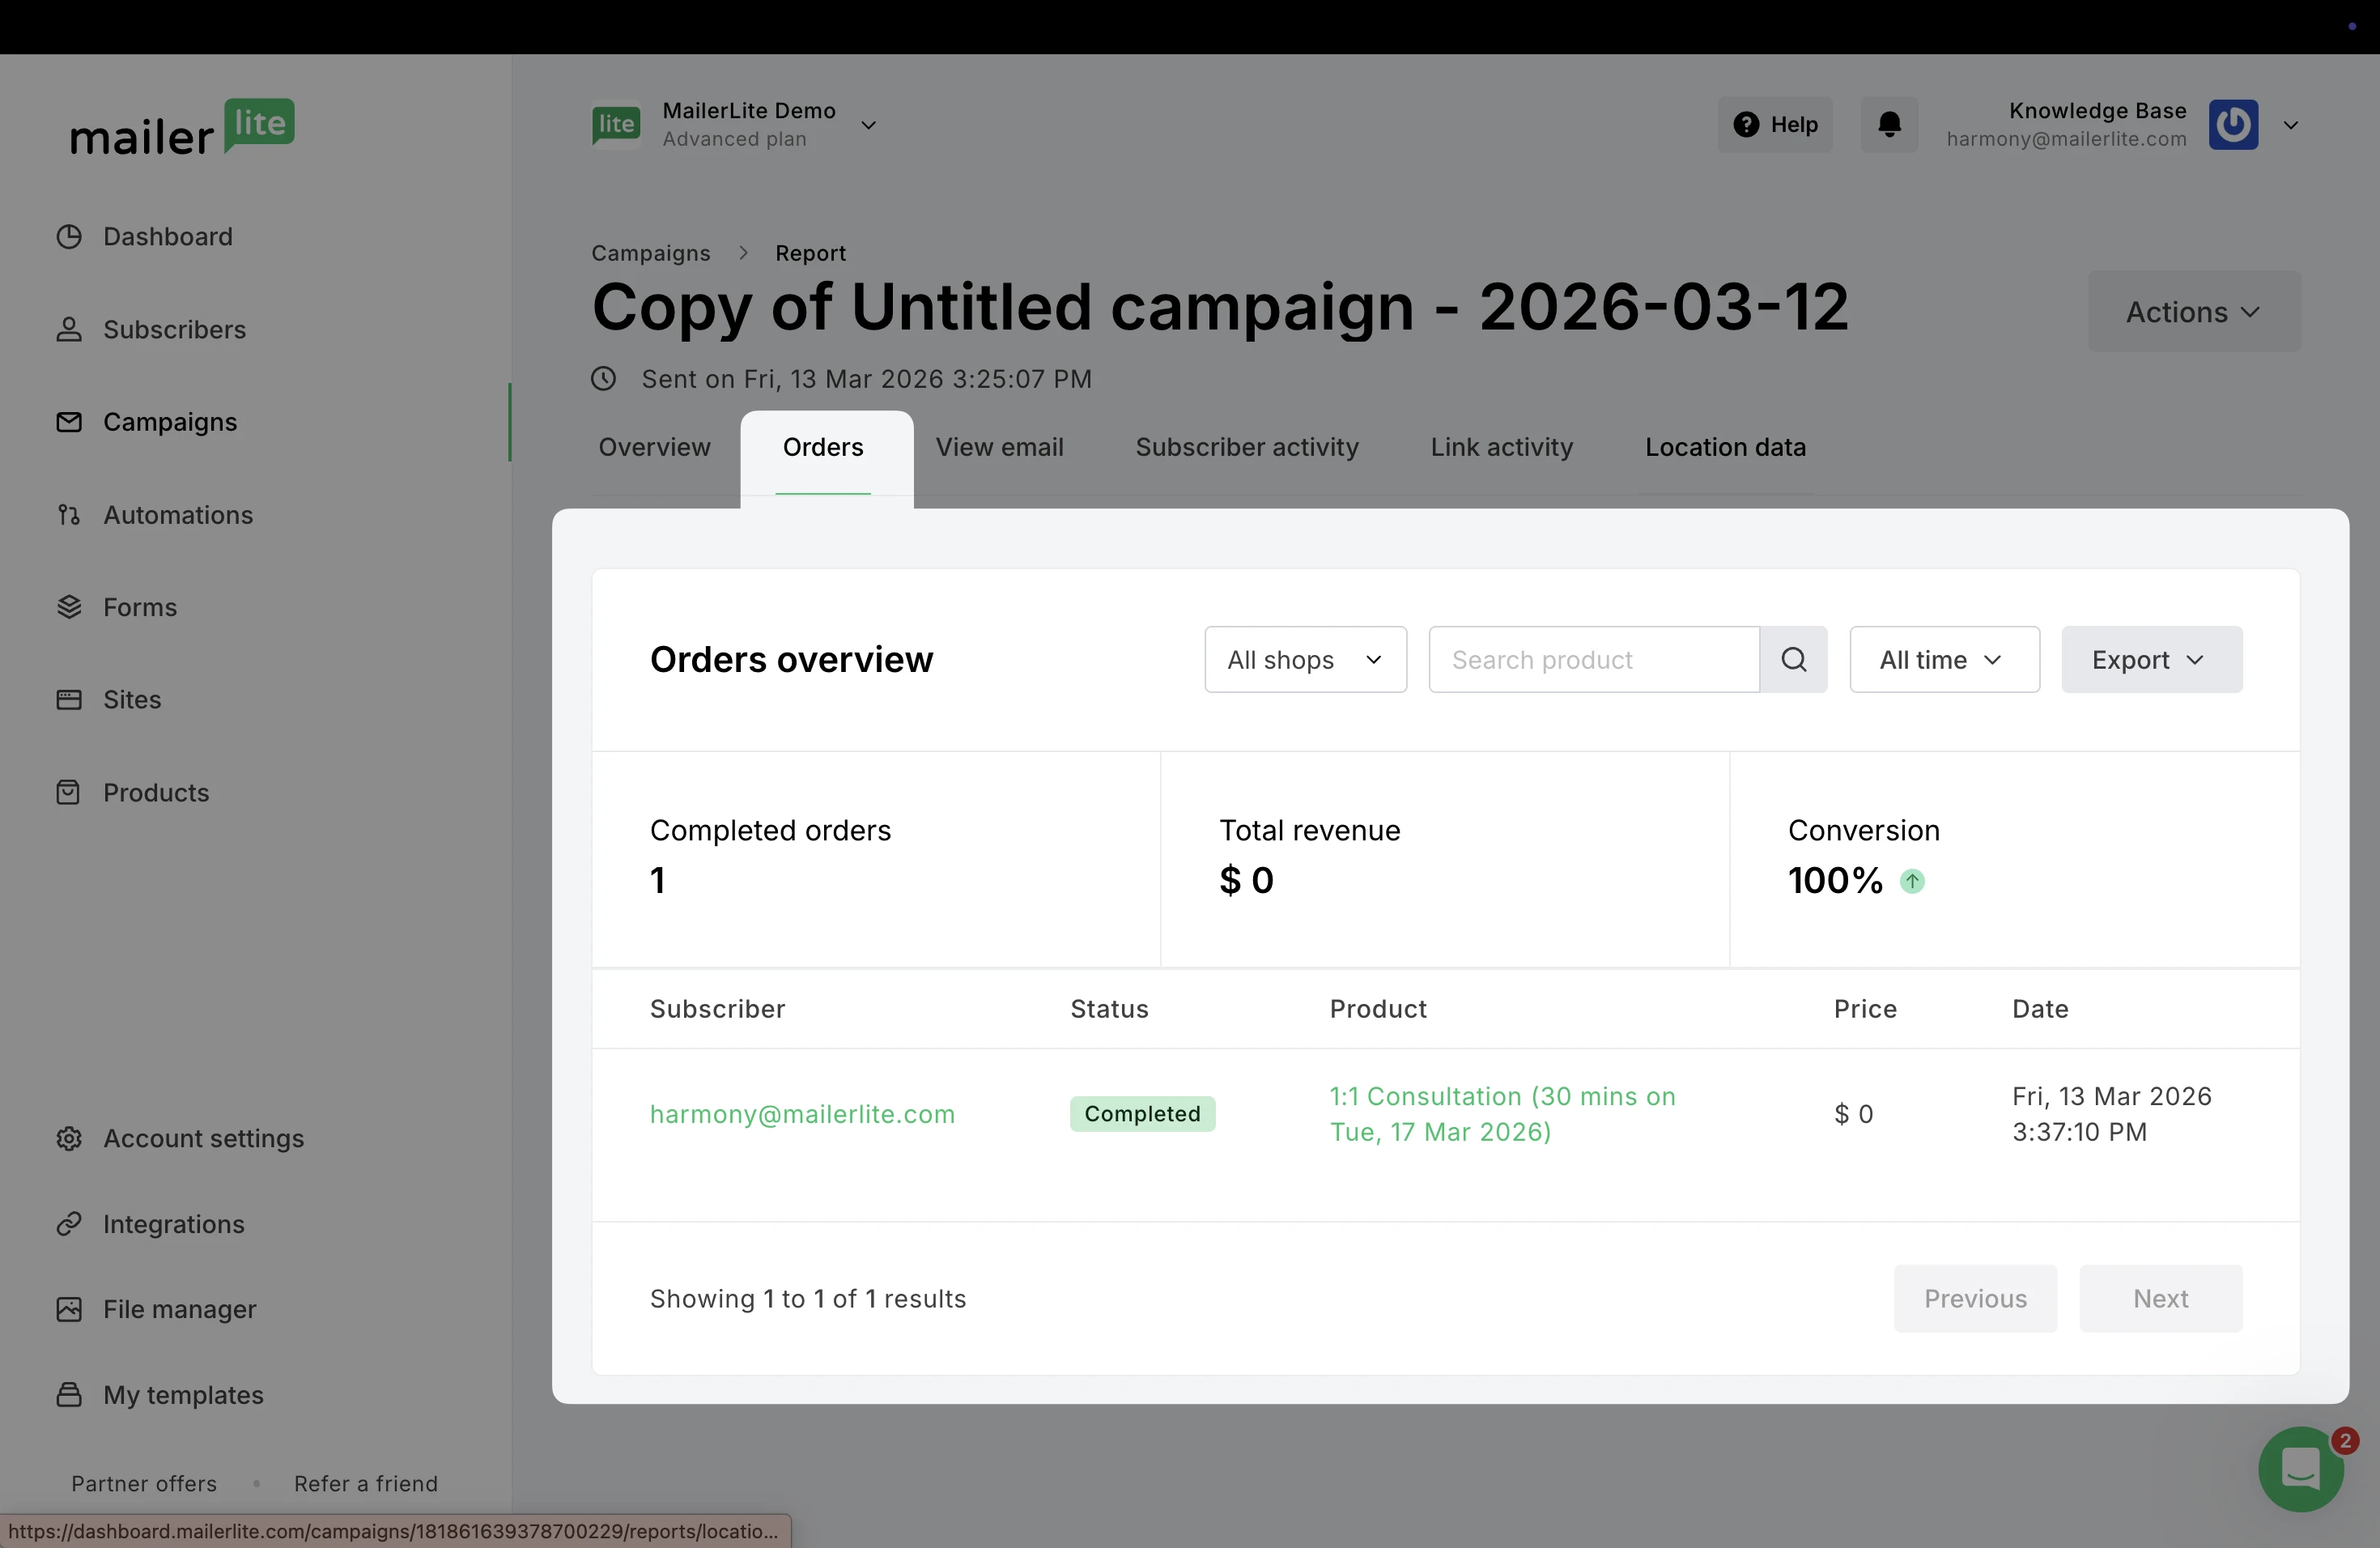
When a subscriber purchases your product through the newsletter and completes the transaction, the order will be tracked in the campaign’s report in the Orders tab.
Add products to a landing page
Similar to the campaign builder, you can also find the Product block available for landing pages and websites.
In your landing page under Elements, you can locate the Product element in the Special category.
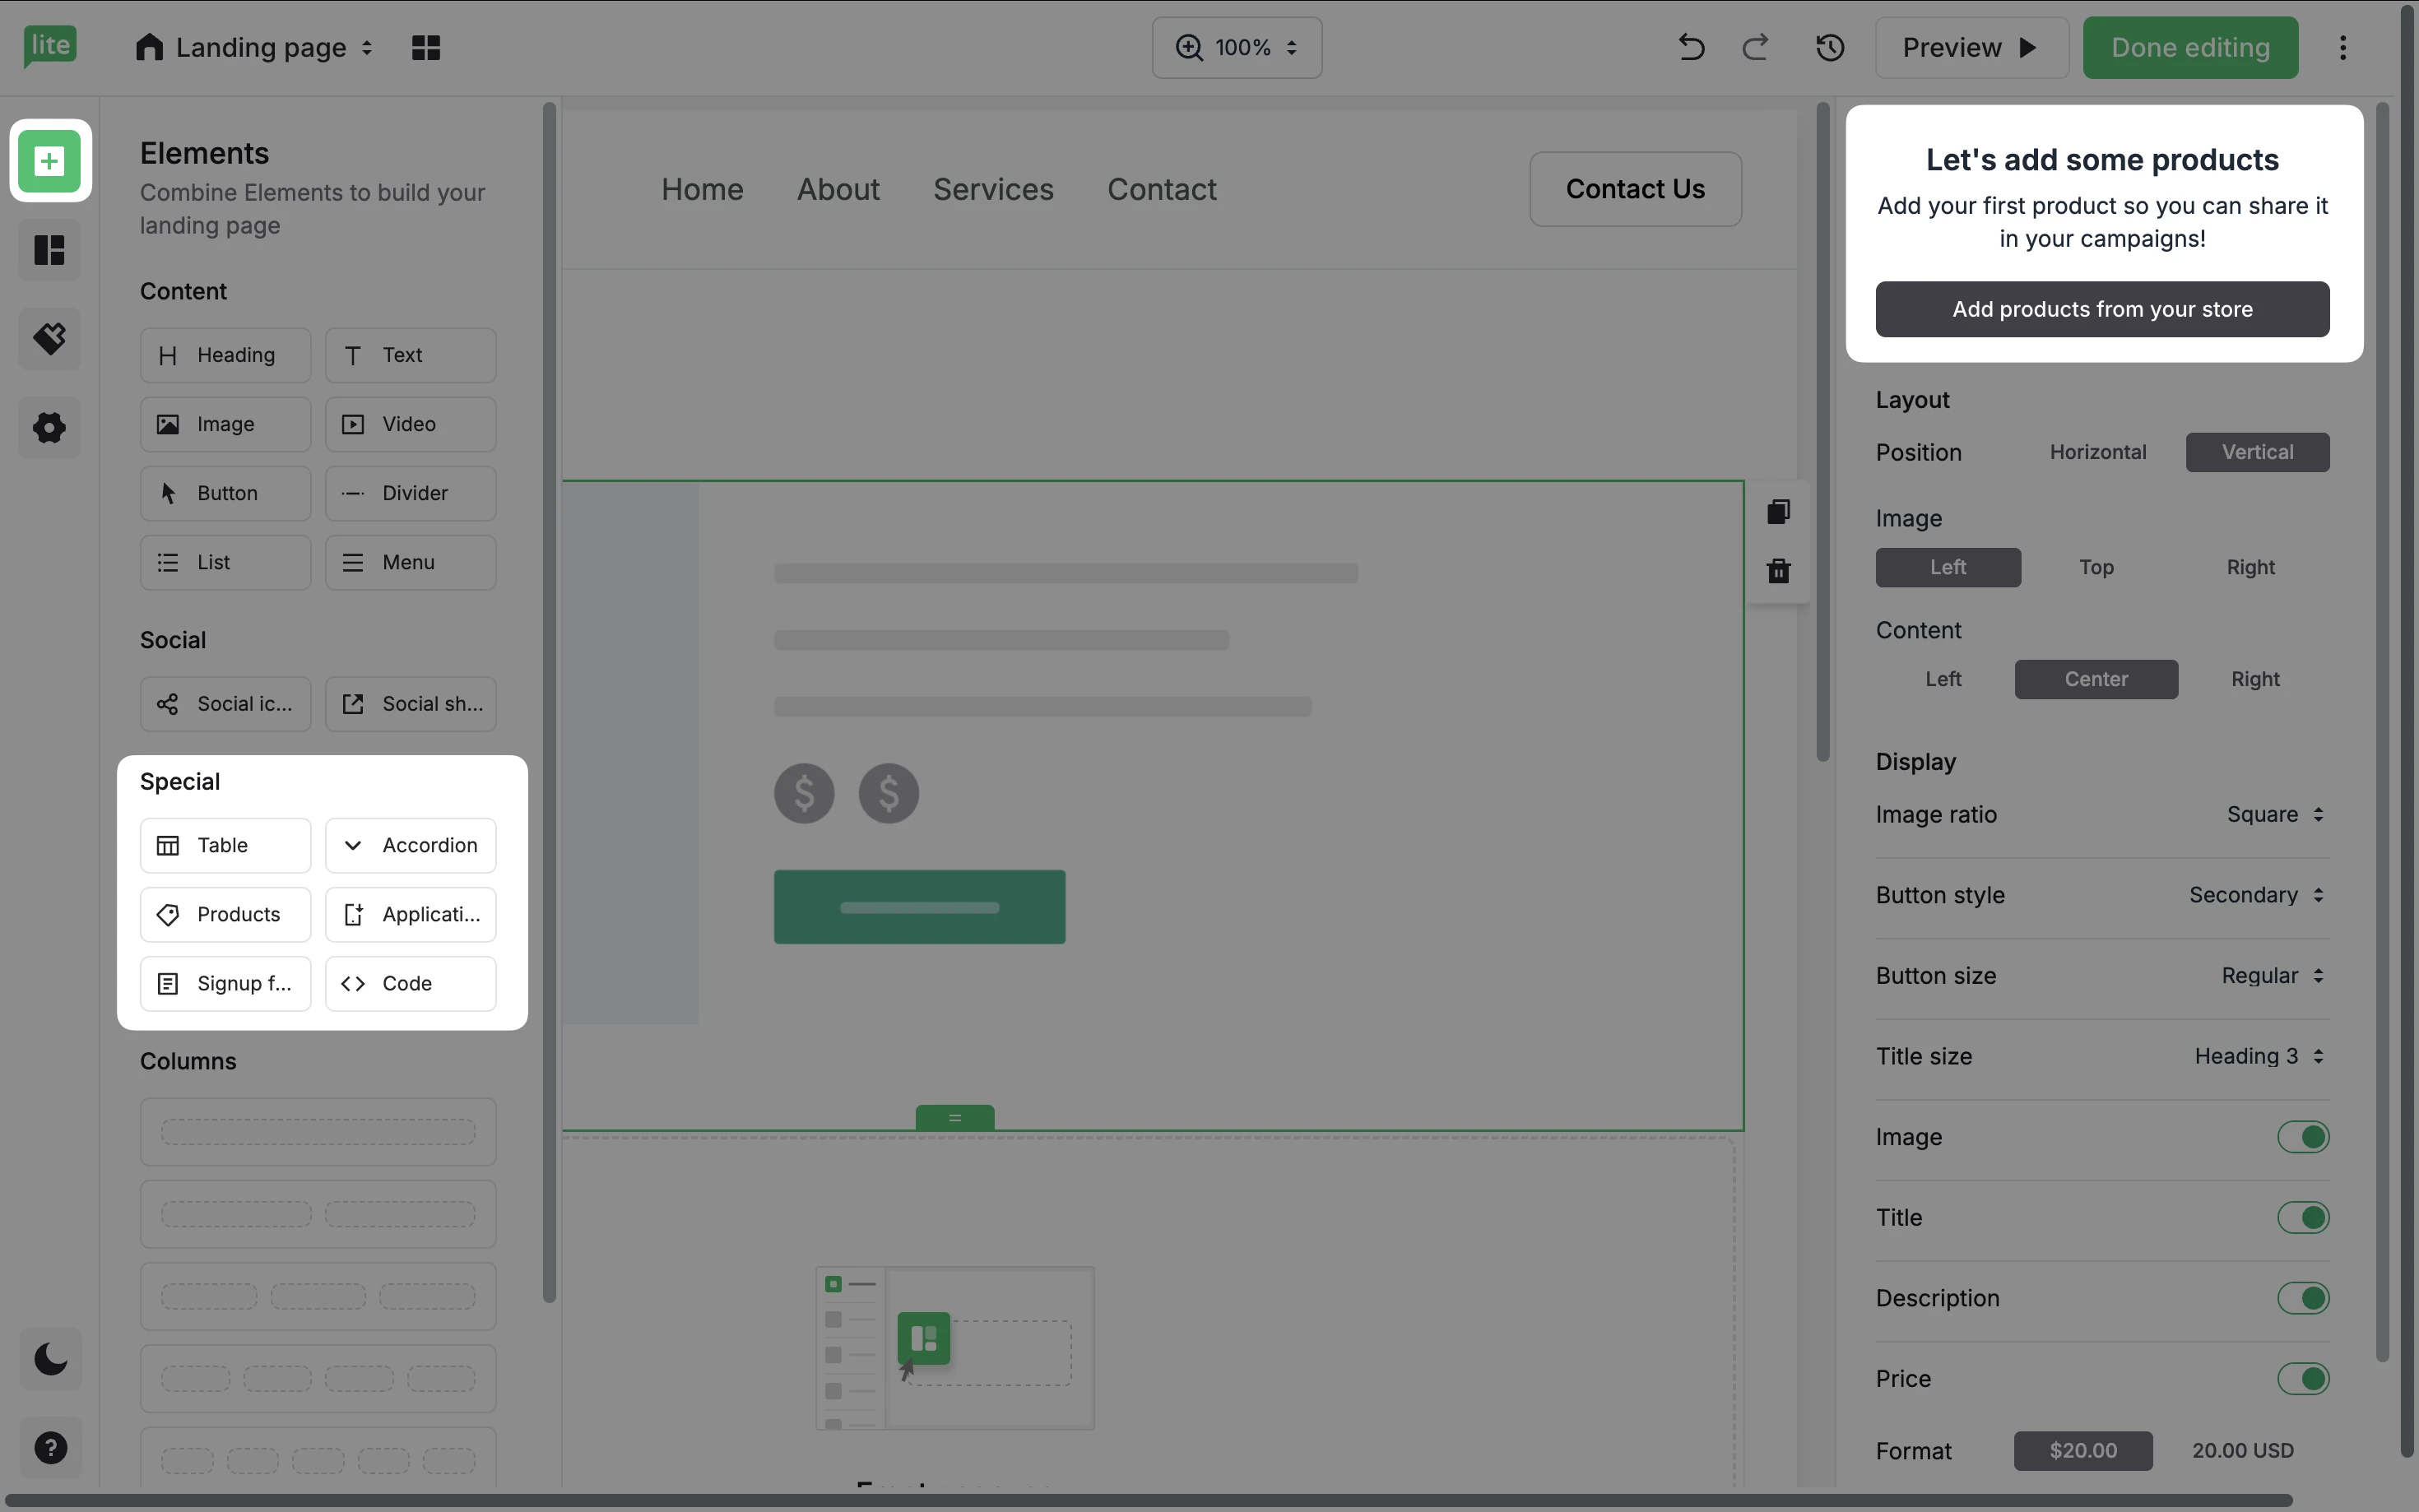
When a product block is placed into your site, you can select the store and pick the products by clicking Add products from your store.
Viewing orders
You can view orders for your products in several ways:
Navigate to the main Products page.
Choose the Orders tab.
Here, you can view:
Product orders: View orders made specifically on products created within MailerLite
Builder orders: View orders made through a builder (an email campaign, a landing page, or a website). This allows you to easily see all orders placed via a specific builder, regardless of the product's origin (MailerLite Products, E-commerce integrations, Stripe, etc.). Only product orders placed for the MailerLite store will be visible here.
Subscriber orders: View orders made by a specific subscriber to see their complete purchase history. If a customer has purchased products from multiple sources (MailerLite Products, E-commerce integrations, Stripe, etc.), all their orders can be viewed in one tab.