With Bookings, you can create and sell bookable sessions directly in MailerLite 📆
Whether you’re offering consultations, coaching calls, workshops, or group sessions, Bookings makes it easy for customers to reserve time with you and for you to manage those appointments.
No need to use external scheduling tools! Simply create a booking service, manage availability, and collect customer details — all in one place.
Plan limits
Bookings are created as a Product, which means they count toward your MailerLite account’s total product limit along with any digital products in your account.
Depending on your plan, the number of products you can create varies:
| Plan | Product limit |
| Free | 1 total |
| Comfort | 3 total |
| Power | Unlimited products |
Products can be any combination of product types, including bookings and digital products.
If you already have the maximum number of products allowed on your plan, you’ll need to delete an existing product or upgrade your plan before creating a new product.
Note: Starting August 13, 2026, new digital product limits will begin to apply. Free plan users will be able to have 1 product; Comfort plan users - up to 5 products; Power plan users - unlimited products.
Stripe integration
To use the Bookings feature, you will need to connect a Stripe account to MailerLite. Stripe is an electronic payment processor that supports the transfer of money from a customer's bank account into a seller’s bank account, as payment for goods or services.
To integrate MailerLite with Stripe:
Click the Integrations tab on the left-side menu.
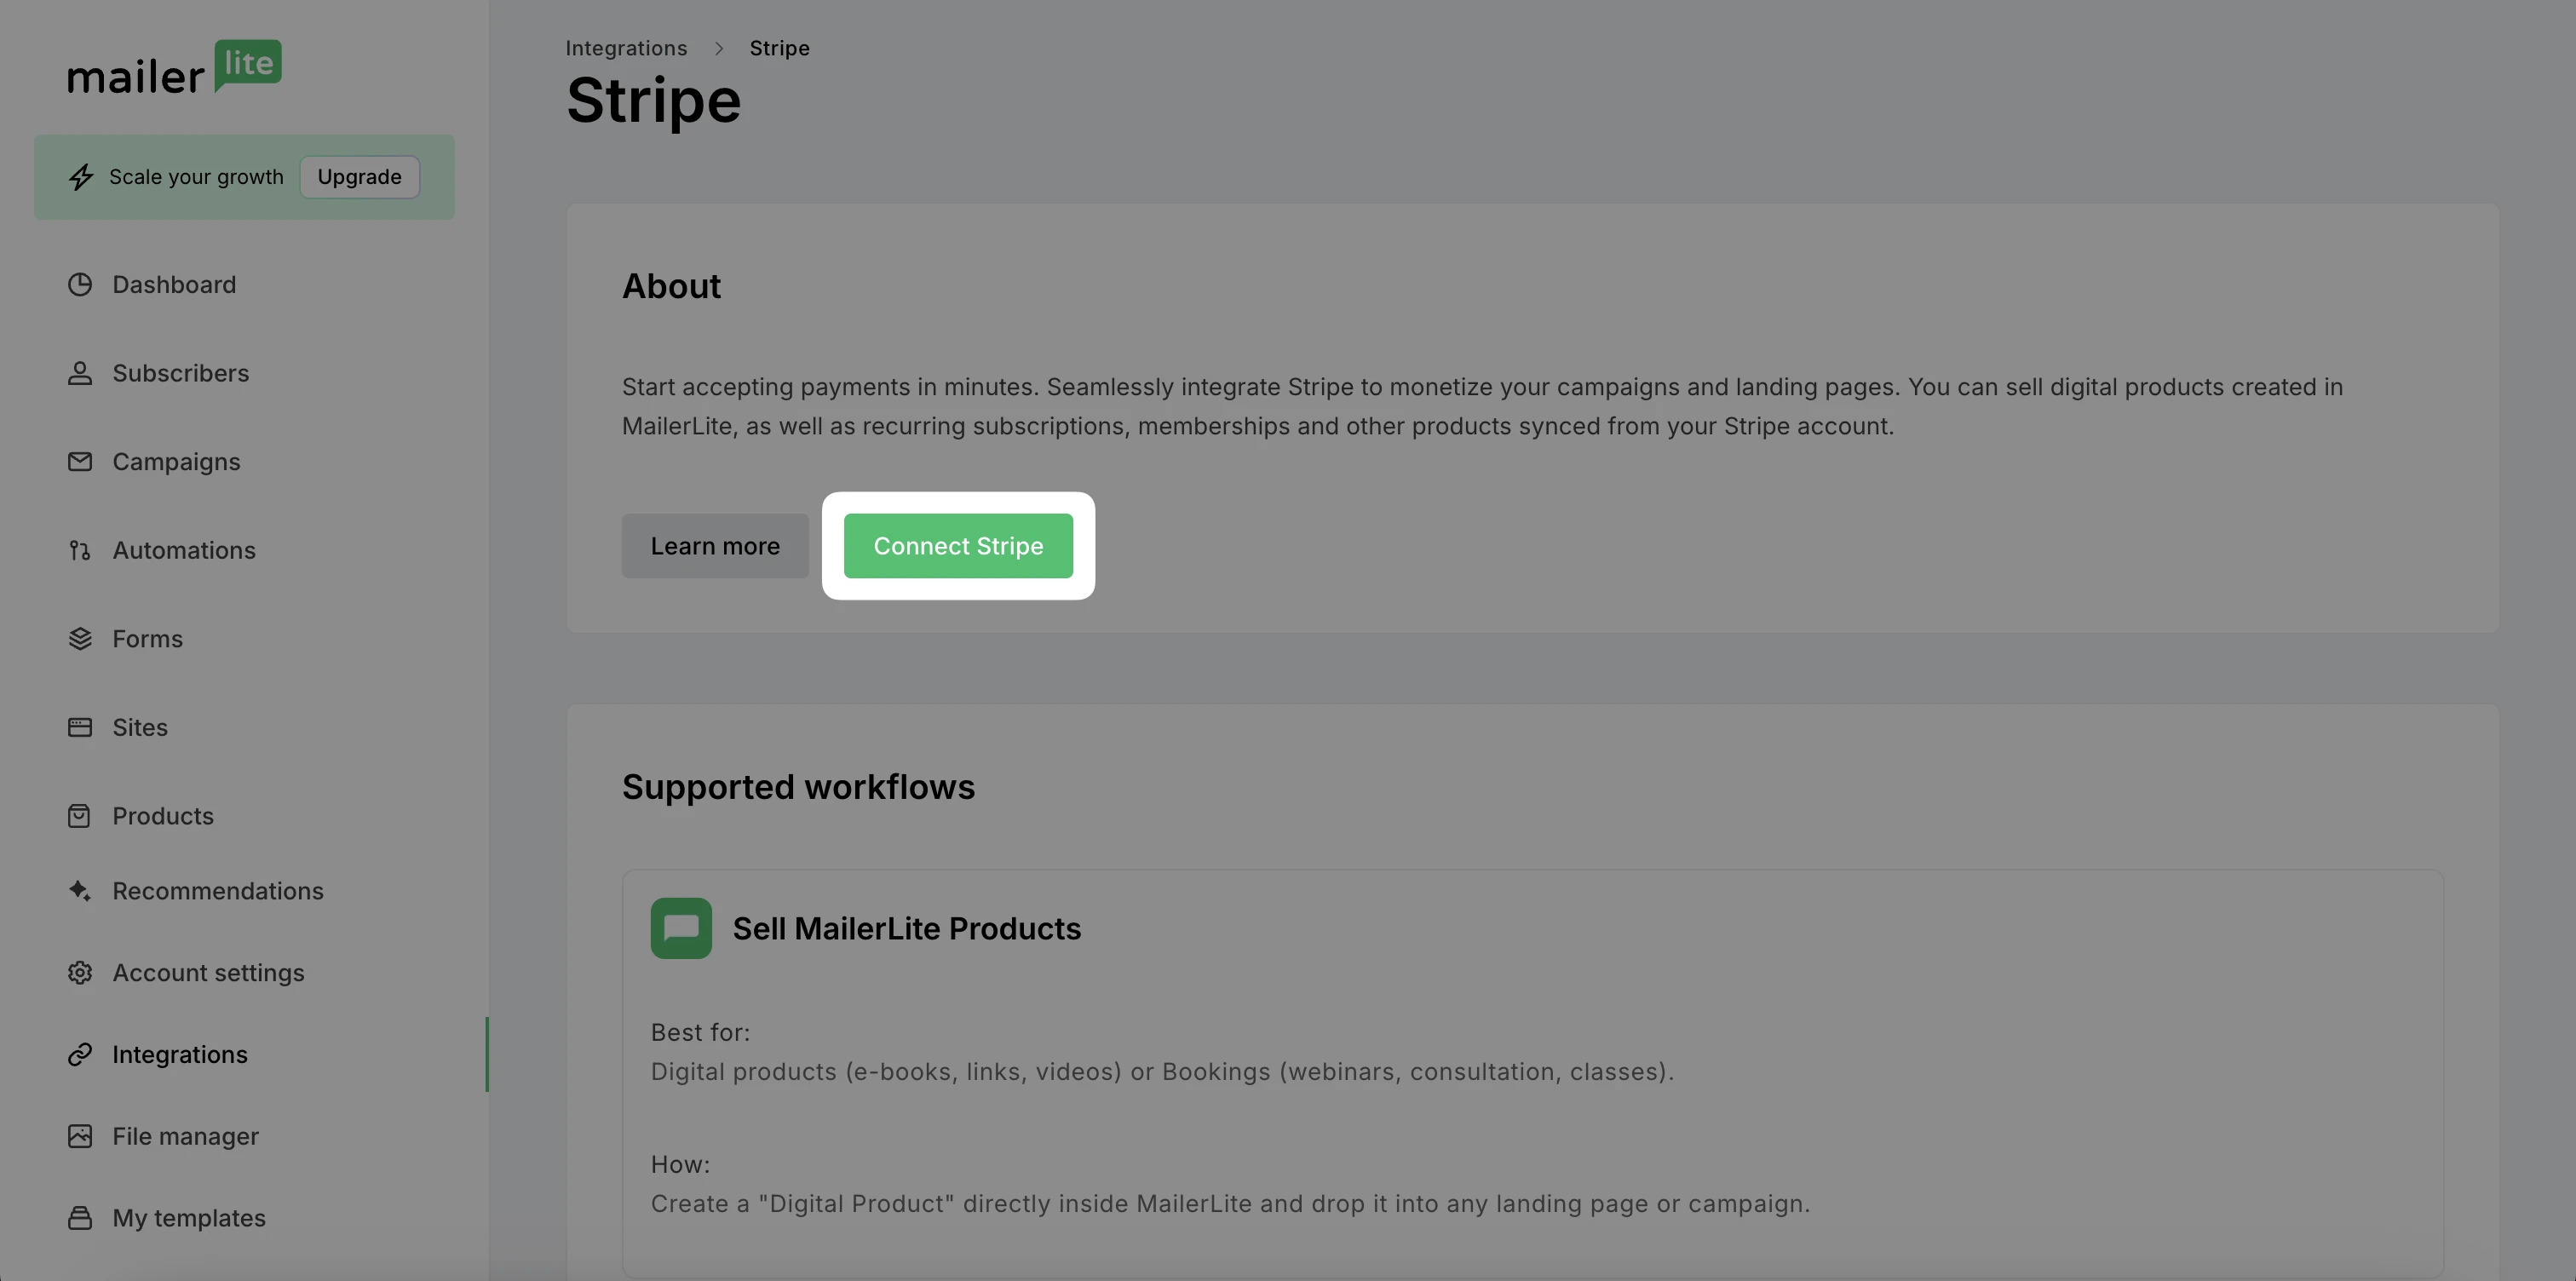
Scroll down until you see Stripe and click Use.
Then, click Connect Stripe.
A popup will appear, asking you to create or log in to your Stripe account. Follow the prompts and provide your business details to complete the integration setup.
Once the integration is complete, scroll down to Stripe settings. In Account management, you’ll be able to review and edit your business details, and in Payment method configuration, select which configuration you’d like to use at checkout.
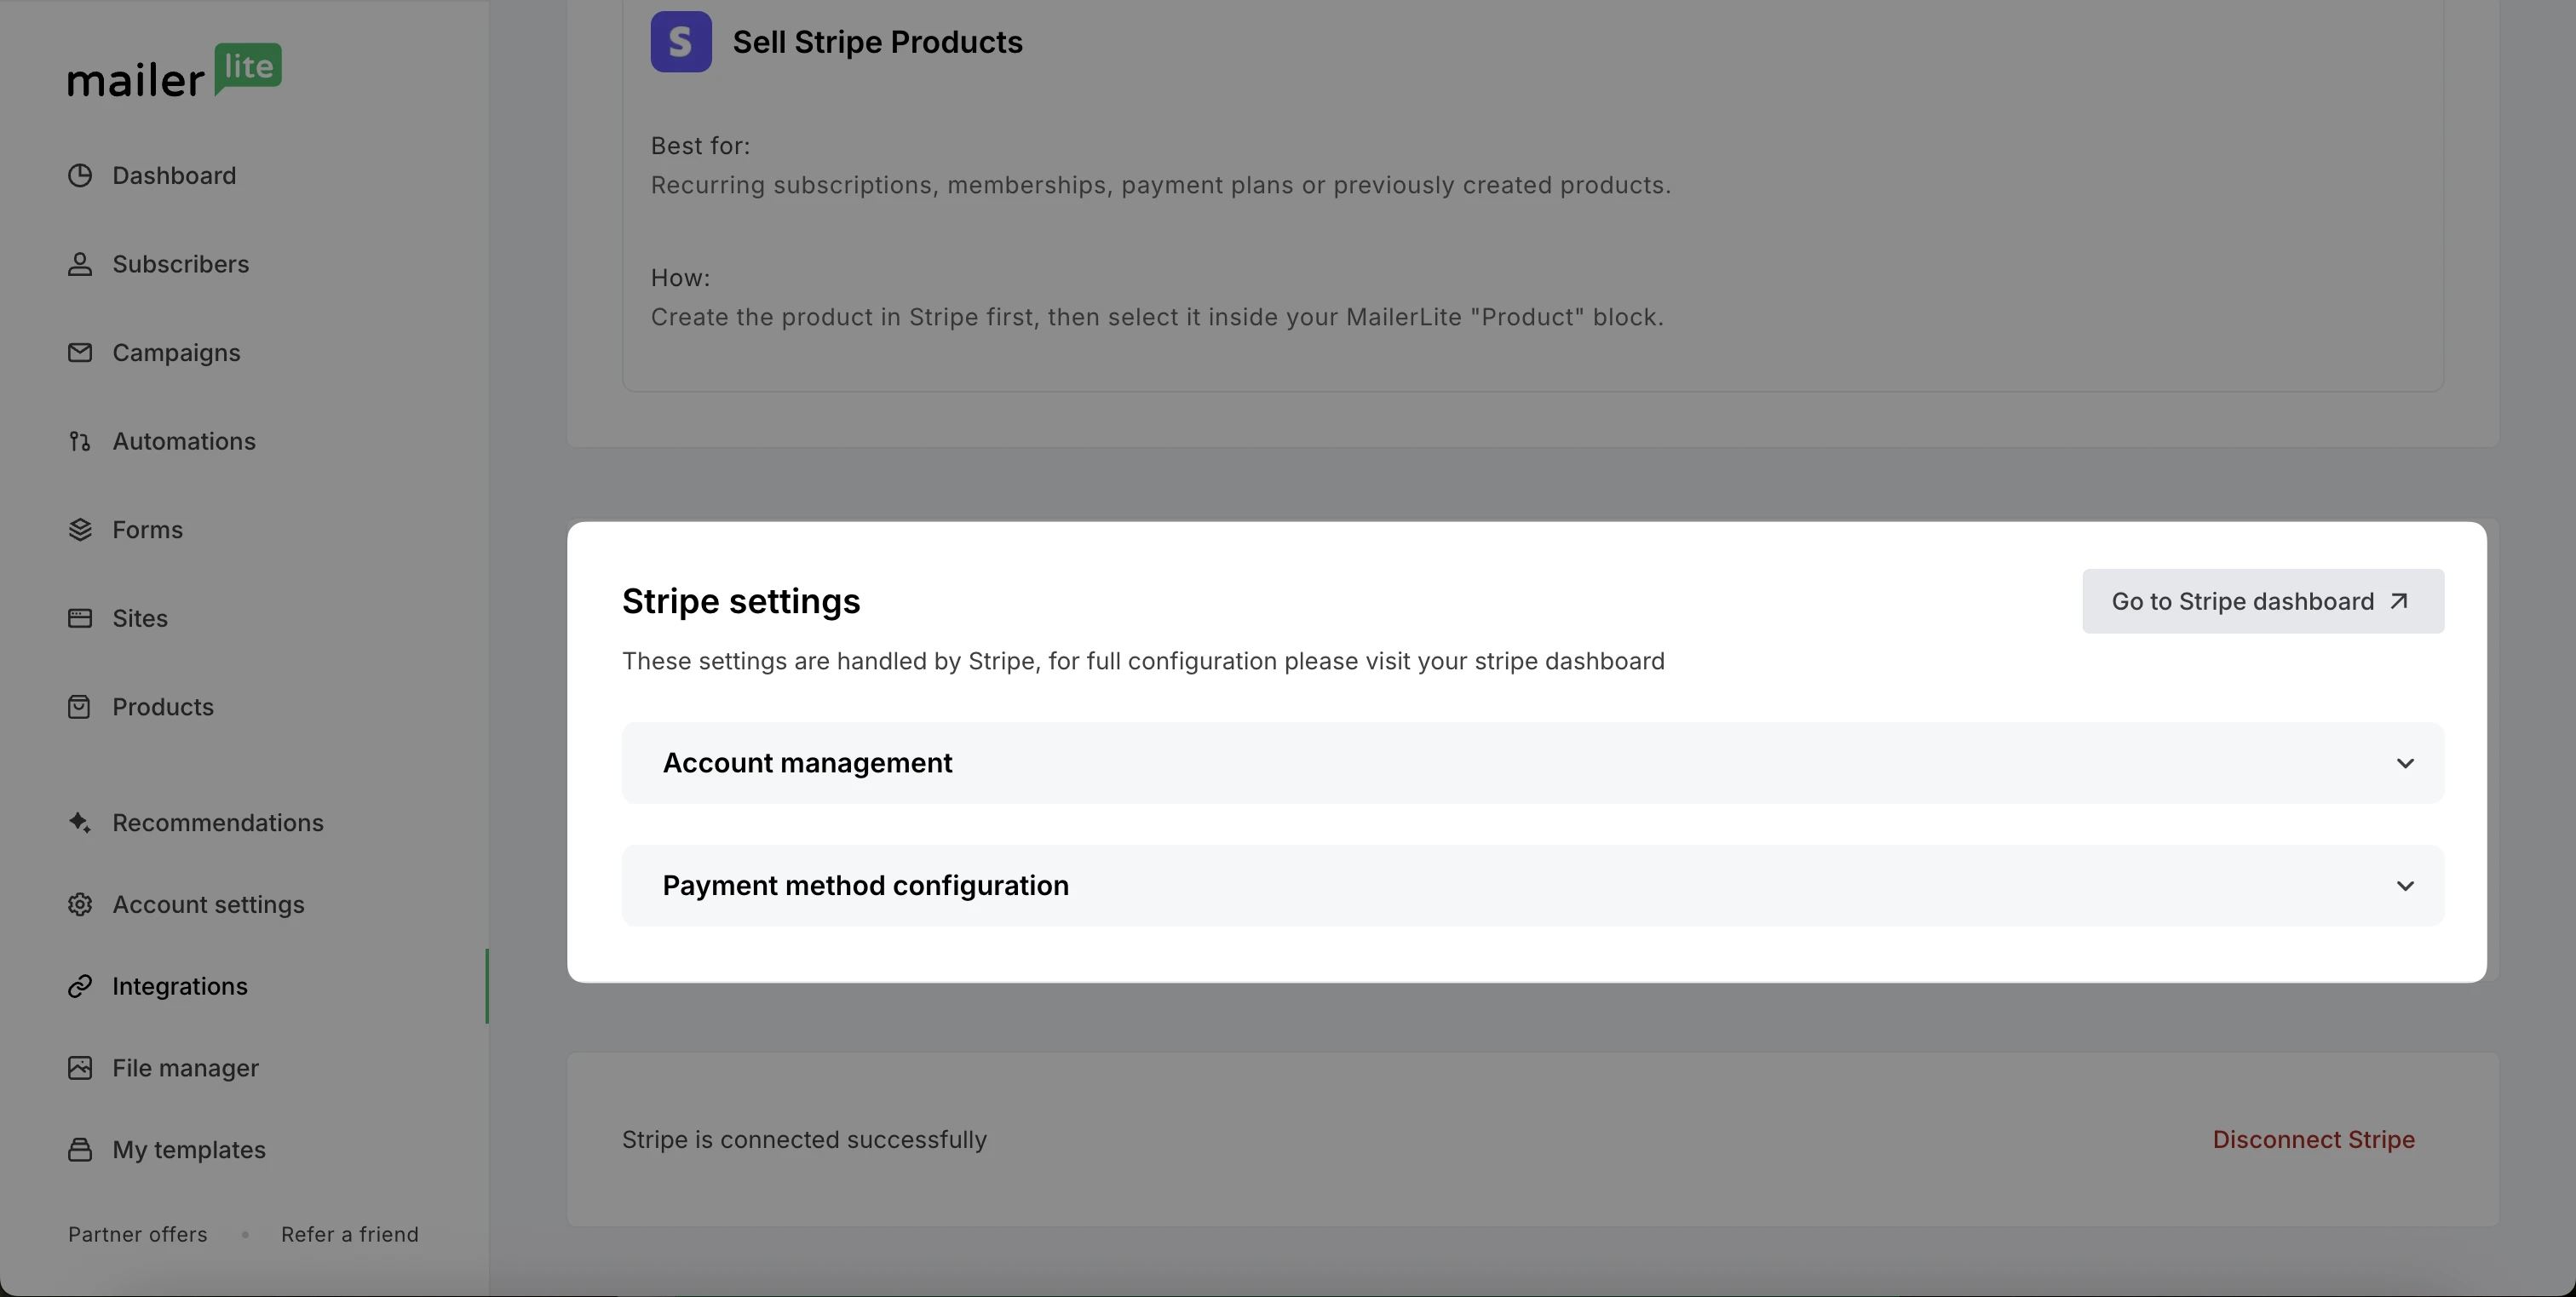
Note: While some settings can be edited through MailerLite, for full configuration, visit your Stripe dashboard.
How to create a booking service
To create a new booking product:
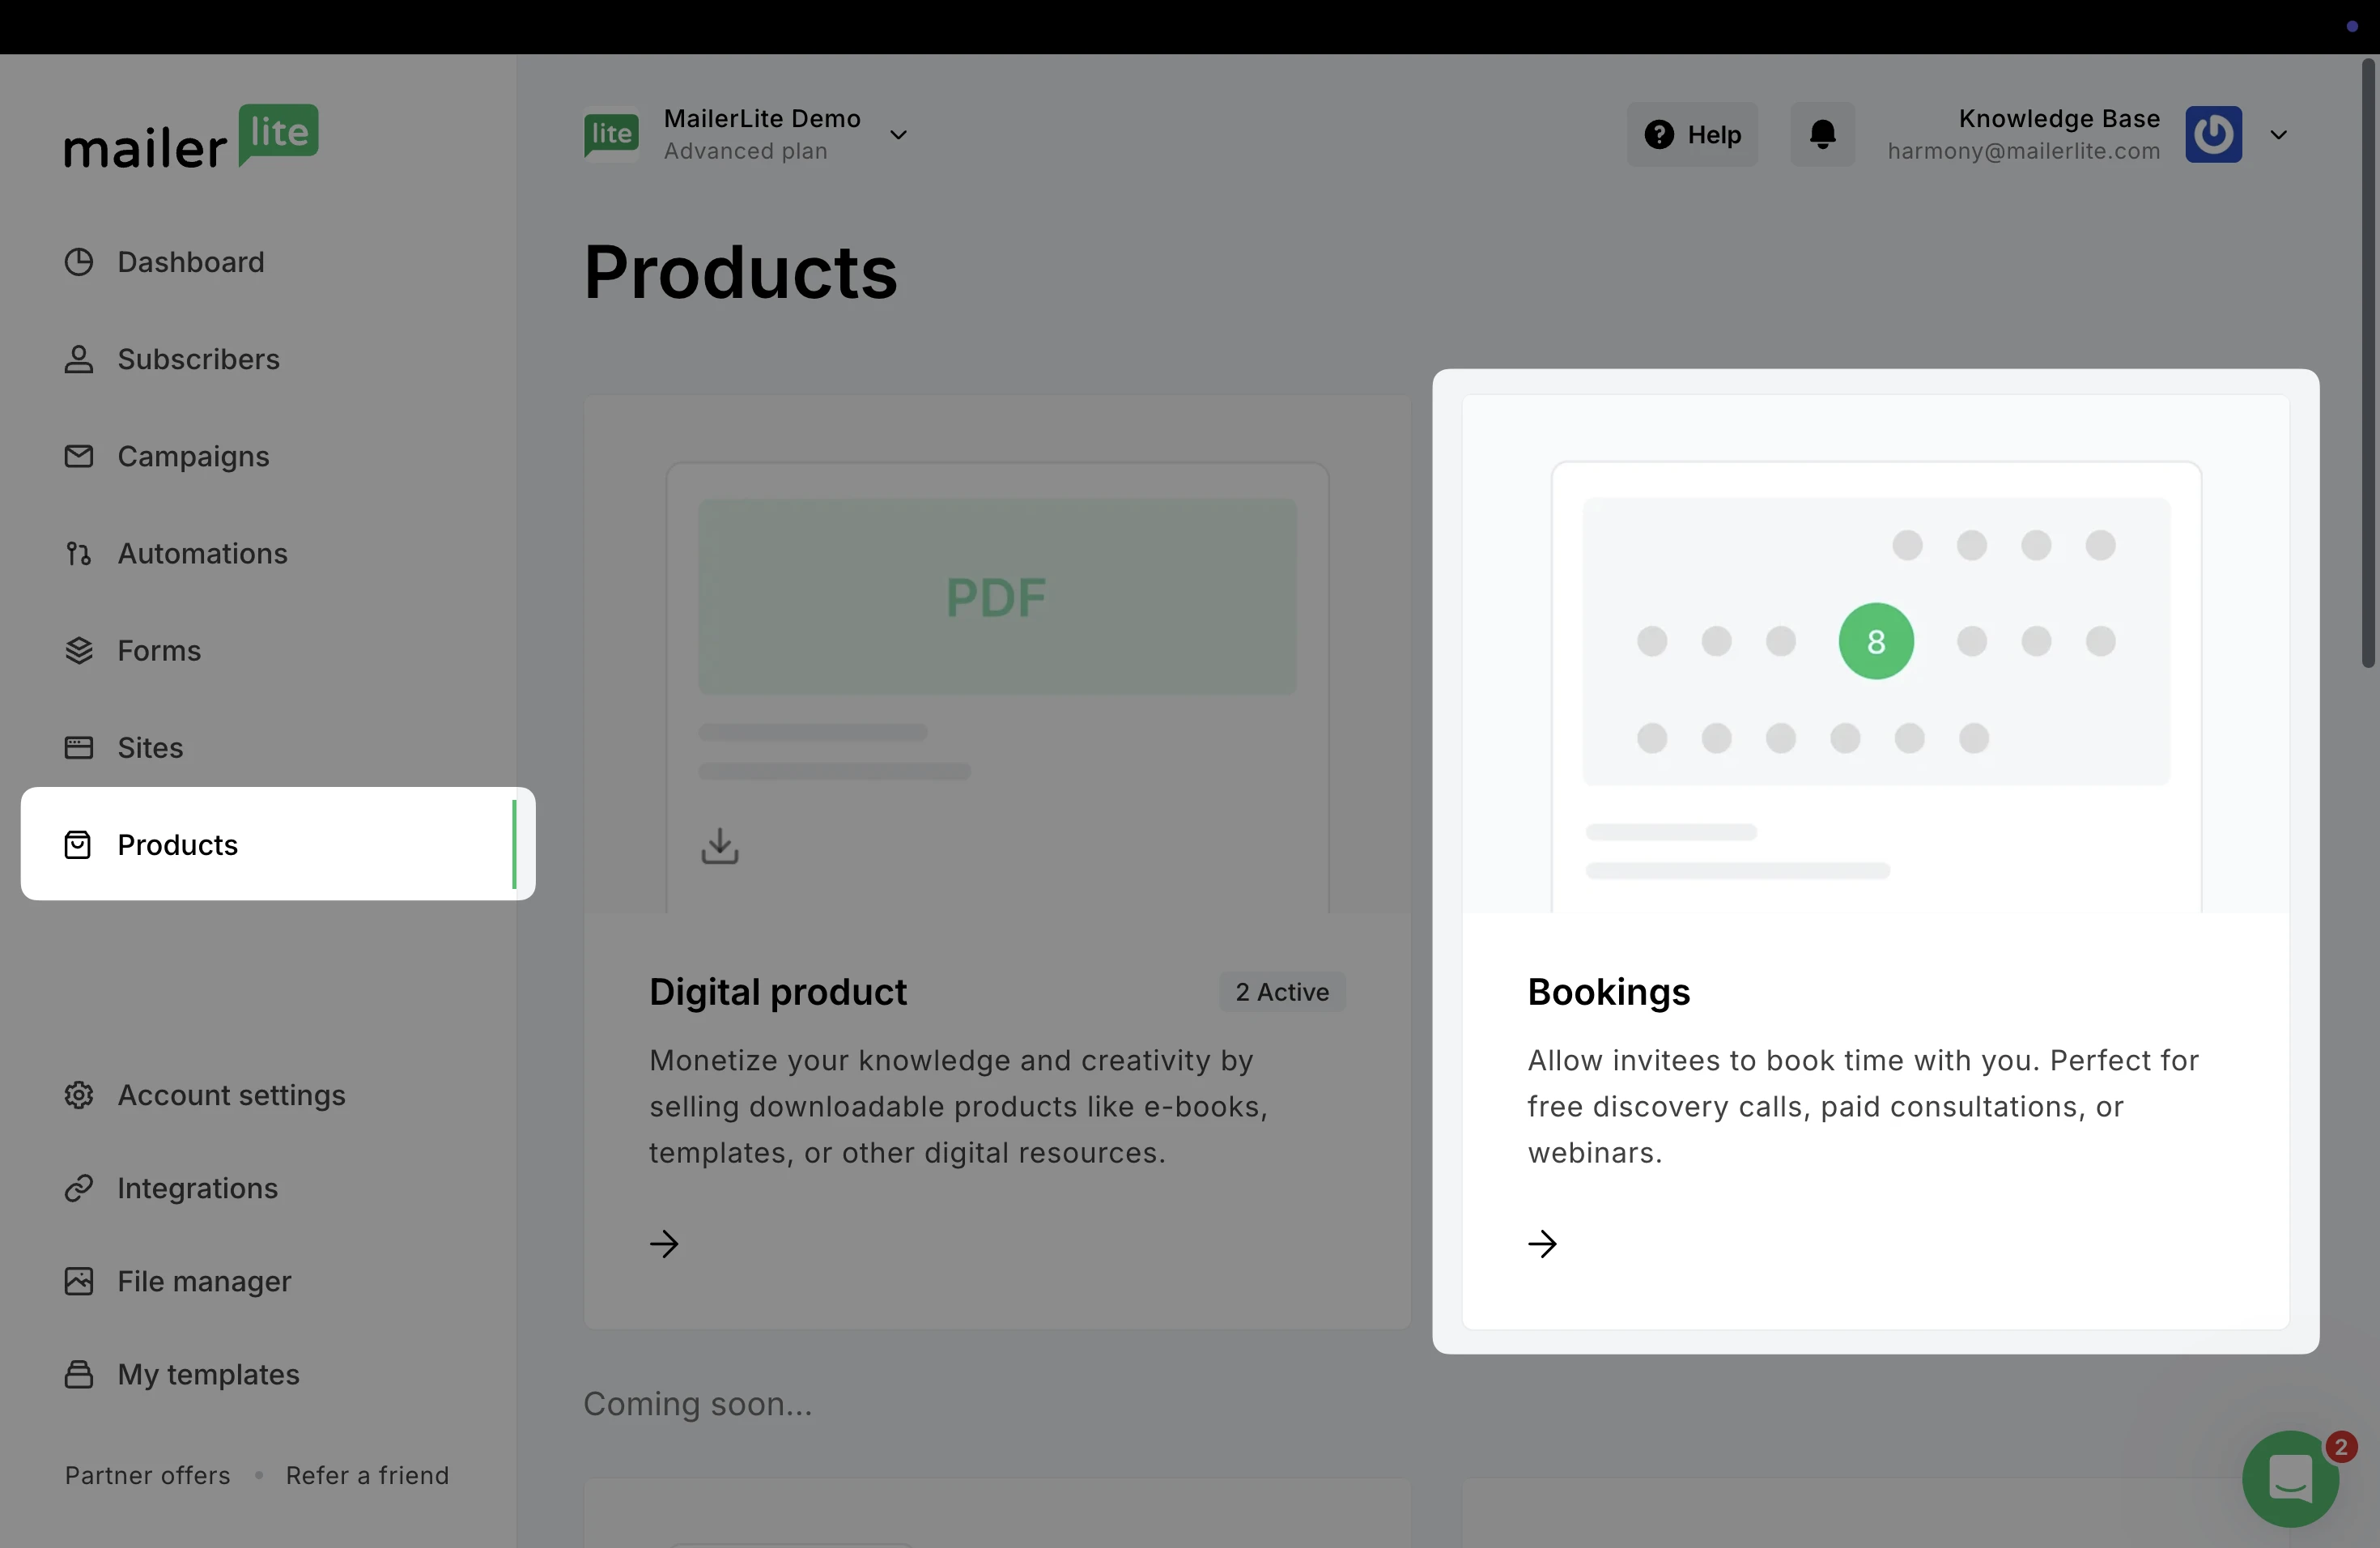
From the Dashboard, navigate to Products.
Choose Bookings.
3. Next, add the details of your booking product such as Name, Description, and Duration. To add an image, click Upload image to choose an image from your File manager.
4. A preview of your product will be shown on the right as you add details.
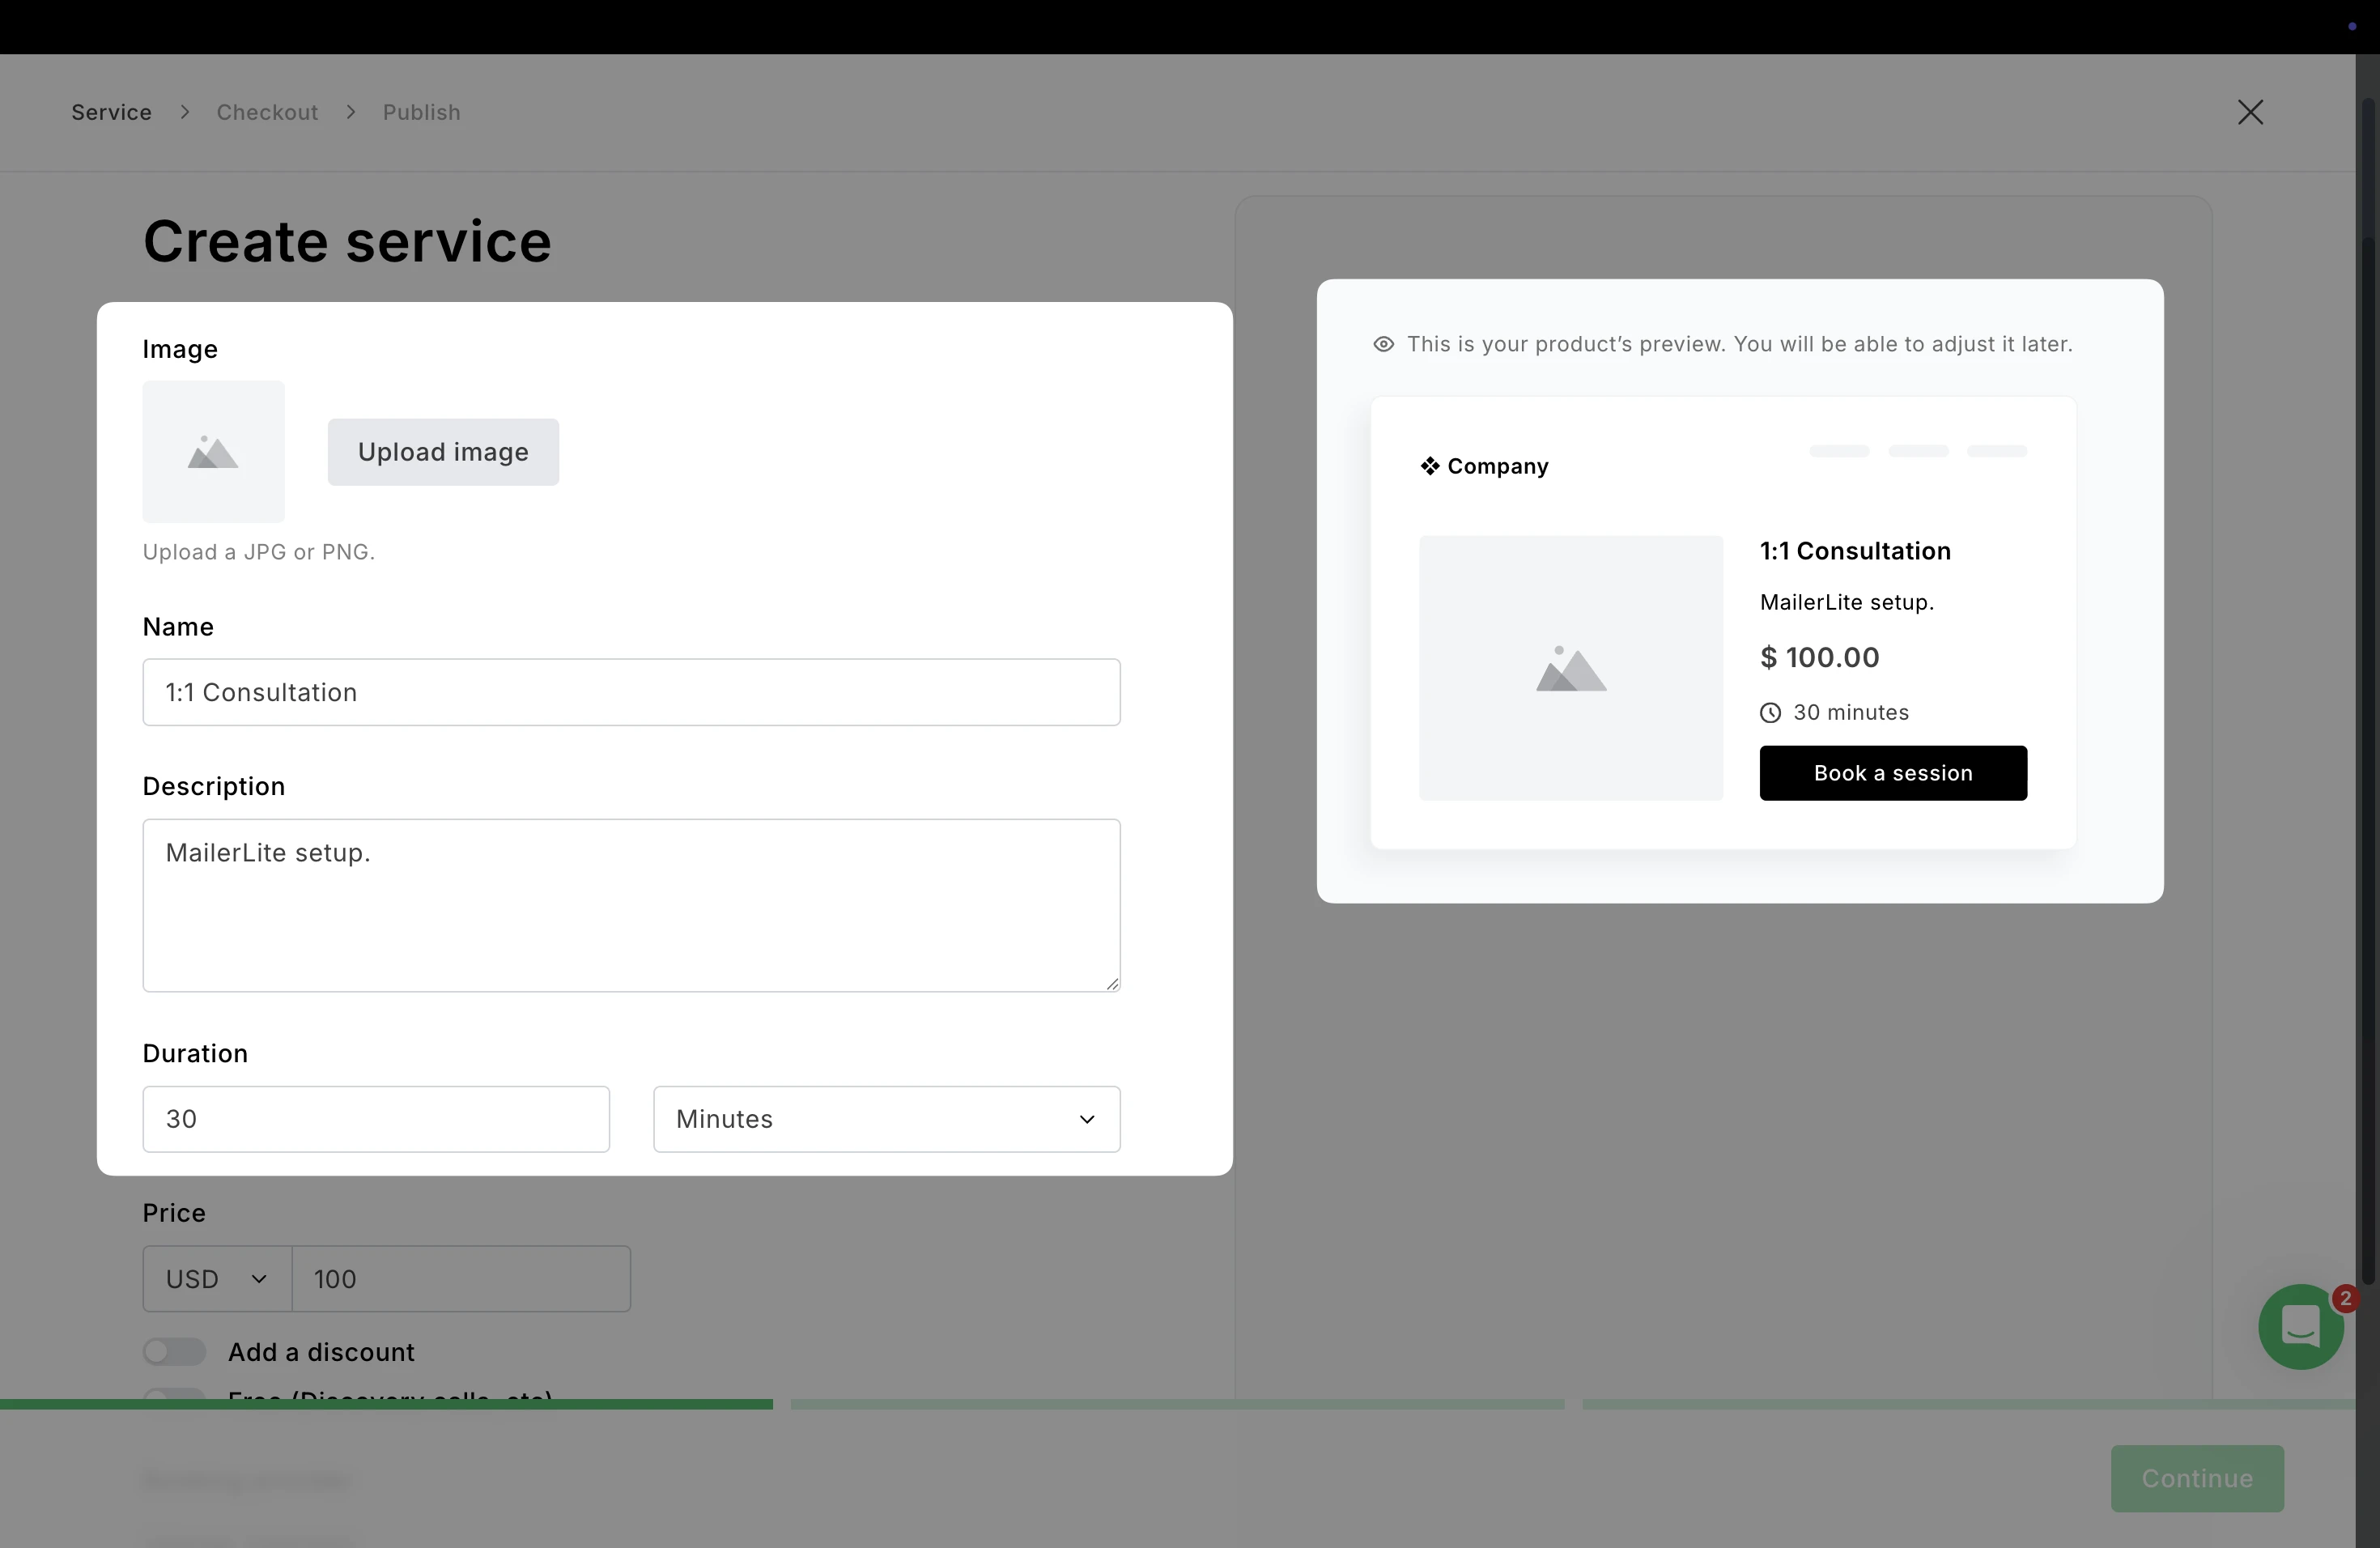
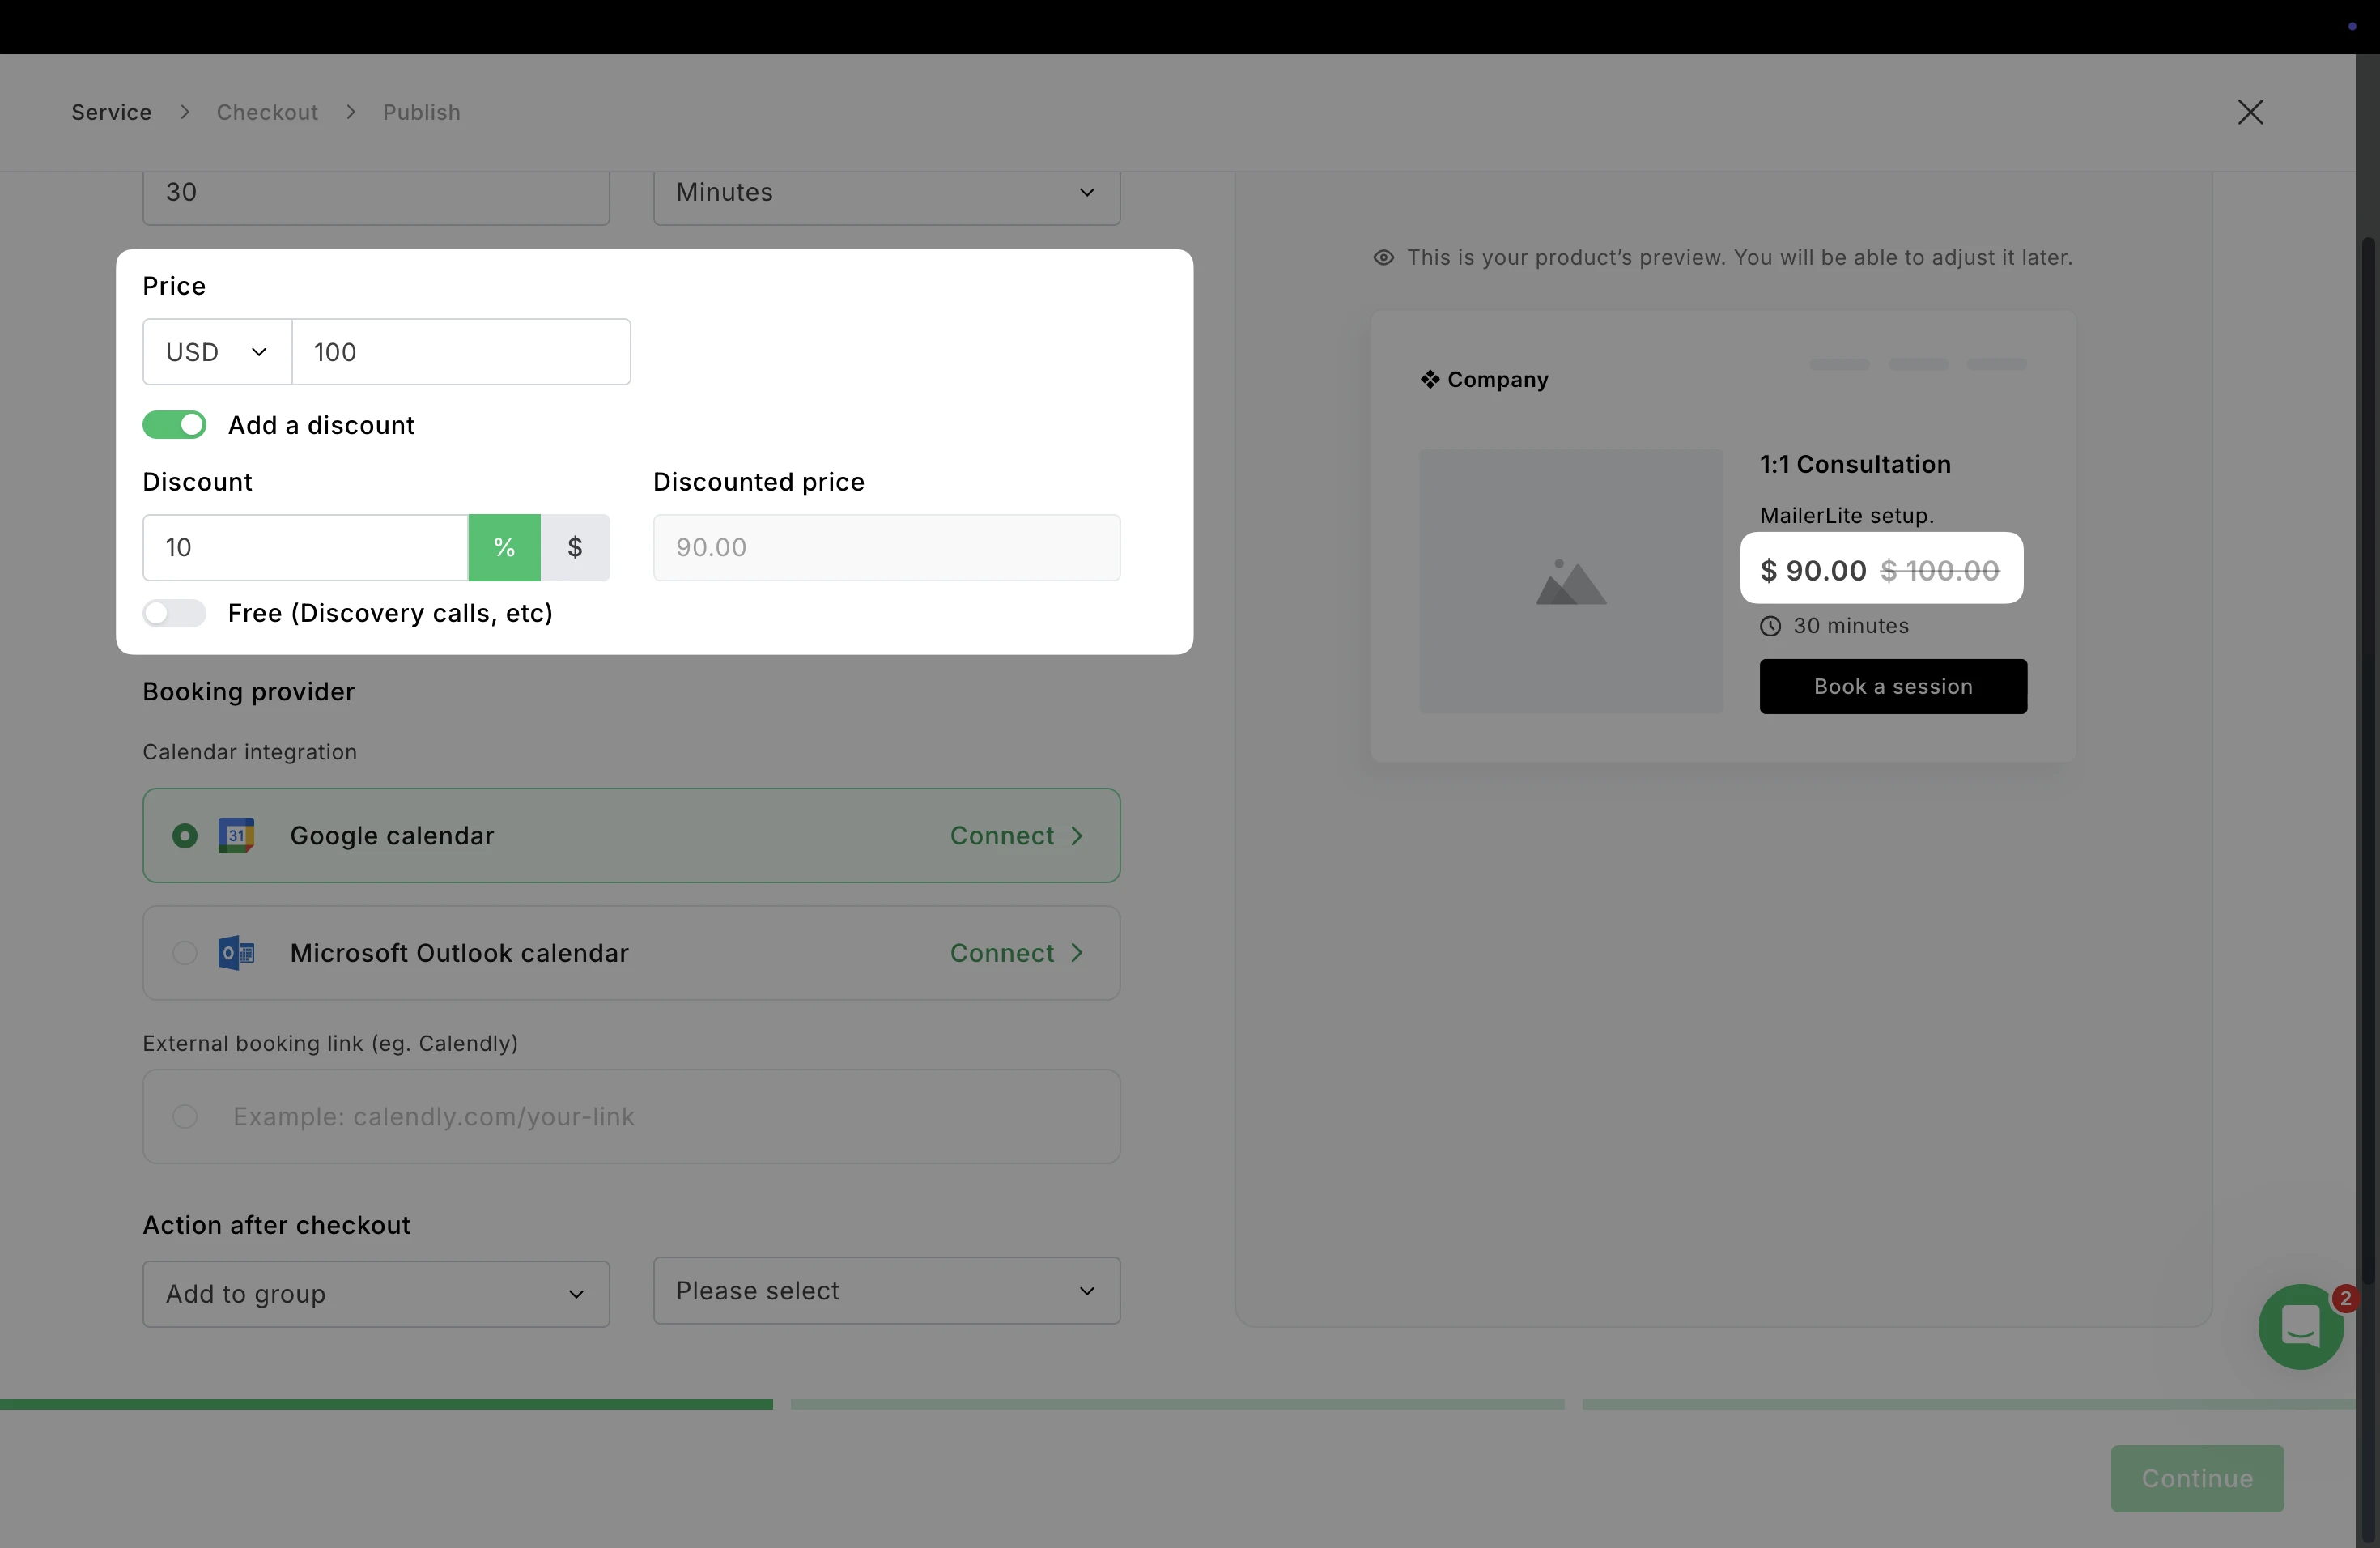
5. Under Price, you can decide whether your booking session is paid or free. For paid, simply enter a value and choose the currency, or toggle the option for Free.
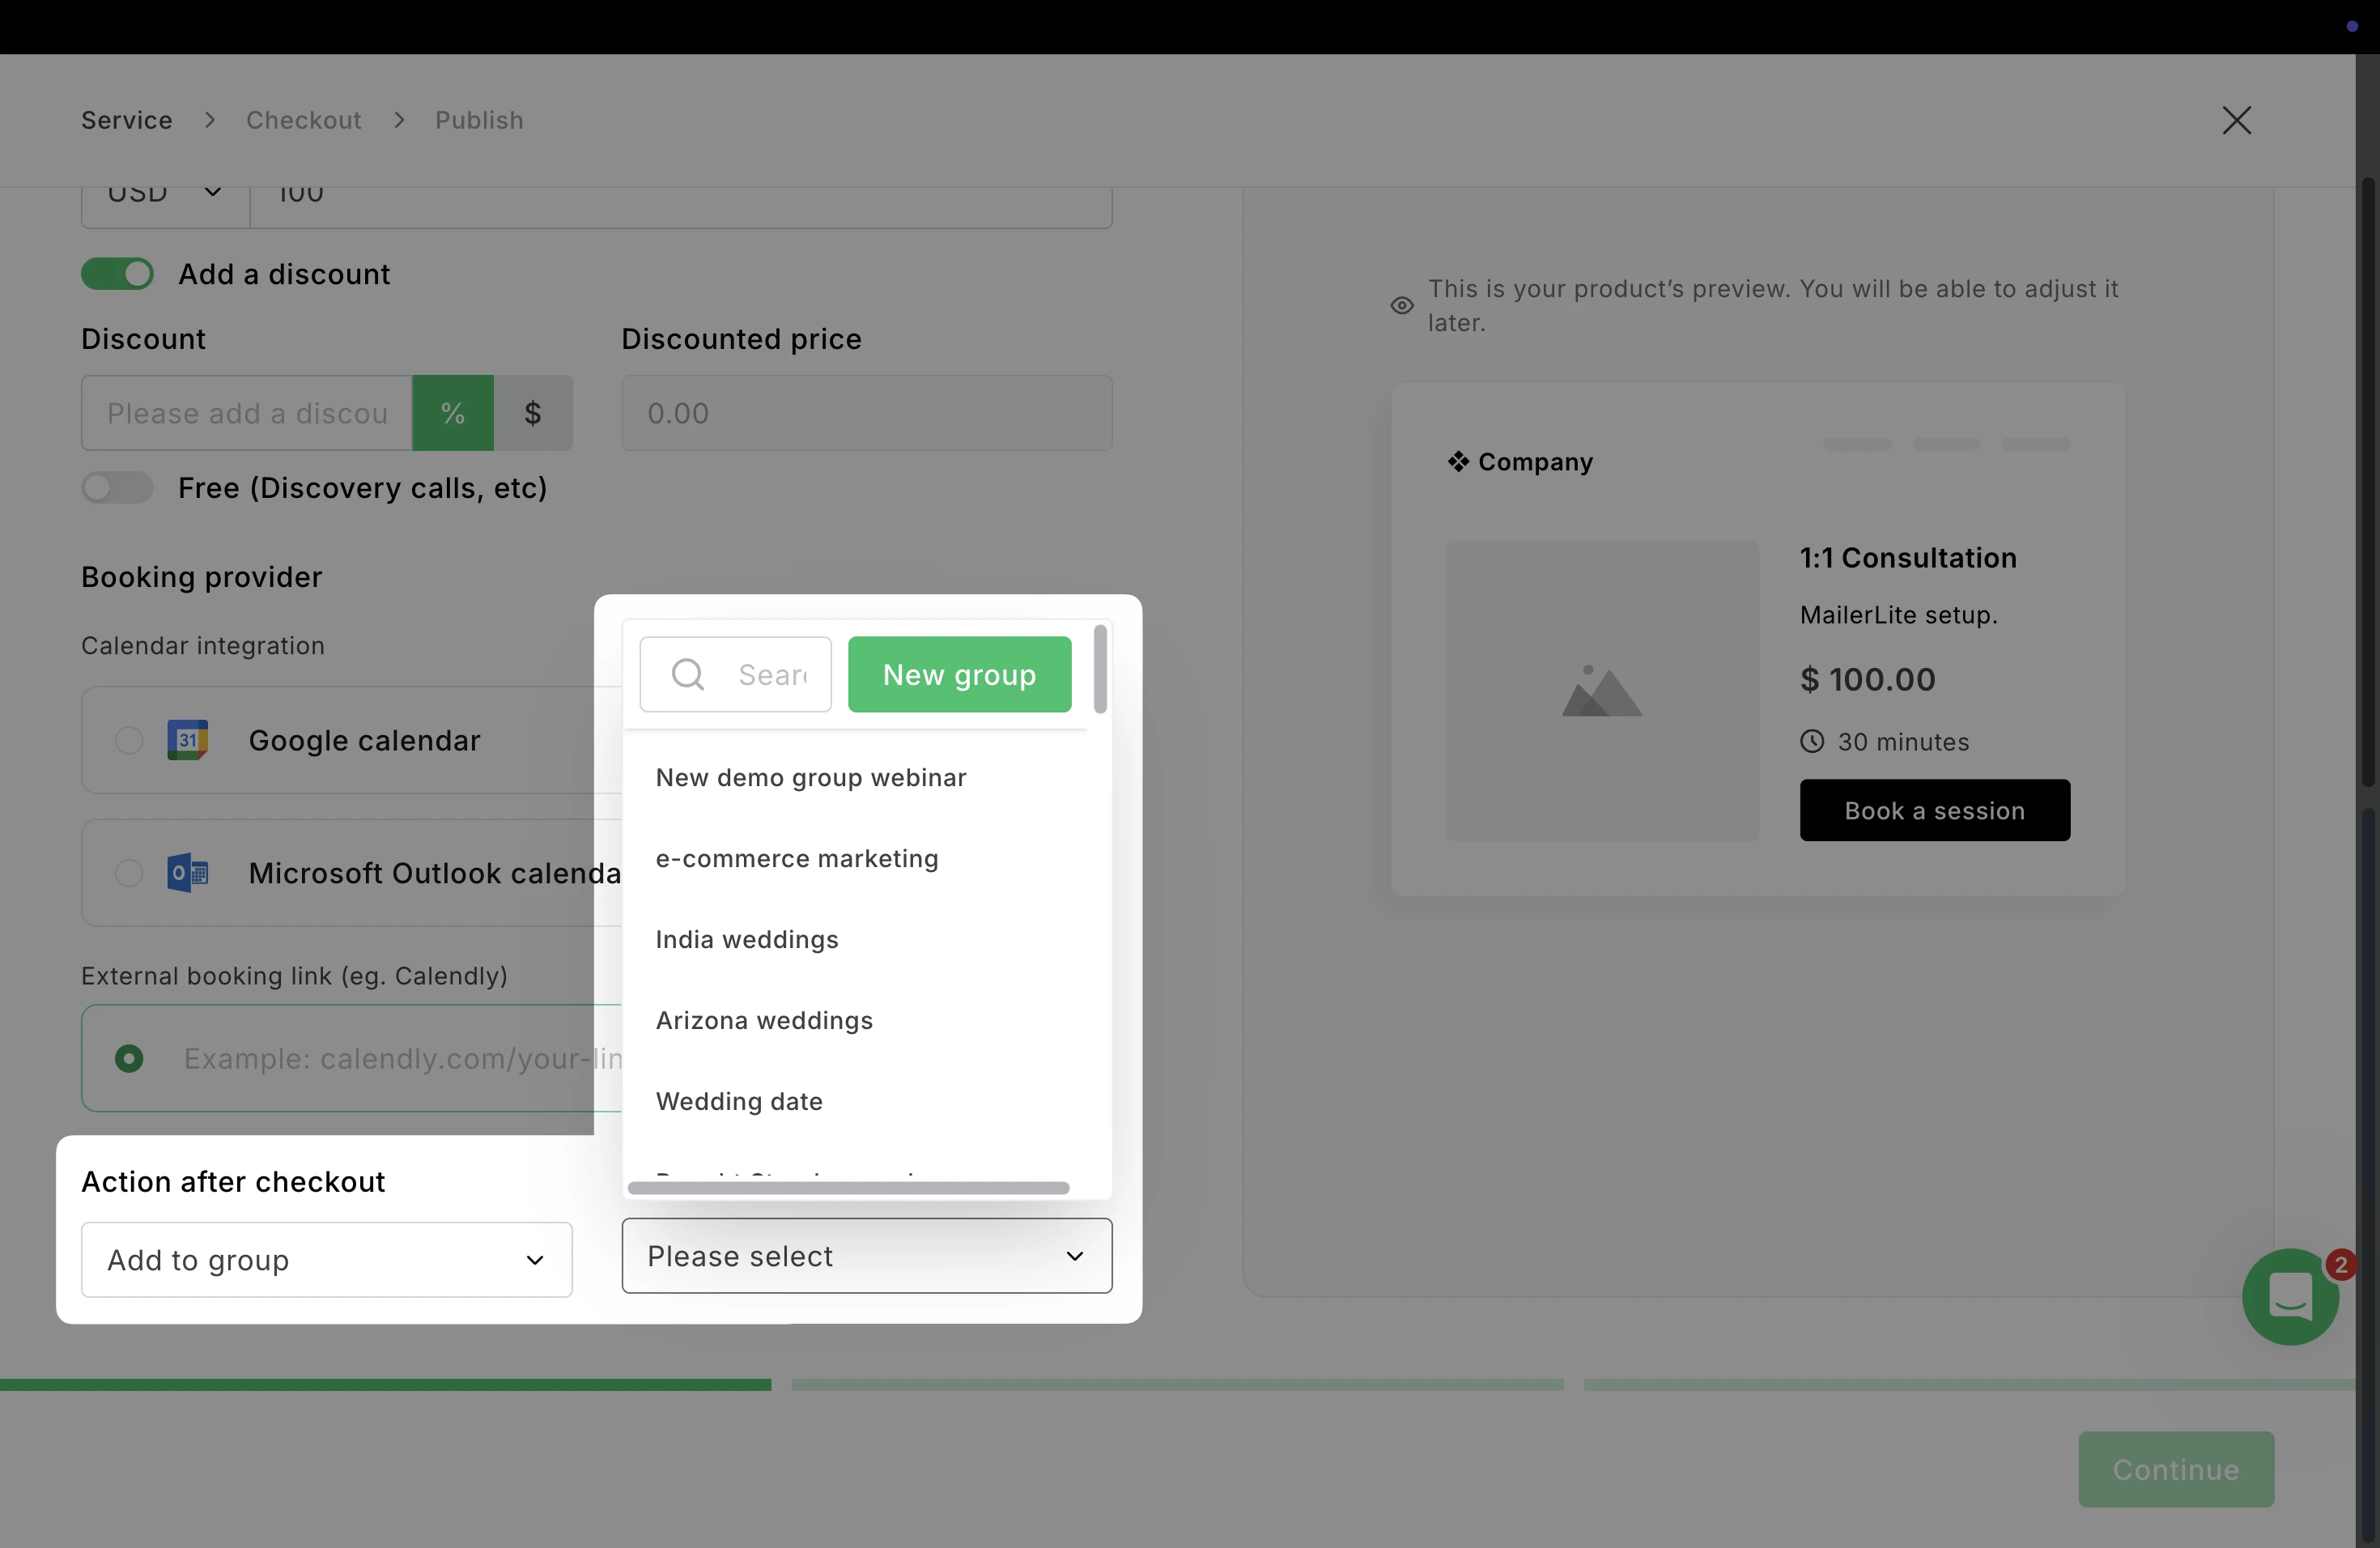
6. Add a discount: Toggle this option to show a discount of your product. When a price or percentage is added here, you will see both the new price and the old price in the preview.
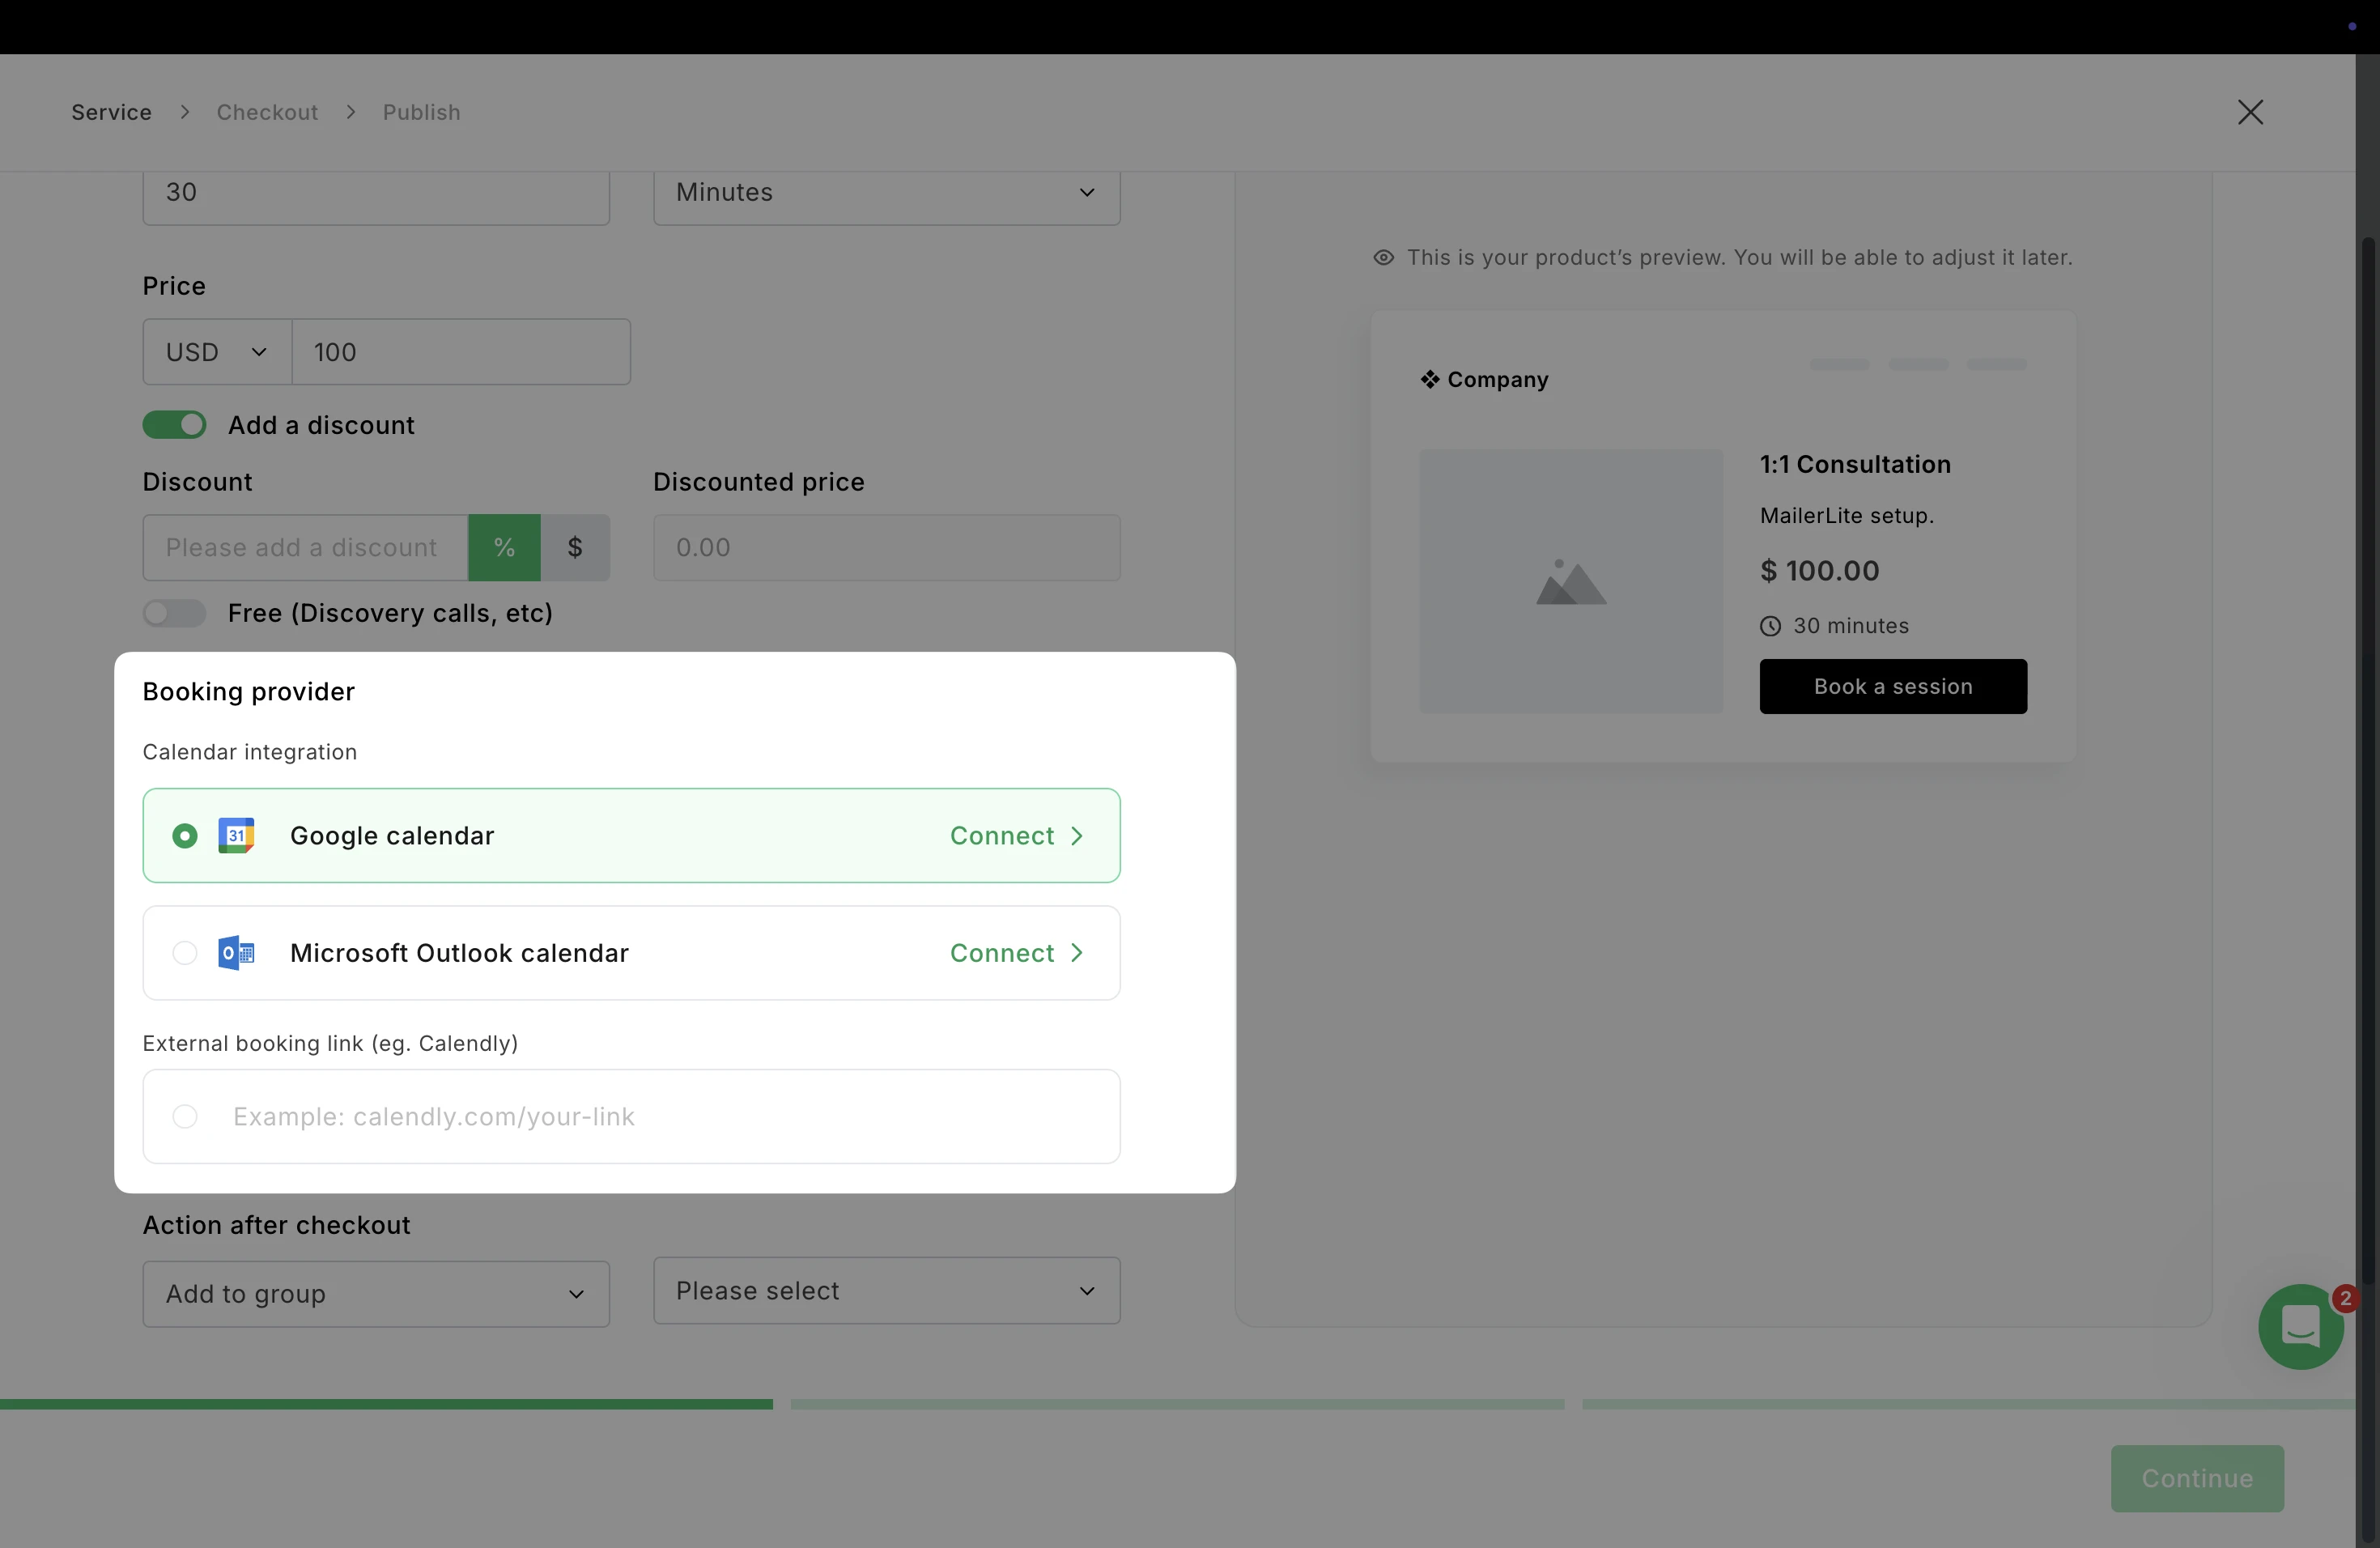
7. Booking provider. Here, you can connect your bookings to your existing calendar to keep everything in sync. Choose between Google Calendar and Outlook Calendar, or you can also link to an external scheduling tool via URL such as Calendly.
8. Click Connect to sync your calendar.
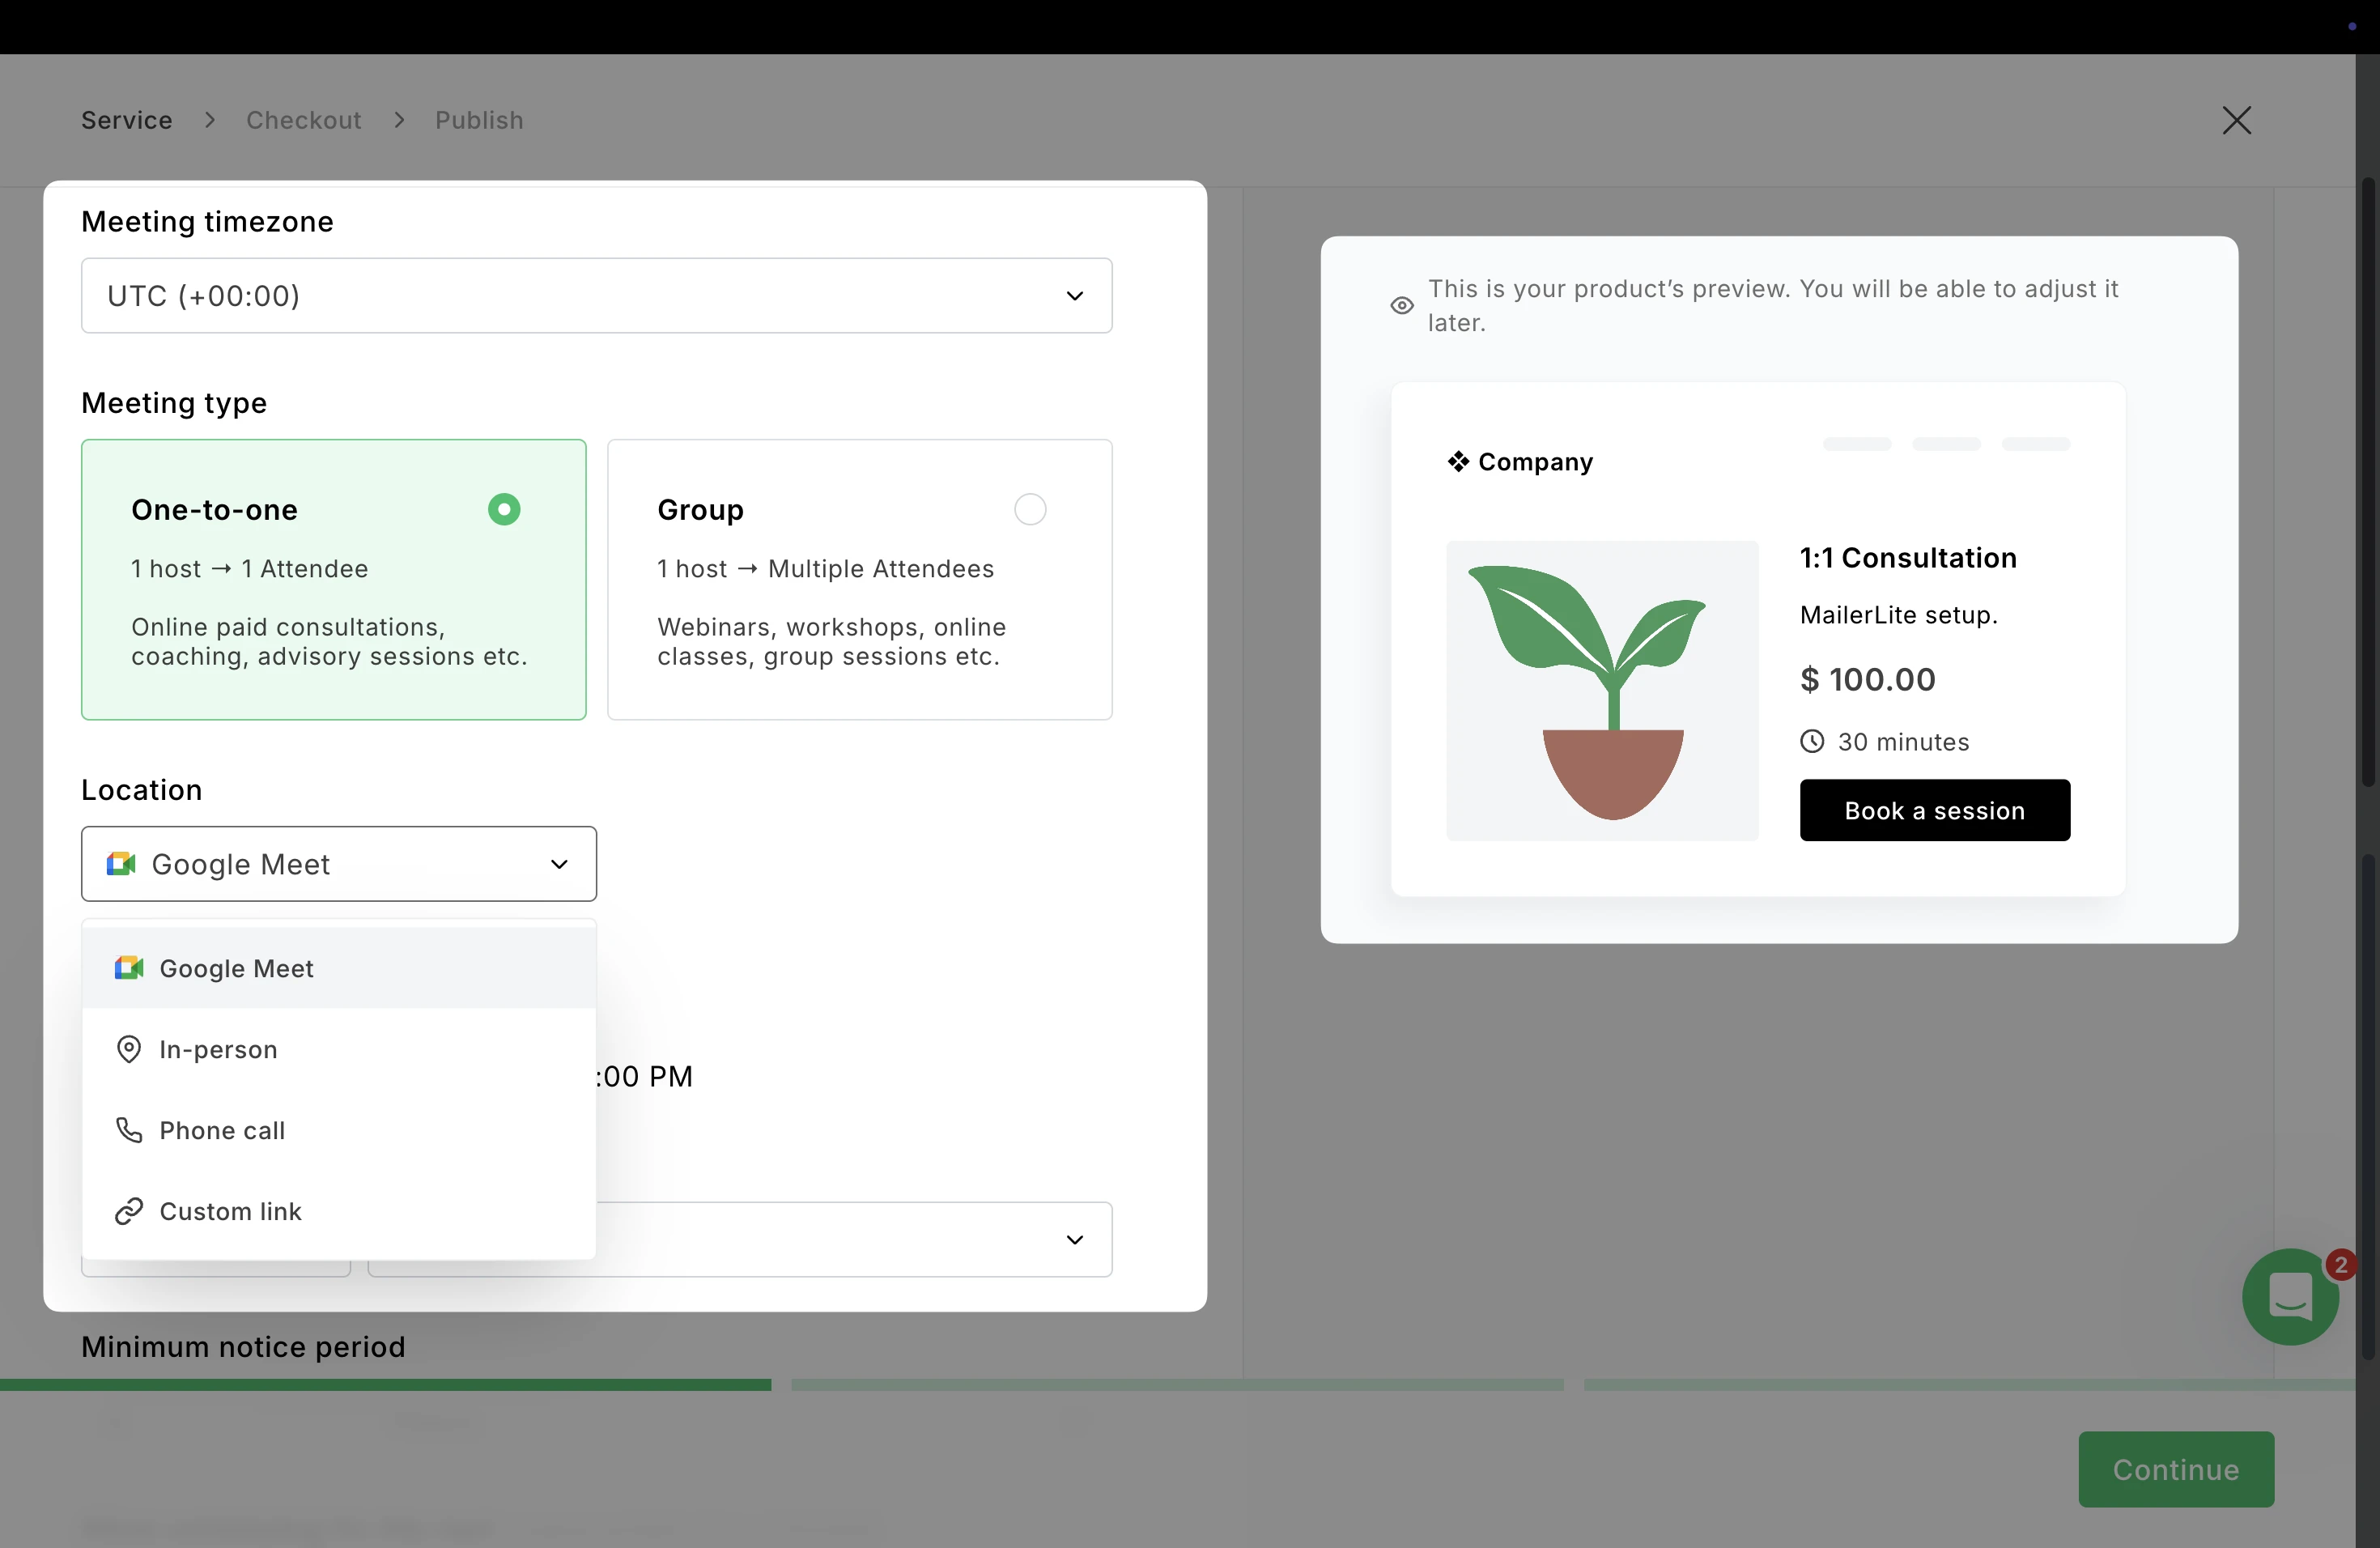
9. Once your calendar is connected, you can choose the Meeting timezone and the Meeting type.
10. Location. Next, choose where the session will happen:
Google Meet: If connected to Google Calendar, you can automatically generate a meeting link for online sessions.
In-person
Phone call
Custom link: Use another platform (such as Zoom or another meeting tool)
The selected location will appear in the booking confirmation and calendar event, so attendees know exactly how to join the session.
Meeting types
For Meeting type, choose whether the booking is One-to-one or Group.
Depending on which meeting type you choose, you’ll see different scheduling options to control how bookings work.
One-to-one bookings
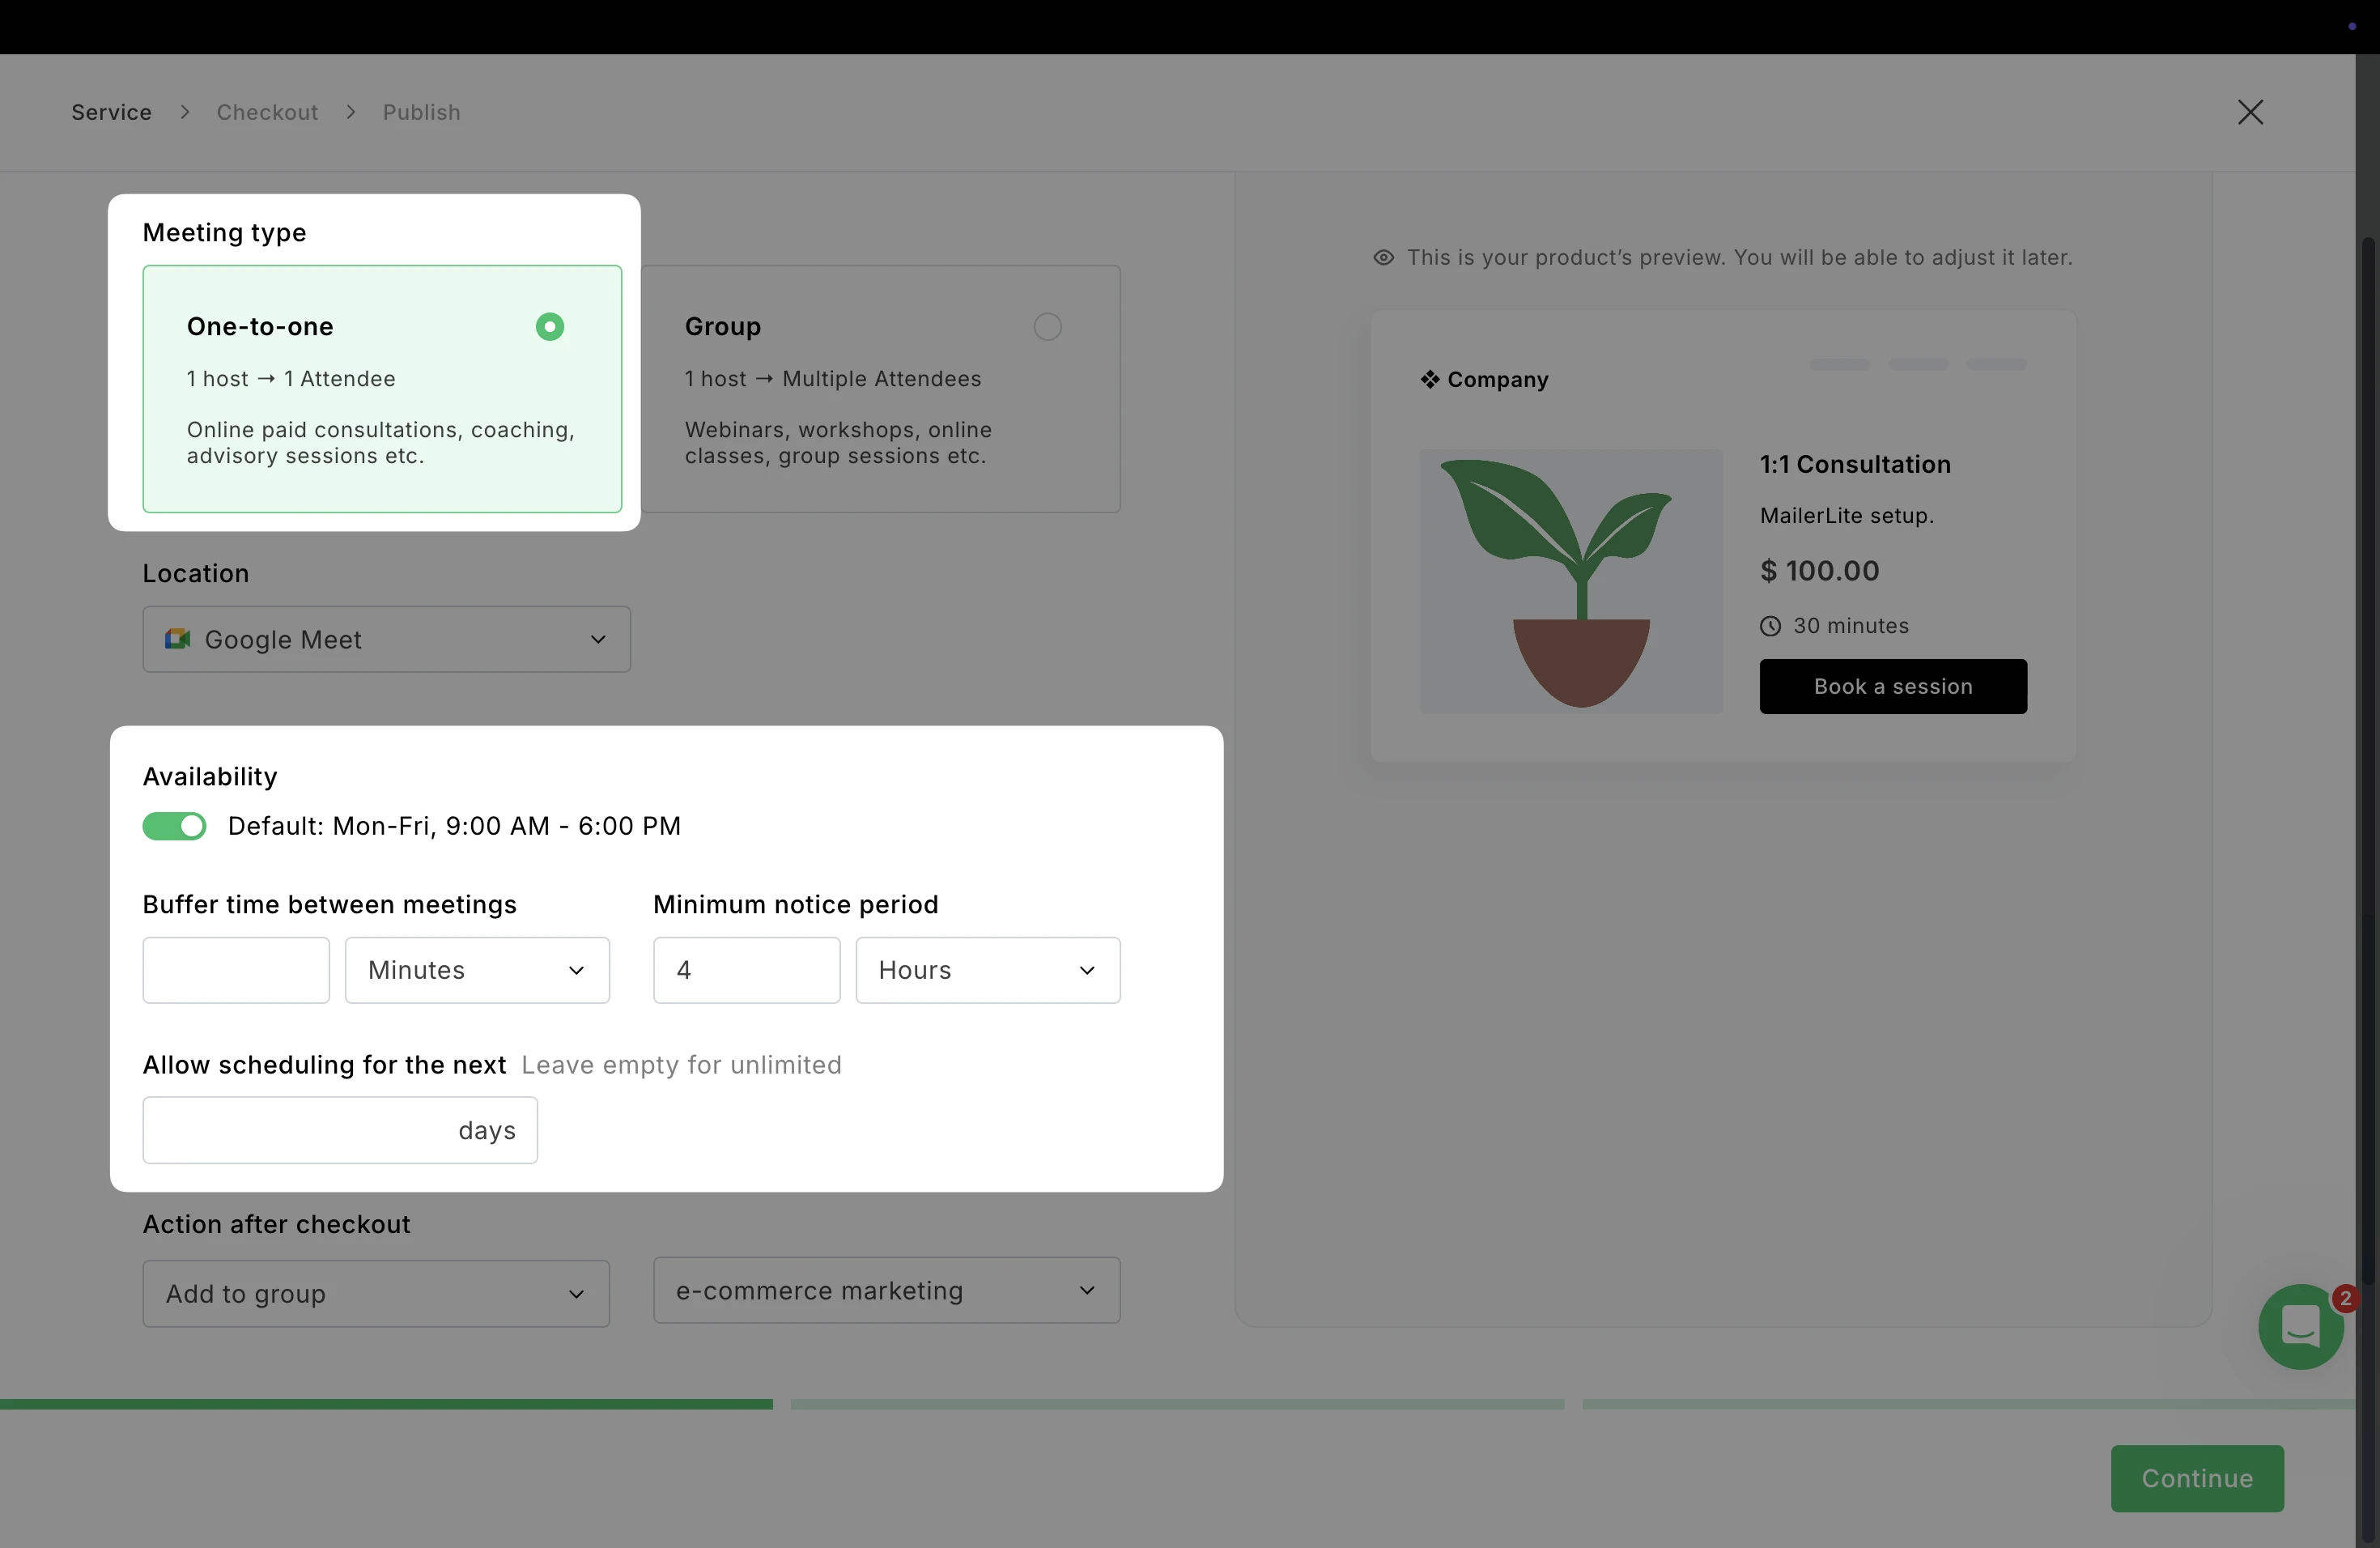
For one-to-one meetings, you define your general availability and scheduling rules.
Availability
Set the days and times when customers can book sessions.
A default schedule (for example Mon–Fri, 9:00 AM – 6:00 PM) can be used or adjusted to match your availability.
Buffer time between meetings: Add extra time before or after meetings to prevent back-to-back bookings.
Minimum notice period: Define how far in advance someone must book a session.
Allow scheduling for the next: Limit how far into the future bookings can be made.
💡 Tip: Leave this field empty if you want customers to book without a future scheduling limit.
Group bookings
For group meetings, you schedule specific sessions rather than general availability.
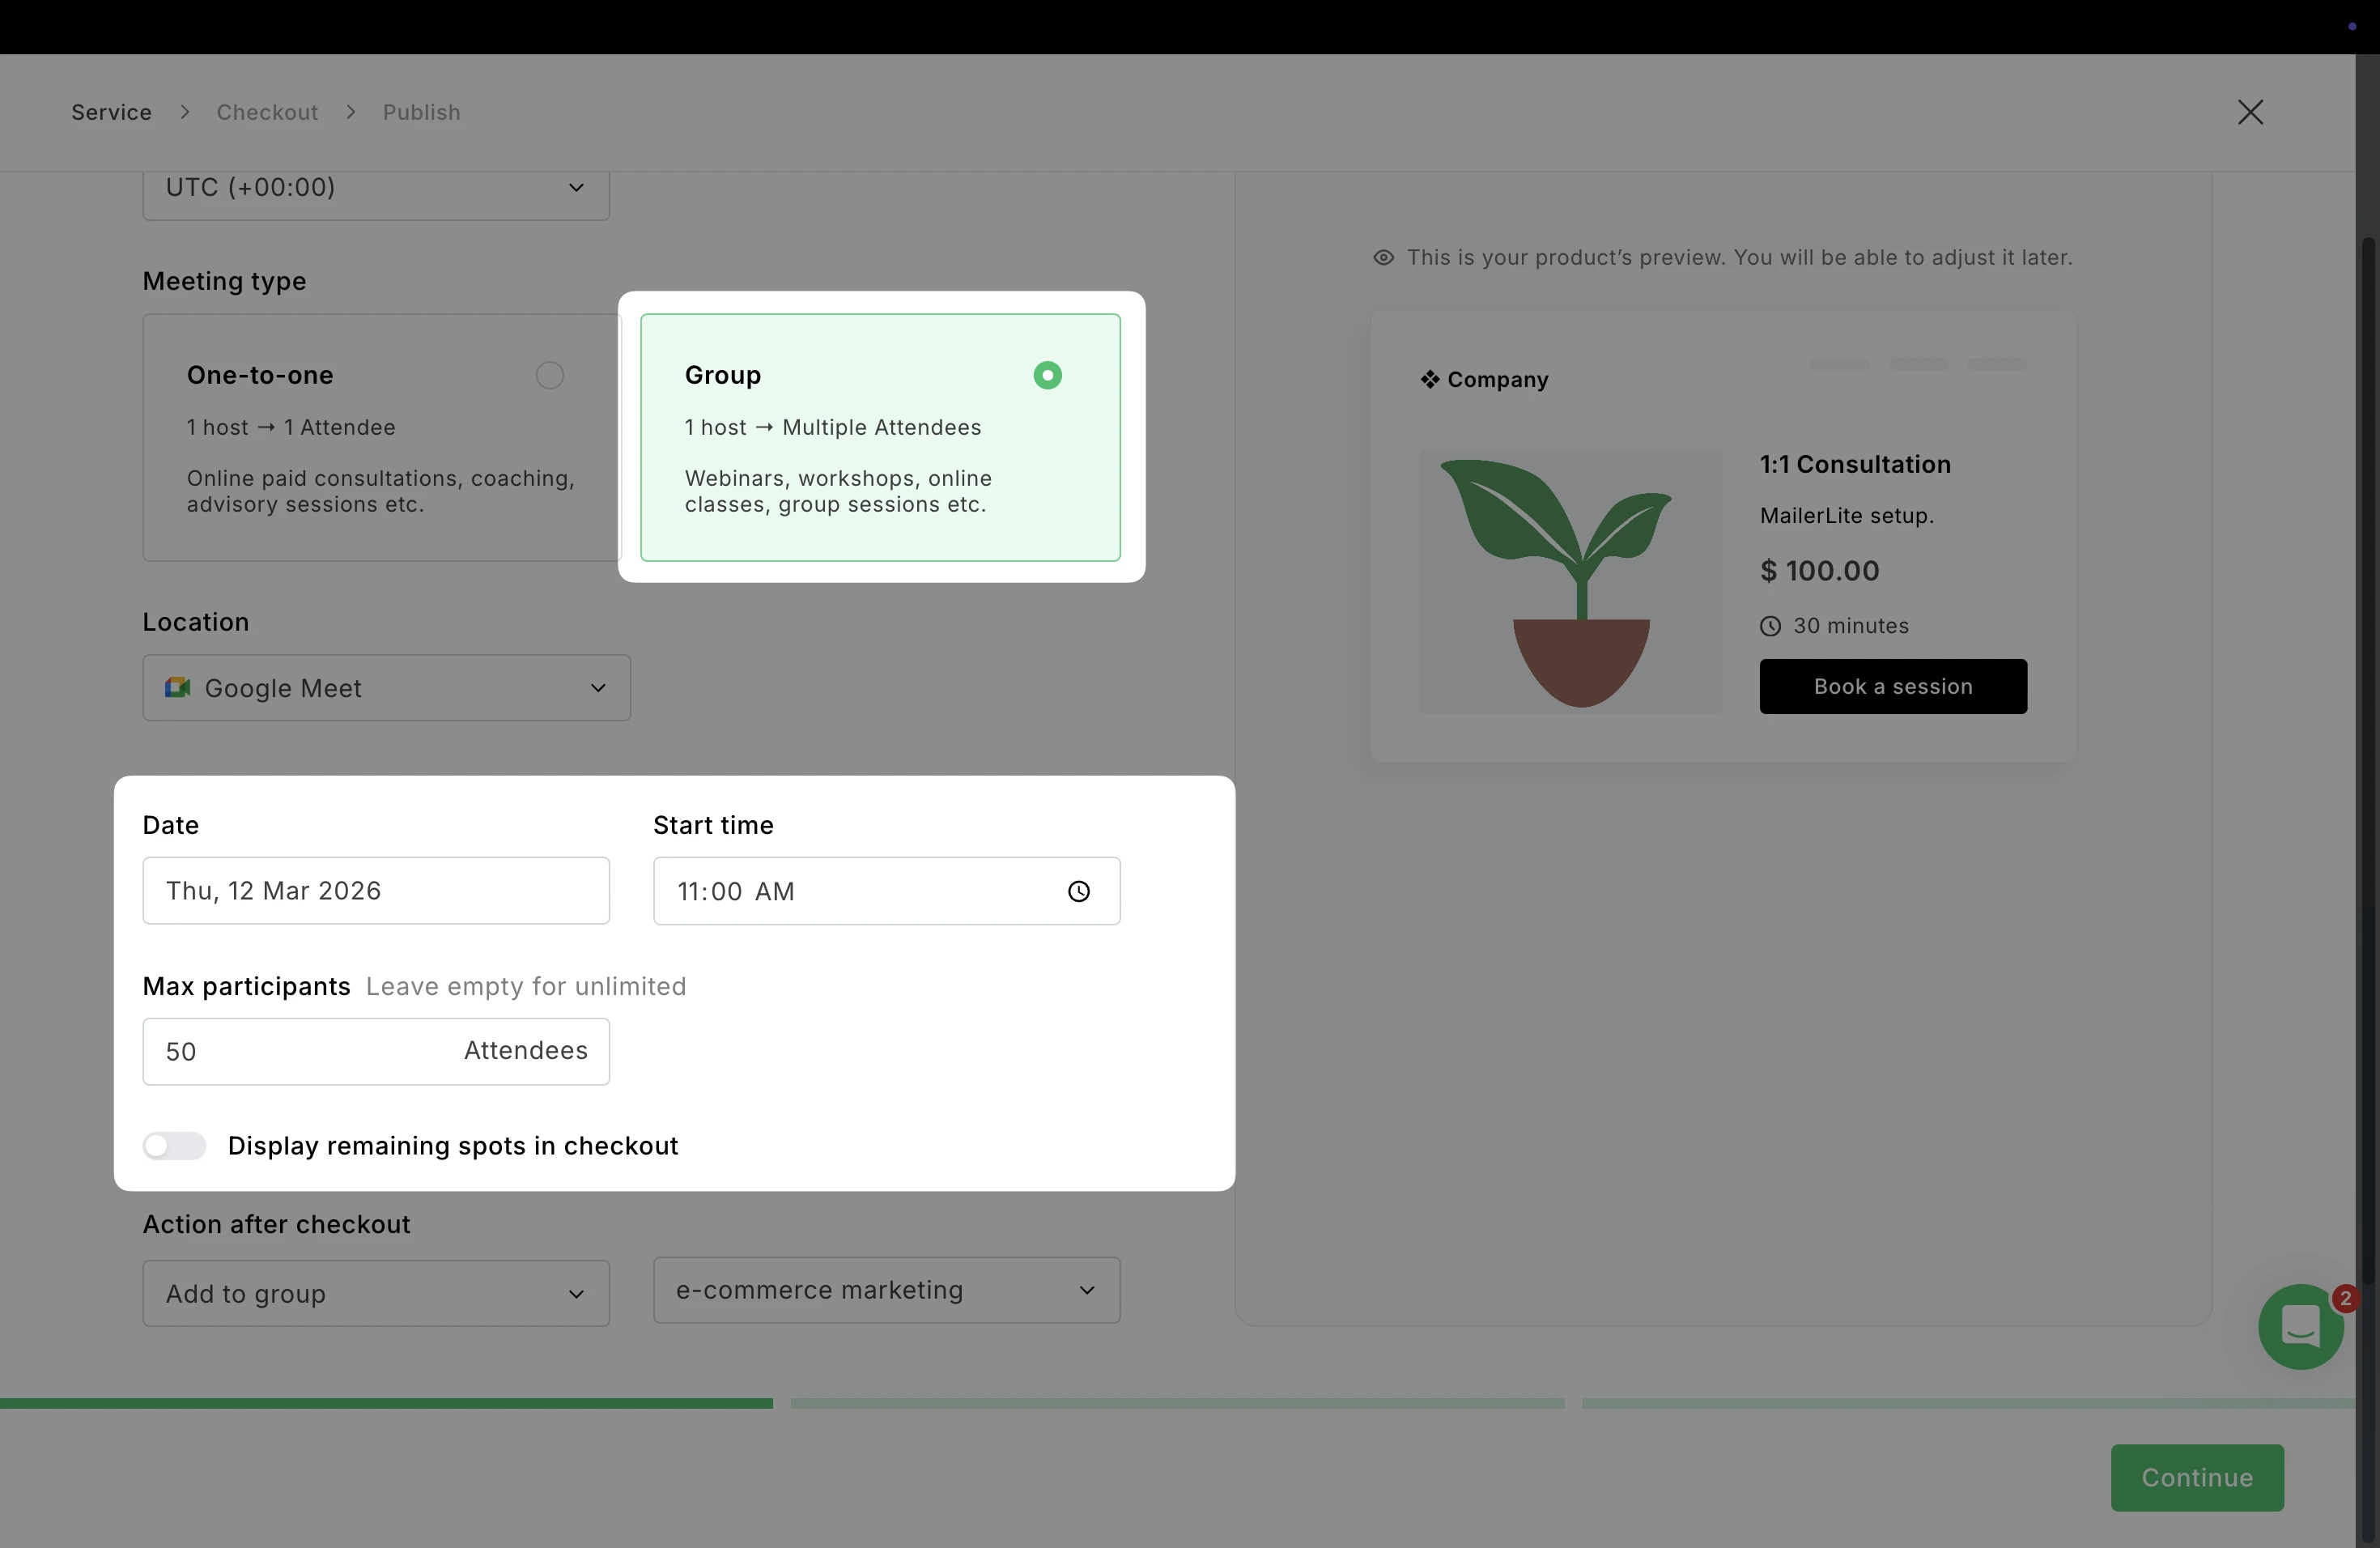
Date and start time: Choose the exact date and time the session will take place.
Max participants: Set the number of attendees allowed for the session.
💡 Tip: Leave this field empty if you want unlimited participants.
Display remaining spots in checkout: Optionally show customers how many spots are still available during checkout. This can help create urgency for limited-capacity sessions such as workshops or webinars.
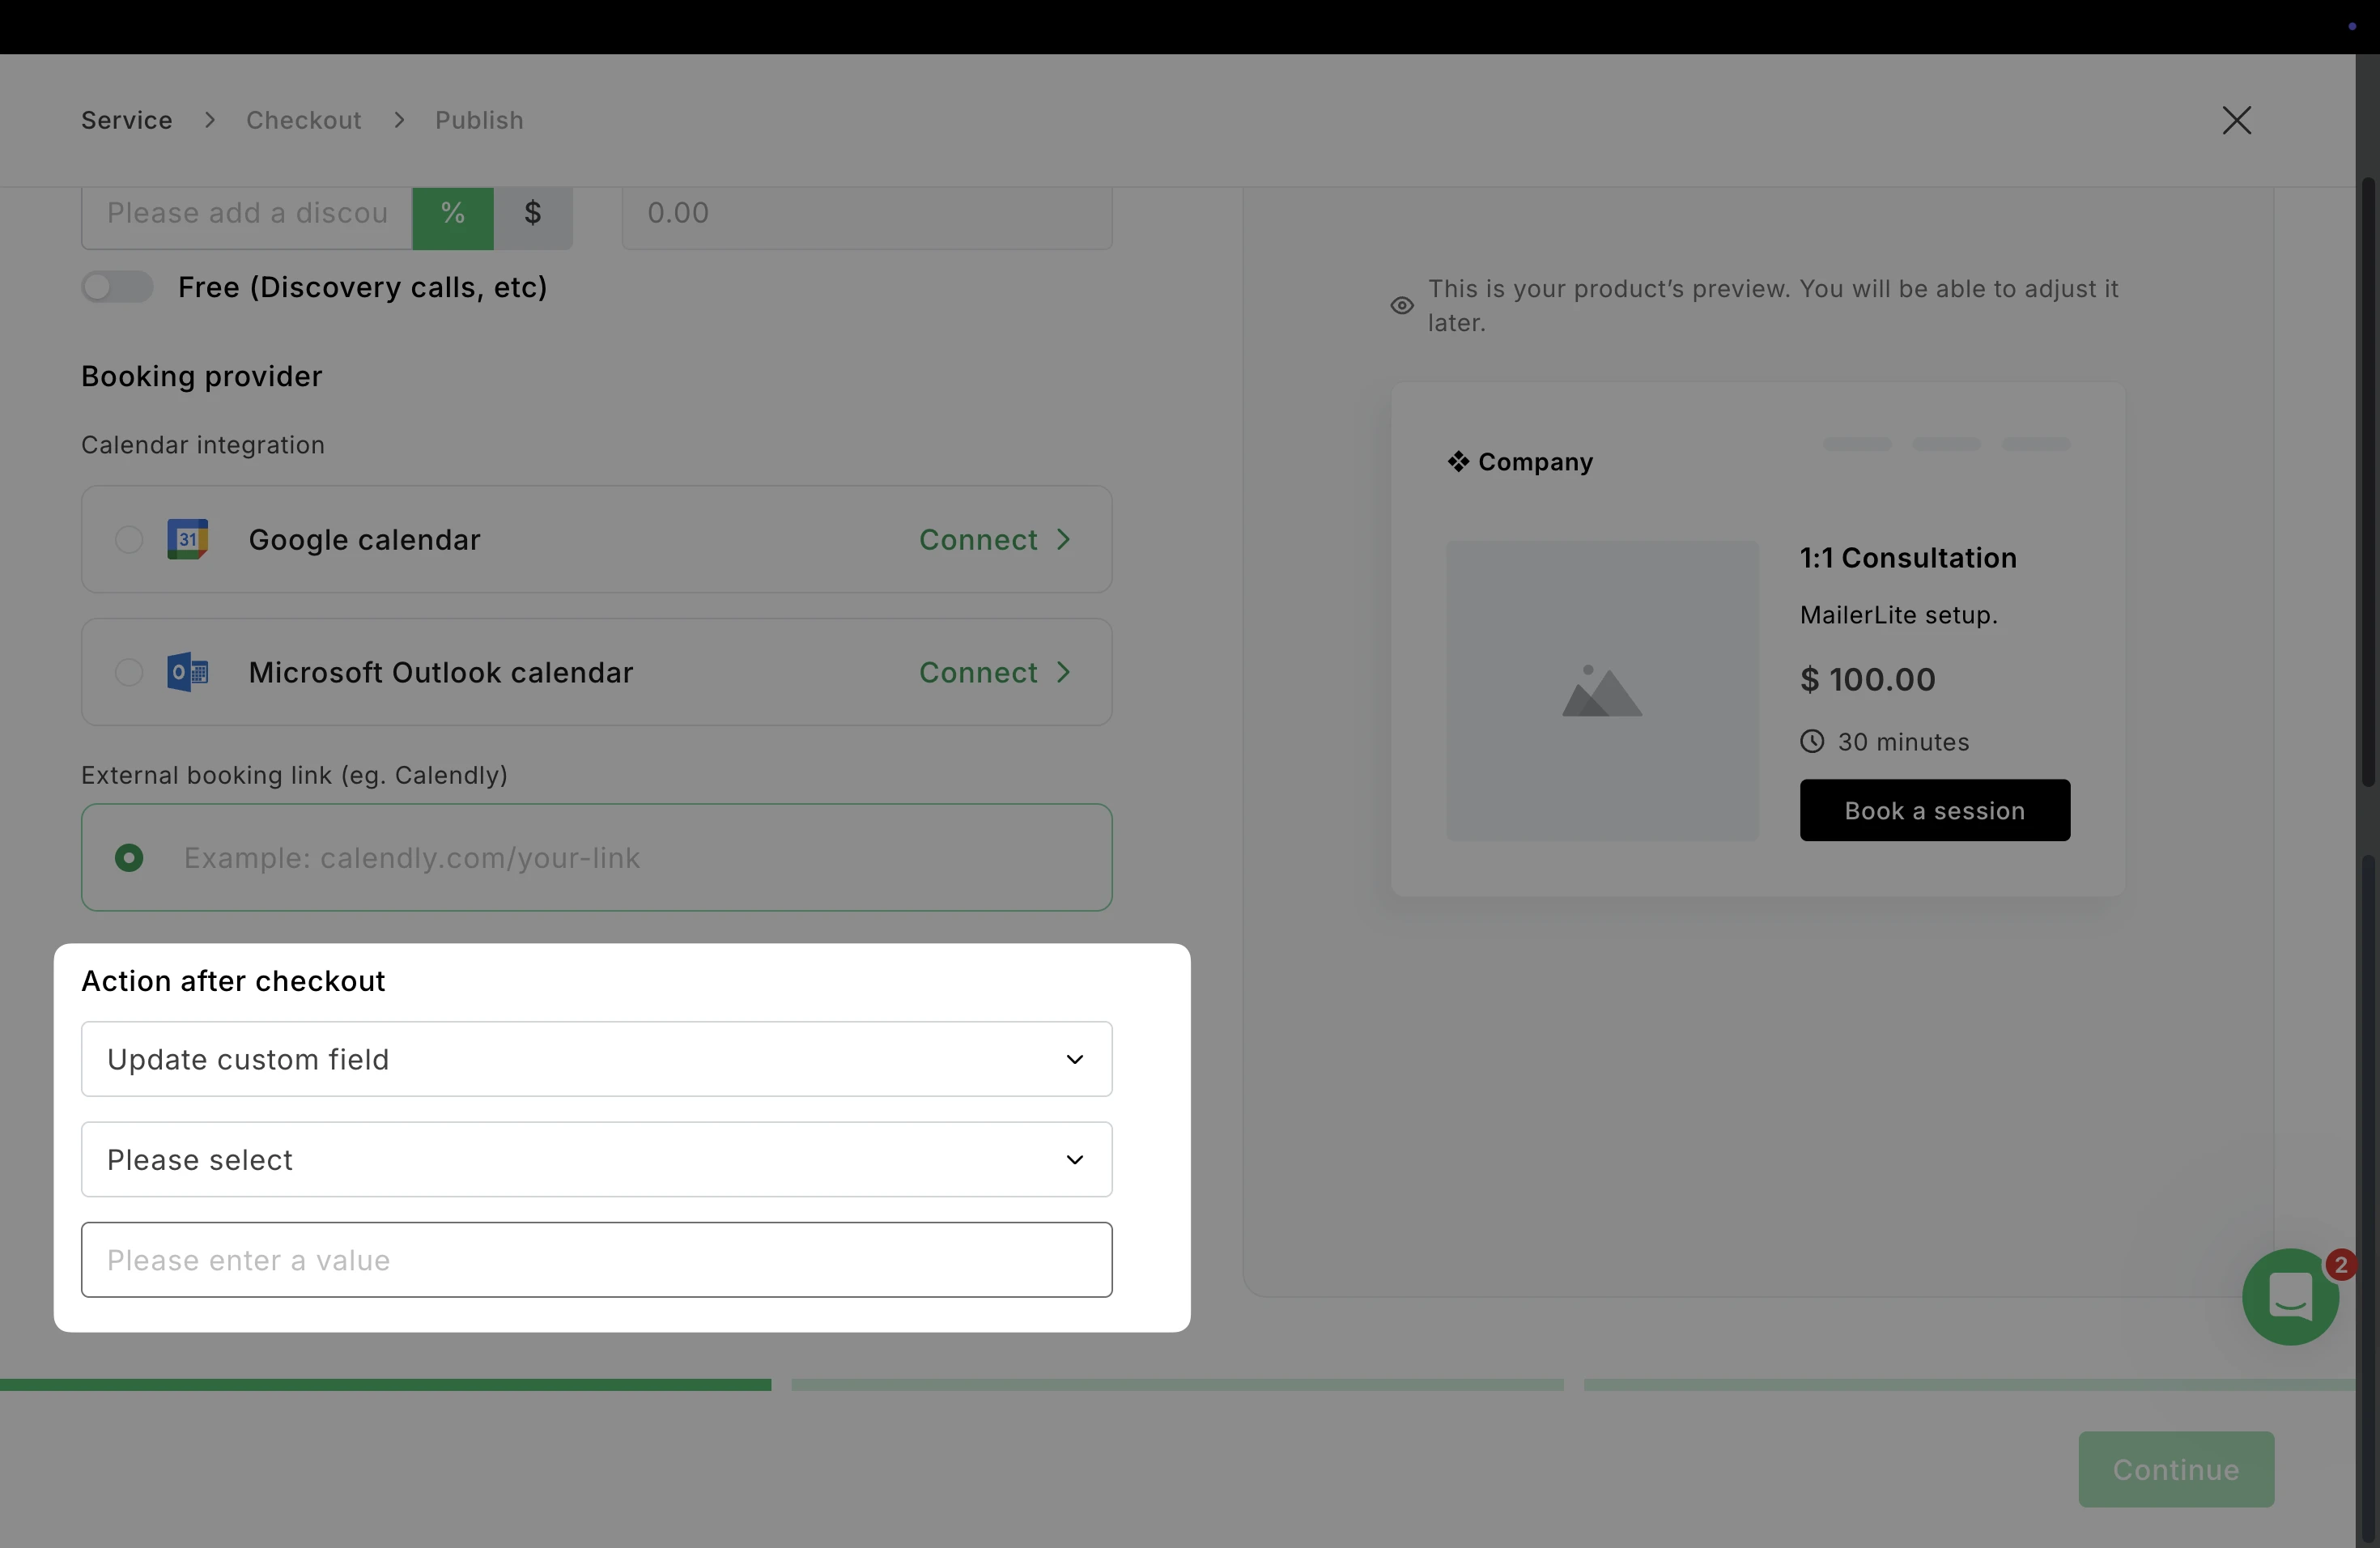
Action after checkout
After a customer completes their booking, choose what happens next automatically. These actions help you organize contacts, collect information, or trigger follow-up workflows.
⚠️ Keep in mind: Action after checkout is mandatory so your subscribers who book your service are properly segmented in MailerLite.
Add to group: Automatically add the customer to a specific subscriber group after they book a session.
Remove from group: Remove the customer from an existing group once the booking is completed.
When choosing either of these options, you can then choose the group it will apply to or create a new one.
Update custom field: Update a custom field in the subscriber’s profile when the booking is completed.
When choosing this option, select the custom field it will apply to, and the value that will be applied to that field.
Checkout
The Checkout step allows you to customize how your booking checkout page looks and what information you collect from customers before they complete their booking.
You’ll also see a live preview on the right side, showing how the checkout form will appear to customers.
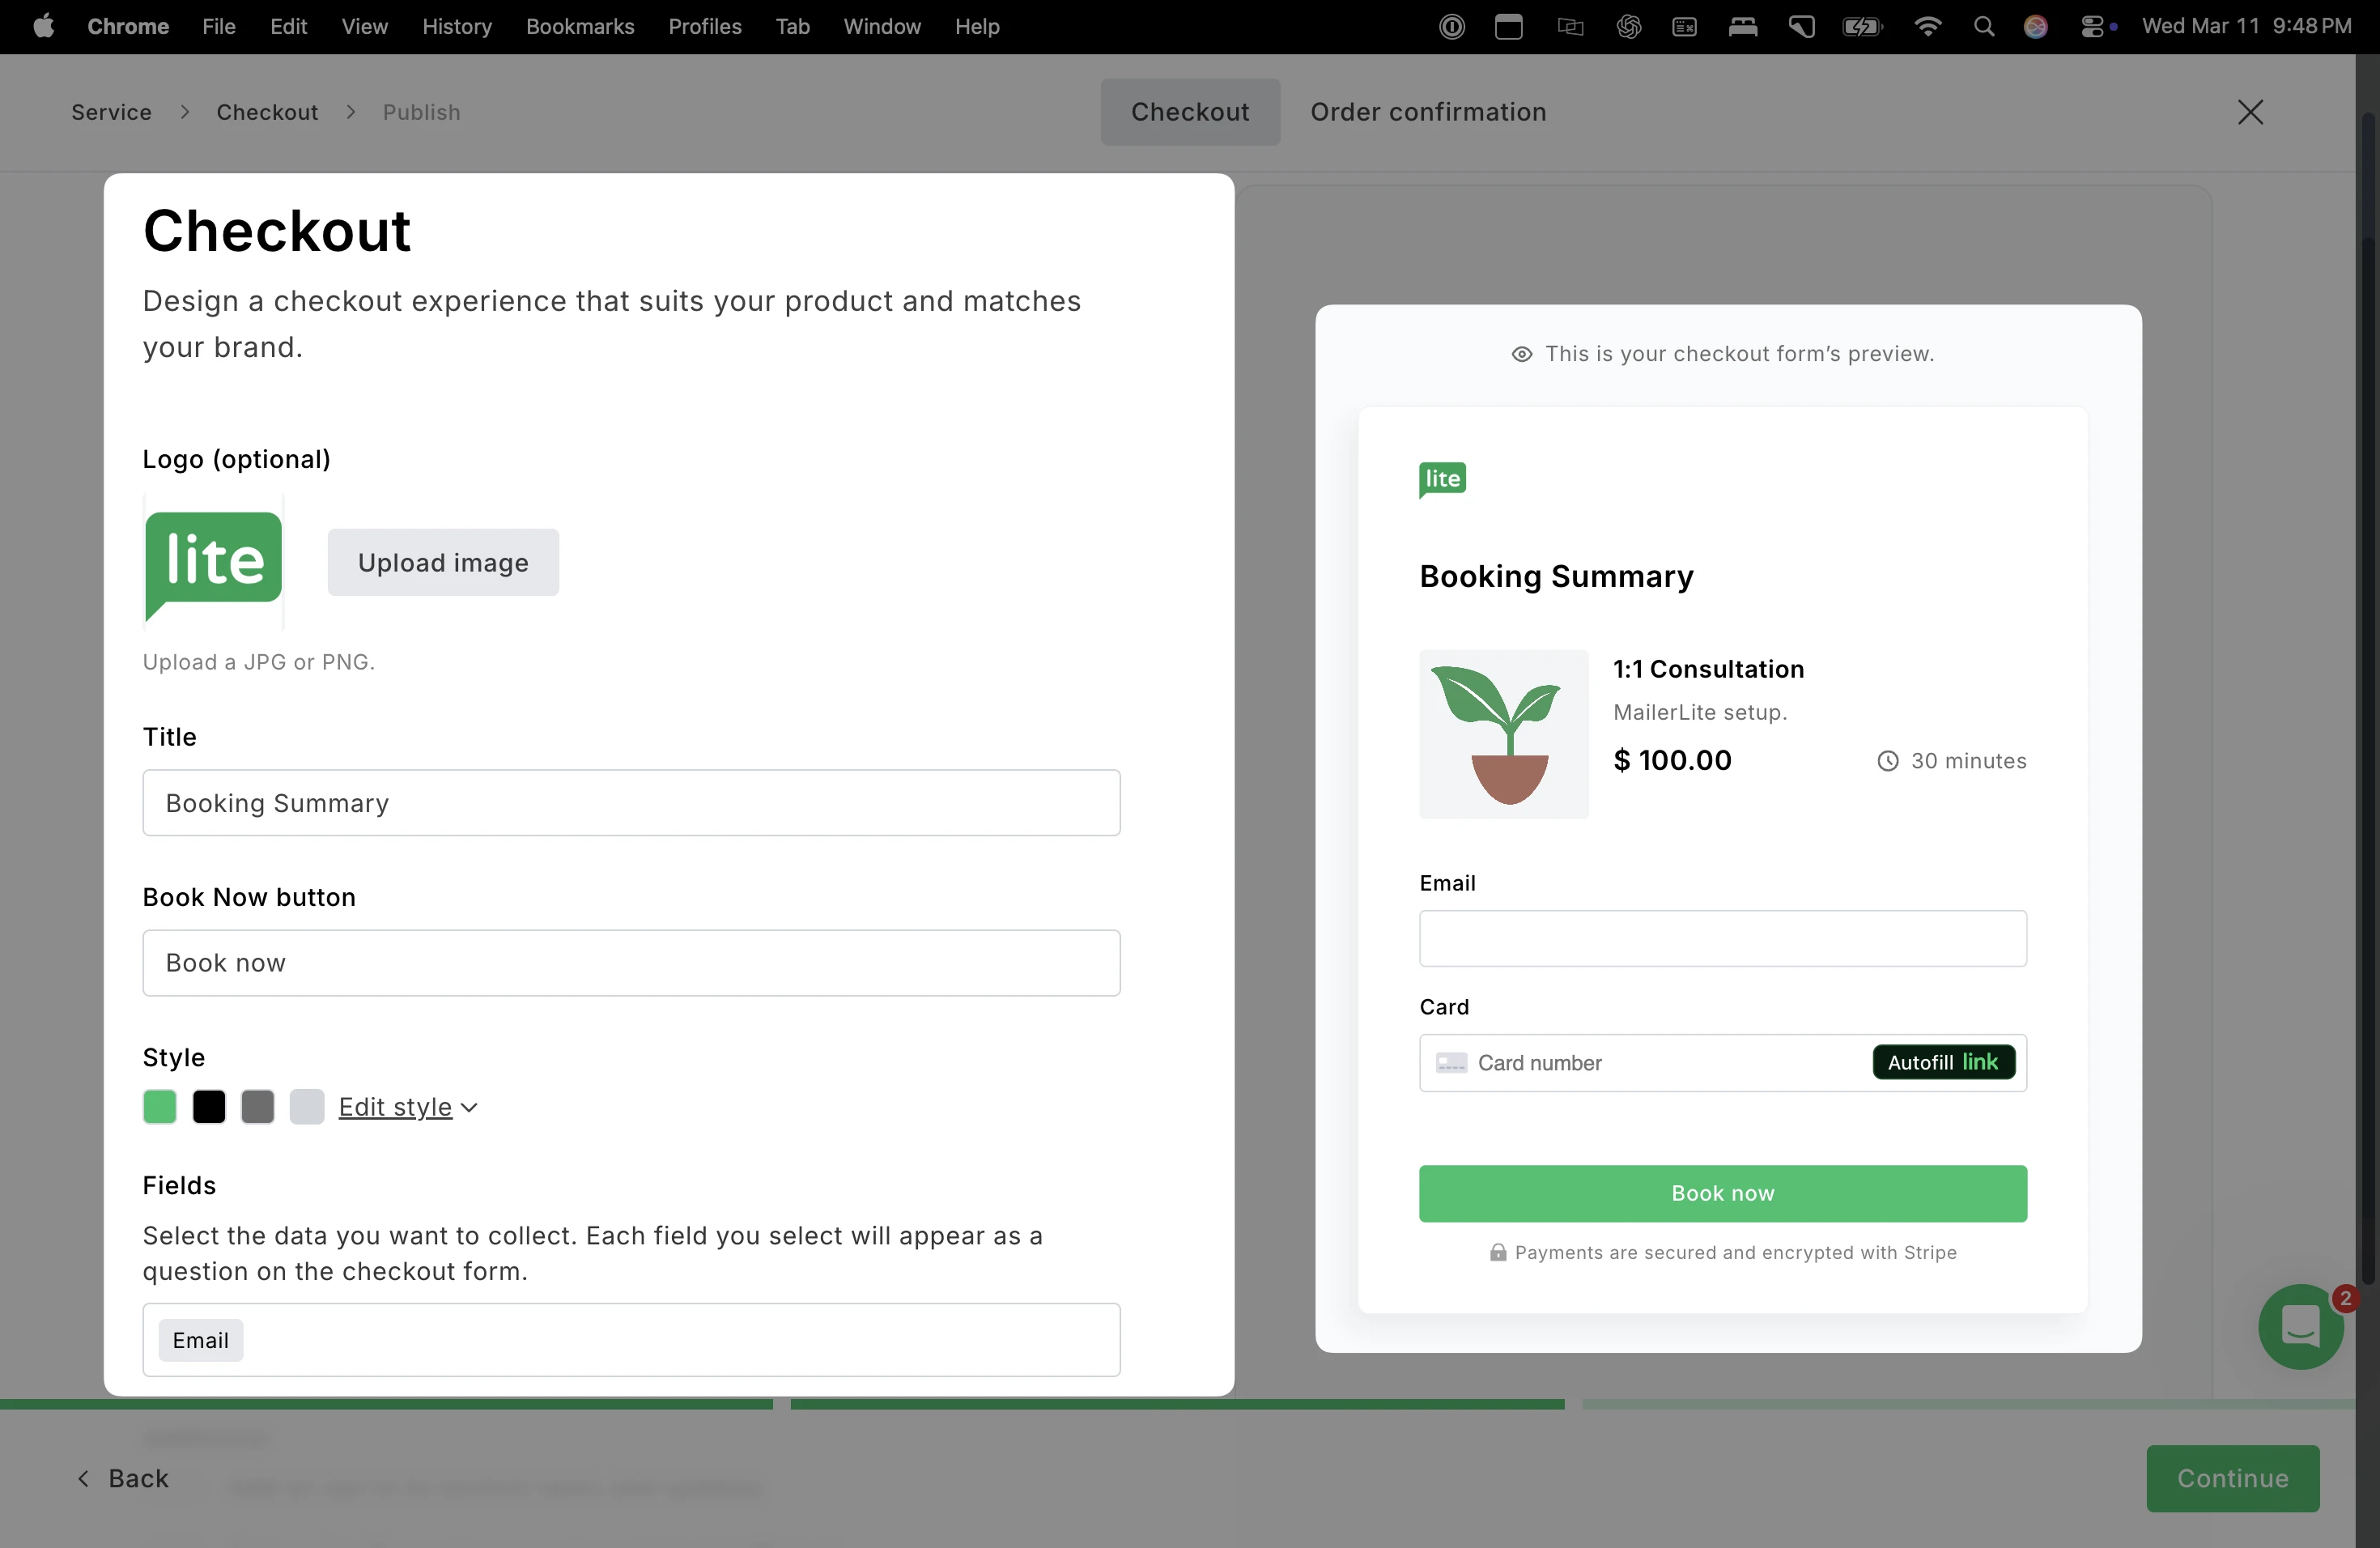
Add your Logo, the booking Title, and customize the text on the Book now button. Style allows you to adjust the appearance of the checkout page to match your brand, such as button color and theme colors.
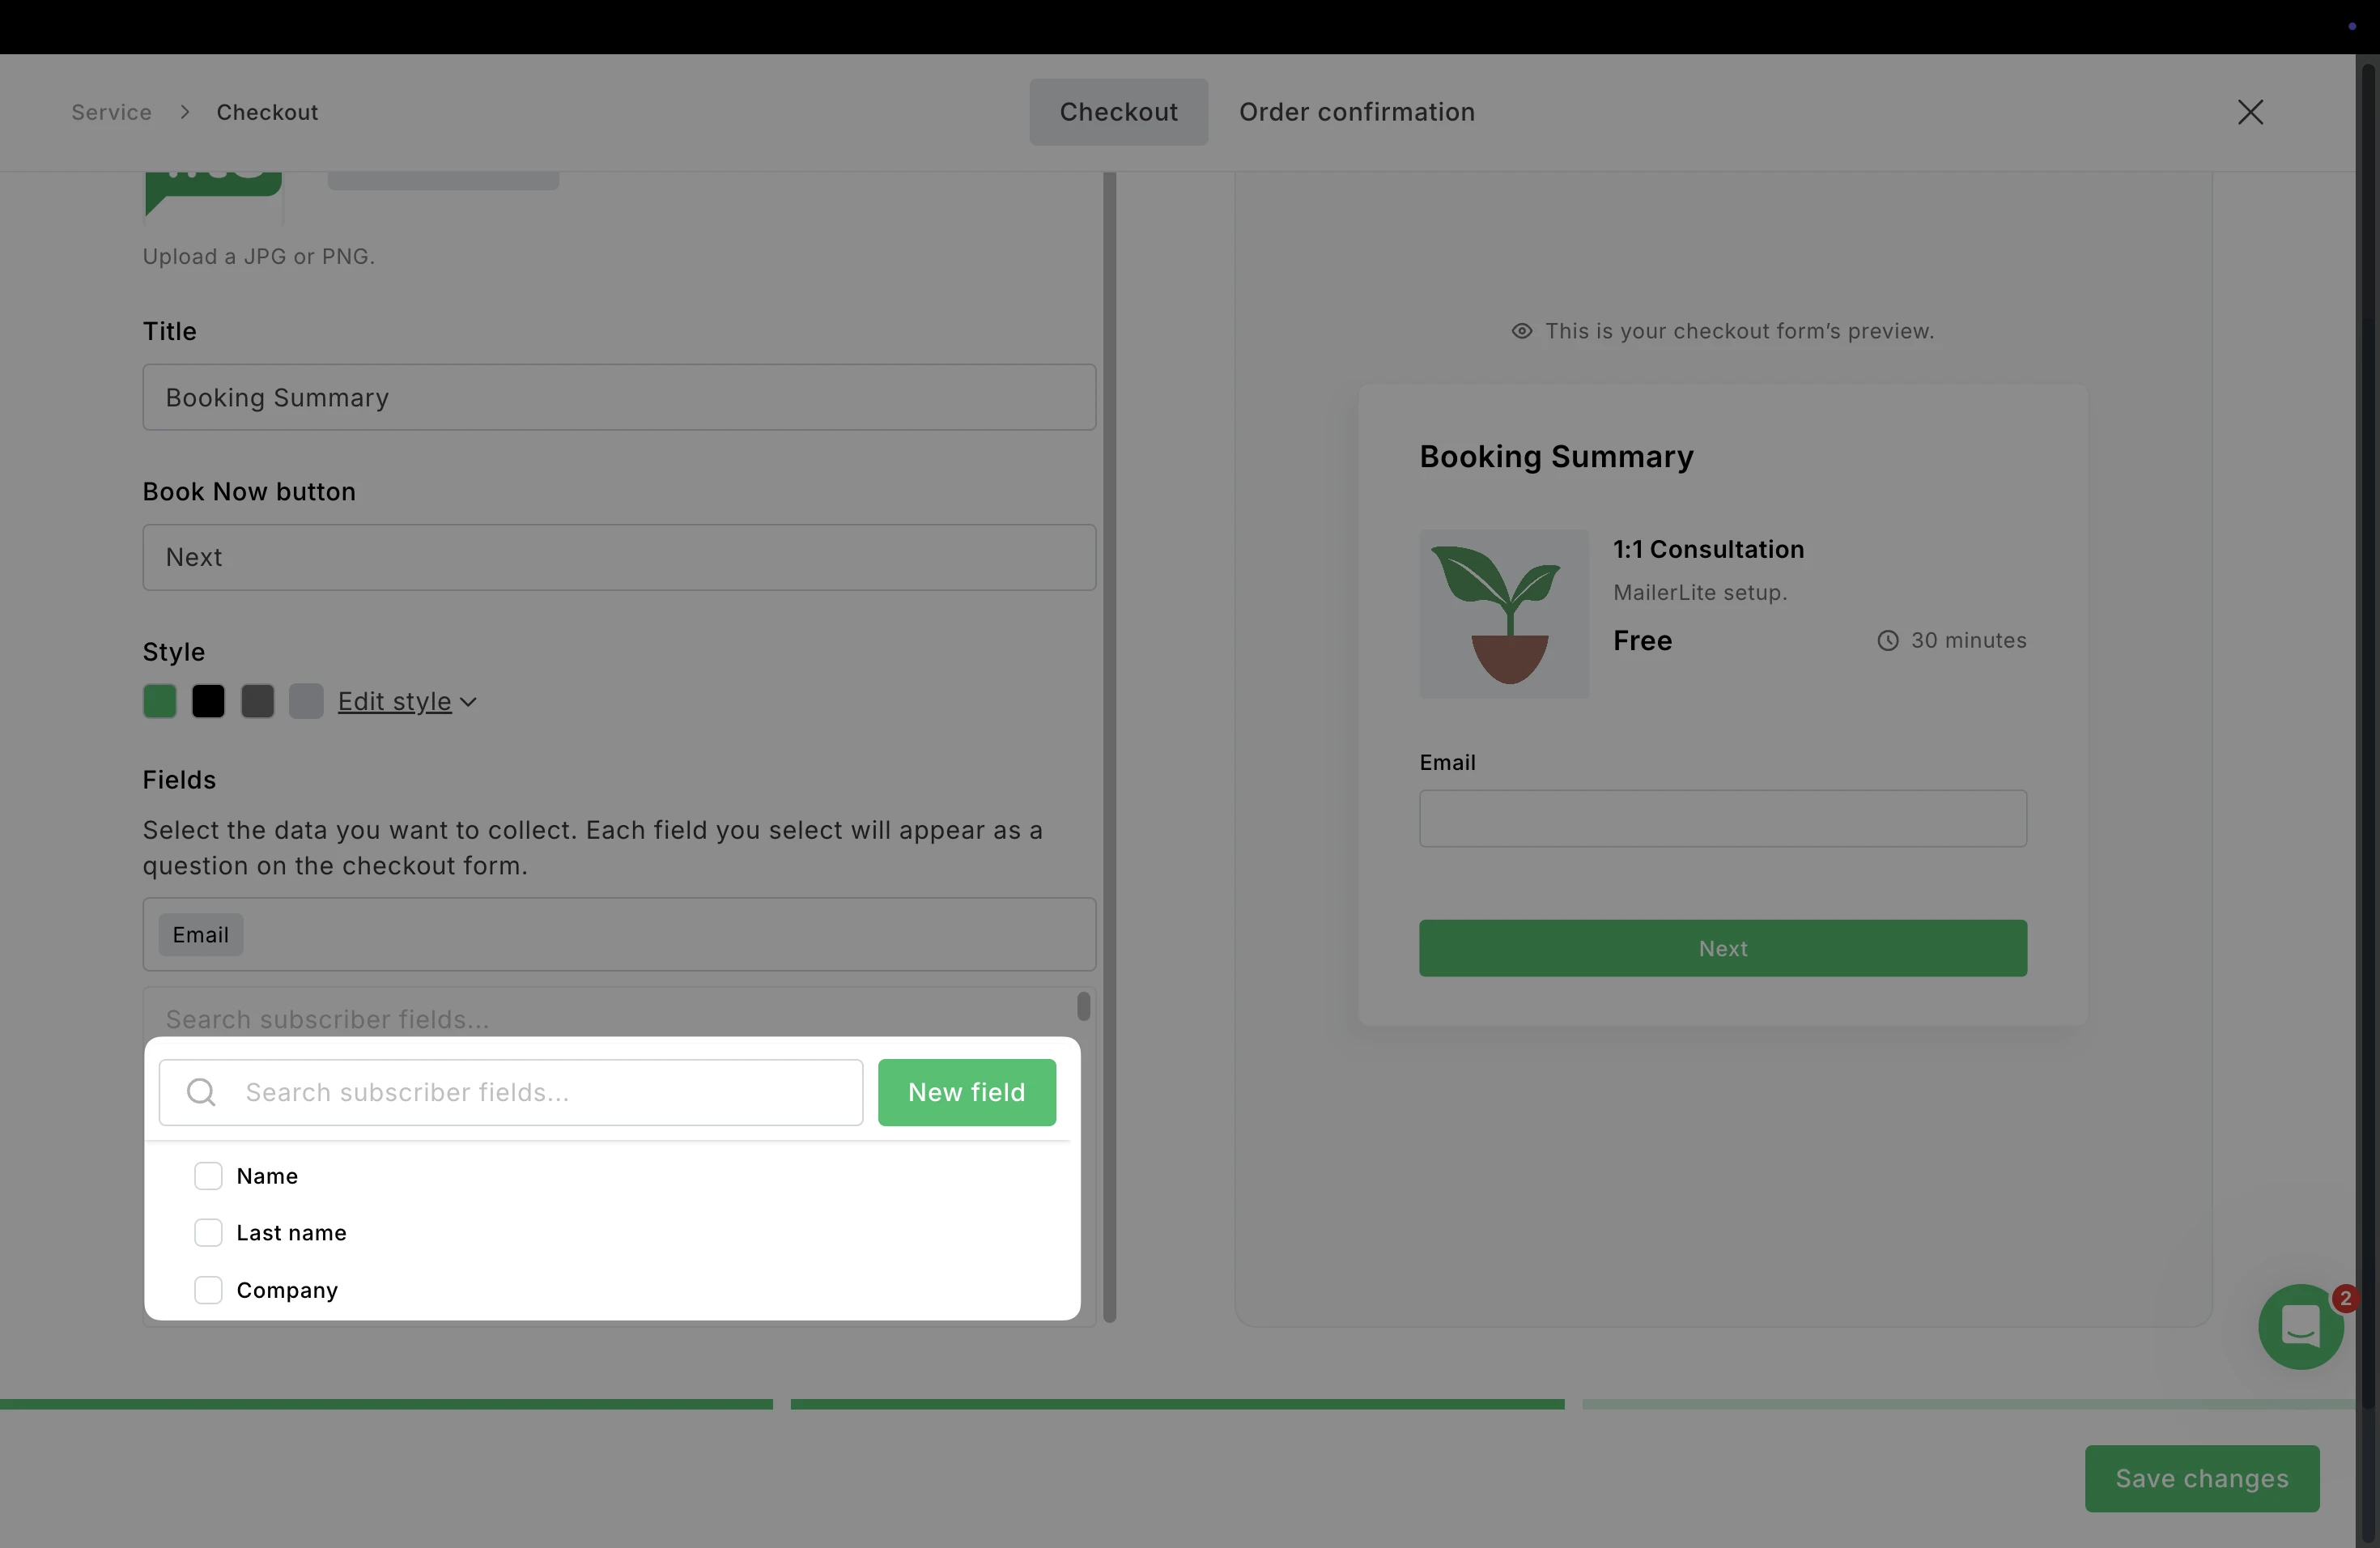
Checkout fields
Select which customer information fields appear on the checkout form. Each field you add will appear as an empty field for the customer to add their information.
Example fields may include Name, Phone number, or create a new subscriber field by clicking New field.
Additional settings
Here, you can configure extra options that affect how customer information is collected and how payments are handled during checkout.
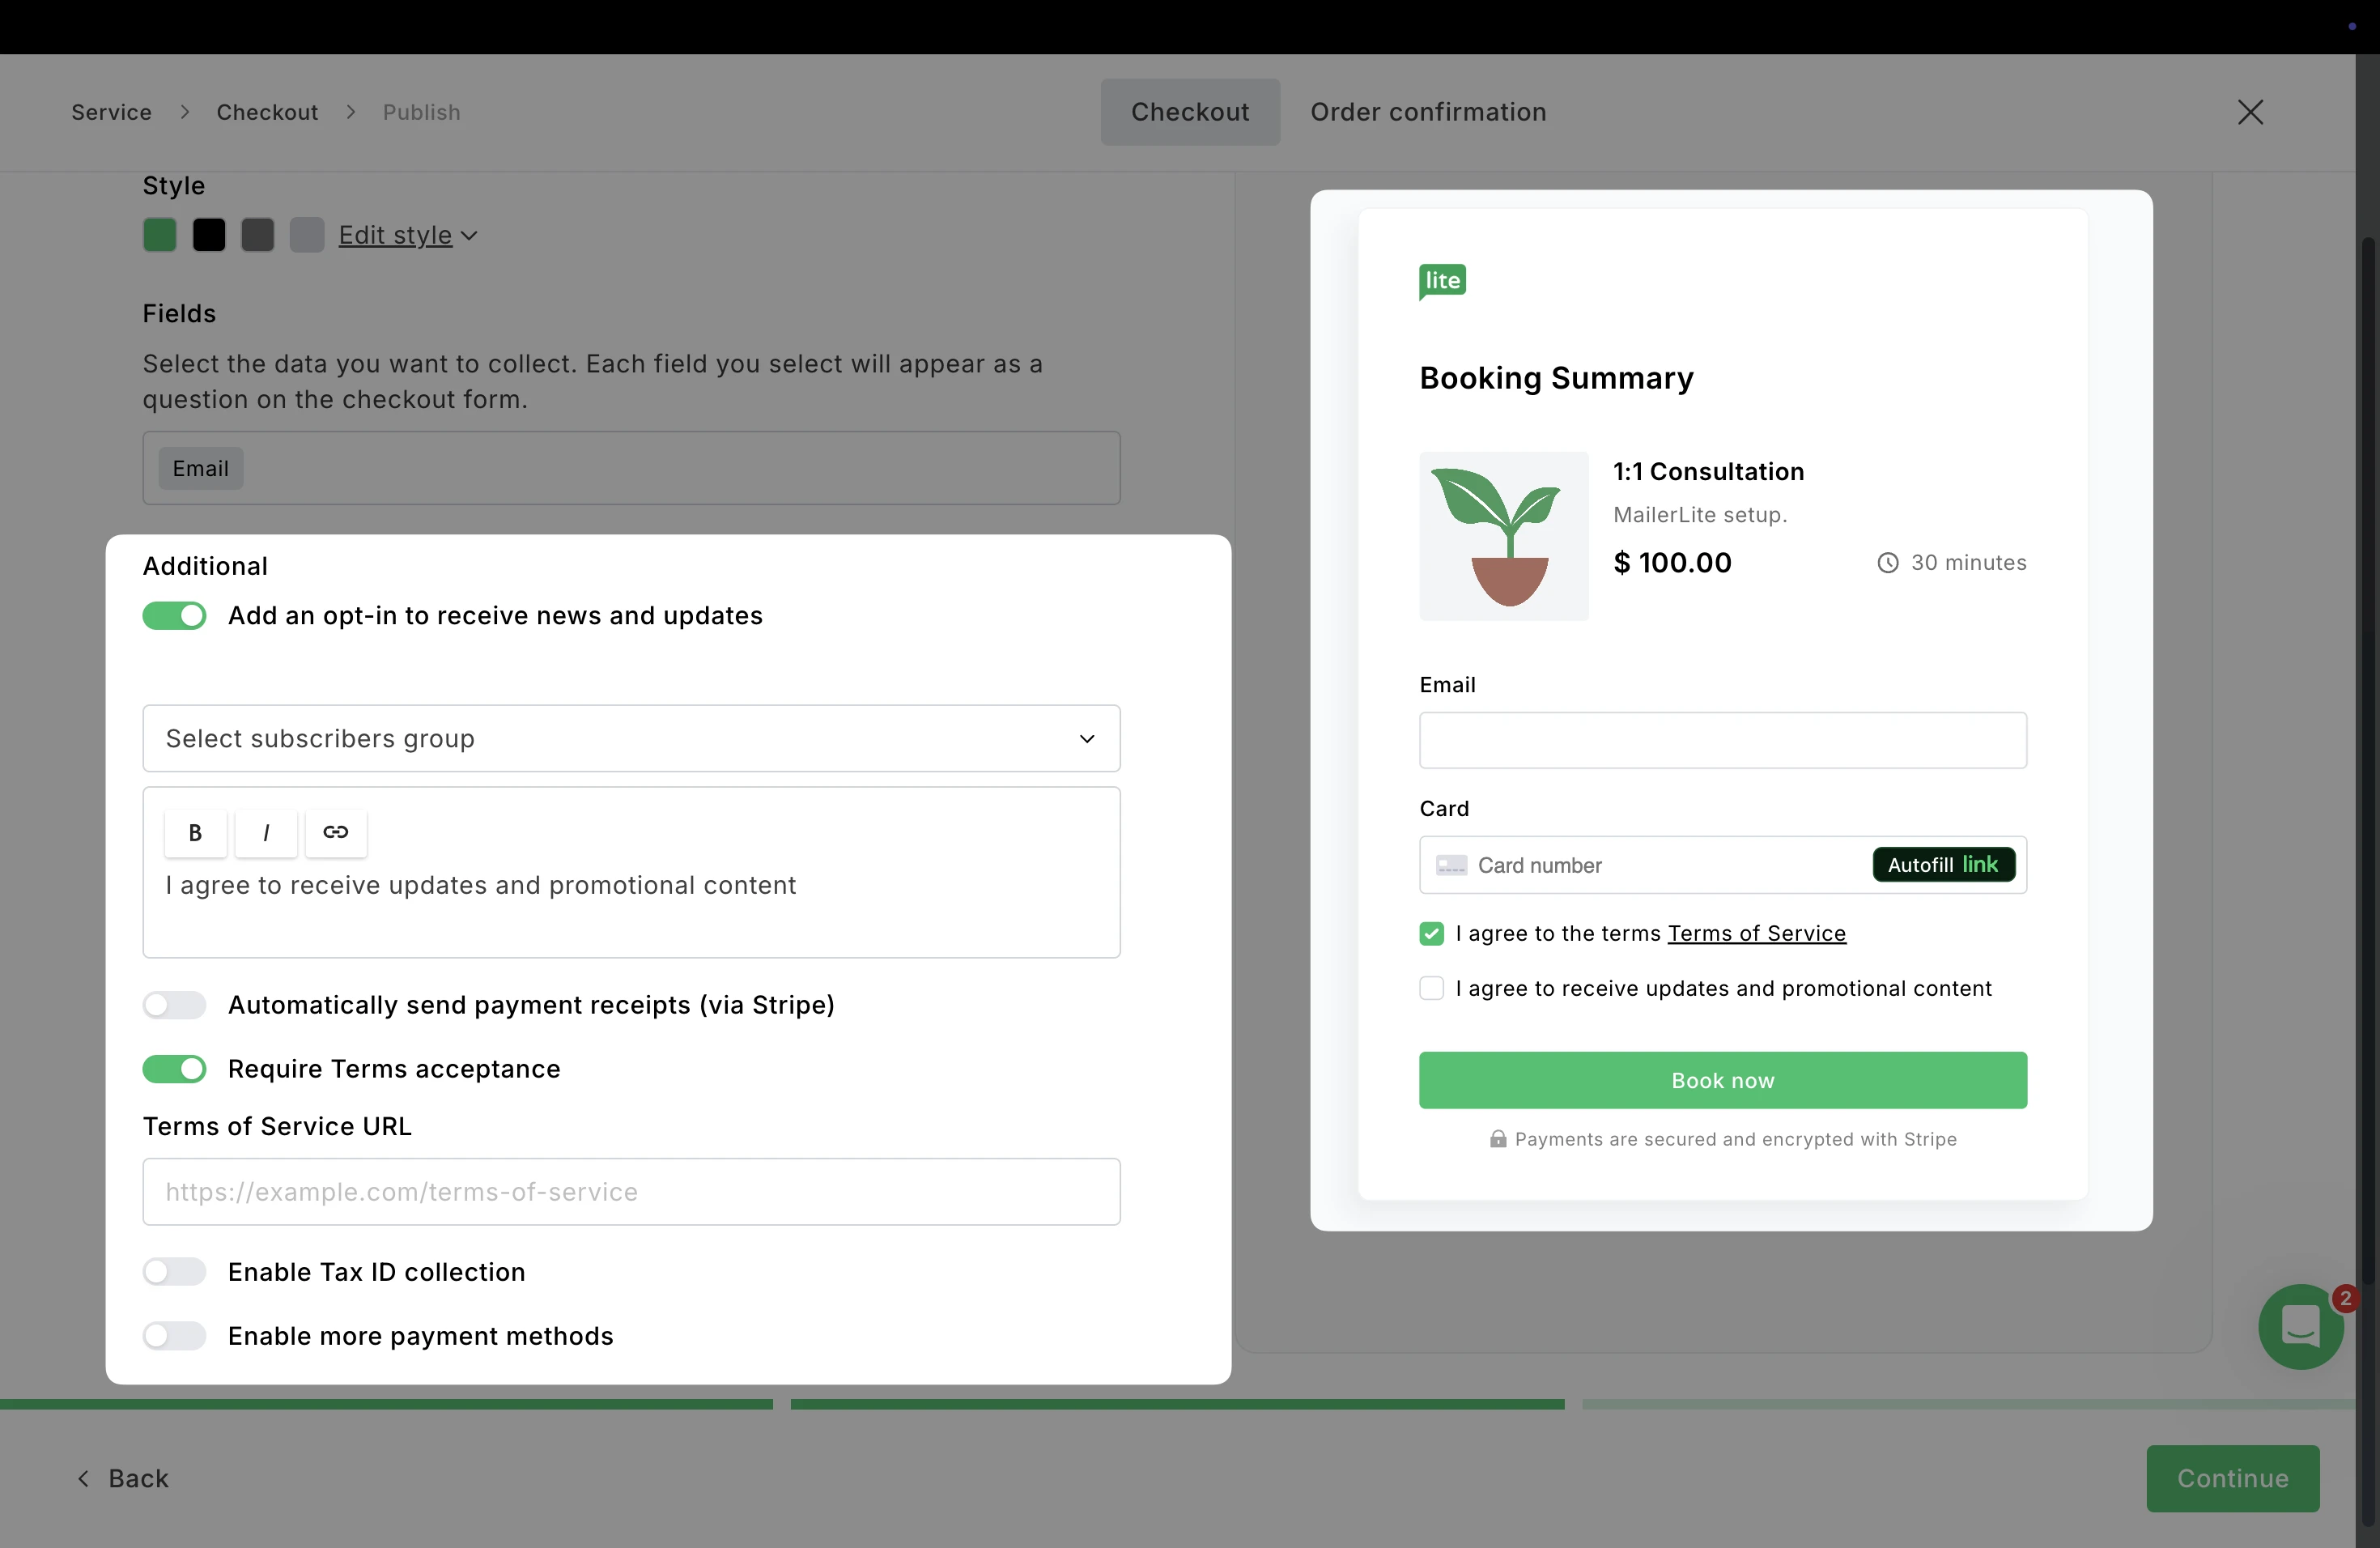
Add an opt-in for news and updates: Add a marketing opt-in checkbox to your checkout page. This allows customers to subscribe to your emails when they book a session.
When enabled, you can:
Select a subscriber group where new contacts will be added
Customize the opt-in message text
Automatically send payment receipts: When enabled, Stripe automatically sends payment receipts to customers after a successful purchase.
Require Terms acceptance: Require customers to agree to your Terms of Service before completing their booking.
Enable Tax ID collection: This option allows you to collect a customer’s Tax ID during checkout.
Enable more payment methods: Enable additional payment methods supported by Stripe, giving customers more ways to complete their booking.
Order confirmation
Navigate over to the Order confirmation page to customize the message customers see after successfully completing their booking.
Here, you can add details such as Title, Description, and customize the text for the Done button.
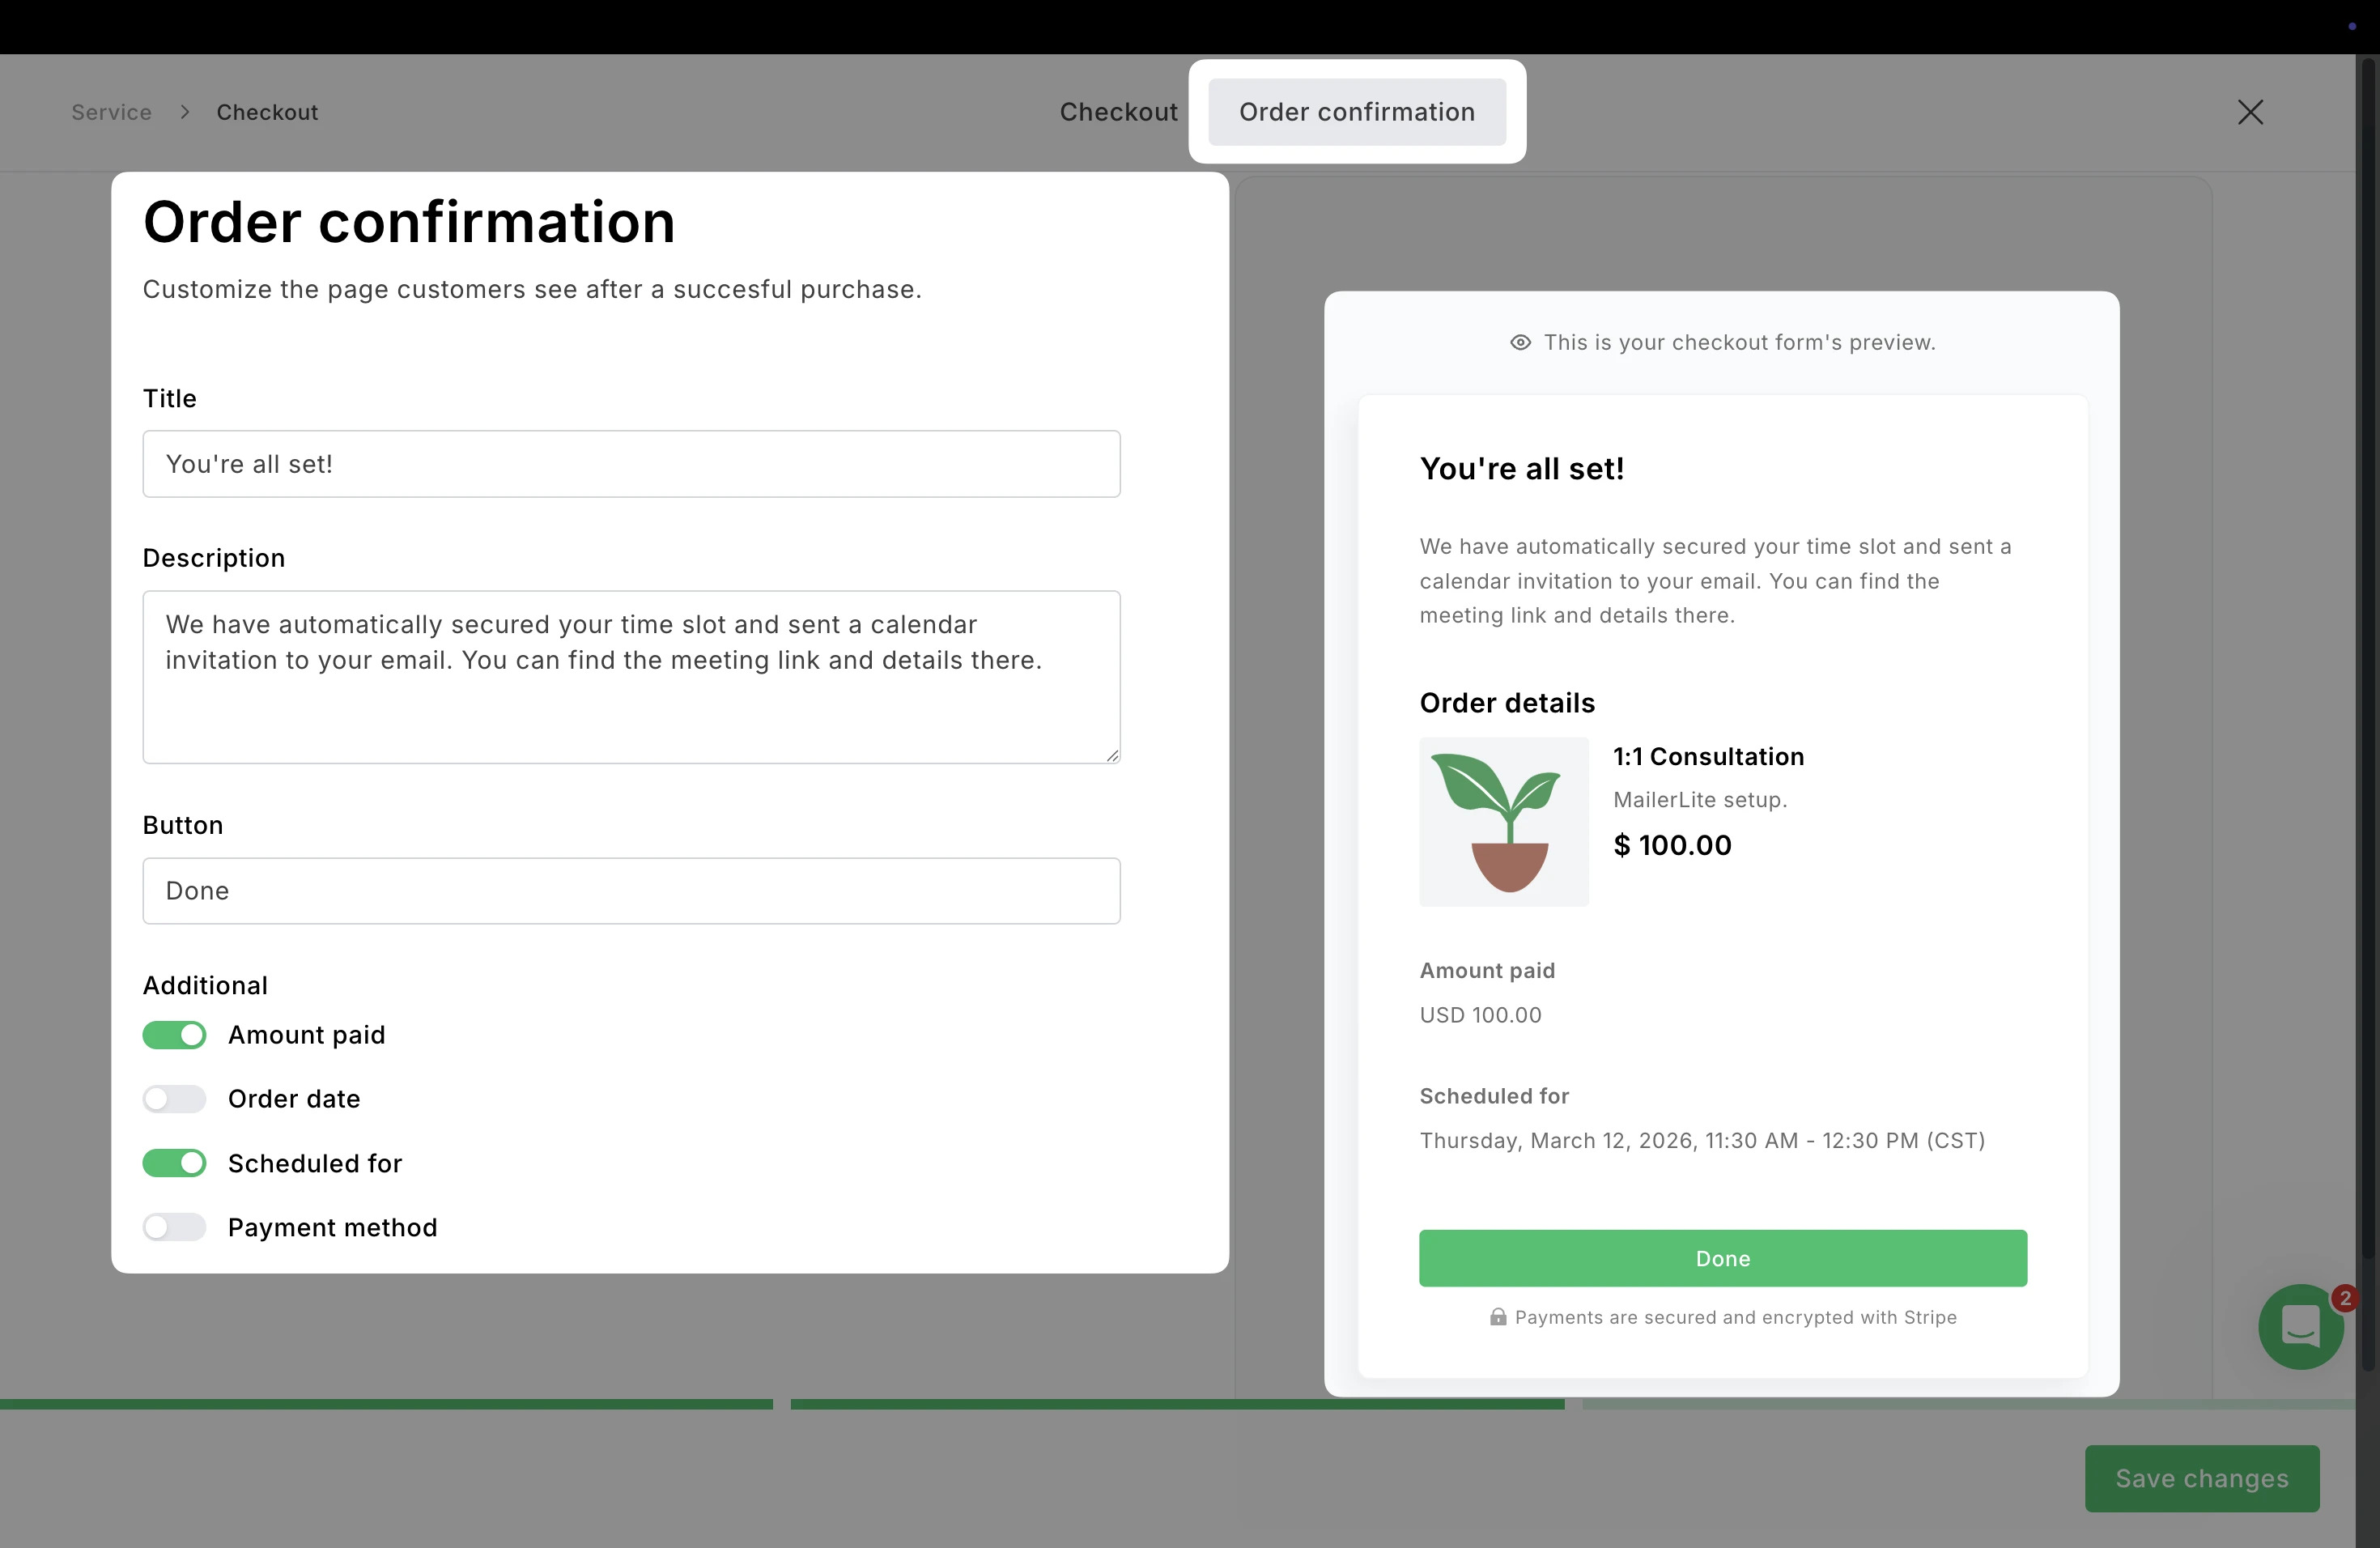
Under Additional, you can choose which booking details are displayed on the confirmation page such as Amount paid, Order date, Scheduled time, and Payment method.
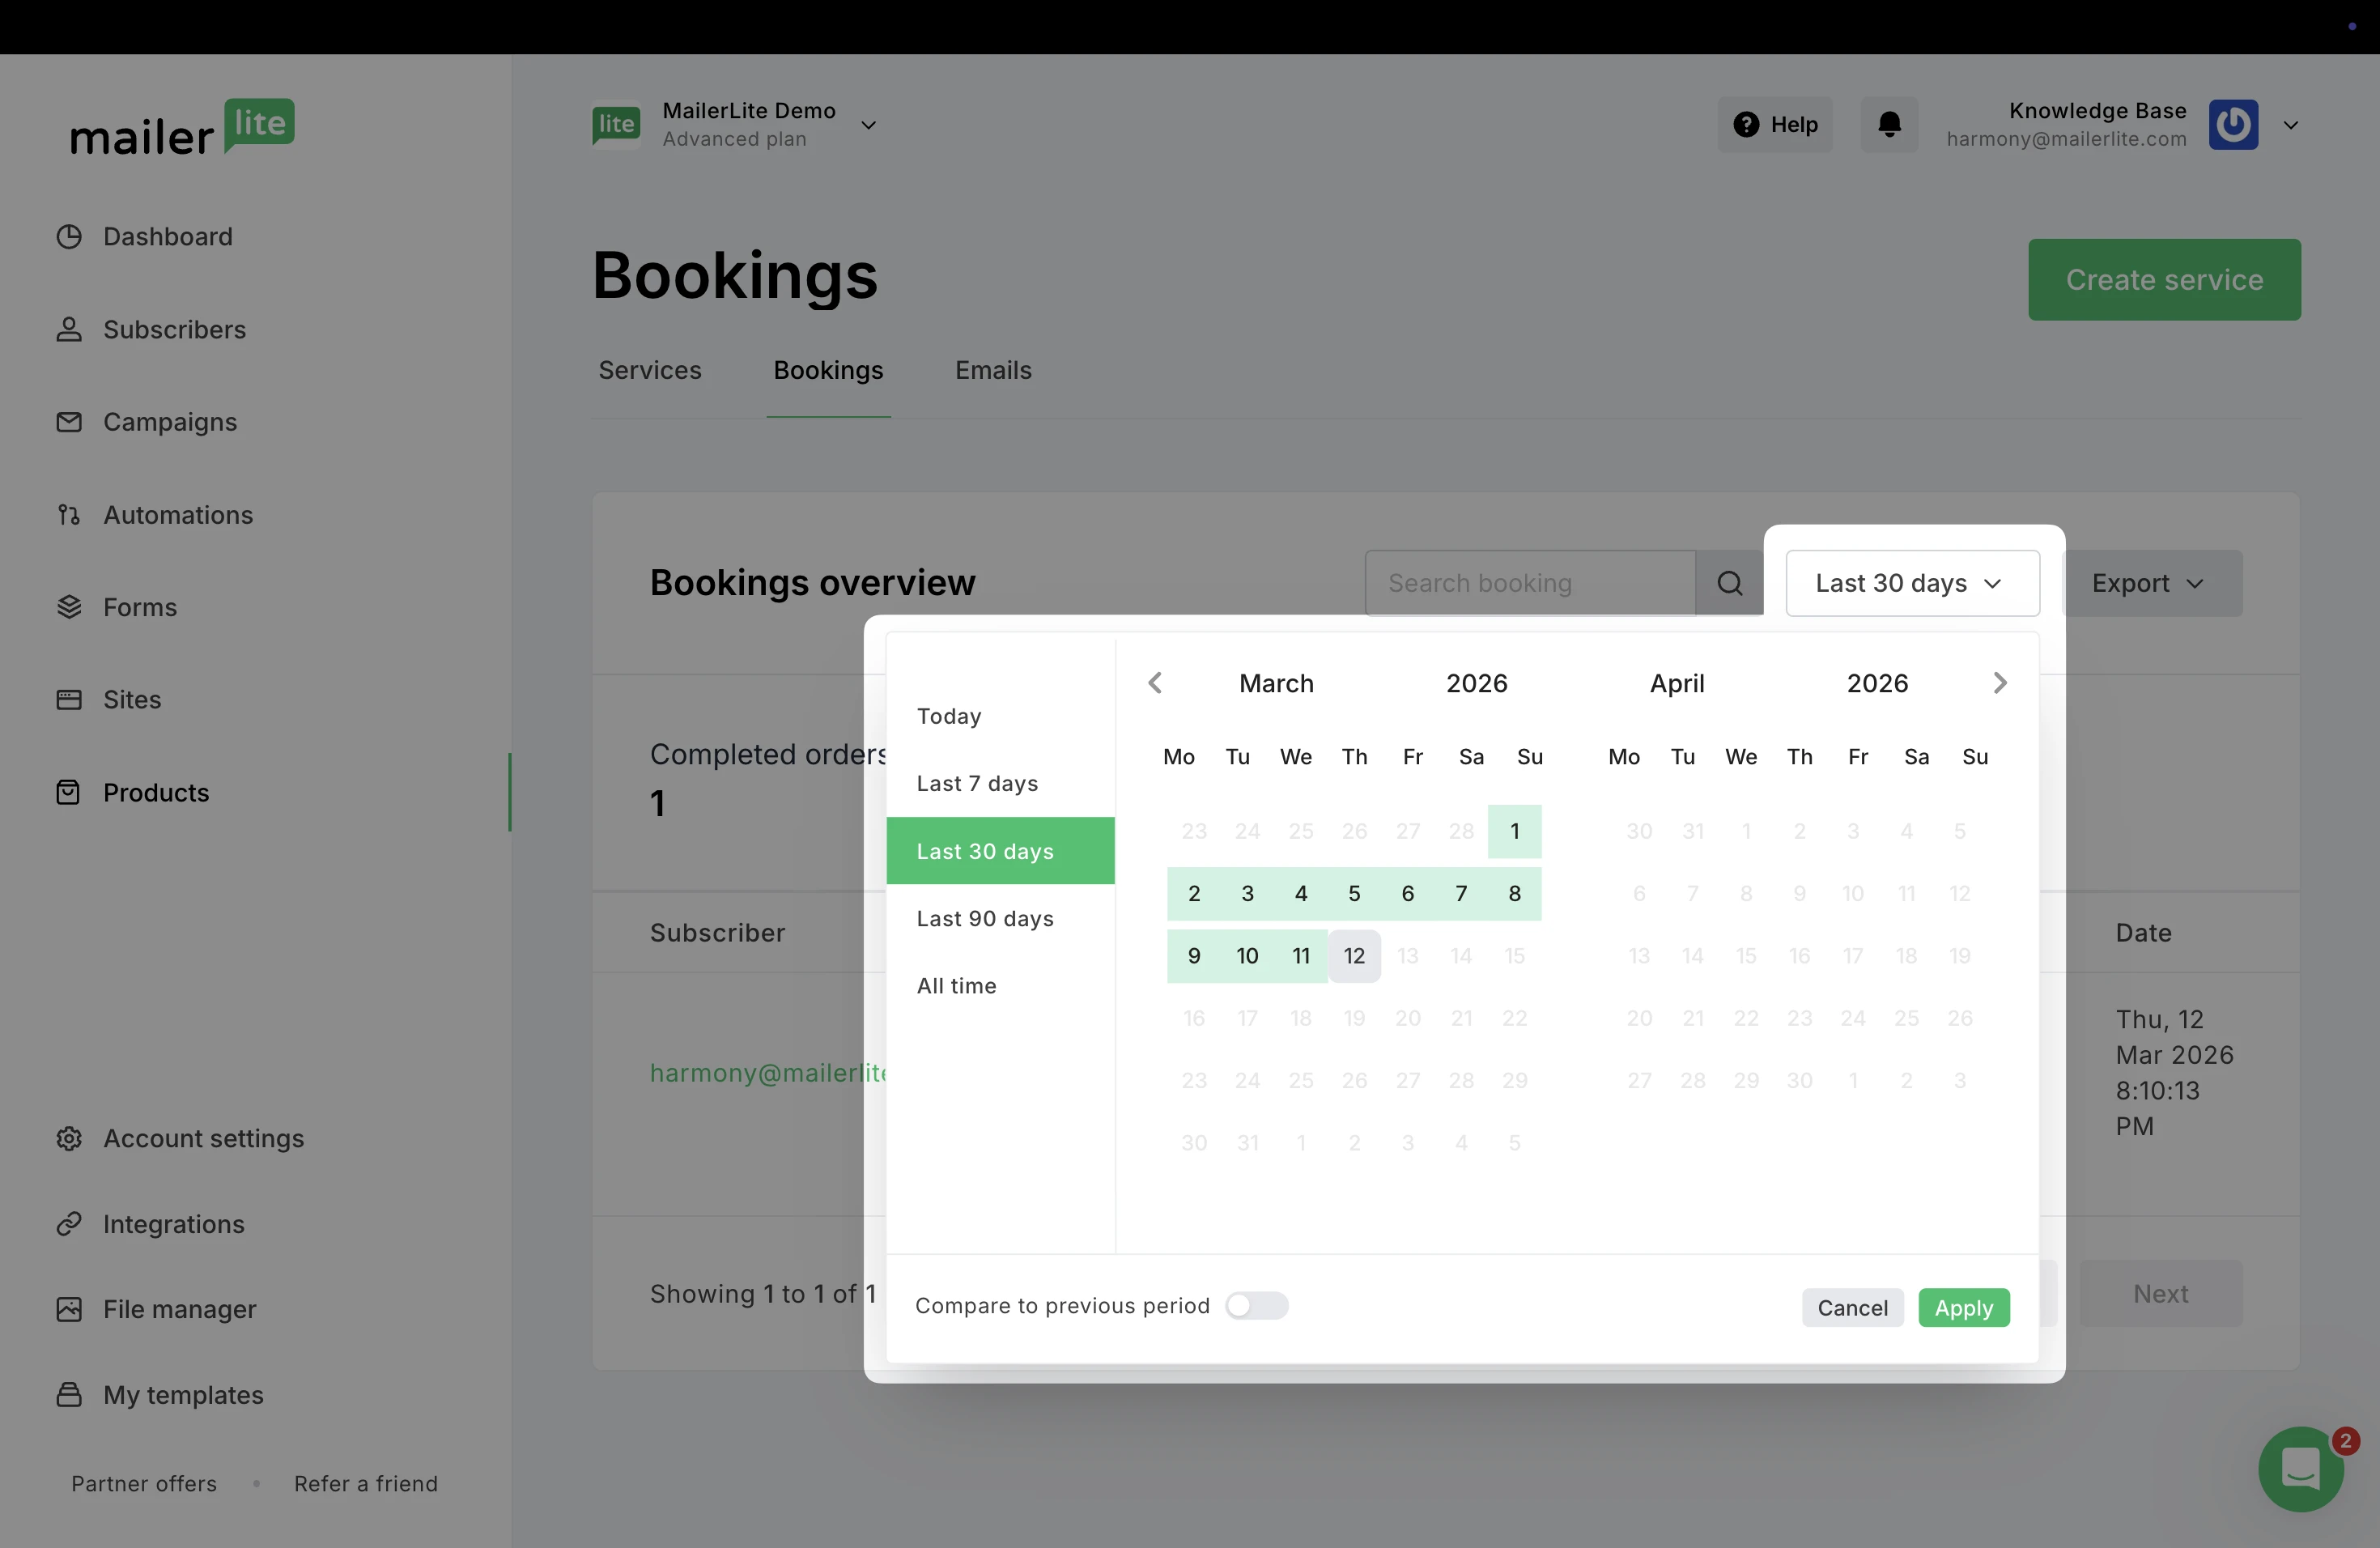
How to track bookings
Navigate over the Bookings tab to track all of your appointments.

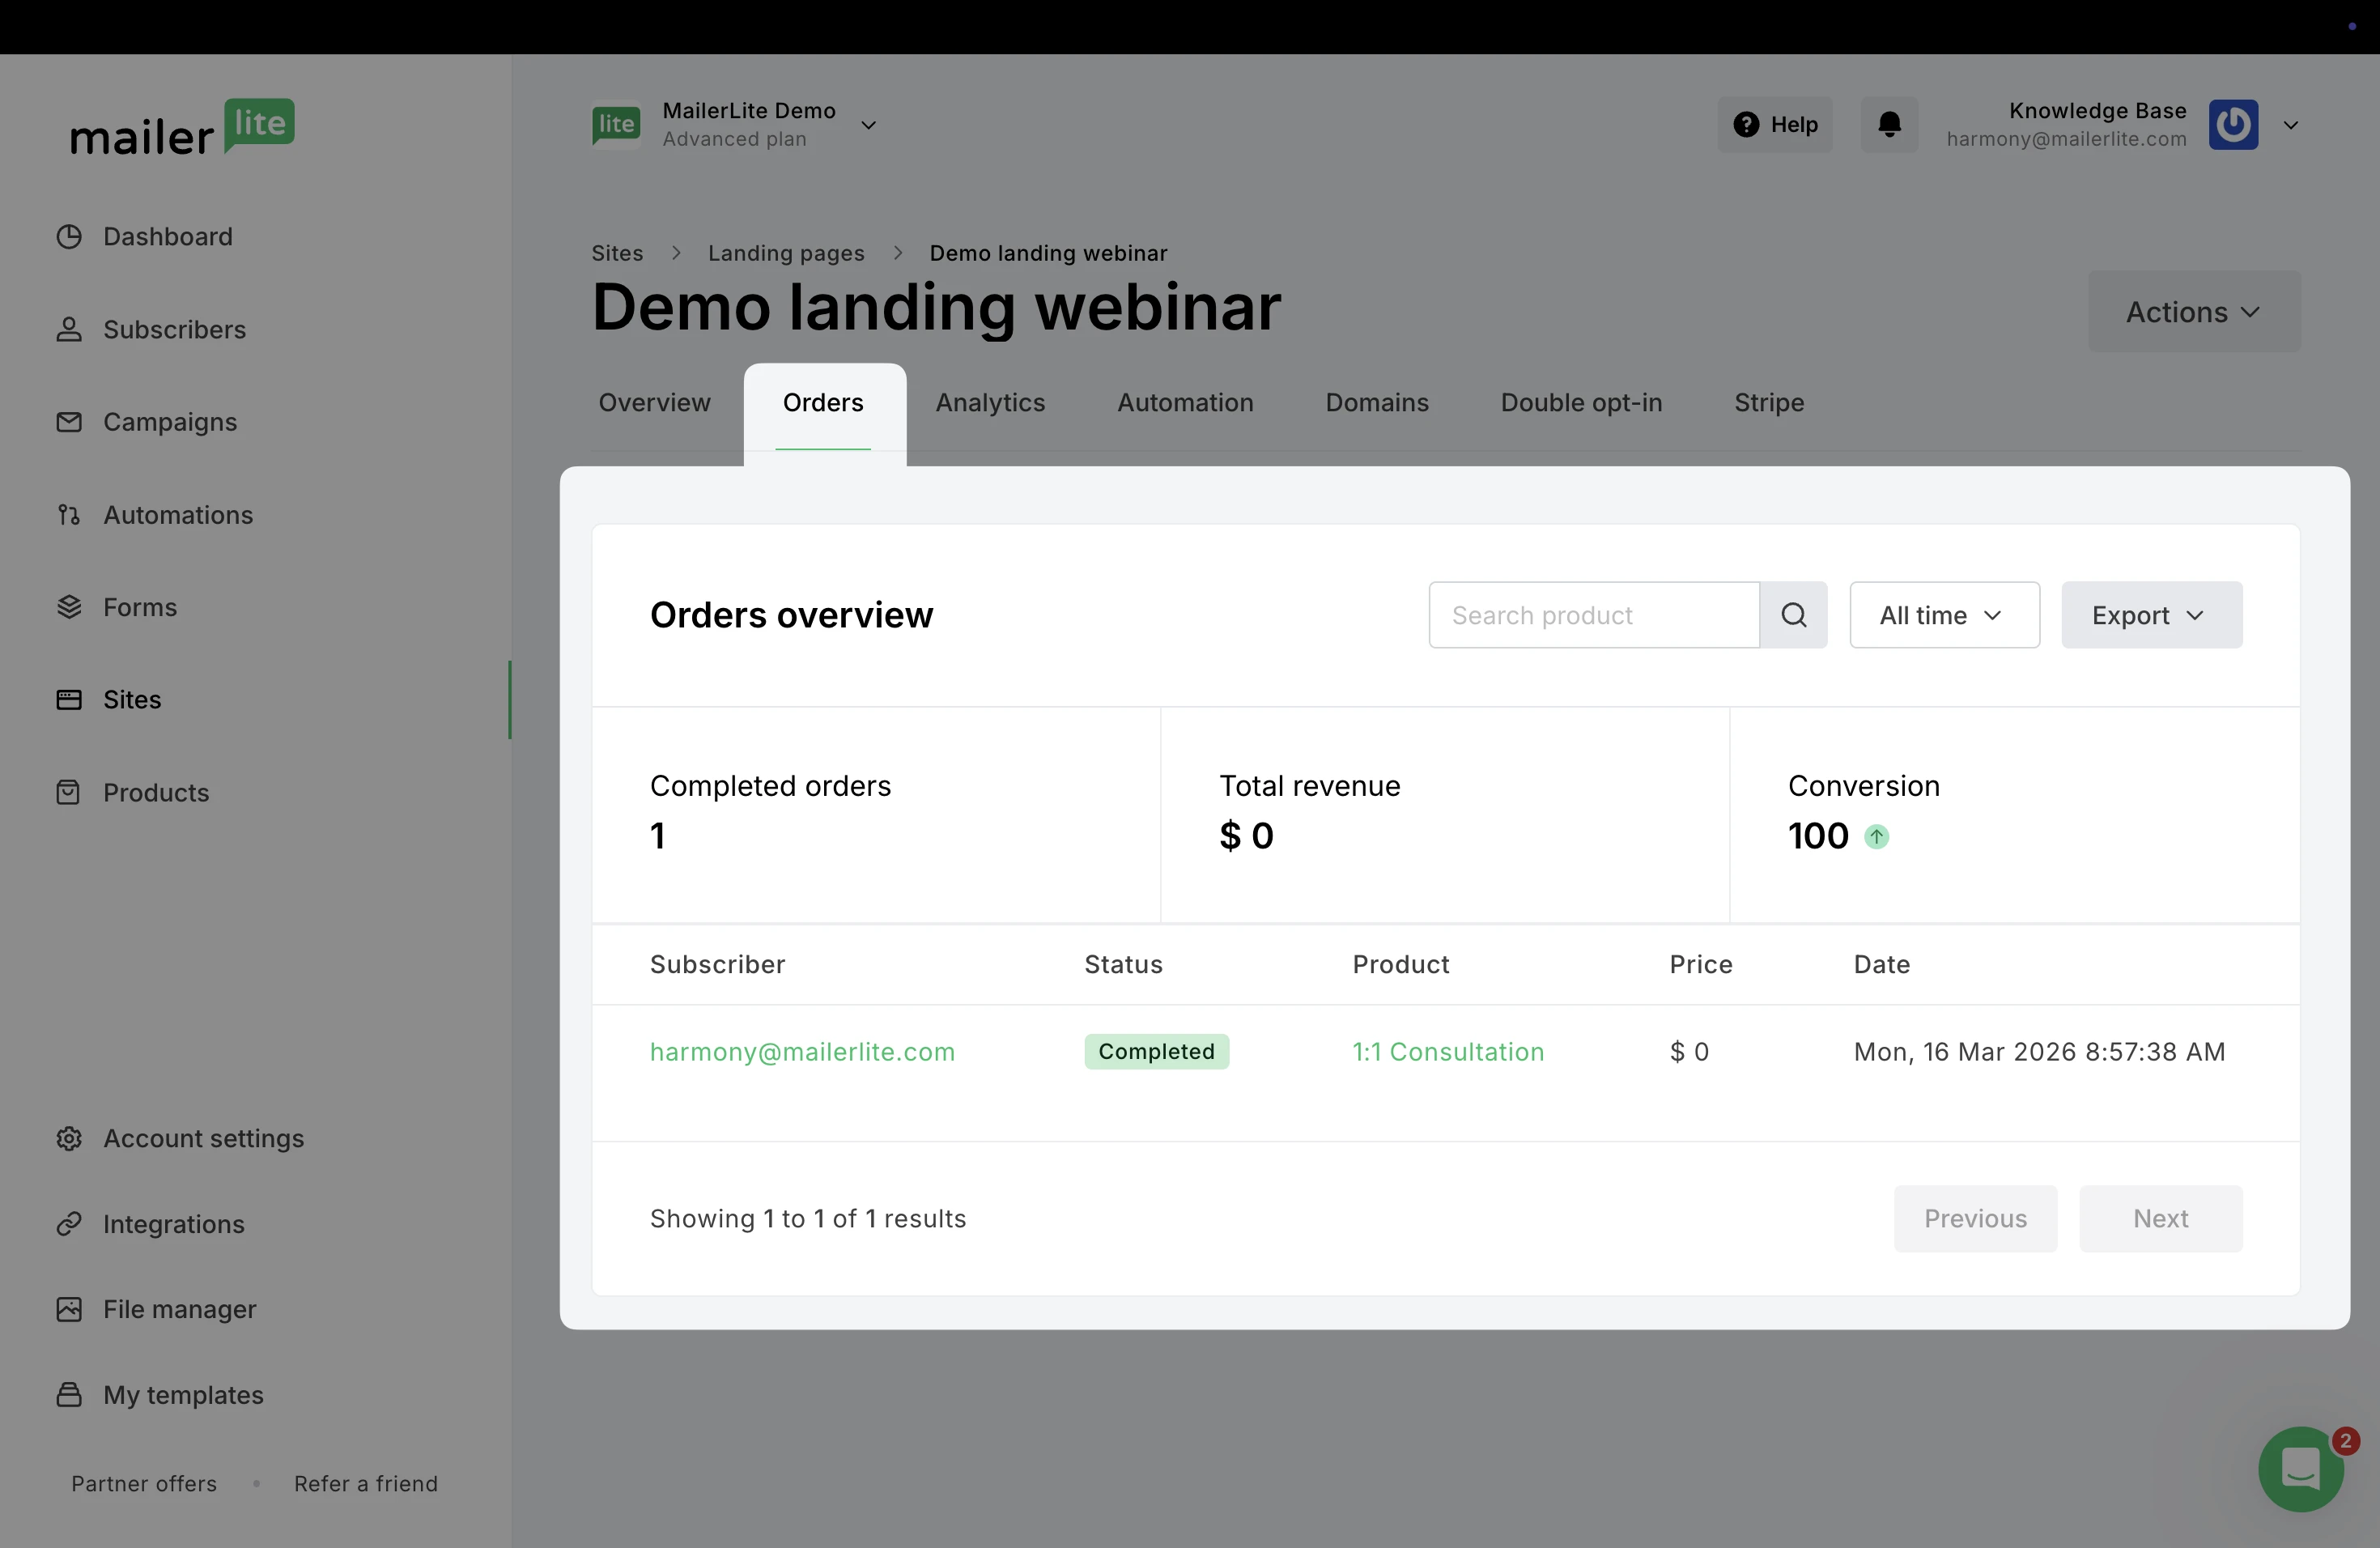
Here, you can see a quick summary of all appointments booked through your services. Monitor upcoming sessions, check booking details, and track the performance of your services.
At the top you’ll see key booking metrics:
Completed orders: The number of appointments that have been successfully booked.
Total revenue: The total amount earned from bookings during the selected time period.
Below the overview, the bookings table lists every appointment and includes important details such as the name of the subscriber and the product they booked.
Search bookings to quickly find a specific customer or booking, and filter by time to view bookings from a specific period.
Editing the confirmation email
In the Email tab, you can customize the confirmation email that is automatically sent to customers after they book one of your services.
The Preview section shows how the confirmation email will look to your customer.
By default, this email includes a confirmation message letting the customer know their booking is secured and that a calendar invitation was sent to their inbox.
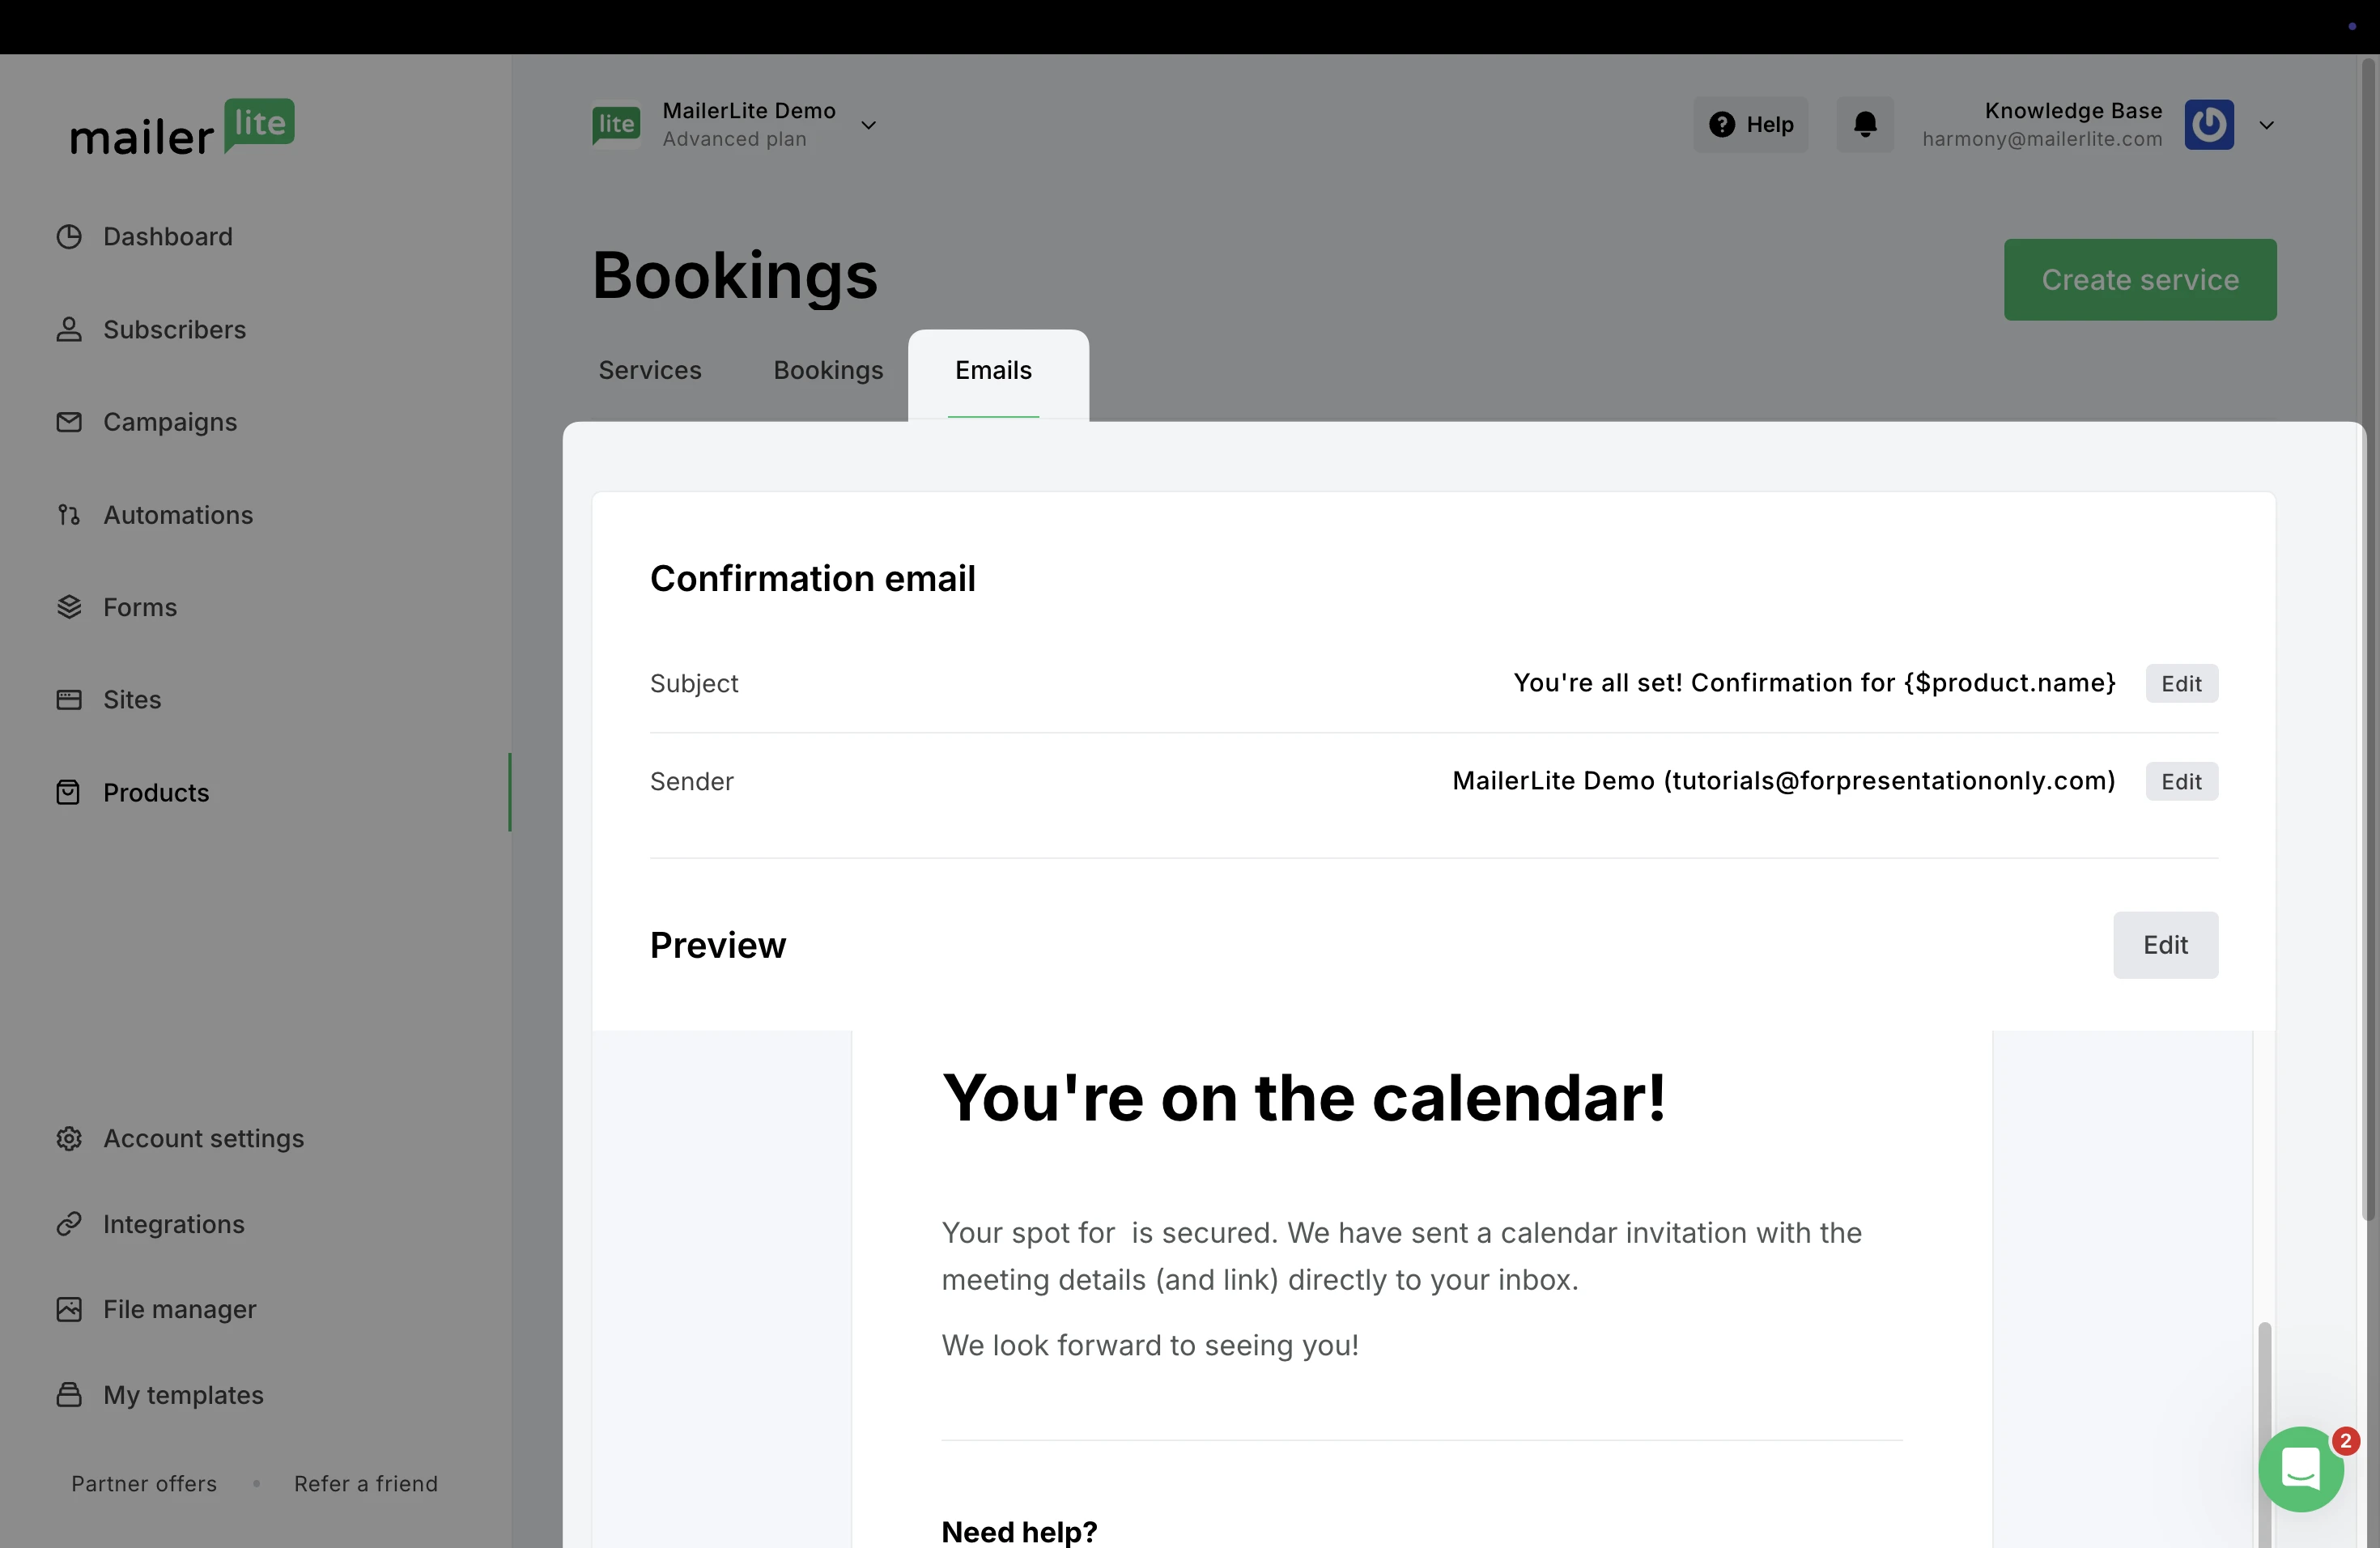
To change the layout or text, click Edit to open the email editor.
Promote your booking
You have several ways to promote your booking product:
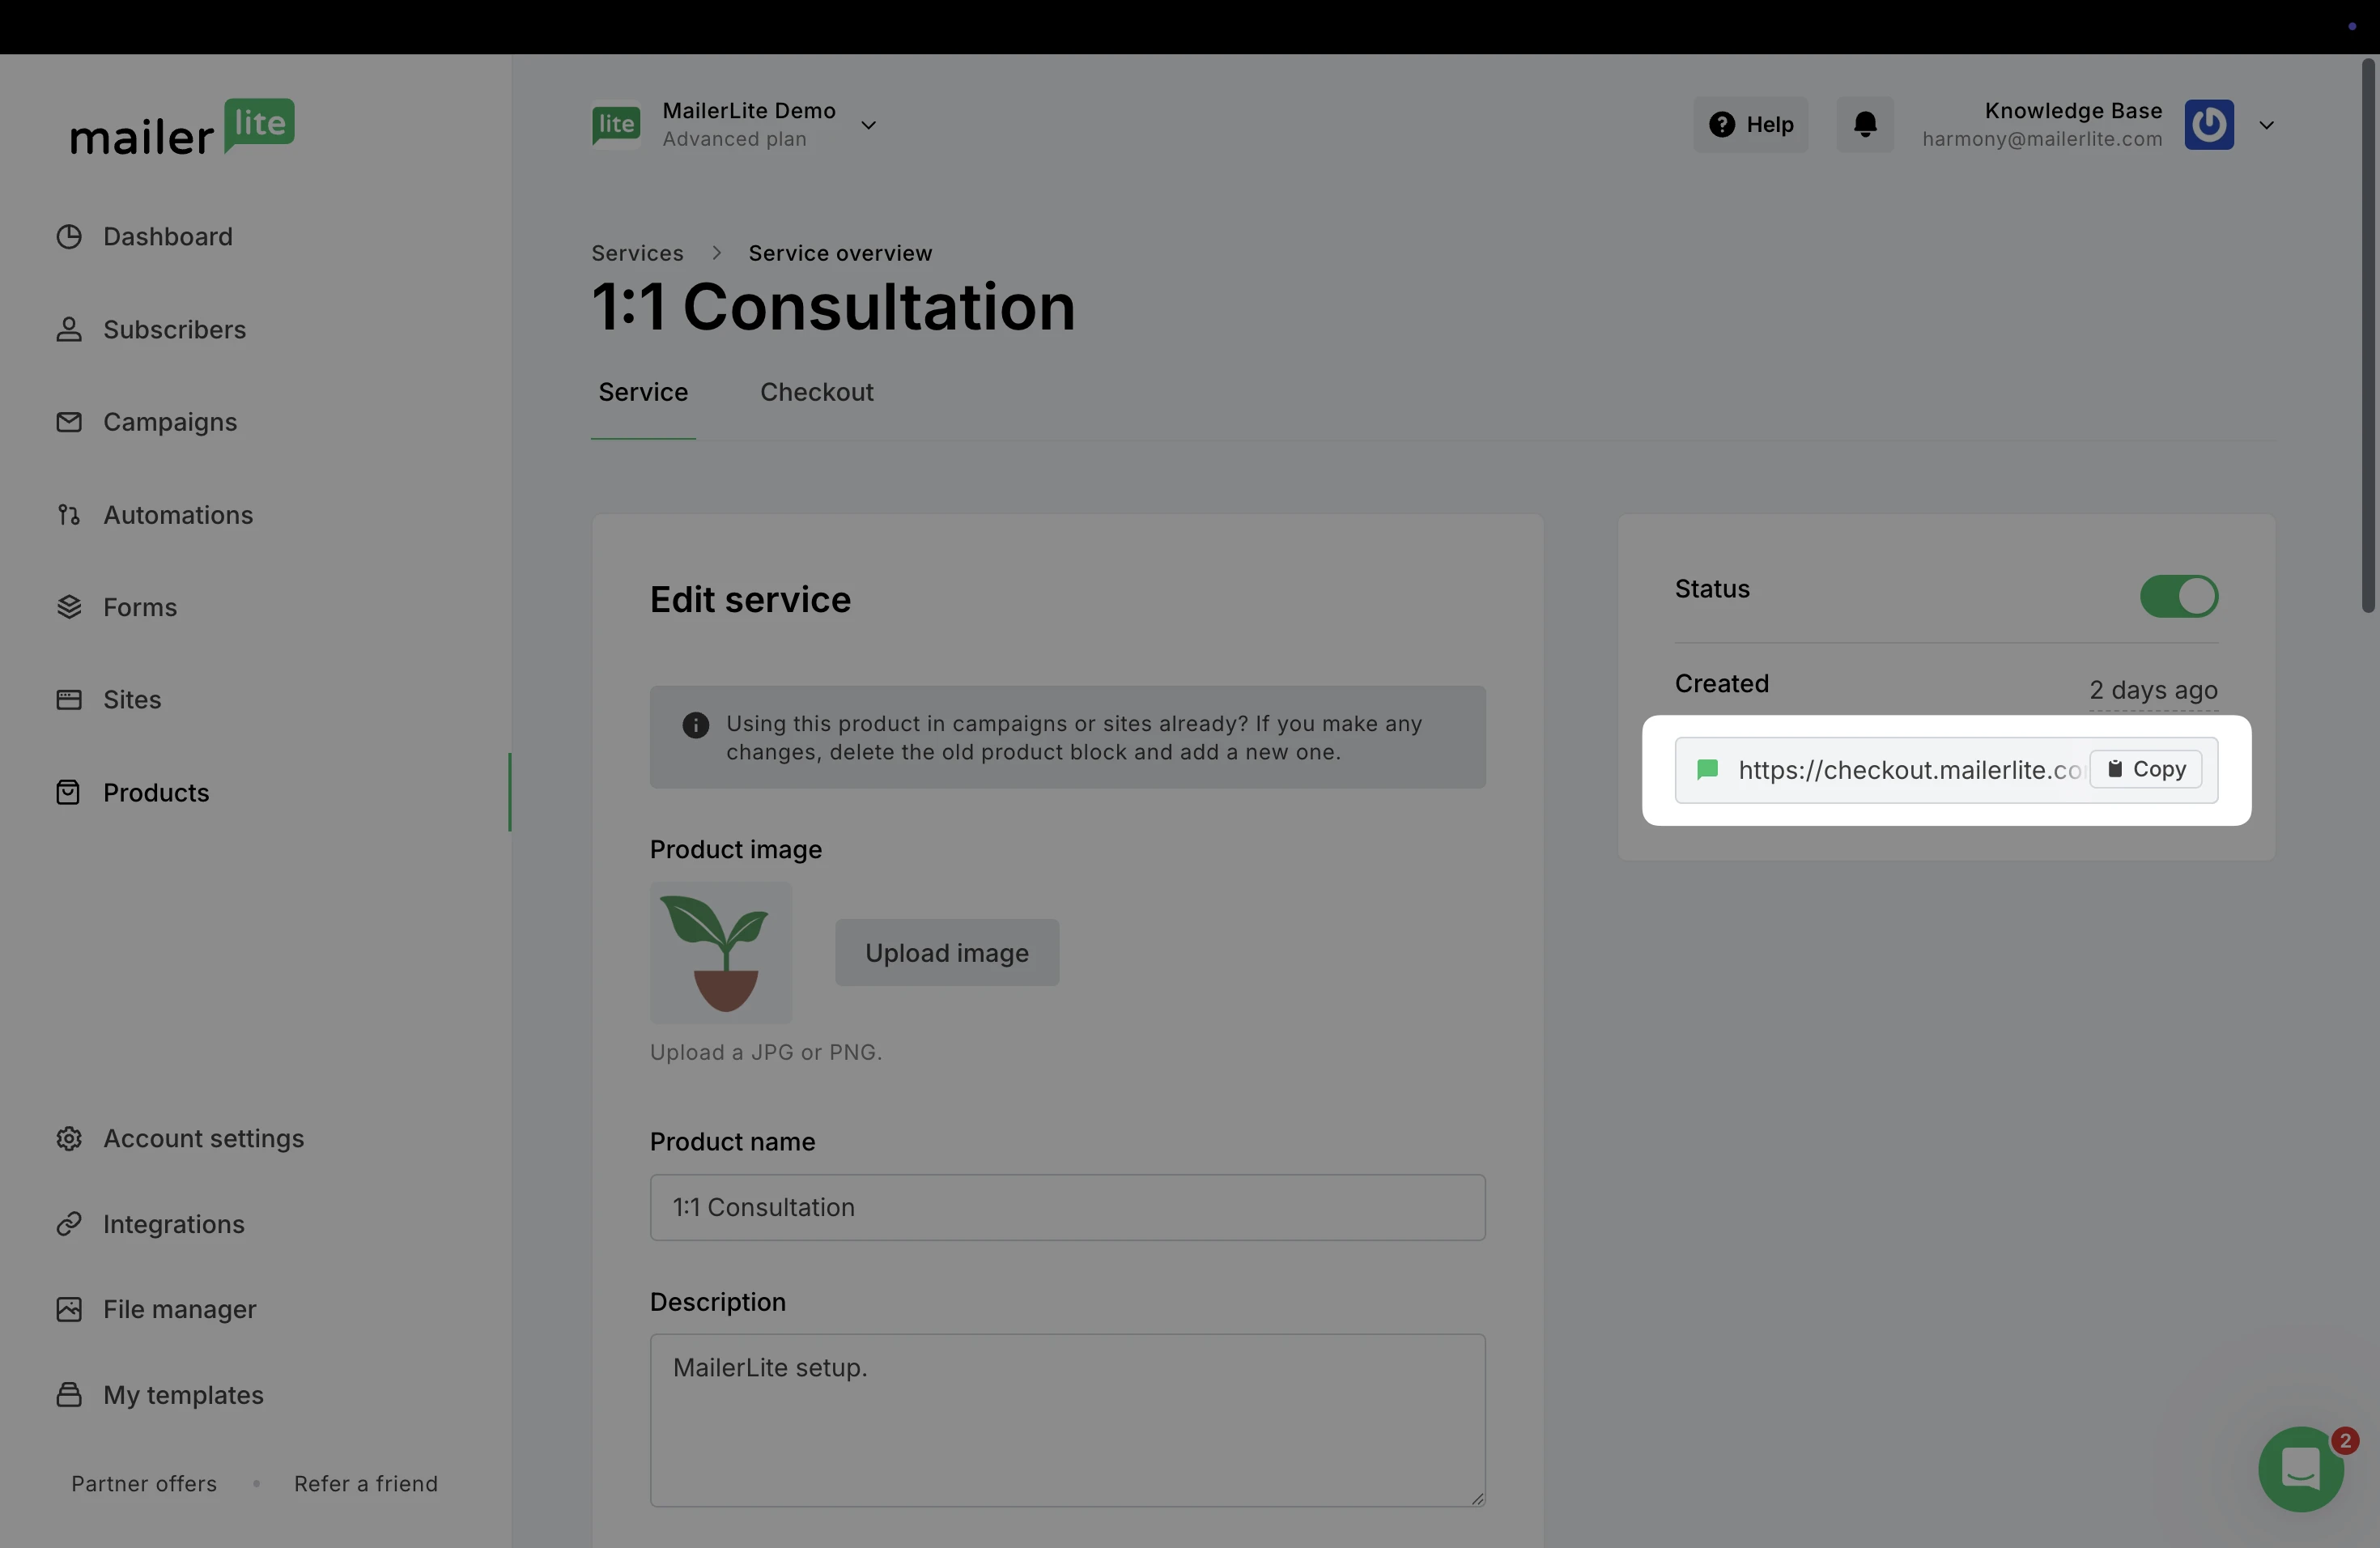
Copy checkout URL
To quickly share your product outside of MailerLite (such as social media), copy its checkout link as a URL. When a buyer clicks this link, the checkout page will open and the rest of the purchase flow remains the same.
To locate this:
In the Products tab, click Edit for the product you wish to promote.

2. Copy the URL on the right.
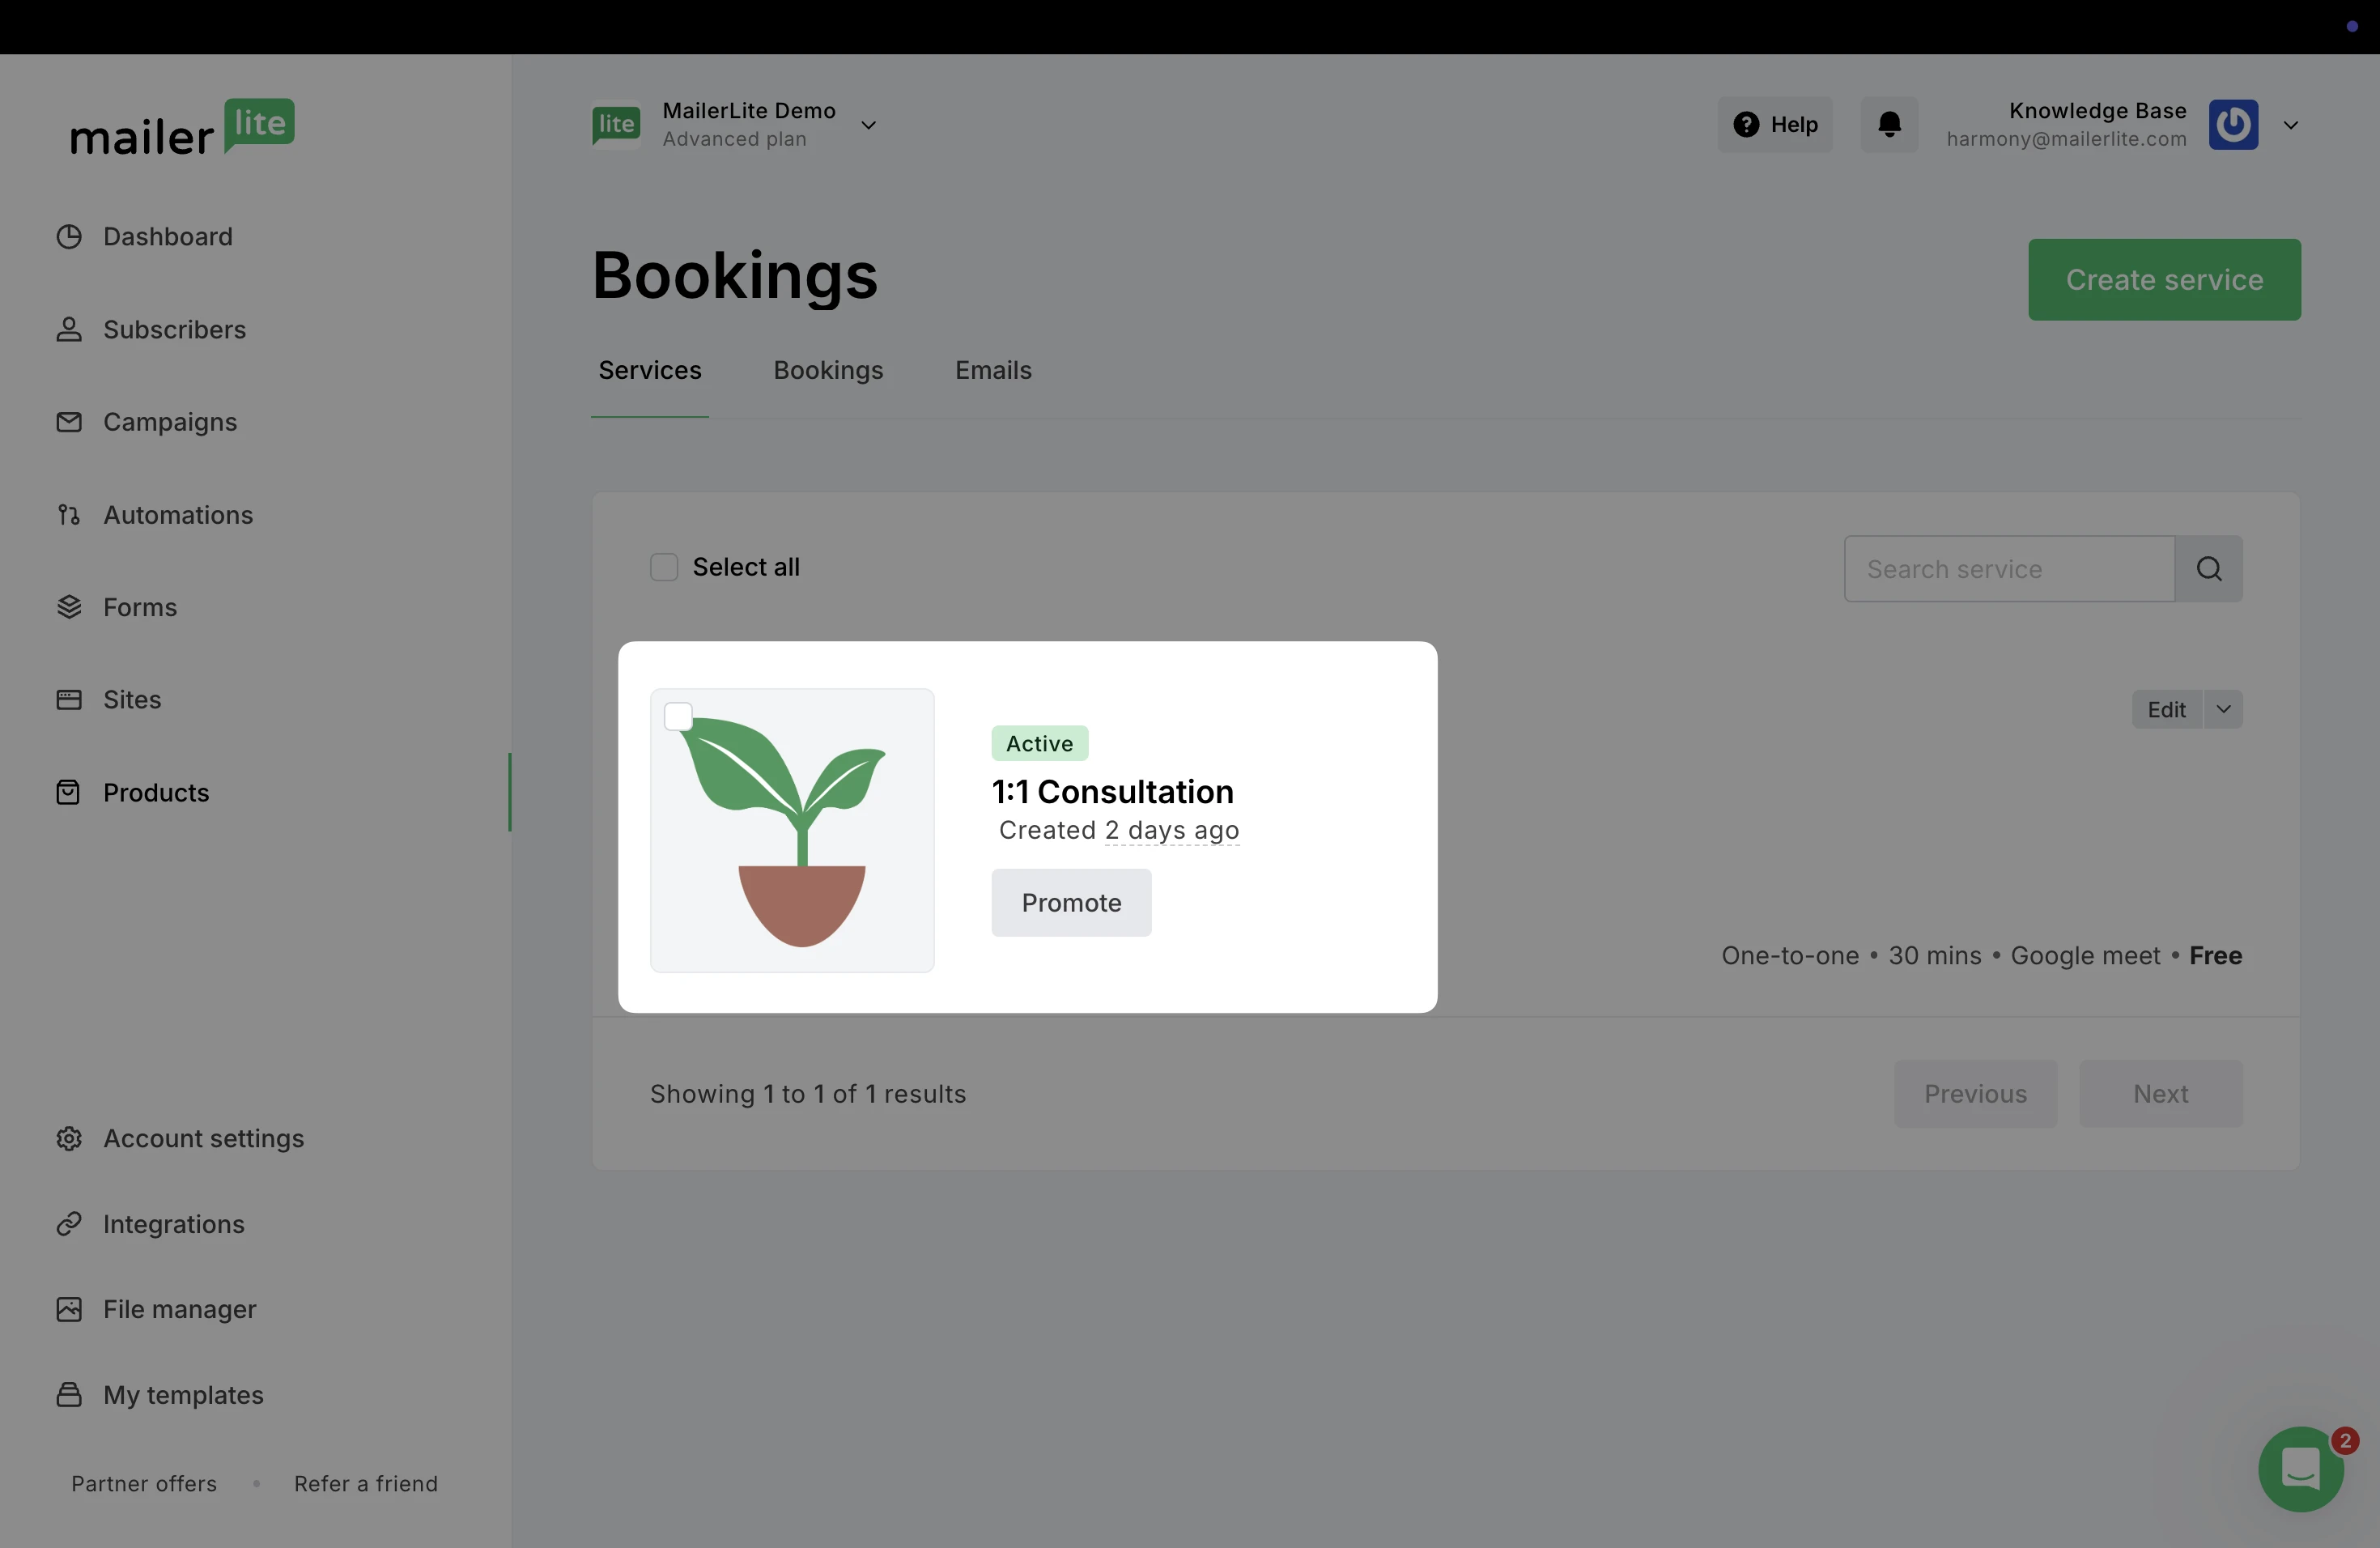
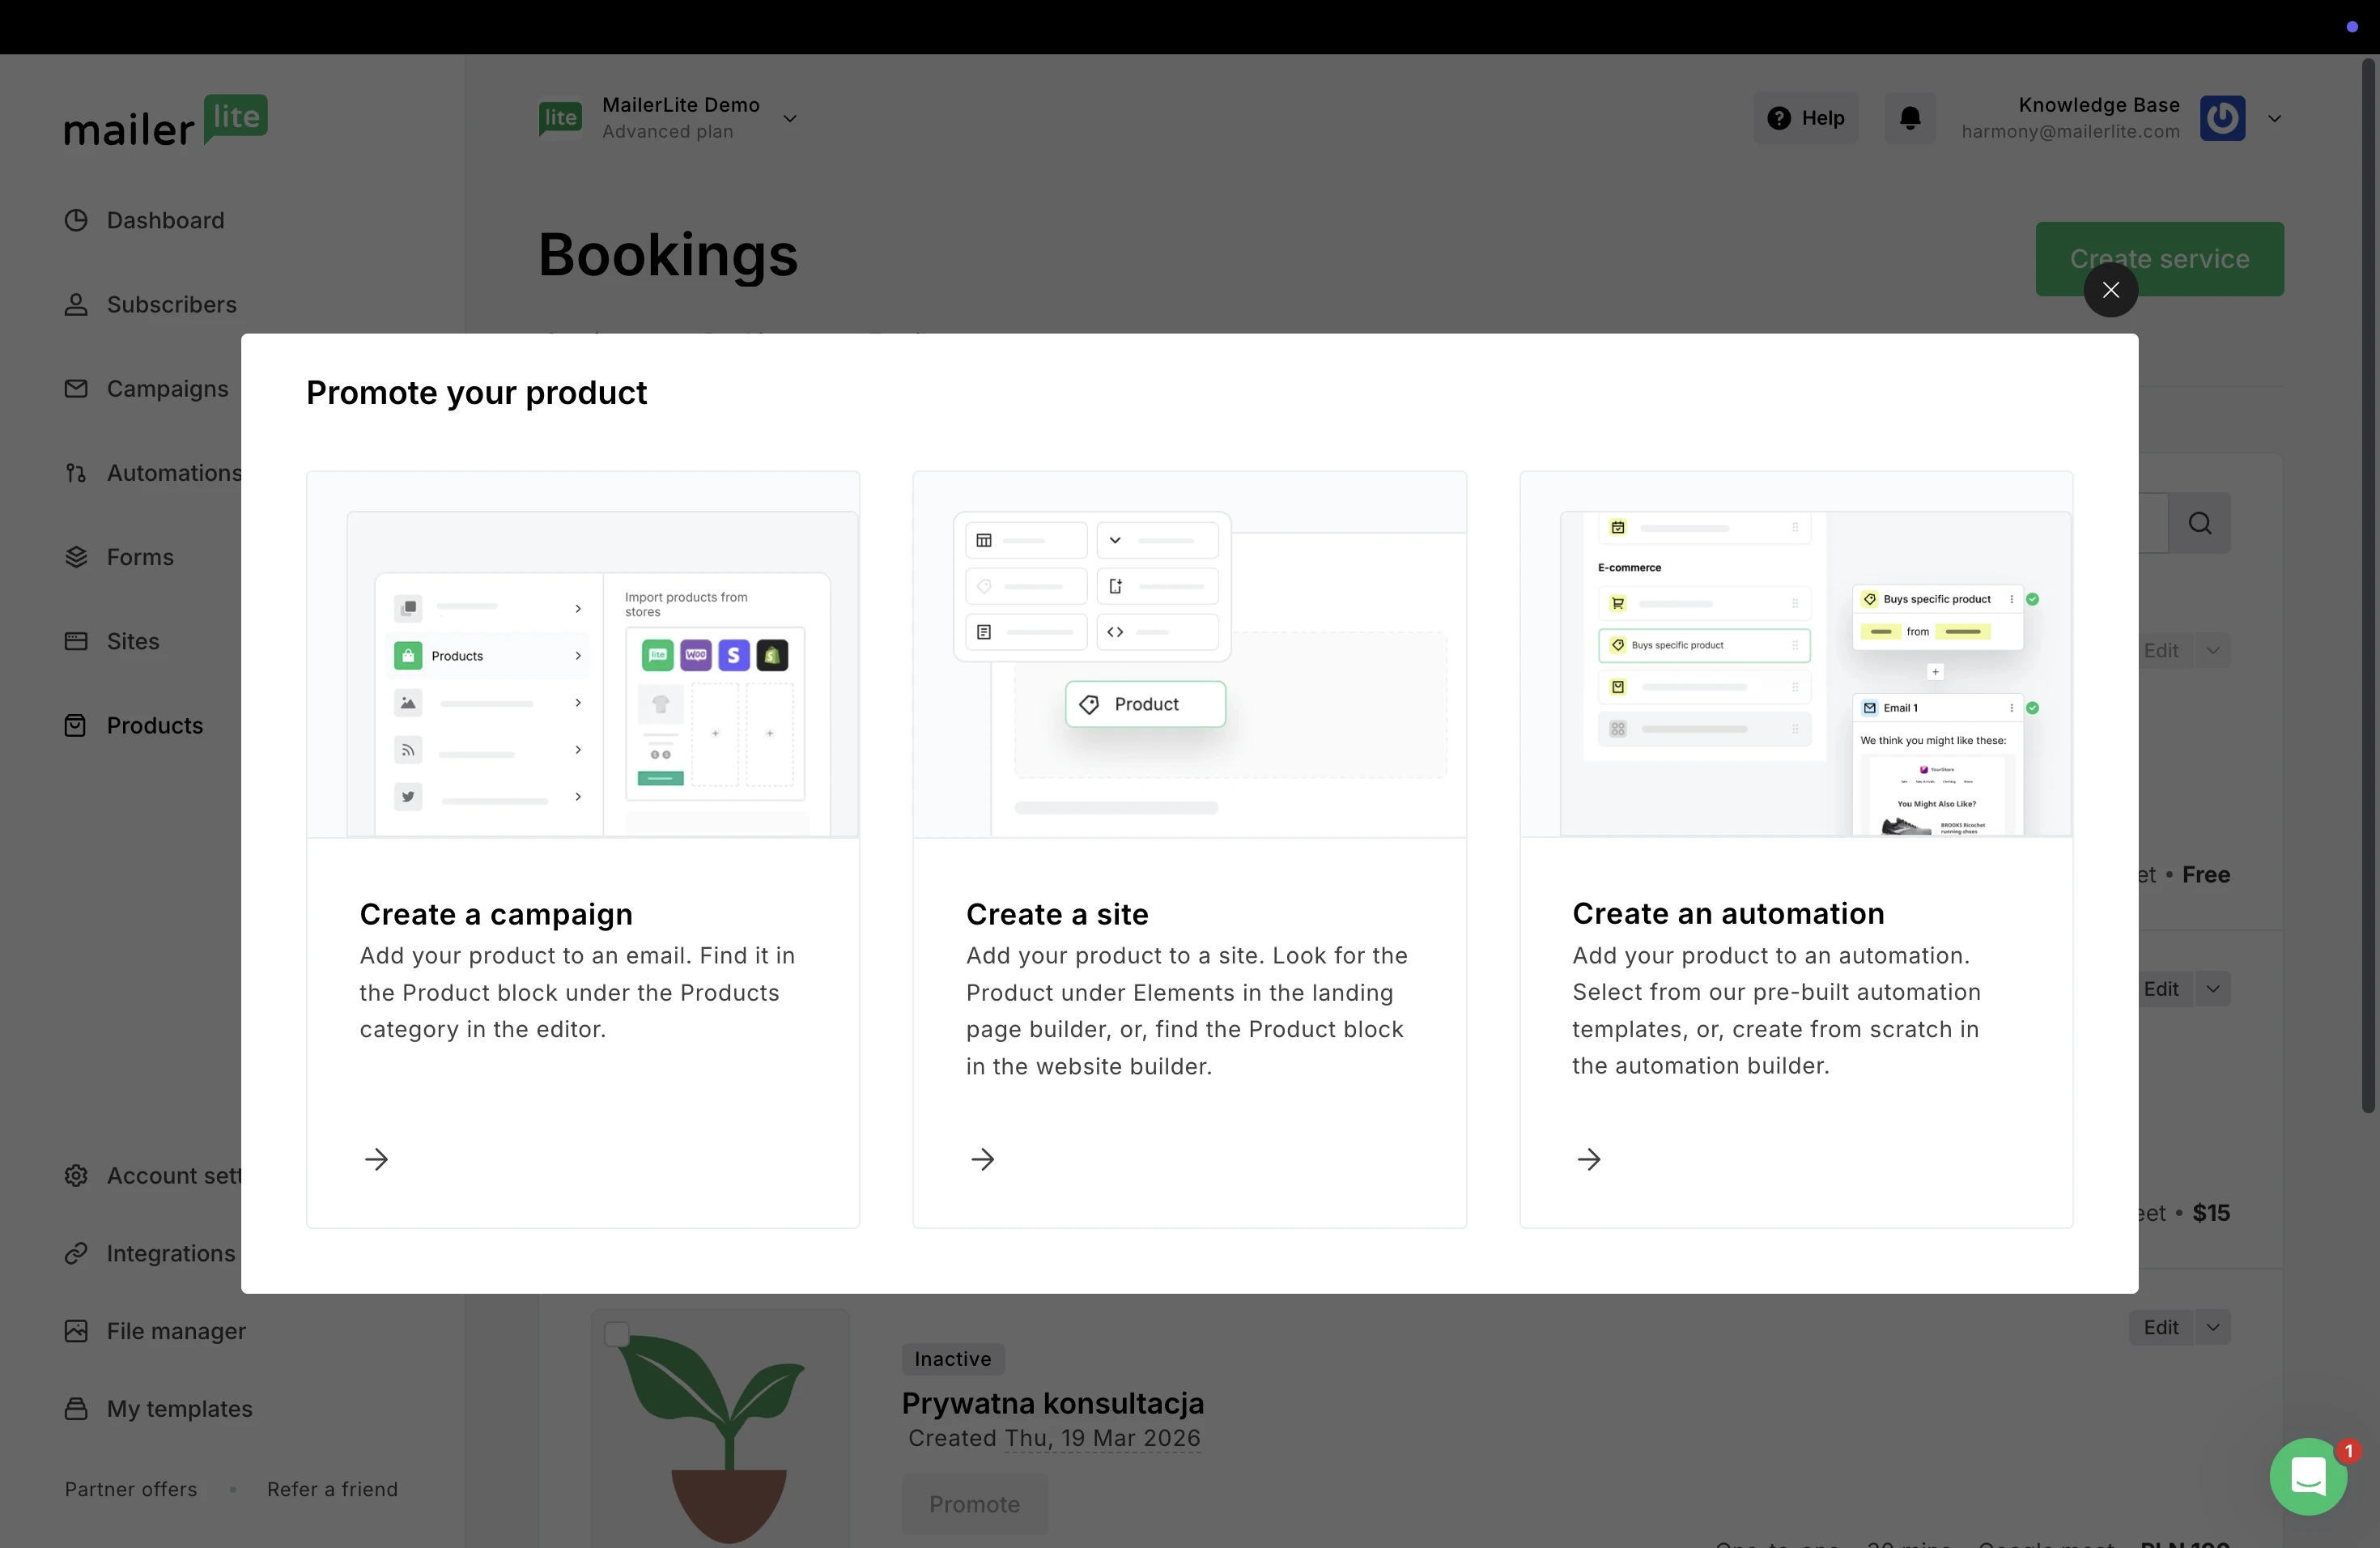
From the main Bookings page, click the Promote button to create a Campaign, Landing page, or Automation with your Booking product.
Place your product in a newsletter
Need help creating a newsletter? Learn more here ➡️ How to create and schedule a campaign
Our Products element in the Drag & drop editor allows you to add your Booking product directly into your MailerLite campaigns.
To do this:
Choose the Drag & drop editor when creating your email campaign.
Under the Products section, you will find Import from stores. Simply drag & drop the block into your email to add a product created in MailerLite or an external shop.
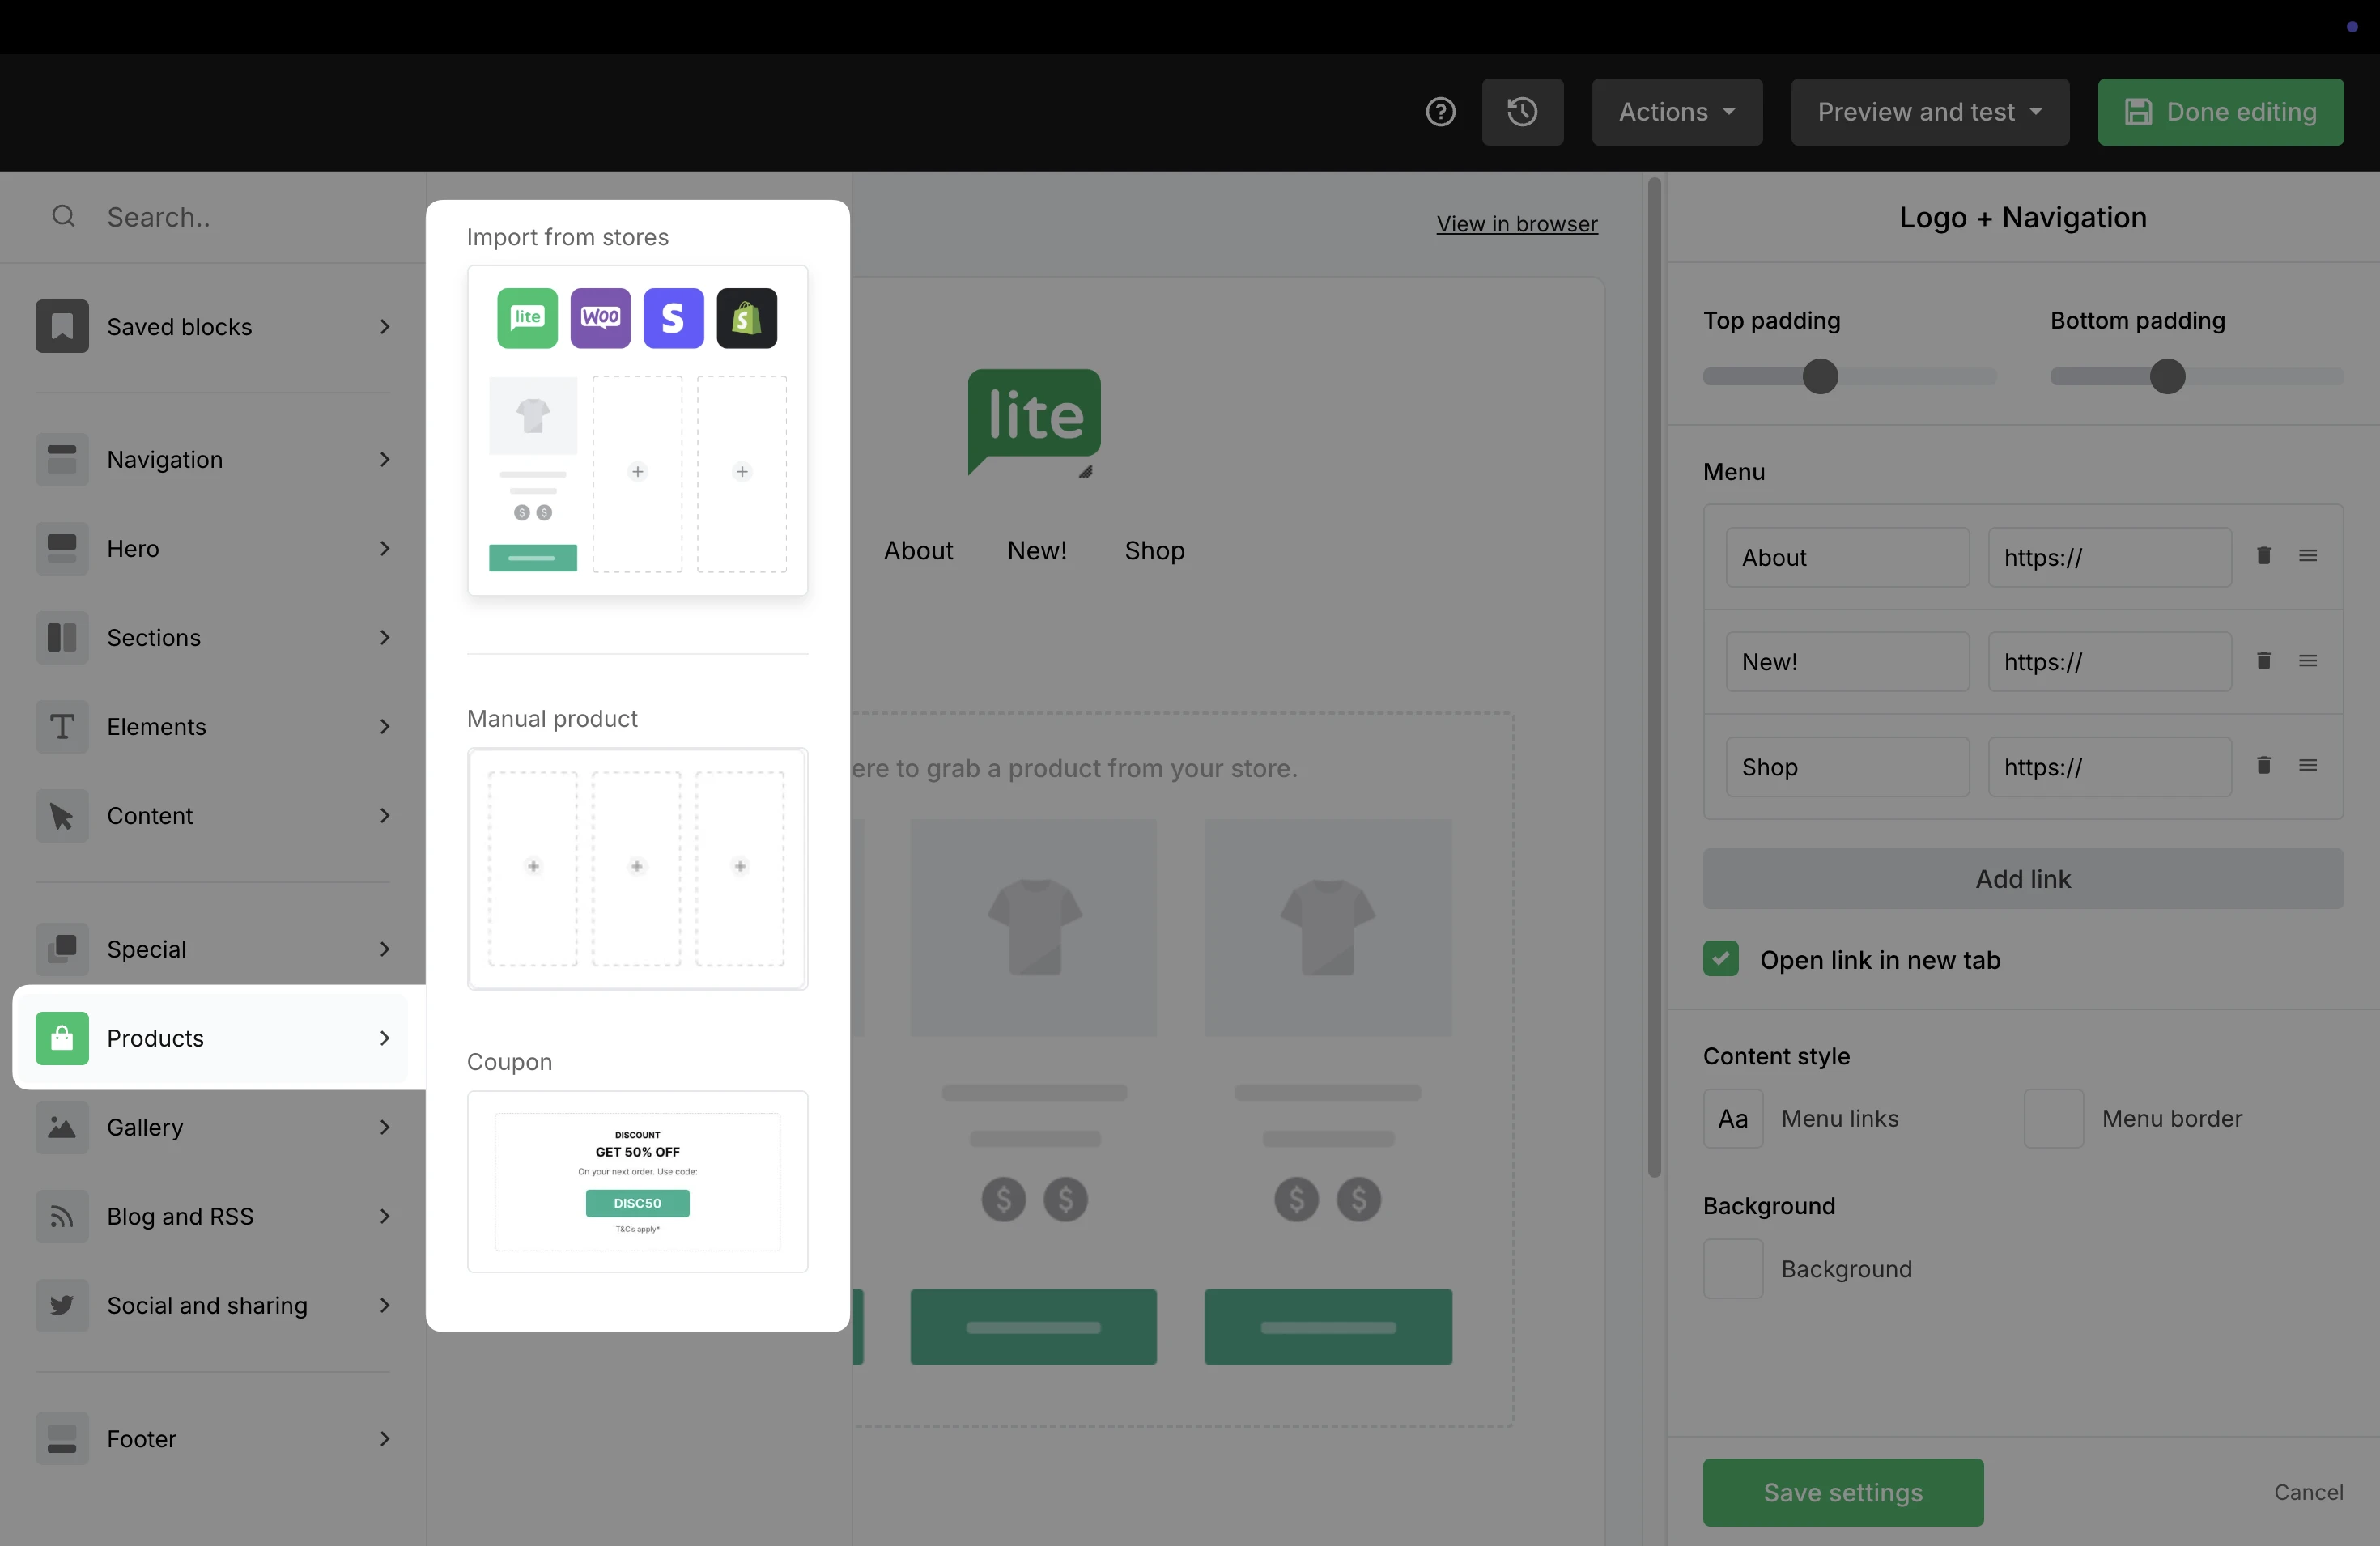
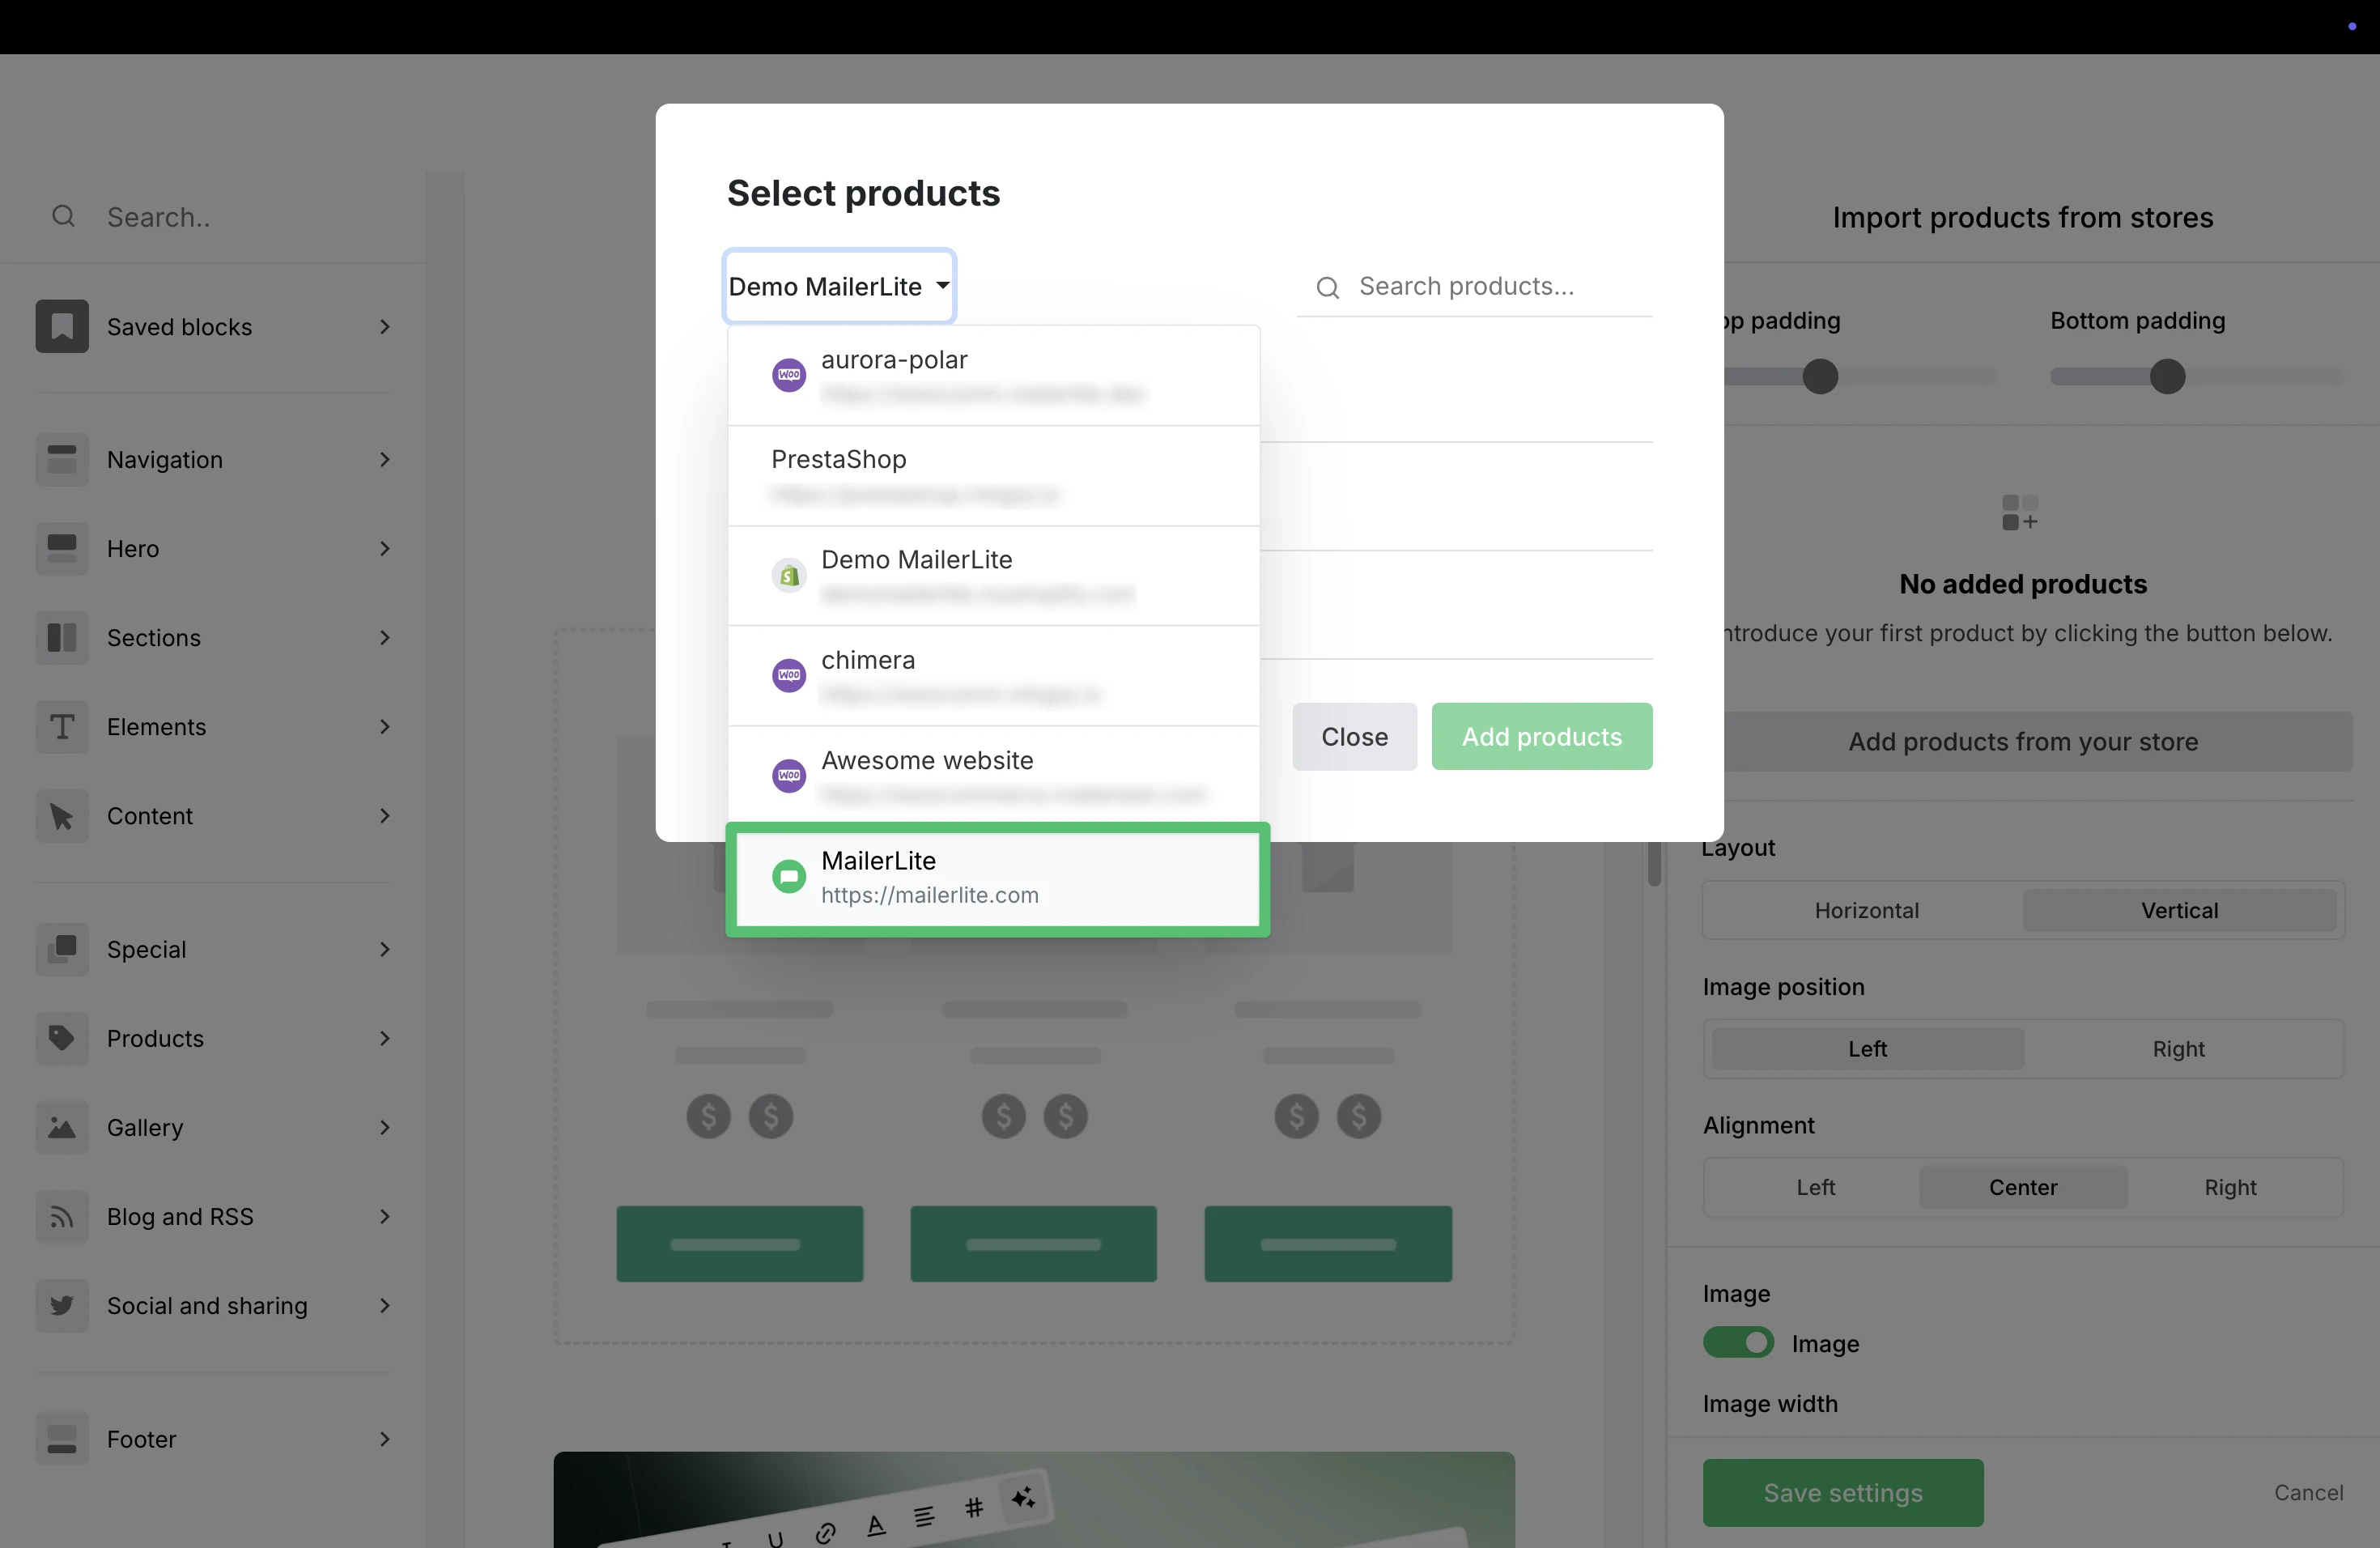
3. Click into the block to open the settings on the right. Use the Add products from your store button to add products from existing stores and/or from the MailerLite store.

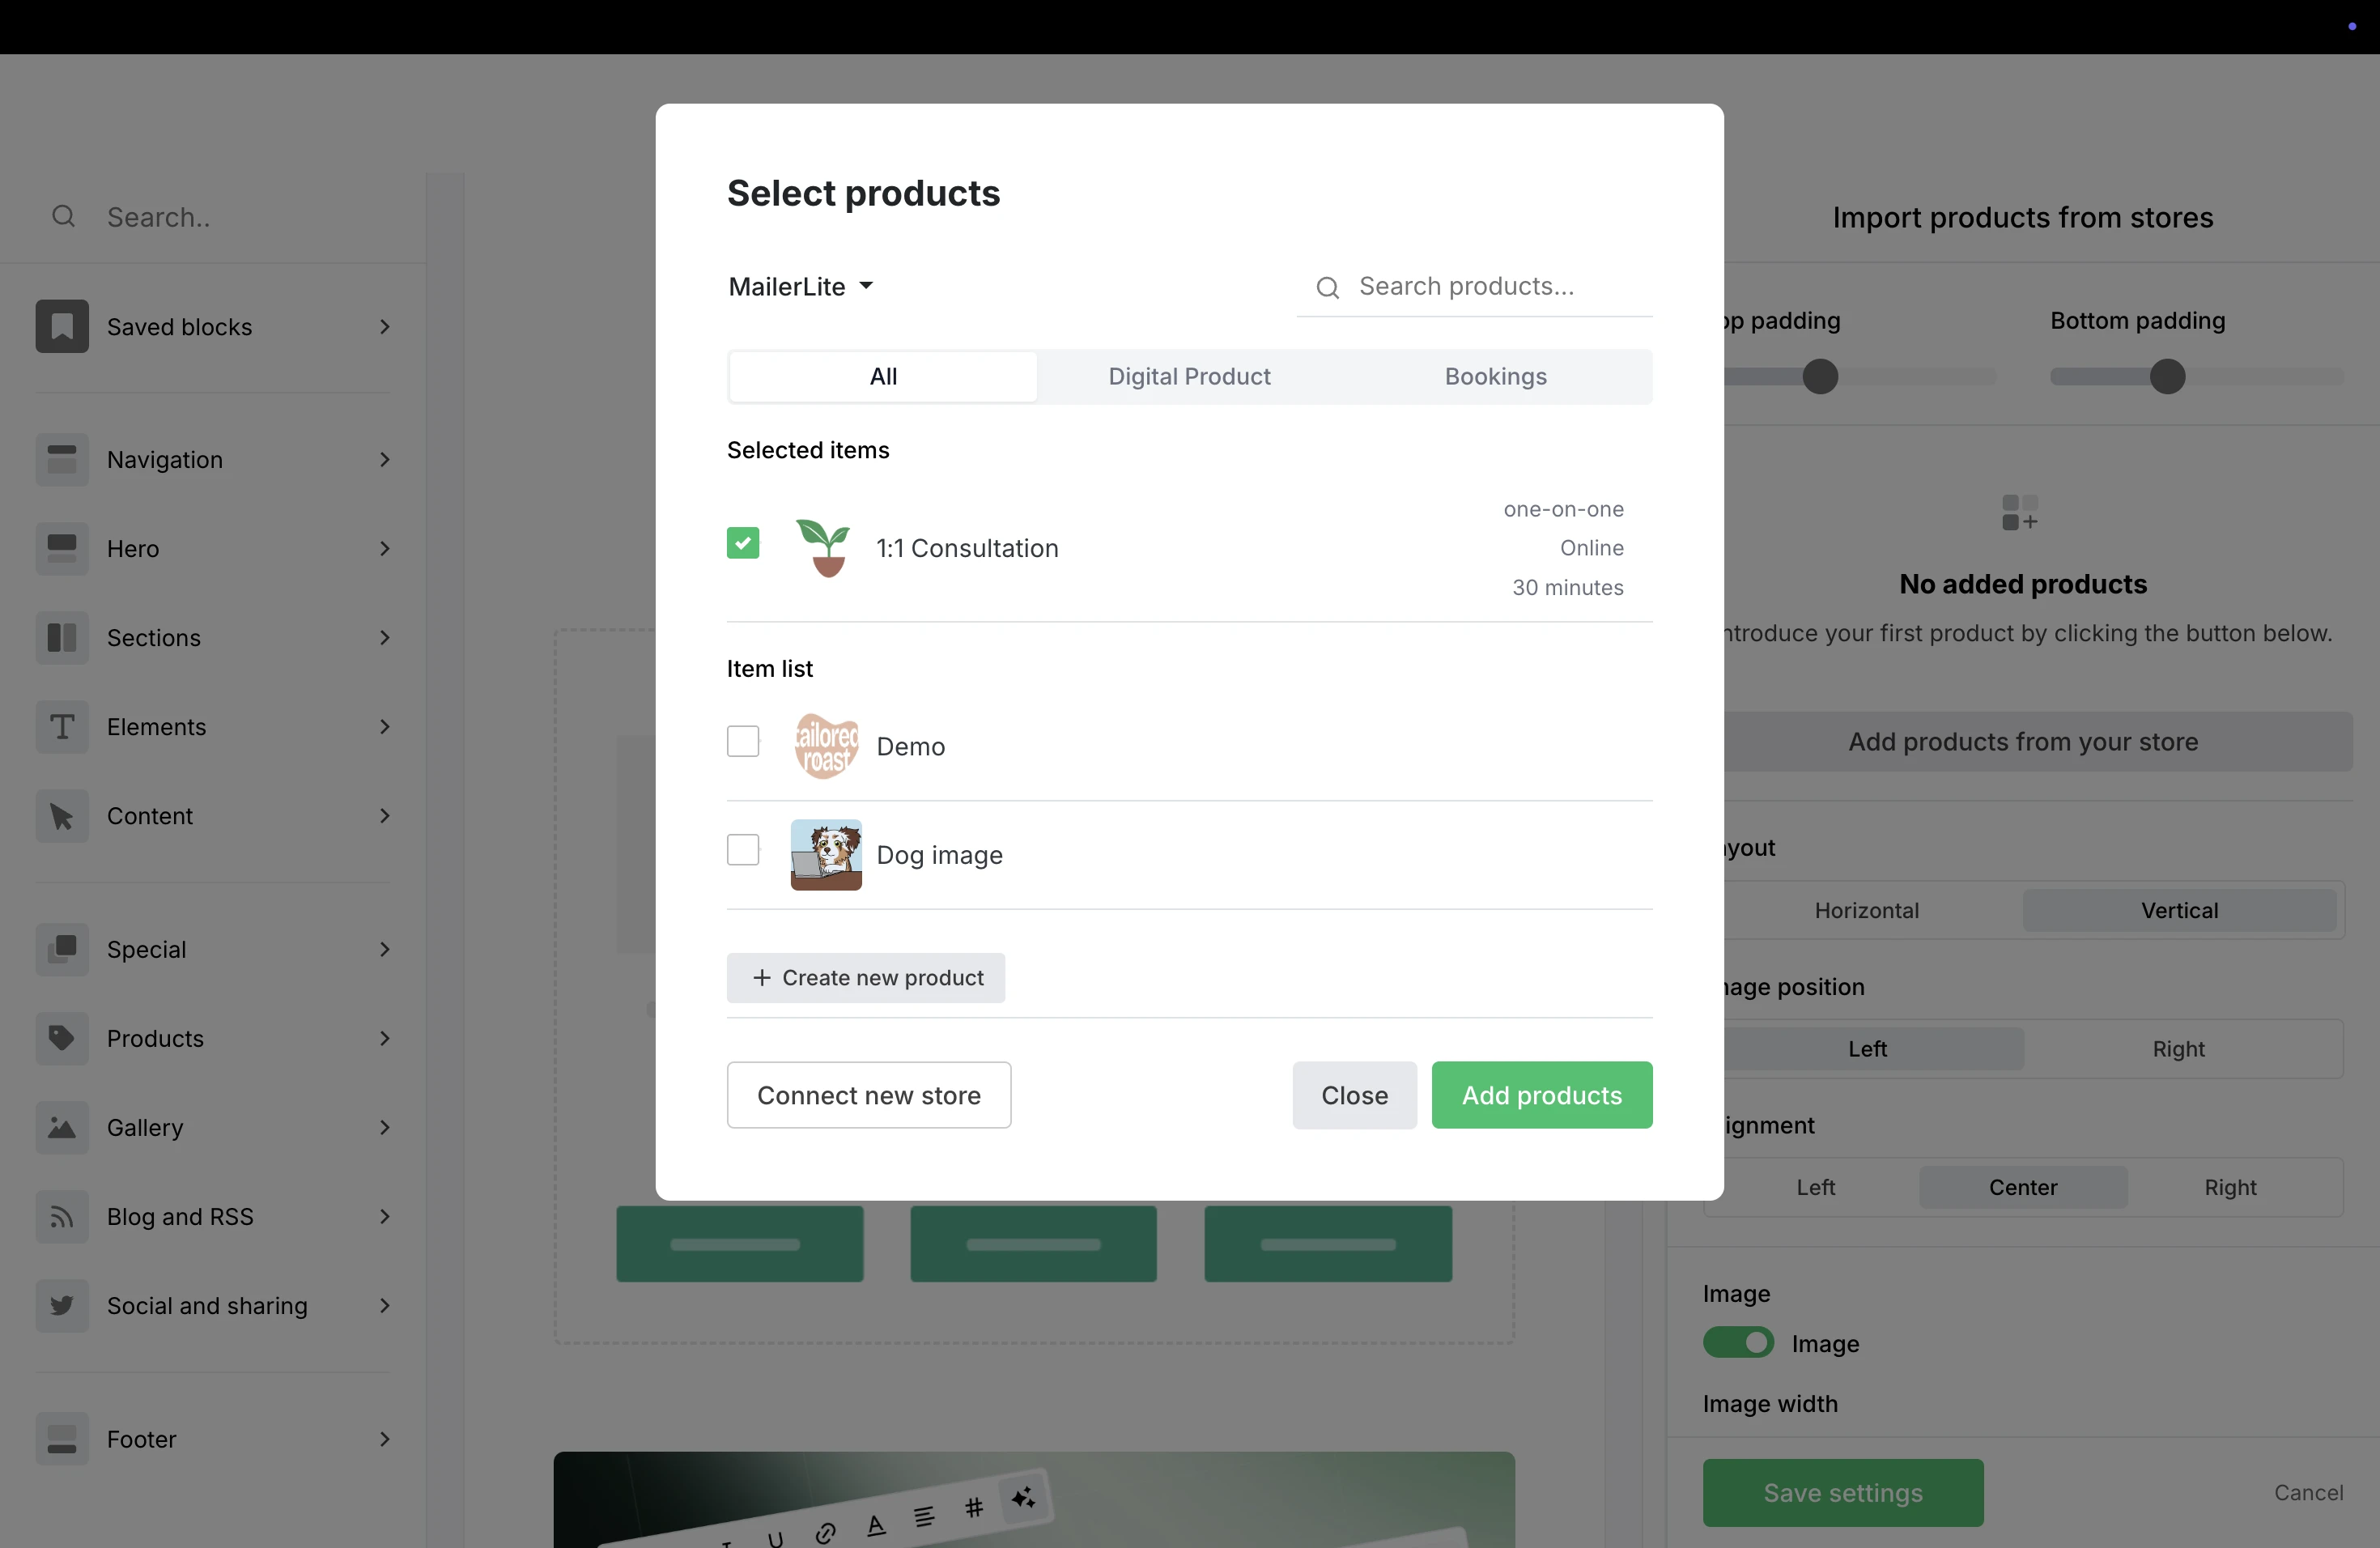
4. If your account has multiple stores connected, be sure to select MailerLite from the drop-down list to add Bookings.
5. You can choose to display one service or multiple. Once the Booking is selected, click Add products to insert the service into your campaign.
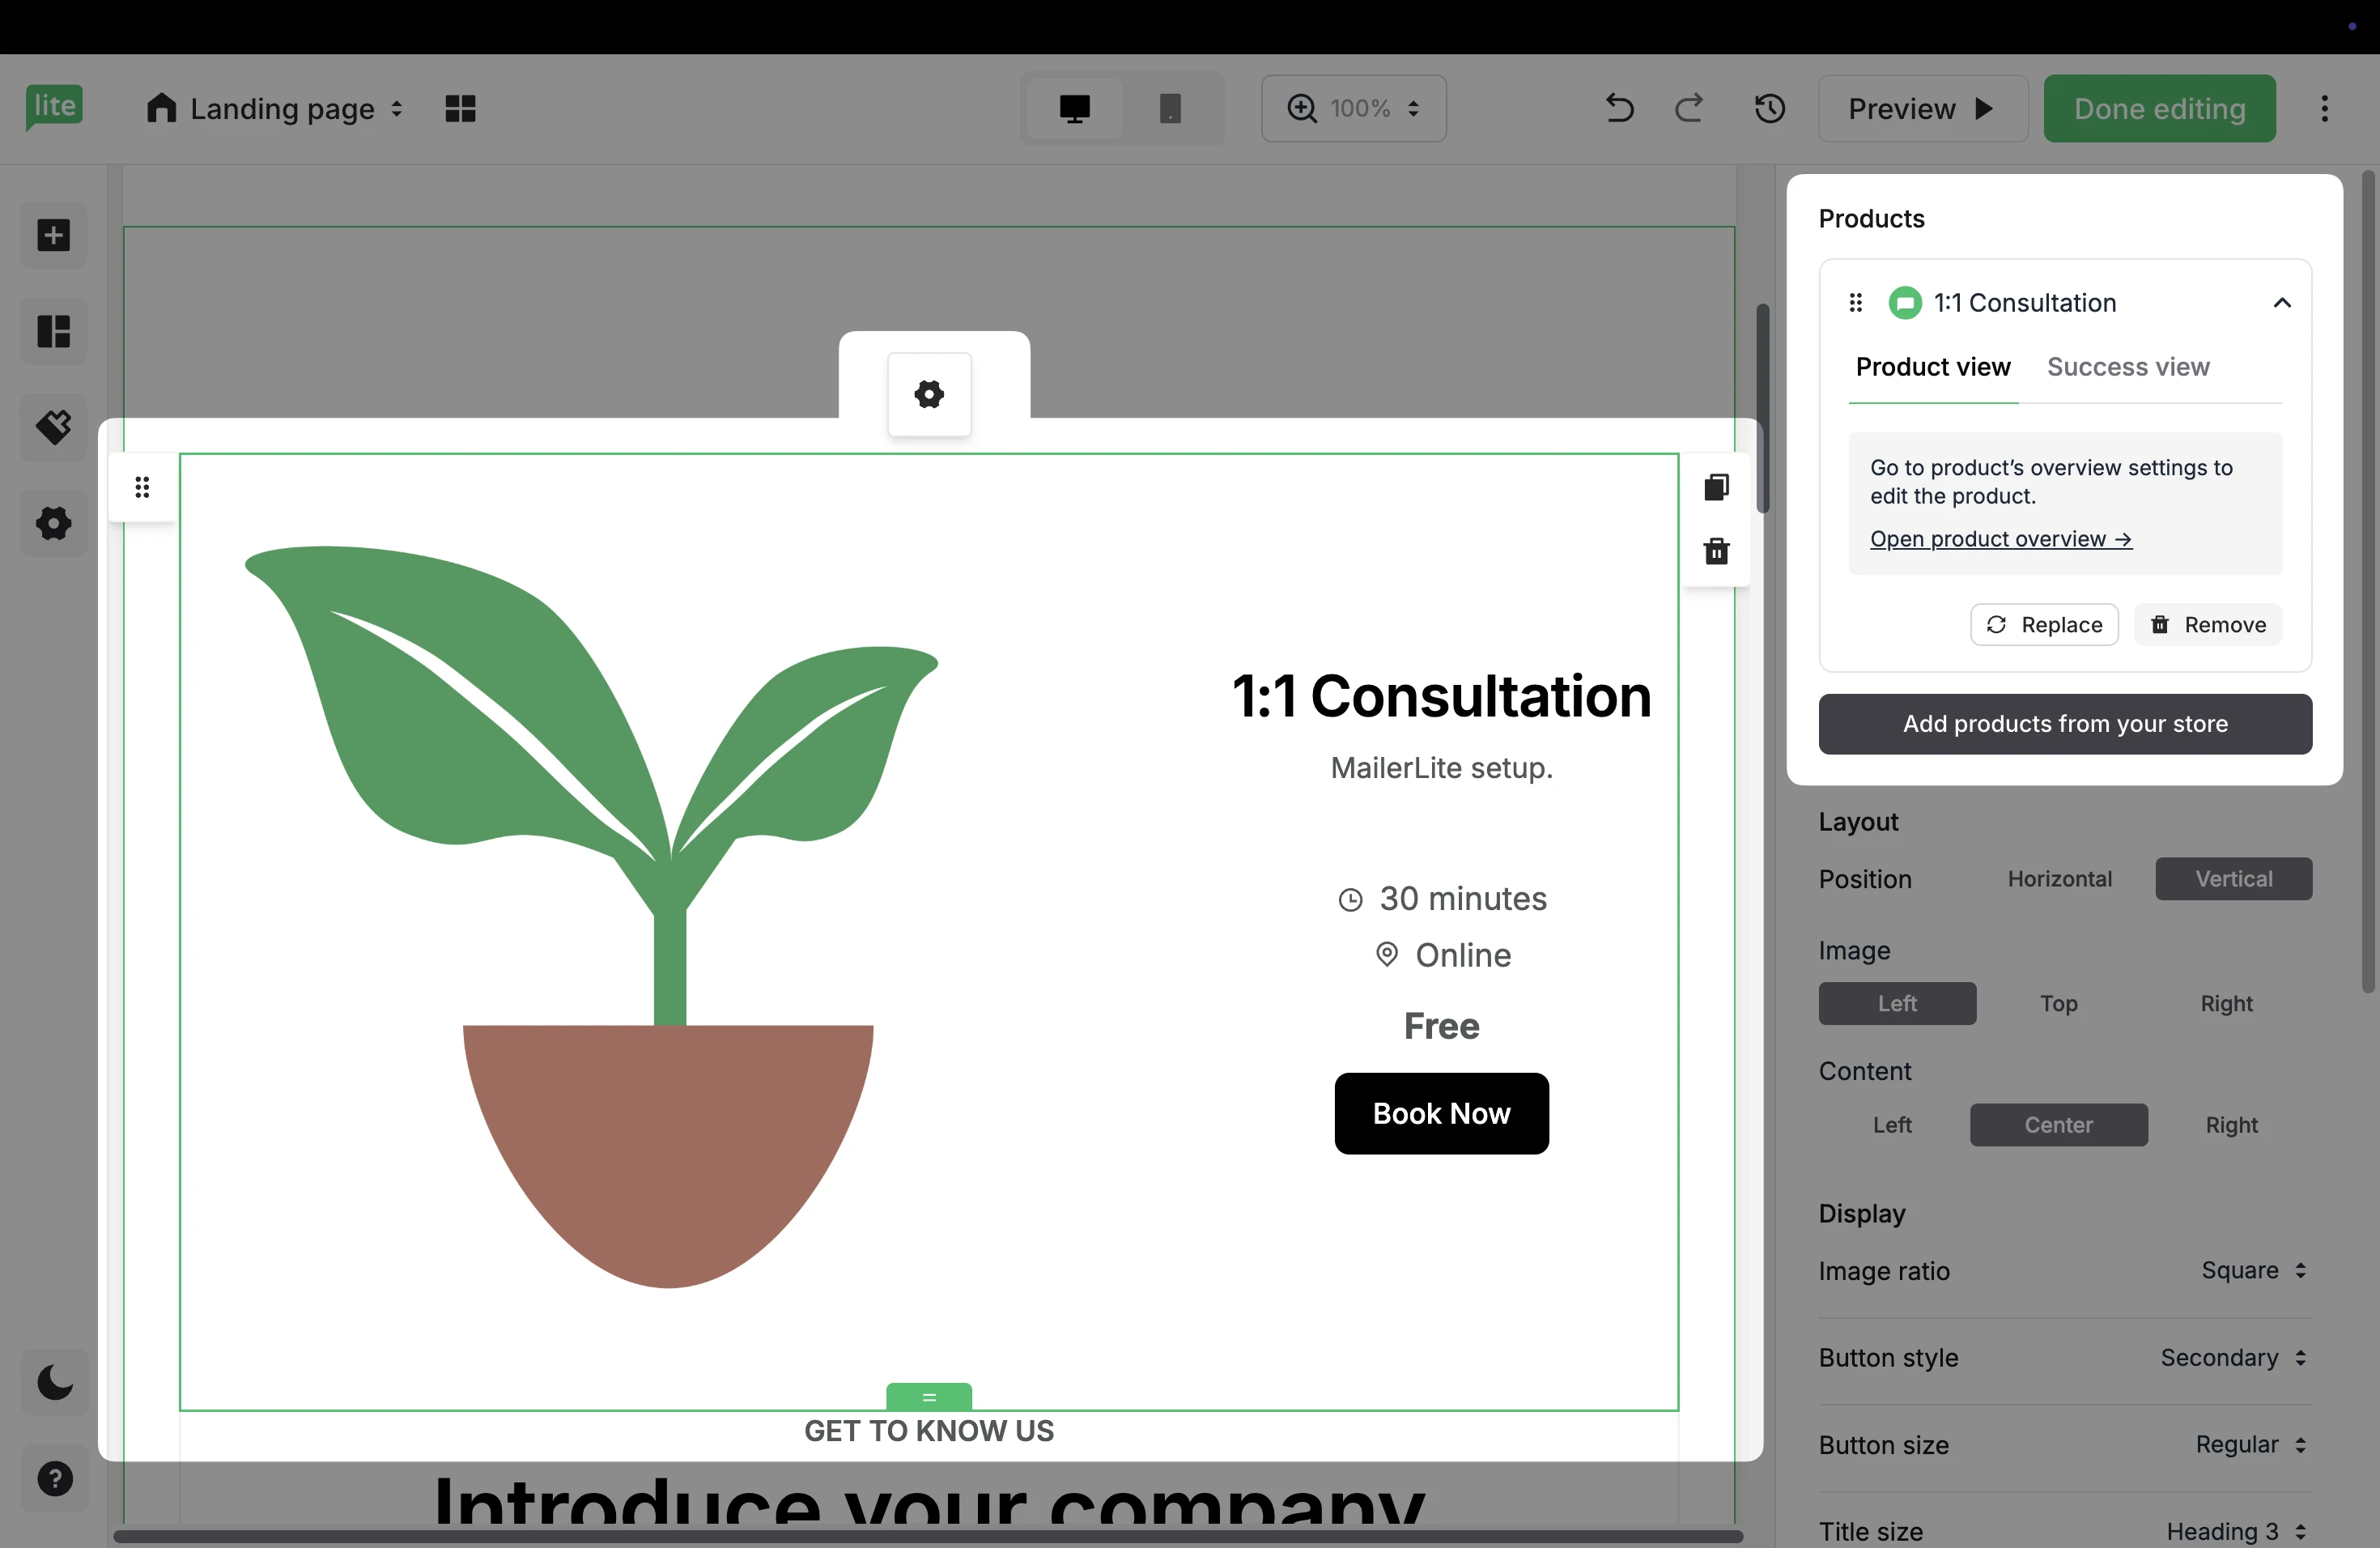
6. Click into the block to open the Settings on the right. From here, you can adjust elements like image positioning, alignment, and choose which details such as Price and Description are displayed.

7. Click Save settings to save your edits to the service.
8. When you are done editing your campaign, click Done editing.
9. On the Campaign details page, fill out the Subject line, Preheader, and choose the Recipients to send your campaign.
⚠️ Important: To make sure that any services booked through your campaign are tracked in MailerLite, toggle ON the option to Track links.

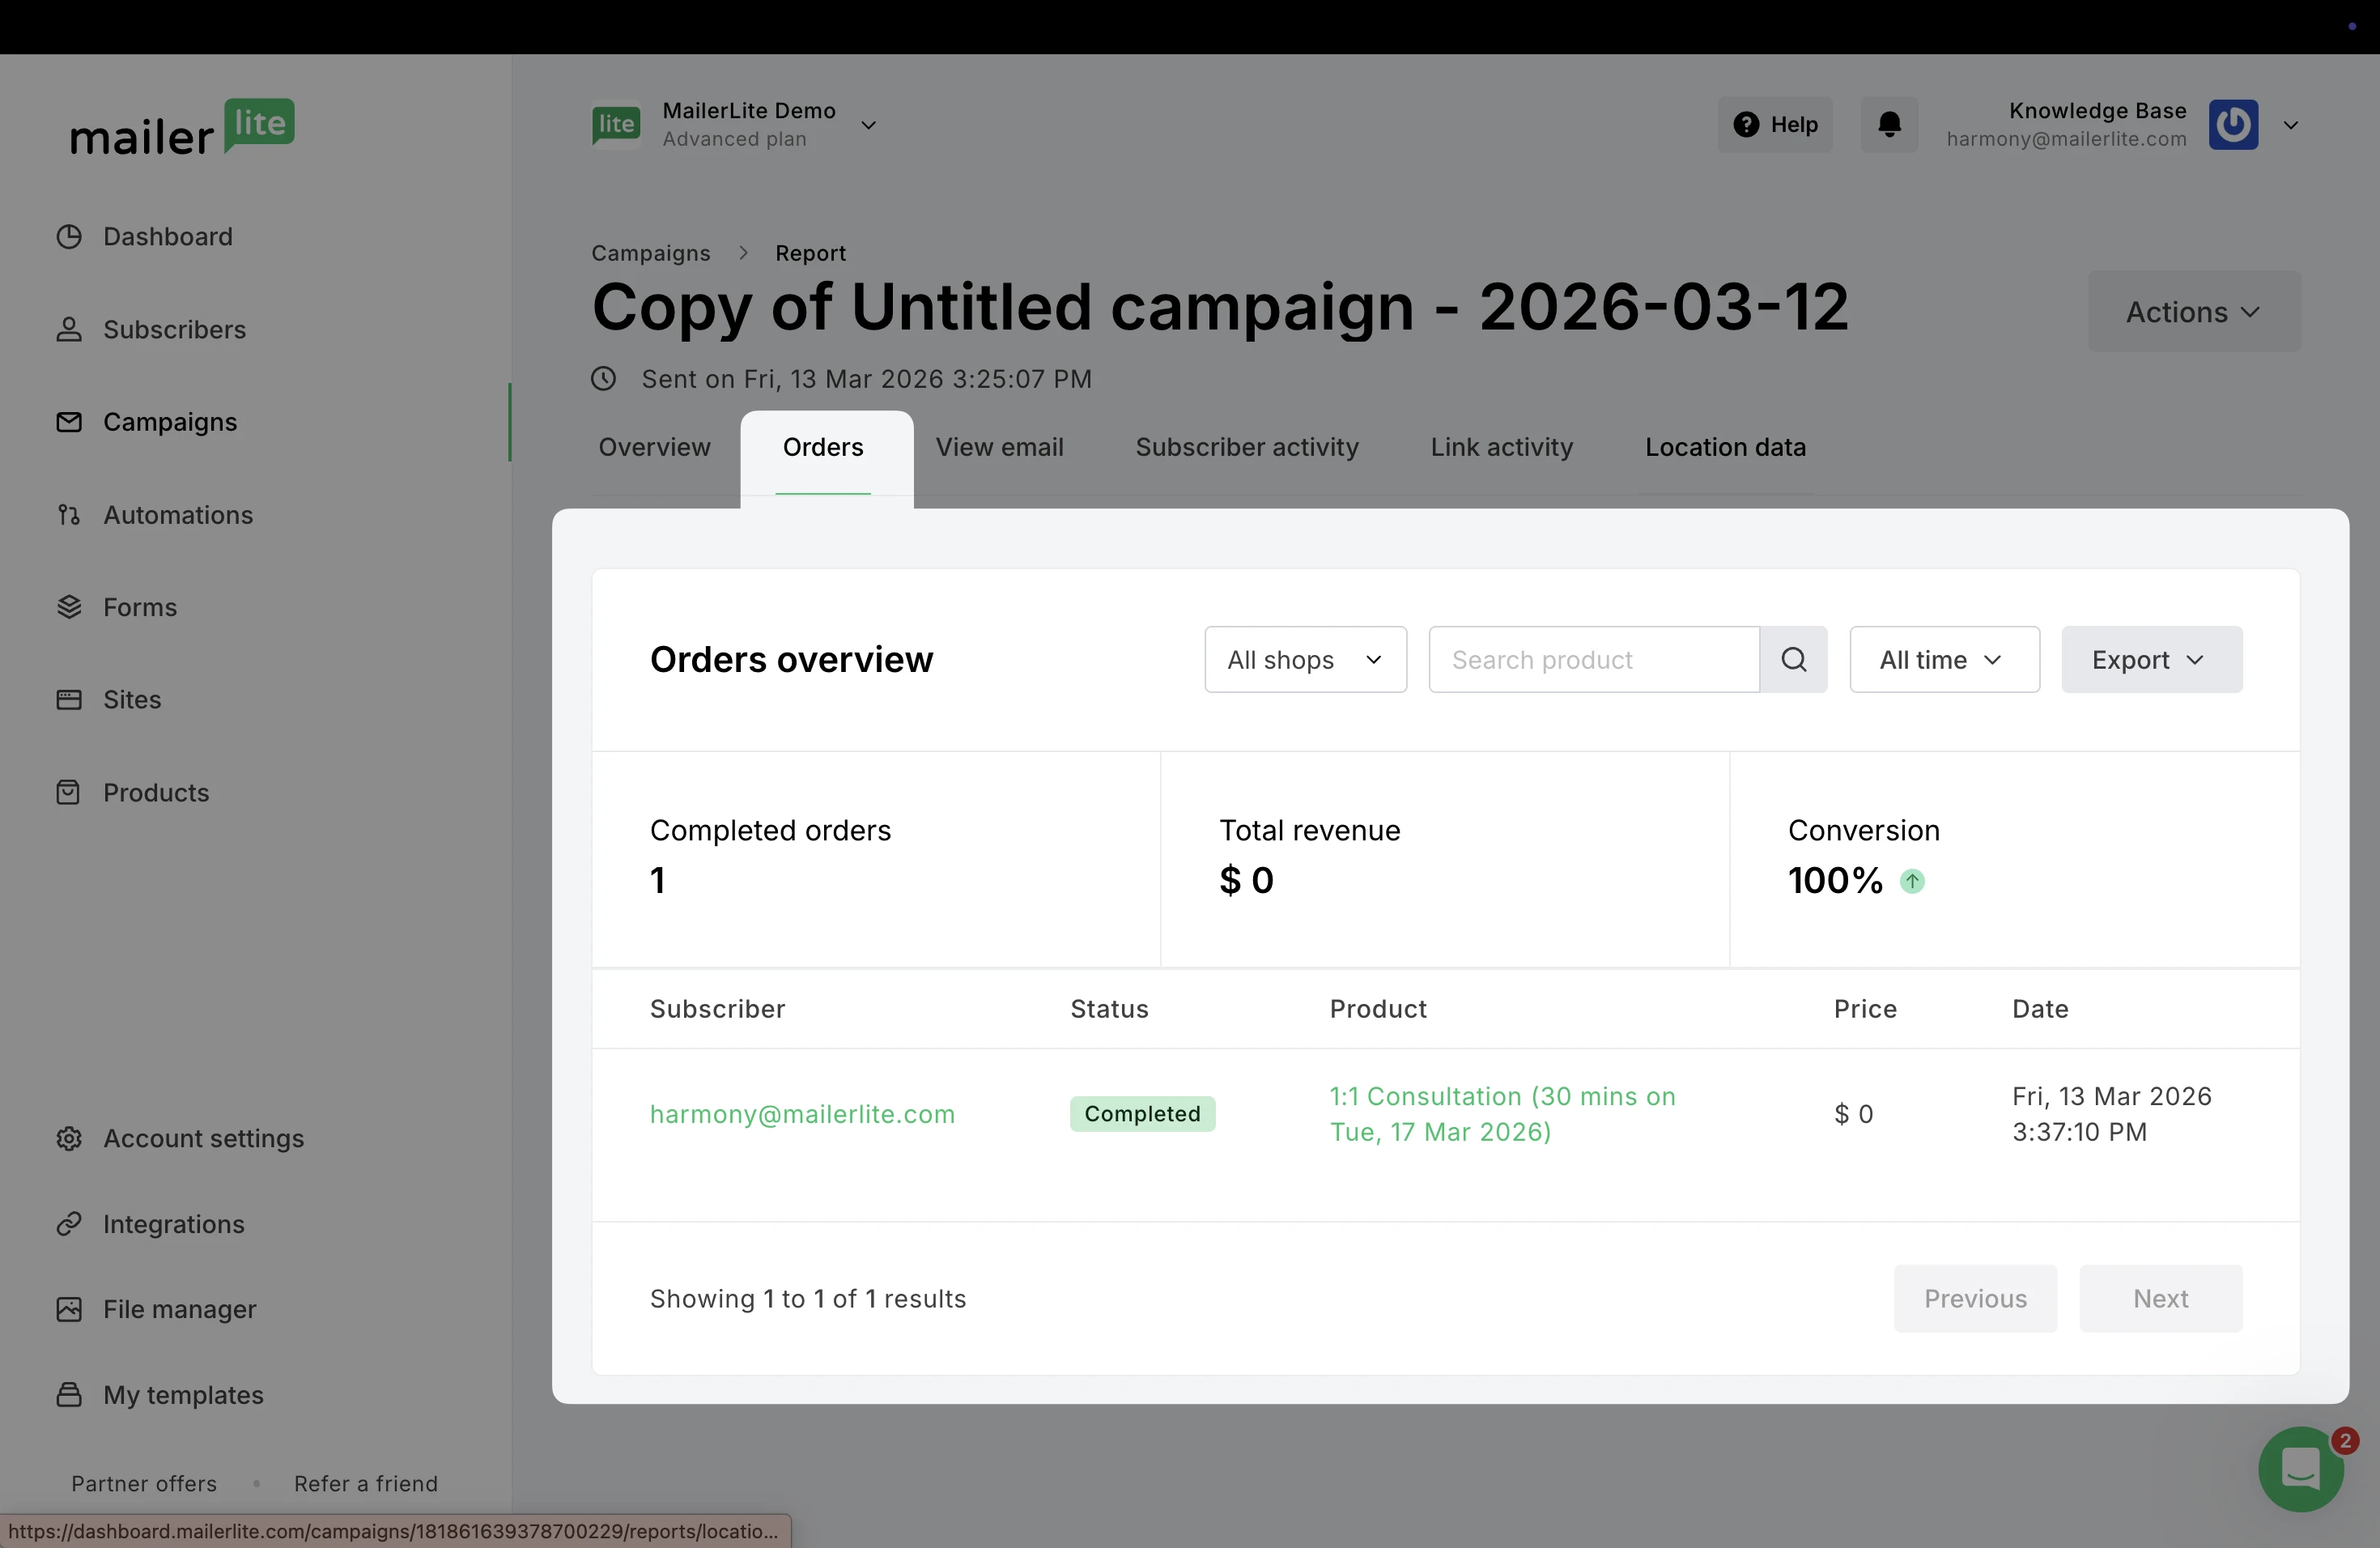
When a subscriber books your service through the newsletter and completes the transaction, the order will be tracked in the campaign’s report in the Orders tab.
Add bookings to a landing page
Need help creating a landing page? Learn more here ➡️ How to create a landing page
To promote your booking service in a landing page:
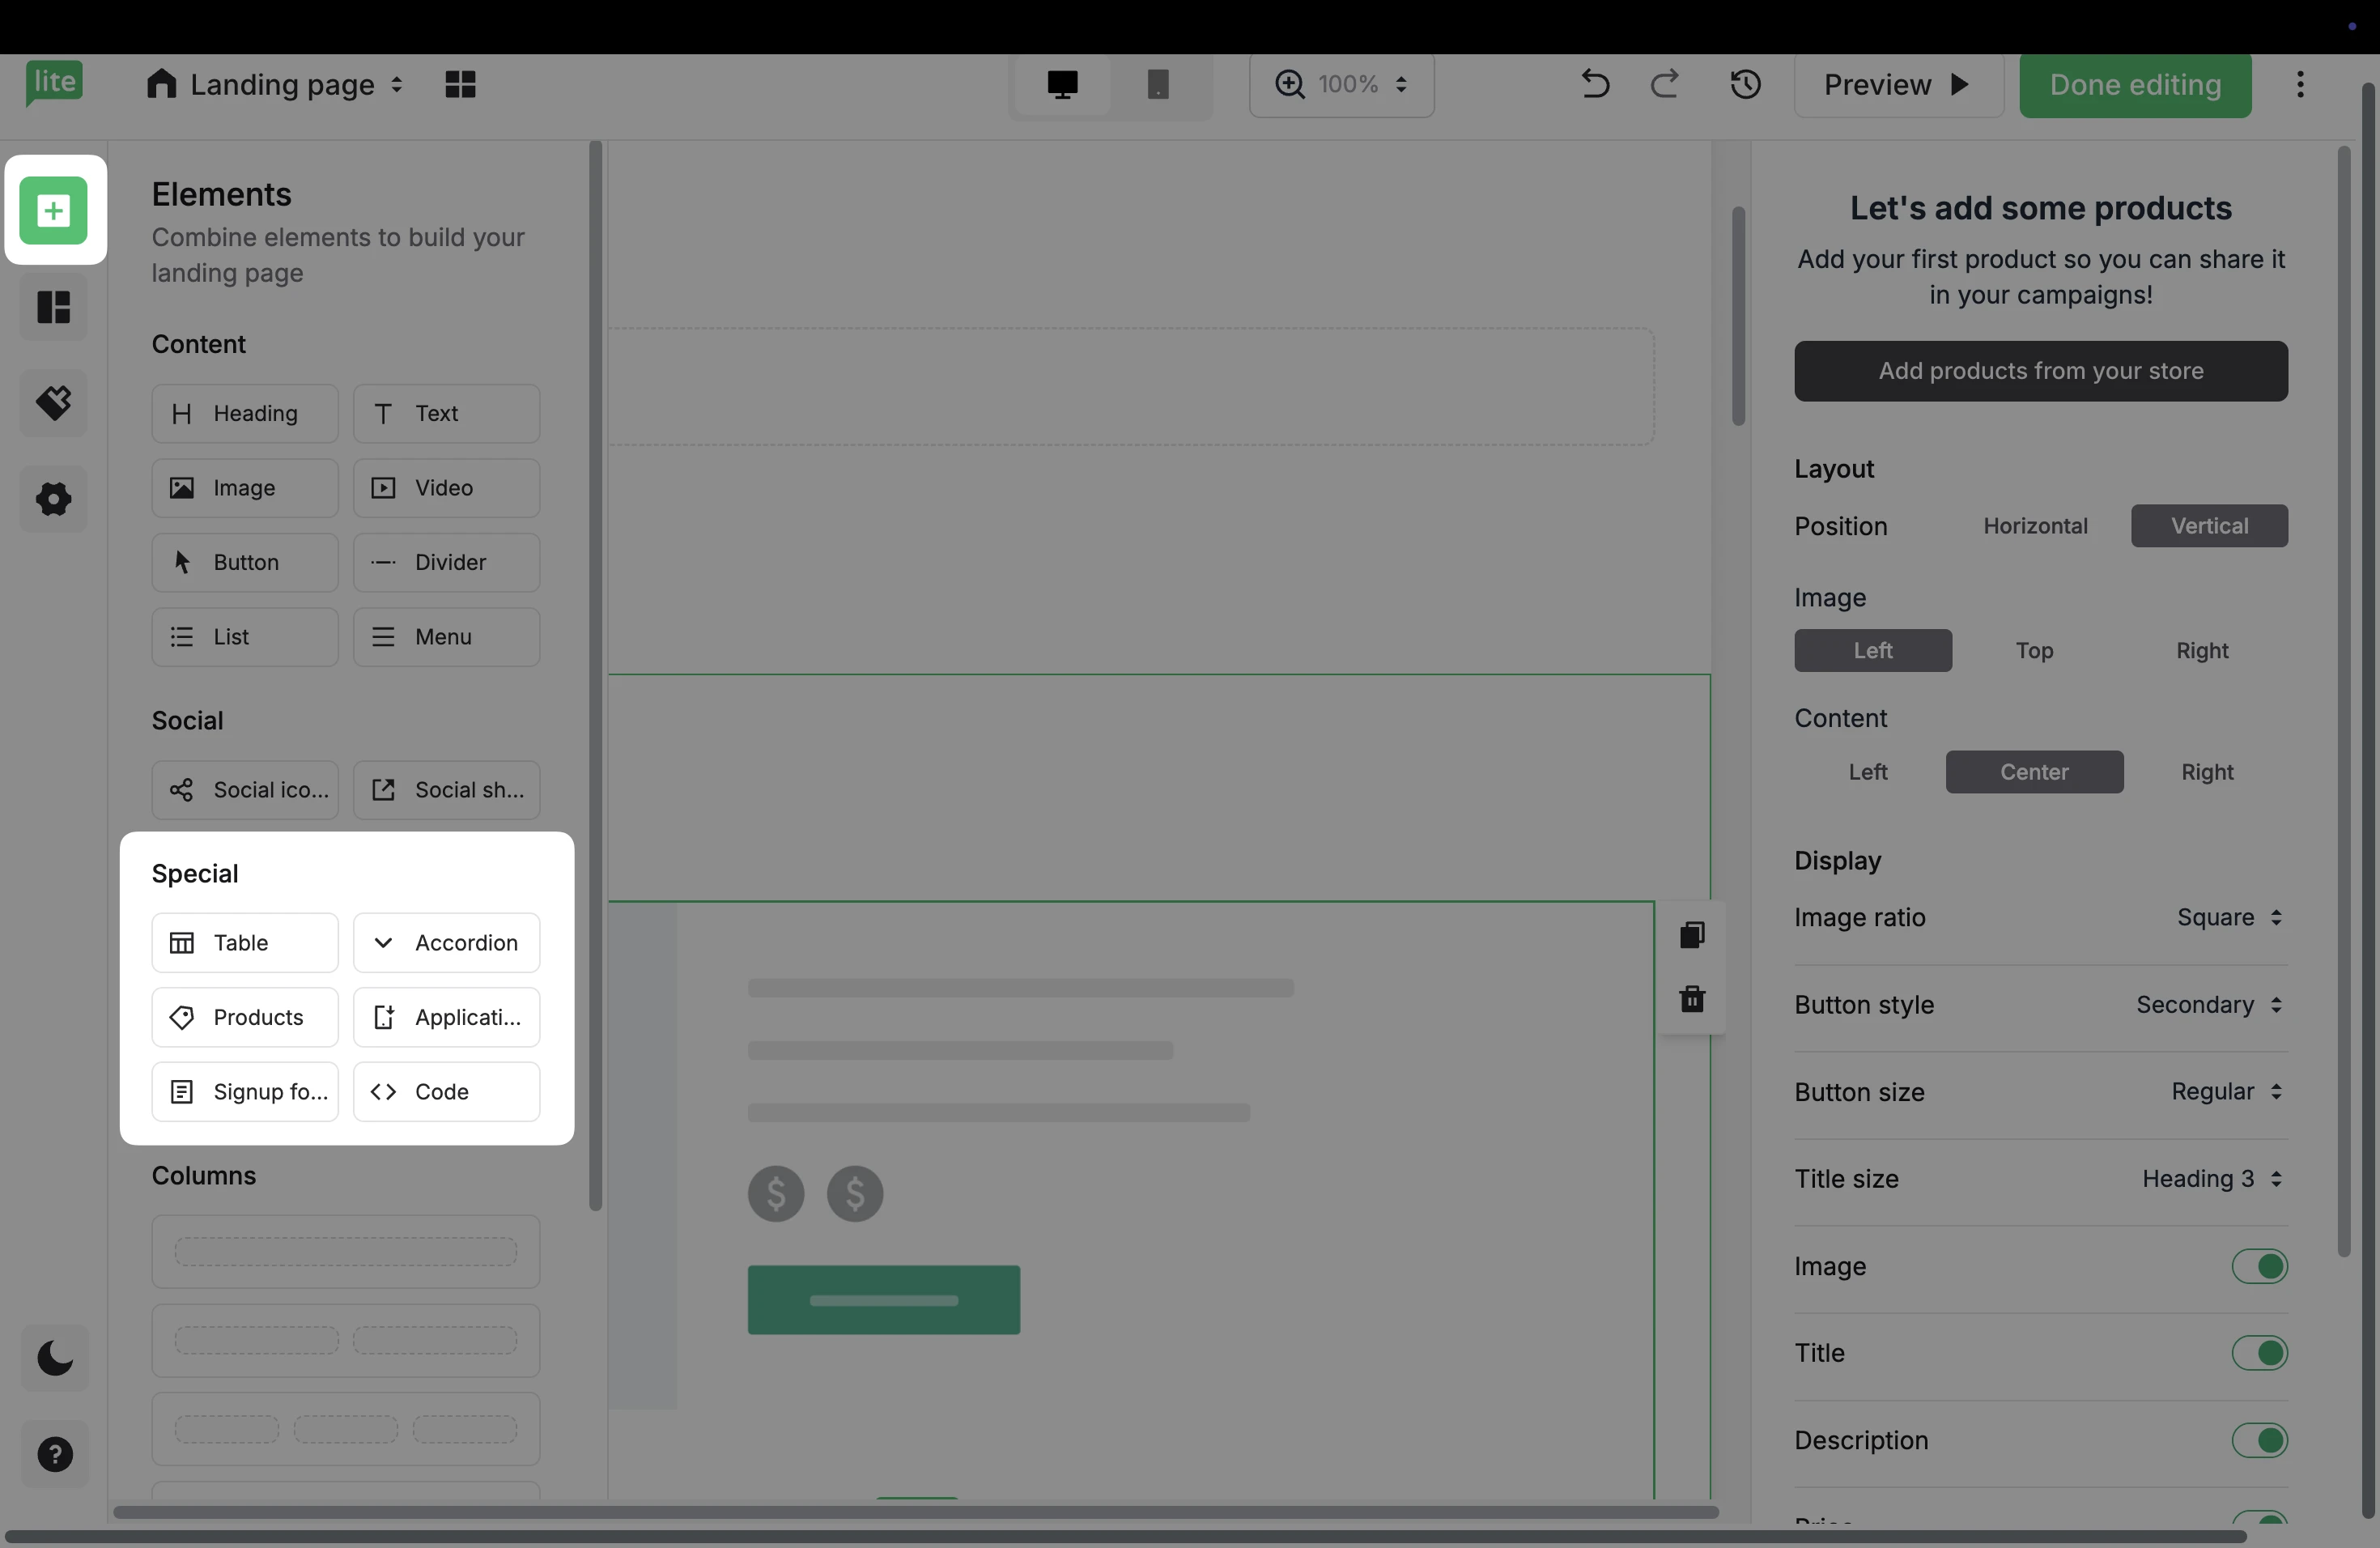
In the landing page editor under Elements, check the Special category to locate the Products element.
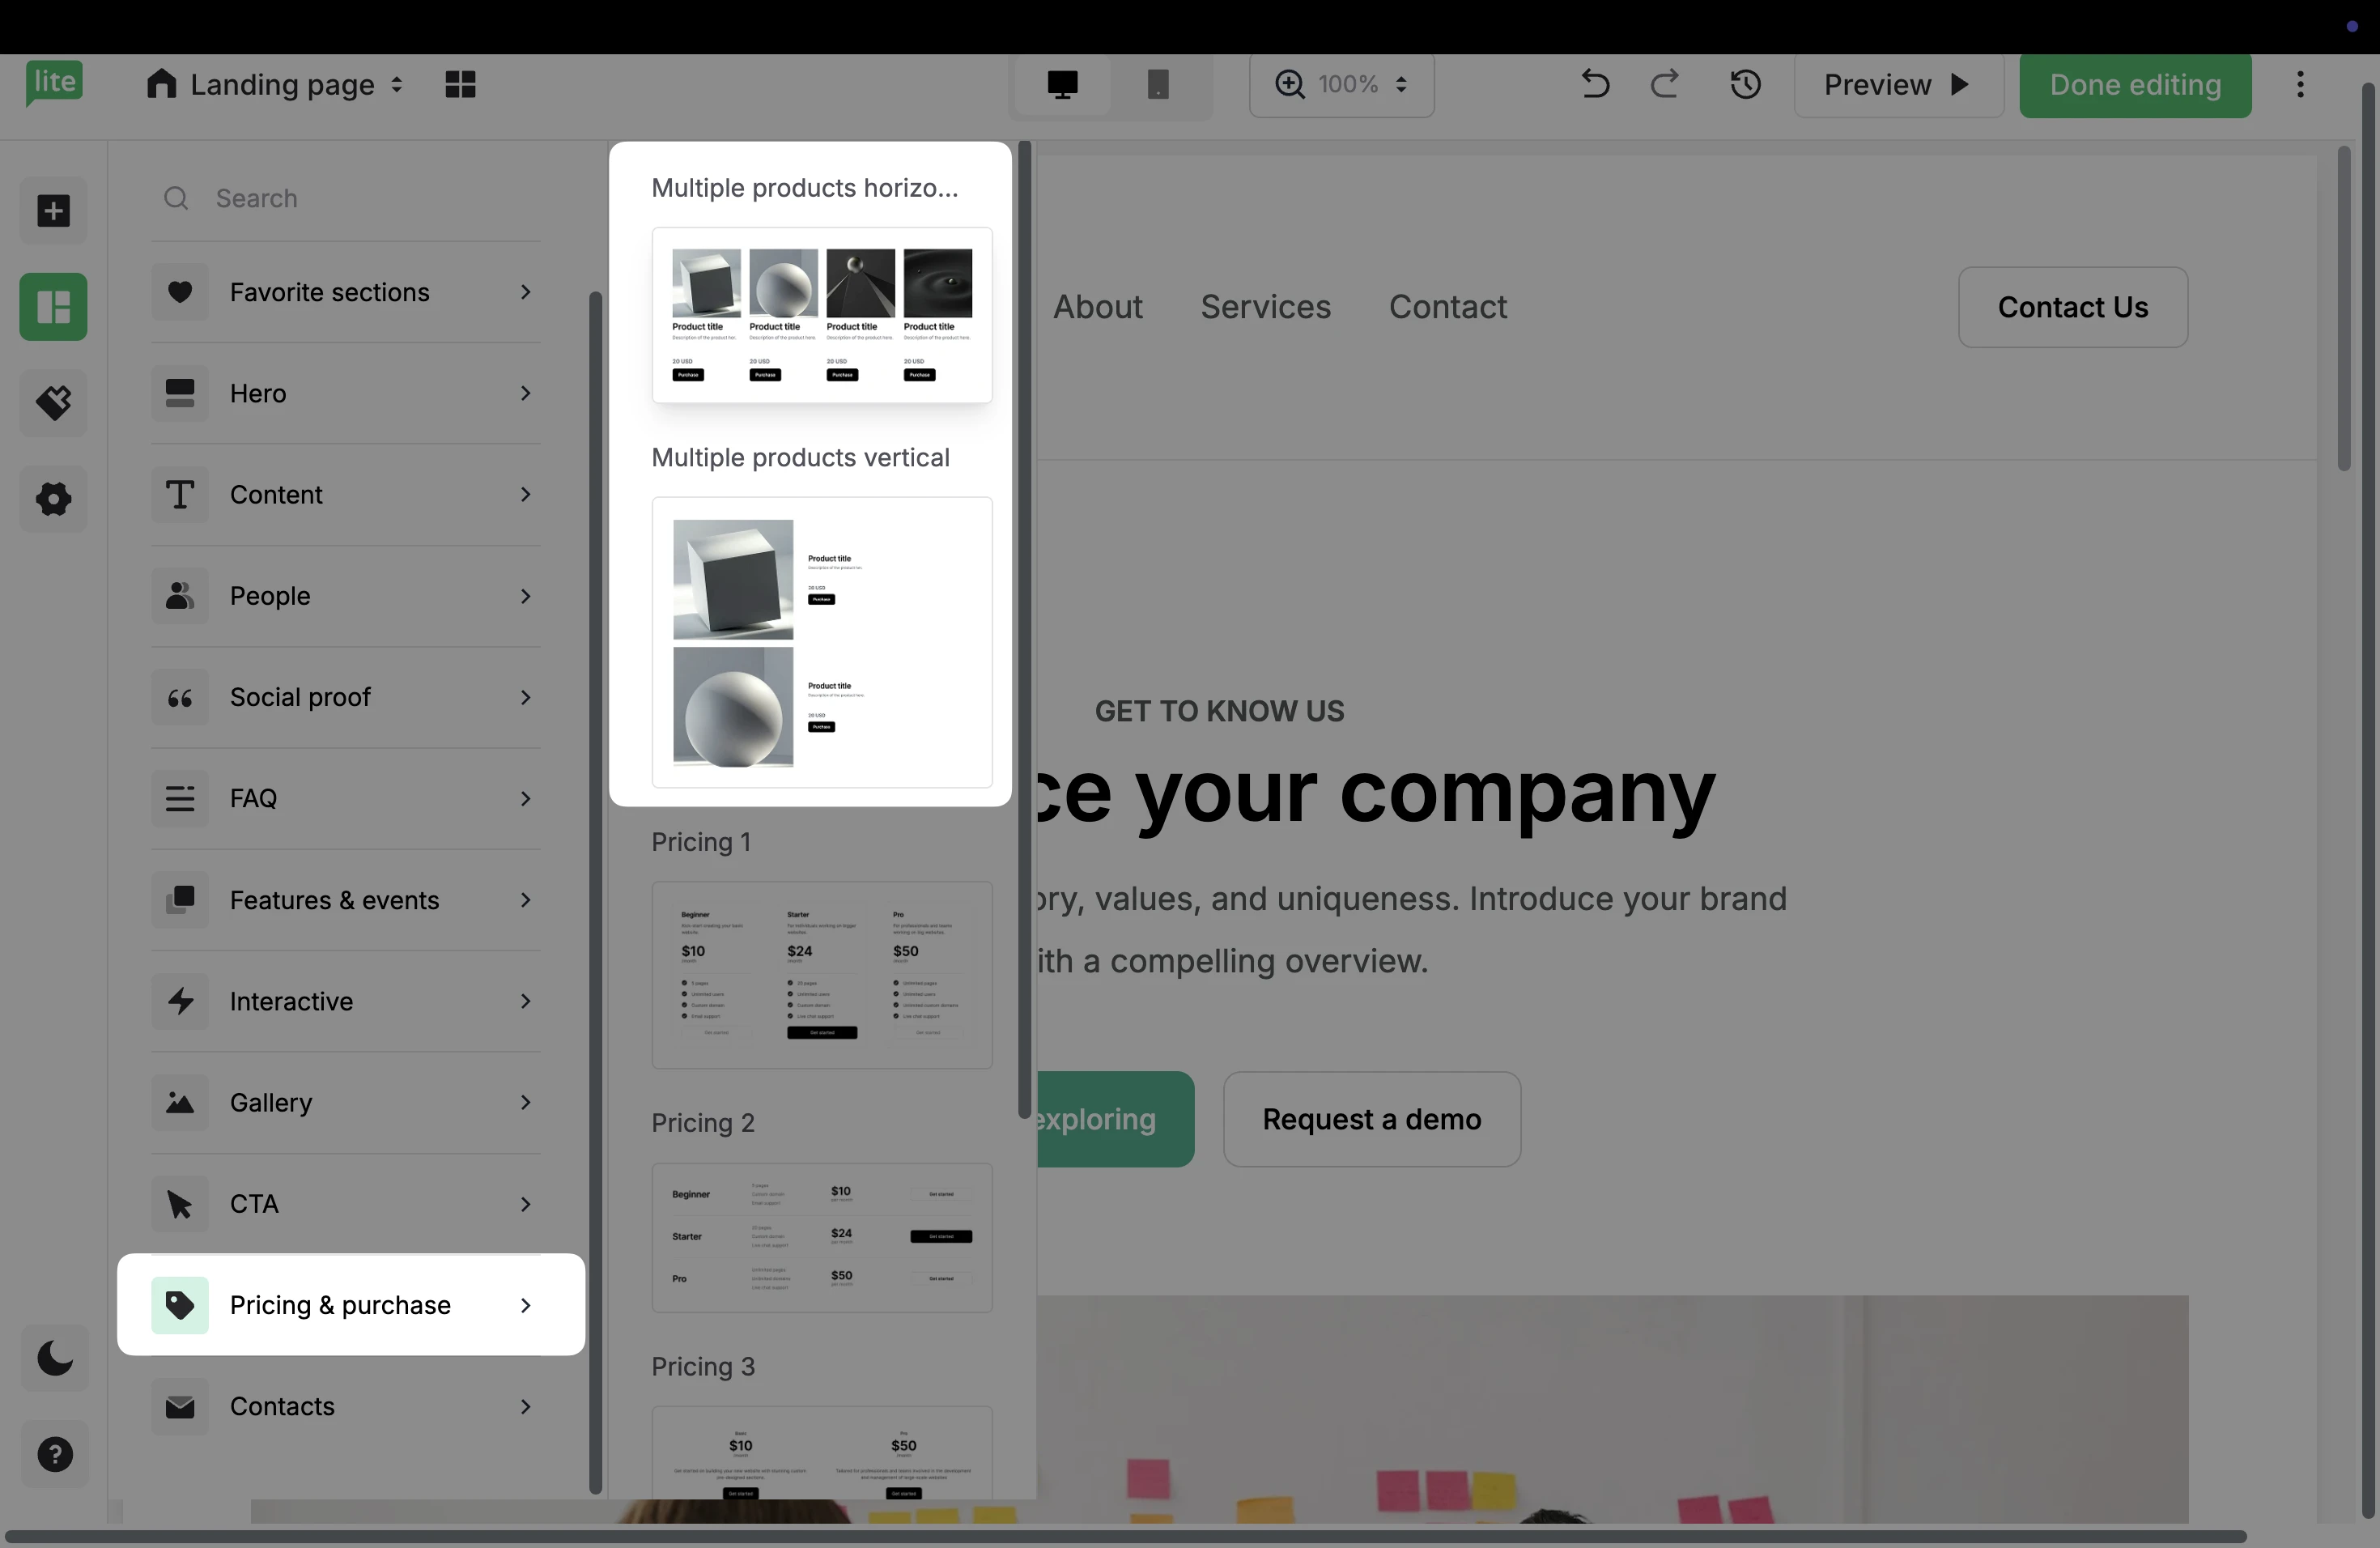
2. Or, under Sections, you can find Multiple product sections in the Pricing & Purchase category.
3. Drag and drop either of these elements into your landing page to add your booking service.
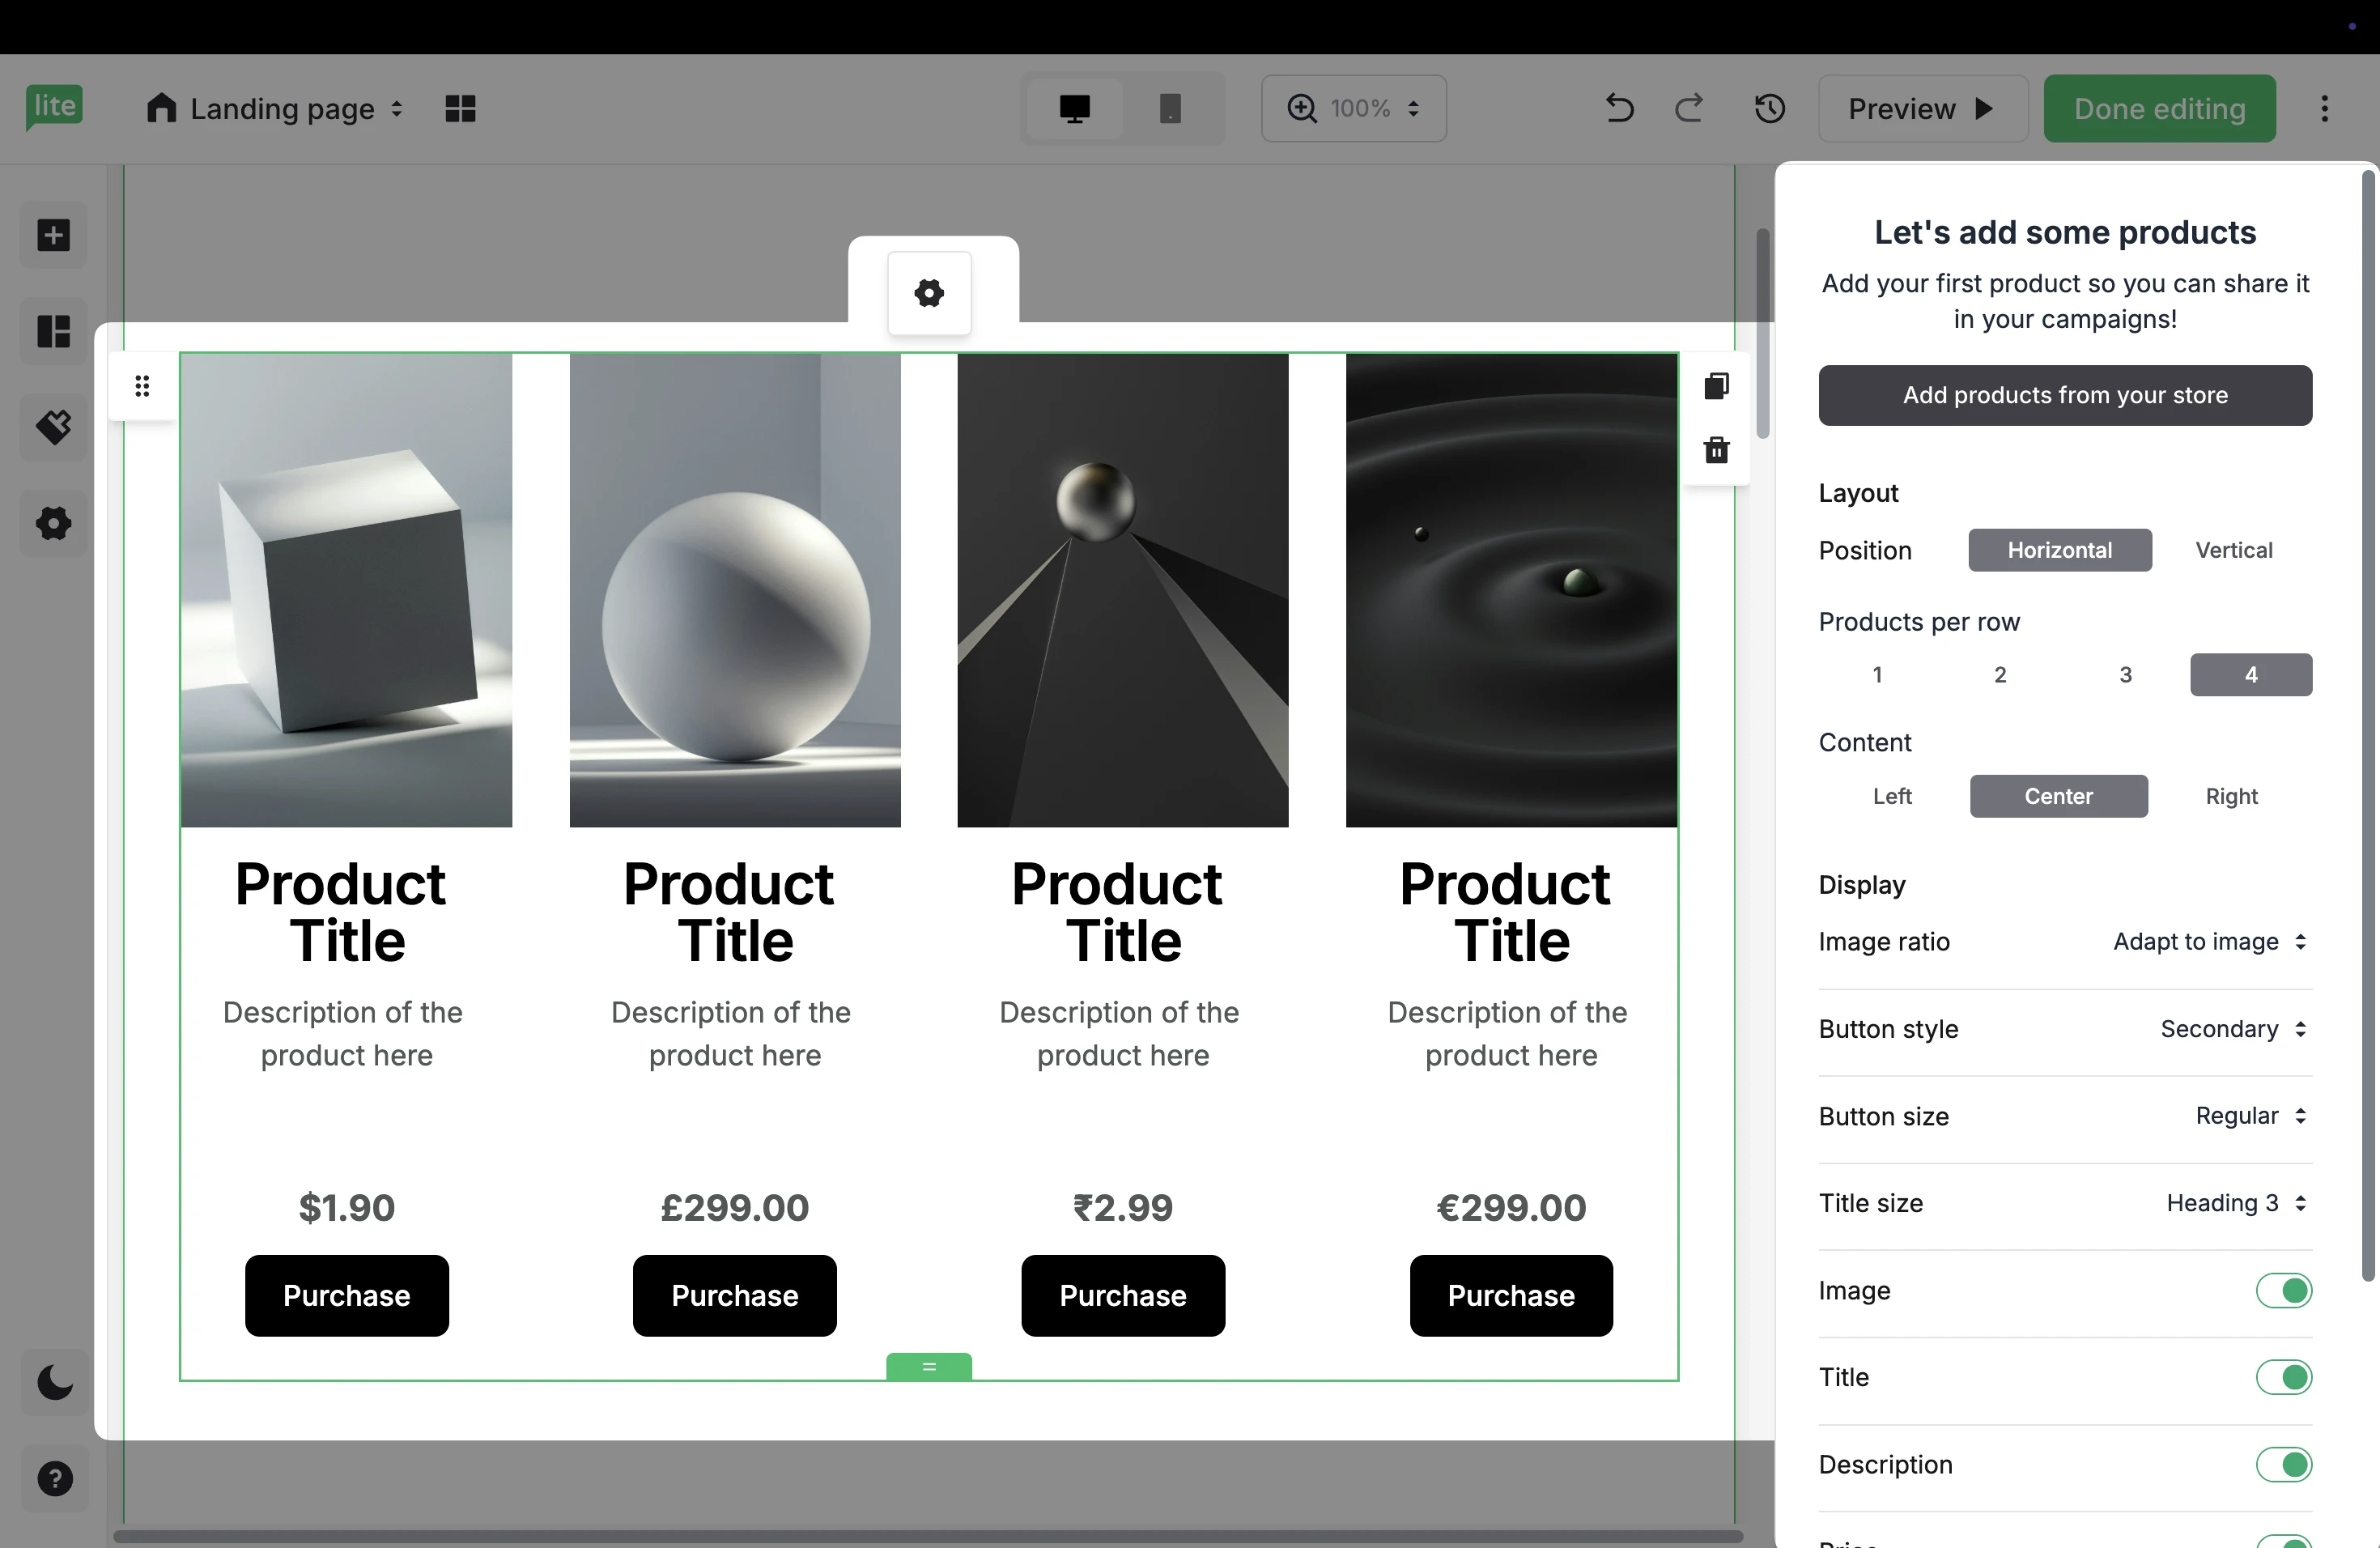
4. Click the Settings icon to open the panel on the right.
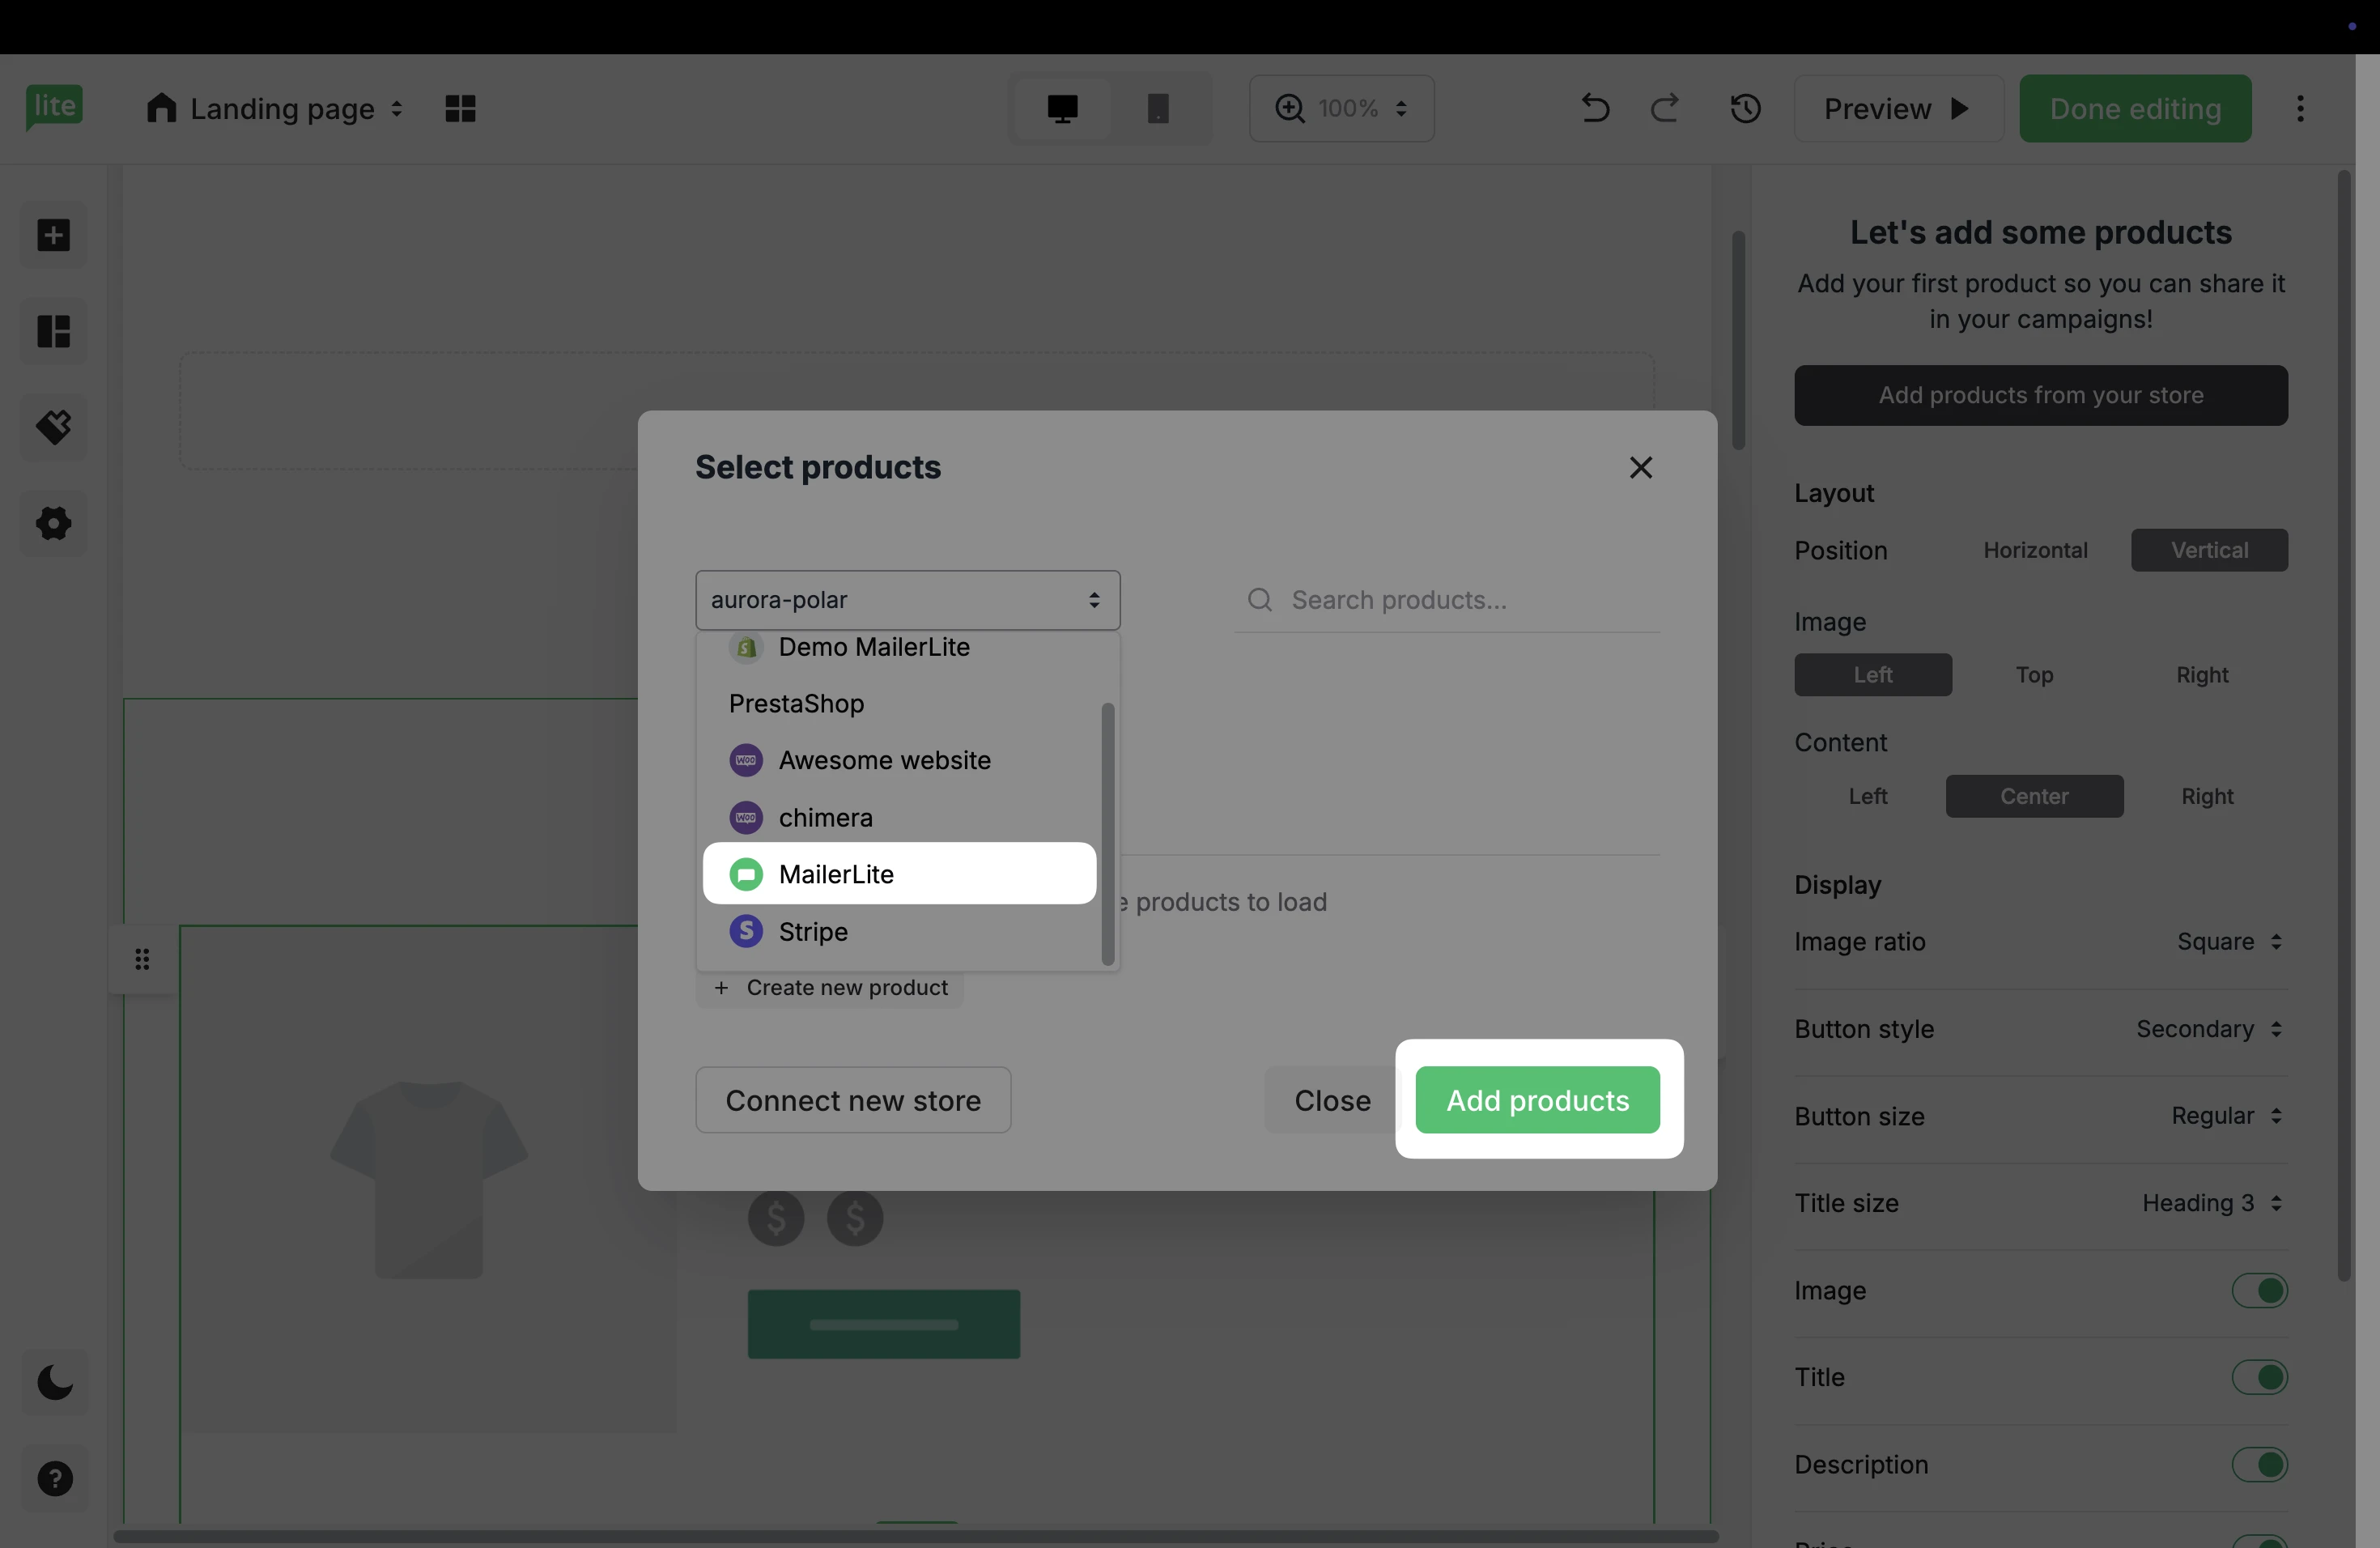
5. Choose Add products from your store to select the products to add to this site.
6. If you have multiple e-commerce stores connected to your MailerLite account, choose MailerLite to select the Bookings created in your account.
Once you have selected your Booking service, click Add products.
7. Once you have added your products, click the Settings button to open the configurations on the right. Here, you can edit the Product and Success view, as well as choose Layout, Content, and Button settings.
8. When a subscriber books your service via the landing page and completes the transaction, the order will be tracked in the site’s report in the Orders tab.
Create an automation
Need help creating automations? Check our guide ➡️ How to create an automation workflow
To create an automation that is triggered when someone books your service:
Navigate to Automations.
Click New automation.
Choose to Start from scratch or use a Template.
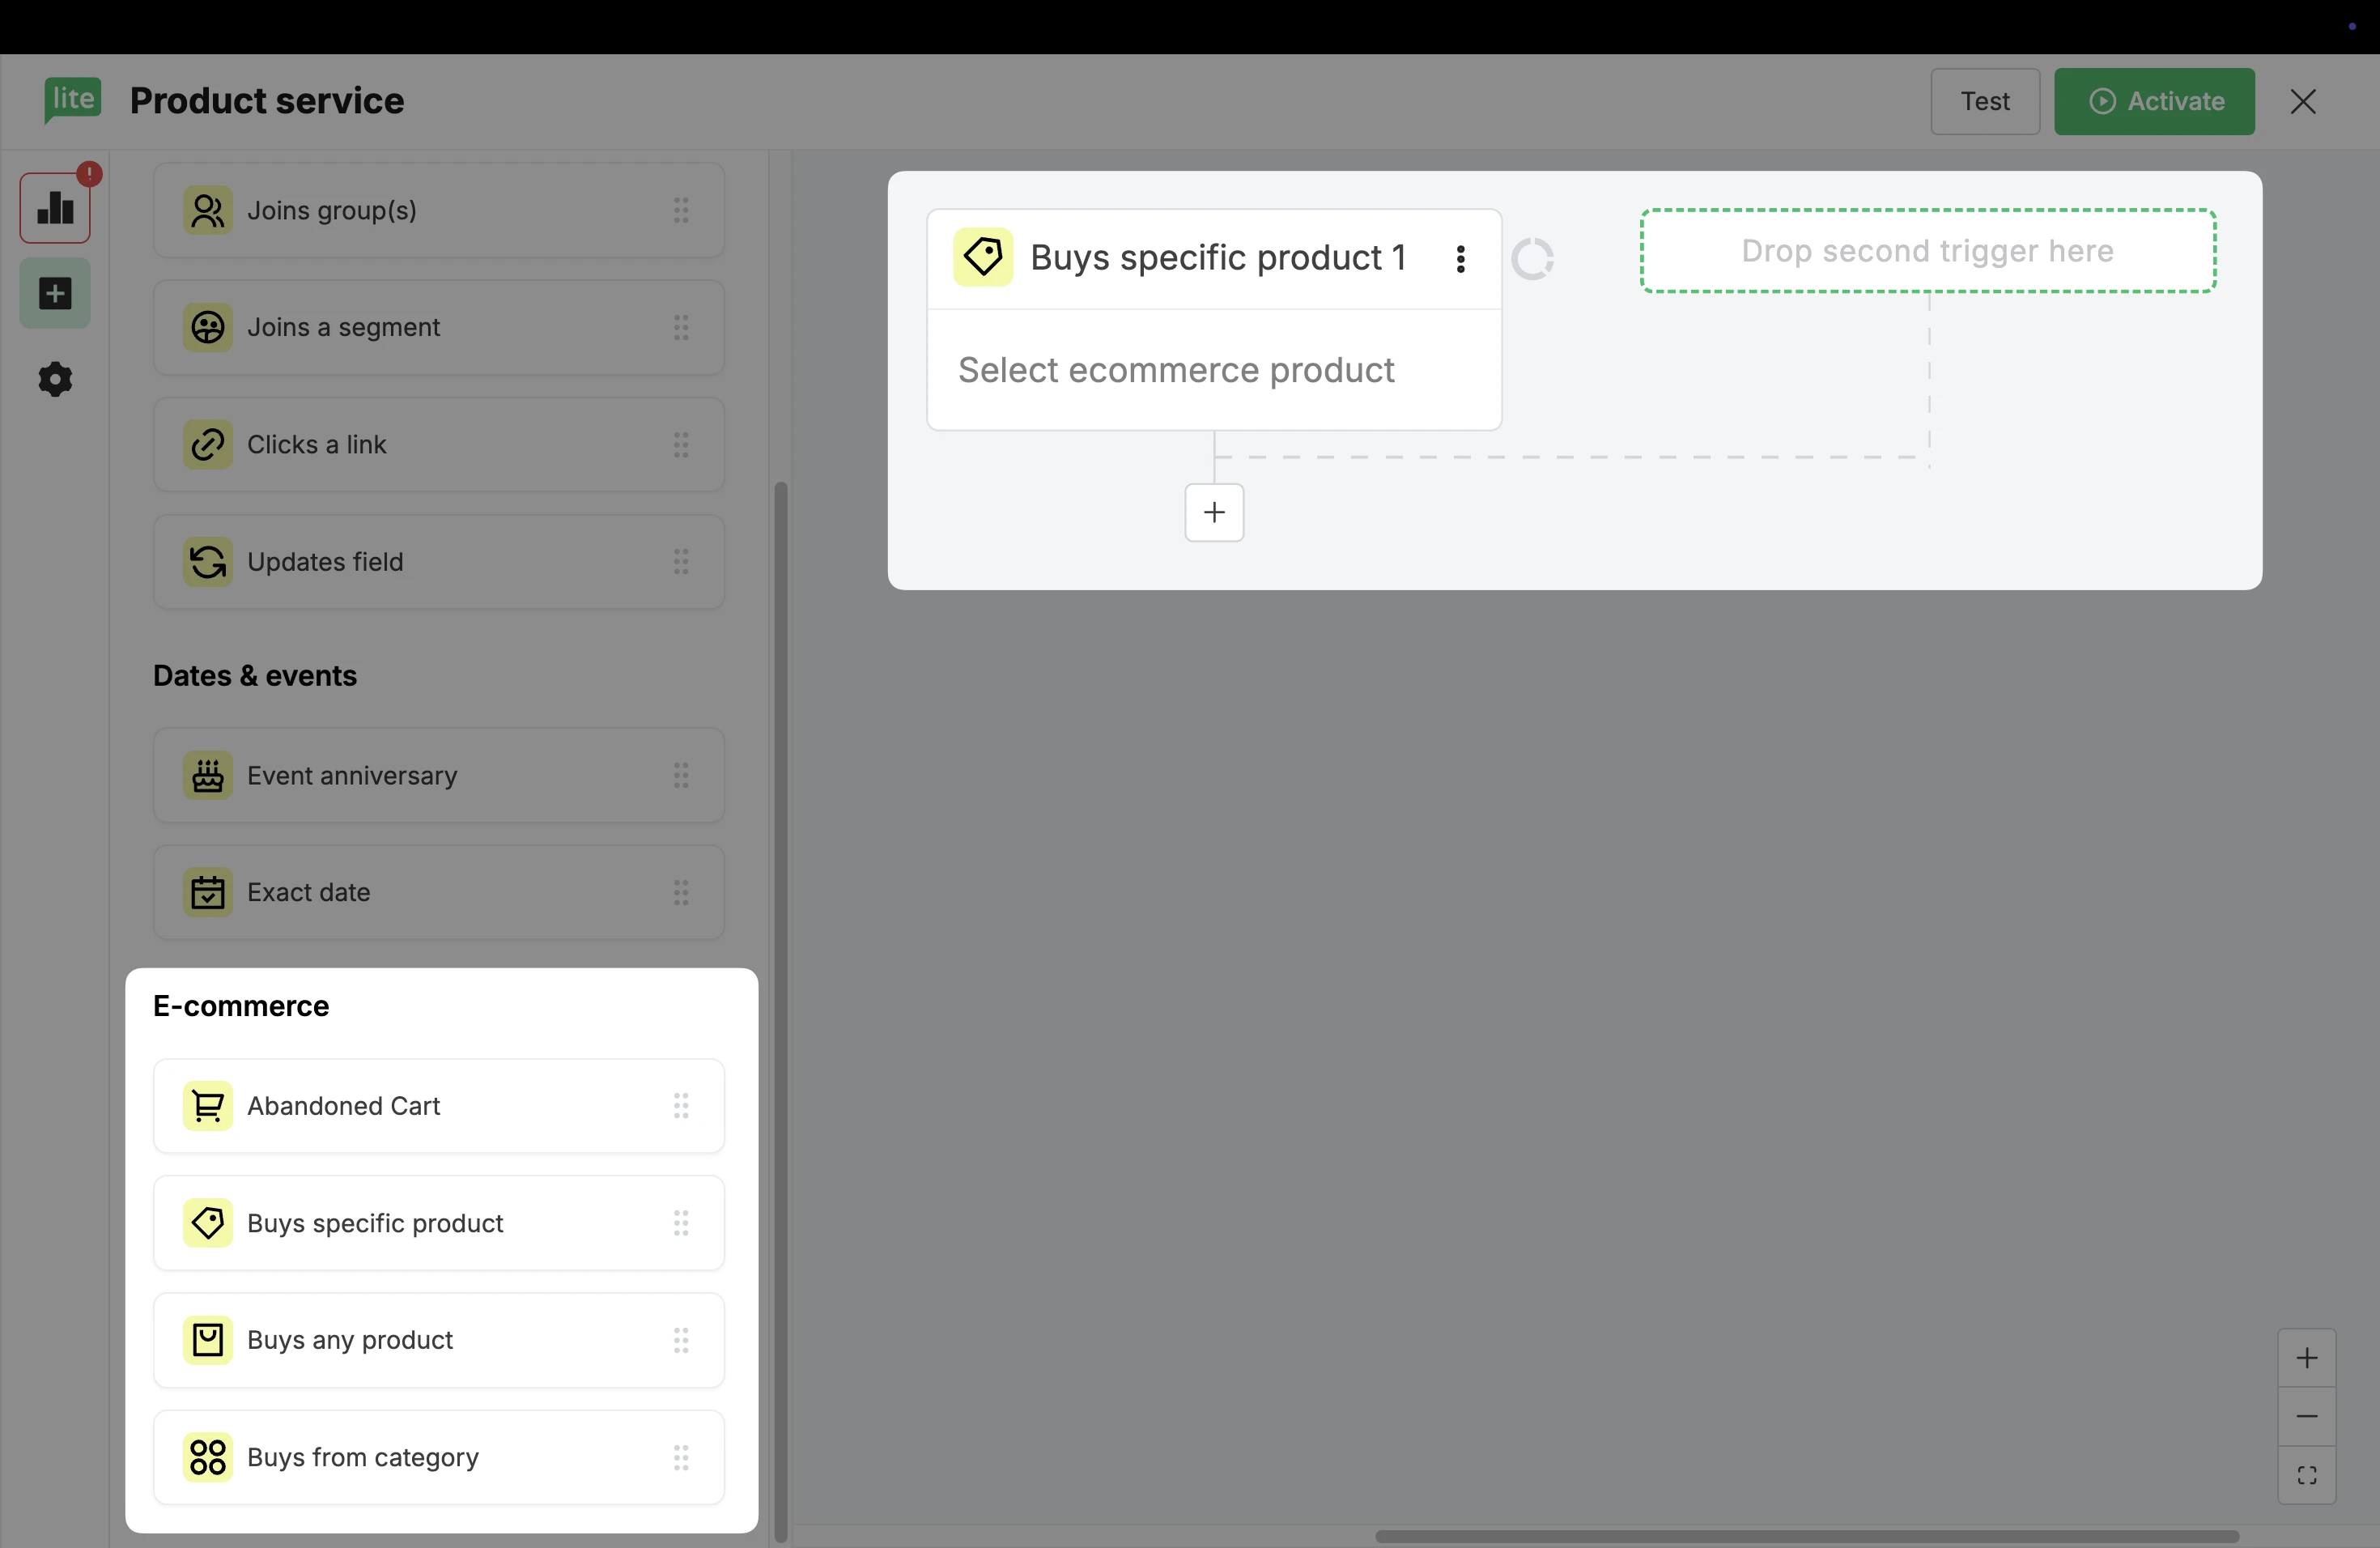
In the Triggers area, scroll down to the E-commerce triggers. Drag and drop the Buys specific product trigger into the workflow editor.
With this trigger, you can start an automation for a subscriber as soon as they complete the transaction to book your service in MailerLite.
5. Click on the trigger to open the settings on the right.
6. Here, choose MailerLite as the shop.
7. Select your service from the dropdown list.
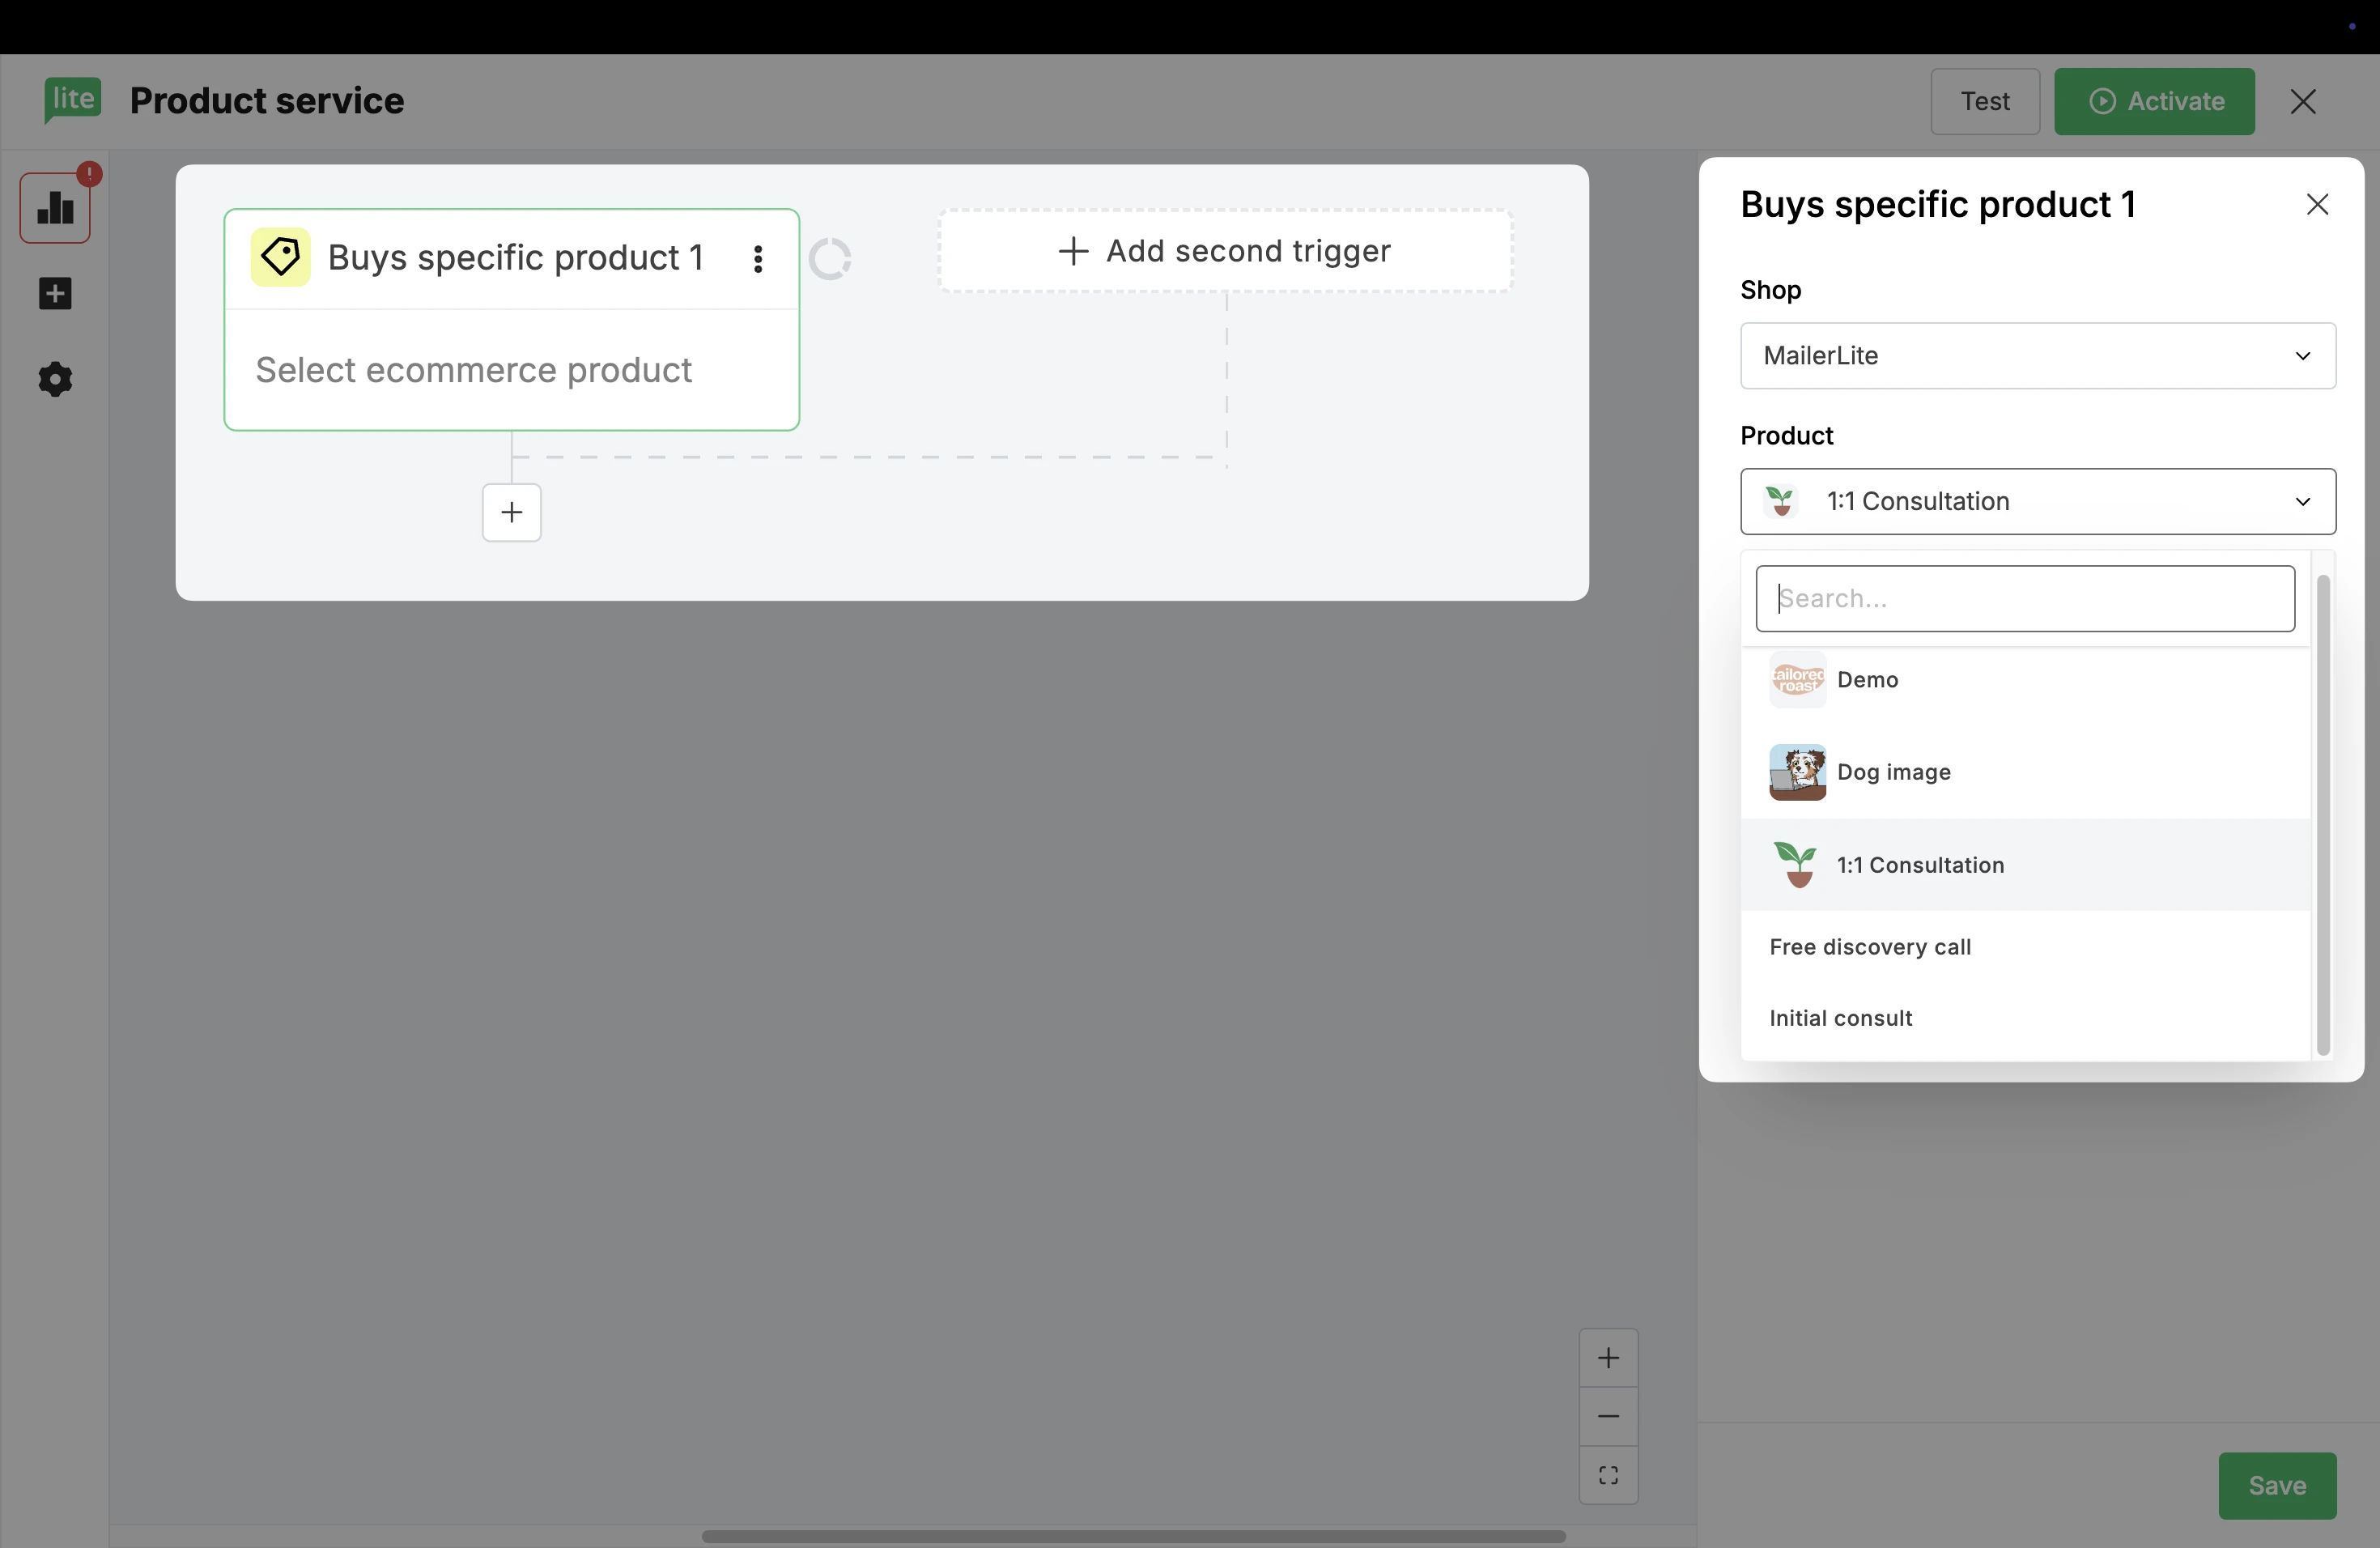
8. Click Save.
From here, continue to add steps (rules and actions) to complete your workflow.
✨ Need inspiration? Check out our blog post ➡️ How to sell coaching, consultations, webinars, and more with your new bookings tool