Note: If you're a Legacy (Classic) user, please log in to your account to access the dedicated Legacy (Classic) Help Center.
Anyone is able to subscribe to your list, even bots (also known as spambots). At the moment, there are no mechanisms that can block a user from subscribing.
However, you can block unwanted subscribers from receiving newsletters.
How to create a blacklist of unwanted subscribers
This sort of blacklist allows you to exclude certain subscribers from receiving your newsletters and automation emails by creating a segment with the filter:
Fields > Email > Equals > [email address you don’t want to send newsletters to]
To achieve this:
Head to Subscribers.
Click on Choose a filter and select Email.
In the next field, choose the operator Equals.
In the last field, enter the email address you don’t want to send newsletters to.
Click Save as segment, give it a name, and click Create.
To add additional email addresses to the segment, select + Add filter under OR and repeat steps 2-4.
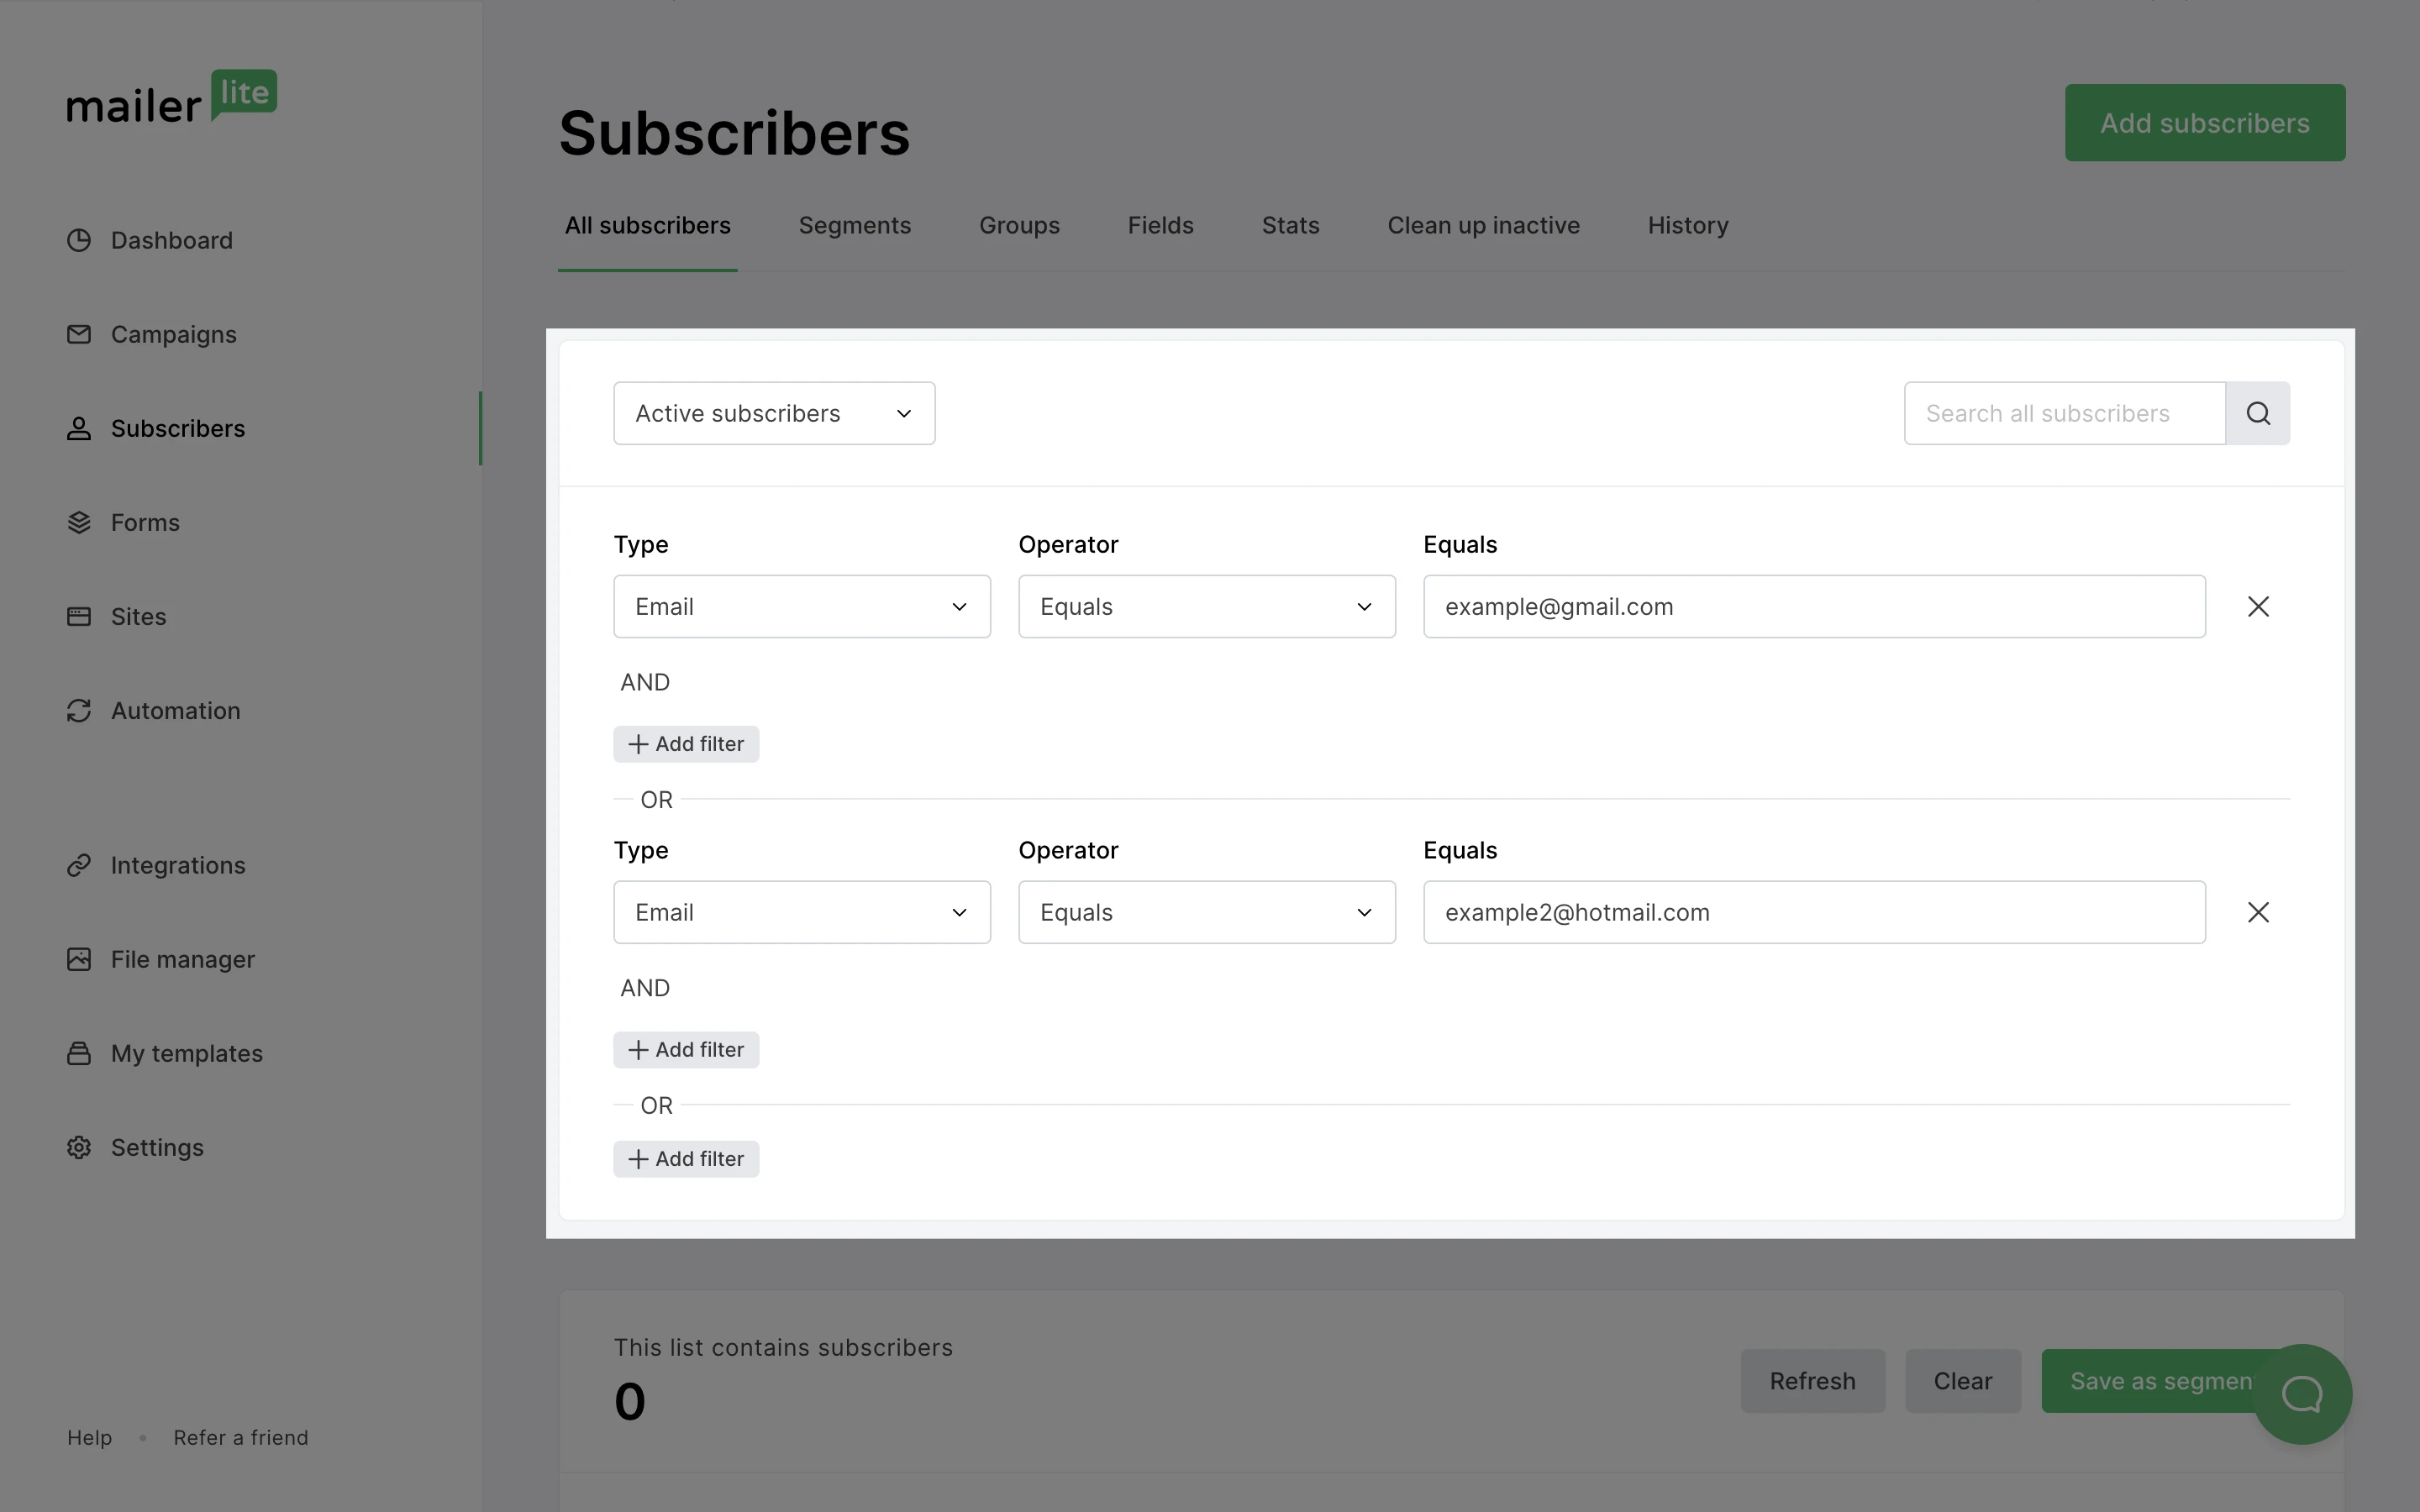
Note: Make sure you add new filters under OR instead of AND, otherwise the segment will not function properly.
To exclude the subscribers in this blacklist from receiving any newsletters or automations, click on Exclude segment on the Recipients page of a campaign. The campaign will not be sent to those who are in this segment.
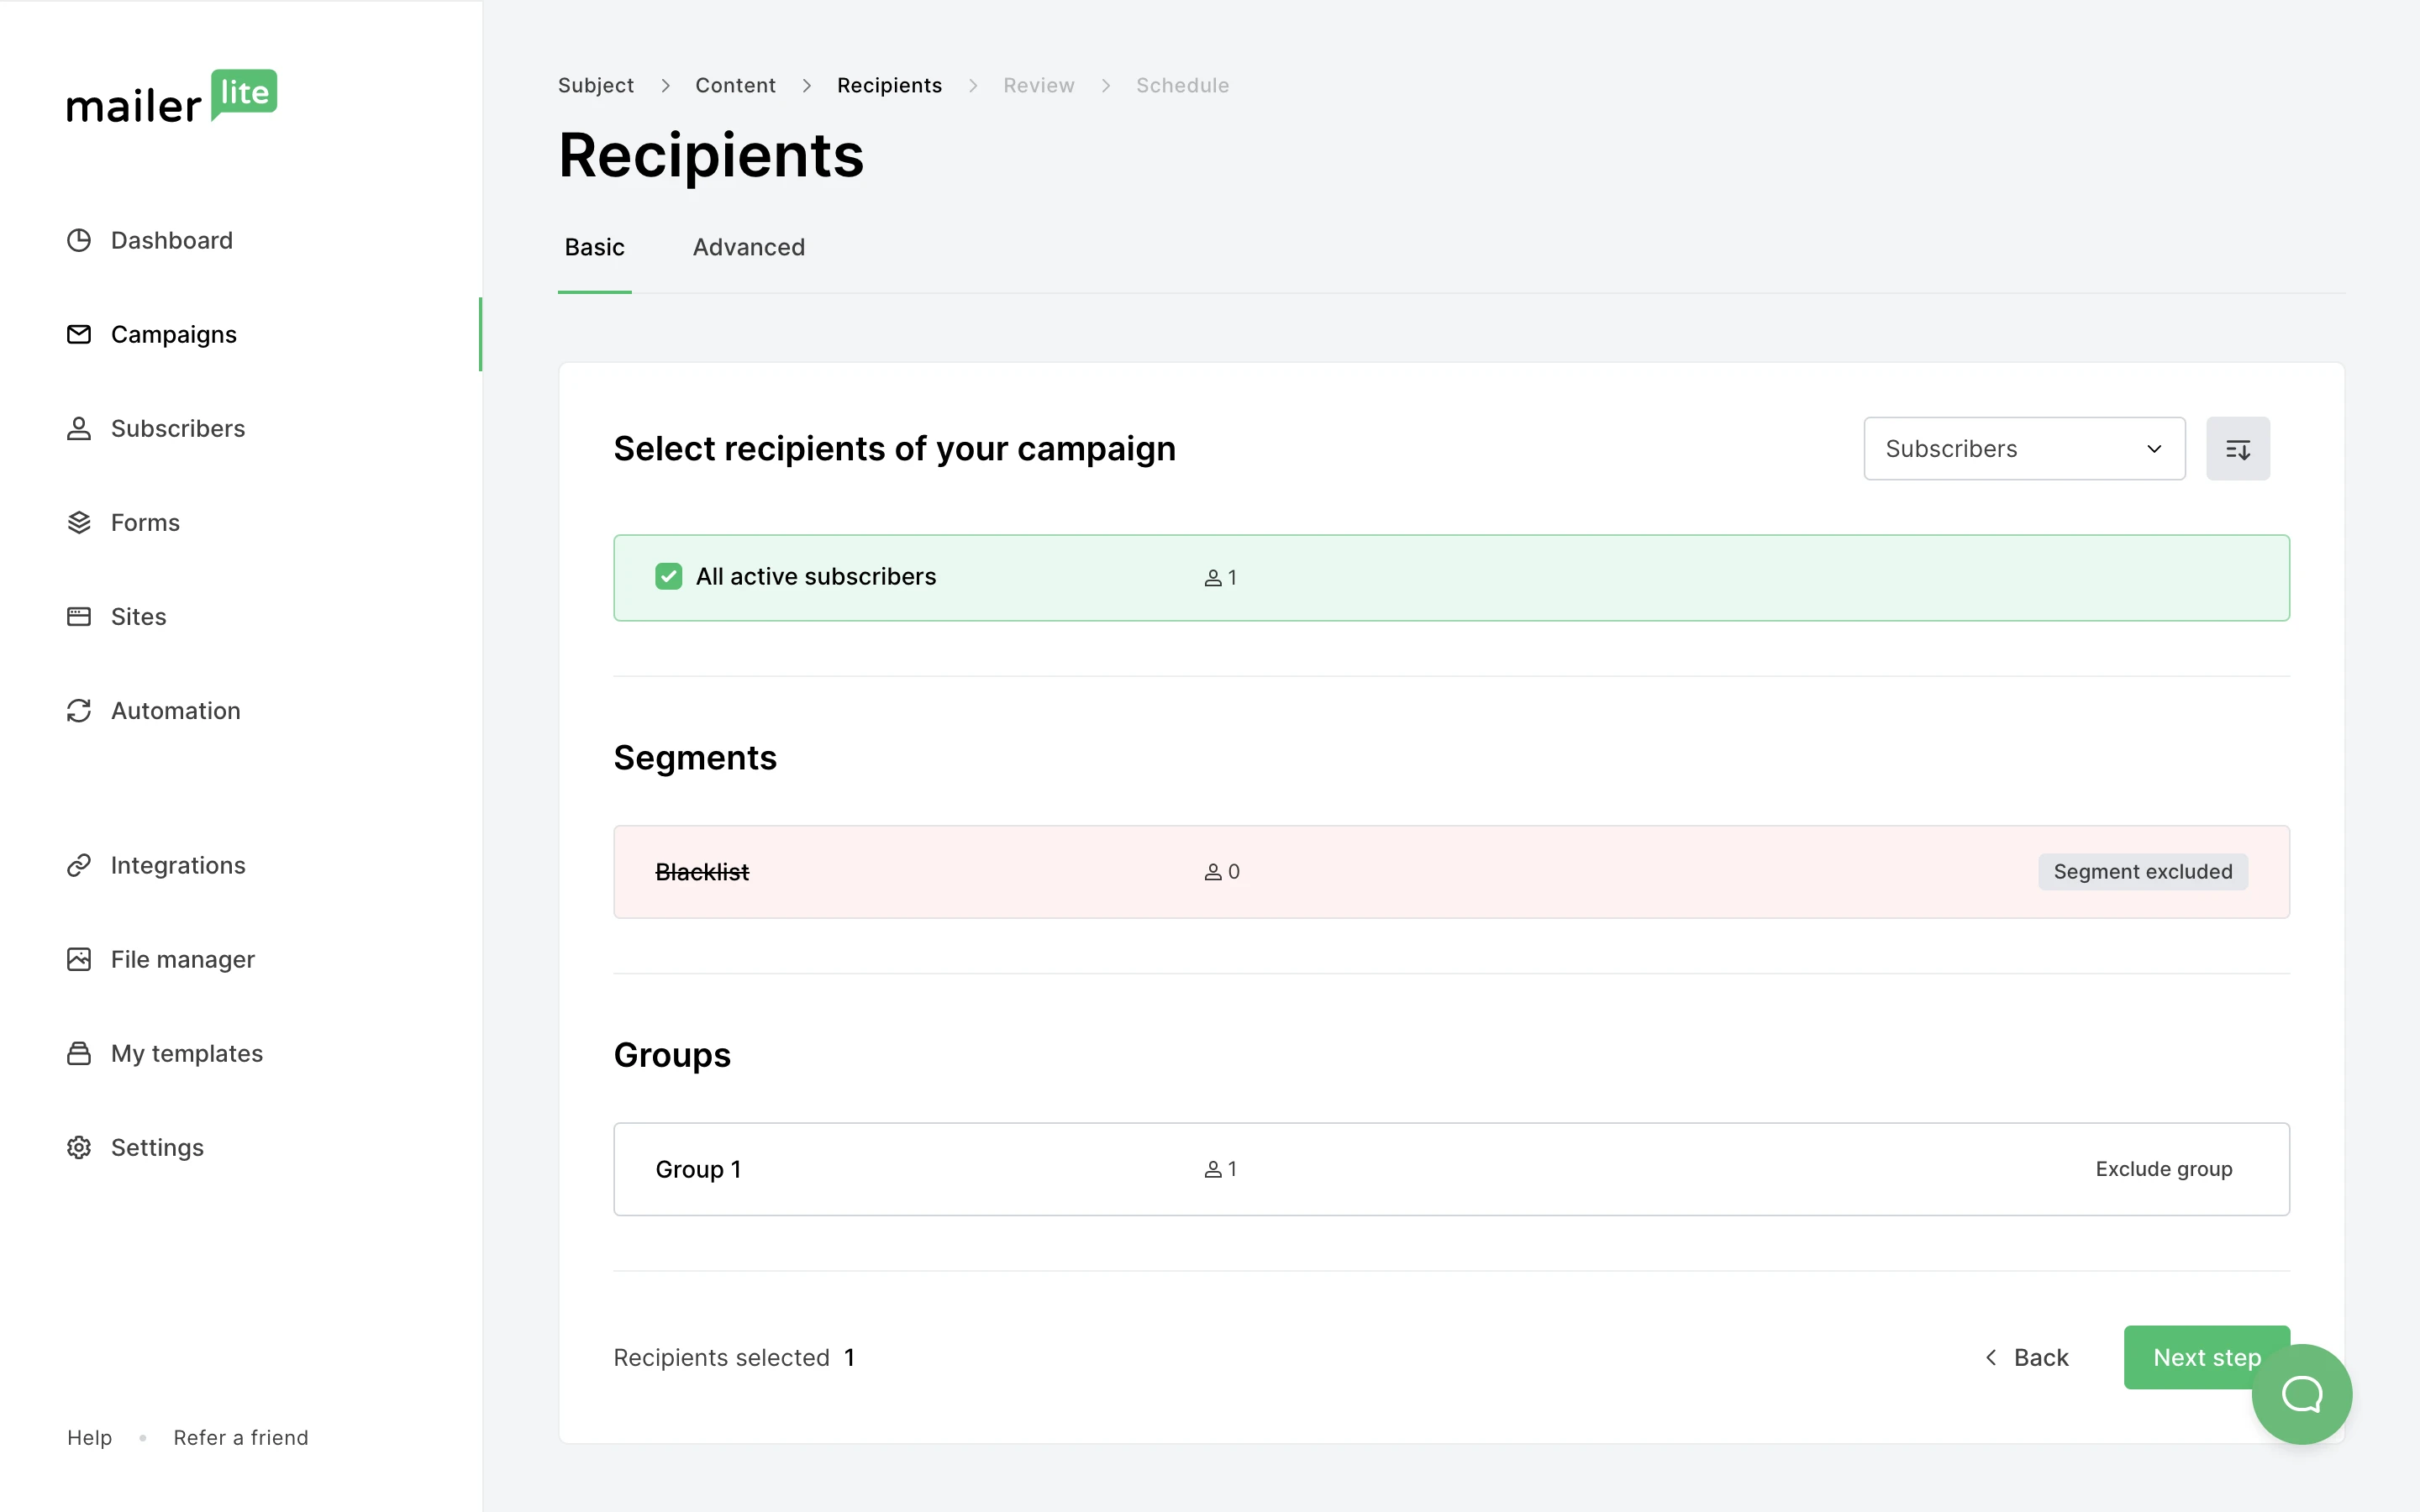
Read How to exclude subscribers from a campaign or an automation for more information.