Note: If you're a Legacy (Classic) user, please log in to your account to access the dedicated Legacy (Classic) Help Center.
After creating a MailerLite popup, embedded, or promotional form, you can follow these steps to install it on your website. Keep in mind that each website will have its own unique settings, and we recommend contacting your website hosting provider for more information on installing JavaScript forms on your site.
How to install an embedded form on a website
To install the form on your website you will need to copy/paste the Javascript snippet onto every page of your website (just before the closing </head> tag and a smaller line of code wherever you want your form to appear):
Navigate to the Forms page.
Click the Overview button of your form.
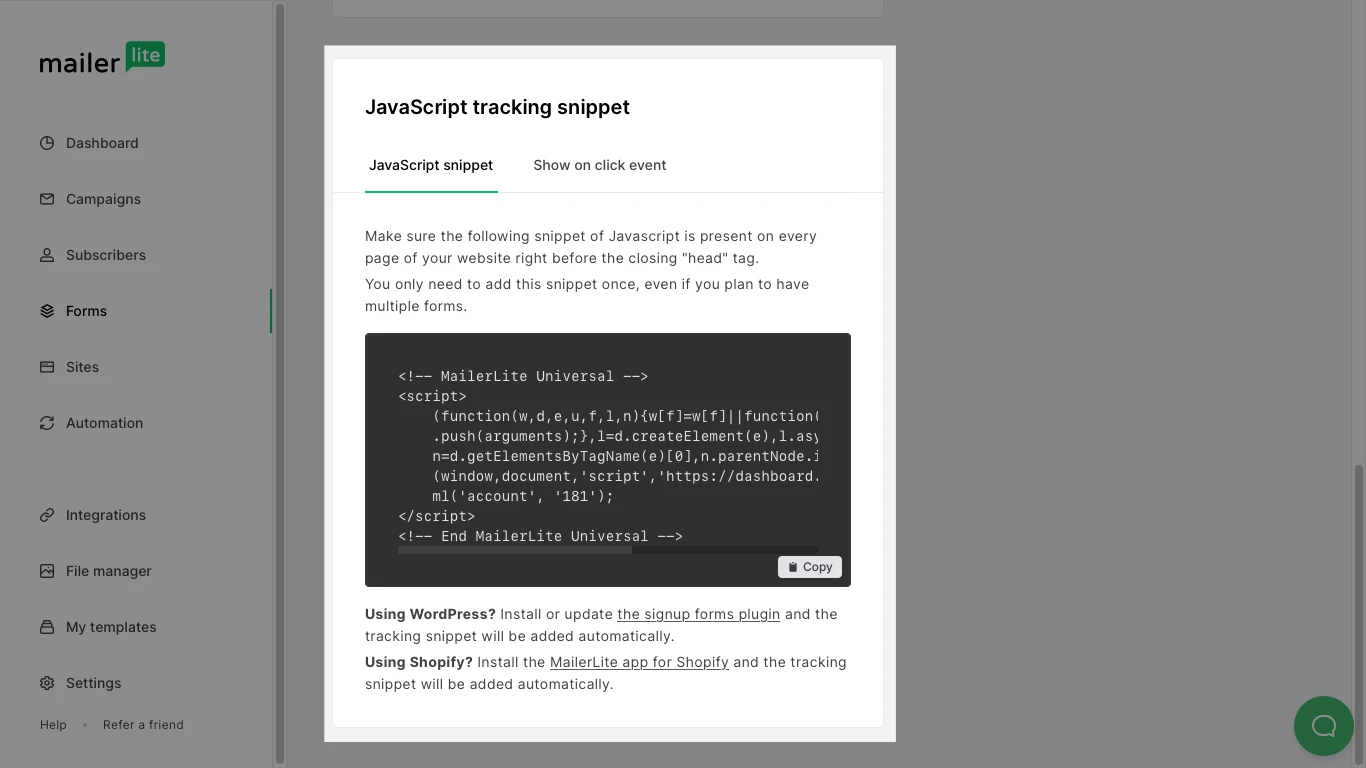
Scroll down to Javascript snippet. Here where you'll find two JavaScript snippets.
The first snippet (the larger piece of code) is the MailerLite universal tracking snippet. The second snippet (the small piece of code) is your individual form’s code.

4. Copy and paste the universal tracking snippet into your website’s HTML just before the closing </head> tag.
Your website is made up of sections of HTML called elements. The very first element is the <head>, it starts with the opening <head> tag and ends with the closing </head> tag. If you’re unsure how to edit your website HTML, we recommend contacting the support team of the platform on which you created your website.
💡 Using Wix? Read the instructions on installing forms on your Wix site.
More ways to install:
If you are not sure where to add the Javascript snippet, check your website builder's settings or help documentation to locate where you can add custom HTML or JavaScript. This might be labeled as Custom Code, HTML/CSS, or JavaScript settings. Some platforms allow code injection globally (affecting the entire site) or on specific pages.
Some website builders, such as Squarespace, have custom code blocks which allow you to add custom HTML and JavaScript directly to a specific page, blog post, sidebar, footer, or other content areas of your site. While other features such as code injection enables you to insert custom HTML and scripts that affect your entire site or specific pages.
How to install a pop-up form on your website
To install the pop-up form on your website, you will need to copy and paste the JavaScript snippet onto every page of your website, right before the closing </head> tag.
To install the JavaScript tracking snippet to your website:
Navigate to the Forms page and click Overview.
Scroll all the way down until you see the JavaScript snippet (or copy it from the Setup page when creating a pop-up).
3. Copy and paste the universal tracking snippet into your website’s HTML just before the closing </head> tag. (You only need to do this once, even if you plan on installing multiple forms on your website).
The popup will then appear on your website and will show according to the Visibility settings in your MailerLite account.
💡 Using Wordpress or Shopify?
Install the MailerLite plugin for Wordpress or the MailerLite plugin for Shopify to install pop-up forms on your website without using any code.
How to install a MailerLite pop-up form to a MailerLite website or landing page
To add a MailerLite pop-up to a landing page or website that was created in your MailerLite account:
Navigate to the Forms page and click Overview.
Scroll all the way down until you see the JavaScript snippet (or copy it from the Setup page when creating a pop-up).
Navigate to Sites and click Overview for the website or landing page that you would like to add the form to.
Scroll down to Settings.
Click Edit settings.
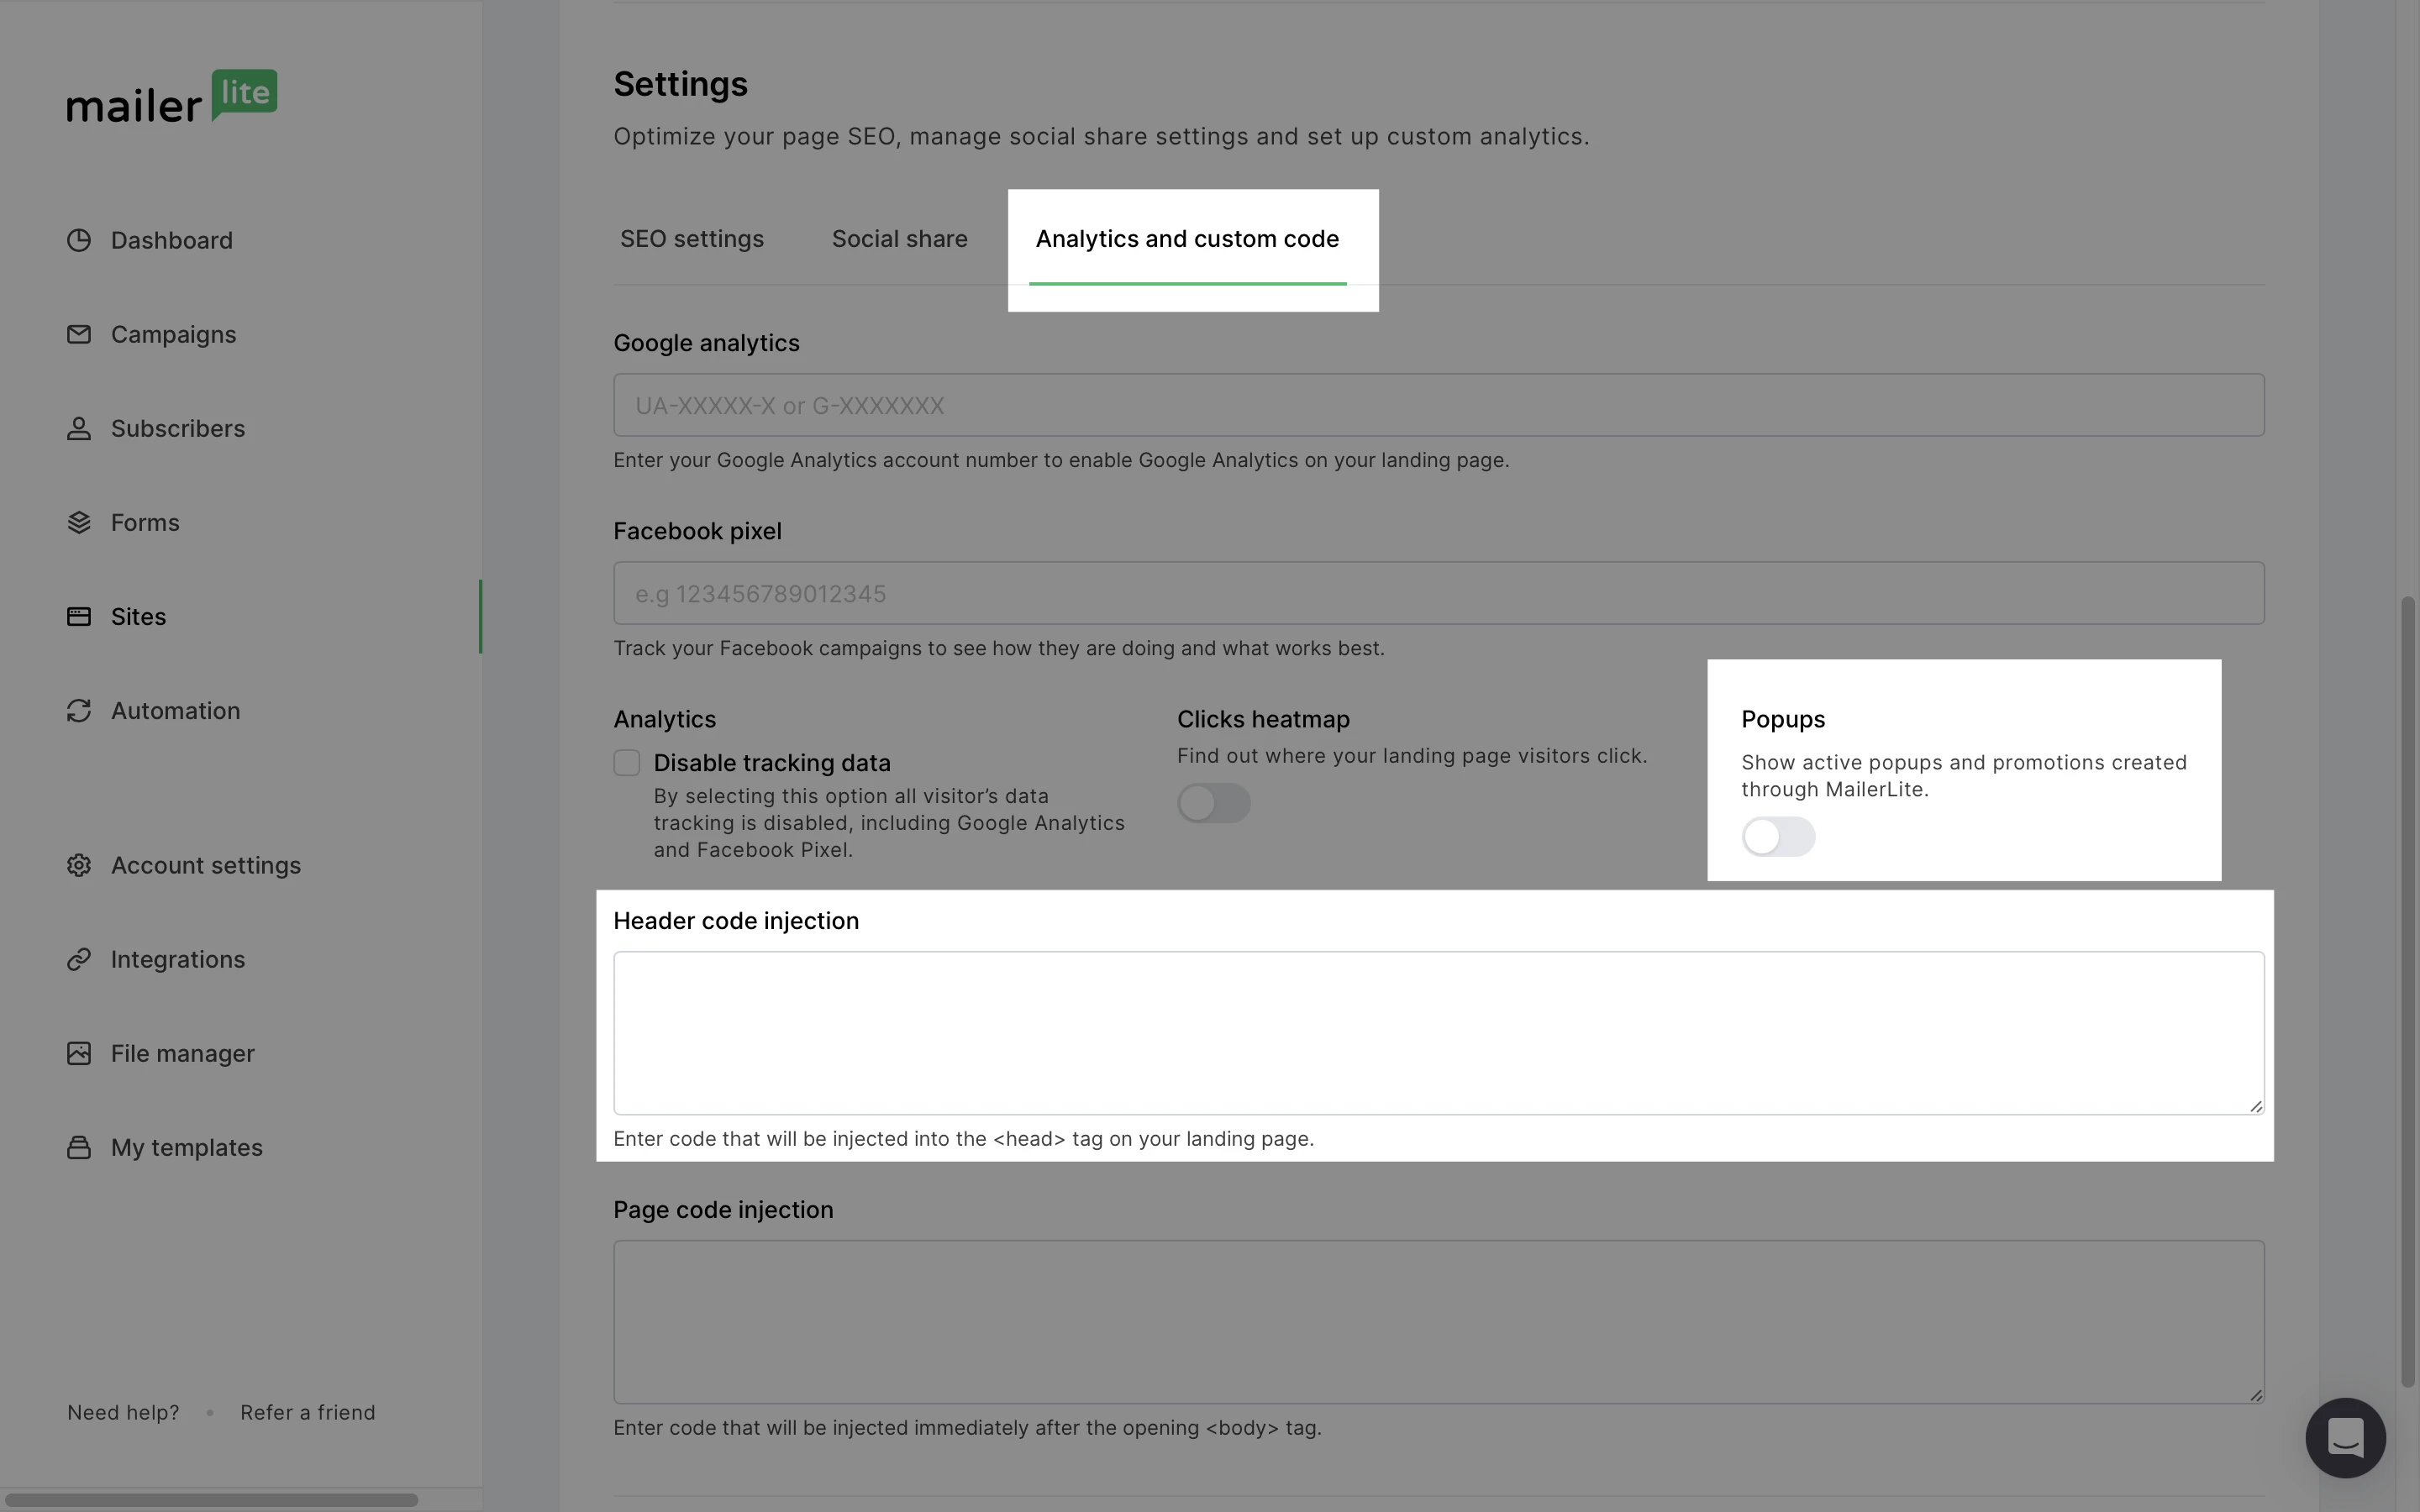
Choose the Analytics and custom code tab.
Paste the form's JavaScript snippet into the Header code injection input area.
Toggle the option for Pop-ups.
9. Click Save and Continue.
Once saved, check your published website or landing page and the form should show according to the form's behavior settings.
✍️ Keep in mind: Those who sign up using the form will only be shown in the form's analytics, not the website or landing page stats.