Note: If you're a Legacy (Classic) user, please log in to your account to access the dedicated Legacy (Classic) Help Center.
The MailerLite Shopify integration connects your Shopify store to MailerLite so your customers, orders, and products sync automatically, and you can use them in campaigns and automations.
Learn how to fix the most common Shopify integration problems, including customers not syncing, data not syncing back to Shopify, and e-commerce automations such as abandoned cart not triggering.
For setup instructions and a settings breakdown, check out How to connect Shopify to MailerLite.
What to check first
Most Shopify integration issues come from one of three setup gaps. Check these before working through the sections below:
The store uses the correct Shopify app. New MailerLite uses the MailerLite Email Automation app. MailerLite Classic (Legacy) uses a different app, MailerLite Email Marketing. A store with the Classic app installed will not sync to your New MailerLite account.
Last-received time is recent. The Shopify settings page shows when MailerLite last received data from your store. If the last-received time is old, the store has likely stopped syncing and requires a re-sync.
The integration was reinstalled after a migration. Integrations linked to a MailerLite Classic (Legacy) account don’t move automatically when you migrate to New MailerLite. You need to reconnect Shopify to your New MailerLite account.
Shopify customers are not syncing to MailerLite
If you don’t see customers syncing to MailerLite, check these other common causes:
Subscribers are syncing to a different group. Review which group you’ve selected in the integration settings under Shopify dedicated group.
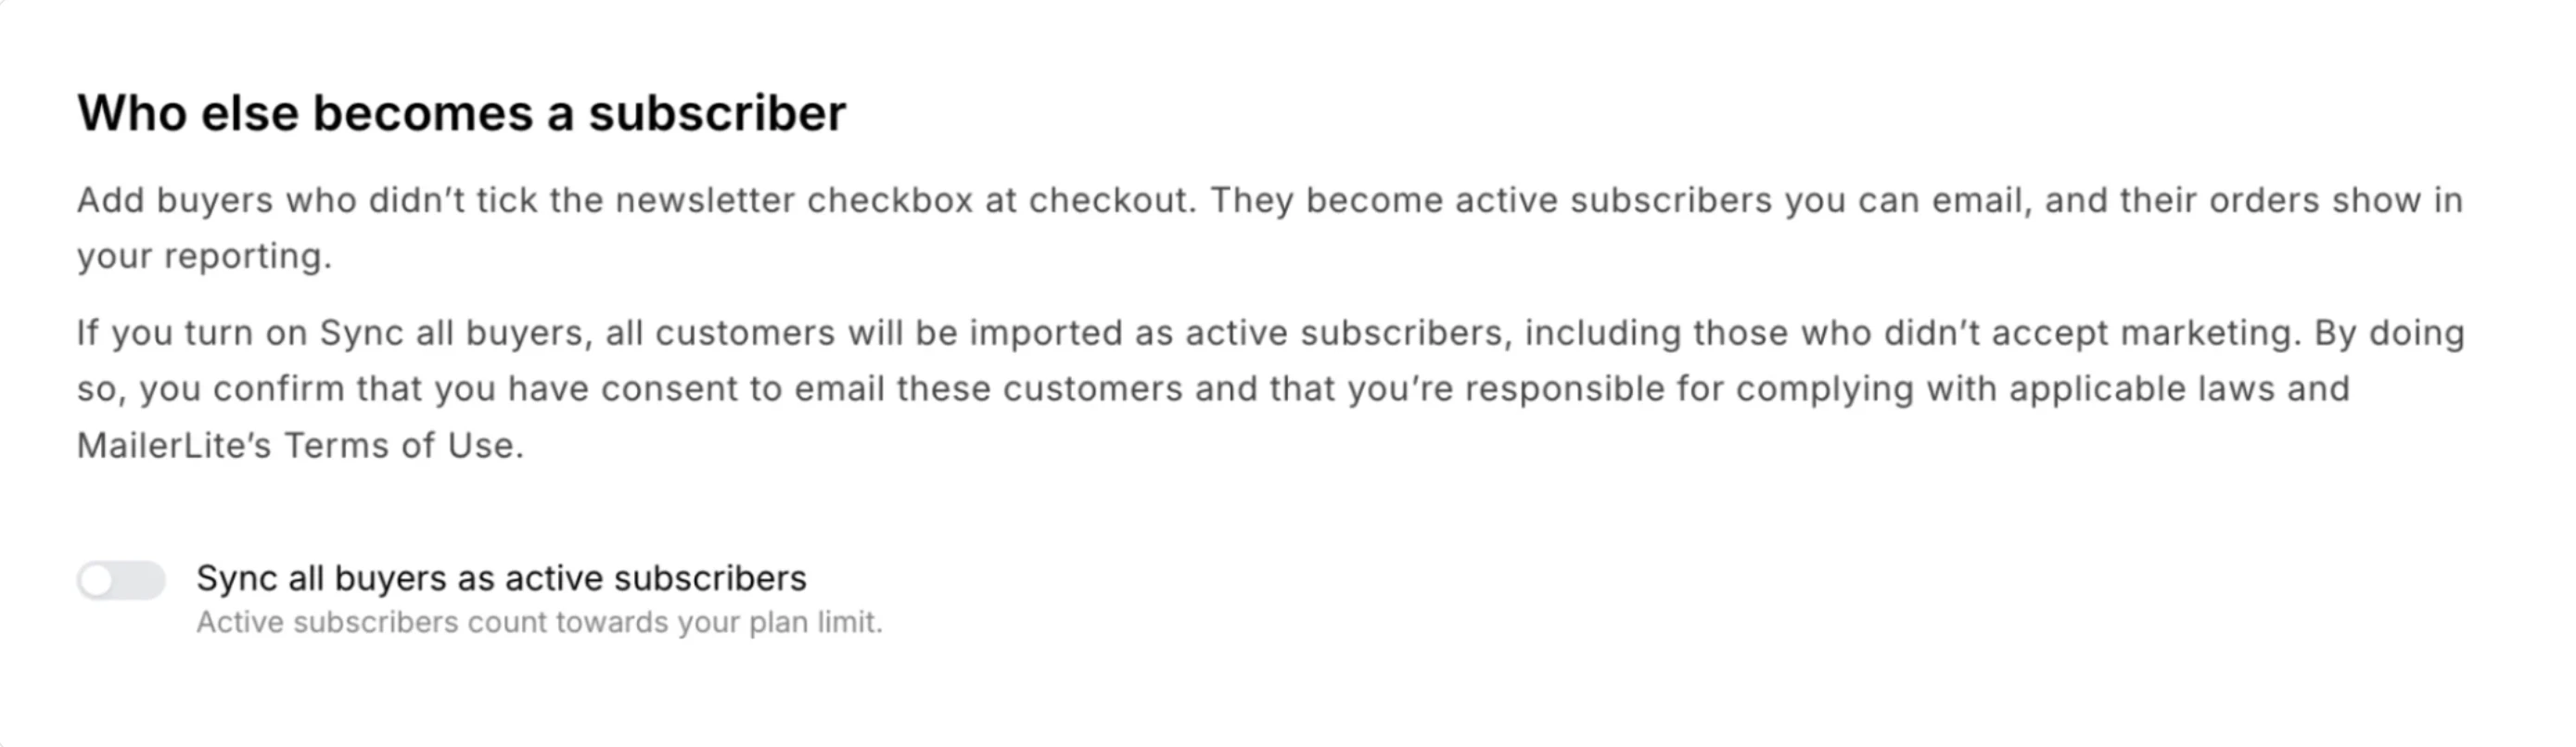
Only customers who accepted marketing are set to sync. If Sync all buyers as active subscribers is turned off, Shopify customers who didn’t tick the marketing checkbox at checkout are not added as active subscribers.
The data is out of date. Run a re-sync from the Shopify settings page.
Shopify customers who didn’t accept marketing were added as active subscribers
Shopify customers who didn’t tick the marketing checkbox at checkout are added to MailerLite as active subscribers when the Sync all buyers as active subscribers setting is turned on. These subscribers have the Accepts marketing field value set to 0 and won’t trigger e-commerce automations.
Because every buyer is added, turning on Sync all buyers as active subscribers can cause a sudden jump in your subscriber count. If your subscriber count goes over your plan’s limit, your plan may upgrade to a higher tier.
To stop syncing customers who didn’t accept marketing:
Navigate to the Integrations page and open the Shopify integration settings.
Turn off Sync all buyers as active subscribers.
E-commerce automations are not triggering
If a Shopify customer didn’t trigger an e-commerce automation, check the following:
Marketing consent at checkout. Open the subscriber’s profile and check the Accepts marketing field. If it shows 0 or is empty, the customer didn’t accept marketing for that purchase and won’t trigger the automation.
The automation was active. E-commerce automation triggers only apply to purchases made while the automation is turned on. Purchases made before you activated the automation, or while it was paused, don’t trigger it.
The order status. The order needs to be marked as Pending payment, Processing, or Completed in Shopify.
The 24-hour limit. An e-commerce automation trigger can only activate once every 24 hours for the same subscriber.
Double opt-in. If double opt-in is turned on, the subscriber needs to confirm their email address before they can trigger the automation.
The subscriber’s status. Only active subscribers can trigger e-commerce automations. Unsubscribed subscribers can’t.
For more details, see E-commerce: Automation does not trigger after a purchase.
Abandoned cart or checkout emails are not sending
Shopify offers two recovery triggers: Abandoned checkout (a shopper enters their email at checkout and leaves) and Abandoned cart (a recognized shopper adds items and leaves before checkout).
If abandoned cart or abandoned checkout emails aren’t sending, check the following:
Marketing consent. If the marketing checkbox is shown at checkout and the shopper didn’t tick it, the trigger won’t fire.
The automation was active. Triggers only apply to carts and checkouts abandoned after the automation was turned on.
The 30-minute delay. MailerLite waits 30 minutes before treating a cart or checkout as abandoned. Wait at least 30 minutes before checking.
Double opt-in. If double opt-in is turned on, the subscriber needs to confirm their email address before they can trigger the automation.
The customer didn’t continue purchasing. For Abandoned cart, shoppers who go on to checkout or complete a purchase are excluded.
The customer was recognized. Abandoned cart only works for shoppers who subscribed via a MailerLite form on your Shopify store or clicked a link in a MailerLite email.
The shopper is a returning customer. Abandoned checkout only triggers for customers who have placed at least one previous order.
Purchase frequency automation is not triggering
If a Purchase frequency automation didn’t trigger, check the following:
Open the subscriber’s profile and confirm the Orders count field has reached the milestone set in the trigger.
Check that the automation was active when the qualifying order was placed.
If the Orders count field is empty, run a re-sync from the Shopify settings page to update it.
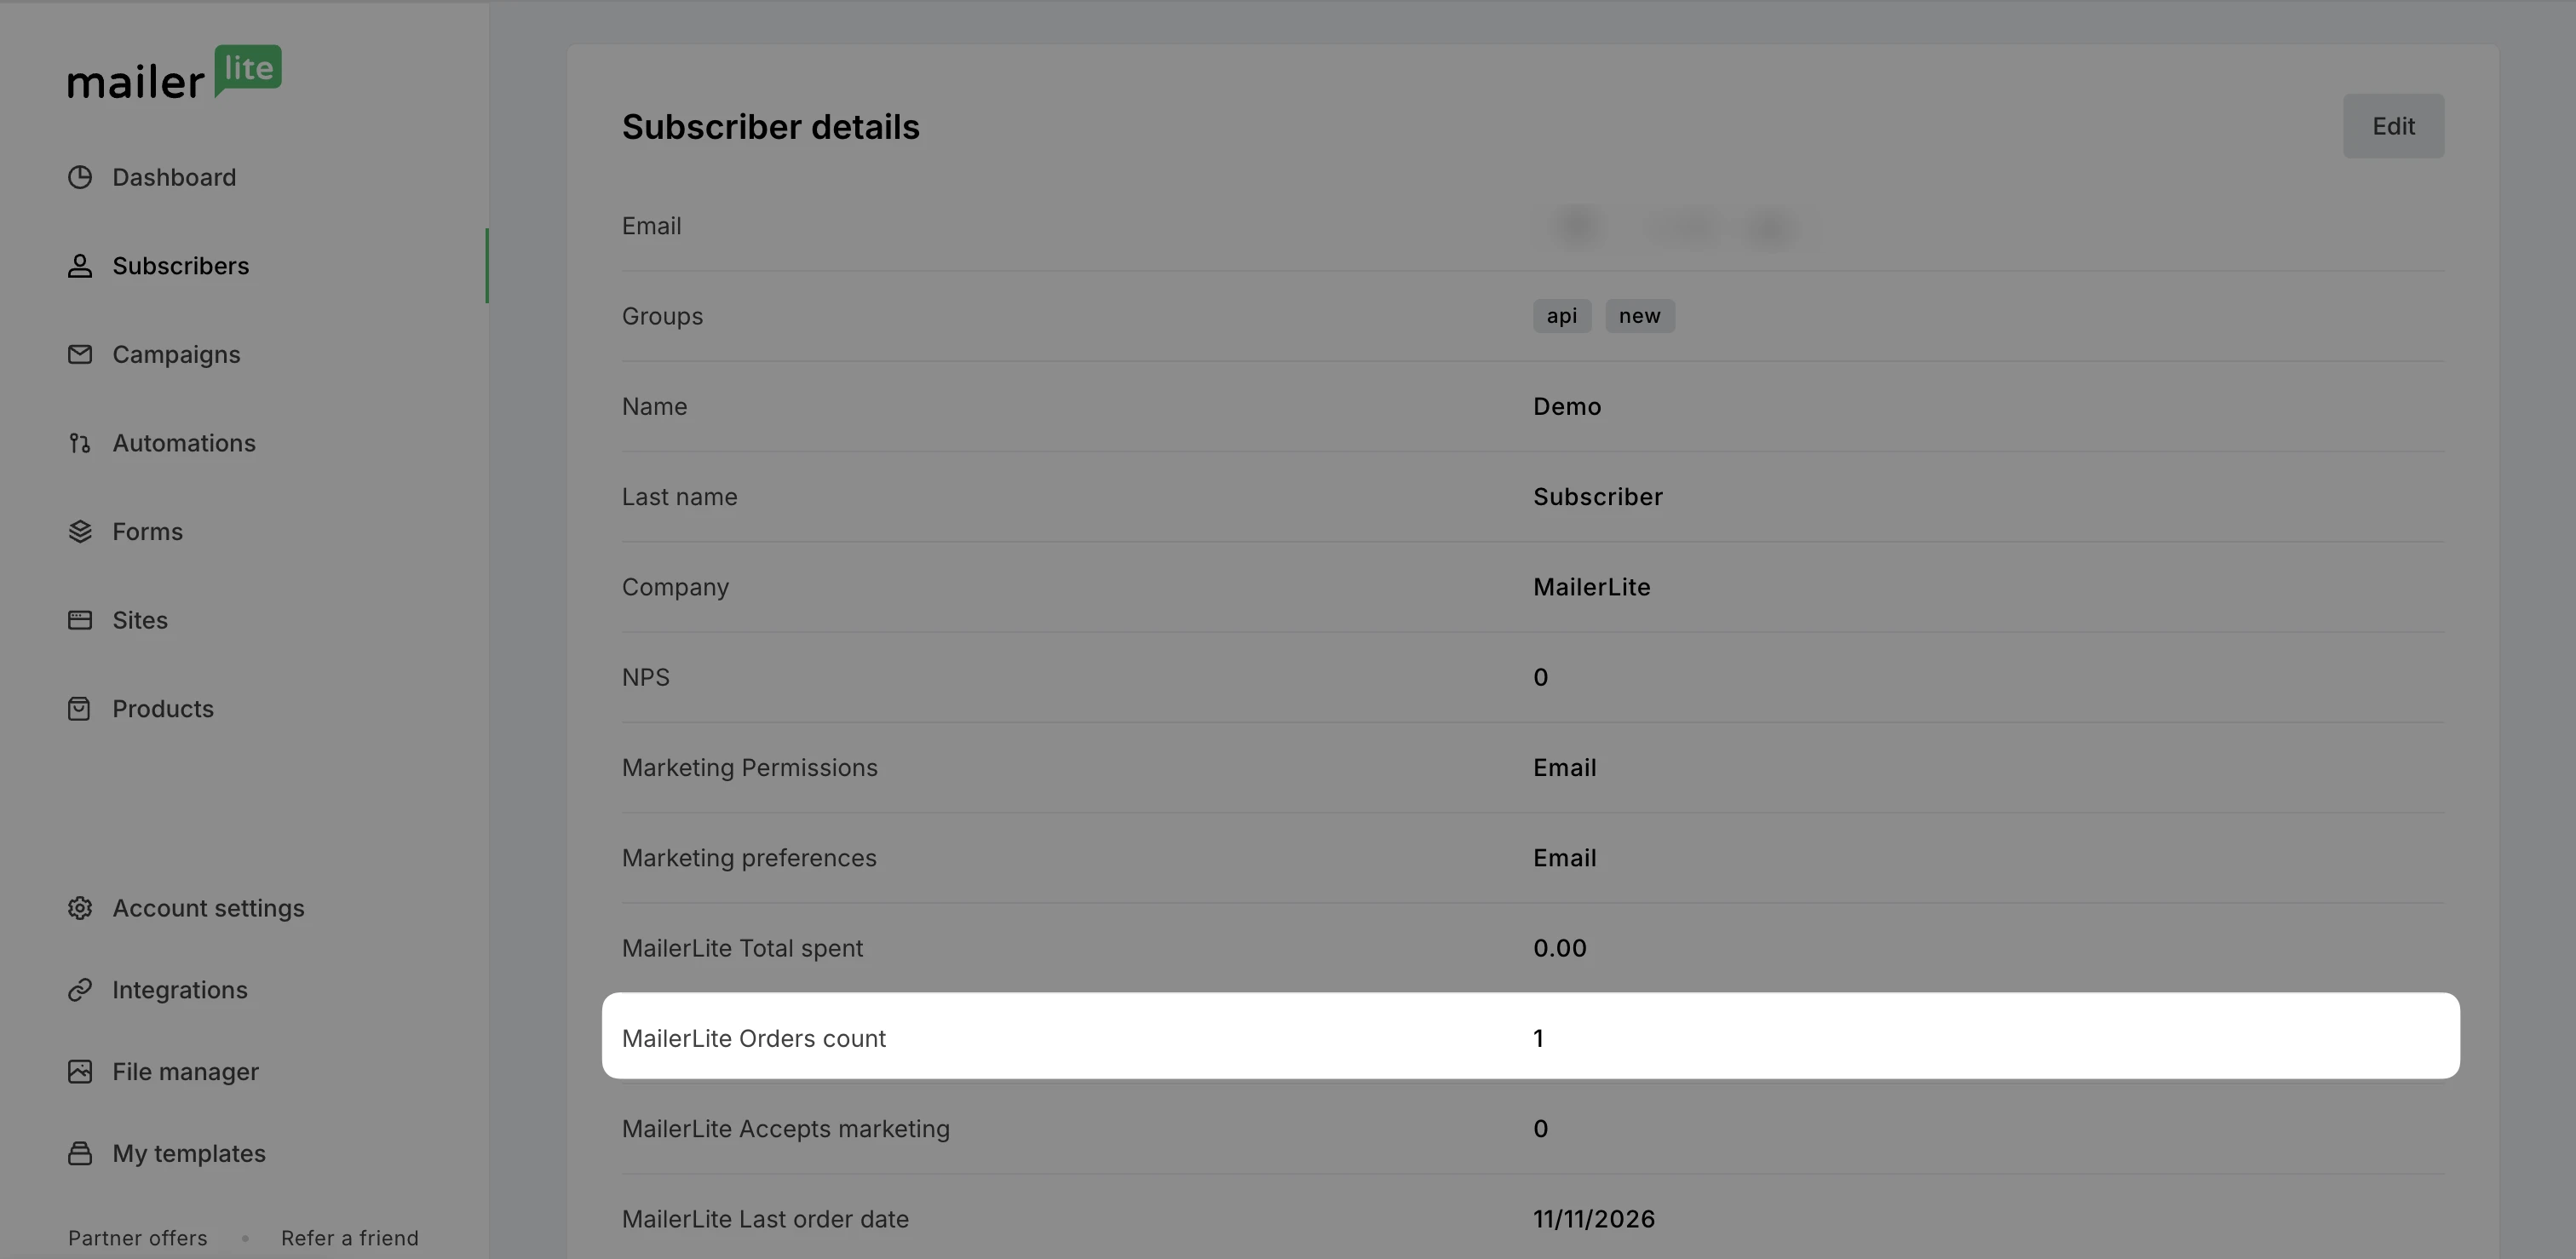
If a subscriber placed several orders in a short time and received only one email, this is expected. Only the most recent milestone per sending cycle is used.
For more details, see How to create a purchase frequency email automation.
Pop-ups are not showing
If your pop-ups aren’t showing, check the following:
Make sure the pop-up form is Active in your MailerLite account. Go to the form’s Overview and use the Status toggle to activate the form.
Check the pop-up’s visibility rules. If the pop-up only shows on certain URLs, make sure the page you’re testing matches those rules.
Navigate to the Integrations page, open the Shopify integration settings, and turn on the Allow pop-ups in this store setting.
Check that only one MailerLite JavaScript snippet is installed on your store.
Orders are not showing in email reports
Shopify orders only show in your campaign and automation revenue reports when e-commerce link tracking is turned on, and the buyer clicked a tracked link in a MailerLite email before purchasing.
To check that e-commerce link tracking is turned on:
Navigate to Account settings and click Default settings.
Under Tracking options, check that E-commerce link tracking is turned on in both the Campaigns and Automations tabs.
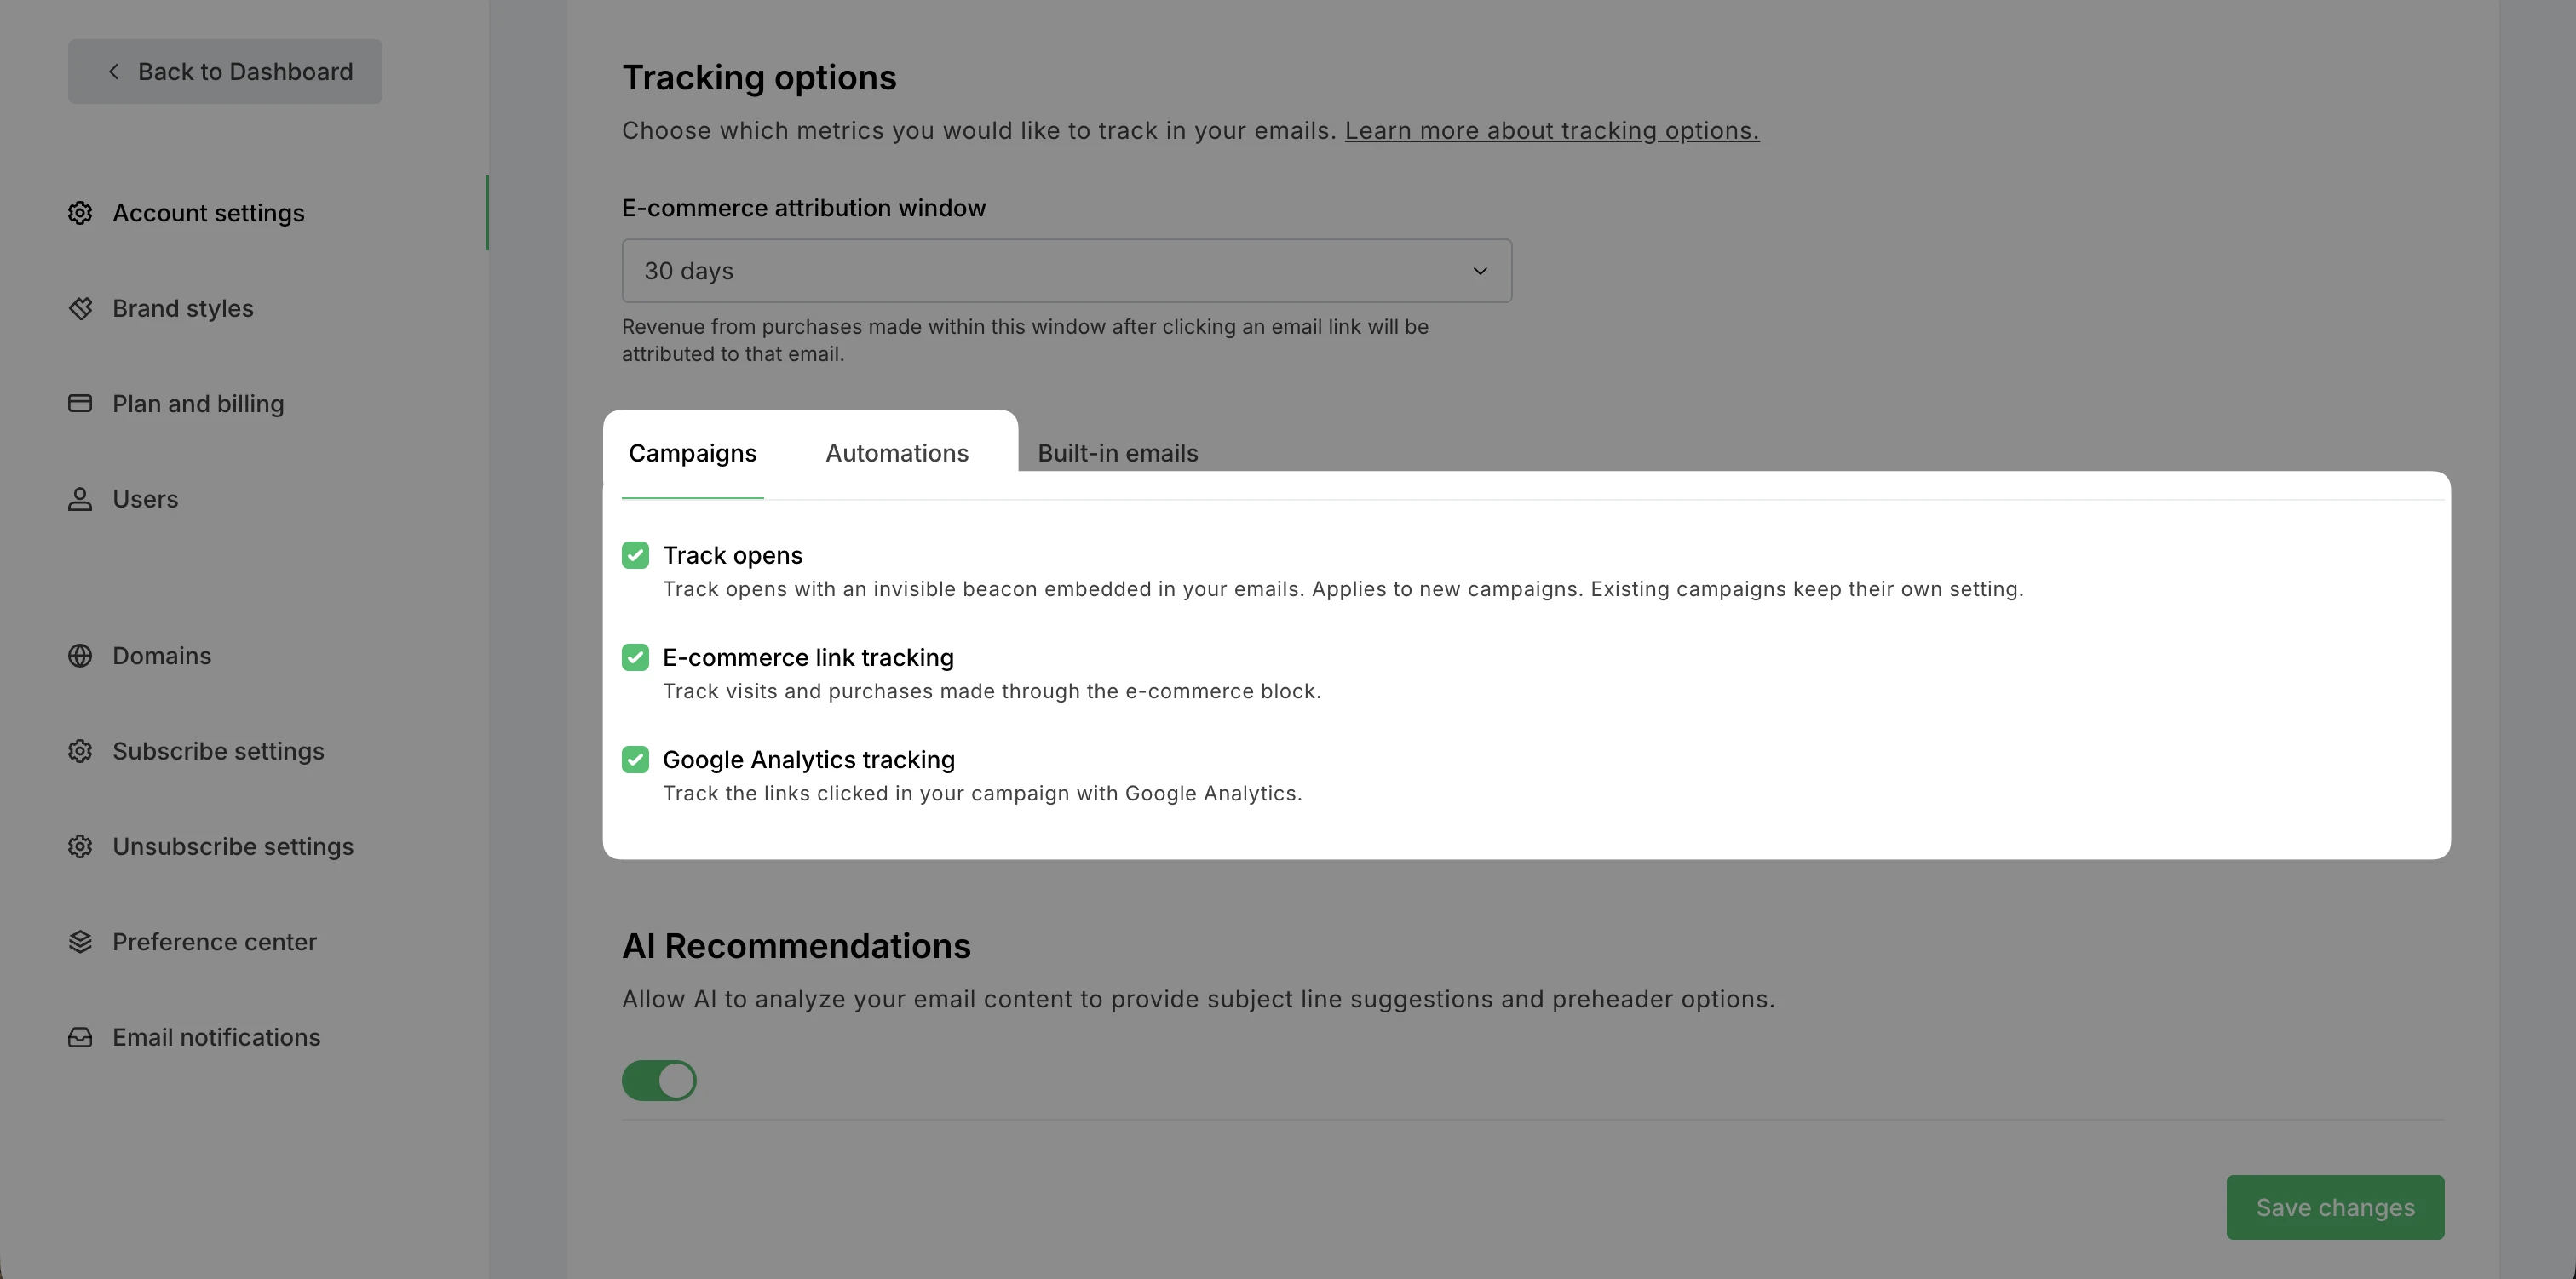
If the setting was turned off, orders placed while it was off won’t be attributed to your emails.
Orders are attributed to the last email link clicked within the E-commece attribution window specified in your Default settings. Orders placed later, or after the buyer clicked a link in a different email, are attributed differently or not at all.
For more details, see How e-commerce tracking works.
Your store doesn’t appear in automation triggers
If your Shopify store is missing from the store dropdown in an e-commerce automation trigger, the Shopify integration setup usually isn’t finished. To make your Shopify store appear in automation triggers:
Navigate to the Integrations page and open the Shopify integration settings.
Make sure the Shopify dedicated group is selected.
Check the live data status to confirm products have synced.
Reopen the workflow editor and select your store in the trigger.
Changes made in MailerLite are not syncing back to Shopify
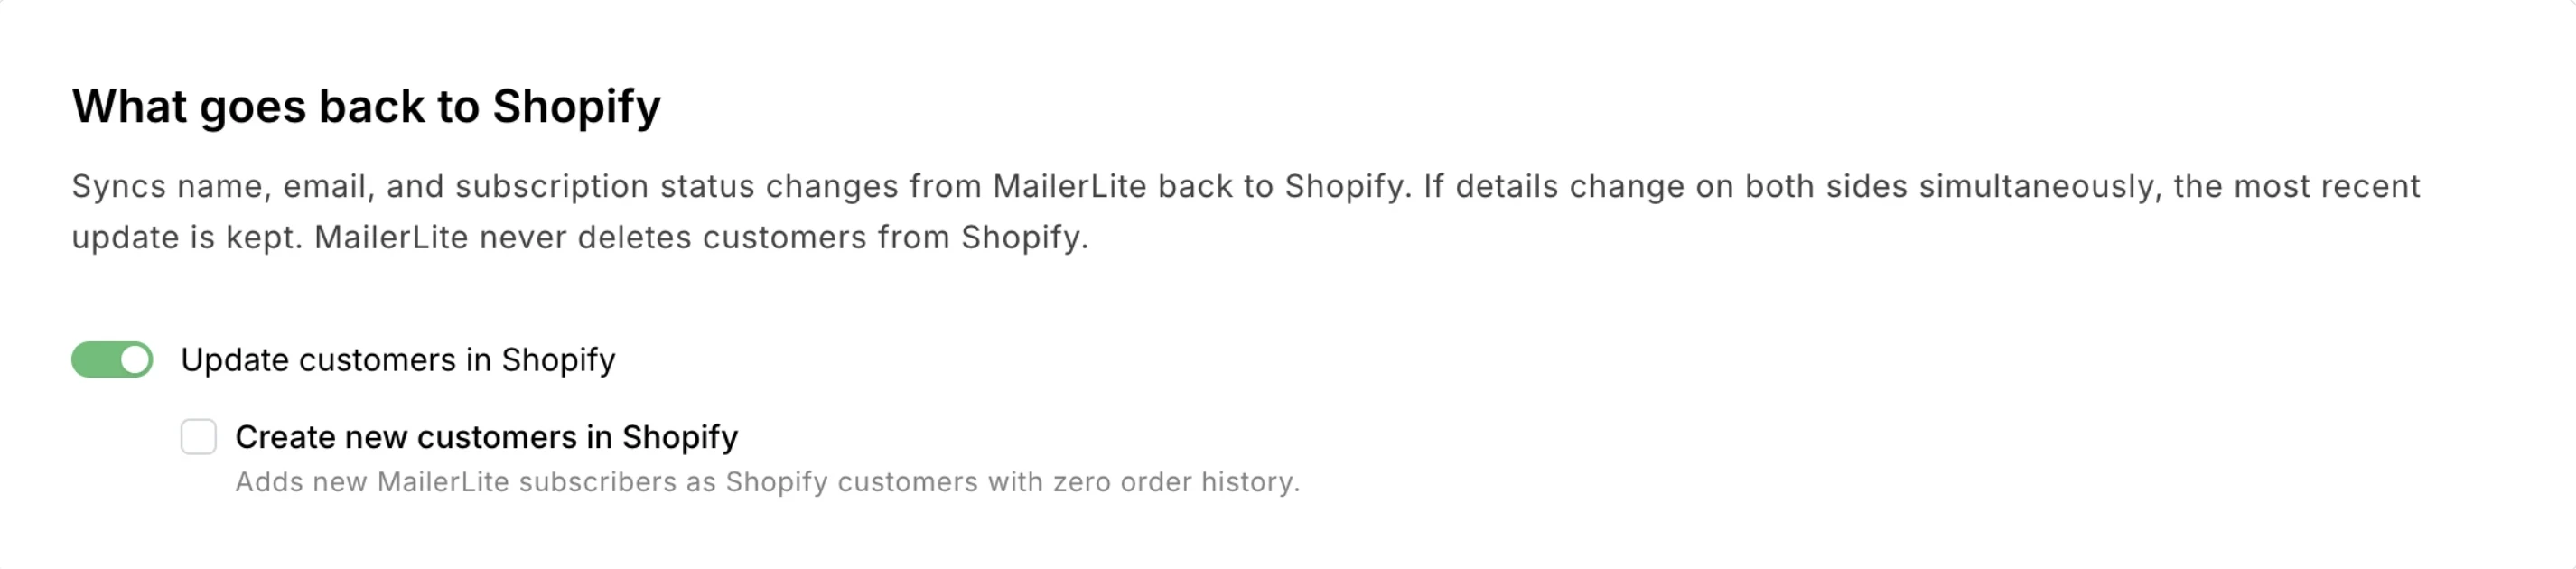
If changes you make in MailerLite aren’t showing in Shopify, two-way synchronization is not enabled in your settings. To enable it:
Navigate to the Integrations page and open the Shopify integration settings.
Scroll down to What goes back to Shopify and enable Update customers in Shopify.
Check the Create new customers in Shopify box if you’d like to add new MailerLite subscribers as Shopify customers with zero order history.
Marketing preference changes are not updating in MailerLite
Shopify marketing preferences only sync to MailerLite automatically when a customer ticks or unticks the marketing checkbox during Shopify checkout. Changes made anywhere else in Shopify don’t sync automatically, including:
Changes you make to a customer in the Shopify admin.
Changes a customer makes on their Shopify account page.
Unsubscribes from emails sent through Shopify.
To bring these changes into MailerLite, run a re-sync from the Shopify settings page.
How to re-sync Shopify data with MailerLite
Re-sync Shopify data when subscriber details, marketing preferences, or order data in MailerLite don’t match what you see in Shopify. To re-sync your Shopify data:
Navigate to the Integrations page and open the Shopify integration settings.
Scroll down to Historical data and click Re-sync.
Wait for the re-sync to finish. The live data status updates when new data arrives.
